When you click on links to various merchants on this site and make a purchase, this can result in this site earning a commission. Affiliate programs and affiliations include, but are not limited to, the eBay Partner Network.
I tackled this weekend replacing both sunshade cables, rails, knock outs, bearing brackets, and a few other dried out plastic pieces. After taking spending an hour or two reading the various posts and studying the movement, its not that difficult to work on. But I have one problem I cannot figure out and ran out of week-end time and patience. The plastic bearing bracket #6 which attaches to the metal rail, does not stay locked into the mounted metal bearing bracket #2. I used a new friction ring for each side but the plastic bearing bracket still pops out with every other use. From the sketch I assume the friction ring #5 is fitted to the metal bracket #2, then the plastic bearing bracket #6 with the rivet is pushed into the metal bracket. Does the friction ring go into the plastic bearing bracket first then to the metal bracket? I'm considering using a spring steel e-clip to secure it in place but fitting this to tightly might restrict the up/down movement needed during operation. Your thoughts and help appreciated.
Is this the part that uses a zip tie at the end? Sorry .. I cannot tell the front / rear and which part that is.
This is in the front not rear. I replaced the rear spring clips and they stay in the notch of the new rails well so I don't see a need for a zip-tie in the rear.
How do you prevent the top end of the spring from snagging on the large rubber seal as the roof closes? There seems to be no way to zip tie the spring down, so I have to manually hold it down as the roof seal passes over it. This is only on one side.
It appears some have drilled a small hole in the guide and used a small zip tie to hold the spring clip in place. But if the roof is hitting it I would not tie it down. I don't recall the space between the roof seal and spring clip but if everything else is in its correct position, i.e. front bearing, middle grove in plastic guide and spring clip is fully seated and locked into end of metal bearing it should not interfere with roof seal. I noticed one of my old spring clips was bent at a higher degree angle than the other. The replacements were exactly like the one bent at a lower degree angle and are firmer providing more resistance. If everthing is in its proper position and the springs are in good shape, maybe use a vice and vice grips to bend the tip end down away from the roof seal.
After fixing my issues, i can say, that if the spring has to be zip-tied or touching something other than the guide, either it or the guide is bent or misaligned. Go alone the guide and make sure for the knock-out lever and make sure it is properly clipped in to the main railing.
There's definitely something going on. The first picture is of the passenger side (no problems). The second picture is the driver side. The clearances are very different, for the same roof open position.
Passenger side. Plenty of clearance below the spring.
Driver side. Very little clearance and a wheel or guide seems to be missing.
hi all, something broke off the knock out levers (part 12) when i tried to open shade.
first driver, then pass side.
theres a small hole at front of KO lever. i found a small metal nub broken off that prob fits it.
i cant ID where the part is on the diag (13-15?) or see the location in my car. if anyone can clarify or show a proper working pic, thanks in advance!
john
John,
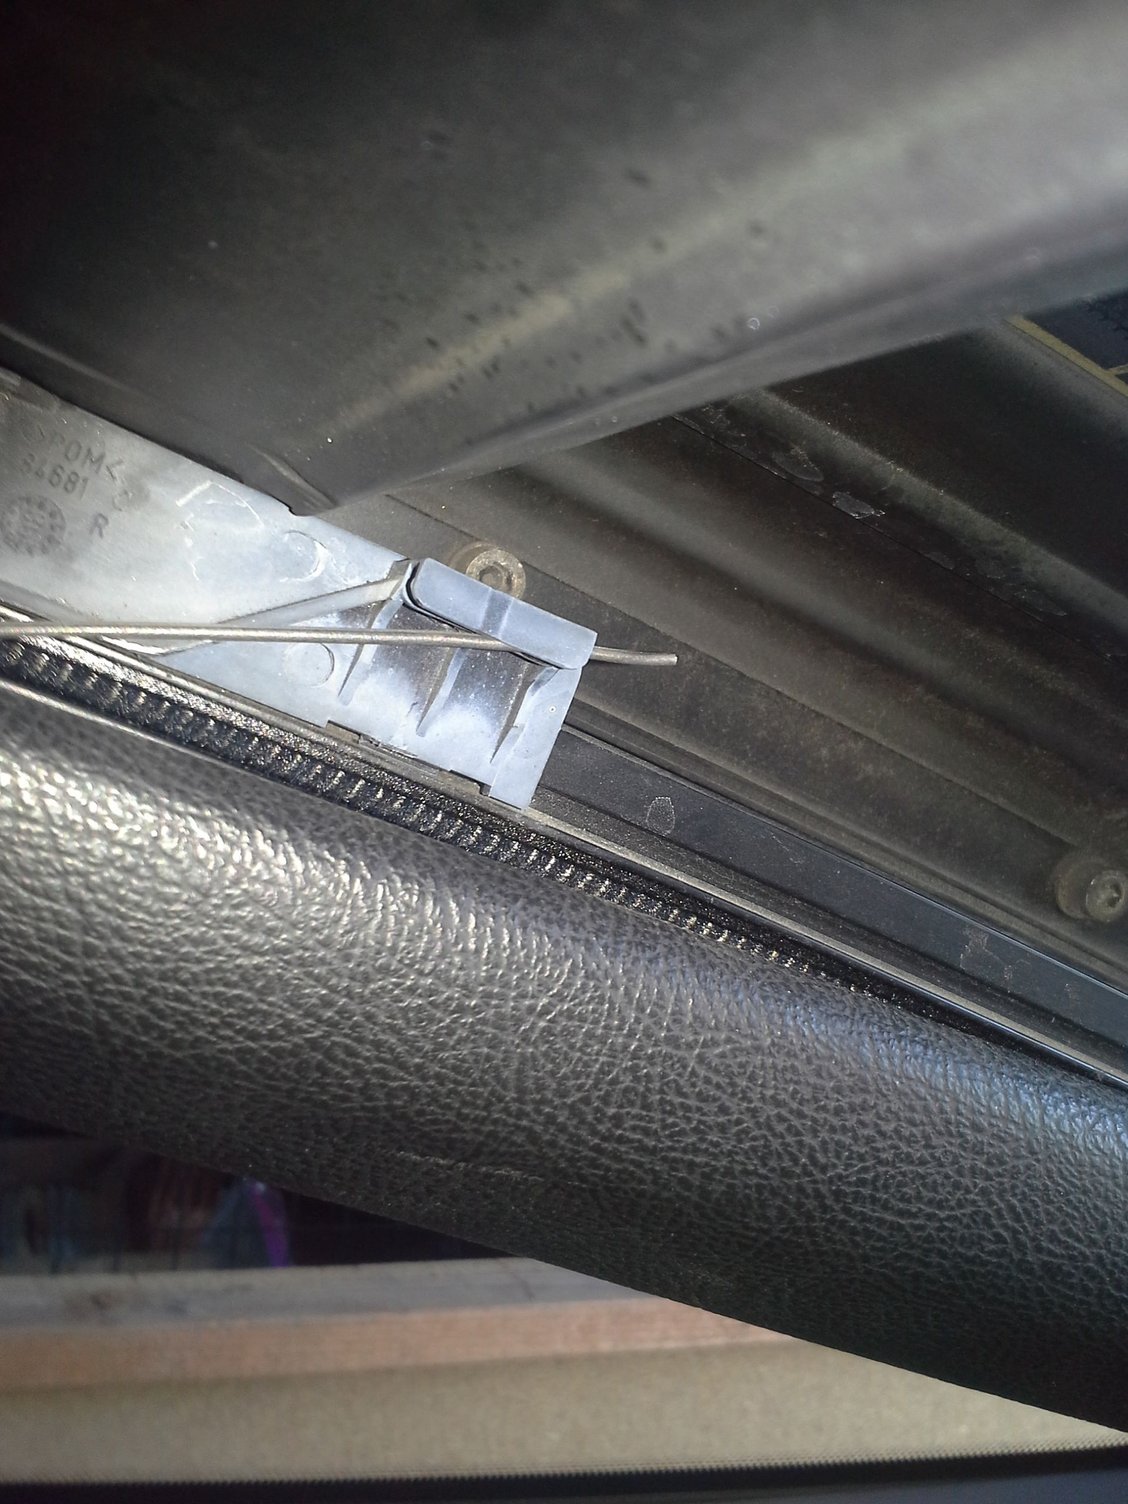
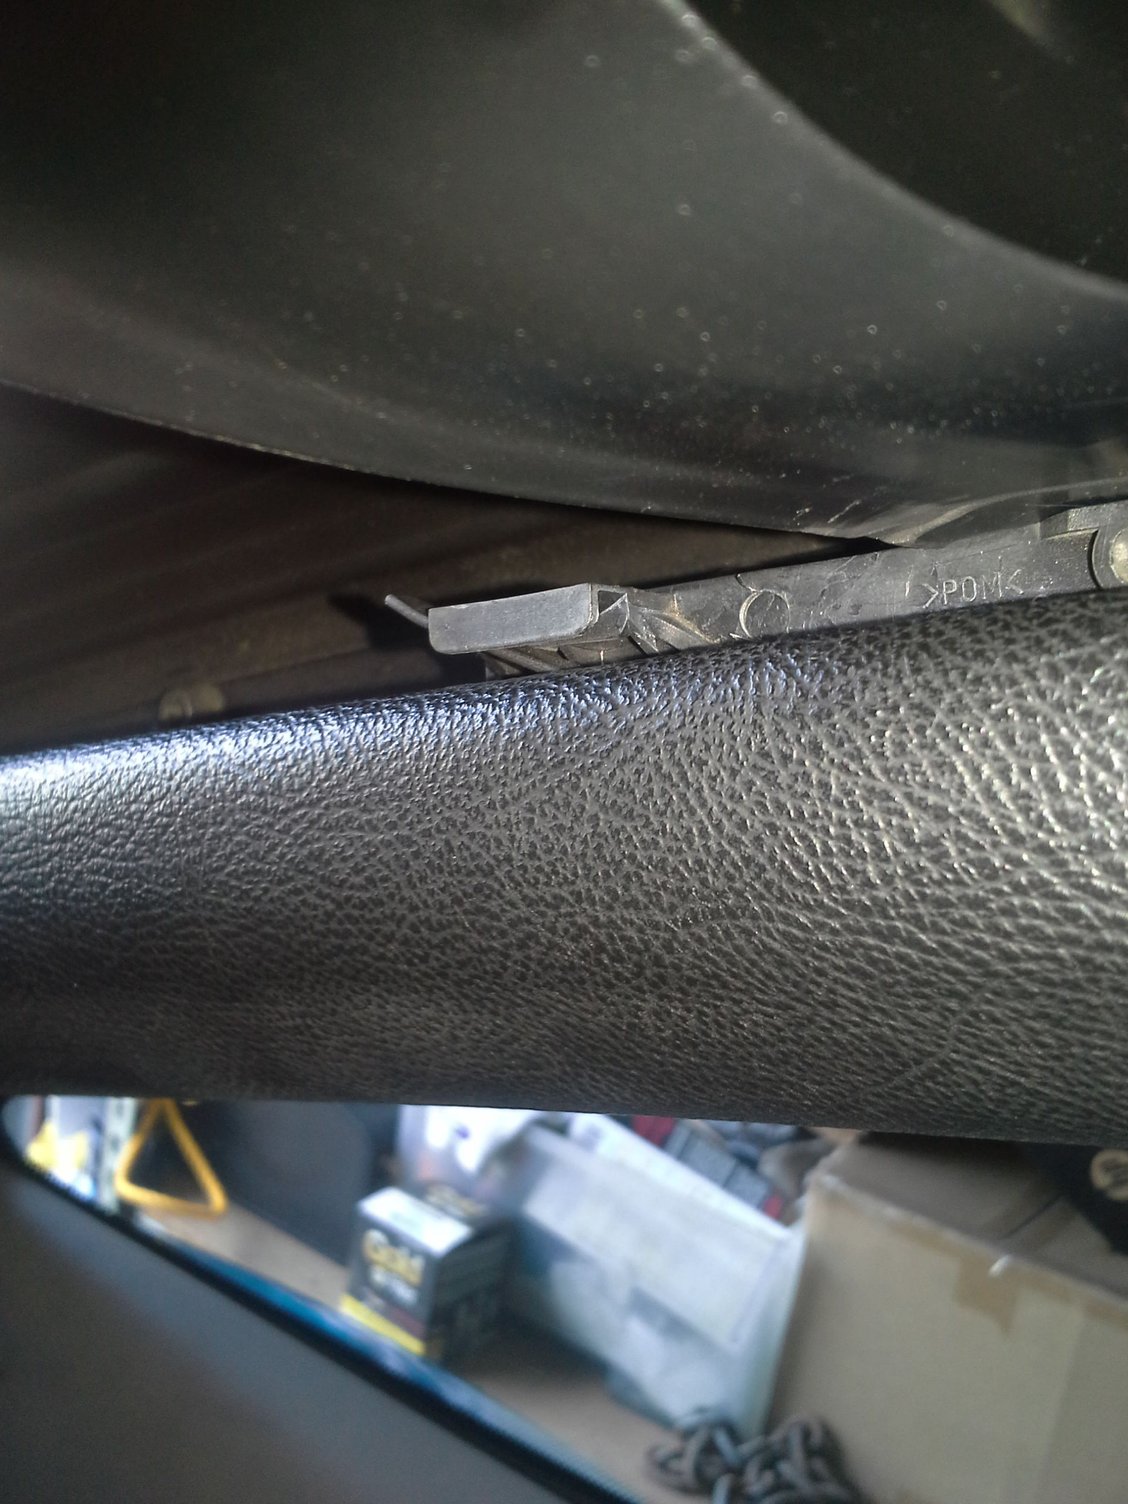
I'll try to help but pictures are always best. The "knock-out lever" or "pull bow" has a tab on one end (which fits inside a plastic sleeve) with a hole on that end and an open clip-on on the other. The lever attaches to the "lever support" by placing pin inside the hole (see pic) and it's held there with tension from the assembly. Both pics are for the left (driver's side).
But both of these parts are malleable and can bend by getting jammed or just over time with use, so you should check that they are still square (fully straight) before putting them back. Otherwise order new ones. Hope that helps.
I'm thinking of redesigning these parts (stronger and last longer) but haven't gotten there yet. Perhaps if there's a strong need at this point.
Per Marc, the metal is really soft. I replaced the levers and guide rails last year to fix a noise on my sunshade (basically any part I could easily replace with new I did) and was surprised at how the metal had changed shape over time. Just by looking at the rails and levers in the car you would not see that they are warped at all. By changing the metal parts, the sunshade rolls smoothly in both directions. Its an easy job to do once you remove the inside cover panels which are a pain in the a**. The hard part is putting the small pin at the front back in -- easy to loose. I ended up using safety wire on one -- which actually looks kinda cool.
Last edited by will007; 08-28-2017 at 06:14 PM.
Reason: did not finish...
hi in this pic #1 is the hole of the pull bow (out of position) and 2 was where i suspected the metal nub broke off.. hope this helps thank you
fyi having trouble adding pic from app, in case it's not shown i'll add later
hi in this pic #1 is the hole of the pull bow (out of position) and 2 was where i suspected the metal nub broke off.. hope this helps thank you
fyi having trouble adding pic from app, in case it's not shown i'll add later
John,
I'm not sure what "metal nub" you are talking about because the "tab" that is at the end of knock-out lever with sleeve over it looks as though it is intact. This "tab" should fit between the metal shade rail (part 10: 993-562-541-00) and the plastic gate guide (part #16: 993-562-559-00). You can see just the top of it from this viewpoint (circled in the picture attached).
I'll try to help but pictures are always best. The "knock-out lever" or "pull bow" has a tab on one end (which fits inside a plastic sleeve) with a hole on that end and an open clip-on on the other. The lever attaches to the "lever support" by placing pin inside the hole (see pic) and it's held there with tension from the assembly. Both pics are for the left (driver's side).
.
marc i think the 'pin' you described here is what snapped off.
thanks
marc i think the 'pin' you described here is what snapped off.
thanks
If you can't find the pin piece that broke off, then look at the other part we are talking about called the "lever support" shown here with the "pin" circled. Is that what's missing?
If so, it's the usual problem as these two pieces can bend and/or break. You need a new one. Make sure you order the correct part from Porsche (that is the left or right side). If I were you, I'd replace all 4 pieces (both knock-out levers and support levers - one on each side) as they tend to all bend before they break.
great info marc , thanks.. i've whistled past the graveyard on these mechanisms
hoping i'd never have to learn lol. hopefully its as simple as you have presented.
cheers!


 04-18-2016, 08:58 PM