

Anyone heard of this (or have tried it)?
 06-08-2012, 02:09 PM
#16
Rennlist Member
I might have to try the clear stuff on the front bumper of my cayman for the next track day....
 06-08-2012, 04:14 PM
#18
Rennlist Member
Judging from the videos is sure looks like it would. All I want to avoid is having to scrub rubber streaks off the paint. I put some plastic wrap stuff on the front of my Dad's GT3 and it is a lot less thick than the plastidip yet worked fine.
06-08-2012, 08:17 PM
#19
Addict
Lifetime Rennlist
Member
Lifetime Rennlist
Member
Very cool!
I can see using this on the inside of wheels as well - lots of protection, or if you want to see what a set of wheels would like like.
My turbo-twists are a bit beaten, and it would be neat to see them in black - hmmmmm.
Cheers,
Mike
I can see using this on the inside of wheels as well - lots of protection, or if you want to see what a set of wheels would like like.
My turbo-twists are a bit beaten, and it would be neat to see them in black - hmmmmm.
Cheers,
Mike
06-09-2012, 01:05 AM
#20
Banned

Join Date: Jul 2011
Location: Freakin' work! Ughhhh!
Posts: 519
Likes: 0
Received 0 Likes
on
0 Posts
I use it on my '10 GT3 for inside the wheel wells. Stuff is freaking amazing! Spray it on, when your done with it, peel it off, its that easy! It holds up to so much abuse such as pressure washers, rocks, sand, all that jazz. Amazing product. Highly recommend Plasti-Dip.
06-10-2012, 06:12 PM
#21
Drifting
I just had some wheels painted a flat-ish semi gloss black and PlastiDip is the perfect color match to use on my silver, embossed, plastic center caps. I didn't want to paint them in case I wanted to use them on the silver wheels again.
My hint would be to shake the can well, and you may have to apply more than you thought to get a smooth coat. This is due to surface tension on the material it appears. It is not very viscous, so it can clump up a bit. Keep adding material, more than you would think (rather than waiting for it to dry) seems to work to fill in the blotchy sections.
The worry that it would fill in the detail on the caps was unfounded and as it dried, it adhered better and the detail came back.

Here's another showing some of the blotchy that I ran into. Best part is you can just peel it off and start again. The really good one show above is the upper right of the four.

My hint would be to shake the can well, and you may have to apply more than you thought to get a smooth coat. This is due to surface tension on the material it appears. It is not very viscous, so it can clump up a bit. Keep adding material, more than you would think (rather than waiting for it to dry) seems to work to fill in the blotchy sections.
The worry that it would fill in the detail on the caps was unfounded and as it dried, it adhered better and the detail came back.
Here's another showing some of the blotchy that I ran into. Best part is you can just peel it off and start again. The really good one show above is the upper right of the four.
Last edited by kjr914; 06-10-2012 at 06:23 PM. Reason: added 2nd pic
06-11-2012, 07:53 AM
#22
Agent Orange
Rennlist Member
Rennlist Member
I've used it on many occasions. The trick is to apply even coats and not overspray because it will bubble up. The thicker the coats, the easier it is to remove. To remove, just pull and peel.
Here are my RH's with gunmetal metallic plasti-dip:
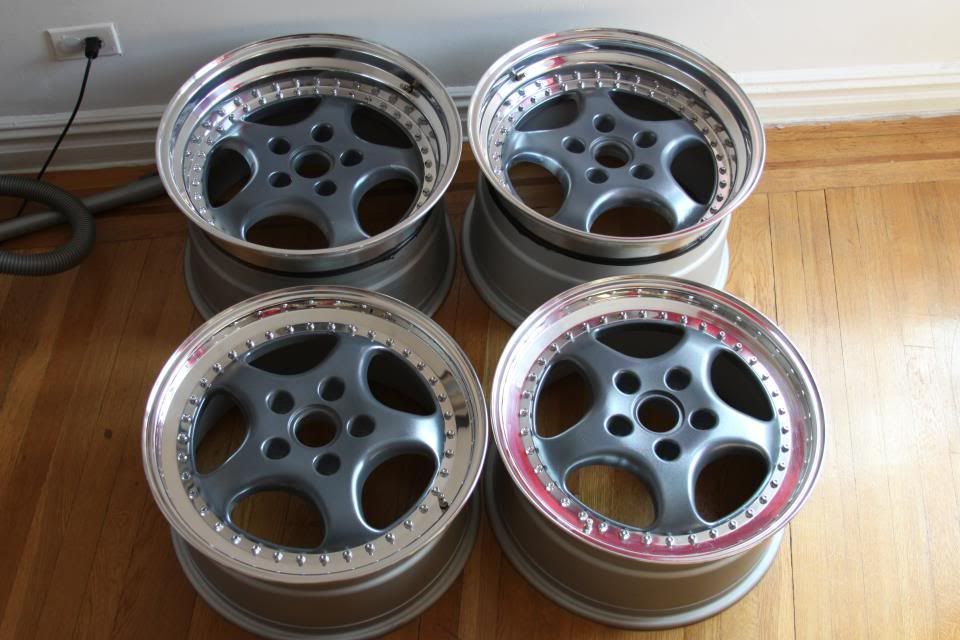
And my S4 for with flat gunmetal plasti-dipped door blades and fog light grilles to match my wheels, grille, and rear valance:

Here are my RH's with gunmetal metallic plasti-dip:
And my S4 for with flat gunmetal plasti-dipped door blades and fog light grilles to match my wheels, grille, and rear valance: