

Max Jax arrived!!
 05-21-2012, 10:56 PM
#1
Racer
Thread Starter
Join Date: Apr 2011
Location: Alexandria Ont.
Posts: 437
Likes: 0
Received 0 Likes
on
0 Posts
And although it was supposed to be shipped 'door to door' according to Costco...the driver arrived in a 5 ton truck with no power tailgate, and consequently I had to get creative in a hurry!
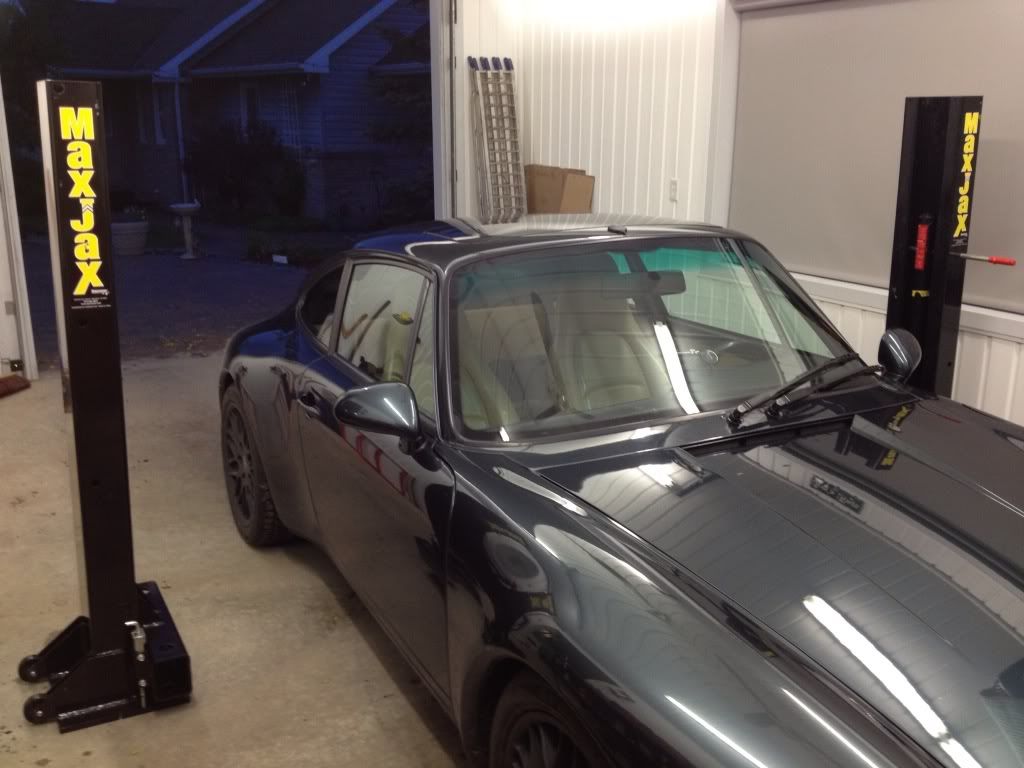
Managed to get the 968lb unit off the truck and placed in the yard until I could find time to disassemble the packaging, and carry the individual pieces into the shop.
The hard part was the columns, they weigh a ton, or at least feel like it when there is only 2 of you to carry them, one at a time of course.
Got them in the bay where they will go and just seeing how they look...I'm thinking of setting them at the max width, 130", in case I ever want to lift a full size pickup, which will also give me the max room on the sides for my p-car. Just need to be sure the arms will reach the lifting points on the 993 with no problems.
Anyone have any experience/input on this?
The arrival and removal, hahaha...


Seeing how it 'looks'...


Jim
Managed to get the 968lb unit off the truck and placed in the yard until I could find time to disassemble the packaging, and carry the individual pieces into the shop.
The hard part was the columns, they weigh a ton, or at least feel like it when there is only 2 of you to carry them, one at a time of course.
Got them in the bay where they will go and just seeing how they look...I'm thinking of setting them at the max width, 130", in case I ever want to lift a full size pickup, which will also give me the max room on the sides for my p-car. Just need to be sure the arms will reach the lifting points on the 993 with no problems.
Anyone have any experience/input on this?
The arrival and removal, hahaha...
Seeing how it 'looks'...
Jim

 05-22-2012, 04:28 AM
#5
this is on my short list...
how did you determine your garage floor thickness to make sure it met their requirements. on my 50 year old house i need to make sure it checks out because it wouldnt surprise me if it didnt
how did you determine your garage floor thickness to make sure it met their requirements. on my 50 year old house i need to make sure it checks out because it wouldnt surprise me if it didnt
05-22-2012, 09:30 AM
#6
Racer
Thread Starter
Join Date: Apr 2011
Location: Alexandria Ont.
Posts: 437
Likes: 0
Received 0 Likes
on
0 Posts
Test hole...the only way I know to check, if it is 50yr vintage I think I would plan on cutting a 24x36 section out and 're-pouring' to the depth you want, plus some rebar to insure a nice secure base. Most residential garage 'floors' are poured to at least 4" these days, 5" is optional depending on what your end use is, and are willing to pay for.
When we poured mine 4 years ago I was actively involved, ( like all the framing and steel...), so I know what is inside mine. My only concern is that since I was raised in the 'if a little is good, a lot must be better' school of thought...I might run into some of all that 'extra' steel mesh and rebar with the hammer drill. Could be a hassle...
Jim
05-22-2012, 01:01 PM
#7
Burning Brakes
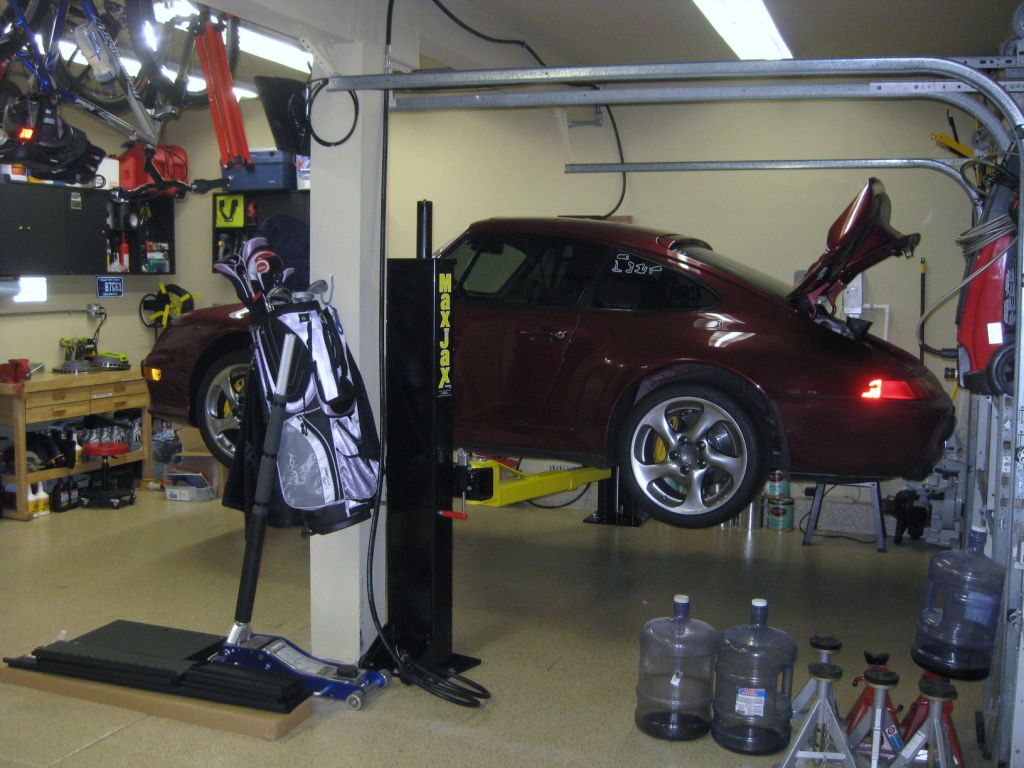
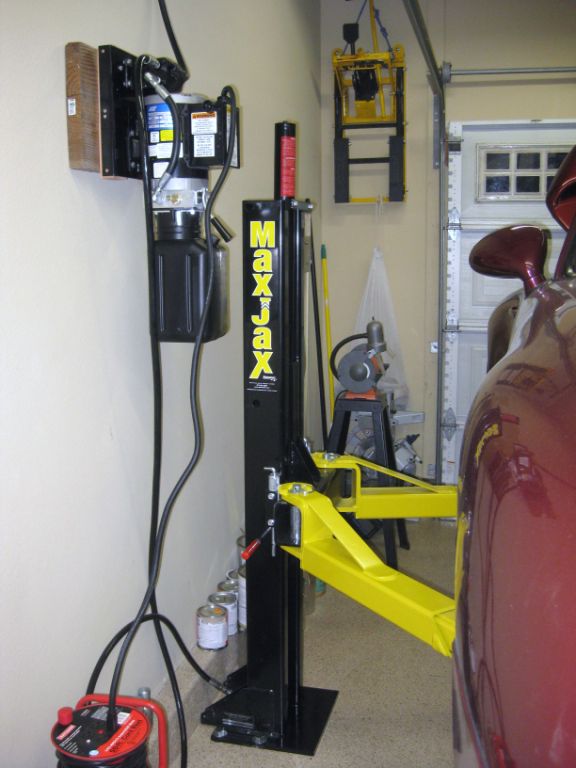
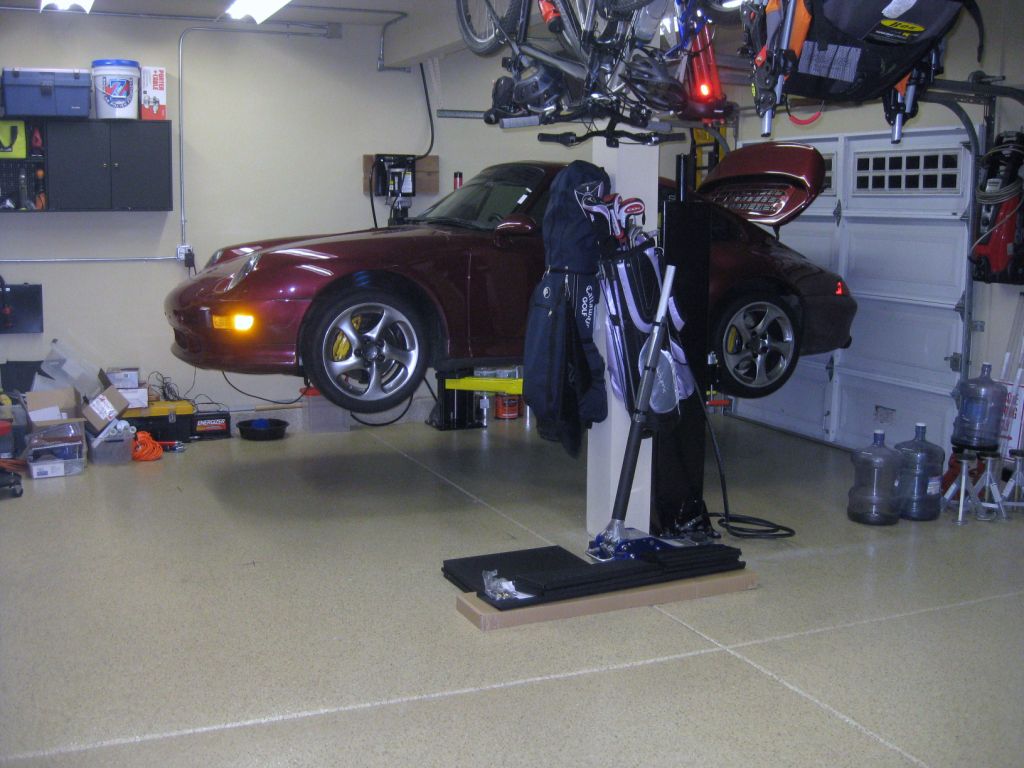
I installed my maxjax a couple months ago. My concrete was post tension so I had a guy come out and draw where the cables were first. I was able to pretty much put it where I wanted it originally which was good. I drilled holes to 6 inches deep and only blew out one hole at the very end...this made me very happy! The anchor system is okay but it is common knowledge with them that getting them all to seat properly and achieve 90 ft.lbs of torque is going to be very hard and require several attempts so they don't pull up. What I did and what I suggest is to use concrete epoxy...about $20/tube at HD and adds an extra day to the process but worth it in my opinion. The TRICKY part with the expoxy is that it will ooze through when you initially set them when wet...this ooze gets on the threads so you have to clean it out. What I did was to use one of the bolts and precoat the inside with white lithium grease by running a the coated bolt in and out. Then I set it and ran it in and out with more grease...wiped off epoxy ooze...repeat. 3-4 times per hole and it looked clean enough...or there was enough grease mixed with the epoxy that it wouldn't set. Worst case was I would just tap out each hole when dry. After 72 hours to dry I found only one anchor was a bit stubborn so I tapped it out. The anchors are set perfect and I am able to take them to 100 ft. lbs without any issue. The extra work makes me feel very safe when working on the lift! I also bought an extra hydraulic line and brought it up and over the car on the ceiling and hard mounted everything to the wall. Slick system now 
Oh...one note...I had to chase some hydraulic weaps after the system was pressurized. The teflon tape wasn't slip enough for me get things tight enough I guess because when there was hydraulic fluid soaked on the threads I could turn the fittings quite a bit more. So, make sure you tighten them enough...maybe even put some fluid on them at the beginning?
Good luck and enjoy the lift!
Here are a couple shots of mine...the garage is still a bit messy as I'm still organizing it the way I want.
Trending Topics
05-22-2012, 03:29 PM
#10
Addict
Rennlist Member
Rennlist Member
I can measure mine when i get home tonight, but i think i am less than 130" and my arms are pretty much maxed out with the 993. I used the bolts that came with it and had a couple that would not seat, so I replaced them with epoxy. If I were to do it again, I would go all epoxy anchors. One of mine was too loose to grab but too tight to come all the way out - it took 2-3 hours to get out and took a chunk of the floor with it.
05-22-2012, 03:49 PM
#11
Racer
Thread Starter
Join Date: Apr 2011
Location: Alexandria Ont.
Posts: 437
Likes: 0
Received 0 Likes
on
0 Posts
Andy, at the max ( hahaha...) height the cylinders extend to 89", or 7'5". Most garage ceilings are at least 8' so shouldn't be an issue.
Adam, how far apart did you set the base's? I'm thinking 130" to the outside edge.
Jim
Adam, how far apart did you set the base's? I'm thinking 130" to the outside edge.
Jim
05-22-2012, 05:38 PM
#12
Three Wheelin'
In my efforts to over engineer the safety of my max jax, I had steel bars made up that bolt to the top of the posts and then to the foundation in my garage. This ensures that the posts stay straight and static. Over engineered? Yes. Overly safe and comforting? Yes.
05-22-2012, 06:05 PM
#13
Burning Brakes
I was limited by that pole you see in the picture and to a single bay garge. In a perfect world I would have spread it out another 4-6 inches. That said, I think mine is probably on the narrow end of the spectrum and around 120 to the outside bases. My only suggestion for you would be to not make them too wide that you can't center the 993's weight on the lift. Mine worked out about perfect as you can see in the picture. Pefectly centered but you do have to take more care in getting the car centered in the garage so both sides can swing in. For my setup as it is I am extending the front arms very far out and I'm not sure how much further they go out. So, if you are thinking 130 make sure you have enough front arm length to get the weight center.