
Engine drop, top end rebuild, and more

 12-29-2011, 10:20 AM
#47
Instructor
Thread Starter
NOW comes the fun part, cleaning and putting it all together~!
That carbon does not look very heavy or unusual. You can get the pistons/case/parts cleaned. I used a professional shop to check the rod balance, press in the ARP bolts, re-bush the rods. I checked the ring clearances, piston clearances, main bearing clearances, etc myself.
Why are you splitting the case? Just curious, its lots of extra work/expense involved, and in my case if was not really worth it, everthing was in good shape.
I assume you are keeping the parts in separate bags for tracking?
Cheers,
Mike
I'm also going to be using a pro shop for those things, as well as cleaning/flusing the case since I don't have a parts cleaner. Did you have to have the rods machined? Do you know a good source for the ARP rod bolts/nuts? What head studs did you use? Do you have any tips on judging the condition of main bearings? Since I'm there I plan to replace them, but I'm just wondering if there is anything particular to be on the lookout for. The only thing I noticed is that some of them have some "glassy" looking spots, but they are smooth and appear otherwise in good shape. The intermediate shaft bearings have more visible wear, almost like scuffing, but I understand that it is normal for those to wear more quickly.
Yes, I do have everything in labeled baggies, and I've sharpied and/or inscribed all the P/Cs and heads. The only part I'm really worried about there is the intake and all the vacuum lines...I labeled and took pictures, but once it is totally apart it does seem like quite the jigsaw puzzle of rubber hoses.
I split the case because I just wanted to be sure everything was OK and because, by my calculations, it really didn't add that much more time and expense, relatively speaking. But yeah, I don't think it was really necessary.
12-29-2011, 10:38 AM
#48
Instructor
Thread Starter
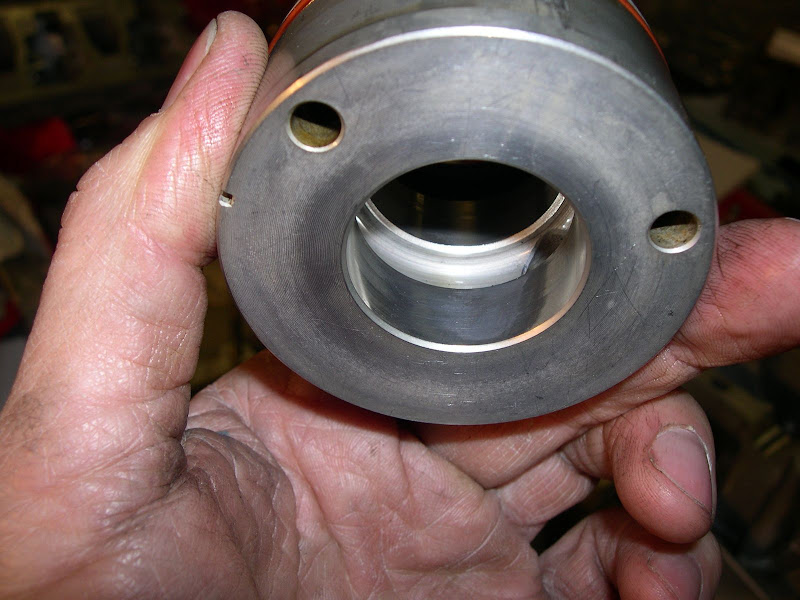
Here's a shot of the crankshaft after I removed all the connecting rods. It's mounted to the flywheel, which acts as a handy stand. The bearing surfaces looked and felt good.
12-29-2011, 10:43 AM
#49
Instructor
Thread Starter
The one strange thing I noticed when opening the case was the condition of the #8 bearing. You can see in the picture below 2 of the 3 pits or divots in the bearing, of which the one on the right has some raised material and is very sharp when running your finger over it. I can only assume that some grit made it's way in there?
12-29-2011, 01:18 PM
#51
Addict
Lifetime Rennlist
Member
Lifetime Rennlist
Member
Mike,
I'm also going to be using a pro shop for those things, as well as cleaning/flusing the case since I don't have a parts cleaner. Did you have to have the rods machined? Do you know a good source for the ARP rod bolts/nuts? What head studs did you use? Do you have any tips on judging the condition of main bearings? Since I'm there I plan to replace them, but I'm just wondering if there is anything particular to be on the lookout for. The only thing I noticed is that some of them have some "glassy" looking spots, but they are smooth and appear otherwise in good shape. The intermediate shaft bearings have more visible wear, almost like scuffing, but I understand that it is normal for those to wear more quickly.
Yes, I do have everything in labeled baggies, and I've sharpied and/or inscribed all the P/Cs and heads. The only part I'm really worried about there is the intake and all the vacuum lines...I labeled and took pictures, but once it is totally apart it does seem like quite the jigsaw puzzle of rubber hoses.
I split the case because I just wanted to be sure everything was OK and because, by my calculations, it really didn't add that much more time and expense, relatively speaking. But yeah, I don't think it was really necessary.
My head studs were in good shape, and there are very few issues with these on the 993, so I reused them.
I used EBS for most of my parts, including the wrightwood racing gaskets, rings, etc. I used Sunset for the Porsche specific parts.
The main bearings should have a consistent grey look - no shiny spots or different points of wear. You noticed the wear on the intermediate shaft - that is typical and I found that on my engine as well, the bearing I think is quite small for the shaft. I had all kinds of wear spots on my bearings (see picts below) but the crankshaft was in excellent shape.
Are you getting the crank checked, cleaned and polished? There are two schools of thought on the bearings - one is that its impossible to check using plastiguage, since torquing the case deforms the bearing shells, and you only want to do that once. The second is its OK to measure this way. I measured it, got about 2 thousands clearance, and went with that.
Your end bearing does look a bit weird. I had some scuffing on mine where the shaft wore though the surface of the bearing material (like the intermediate shaft) but not like yours (see first picture below). How is the case condition once the bearing halves were removed? How about the intermediate shaft bearings, etc?
I have about 600+ pictures of the rebuild, many not published because at the time its was VERY painful to upload to rennlist. Do you think those would be useful to you?
Cheers,
Mike


 12-29-2011, 01:48 PM
#52
Instructor
Thread Starter
Mike,
Any pictures you can share would be appreciated, particularly pics of the case, crank, bearings, rods, and P/Cs.
The case looked good overall and I specifically checked the area around the #8 bearing, which showed no marring or anything that looked problematic. I honestly haven't had the chance to go over it thoroughly yet.
For the crank, I'm having it cleaned, checked, and measured, and plan to have a pro install the rods with new bearings and wrist pin bushings.
I've heard that there can be issues with head stud breakage when re-torquing the head nuts on dilavar studs. My head studs look fine, and I hate to shell out the crazy money for new ones, but at the same time my plan is to renew as much as possible while I'm there.
I did plan to check the bearing clearances using plastiguage, I'm unaware of the differing schools of thought on this that you mention.
01-03-2012, 10:51 AM
#54
Instructor
Thread Starter
When I removed the cam housings a week ago a little metal cap felll to the floor. It was in good shape but it didn't look familiar, and I at first surmised it was some type of plug for the oil galleys on the cam housings. Inspecting the housings, though, I couldn't find a place for it so I stuck it in a baggie labeled "cam housing ??"
Yesterday I was giving a friend a grand tour of my disassembled engine, and I noticed that the lifter end of the cyl. 1 exhaust rocker looked different than the others. Then is suddenly dawned on me (duh) that the mystery cap is a tip of a hydraulic valve lifter. The reason this mystery is only partially solved is that there's another part of the lifter still missing, the sleeve that holds the metal cap to the rocker. I checked the cam housing again and the #1 head but didn't find it. Wonder where it went? I'll post pictures later.
Yesterday I was giving a friend a grand tour of my disassembled engine, and I noticed that the lifter end of the cyl. 1 exhaust rocker looked different than the others. Then is suddenly dawned on me (duh) that the mystery cap is a tip of a hydraulic valve lifter. The reason this mystery is only partially solved is that there's another part of the lifter still missing, the sleeve that holds the metal cap to the rocker. I checked the cam housing again and the #1 head but didn't find it. Wonder where it went? I'll post pictures later.
01-03-2012, 02:01 PM
#55
Instructor
Thread Starter
I found a picture (from a post by Mark D) that illustrates what I'm talking about. The part on the left in the picture below is all that was left in my cyl 1 exhaust rocker. The spring and the "sleeve" are missing, but I found the little end cap that makes contact with the valve.
05-03-2012, 01:46 PM
#56
Instructor
Thread Starter
OK, it's been awhile but I'm finally starting to put things back together. A few weeks back some local PCA friends helped me seal up the case, and this past week I installed the pistons and cylinders.
Sealing the case was a challenge but seemed to go smoothly. The tricky part is getting the oil seals on the through bolts and torquing everything up in the 45 mins you have after pushing the two halves together. It also took me several tries to drop the crank/rods correctly without catching the rods on the case.
Getting the pistons installed into the cylinders was not an easy task for this rookie engine builder. I had a few pop out AFTER install onto the case, and had to go back again and remove some others for access, etc. You have to be extremely careful in lining up the pistons so that the rings don't pop out but that you still have enough clearance to get the the wrist pin into the rod. VERY FRUSTRATING but I managed in the end to get them all in, and with all the extra practice my technique certainly improved by the end. The wrist pin clip injector was invaluable for this task.
The most satisfying task was painting the fan. Check out how it looks in the freshly powdercoated housing -- a nice bit of bling for the engine bay.
05-03-2012, 01:52 PM
#57
Addict
Lifetime Rennlist
Member
Lifetime Rennlist
Member
Don, looks like you are doing GREAT!
Agree with the case half's, you have to be well prepared and have someone help to hold the through bolts still while you torque them down so you can motor through it.
I did not have too much trouble with the pistons slipping out of the barrels - did you end up making up a tool to put the wrist pin clips in?
The most nervous and best part ?- starting it up and it WORKS! :-)
Cheers,
Mike
05-03-2012, 02:12 PM
#58
Instructor
Thread Starter
I borrowed the SIR tool from Emerald for the clips, who kindly offered his for loan. It took a few tries for me to get the technique down for that, but then it was really easy. I can't imagine doing it without a proper tool!
05-08-2012, 05:42 AM
#60
Rennlist Member
The one strange thing I noticed when opening the case was the condition of the #8 bearing. You can see in the picture below 2 of the 3 pits or divots in the bearing, of which the one on the right has some raised material and is very sharp when running your finger over it. I can only assume that some grit made it's way in there?
to remove the pulley.
late, but this is how I block my pulley.
https://rennlist.com/forums/993-foru...n-car-diy.html
best of luck, regards