

Dropped the engine over the weekend w/pics
 03-21-2011, 03:07 PM
#46
Burning Brakes
Thread Starter
Next I moved to the AWD system removal. John (BlueMax) joined me for the fun as these bits are heavy and you really need two people. I had done part of this job before helping cgfen convert his car but on my car things were a lilttle different because I wasn't dropping the front subrame to clear the front pumpkin. That said, it was a bit more of a puzzle for me; however, I did have more room to work with the torque tube since the transmission wasn't in the way. This was essential to be able to slide the tube back to let the sleeve of the pumpkin come out of the torque tube. The order that I used was to remove the half shafts first. This could be done only if someone was rotating the pumpkin to clear. Then it was time to get the pumpkin out. First off, there are 4 big bolts that hold the torque tube to the front differential...the bottom two are easy...the top two, not so much. It took an exact combination of extensions and swivel adapters to be able to access them...I'm serious, I think there is only one possible way to make it work! Cgfen had warned me of this and he was right. Once these are off it feels like you are home free but you're not. You have to deal with the power steering line that runs under the pumpkin. I removed one side of the line and moved it out of the way. This was the trick! The last part was getting the torque tube out of the car. It is interesting to note that there is a recessed portion of the tube near the front, I think this is done so you can get the tube in and out to clear the hard brake lines...otherwise the tube will not come out. John noticed this feature and with us both guiding things we were able to drop it out of the car. Success! 
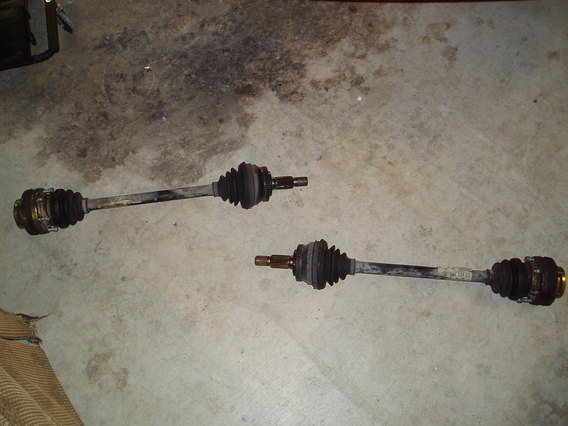
The half shafts.
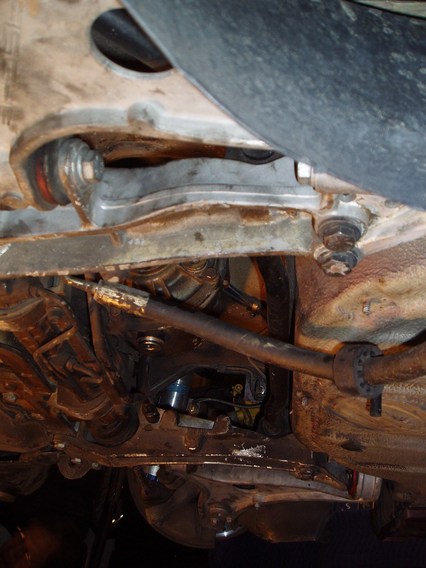
Not a great picture but this shows the power steering fluid line removed and swung out of the way. It normally would be bending the other way and loop under and around the front pumpkin. You cannot get enough give on the line to slide it out so this was the best way since I'll need to bleed the system anyway after putting the engine back in.
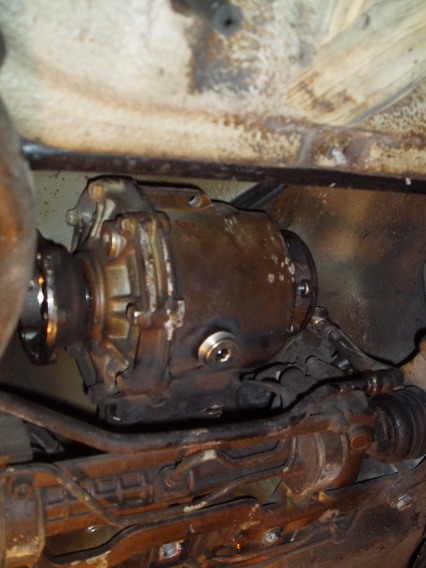
The pumpkin only being held in by its sleeve that fits into the torque tube
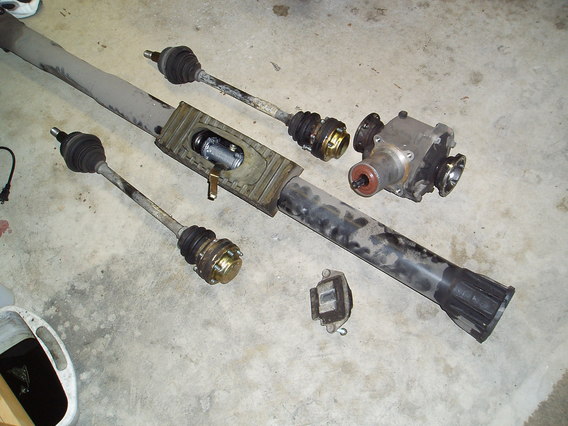
All the bits and pieces...about 100lbs worth. The half shafts are much heavier than they look!
This is a shot of one of the junkyard front hubs I bought to source the ABS ring gear, big axle nut and the big hub bolt. The ring rear alone is $110 new for one!!!
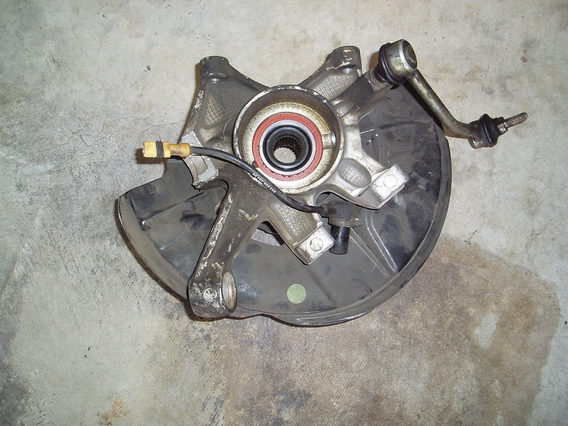
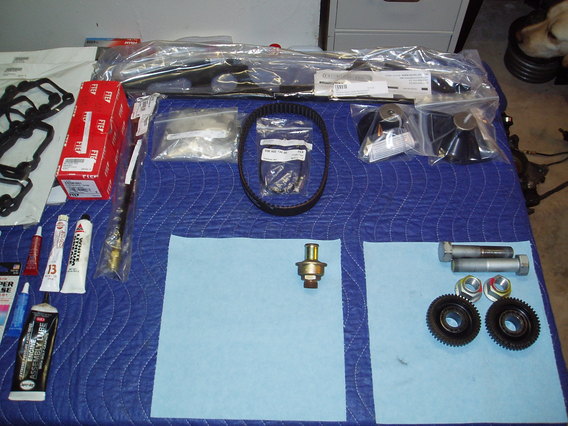
In the bottom right corner of this picture you can see the bits I pulled out of the junkyard hubs. This is about half of my "surgical" table that holds all the parts for this job!
The half shafts.
Not a great picture but this shows the power steering fluid line removed and swung out of the way. It normally would be bending the other way and loop under and around the front pumpkin. You cannot get enough give on the line to slide it out so this was the best way since I'll need to bleed the system anyway after putting the engine back in.
The pumpkin only being held in by its sleeve that fits into the torque tube
All the bits and pieces...about 100lbs worth. The half shafts are much heavier than they look!
This is a shot of one of the junkyard front hubs I bought to source the ABS ring gear, big axle nut and the big hub bolt. The ring rear alone is $110 new for one!!!
In the bottom right corner of this picture you can see the bits I pulled out of the junkyard hubs. This is about half of my "surgical" table that holds all the parts for this job!
 03-21-2011, 03:11 PM
#47
Burning Brakes
Thread Starter
03-21-2011, 07:01 PM
#48
Rennlist Member
Next I moved to the AWD system removal. John (BlueMax) joined me for the fun as these bits are heavy and you really need two people. It took an exact combination of extensions and swivel adapters to be able to access them...I'm serious, I think there is only one possible way to make it work! Cgfen had warned me of this and he was right. Once these are off it feels like you are home free but you're not.
i'll be doing the reverse very soon.
Craig
03-22-2011, 01:50 AM
#50
6th Gear

Join Date: Mar 2011
Posts: 6
Likes: 0
Received 0 Likes
on
0 Posts
The picture showing the combination of extensions and swivel is great. I'll file it away for future wrenching jobs. Did you buy the aluminum oxide media for the mini air etcher at Harbor Freight?
Yeah, I own a 997 but I won't hold it against you 993 guys. Oops! ...did I say the wrong thing?
John
Yeah, I own a 997 but I won't hold it against you 993 guys. Oops! ...did I say the wrong thing?
John
03-23-2011, 01:07 PM
#51
Burning Brakes
Thread Starter
03-23-2011, 01:40 PM
#52
Burning Brakes
Thread Starter
Okay, still trying to catch up my posts with my progress so this is what I worked on this past Sat.
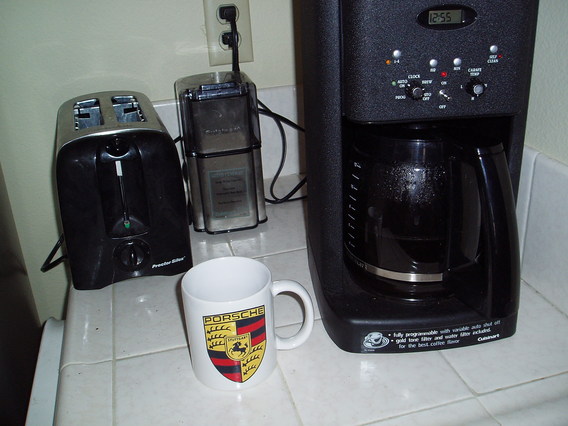
Started bright and early with my trusty garage mug and some coffee
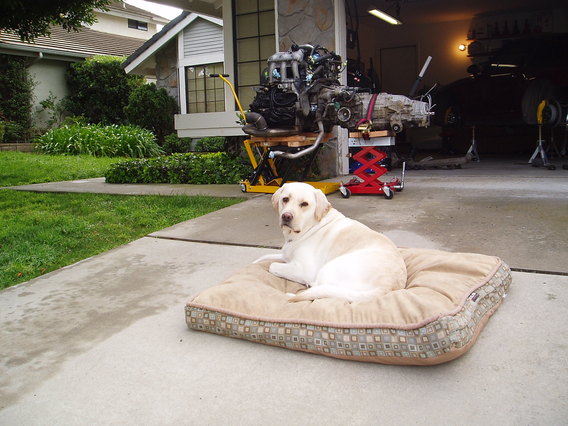
The dirty lump was carefully rolled out to be powerwashed...of course my buddy Moose was overseeing the whole process as safety advisor. And, yes, I did move his bed before I started with the water.
In honor of some of our more detail oriented rennlisters...I polished this one section just to see what it "could" look like. Aside from that, the grease and dirt was all off so I was happy and stopped there. I took the air hose and blew all the water out to speed up the drying process and so there was no standing water anywhere for any length of time.

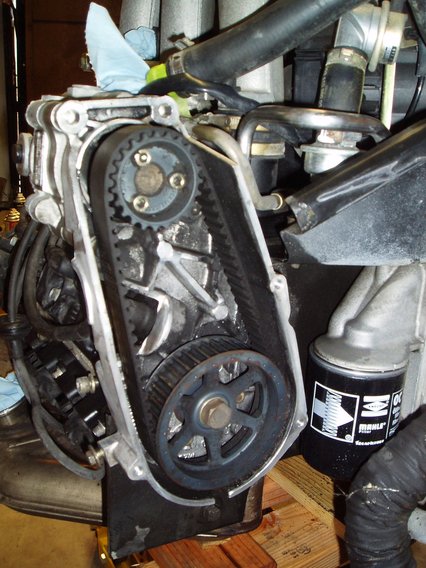
The power steering belt...what a rediculous place to put this!!! It's all the way in the back of the engine...if mine broke I would rather live with no power steering than to attempt to change it in the car...not sure if it's even possible!
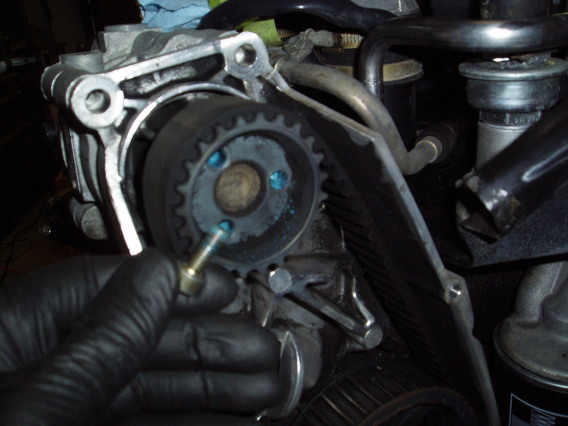
I took the small cog wheel off...you can see the factory blue locktight. I suspected this might be the case taking the first one off becuase it had tension the whole way backing out. I blew out the old dust and put fresh locktight on with the new belt.
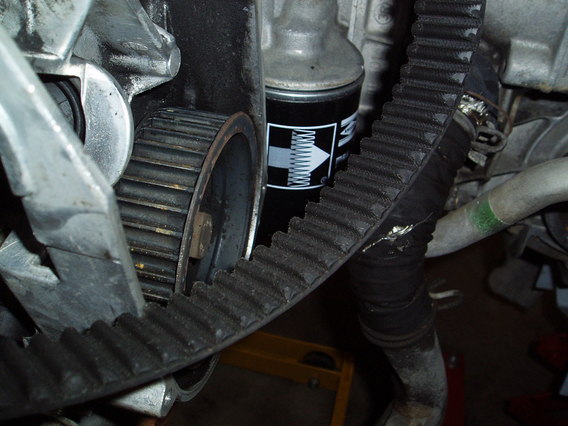
The old belt was not too bad off...no cracking, just some uneven wear on one side.
While I was working on the cam chain housing gaskets, Keith (kjr914) was starting the valve cover gaskets...more labeling! I really like the green tape as it shows the black very well. Keith did a nice job of cleaning out the spark plug areas of all the debris and spent a good while cleaning out the spark plug threads in the block until the plugs threaded like butter. The bad news is he only did one cover and 3 plugs because of his attention to detail...that means I still have 9 more and 3 covers to do! I'll be doing the lifters before I button everything up for good.

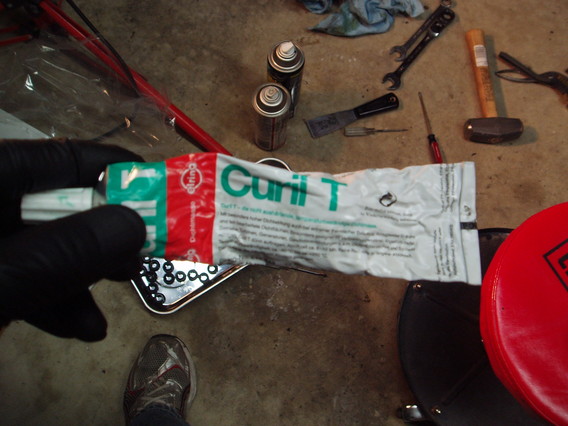
This is what I used for the cam chain cover gaskets...it says it never hardens and I have to say I believe them because I've had this stuff for over 6 years back from my 912 days and it is still like new!
Started bright and early with my trusty garage mug and some coffee
The dirty lump was carefully rolled out to be powerwashed...of course my buddy Moose was overseeing the whole process as safety advisor. And, yes, I did move his bed before I started with the water.
In honor of some of our more detail oriented rennlisters...I polished this one section just to see what it "could" look like. Aside from that, the grease and dirt was all off so I was happy and stopped there. I took the air hose and blew all the water out to speed up the drying process and so there was no standing water anywhere for any length of time.
The power steering belt...what a rediculous place to put this!!! It's all the way in the back of the engine...if mine broke I would rather live with no power steering than to attempt to change it in the car...not sure if it's even possible!
I took the small cog wheel off...you can see the factory blue locktight. I suspected this might be the case taking the first one off becuase it had tension the whole way backing out. I blew out the old dust and put fresh locktight on with the new belt.
The old belt was not too bad off...no cracking, just some uneven wear on one side.
While I was working on the cam chain housing gaskets, Keith (kjr914) was starting the valve cover gaskets...more labeling! I really like the green tape as it shows the black very well. Keith did a nice job of cleaning out the spark plug areas of all the debris and spent a good while cleaning out the spark plug threads in the block until the plugs threaded like butter. The bad news is he only did one cover and 3 plugs because of his attention to detail...that means I still have 9 more and 3 covers to do! I'll be doing the lifters before I button everything up for good.
This is what I used for the cam chain cover gaskets...it says it never hardens and I have to say I believe them because I've had this stuff for over 6 years back from my 912 days and it is still like new!
Last edited by flatsixforme; 03-23-2011 at 05:31 PM.
03-23-2011, 02:27 PM
#53
Drifting
While I was working on the cam chain housing gaskets, Keith (kjr914) was starting the valve cover gaskets...more labeling! I really like the green tape as it shows the black very well. Keith did a nice job of cleaning out the spark plug areas of all the debris and spent a good while cleaning out the spark plug threads in the block until the plugs threaded like butter. The bad news is he only did one cover and 3 plugs because of his attention to detail...that means I still have 9 more and 3 covers to do! I'll be doing the lifters before I button everything up for good.
Attachment 522504
Attachment 522504
LDF = lower valve cover, driver's side (USA...sorry mates), front of car
LDM = ..., middle of car
LDR = ..., rear of car
How in the heck anything gets down into the spark plug cavity with the plug boots in place, I don't know, but there were small leaf parts and a bit of grime in there. Perhaps the plugs were last changed under the shade of a tree in the fall...

I found the plug threads a bit grimy and resistant to plug threading, so I threaded the new plug in/out and wiped it clean, and repeated about 3 times. VERY carefully, so as to not foul up the threads. After this, plugs went in smoothly. I didn't put any Kroil, Liquid Wrench or other stuff on the threads, which would have made the job quicker, because I didn't want the stuff leaking into the engine (the oil was a relatively fresh change before the engine removal, so Adam's trying to keep it clean). The last step was the use of high temp anti-seize on the plugs to make life easier in 30k miles...

Like Adam said, this takes a while....
My thanks to Adam for letting us play in the garage with him! Like I've been telling people, its better for me to learn on someone else's engine before it becomes MY turn!
 <<---Adam's new beer fridge is getting well used in this process!
03-23-2011, 03:10 PM
<<---Adam's new beer fridge is getting well used in this process!
03-23-2011, 03:10 PM
#54
Rennlist Member
I changed the power steering belt on my 964 with the motor in, not fun!. I was not going after the belt, but an o-ring behind it. On the back side of the large power steering cog, which is at the end of one of the cams, there is a o-ring on the 964 which often goes bad. When it's bad, they leak a lot of oil from the area. They must have changed the design on the 993 because I don't hear anyone complaining about it.
03-23-2011, 04:27 PM
#55
Addict
Rennlist Member
Rennlist
Site Sponsor
Rennlist Member
Rennlist
Site Sponsor
The power steering belt...what a rediculous place to put this!!! It's all the way in the back of the engine...if mine broke I would rather live with no power steering than to attempt to change it in the car...not sure if it's even possible!
Attachment 522501
Great work as always!
03-23-2011, 09:45 PM
#56
6th Gear
Join Date: Mar 2011
Posts: 6
Likes: 0
Received 0 Likes
on
0 Posts
Oooh...Aaah!! Polished aluminum! I'm living your engine tear down thru the internet. Keep posting the pics.
Got inspired by the story of Richard Gimmi in the latest issue of Porsche Panorama. Richard got his solo designation at age 89 yrs. driving a 2010 Cayman S at Virginia International Raceway.
Here is my history with P-cars.
1970 911T 2.2-liter Adriatic Blue Living on bread and water but went to a drive-in theater driving my brand new Porsche to see "Le Mans". How cool is that? But what do you know, Adam, you weren't even born yet.
1973 914 2.0-liter Black Actually joined the SD Porsche club but dropped out because of kids.
1979 911 SC 3.0-liter Champagne Sweet engine!
1988 964 Carrera White Replaced the entire A/C system and added a radiator/fan with wife's help.
2006 997S Lapis Blue 3.8-liter Wife says, "this is your last Porsche!" Nah.. .I always have the last word, "YES DEAR". Heh, heh, maybe I can get Michael to buy it and get the GT3 I've always wanted.
Got inspired by the story of Richard Gimmi in the latest issue of Porsche Panorama. Richard got his solo designation at age 89 yrs. driving a 2010 Cayman S at Virginia International Raceway.
Here is my history with P-cars.
1970 911T 2.2-liter Adriatic Blue Living on bread and water but went to a drive-in theater driving my brand new Porsche to see "Le Mans". How cool is that? But what do you know, Adam, you weren't even born yet.
1973 914 2.0-liter Black Actually joined the SD Porsche club but dropped out because of kids.
1979 911 SC 3.0-liter Champagne Sweet engine!
1988 964 Carrera White Replaced the entire A/C system and added a radiator/fan with wife's help.
2006 997S Lapis Blue 3.8-liter Wife says, "this is your last Porsche!" Nah..
.I always have the last word, "YES DEAR". Heh, heh, maybe I can get Michael to buy it and get the GT3 I've always wanted.
03-24-2011, 01:26 PM
#59
Burning Brakes
Thread Starter
This past Sunday was when I tackled splitting the tranny to get to the clutch pack. Keith (kjr914) had so much fun on Saturday that he was at my house bright and early the next day...my wife just shook her head and said, "you should have just slept here!" After reading the worshop manual a bit I could see that we needed to get the release fork shaft out; however, it was not very clear as to how. I then went to some DIYs I printed and there was more detail on what to do but it still wasn't crystal clear. More on that later.
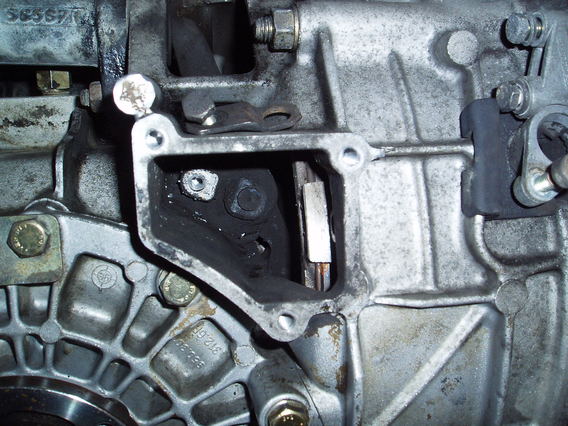
Here is a picture through the access hole on the transmission of the retaining piece that holds the dust boot over one end of the release fork shaft. The piece is sitting on top of the access hole in the orientation it needs to go back in. You can also see in the hole at the black cap looking piece to the right of the shinny metal. The manual says to use a screw driver to pry this boot cover off, inserting it from the second access hole from the top. I found this to be pretty impossible because you couldn't get the screw driver blade (even a very skinny one) on top of the boot, rather only to the side. Instead of fiddling with this I used some channel pliers to gently pull the cover off...it came off quite easily.
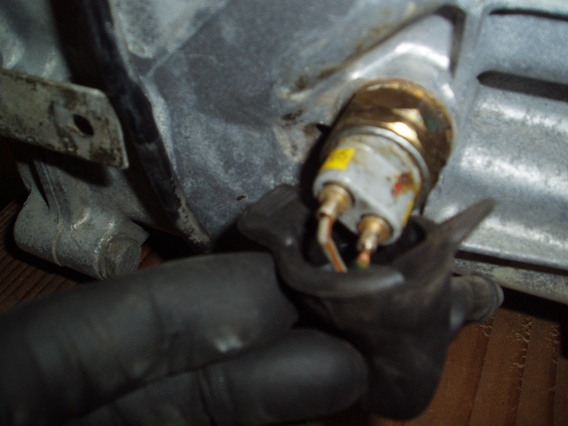
Don't forget to take off the reverse light sensor! Keith, an ex-914 owner, was very excited to see that the part number on this started with a 914. Pretty neat to think the same piece designed back then is used in our cars.
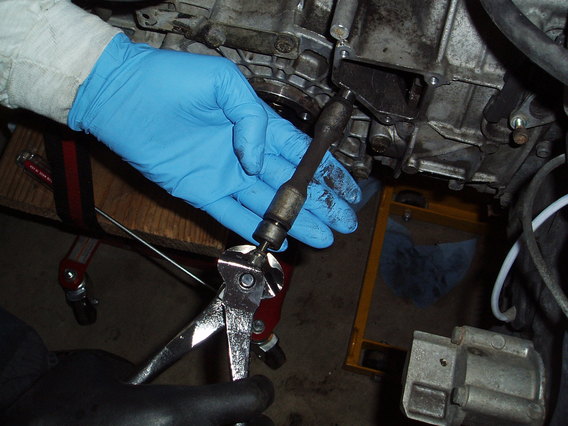
Okay, back to the release fork shaft. Here it is pulled out of the access hole. That is the key...it is pulled out and not punched though. The trick is you need to thread an M6 bolt into the end of the shaft which is threaded...then pull it back towards you. Pretty slick design...as long as you know this trick! Thanks to Karl (PorscheDoc) for clearing this up for me on the phone! Ideally you want to use a very long M6 bolt but I didn't have one. The longest we could come up with was a valve cover bolt and some end snip pliers to grip the head. It was a tight fit but worked fine.
Taking the last bolts off before she is free! And, for those that don't have a headlamp in the garage they are very useful, especially when needing to look through tight spaces or access holes in transmissions!
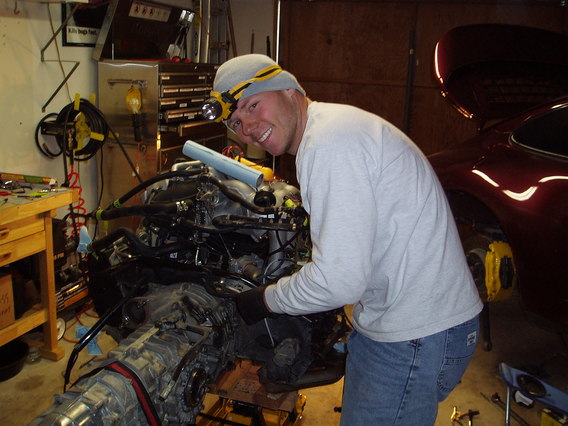
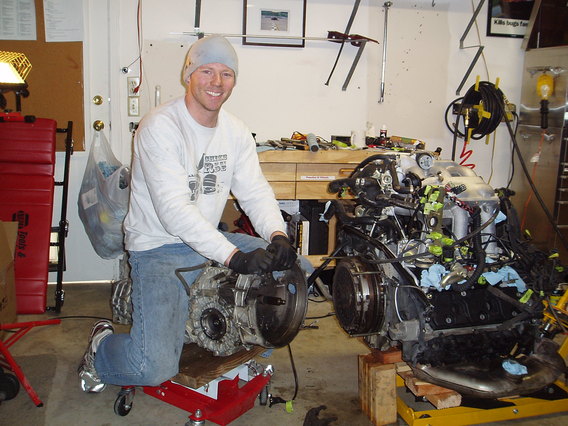
Success! For some reason I had the urge to ride the transmission like a pony...don't ask me why...Keith indulged me being the nice guy that he is. Apparently there is a picture out there of me really "riding" it but I'm not sure if that should surface
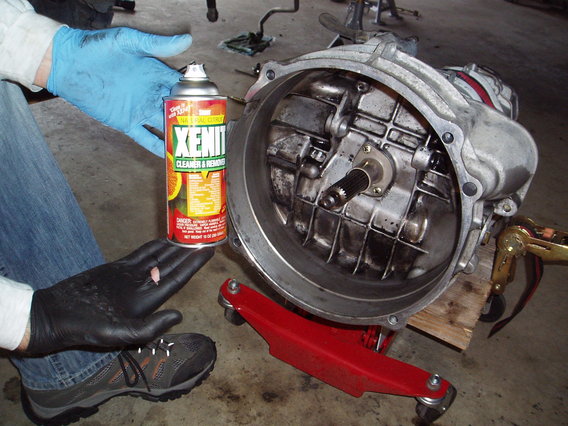
Xenit is great stuff (along with several of the other Stoner products I've used...and no I have no affiliation with them, just a happy customer) and cleaned up the bell housing nicely. Andreas, this is not up to your standard of course but nobody will ever see it once it's back together!
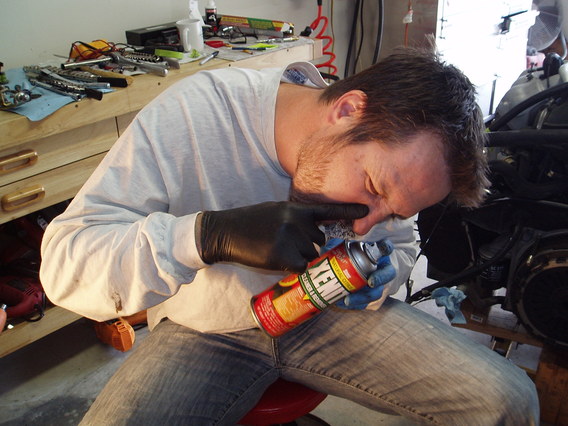
Also, notice how Keith is sporting different colored gloves...I think the Xenit might be getting to him...
Well now this clearly explains it...the guy was huffing the stuff behind my back! No wonder I'm running low on my supply
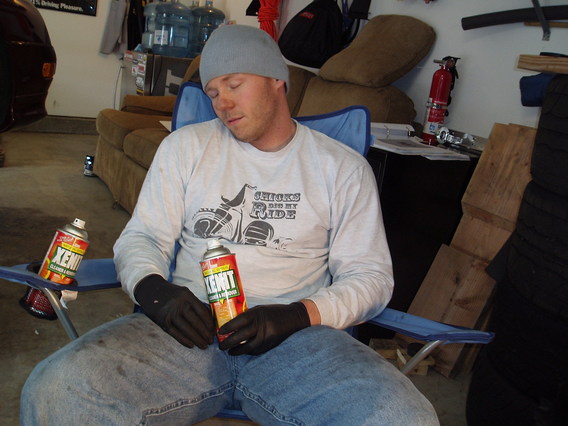
Peer pressure at its finest...I tried it but just didn't have the same tolerance as Keith I guess...I couldn't even make it to the couch before I passed out.
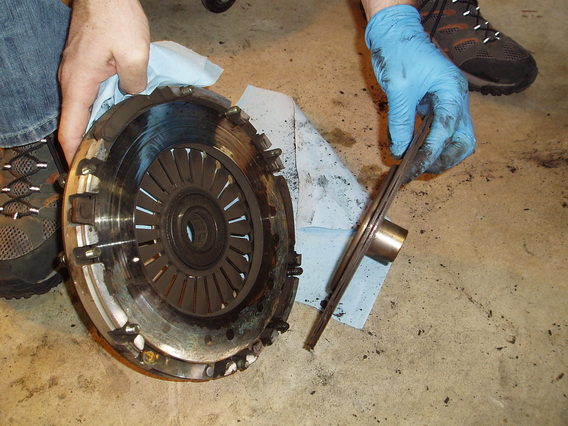
Back to work!!! I took the clutch pack apart and inspected things. I knew my clutch was releasing VERY late; however, I had no signs of slipping. Nevertheless, I knew my time was limited and I'm glad I decided to do it now. This is the pressure plate side of things and as you can see there is a half inch wide groove worn into the metal thanks to the clutch wearing down to the rivets! Let's just say I got all the life out of that clutch!
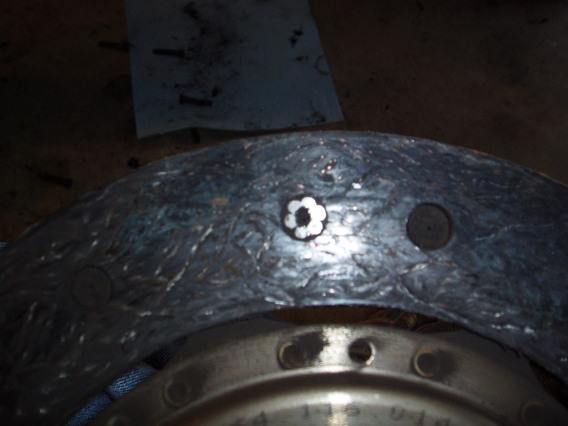
And a picture of the worn down rivet.
Okay, now I'm all caught up and need to get back to work in the garage! I haven't been able to do much this week so I'm planning on having a big weekend to knock out a lot of the loose ends. I hope everyone is enjoying the journey as much as I am!
Here is a picture through the access hole on the transmission of the retaining piece that holds the dust boot over one end of the release fork shaft. The piece is sitting on top of the access hole in the orientation it needs to go back in. You can also see in the hole at the black cap looking piece to the right of the shinny metal. The manual says to use a screw driver to pry this boot cover off, inserting it from the second access hole from the top. I found this to be pretty impossible because you couldn't get the screw driver blade (even a very skinny one) on top of the boot, rather only to the side. Instead of fiddling with this I used some channel pliers to gently pull the cover off...it came off quite easily.
Don't forget to take off the reverse light sensor! Keith, an ex-914 owner, was very excited to see that the part number on this started with a 914. Pretty neat to think the same piece designed back then is used in our cars.
Okay, back to the release fork shaft. Here it is pulled out of the access hole. That is the key...it is pulled out and not punched though. The trick is you need to thread an M6 bolt into the end of the shaft which is threaded...then pull it back towards you. Pretty slick design...as long as you know this trick! Thanks to Karl (PorscheDoc) for clearing this up for me on the phone! Ideally you want to use a very long M6 bolt but I didn't have one. The longest we could come up with was a valve cover bolt and some end snip pliers to grip the head. It was a tight fit but worked fine.
Taking the last bolts off before she is free! And, for those that don't have a headlamp in the garage they are very useful, especially when needing to look through tight spaces or access holes in transmissions!
Success! For some reason I had the urge to ride the transmission like a pony...don't ask me why...Keith indulged me being the nice guy that he is. Apparently there is a picture out there of me really "riding" it but I'm not sure if that should surface
Xenit is great stuff (along with several of the other Stoner products I've used...and no I have no affiliation with them, just a happy customer) and cleaned up the bell housing nicely. Andreas, this is not up to your standard of course but nobody will ever see it once it's back together!
Also, notice how Keith is sporting different colored gloves...I think the Xenit might be getting to him...
Well now this clearly explains it...the guy was huffing the stuff behind my back! No wonder I'm running low on my supply
Peer pressure at its finest...I tried it but just didn't have the same tolerance as Keith I guess...I couldn't even make it to the couch before I passed out.
Back to work!!! I took the clutch pack apart and inspected things. I knew my clutch was releasing VERY late; however, I had no signs of slipping. Nevertheless, I knew my time was limited and I'm glad I decided to do it now. This is the pressure plate side of things and as you can see there is a half inch wide groove worn into the metal thanks to the clutch wearing down to the rivets! Let's just say I got all the life out of that clutch!
And a picture of the worn down rivet.
Okay, now I'm all caught up and need to get back to work in the garage! I haven't been able to do much this week so I'm planning on having a big weekend to knock out a lot of the loose ends. I hope everyone is enjoying the journey as much as I am!