

Dropped the engine over the weekend w/pics

 03-15-2011, 01:52 PM
#17
Racer
Thanks guys! I got a kick out of that last picture too, glad we went through the effort to do it.
I dropped the engine to do a LWF and new clutch primarily as my current one is almost gone. Also, I'm going to do an AWDectomy since it is very easy to get the torque tube out with engine gone. I do a lot of time trials so the 100 lbs will make a difference for me. And, of course all the while I'm in there stuff like, plugs, wires, dist rebuild, caps, rotors, valve cover gaskets, chain tensioner gaskets, PS belt, new clutch slave, new clutch slave rubber line, lifters, fuel filter, SAI port clean, RMS, Wevo engine mounts, rennline rear subframe solid mounts, rennline gusset kit for engine carrier...I think that gets most of it but I'm sure I'm missing stuff. Bottom line, I'll be a busy guy for the next couple weeks!!!
I dropped the engine to do a LWF and new clutch primarily as my current one is almost gone. Also, I'm going to do an AWDectomy since it is very easy to get the torque tube out with engine gone. I do a lot of time trials so the 100 lbs will make a difference for me. And, of course all the while I'm in there stuff like, plugs, wires, dist rebuild, caps, rotors, valve cover gaskets, chain tensioner gaskets, PS belt, new clutch slave, new clutch slave rubber line, lifters, fuel filter, SAI port clean, RMS, Wevo engine mounts, rennline rear subframe solid mounts, rennline gusset kit for engine carrier...I think that gets most of it but I'm sure I'm missing stuff. Bottom line, I'll be a busy guy for the next couple weeks!!!
03-15-2011, 02:49 PM
#18
Burning Brakes
Thread Starter
85k and oil consumption is below average from what I see people post on rennlist. I've never thrown a CLE for SAI issues and I'll be cleaning out the ports. I feel the engine is strong and does not warrant a top end at this point. Besides, if I need it in a few years I'll get to drop everything again and do a bunch of other maintanence keeping things fresh.
Good suggestions, these were not on my list!
A question to everyone...would you do a sound pad or not (meaning leave it out completely)??? I like the extra noise but am somewhat concerned about the heat transfer. Does anyone know how much the sound pad actually reduces cabin heat, if any?
A question to everyone...would you do a sound pad or not (meaning leave it out completely)??? I like the extra noise but am somewhat concerned about the heat transfer. Does anyone know how much the sound pad actually reduces cabin heat, if any?
03-15-2011, 03:14 PM
#19
Burning Brakes
Thread Starter
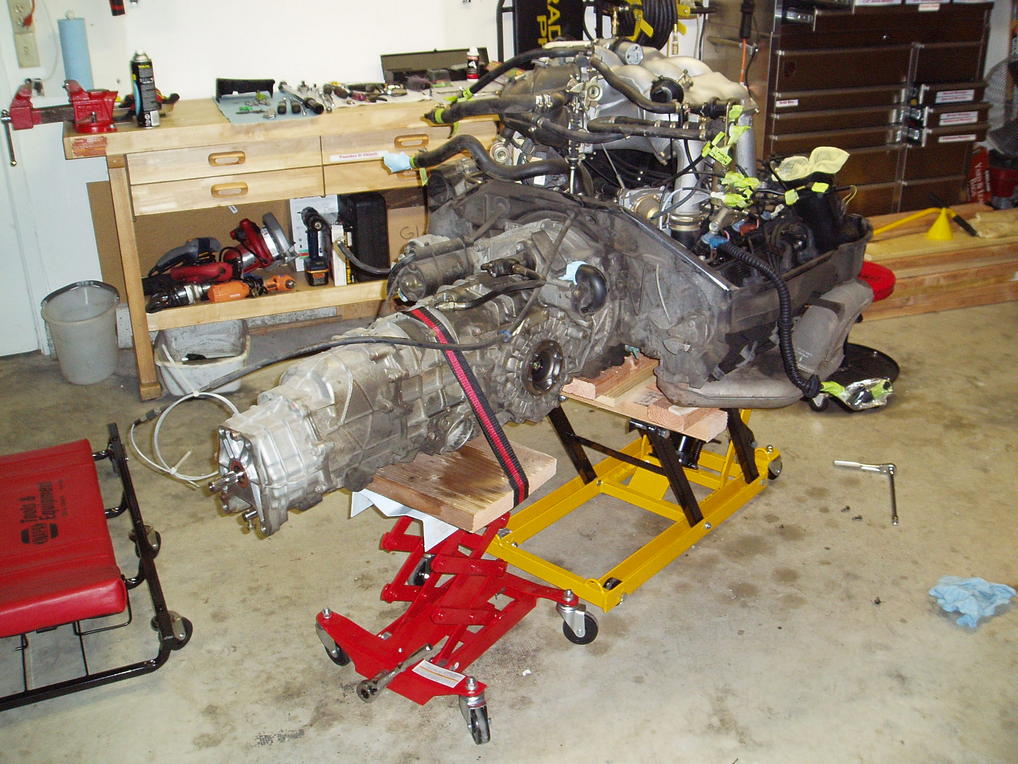
Okay, here is the next installment of the project.
Here is the engine before I started tearing it down.

Another shot of the engine...my wife came out to the garage and had this view and said, "wow, it's bigger than I thought...it looks like a giant *****". I laughed and then looked at it at this angle...I couldn't argue!
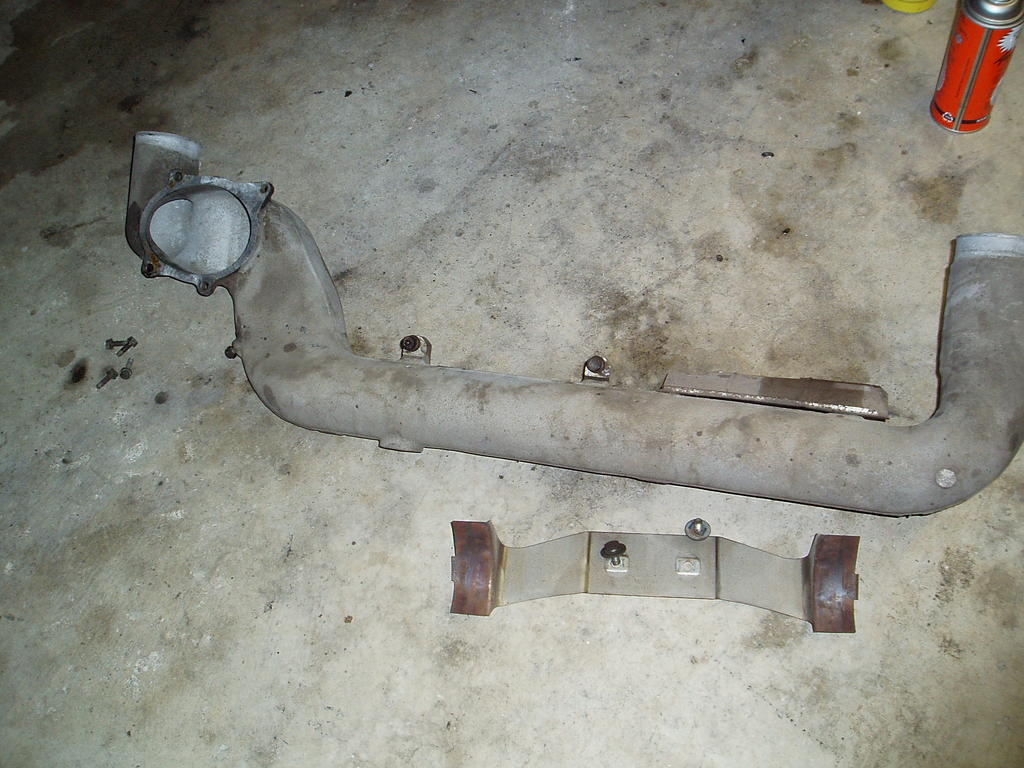
The cat...all I can say is thank god for impact wrenches and Kroil as those rusty bolts would have been a real chore without one. I'll be getting new hardware and sandblasting everything before reinstallation.

The heater core (not sure what it's actually called) that sits above the cat. It was at this stage in the process that I thought to myself, "how the hell are you going to get this all back together!" I then went to the beer fridge for some more liquid courage, took some pictures and made some notes for my memory, and pressed on. I couldn't help but think how complex and heavy all this is just for some simple heat! I'm not one to question the Porsche engineers but what about an electric heater unit mounted in the front of the car??? It would have made the engine design easier and less expensive...and saved a good 30+lbs once you take out the whole system needed to get the hot air from the rear of the car all the way to the cabin.
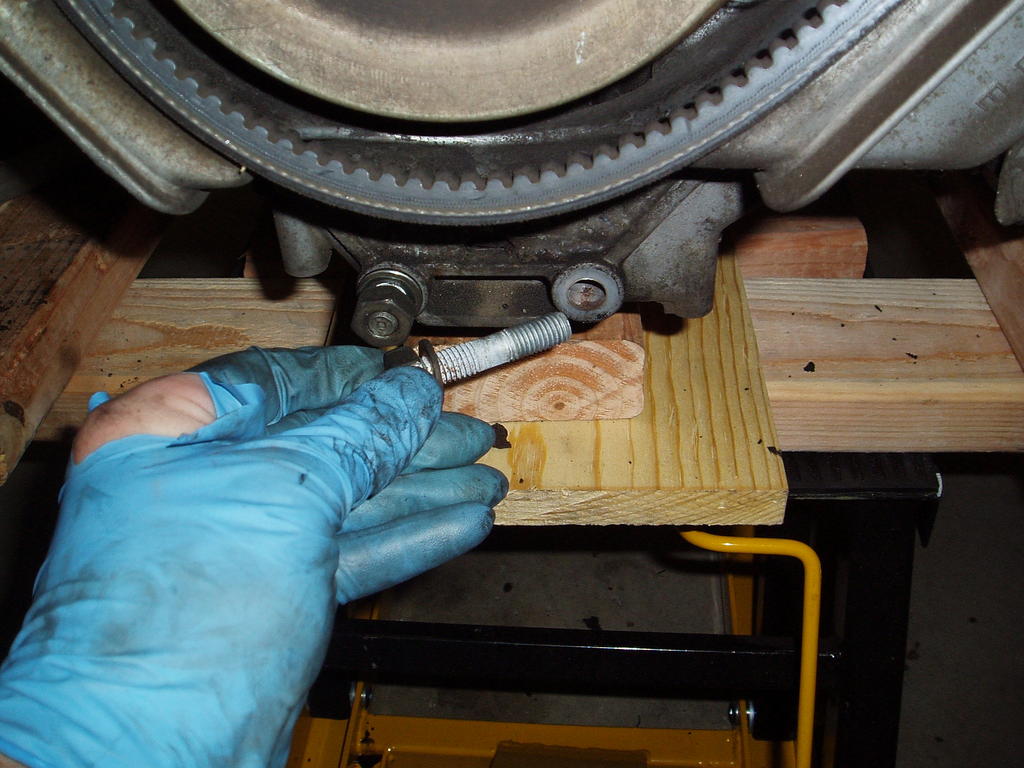
This is a shot of one of the double sided bolts that go into the engine case to hold on the engine carrier. These looked kind of rough so I'll likely replace them. The impact wrench is your friend on these.
And here is everything removed including the rear half of the engine tin giving me access to the chain tensioner covers. I'll be sending the engine carrier out to be welded with the gusset kit and then powdercoated. And, yes that is a nice big couch in my garage...and no, I have not had to use it at night...yet! We'll see how long this project takes
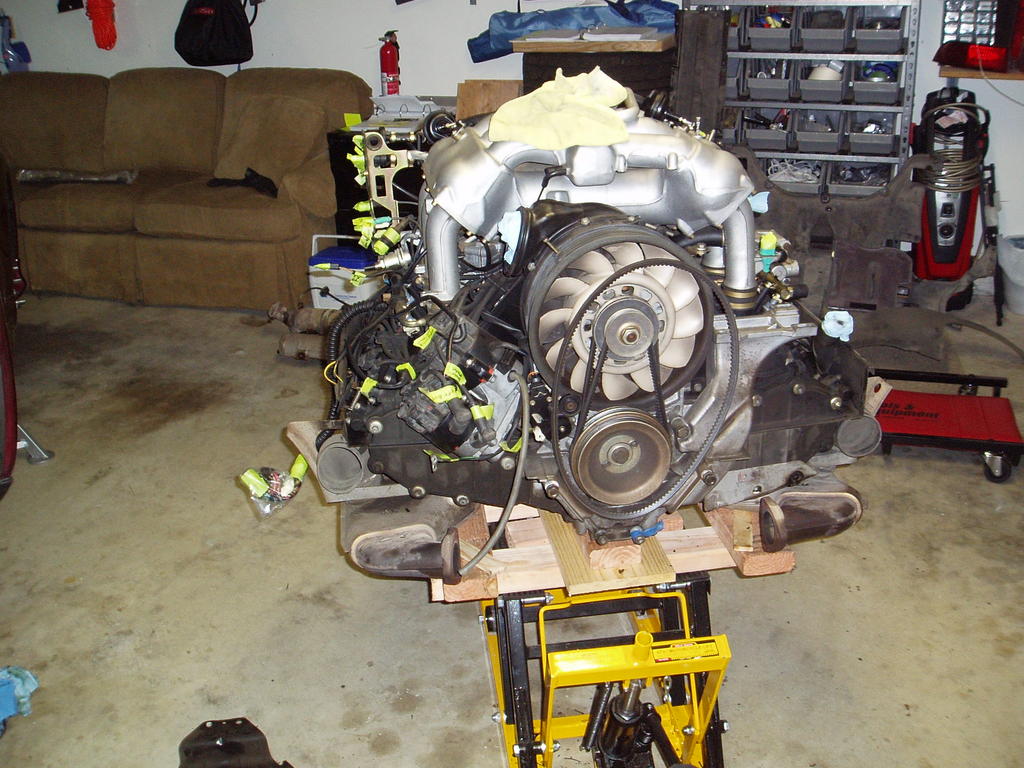
Here is the engine before I started tearing it down.
Another shot of the engine...my wife came out to the garage and had this view and said, "wow, it's bigger than I thought...it looks like a giant *****". I laughed and then looked at it at this angle...I couldn't argue!
The cat...all I can say is thank god for impact wrenches and Kroil as those rusty bolts would have been a real chore without one. I'll be getting new hardware and sandblasting everything before reinstallation.
The heater core (not sure what it's actually called) that sits above the cat. It was at this stage in the process that I thought to myself, "how the hell are you going to get this all back together!" I then went to the beer fridge for some more liquid courage, took some pictures and made some notes for my memory, and pressed on. I couldn't help but think how complex and heavy all this is just for some simple heat! I'm not one to question the Porsche engineers but what about an electric heater unit mounted in the front of the car??? It would have made the engine design easier and less expensive...and saved a good 30+lbs once you take out the whole system needed to get the hot air from the rear of the car all the way to the cabin.
This is a shot of one of the double sided bolts that go into the engine case to hold on the engine carrier. These looked kind of rough so I'll likely replace them. The impact wrench is your friend on these.
And here is everything removed including the rear half of the engine tin giving me access to the chain tensioner covers. I'll be sending the engine carrier out to be welded with the gusset kit and then powdercoated. And, yes that is a nice big couch in my garage...and no, I have not had to use it at night...yet! We'll see how long this project takes
03-16-2011, 05:51 PM
#22
Burning Brakes
Thread Starter
Okay folks, time for a quick update. I only had a couple hours to work on things last night and unfortunately my progress was limited to getting the 8 or so bolts needed to get the side engine tins off. A fellow 993 friend, Nick (NickyP), came over to check things out and we decided he was bad luck because the moment he walked in the garage and I started on this bolt things got ugly  I was removing one of the allen head bolts from the side of the engine that holds the muffler hanger and engine tin on...you know, those same bad quality bolts that hold our seat in place...well, with moderate effort the bolt stripped...it was even pre-soaked with Kroil! No problem, right...just use a bolt extractor or even drill it out...wrong! The damn muffler hanger bracket prevents any real access with a drill unless you have an 8 inch + bit...even my 90 degree angle drill would not fit. There were only two options that we saw, dremel a slit in the bolt to try and break it loose or drill the head out. Knowing it was soft metal I figured it would drill out fairly easily and I would attack it from a couple different angles around the bracket. About 30 minutes later the head was nothing more than a pile of shavings! It was a slow night. No worries, tonight is a new day and I'm ready to press on!


I was removing one of the allen head bolts from the side of the engine that holds the muffler hanger and engine tin on...you know, those same bad quality bolts that hold our seat in place...well, with moderate effort the bolt stripped...it was even pre-soaked with Kroil! No problem, right...just use a bolt extractor or even drill it out...wrong! The damn muffler hanger bracket prevents any real access with a drill unless you have an 8 inch + bit...even my 90 degree angle drill would not fit. There were only two options that we saw, dremel a slit in the bolt to try and break it loose or drill the head out. Knowing it was soft metal I figured it would drill out fairly easily and I would attack it from a couple different angles around the bracket. About 30 minutes later the head was nothing more than a pile of shavings! It was a slow night. No worries, tonight is a new day and I'm ready to press on!
03-16-2011, 06:14 PM
#23
Instructor
Good job !
You should consider yourself as a lucky guy with that damned bolt ! I've had the same issue last winter with the engine on... Bolt extractors didn't work, I also tried to get room by "dremmelling" the washer (imagine the job), unsuccessful...
Finally I decided to drill through the bolt to fill in the back with oil... that could have been a nice idea if my drill did not break inside...At the end I drilled at the same diameter of the bolt and had to make a new thread...
Put a lot of loctite and so far that's ok!!
Probably spent about 12 hours laid down in the garage during the winter and no couch ...
...
You should consider yourself as a lucky guy with that damned bolt ! I've had the same issue last winter with the engine on... Bolt extractors didn't work, I also tried to get room by "dremmelling" the washer (imagine the job), unsuccessful...
Finally I decided to drill through the bolt to fill in the back with oil... that could have been a nice idea if my drill did not break inside...At the end I drilled at the same diameter of the bolt and had to make a new thread...
Put a lot of loctite and so far that's ok!!
Probably spent about 12 hours laid down in the garage during the winter and no couch
...
 03-17-2011, 12:26 AM
#26
Rennlist Member
Whaddaya' mean bad luck!!?? I still can't believe the threaded shaft came out after you mutilated the head of that bolt. Man, I'm GOOD luck!! Ha ha. I enjoyed the visit last night, I'll be back.
Nick
Nick
03-17-2011, 01:43 PM
#27
Burning Brakes
Thread Starter

I was told by a p-car mechanic friend of mine that he uses only snap-on allen sockets for this exact reason...apparently their tolerances and material are far superior to mortal tools. They also have a superior price tag of $120!!!
03-17-2011, 02:12 PM
#28
Burning Brakes
Thread Starter
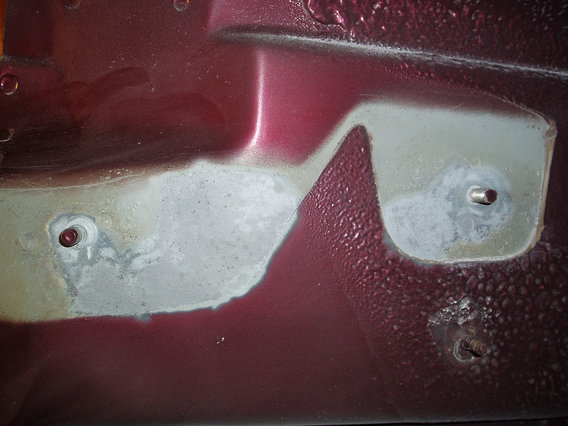
Last night I moved away from the engine and worked on cleaning up the engine bay a bit. I had read a couple threads on here about a weak point in the factory paint/sealing of the rear plate/bumper bracket. I noticed where the issue was right away...a channel where all the dirt/road grime can sit and never get cleaned out. I knew I'd never sleep well again unless I took the plates off...part of me didn't want to because I'd have to cut into some of the factory undercoating to release the piece from the body but looking at the top where there was not a proper seal made me really nervous so I did it. I'm glad (if finding rust can make anyone glad!!!) I did!
This shows the problem part/area in the upper right hand side of the picture...notice the undercoating on the bottom side...this is what should have been sprayed on the top side as well.
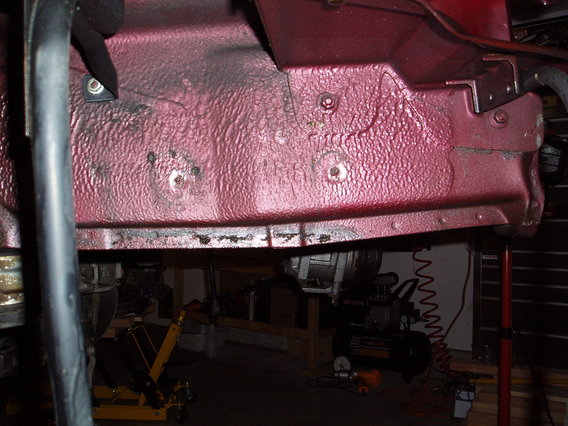
Here is a shot of where the moisture gets in...notice all the black/wet dirt in the channel between the piece and the body.
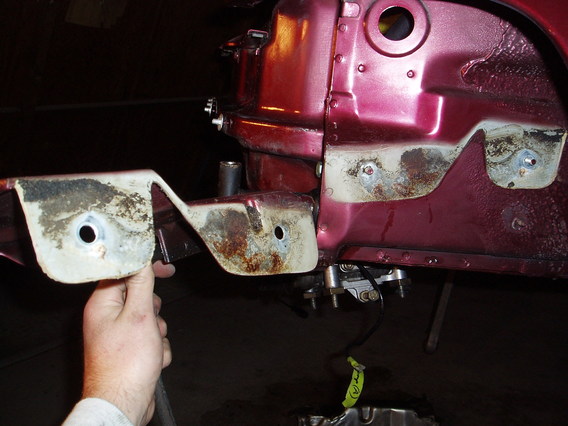
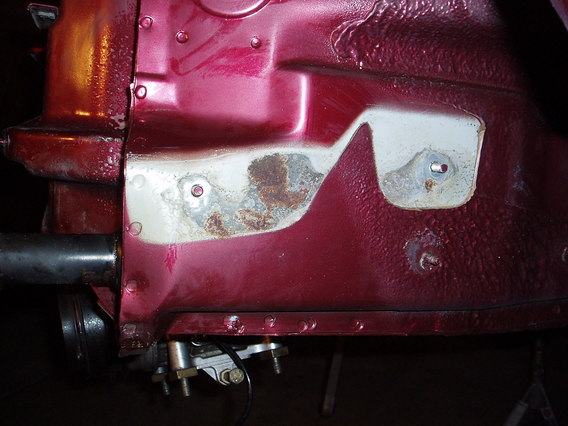
RUST!!! Thankfully it is just surface rust but there was evidence of pitting in the bad parts so it was certainly starting to eat through the metal.
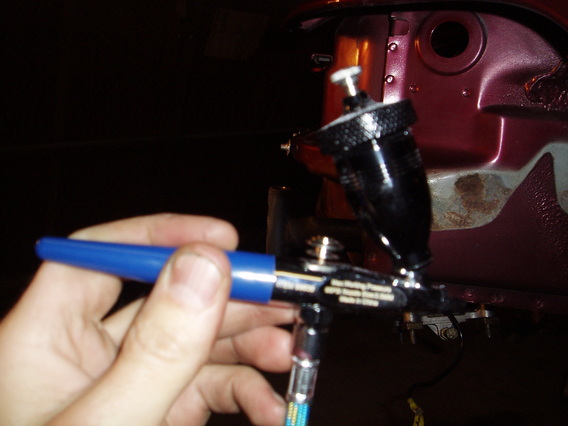
My weapon of choice! I decided to use an air etcher (mini sandblaster) instead of taking a grinding wheel to it...I felt I could do a more precise preparing the metal for paint and thus keep things as "factory" as possible when I'm all finished. It worked great. I used 250 grit aluminum oxide media.
All cleaned up!
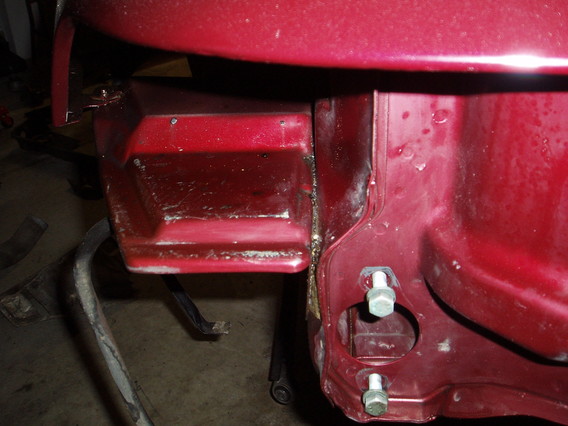
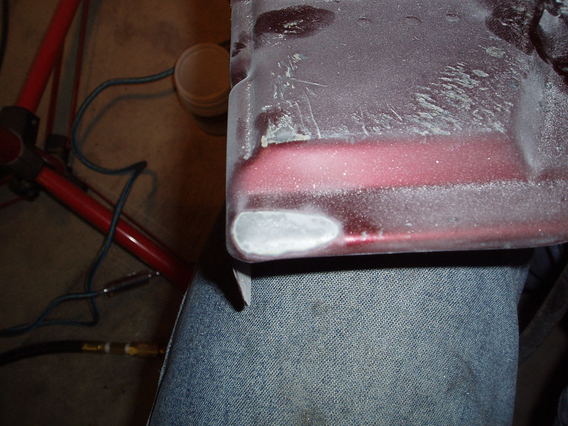
The top corner of the support piece was showing some rust as well....

All cleaned up!
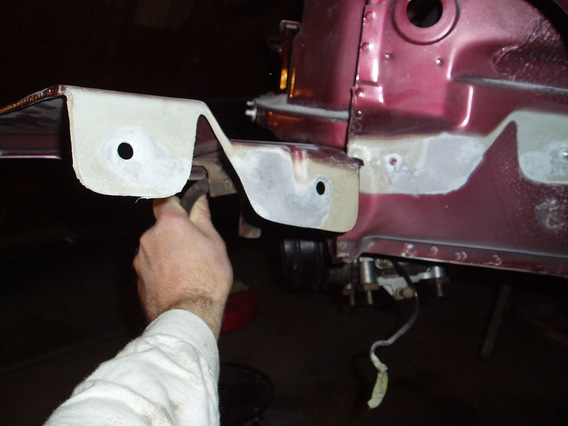
Everything rust free...I can sleep at night
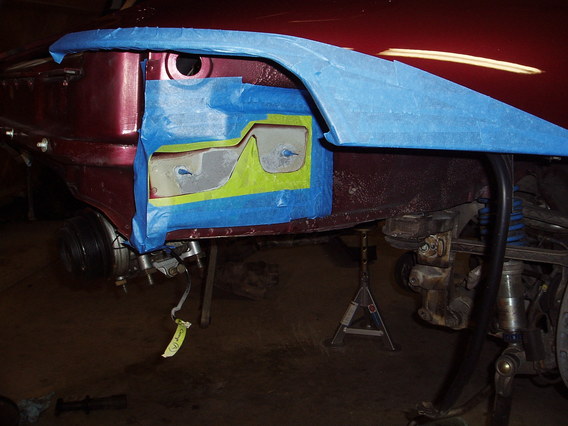
Cleaned with alcohol, taped up and ready for primer...stay tuned for the finished product
This shows the problem part/area in the upper right hand side of the picture...notice the undercoating on the bottom side...this is what should have been sprayed on the top side as well.
Here is a shot of where the moisture gets in...notice all the black/wet dirt in the channel between the piece and the body.
RUST!!! Thankfully it is just surface rust but there was evidence of pitting in the bad parts so it was certainly starting to eat through the metal.
My weapon of choice! I decided to use an air etcher (mini sandblaster) instead of taking a grinding wheel to it...I felt I could do a more precise preparing the metal for paint and thus keep things as "factory" as possible when I'm all finished. It worked great. I used 250 grit aluminum oxide media.
All cleaned up!
The top corner of the support piece was showing some rust as well....
All cleaned up!
Everything rust free...I can sleep at night
Cleaned with alcohol, taped up and ready for primer...stay tuned for the finished product
03-17-2011, 03:14 PM
#29
Rennlist Member
RUST!!! Thankfully it is just surface rust but there was evidence of pitting in the bad parts so it was certainly starting to eat through the metal.
Attachment 521257
Attachment 521258
The photo i've attached shows rust.
Adam, it seems that you are having quite the journey with Ruby.
Have a great time.
Craig
 03-17-2011, 03:23 PM
#30
Seared
Rennlist Member
Rennlist Member
Adam,
Good catch. I would use an etching primer (ex: Duplicolor makes one that is green).
Where did you purchase that 'mini media blaster'? I have a full-size bead blasting cabinet, but that's an interesting piece.
Andreas
Good catch. I would use an etching primer (ex: Duplicolor makes one that is green).
Where did you purchase that 'mini media blaster'? I have a full-size bead blasting cabinet, but that's an interesting piece.
Andreas