

Dropped the engine over the weekend w/pics


 04-14-2011, 06:03 AM
#138
Rennlist Member
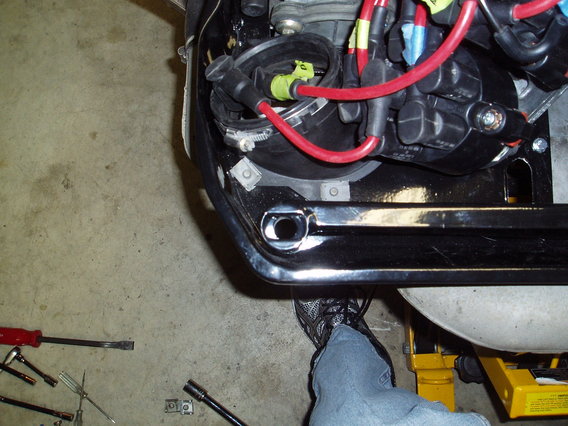
The new exhaust gaskets. A tip to make your life easier is to put a couple dabs of antisieze on them and then stick them in place. This way you can put them in and not fiddle with them when putting on the heat exchangers.
Attachment 528202
The flat part goes on the cylinder and convex part on the exchangers.
They are made from same material as cylinder.
great thread, courage !
here's an old thread about the exchanger gaskets
https://rennlist.com/forums/993-foru...=exhaust+rings
04-14-2011, 12:00 PM
#139
Track Day
Join Date: May 2003
Location: England
Posts: 23
Likes: 0
Received 0 Likes
on
0 Posts
Hope it's not too late, but while you have the engine out, have you thought of replacing the seals between the timing chain case and the crankshaft and camshaft housing ?
That's the bit that's leaking on my car. I tried replacing the timing chain cover gaskets with engine in the car a while ago, but that didn't stop the leak.
The only problem is you have to remove timing chains and cam sprockets, which may mean re-setting the timing. I would definitely do it if I had my engine out, although it is possible with the engine in the car it would take me about 3 days !
Sorry if you have done it and I missed it.
Great thread, by the way. Looking forward to when she fires up for the first time !!
04-14-2011, 12:15 PM
#140
Racer
Amazing that just a few bolts are holding the full weight of the engine when on the stand.
I used the same set-up: Engine stand with modified adapter ring. The stand itself didn't concern me but the fact that depending on position of the engine, there are just a couple bolts holding the full weight that wants to tilt down.
My rebuild was a 3.0 liter, lighter by about 100 lbs. than a 3.6 but even so, I supported the engine most of the time with a jack under it except when rotating was required.
Just didn't feel good about letting it hang there.
04-14-2011, 12:33 PM
#141
Burning Brakes
Thread Starter
If you stuck them 'in place' on the cylinders, from the picture, I see they are the other way around.
The flat part goes on the cylinder and convex part on the exchangers.
They are made from same material as cylinder.
great thread, courage !
here's an old thread about the exchanger gaskets
https://rennlist.com/forums/993-foru...=exhaust+rings
The flat part goes on the cylinder and convex part on the exchangers.
They are made from same material as cylinder.
great thread, courage !
here's an old thread about the exchanger gaskets
https://rennlist.com/forums/993-foru...=exhaust+rings
Hope it's not too late, but while you have the engine out, have you thought of replacing the seals between the timing chain case and the crankshaft and camshaft housing ?
That's the bit that's leaking on my car. I tried replacing the timing chain cover gaskets with engine in the car a while ago, but that didn't stop the leak.
The only problem is you have to remove timing chains and cam sprockets, which may mean re-setting the timing. I would definitely do it if I had my engine out, although it is possible with the engine in the car it would take me about 3 days !
Sorry if you have done it and I missed it.
Great thread, by the way. Looking forward to when she fires up for the first time !!
That's the bit that's leaking on my car. I tried replacing the timing chain cover gaskets with engine in the car a while ago, but that didn't stop the leak.
The only problem is you have to remove timing chains and cam sprockets, which may mean re-setting the timing. I would definitely do it if I had my engine out, although it is possible with the engine in the car it would take me about 3 days !
Sorry if you have done it and I missed it.
Great thread, by the way. Looking forward to when she fires up for the first time !!
Amazing that just a few bolts are holding the full weight of the engine when on the stand.
I used the same set-up: Engine stand with modified adapter ring. The stand itself didn't concern me but the fact that depending on position of the engine, there are just a couple bolts holding the full weight that wants to tilt down.
My rebuild was a 3.0 liter, lighter by about 100 lbs. than a 3.6 but even so, I supported the engine most of the time with a jack under it except when rotating was required.
Just didn't feel good about letting it hang there.
I used the same set-up: Engine stand with modified adapter ring. The stand itself didn't concern me but the fact that depending on position of the engine, there are just a couple bolts holding the full weight that wants to tilt down.
My rebuild was a 3.0 liter, lighter by about 100 lbs. than a 3.6 but even so, I supported the engine most of the time with a jack under it except when rotating was required.
Just didn't feel good about letting it hang there.
04-14-2011, 01:06 PM
#142
Rennlist Member
I'd say that's a low percentage leaking point, although obviously you did experience it. Unless one has a problem, probably best left alone. Although, I will say that cam timing is pretty straight forward when you understand the sequence and jump into it.
Hope it's not too late, but while you have the engine out, have you thought of replacing the seals between the timing chain case and the crankshaft and camshaft housing ?
That's the bit that's leaking on my car. I tried replacing the timing chain cover gaskets with engine in the car a while ago, but that didn't stop the leak.
The only problem is you have to remove timing chains and cam sprockets, which may mean re-setting the timing. I would definitely do it if I had my engine out, although it is possible with the engine in the car it would take me about 3 days !
Sorry if you have done it and I missed it.
Great thread, by the way. Looking forward to when she fires up for the first time !!
That's the bit that's leaking on my car. I tried replacing the timing chain cover gaskets with engine in the car a while ago, but that didn't stop the leak.
The only problem is you have to remove timing chains and cam sprockets, which may mean re-setting the timing. I would definitely do it if I had my engine out, although it is possible with the engine in the car it would take me about 3 days !
Sorry if you have done it and I missed it.
Great thread, by the way. Looking forward to when she fires up for the first time !!
04-15-2011, 04:53 PM
#144
6th Gear

Join Date: Mar 2011
Posts: 6
Likes: 0
Received 0 Likes
on
0 Posts
Adam,
It's been real interesting watching the progress of reassembling. Did you have an extra set of hands during the use of two jacks to press in the bearing on the LWF? Or did you do it all by yourself?
We'll be back in town on Sunday April 17th, 7:30pm. Hopefully, you will have the engine installed and test fired by then.
John
04-15-2011, 05:21 PM
#145
Burning Brakes
Thread Starter
I just hope it all works as planned! The AWD weight savings should make a noticeable difference!
John, I was flying solo during the cluth install...no biggie, just more moving around. I'm waiting for some final hardware which should be in today (please lord/postal service, come through for me on this one!) which will allow me to slap it all together tonight, lift it in it's place a bit to attach the clutch slave hose, bleed the clutch and test clutch action, then do the final lift/install tomorrow.
Adam,
It's been real interesting watching the progress of reassembling. Did you have an extra set of hands during the use of two jacks to press in the bearing on the LWF? Or did you do it all by yourself?
We'll be back in town on Sunday April 17th, 7:30pm. Hopefully, you will have the engine installed and test fired by then.
John
It's been real interesting watching the progress of reassembling. Did you have an extra set of hands during the use of two jacks to press in the bearing on the LWF? Or did you do it all by yourself?
We'll be back in town on Sunday April 17th, 7:30pm. Hopefully, you will have the engine installed and test fired by then.
John
04-18-2011, 08:00 PM
#146
Burning Brakes
Thread Starter
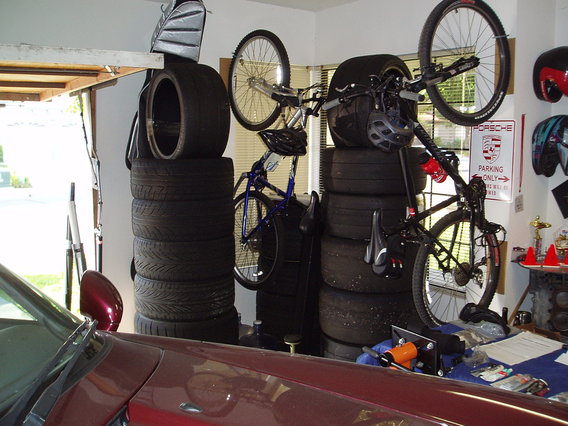
I feel like I'm in fairly good company when I share this secret with all of you...I have an addiction...I'm addicted to TIRES!!! I not only love going fast on them, I also love getting in my car at lunch to go get them mounted after they have been in the hot car for hours...the smell puts an immediate smile on my face 
I also love when this happens!!!
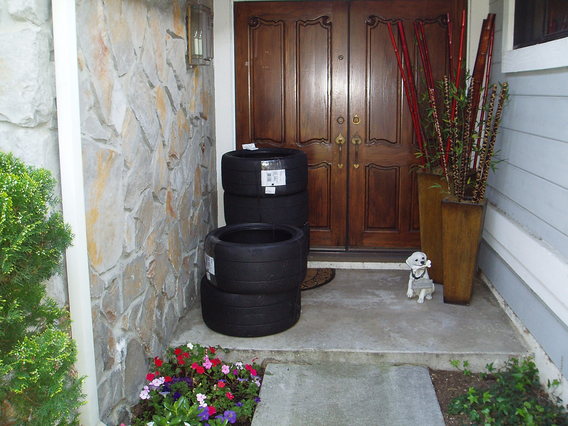
Here is a picture of my addiction...
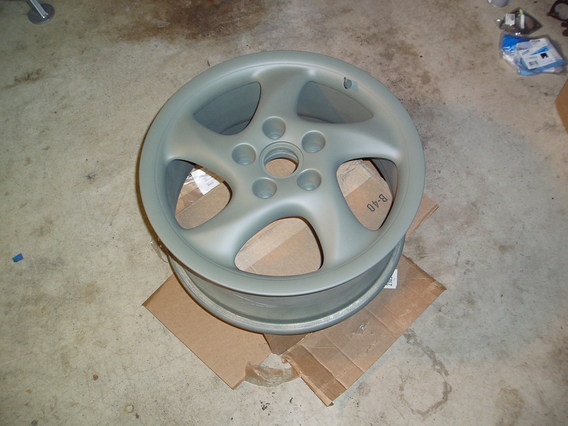
And here is a picture of the wheels I'm refinishing in matte black for the tires to go on. This is one primed...don't have a picture of them finished in black but they look great.
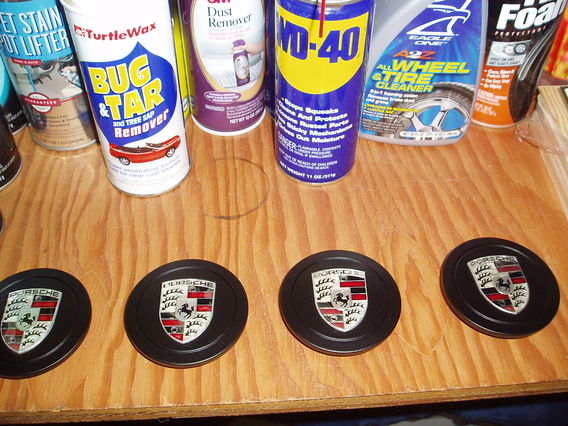
And the center caps.
I also love when this happens!!!
Here is a picture of my addiction...
And here is a picture of the wheels I'm refinishing in matte black for the tires to go on. This is one primed...don't have a picture of them finished in black but they look great.
And the center caps.
04-18-2011, 08:26 PM
#147
Burning Brakes
Thread Starter
Last Friday night was the offical beginning to the end of this project. I had been waiting on some parts from Germany to allow me to put the engine bits all back together and thanks to the great efforts of Mark D. at FD Motorsports, he made sure I got them Friday. As a side note, I can't say enough great things about Mark and his service/advice/knowledge. He is truely a great asset to this community and I can't thank him enough! Cgfen (Craig) and kjr914 (Keith) came over for the evening of fun...thanks guys!
The main part I needed were the 4 engine studs that allow you to bolt the AC bracket and then engine carrier on the car. Mine looked really bad when I took them off the car so I wanted new ones. For those that are interested, the proper torque for these are around 40 ft.lbs. Don't misread the manual where it says "engine carrier to engine mount...60ft.lbs." That is referring to the motor mounts. Craig helped out in this department calling Tony Callas (who better to call) for clarification. He said that you want to torque 30 ft.lbs. on each...let sit...then go 35 ft.lbs. and let sit...then 38-40 and retorque until they stop moving. Great, tip, thanks Tony if you are watching!
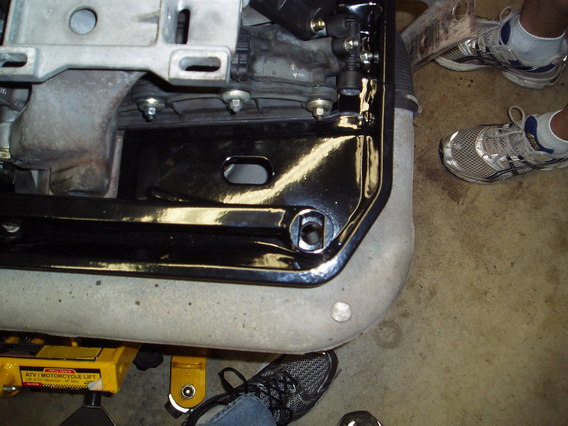
Another head scratcher for us came when putting on the engine carrier...we noticed that the slotted holes were different from each other side to side...one was horzontial to the carrier and one was perpendicular. Having had my engine carrier welded and powdercoated I paused wondering if this was right or if something fishy was going on...did the welder cutt off the ends to make it easy on himself to weld the gusset kit on?!?!?!? I went to the computer to look at rennline install pictures. This added even more confusion to the mix because while they were off axis to each other...the slotted portion was upsidedown in relation to my carrier!!! I was really perplexed...now thinking that they were cut off and flipped by accident. Thankfully, pictures I took of my drop showed that everything was perfectly fine...whew! The slots are supposed to be off axis and slot side pointed up.
Other side
I got the easy job since I was topside making sure everything cleared...hey, these guys were there to work so I put them to work!
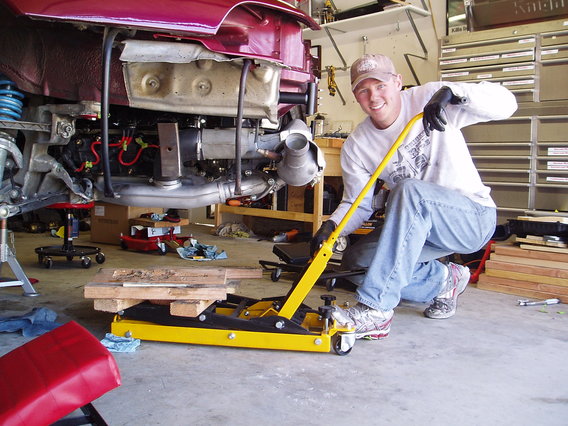
We got everything jacked up and cleared the half shafts so all that was left to do for the evening was to attach and bleed the clutch to make sure that felt okay before putting it all the way in the car. This went smoothly and the clutch action felt perfect with no squeeks even!
The next day was the big day...more to come
The main part I needed were the 4 engine studs that allow you to bolt the AC bracket and then engine carrier on the car. Mine looked really bad when I took them off the car so I wanted new ones. For those that are interested, the proper torque for these are around 40 ft.lbs. Don't misread the manual where it says "engine carrier to engine mount...60ft.lbs." That is referring to the motor mounts. Craig helped out in this department calling Tony Callas (who better to call) for clarification. He said that you want to torque 30 ft.lbs. on each...let sit...then go 35 ft.lbs. and let sit...then 38-40 and retorque until they stop moving. Great, tip, thanks Tony if you are watching!
Another head scratcher for us came when putting on the engine carrier...we noticed that the slotted holes were different from each other side to side...one was horzontial to the carrier and one was perpendicular. Having had my engine carrier welded and powdercoated I paused wondering if this was right or if something fishy was going on...did the welder cutt off the ends to make it easy on himself to weld the gusset kit on?!?!?!? I went to the computer to look at rennline install pictures. This added even more confusion to the mix because while they were off axis to each other...the slotted portion was upsidedown in relation to my carrier!!! I was really perplexed...now thinking that they were cut off and flipped by accident. Thankfully, pictures I took of my drop showed that everything was perfectly fine...whew! The slots are supposed to be off axis and slot side pointed up.
Other side
I got the easy job since I was topside making sure everything cleared...hey, these guys were there to work so I put them to work!
We got everything jacked up and cleared the half shafts so all that was left to do for the evening was to attach and bleed the clutch to make sure that felt okay before putting it all the way in the car. This went smoothly and the clutch action felt perfect with no squeeks even!
The next day was the big day...more to come
04-18-2011, 08:54 PM
#148
Drifting


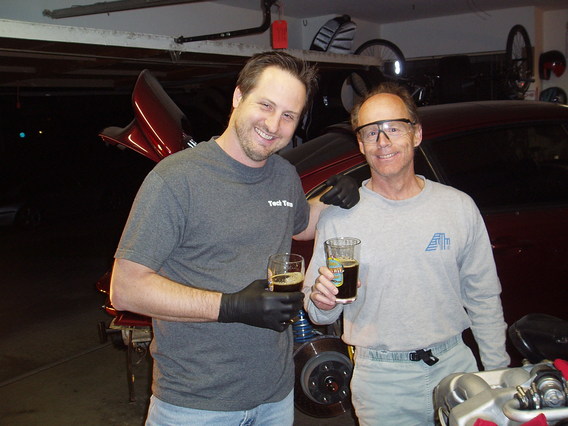
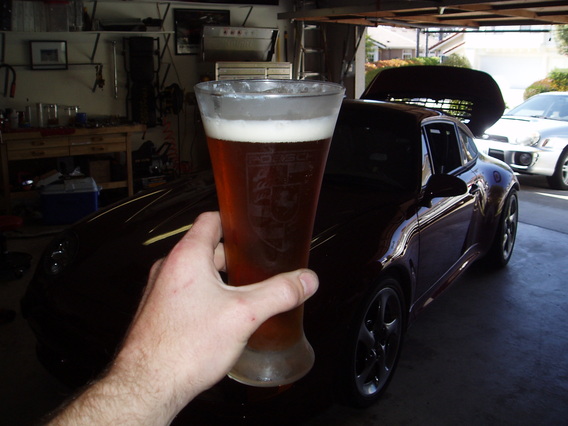
^^^^The real reason Adam invites me over the the garage...I bring beer! We were all in agreement on this one. One of the best we've ever had!

http://www.lostabbey.com/lost-abbey-...-commandments/
Tease!
04-20-2011, 02:04 PM
#149
Burning Brakes
Thread Starter
Finally, the time has come to put the car back together. It's been a lot of work but the last few weeks have gone by quite fast. I had a few people planning on stopping over to either watch or help in what I hoped would be a successful day. kjr914 (Keith) and Ed Hughes were there nice and early to help. NickyP and Javier (niche) showed up a bit later in the day to also lend a hand. Nick was all over the tools and really helped speed up the process by handing whoever was under the car whatever they needed! Hopefully, he learned a few things despite not getting to do much wrenching. Javier, not being an experienced wrencher, was give the task of feeding us and he ordered some great pizza for lunch But, I'm getting ahead of myself...
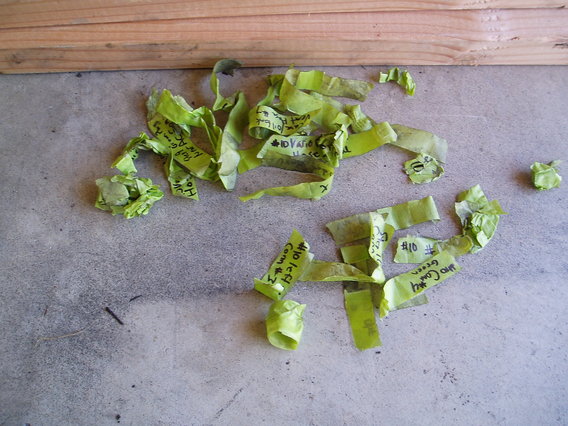
The day started with matching up labels reconnecting all the hoses and wires. This was a most satisfying picture!
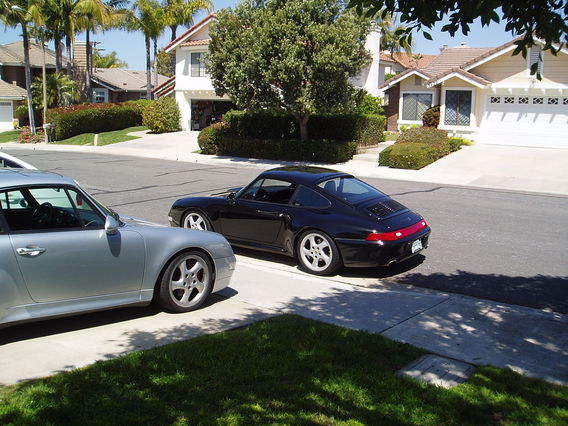
As everyone arrived I couldn't help but take a shot of all the cool cars parked outside my house. Keith = polar silver and Nick = black
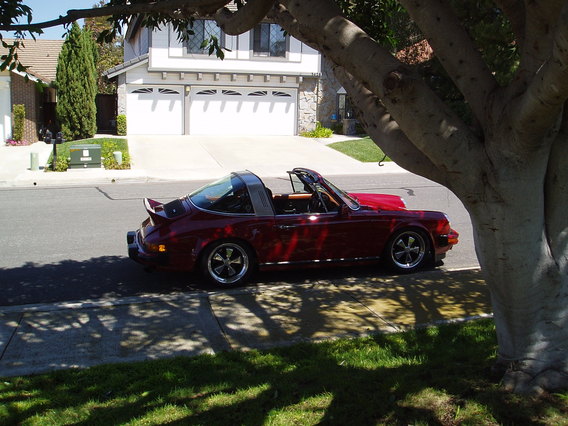
Ed brought HIS Ruby...she was looking good under the shaded tree.
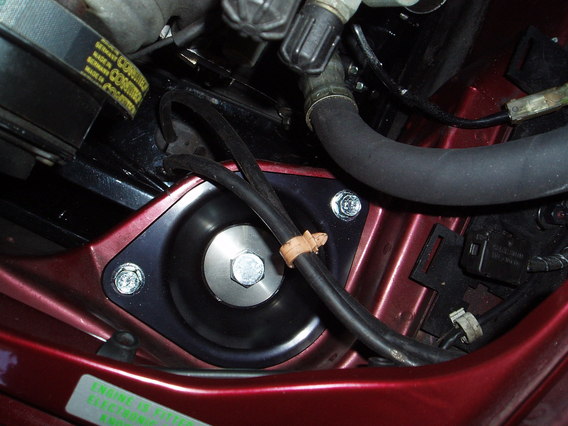
Wevo mounts with black pillows...a nice clean look and easy to install. I couldn't wait to drive the car to feel the difference!
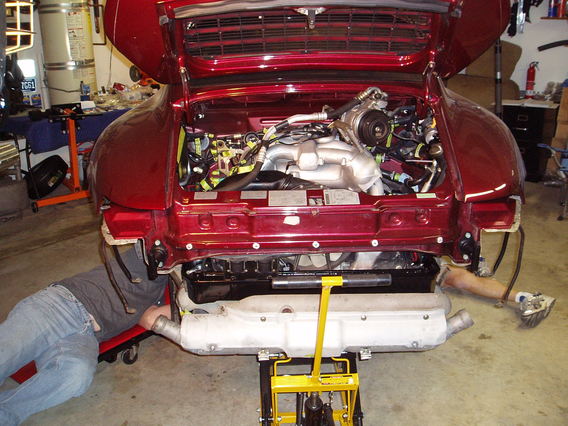
After a few hours the engine was in!!! Wooo whooo Still a bit of work to do before we fire the engine but this was a great feeling to lower that lift. We pushed on and by late afternoon we were ready to fire it up. Pulled DME and cranked for a while for pressure and then once the throttle cable was hooked up she fired right up on the first try! Everything sounded in order with no misfires/stumbles...I was so relieved that it all worked! By this time everyone needed to head out for the day, it was great to have so many people there to help and witness either my failure or success...thanks guys!
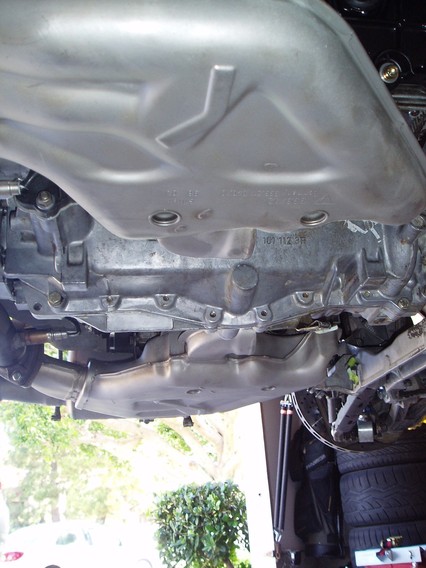
Isn't that a pretty sight...nothing like a clean engine!
I continued to work on putting things back together in order for me to get the car off stands for a test drive. Of course it would be silly to put the bumper back on for this just in case I needed to take something apart to fix/inspect so I decided to just cruise around the neighborhood without it. As I got the car on the ground I had to just stand back and stare at cool it looked with those giant 315 rear tires exposed!

The test drive went great, no check engine light and everything felt great. The car fired up much faster than before, pretty much on the first crank. Just in the neighborhood I could tell this was a different car...WOW! The combination of the solid rear subrame mounts and engine mounts really made the rear of the car come alive. We talk about how the front of these cars are precise, well we never really talk about the rear that way...this is the best way for me to now describe the change, the rear feels so much more precise now. And the LWF, can't say enough about that, the engine spools up so much faster and a pull in first gear found me having to grab for second faster than before. Bottom line, the car is much more involving. I LOVE IT!!!
The other day I started to think about how many hours I have in this project and I stopped counting once I got to 100! I've learned a great deal in this process about working on Porsches, especially the 993. It was a bit sad for me to get to the final steps, the process has been more important and enjoyable to me than finishing. I've been able to take my time and do things right which has given me great pride.
I have to thank all my Porsche friends yet again for all their great help. My goal was to get the car finished before this coming weekend and I couldn't have done it without them! Big thanks to Keith for the time he spent helping both with the drop and reinstall of the engine. An extra set of hands really goes a long way. Also, thanks to BlueMax (John) for lending a hand on the engine drop and also several evenings. And, of course, PorscheDoc, he was my go-to technical advisor when I had a question...thanks Karl! To all the others who I've mentioned in this post (cgfen, niche, Ed, Nick) thanks again for your help.
Last, but certainly not least, I have to give a big thanks to my wife! Since she now has a rennlist username and reads this I can't forget her She is always awesome but she was really great and supportive during this process. She allowed me to spend the time working hours on end when I needed to and for that I greatly appreciate her. You know what they say, behind every good man is a great woman...well, I'm not sure how good I am but she is certainly great
I hope everyone has enjoyed following my journey. It has been fun posting my progress as I go, I"m sure I'll get a kick out of it down the road. For those that are thinking of trying a job like this, don't be scared, it's all very doable for the most part. I consider myself a fairly novice mechanic and with enough preparation, patience, time and the right tools, you can do this.
Now time to get the car ready for a race this weekend
But, I'm getting ahead of myself...The day started with matching up labels reconnecting all the hoses and wires. This was a most satisfying picture!
As everyone arrived I couldn't help but take a shot of all the cool cars parked outside my house. Keith = polar silver and Nick = black
Ed brought HIS Ruby...she was looking good under the shaded tree.
Wevo mounts with black pillows...a nice clean look and easy to install. I couldn't wait to drive the car to feel the difference!
After a few hours the engine was in!!! Wooo whooo
Still a bit of work to do before we fire the engine but this was a great feeling to lower that lift. We pushed on and by late afternoon we were ready to fire it up. Pulled DME and cranked for a while for pressure and then once the throttle cable was hooked up she fired right up on the first try! Everything sounded in order with no misfires/stumbles...I was so relieved that it all worked! By this time everyone needed to head out for the day, it was great to have so many people there to help and witness either my failure or success...thanks guys! Isn't that a pretty sight...nothing like a clean engine!
I continued to work on putting things back together in order for me to get the car off stands for a test drive. Of course it would be silly to put the bumper back on for this just in case I needed to take something apart to fix/inspect so I decided to just cruise around the neighborhood without it. As I got the car on the ground I had to just stand back and stare at cool it looked with those giant 315 rear tires exposed!
The test drive went great, no check engine light and everything felt great. The car fired up much faster than before, pretty much on the first crank. Just in the neighborhood I could tell this was a different car...WOW! The combination of the solid rear subrame mounts and engine mounts really made the rear of the car come alive. We talk about how the front of these cars are precise, well we never really talk about the rear that way...this is the best way for me to now describe the change, the rear feels so much more precise now. And the LWF, can't say enough about that, the engine spools up so much faster and a pull in first gear found me having to grab for second faster than before. Bottom line, the car is much more involving. I LOVE IT!!!
The other day I started to think about how many hours I have in this project and I stopped counting once I got to 100! I've learned a great deal in this process about working on Porsches, especially the 993. It was a bit sad for me to get to the final steps, the process has been more important and enjoyable to me than finishing. I've been able to take my time and do things right which has given me great pride.
I have to thank all my Porsche friends yet again for all their great help. My goal was to get the car finished before this coming weekend and I couldn't have done it without them! Big thanks to Keith for the time he spent helping both with the drop and reinstall of the engine. An extra set of hands really goes a long way. Also, thanks to BlueMax (John) for lending a hand on the engine drop and also several evenings. And, of course, PorscheDoc, he was my go-to technical advisor when I had a question...thanks Karl! To all the others who I've mentioned in this post (cgfen, niche, Ed, Nick) thanks again for your help.
Last, but certainly not least, I have to give a big thanks to my wife! Since she now has a rennlist username and reads this I can't forget her
She is always awesome but she was really great and supportive during this process. She allowed me to spend the time working hours on end when I needed to and for that I greatly appreciate her. You know what they say, behind every good man is a great woman...well, I'm not sure how good I am but she is certainly great I hope everyone has enjoyed following my journey. It has been fun posting my progress as I go, I"m sure I'll get a kick out of it down the road. For those that are thinking of trying a job like this, don't be scared, it's all very doable for the most part. I consider myself a fairly novice mechanic and with enough preparation, patience, time and the right tools, you can do this.
Now time to get the car ready for a race this weekend
Last edited by flatsixforme; 04-20-2011 at 02:26 PM.
04-20-2011, 02:21 PM
#150
Burning Brakes
Great Job!
This has been one of the best threads of late and I hate to see it come to an end.
Thanks for posting all of the pictures and steps along the way.
Enjoy your "new" car.
This has been one of the best threads of late and I hate to see it come to an end.
Thanks for posting all of the pictures and steps along the way.
Enjoy your "new" car.