When you click on links to various merchants on this site and make a purchase, this can result in this site earning a commission. Affiliate programs and affiliations include, but are not limited to, the eBay Partner Network.
I have no experience, and am just giving brain-storm considerations. Looking at the picture, could you pluck the seal out with needle nose pliers or pick at it to remove it. Once the seal is removed, it should leave enough of an exposed edge on the bearing to begin tapping it out. Also, does the bearing come out by tapping on the lettered side, or the seal side? In other words did the bearing go in last, or first. In other applications, I have seen where a seal or o-ring is what holds in the bearing or bushing.
The seal is in between the bearing and the top of the case so you'd have to tap from the top. I am unwilling to tap on the bearing from above using a screwdriver or such since that will only wedge it in place. Looks to me like it's held in place by an interference fit.
The tool shown on the ZF repair instructions is an expanding sleeve such as is used to remove a pilot bearing. I have such a tool but there's a good chance it would mar or even irreparably damage the bearing, which I am unable to find.
If anyone needs the KLA seal kit, let me know. I purchased with the plan to DIY my own rack; however, when I removed my rack the shaft was severely corroded, so I bought a remanufactured rack (KLA wouldn't let me return the seal kit).
Price direct from KLA is $124.95 plus shipping. I'd take $100 shipped CONUS. Thank you.
Hi Luis A. - I am so sorry, but I just do not remember how I dealt with this issue! I do not remember purchasing or installing any new roller bearings though.
Sold the car in late 2019 and the rack rebuild hadn't failed by then. I even had some minor corrosion on the input shaft that I burnished to smooth/reduce and it still held.
Damn, I wish I could be more help.
BTB
No worries; thanks for replying.
I was able to press them out as Wicks suggested but you need to use a socket/drift that is nearly the size of the opening as there is very little seal and bearing edge to catch on.
If anyone needs the KLA seal kit, let me know. I purchased with the plan to DIY my own rack; however, when I removed my rack the shaft was severely corroded, so I bought a remanufactured rack (KLA wouldn't let me return the seal kit).
Price direct from KLA is $124.95 plus shipping. I'd take $100 shipped CONUS. Thank you.
I�ll take it, if no one needs it now. I don�t need it now, but I�m happy to collect parts at a discount. Sending a PM. If someone else has an immediate need for it, I�m happy to step aside.
I�ll take it, if no one needs it now. I don�t need it now, but I�m happy to collect parts at a discount. Sending a PM. If someone else has an immediate need for it, I�m happy to step aside.
It turns out the US kit (LHD) is slightly different to my RHD rack. They were very helpful and promptly sent me 4 square ring seals that were about 10mm bigger diameter to fit my input shaft at no extra cost! (nice guys!)
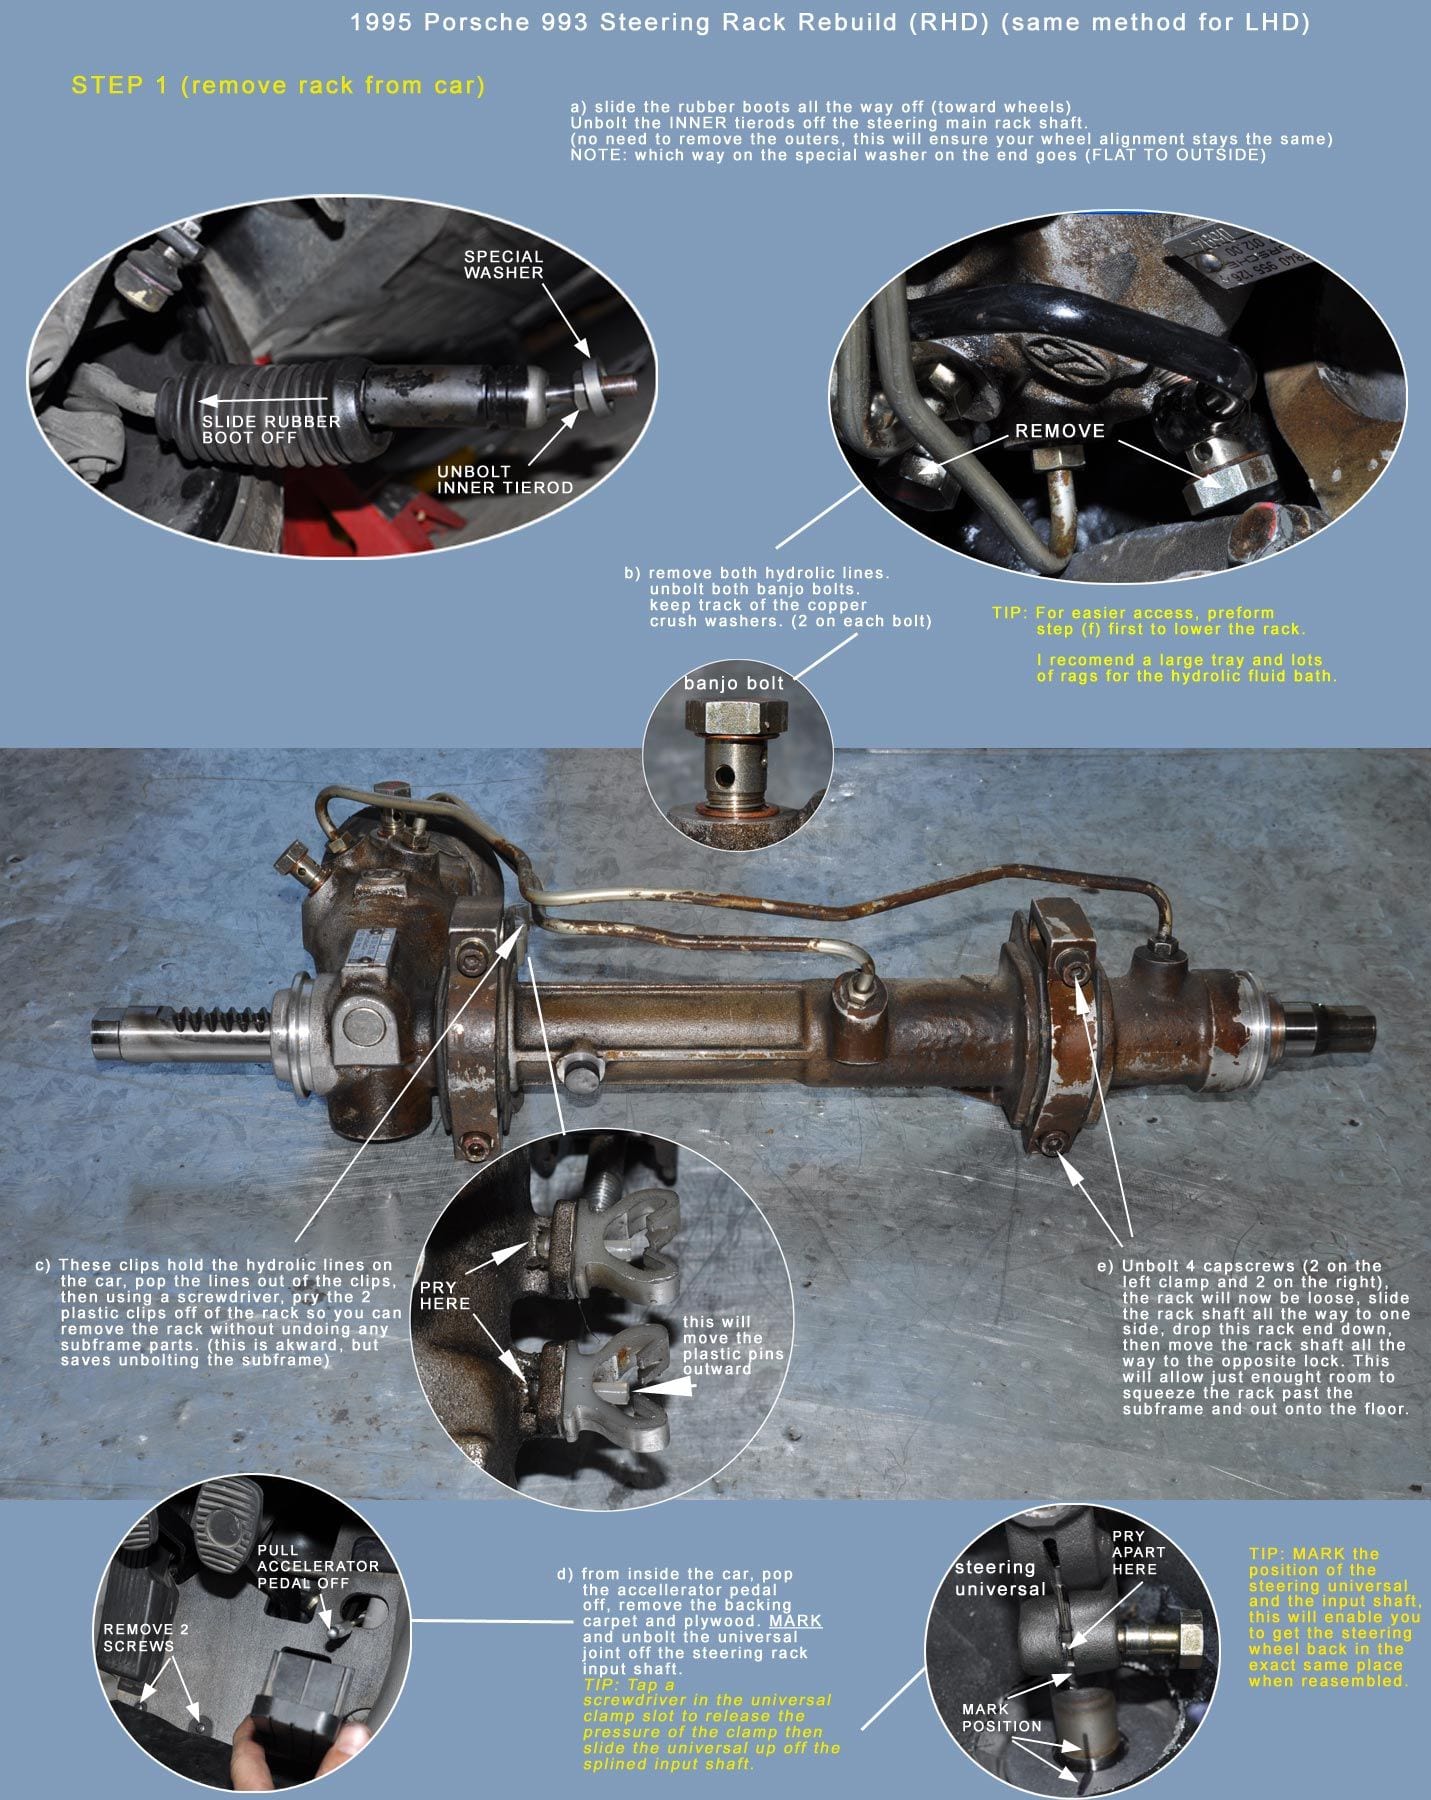
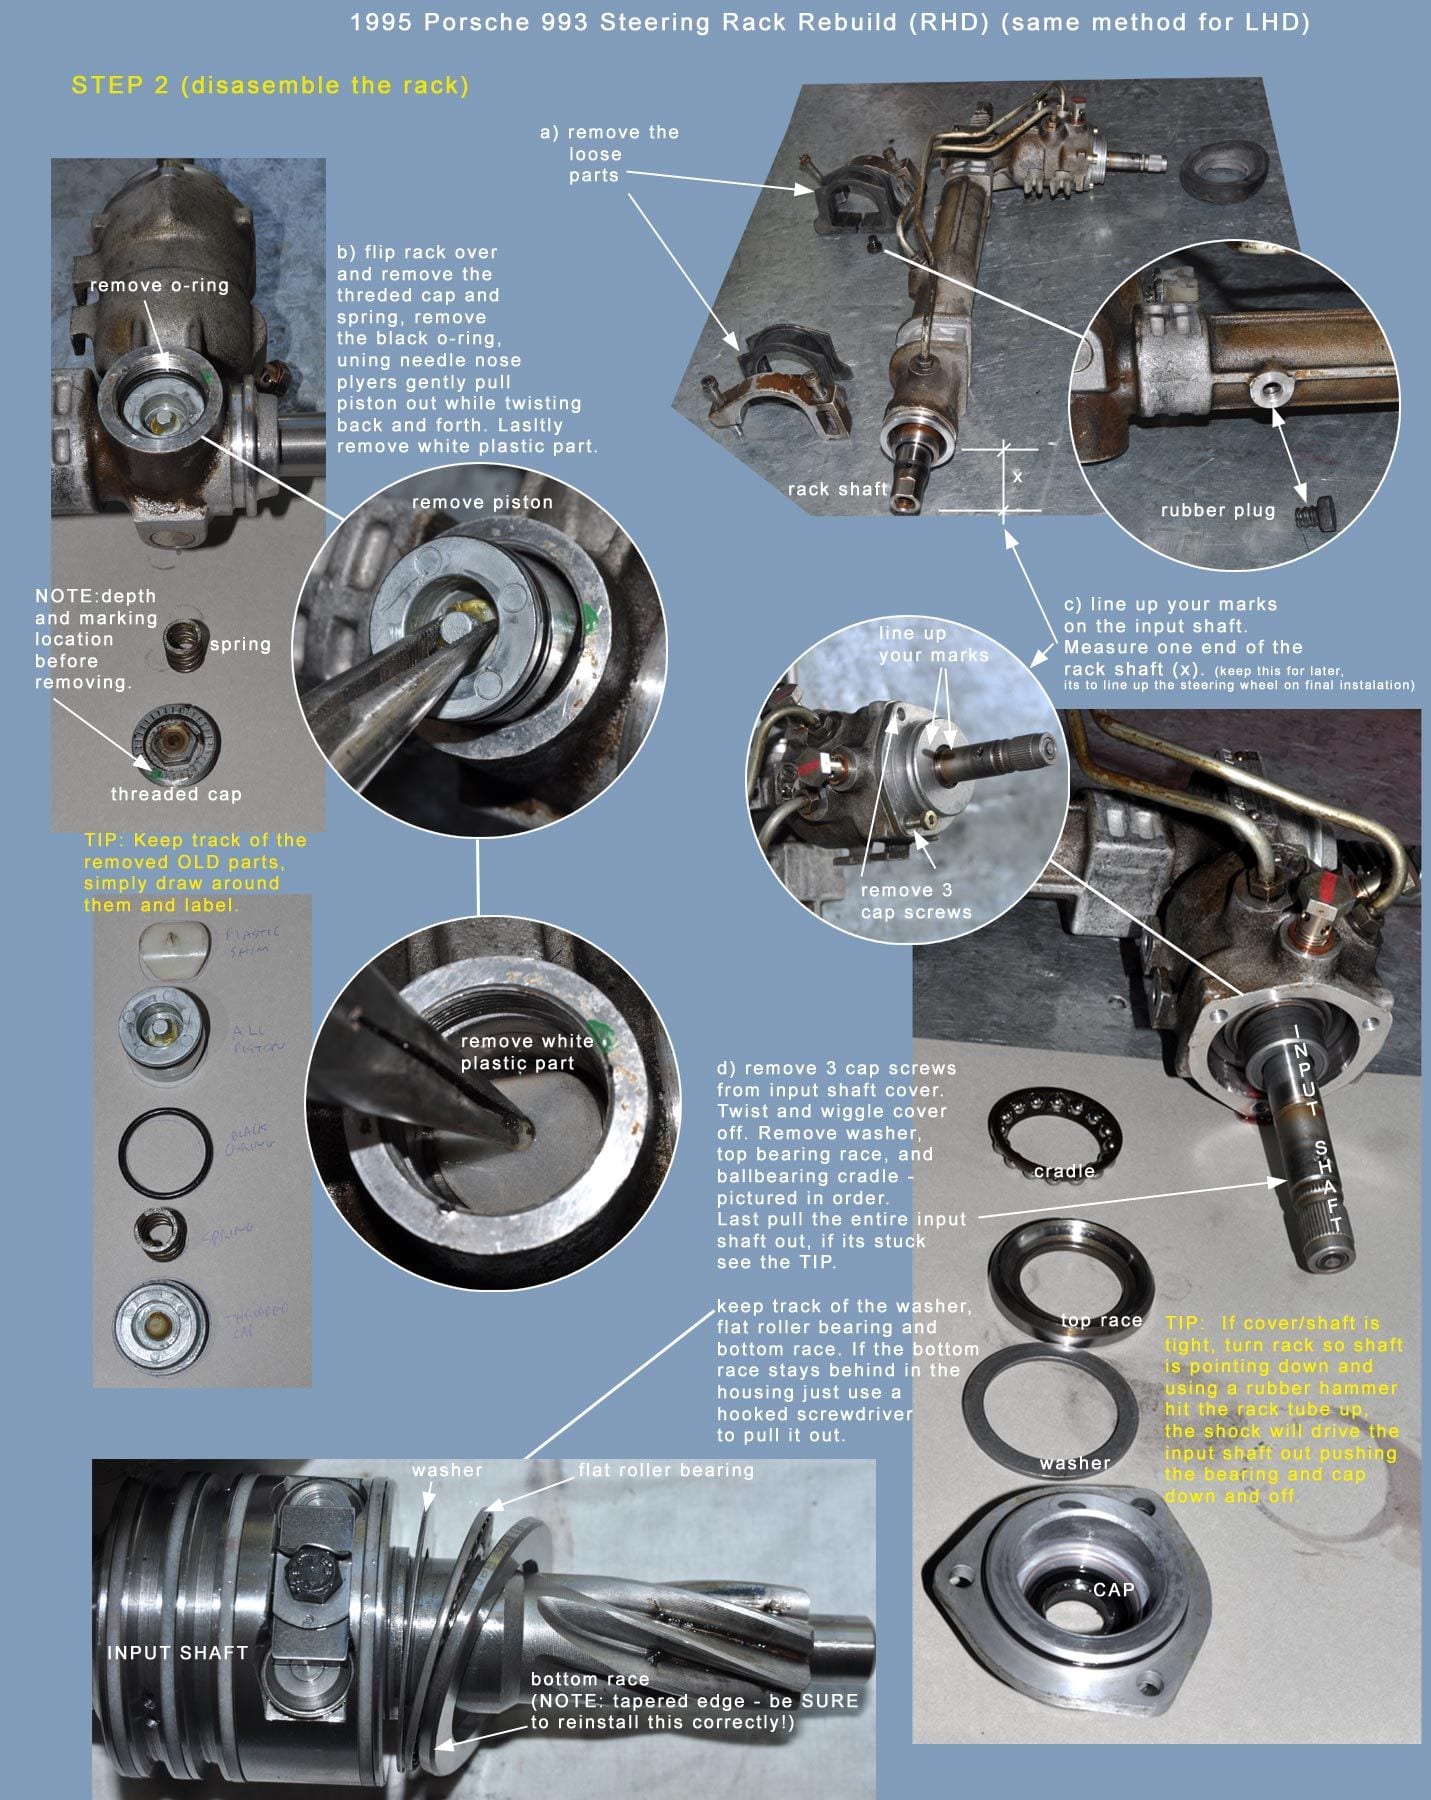
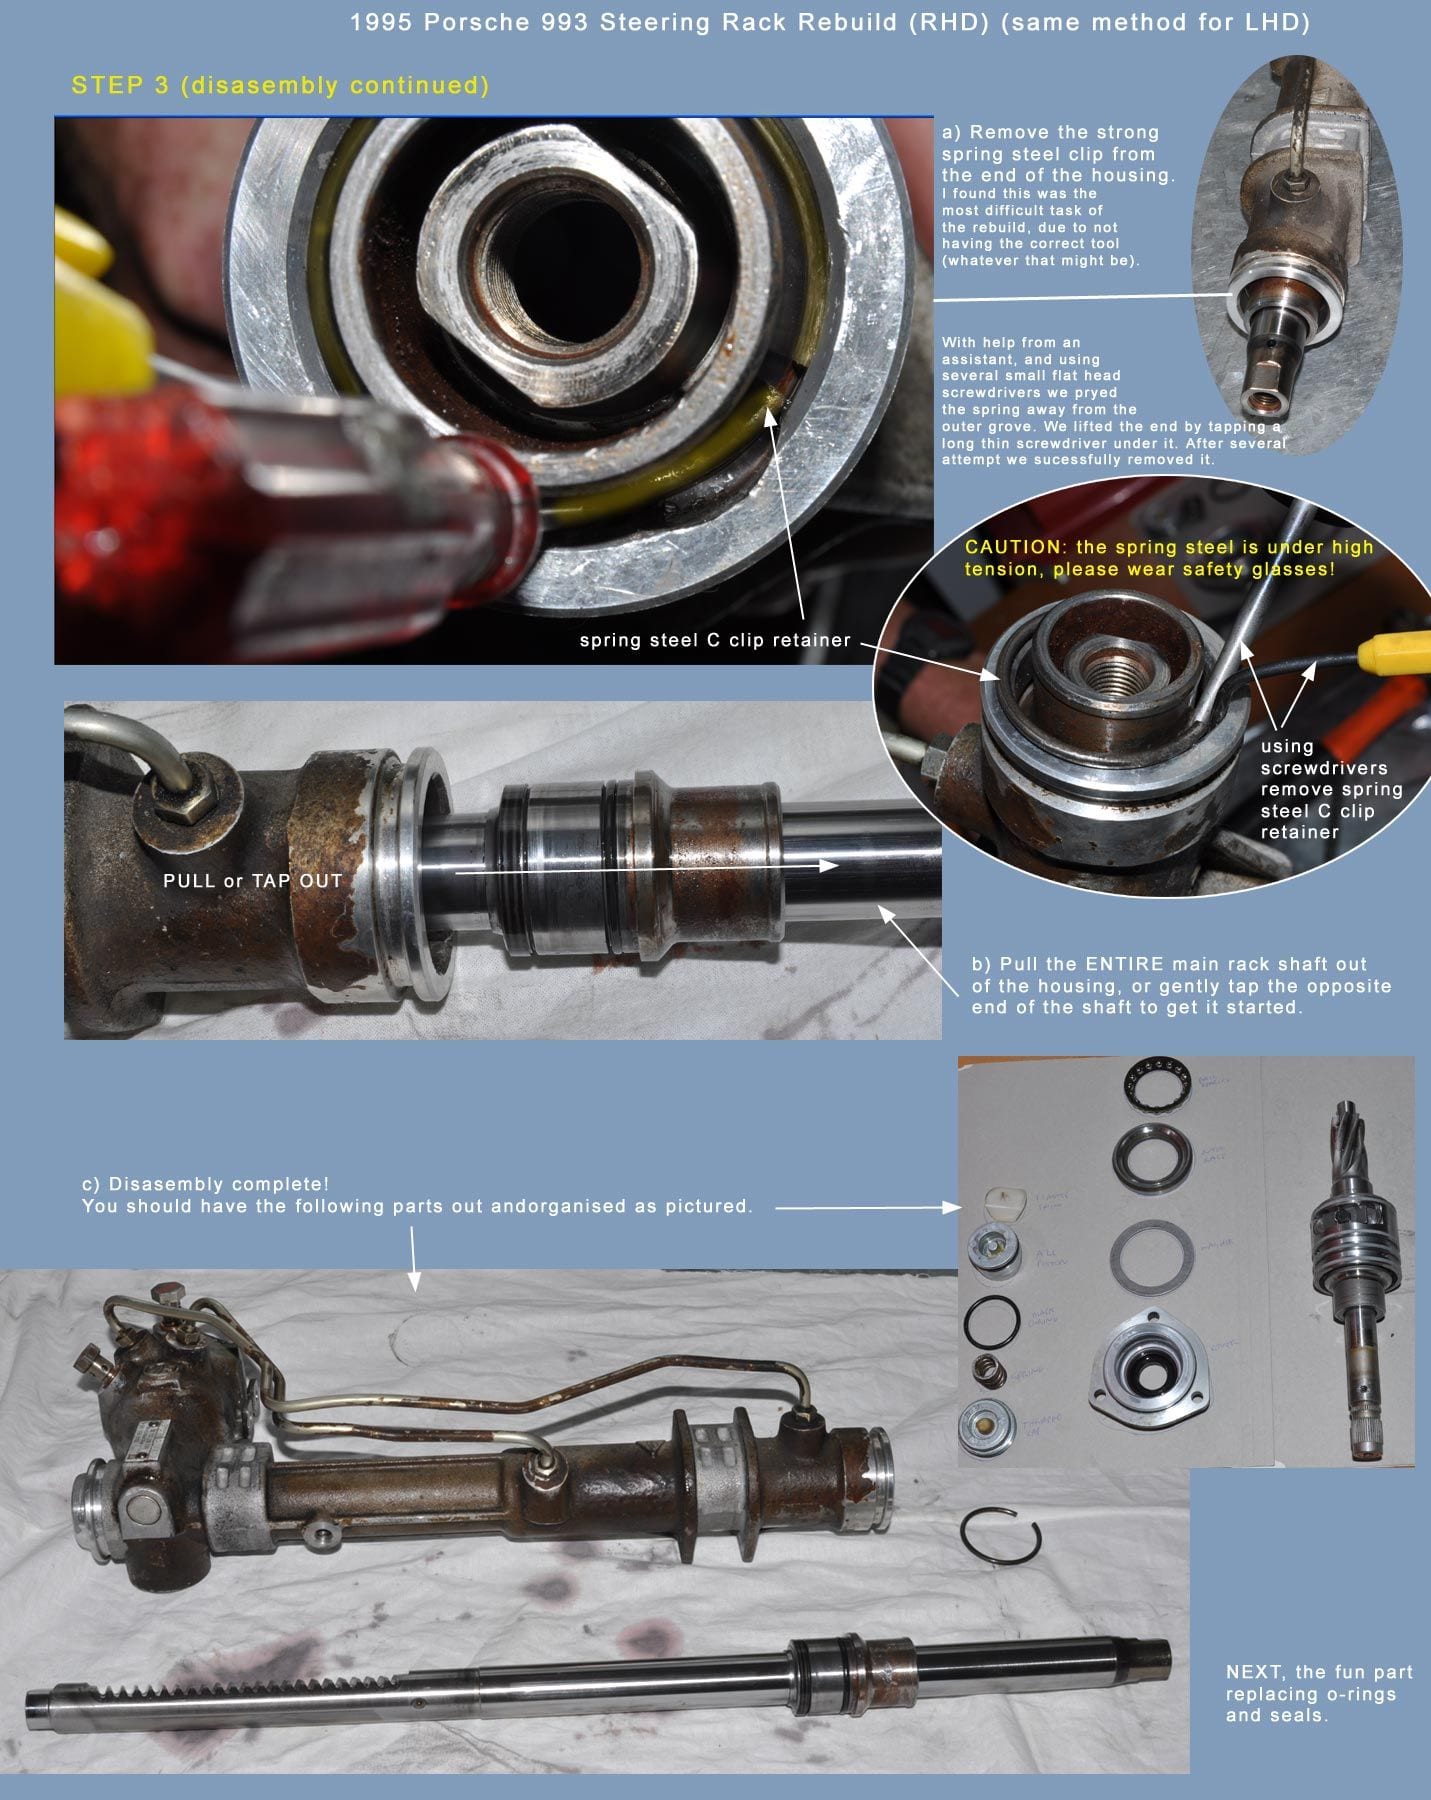
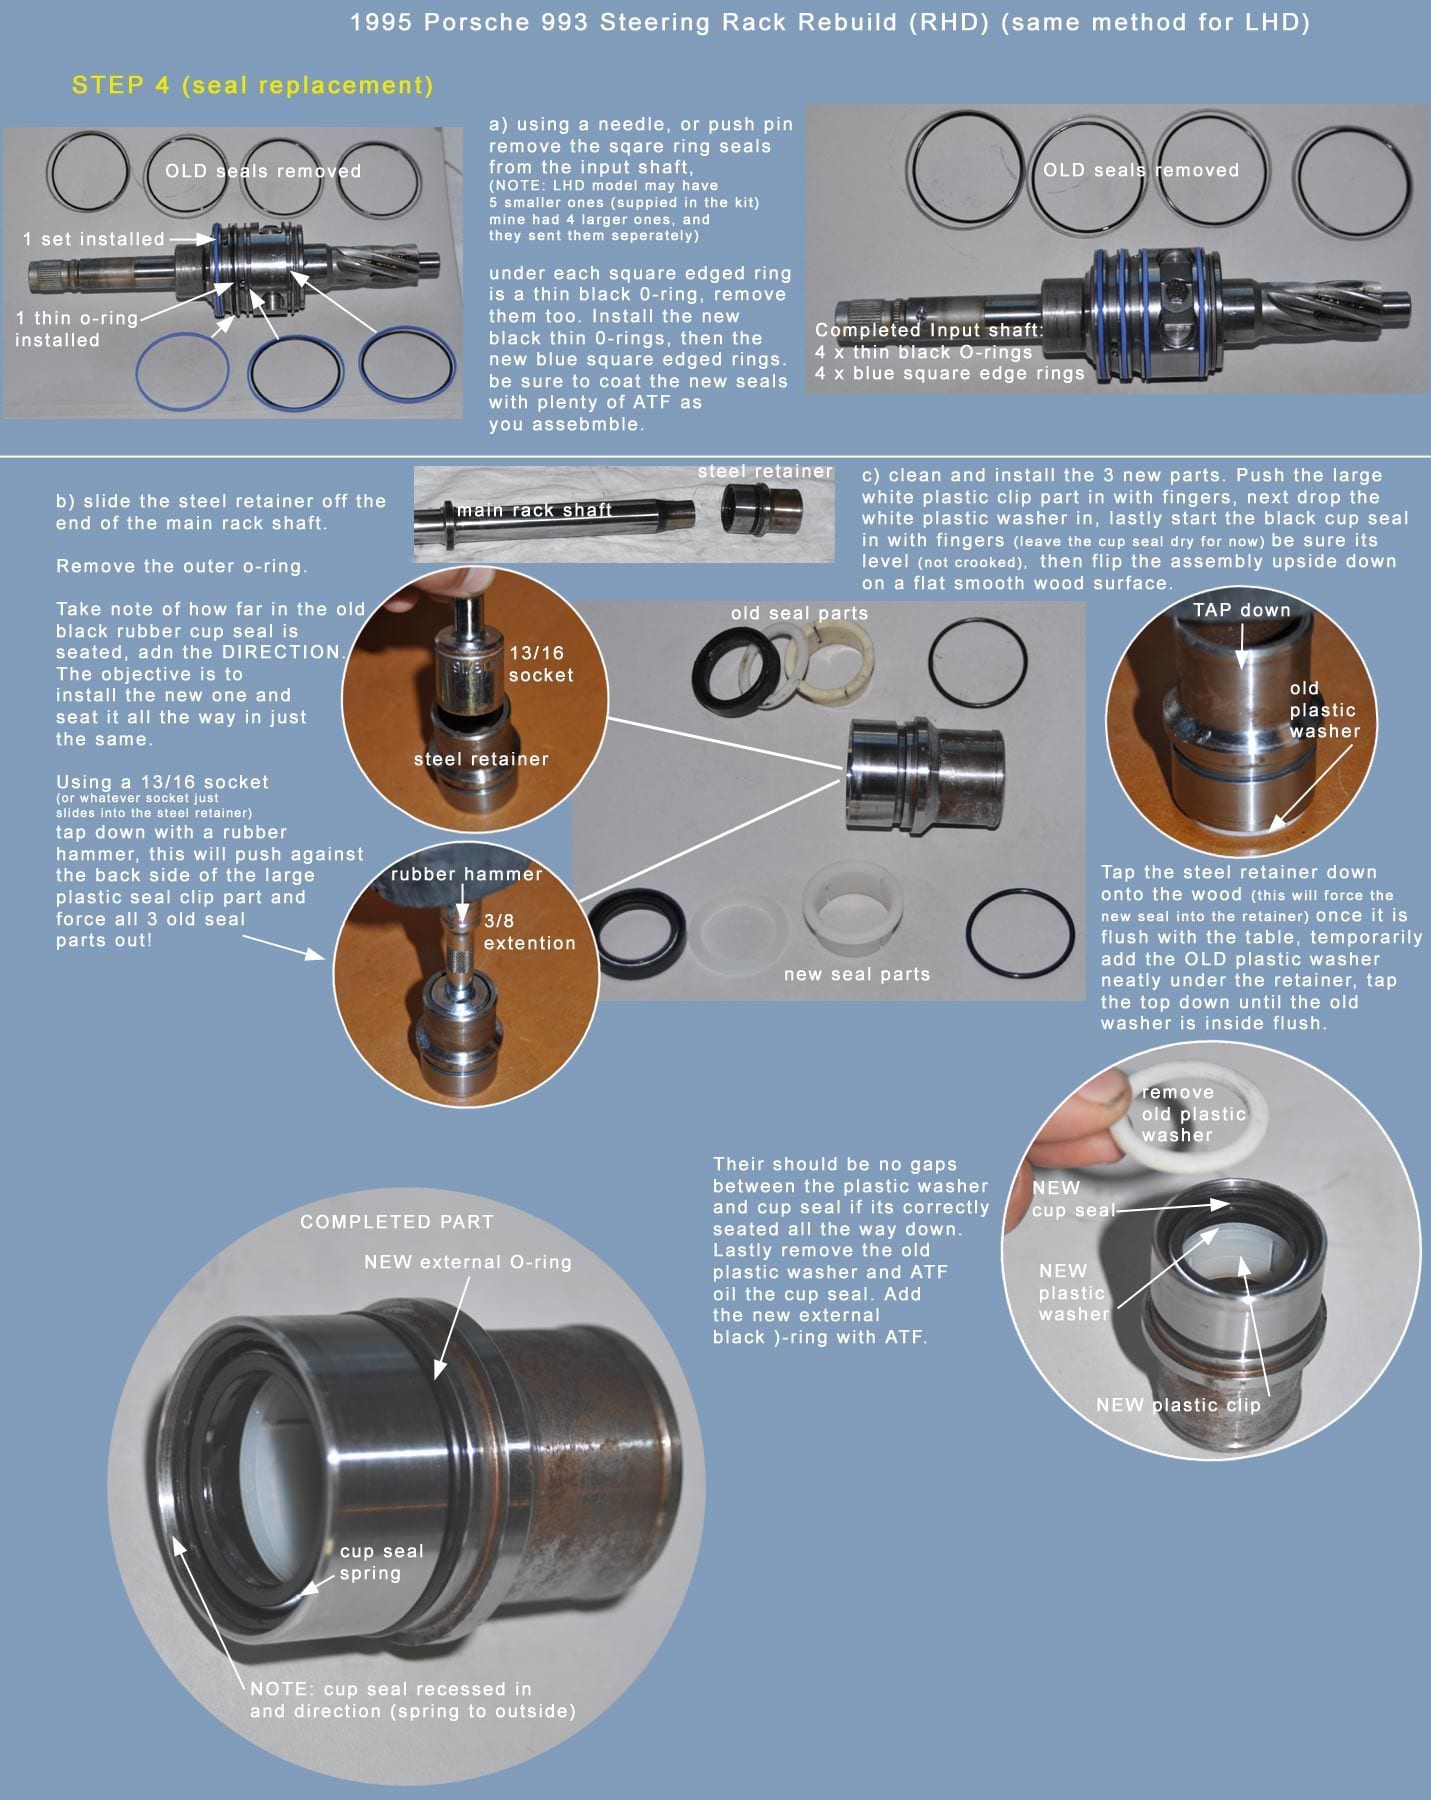
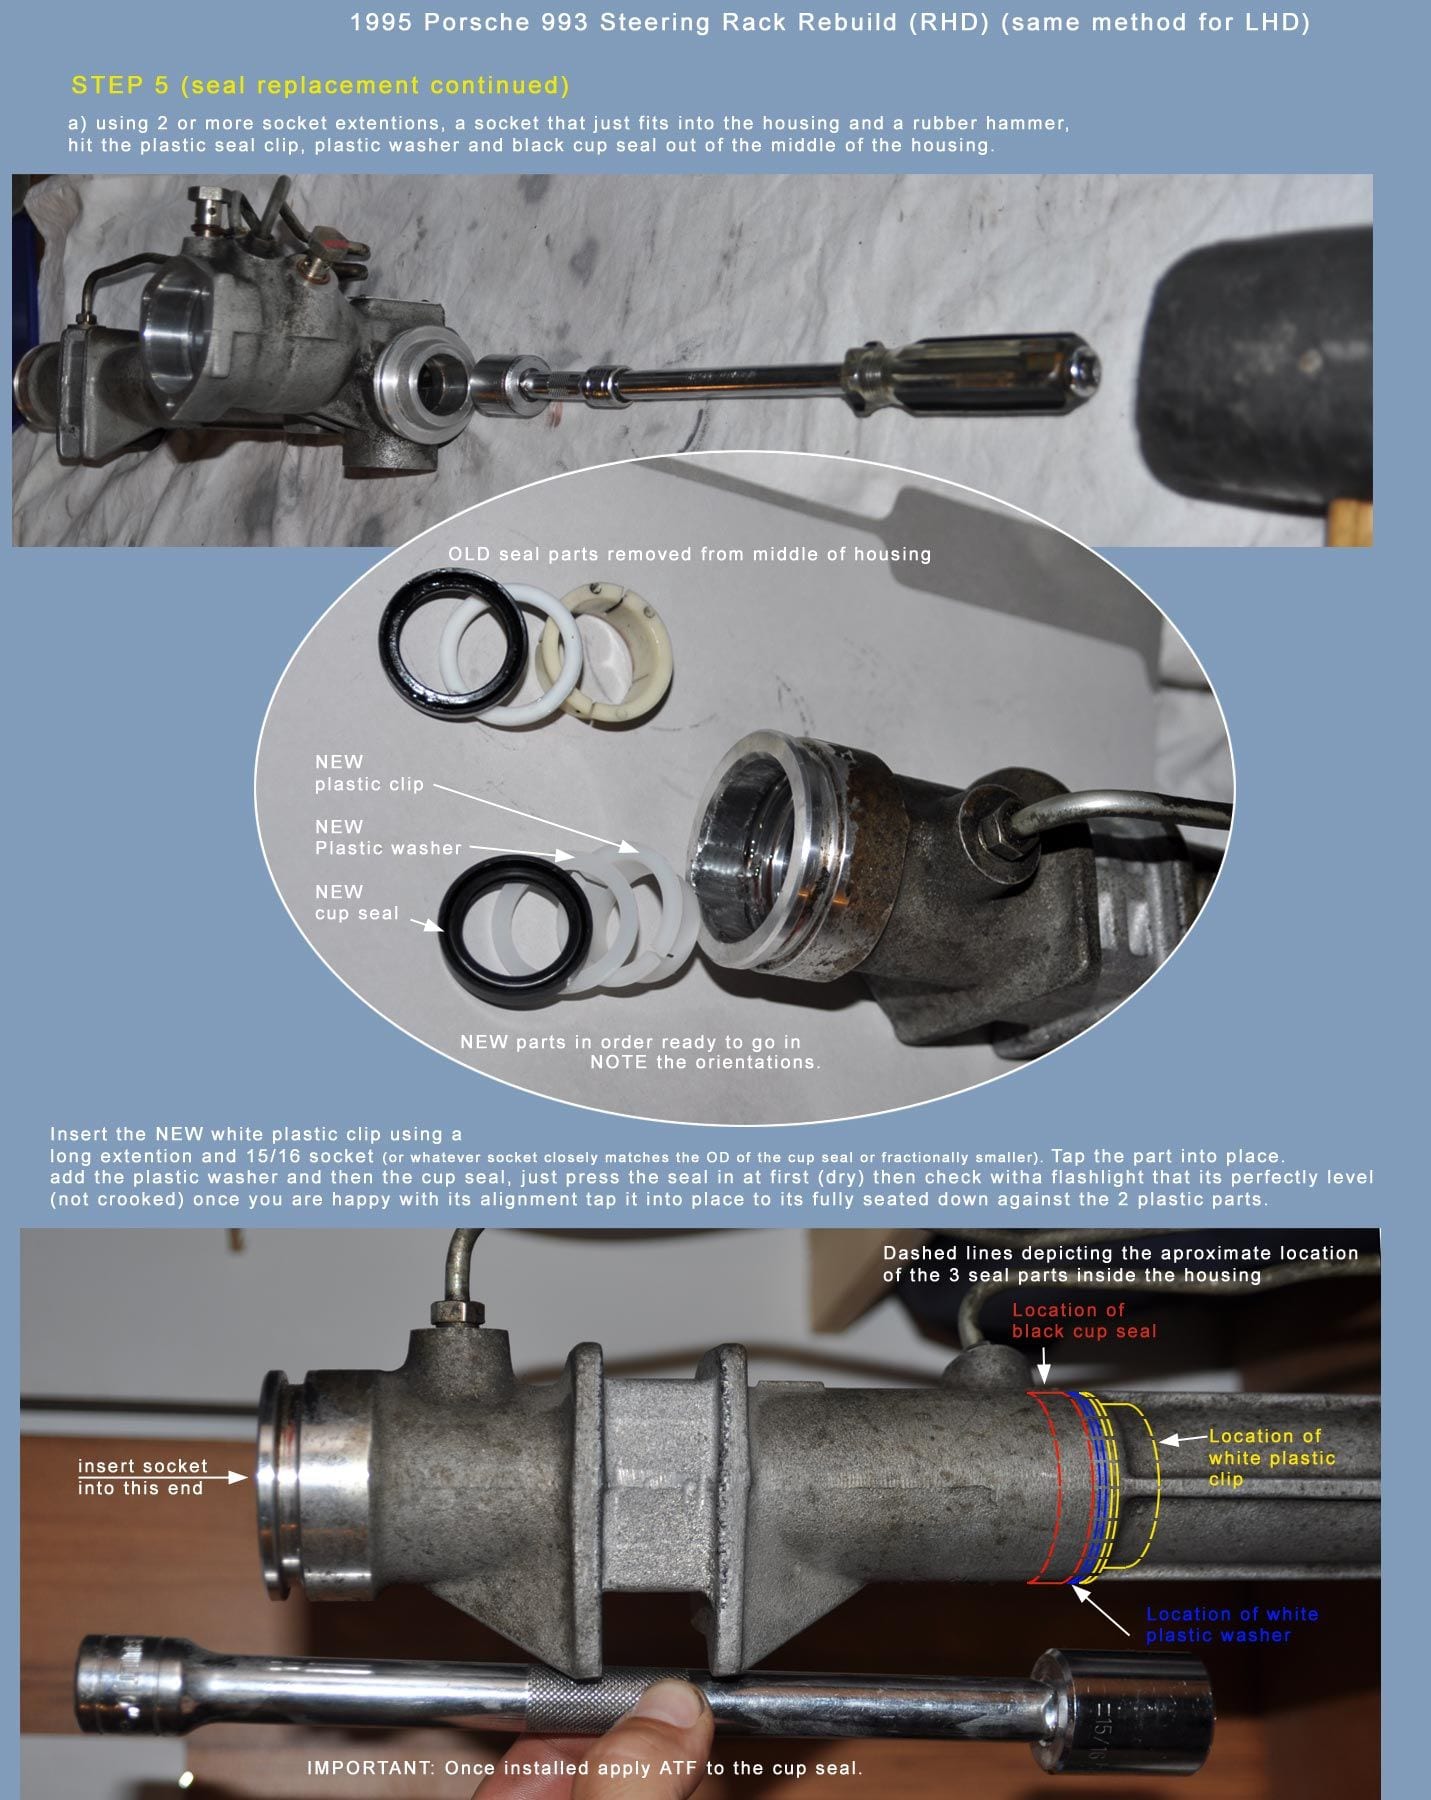
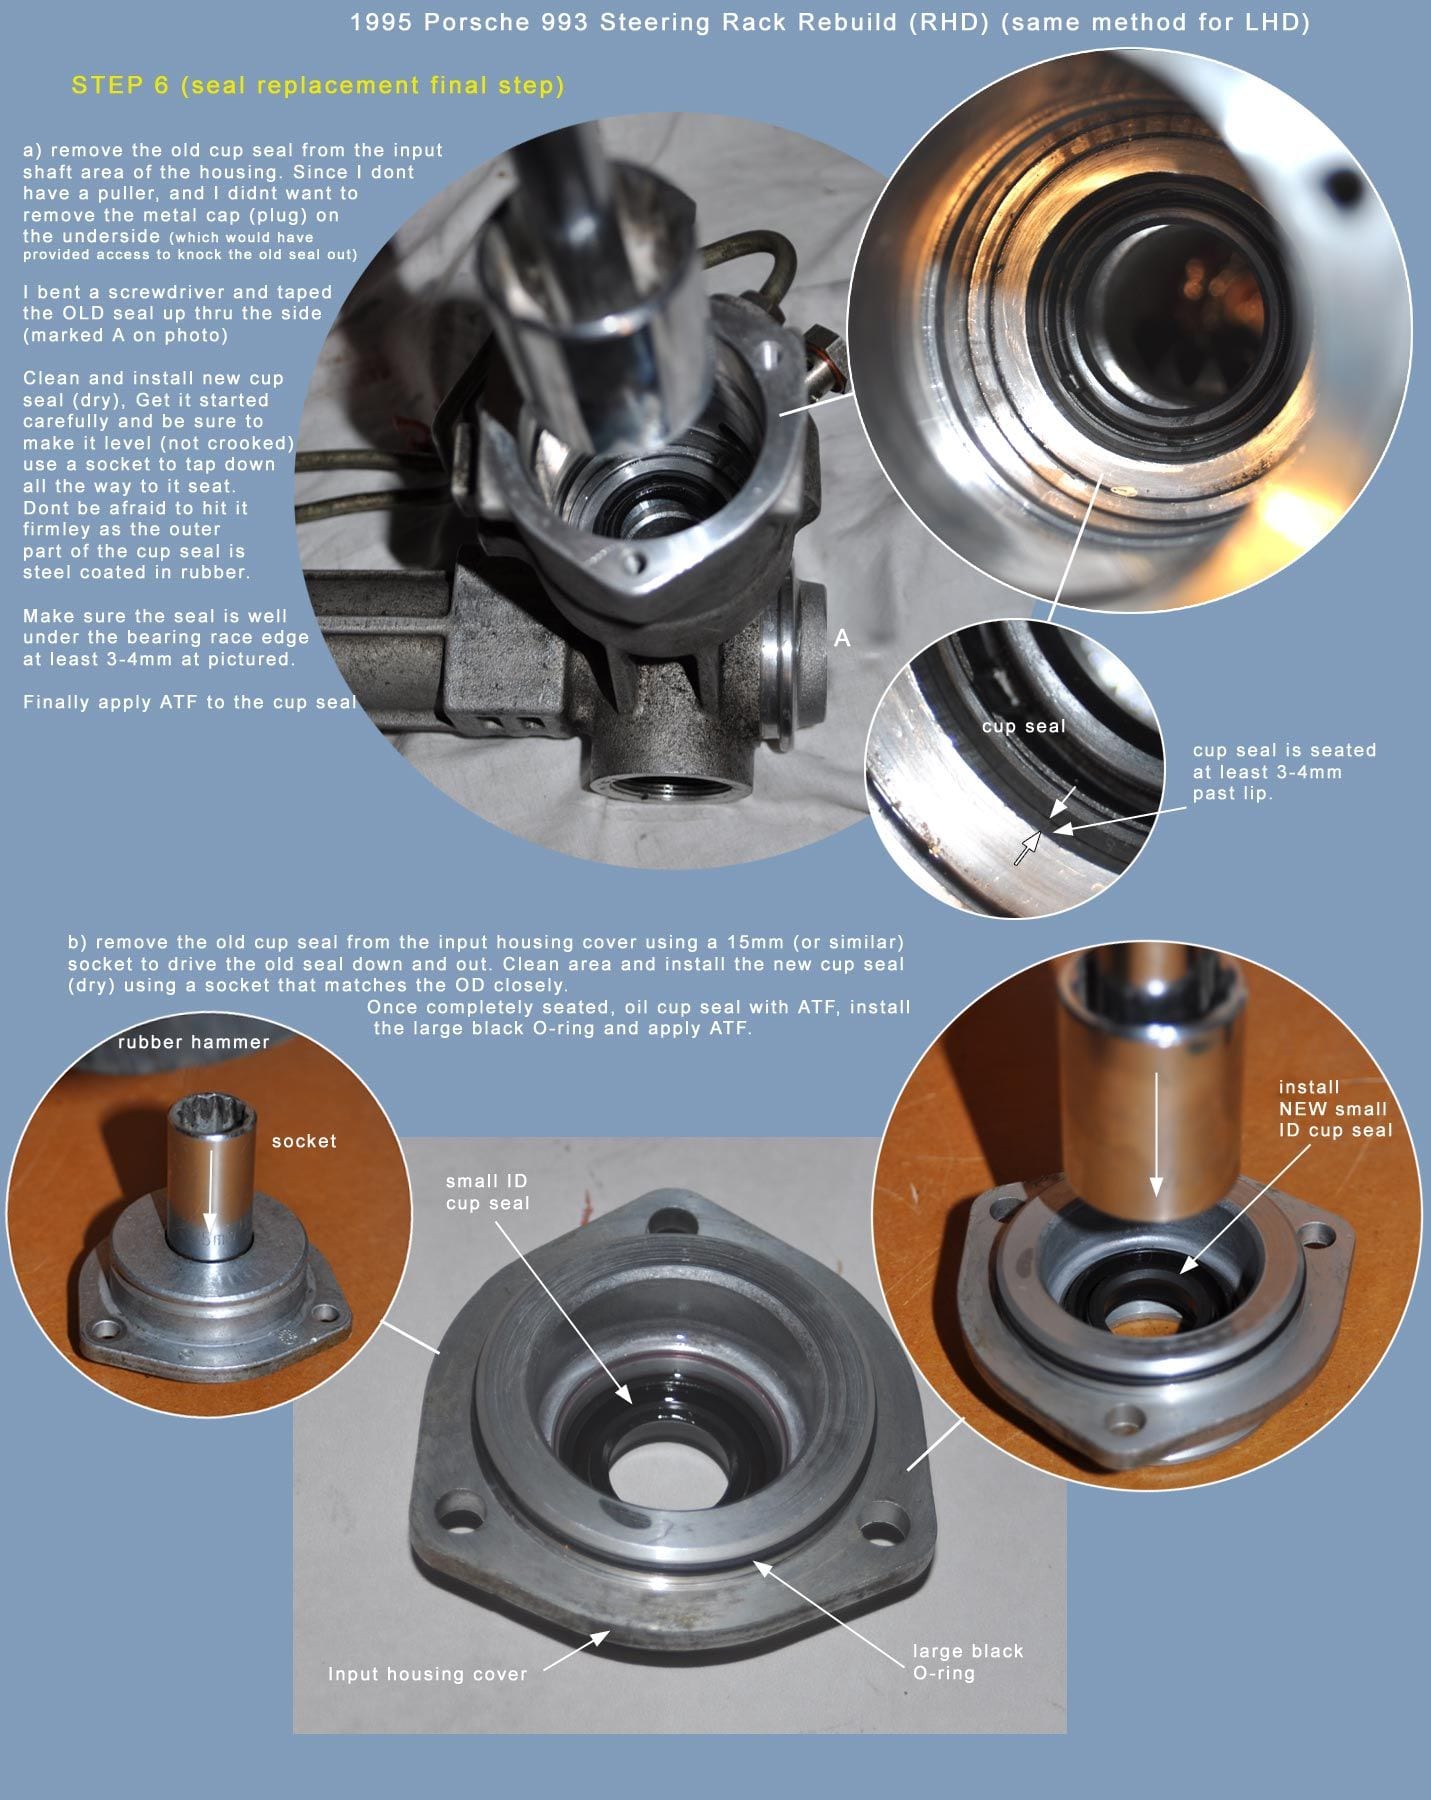
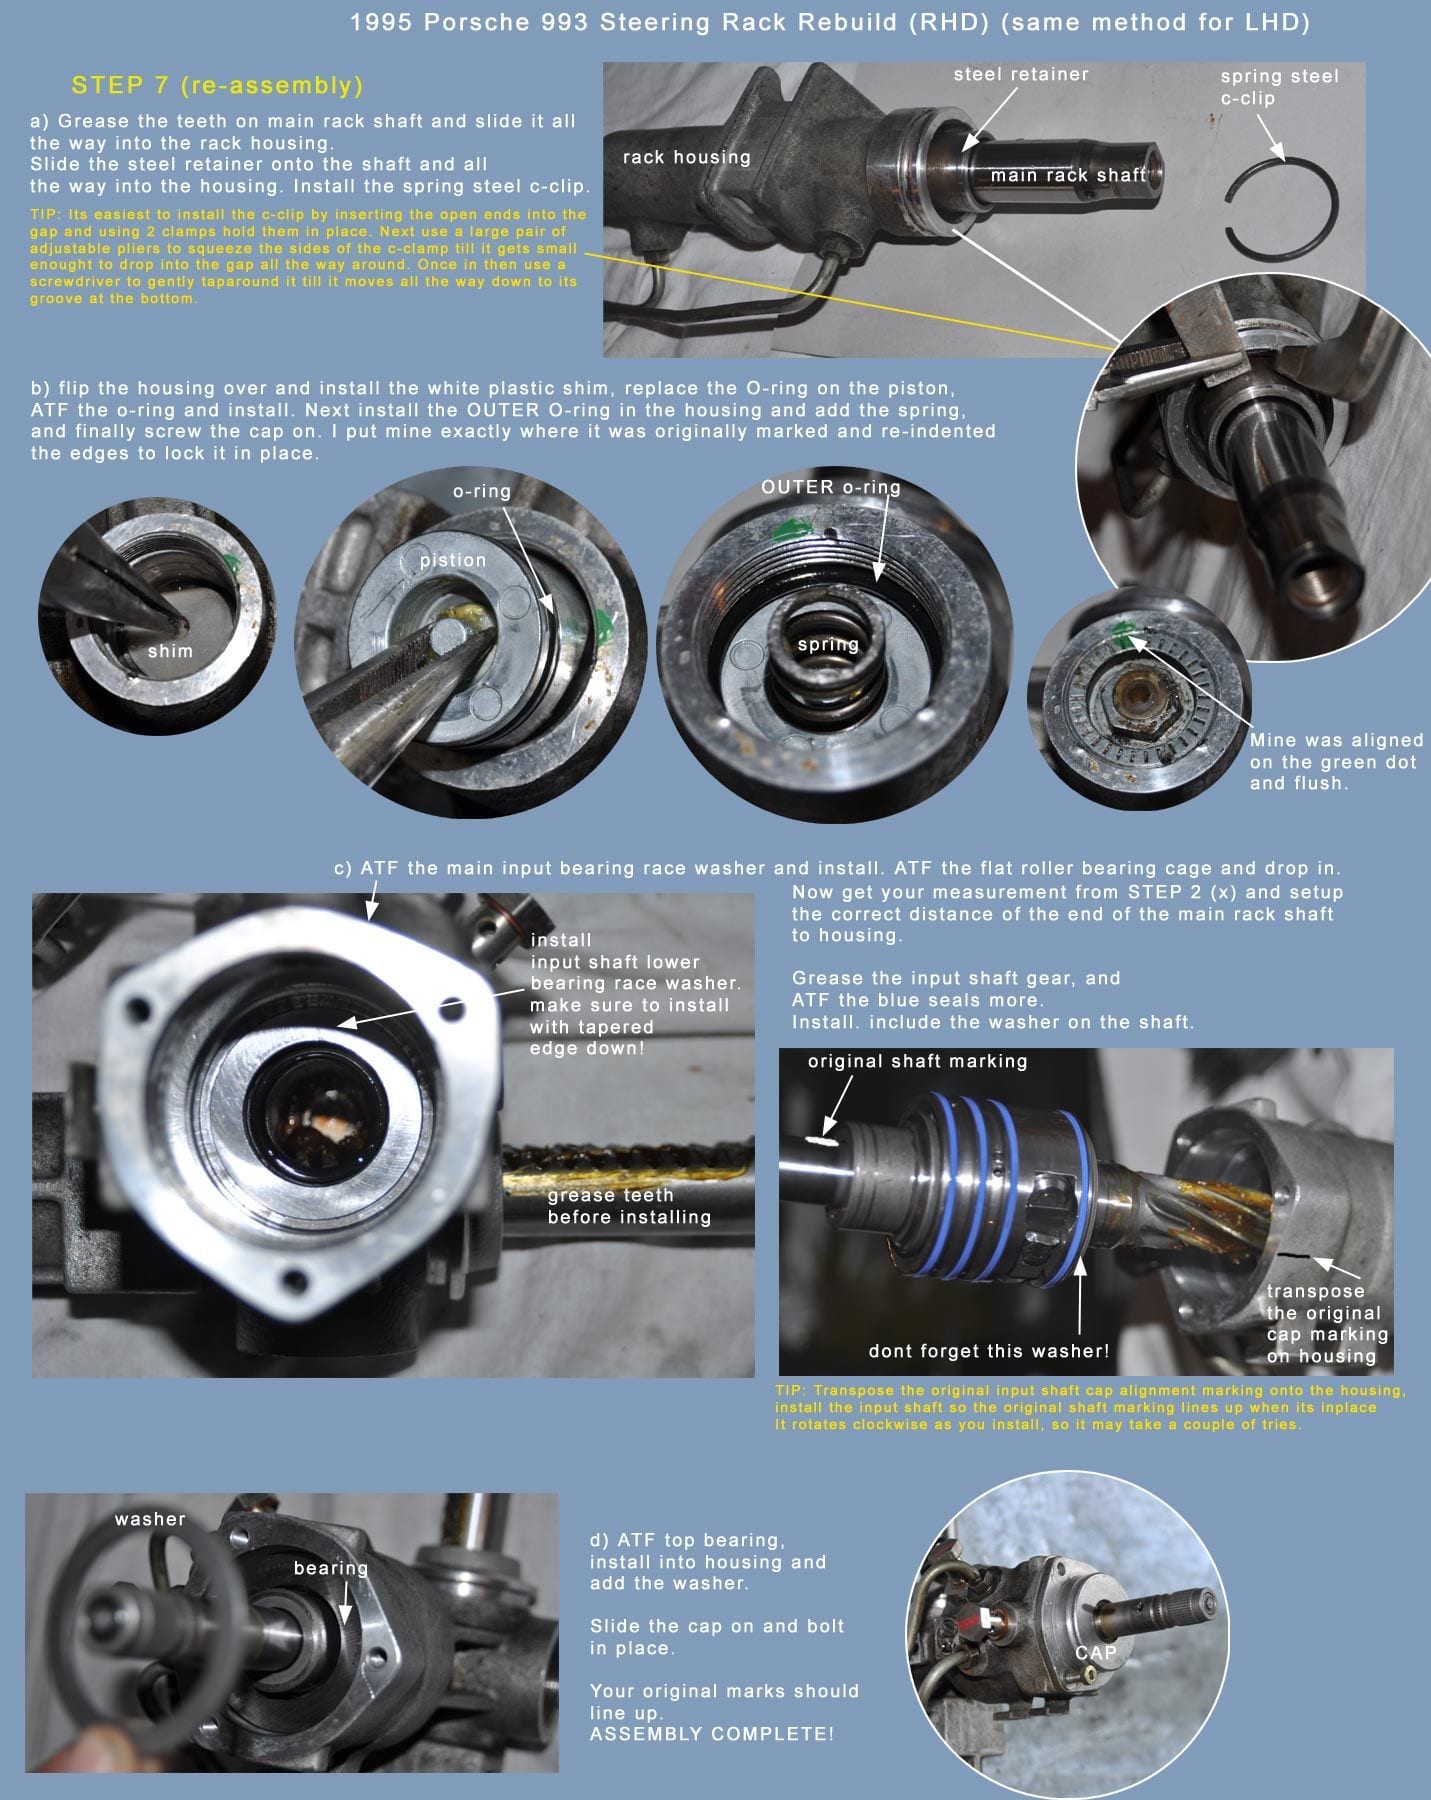
I have broken these DIY instructions into steps (each with its own large image) 993 Steering Rack Rebuild STEP 1 993 Steering Rack Rebuild STEP 2 993 Steering Rack Rebuild STEP 3 993 Steering Rack Rebuild STEP 4 993 Steering Rack Rebuild STEP 5 993 Steering Rack Rebuild STEP 6 993 Steering Rack Rebuild STEP 7
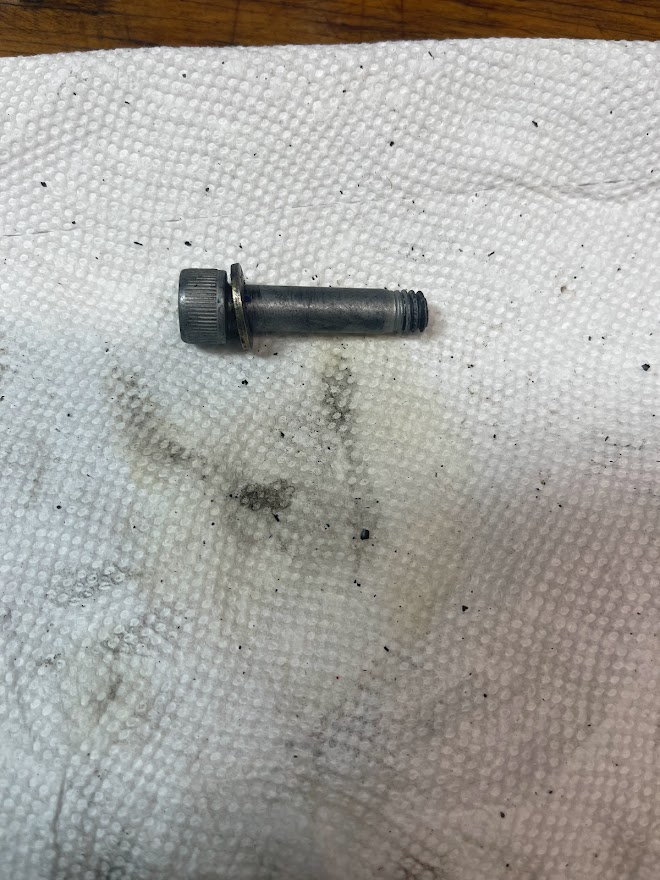
Does anyone have insight to what commonly causes unwanted play in these racks?
I bought a core and had it sent to Rack Doctor. It returned with enough play to make my car feel very dangerous to drive.
Rack Doctor says there is "nothing wrong" but sitting on my bench next to the rack I took out of my 964, original with 130k+ miles, the 964 rack is tight, the 993 rack has about 10 degrees of input movement (using channel lock pliers on the input shaft) before there is any effect on the tie rod connections.
The only rubber in the front end is new Elephant RS control arm bushings, everything else is new monoball - 400lb springs, 225/18.
Once either side is loaded up the car feels great, but transitioning in tight twisties from left to right is sketchy!
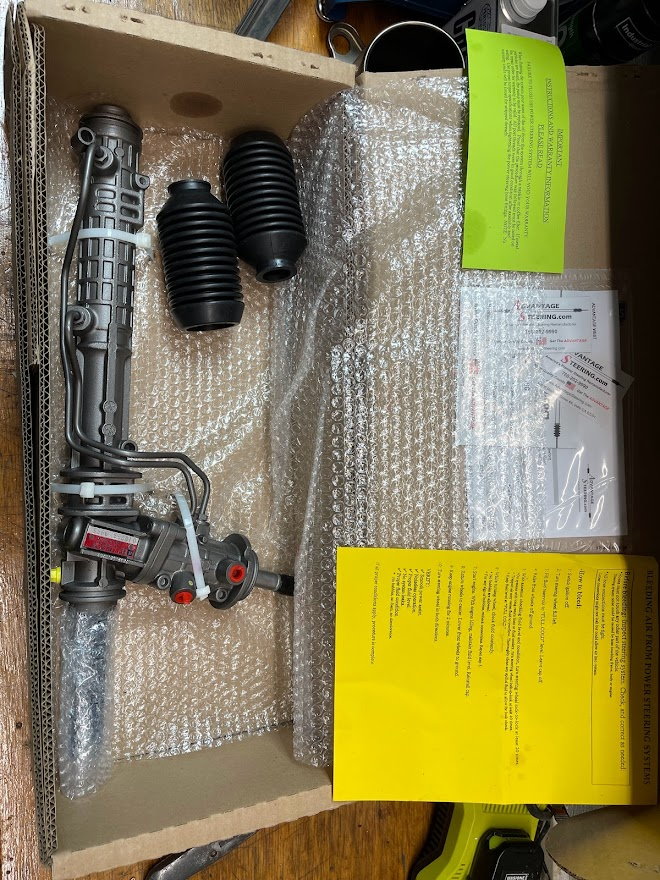
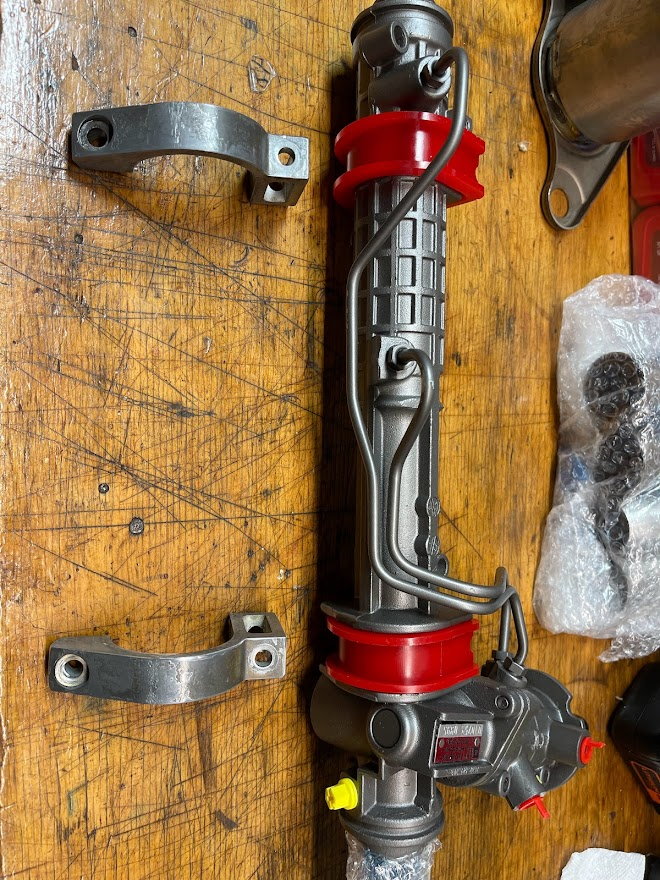
Appreciate the information on this thread. I planned to rebuild my rack, but after removal I noted some pitting/corrosion on the shaft. I elected to purchase a rebuilt rack from Advantage Steering (with core exchange). Process was very smooth and the rack that I received looked new (see photos). Highly recommend Advantage Steering (after core exchange the net cost is $695).
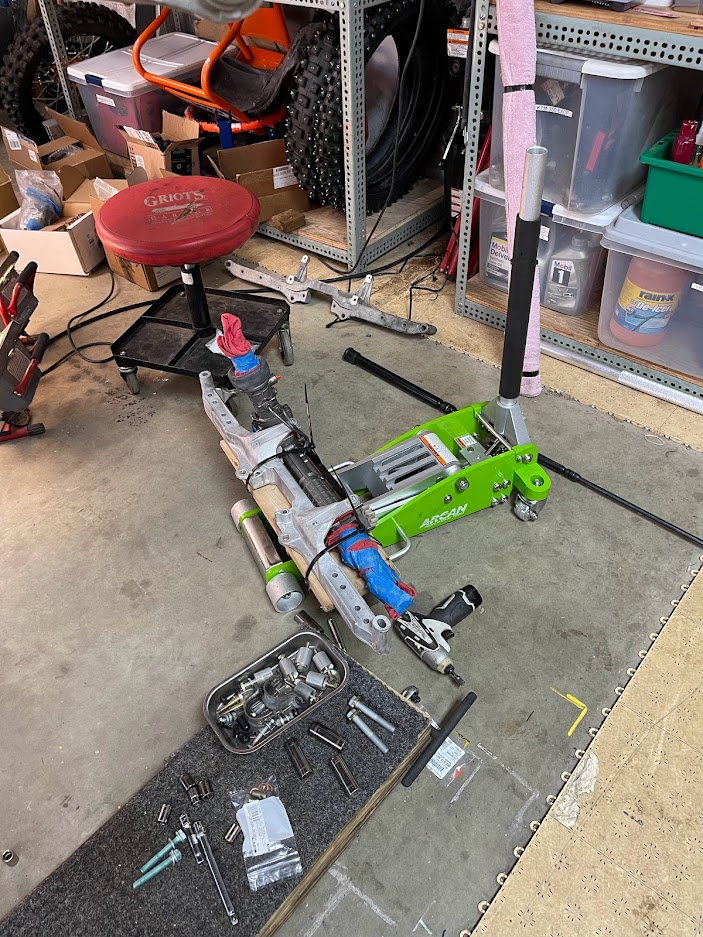
Just another word of caution installing the rack. Be VERY VERY careful when installing the four mounting bolts to the crossmember. Use new hardware! Absolutely ensure that you're not crossthreading the bolt (very very easy to do given the meaneuvers that have to happen to get the bushings compressed, which can cause the clamps to be offset). Many have recommended using a jack to compress the clamp/bushings and push the rack into place. If you have trouble, remove the bushings and heat them up in your oven. Will make compressing them much easier.
Unfortunately, despite my best efforts, I busted the last bolt off in the cross member. Tried every trick to extract it to no avail. I ended up having to replace the crossmember, which was a major PITA (>24 bolts to remove: brake booster, side members, sway bar, shift linkage, etc). Only saving grace was that I a was able to mount the rack to the crossmember on my workbench rather than under the car.... so much easier.. Just jacked the whole assembly (preassembled crossmember and rack) up under the car and into place. Then you just have to bolt the crossmember in place.
3 hour project turned into a month delay and probably a dozen hours under the car.
Last edited by ninjabones; 12-20-2022 at 03:02 PM.
 10-26-2022, 10:48 PM