
DIY - 993 Transmission Drop & LWF
 01-04-2009, 11:10 PM
#1
Instructor
Thread Starter

Join Date: Mar 2004
Location: Amelia Island, Florida
Posts: 202
Likes: 0
Received 9 Likes
on
9 Posts
993 TRANSMISSION DROP
My 1997 C2 had 78K and I wanted to upgrade to a Light Weight Flywheel (LWF). Like many of you I do the majority of the work on my car so I felt this “tranny drop” could be an interesting adventure. I hope this write-up is helpful should you choose to do the same.
SPECIAL THANKS to my friend Andreas. We really enjoy this stuff.
I sourced all of my parts from Sunset Porsche and had the pleasure of dealing exclusively with Aaron Cope. He went beyond all expectations of customer service. He pressed the pilot bearing into the Flywheel, and provided a small baggie of Olista grease as a courtesy.
While the transmission was out I went for a “refresh”, and added a Porsche Motorsport LSD. Brian Copans of BMC&G is the established expert in this field and I thoroughly enjoyed working with Brian, Tony, and Brian’s wife Pam.
Even though I didn’t do this to save money, it was really easy to use the money I saved on a re-flash of my ECU by Steve Weiner. He is an invaluable resource and always great to talk to!
SPECIAL TOOLS
The transmission jack I used was purchased from Harbor Freight (China). I apologize to all American workers but I couldn’t find anything similar manufactured in the U.S.
The accepted method of shipping a 993 transmission is in a large cooler. Our tranny fits nice and snug in the Igloo Polar 120 qt. Made in the USA
Might as well bite the bullet and purchase a set of XZN triple square sockets. You will need them.
PARTS LIST
I choose to replace everything. Sunset Porsche

The following users liked this post:
samurai_k (08-05-2019)
01-04-2009, 11:12 PM
#2
Instructor
Thread Starter
Join Date: Mar 2004
Location: Amelia Island, Florida
Posts: 202
Likes: 0
Received 9 Likes
on
9 Posts
GETTING STARTED
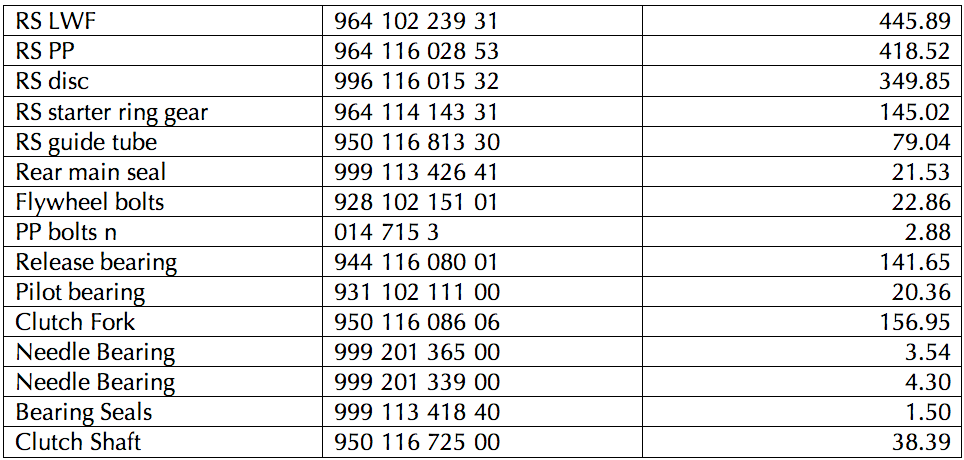
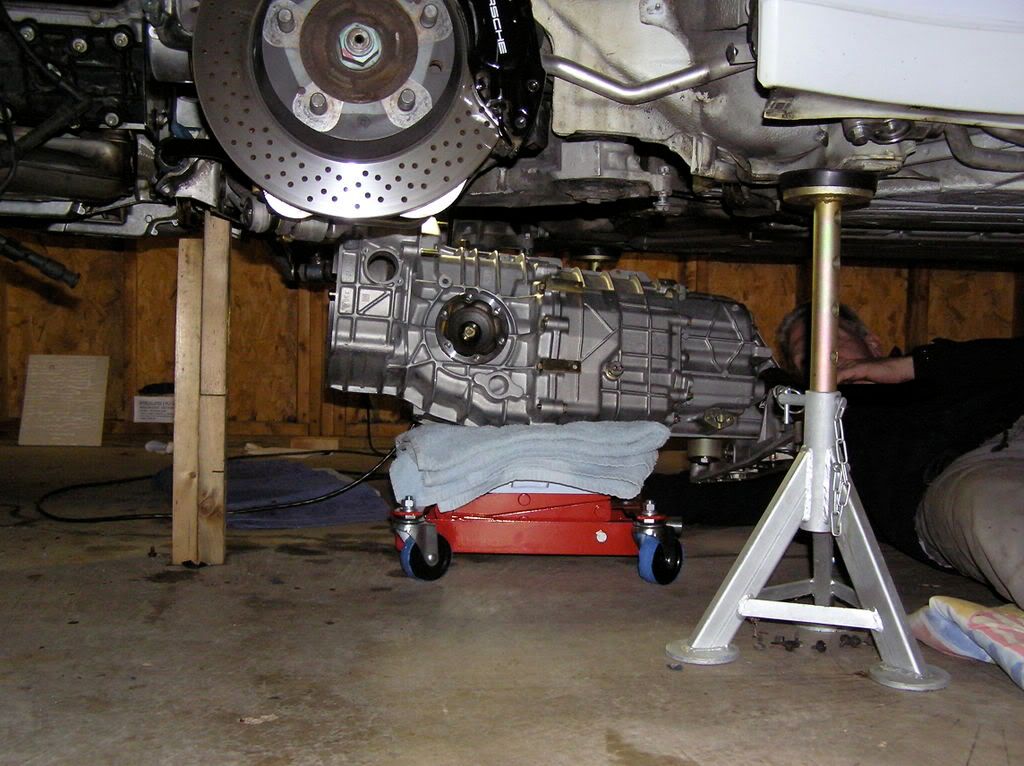
My jack stands (AC/Esco) at full height put the car at 22” from the floor. This was just right for the limits of my transmission jack. There are many methods for jacking our cars but I just use a block under the engine case, and a board cut to length that fits snug between the front body tabs and rests on the aluminum sub frame.
Disconnect the battery
Remove the rear wheels, transmission pan, air tubes, oil tube (drain the oil).
Drain the transmission
Disconnect the throttle cable from the transmission, and the shift rod (13mm).
Label and disconnect the starter and reverse electrical connections.
Unbolt the half shafts (8mm Allen socket) from the transmission. Use the handbrake to keep them from spinning.
Remove the flexible tube and fitting for the clutch vent on the passenger side.
Remove the air intake (curved black plastic) from the driver’s side.
Remove the aluminum cross brace.
The following users liked this post:
jk356 (06-27-2019)
01-04-2009, 11:17 PM
#3
Instructor
Thread Starter
Join Date: Mar 2004
Location: Amelia Island, Florida
Posts: 202
Likes: 0
Received 9 Likes
on
9 Posts
LOWERING THE DRIVETRAIN
Slide the floor jack back under the engine and try to position it as far forward as possible. The key to this position is that you will be supporting the transmission weight and the front of the engine. Make sure it is snug.
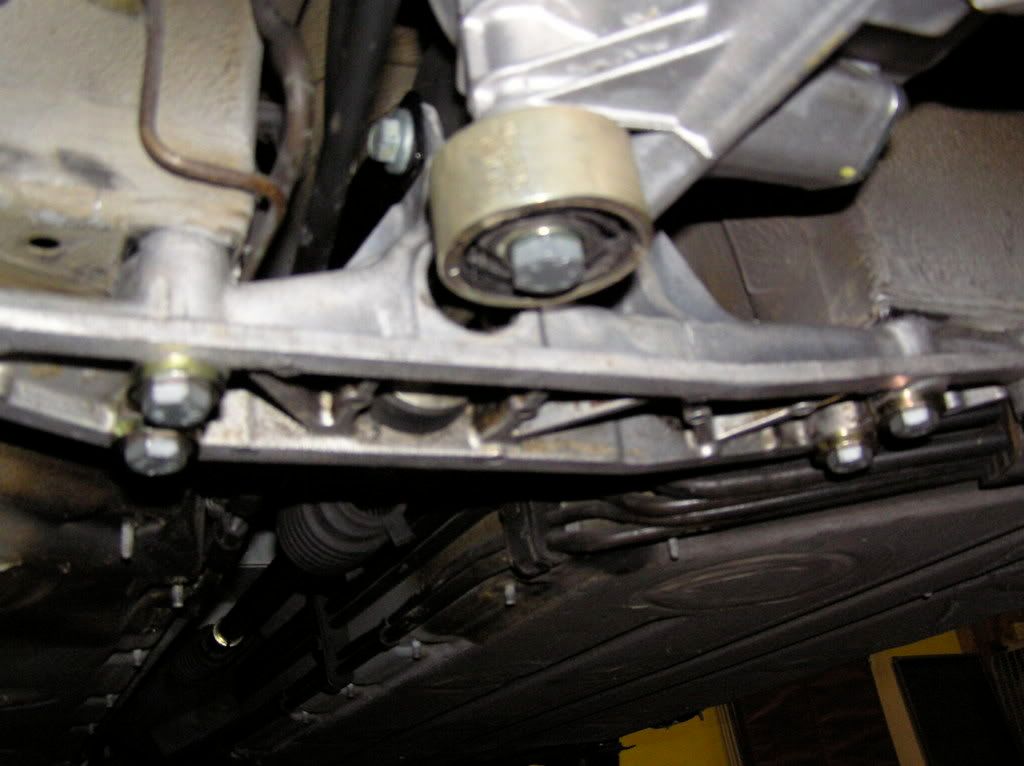
Loosen the 6 bolts that secure the transmission mount to the body. Remove the 2 bolts that secure the tranny front mount to the inside of the tunnel. Lower slowly. Have another jack stand ready to put in place once you get to the desired height. For my purposes this was when the engine block was almost touching the sway bar.
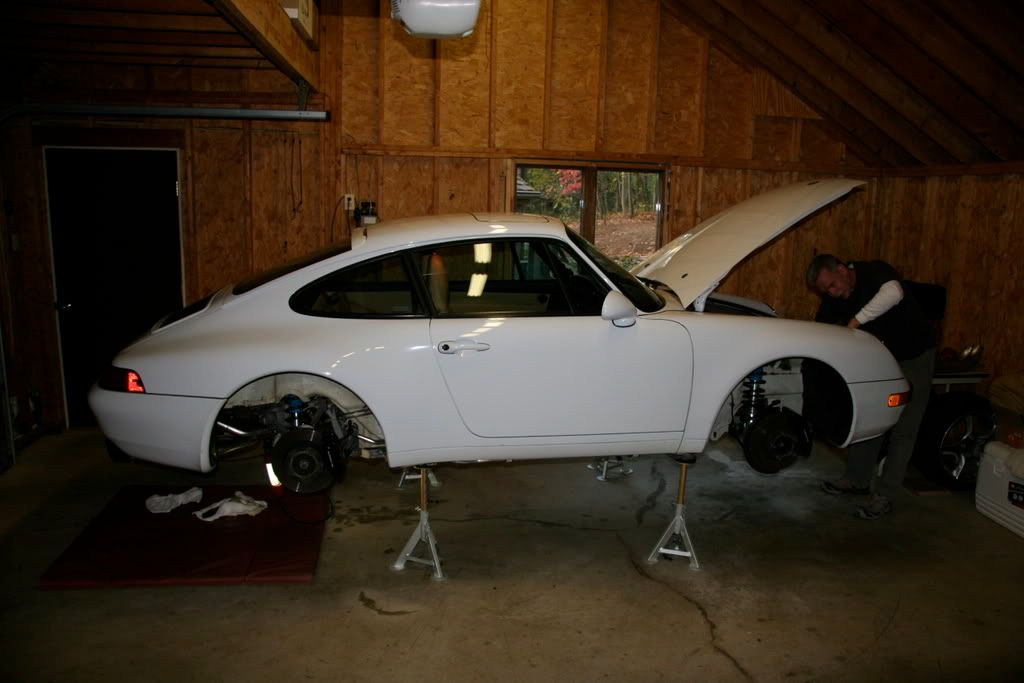
With the transmission lowered access to the slave cylinder bolts (13mm) is much improved. Remove the slave and tuck it away near the shock.
The starter top bolt (10mm Allen) is much easier to get to now. If you use a long extension the socket wrench will work easily if it is positioned forward of the high hump of the transmission. Remove the starter and set it aside. Tuck the ground strap from the lower starter bolt out of the way. This is a good time to get some strong bungees and pull the half shafts up and back so they don’t interfere with the transmission moving forward and down.
REMOVING THE TRANNY
Slide the transmission jack into place and snug it up. I actually raised the engine a bit to get it as level as possible yet still have room to slide forward without hitting the body.
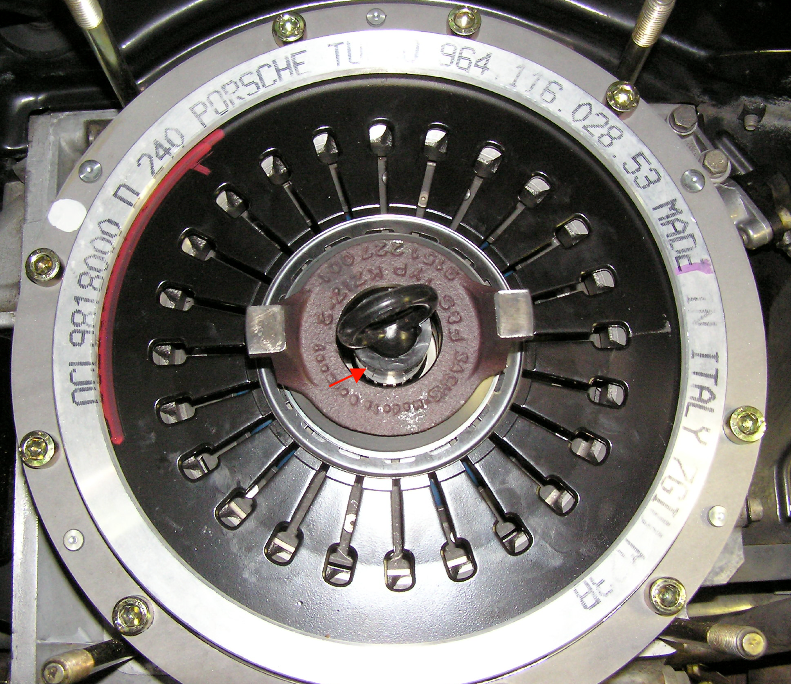
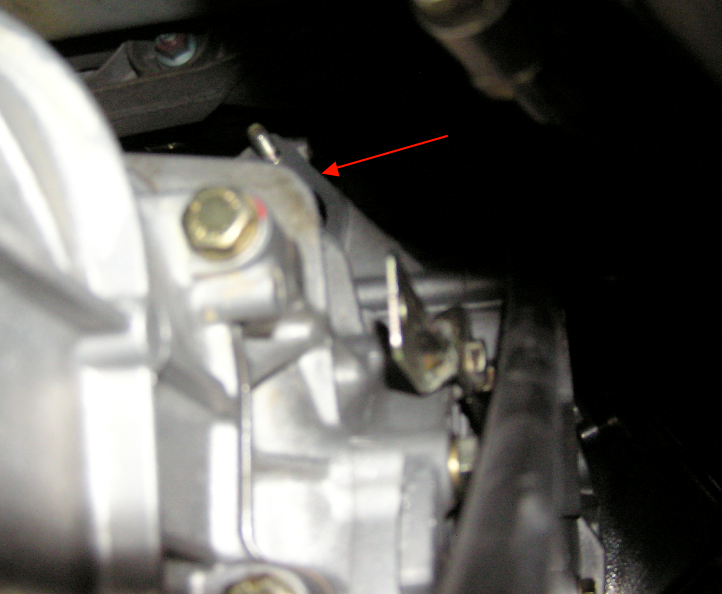
The top driver’s side nut and the two bottom nuts still secure the transmission to the engine. Before you remove these get a strong light and mirror to inspect the clutch fork shaft area. I found it helpful to tape a small mirror to the suspension upright but nothing could improve on the directions from another person who had a direct line of sight.
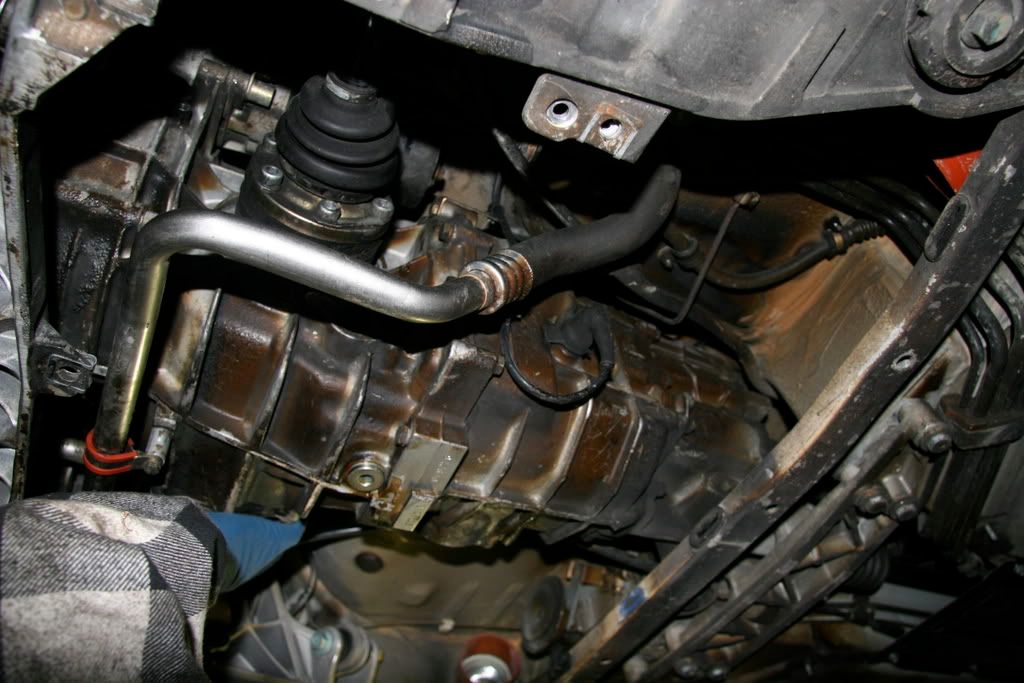
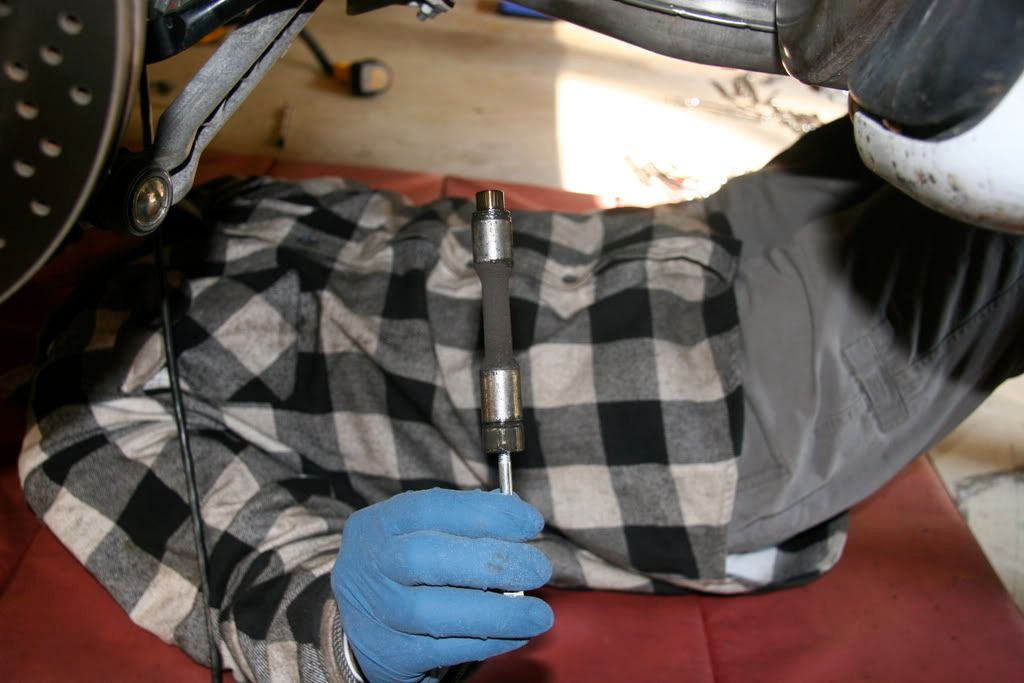
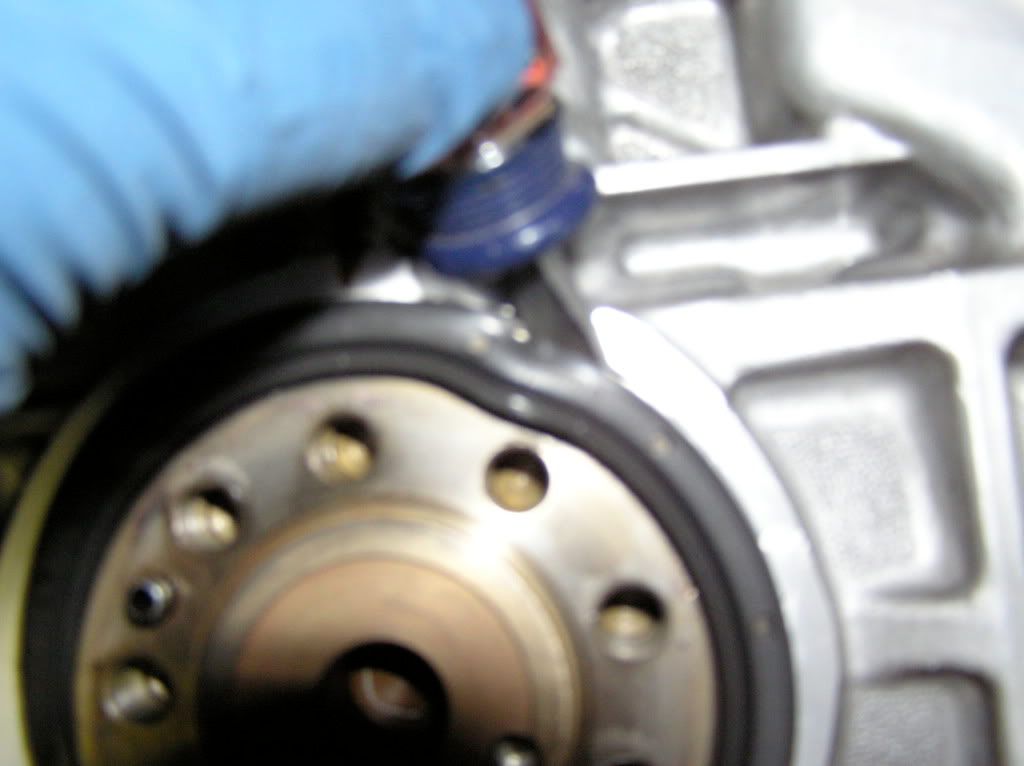
View from the wheel well. The blue thing is my hand screwing the bolt into the threaded end of fork shaft.
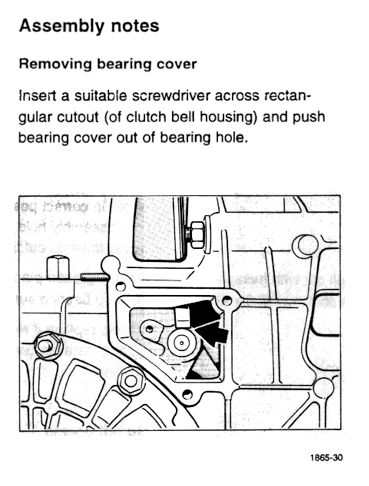
Because this is a 2 person DIY, 1 person is under the car, feet facing the back, and able to reach up and into the recessed area revealed when you removed the clutch air vent on the driver’s side. Inside is a 10mm bolt that secures a metal hold down on a black bearing cap. It was easy for the other worker to access this bolt from the driver’s side wheel well with a long extension and socket. Once the bolt and hold down are removed you must remove the plastic bearing cap. I used a small pair of pliers to grab the bearing cap. The tapped end of the fork shaft is now accessible.
Now, with the guidance from the spotter in the wheel well insert the 6mm bolt and thread it into the fork shaft a few turns. Give it a tug and the shaft will pull straight out. You will hear the metallic sound of the fork, now free, rotating back against the top of the flywheel.
Eureka! Ready to split the tranny from the engine.
Slide the tranny back ˝ an inch. Check to see that you have the height correct by adjusting against the gap between the engine and the bell housing. Once level slide the tranny back off of the studs allowing for clearance issues where the front of the transmission sits below the tunnel. Lower the jack and roll your prize out from under the car. The easiest route was out the wheel well. If you are just doing the RMS and the clutch I recommend sliding the tranny out of the way, but leave it on the jack.

Slide the floor jack back under the engine and try to position it as far forward as possible. The key to this position is that you will be supporting the transmission weight and the front of the engine. Make sure it is snug.
Loosen the 6 bolts that secure the transmission mount to the body. Remove the 2 bolts that secure the tranny front mount to the inside of the tunnel. Lower slowly. Have another jack stand ready to put in place once you get to the desired height. For my purposes this was when the engine block was almost touching the sway bar.
With the transmission lowered access to the slave cylinder bolts (13mm) is much improved. Remove the slave and tuck it away near the shock.
The starter top bolt (10mm Allen) is much easier to get to now. If you use a long extension the socket wrench will work easily if it is positioned forward of the high hump of the transmission. Remove the starter and set it aside. Tuck the ground strap from the lower starter bolt out of the way. This is a good time to get some strong bungees and pull the half shafts up and back so they don’t interfere with the transmission moving forward and down.
REMOVING THE TRANNY
Slide the transmission jack into place and snug it up. I actually raised the engine a bit to get it as level as possible yet still have room to slide forward without hitting the body.
The top driver’s side nut and the two bottom nuts still secure the transmission to the engine. Before you remove these get a strong light and mirror to inspect the clutch fork shaft area. I found it helpful to tape a small mirror to the suspension upright but nothing could improve on the directions from another person who had a direct line of sight.
View from the wheel well. The blue thing is my hand screwing the bolt into the threaded end of fork shaft.
Because this is a 2 person DIY, 1 person is under the car, feet facing the back, and able to reach up and into the recessed area revealed when you removed the clutch air vent on the driver’s side. Inside is a 10mm bolt that secures a metal hold down on a black bearing cap. It was easy for the other worker to access this bolt from the driver’s side wheel well with a long extension and socket. Once the bolt and hold down are removed you must remove the plastic bearing cap. I used a small pair of pliers to grab the bearing cap. The tapped end of the fork shaft is now accessible.
Now, with the guidance from the spotter in the wheel well insert the 6mm bolt and thread it into the fork shaft a few turns. Give it a tug and the shaft will pull straight out. You will hear the metallic sound of the fork, now free, rotating back against the top of the flywheel.
Eureka! Ready to split the tranny from the engine.
Slide the tranny back ˝ an inch. Check to see that you have the height correct by adjusting against the gap between the engine and the bell housing. Once level slide the tranny back off of the studs allowing for clearance issues where the front of the transmission sits below the tunnel. Lower the jack and roll your prize out from under the car. The easiest route was out the wheel well. If you are just doing the RMS and the clutch I recommend sliding the tranny out of the way, but leave it on the jack.
01-04-2009, 11:17 PM
#4
Instructor
Thread Starter
Join Date: Mar 2004
Location: Amelia Island, Florida
Posts: 202
Likes: 0
Received 9 Likes
on
9 Posts
CLEANING – OCD!!
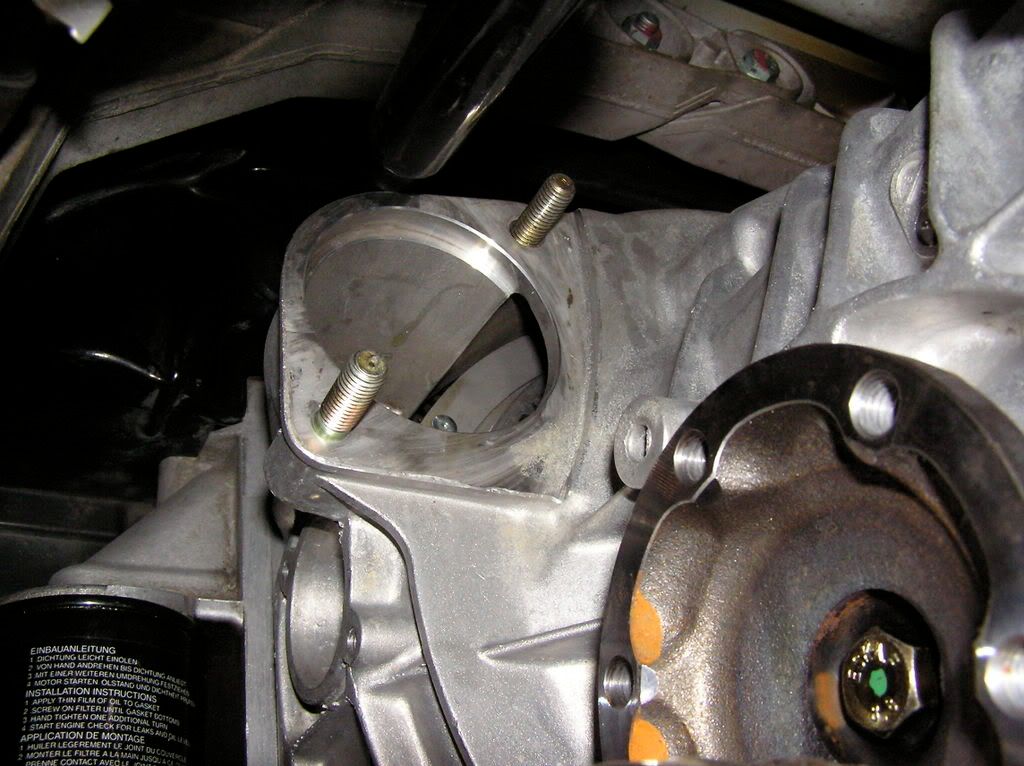
My plan included sending the transmission out for refreshing so a little cleaning was in order. Remove the passenger side shaft bearing. Also, if you look closely in the back of the starter opening you will see a recess with a bronze bush that supports the end of the starter shaft. Remove this now so you don’t loose it. A small plastic cap can be removed from the engine side of the bell housing as well. Before power washing, cover the vent at the top of the tranny. I found ZENIT a citrus cleaner from STONER to be very effective on the cosmoline.
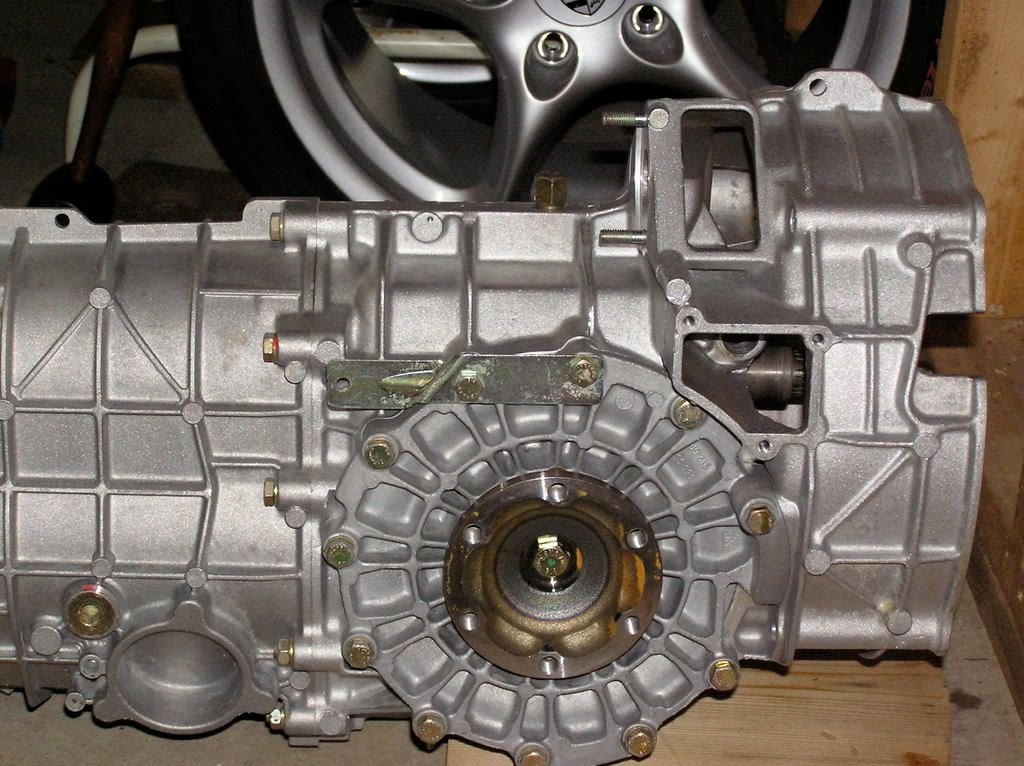
My plan included sending the transmission out for refreshing so a little cleaning was in order. Remove the passenger side shaft bearing. Also, if you look closely in the back of the starter opening you will see a recess with a bronze bush that supports the end of the starter shaft. Remove this now so you don’t loose it. A small plastic cap can be removed from the engine side of the bell housing as well. Before power washing, cover the vent at the top of the tranny. I found ZENIT a citrus cleaner from STONER to be very effective on the cosmoline.
01-04-2009, 11:20 PM
#5
Instructor
Thread Starter
Join Date: Mar 2004
Location: Amelia Island, Florida
Posts: 202
Likes: 0
Received 9 Likes
on
9 Posts
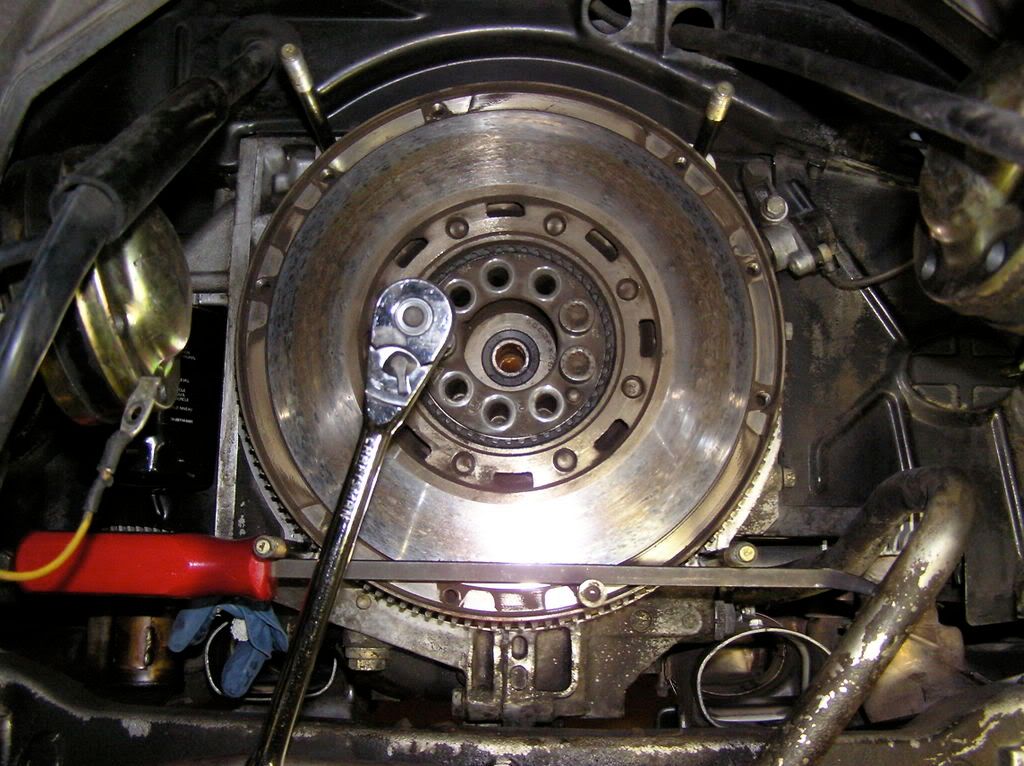
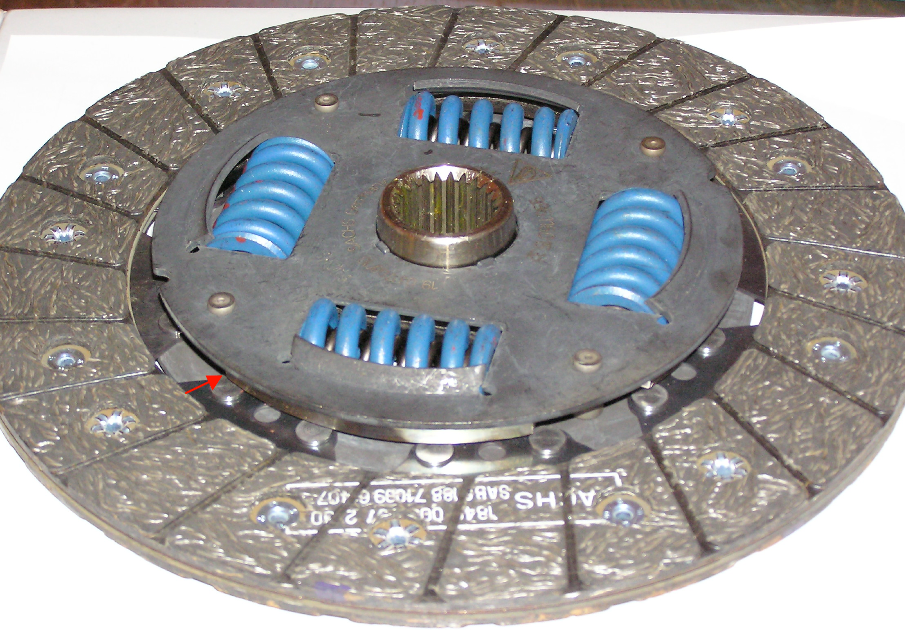
REMOVING THE CLUTCH ASSEMBLY
This is where the XZN sockets come into play. 8mm for the pressure plate working around until the pressure is off. Pull out the disc. The flywheel bolts 10mm, are really on there. To hold the flywheel in place I put a small pry bar under the bottom studs and over a pressure plate bolt. Remove the bolts and out with the flywheel.
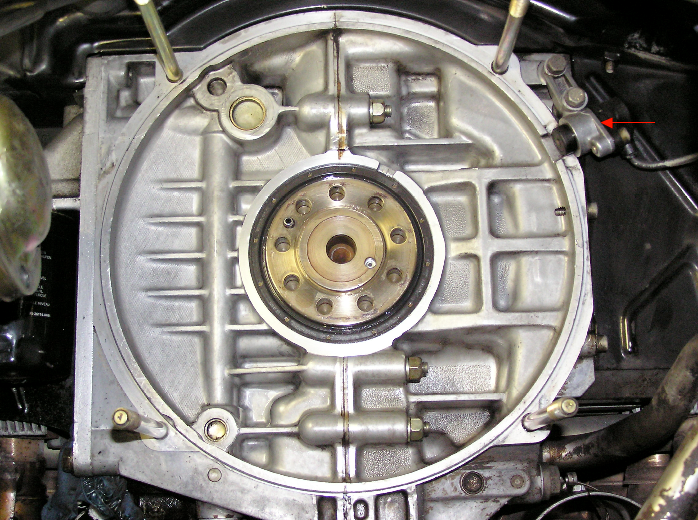
RMS
Take a look at the RMS and you will see a small notch. I used a punch and a light hammer to deform the outer edge of the seal. Once this is done the seal can be coaxed out using a dental pick applied to the outer surface only. Oil up the new one and tap it in square. The manual says the seal should recess approx 2mm when properly seated.
This is a good time to remove and clean the sensor. Tape it to the side so it is easy to install after the new flywheel is on. Clearance to the flywheel is 1mm.
This is where the XZN sockets come into play. 8mm for the pressure plate working around until the pressure is off. Pull out the disc. The flywheel bolts 10mm, are really on there. To hold the flywheel in place I put a small pry bar under the bottom studs and over a pressure plate bolt. Remove the bolts and out with the flywheel.
RMS
Take a look at the RMS and you will see a small notch. I used a punch and a light hammer to deform the outer edge of the seal. Once this is done the seal can be coaxed out using a dental pick applied to the outer surface only. Oil up the new one and tap it in square. The manual says the seal should recess approx 2mm when properly seated.
This is a good time to remove and clean the sensor. Tape it to the side so it is easy to install after the new flywheel is on. Clearance to the flywheel is 1mm.
01-04-2009, 11:22 PM
#6
Instructor
Thread Starter
Join Date: Mar 2004
Location: Amelia Island, Florida
Posts: 202
Likes: 0
Received 9 Likes
on
9 Posts
FLYWHEEL/CLUTCH INSTALL
The LWF install is uneventful. Get it seated on the pin in the crank and use locktite. I removed the sensor prior so it wasn’t in the way and I knew it needed to be adjusted anyway. When tightening/torqueing the flywheel bolts follow a star pattern and torque to
63 ftlb. Don’t forget to put the ring on. Pressure plate to 17 ftlb. And use a proper alignment tool. I did not use a press for the Throw Out Bearing. Following the order of washers and lock ring shown in the manual I just put it on the floor and pushed down with my knees. My weight was more than enough to compress the spring and allow for the snap ring to fit in the groove. The raised side of the disc is oriented to the flywheel.
01-04-2009, 11:25 PM
#7
Instructor
Thread Starter
Join Date: Mar 2004
Location: Amelia Island, Florida
Posts: 202
Likes: 0
Received 9 Likes
on
9 Posts
REINSTALLING THE TRANSMISSION
Remember – if you are moving to a LWF this is your last chance to install the correct guide tube!
Reinstall the starter shaft bush. Reinstall a new fork shaft bearing – starter side.
Using about 5 inches of duct tape, position the fork on top of the TOB and plumb to the engine. Don’t wrap the tape over the top of the flywheel, as this could be problematic when removing it. Smear a little Olista in the cup on the fork where the slave fits.
Get the jack back under the engine and lower it just a bit. My reference was to stop about ˝ “ from the sway bar.
Raise the tranny and shim (folded towel) to match the angle of the engine. Once you get the bell housing holes lined up, use the gap between it and the engine to get plumb. Slide/roll the transmission forward on the studs. With about 2 “ to go you will feel resistance. The shaft spline needs to mate with the disc. This was just a little wiggle and push for us. The bell housing should slide up tight to the engine.
Now, the daunting task of inserting the fork shaft is the one aspect of the DIY that everyone warned me about. All I can say is that with a second person this was very straight forward and without drama. I would not even want to attempt this by myself. It is essentially a blind maneuver.
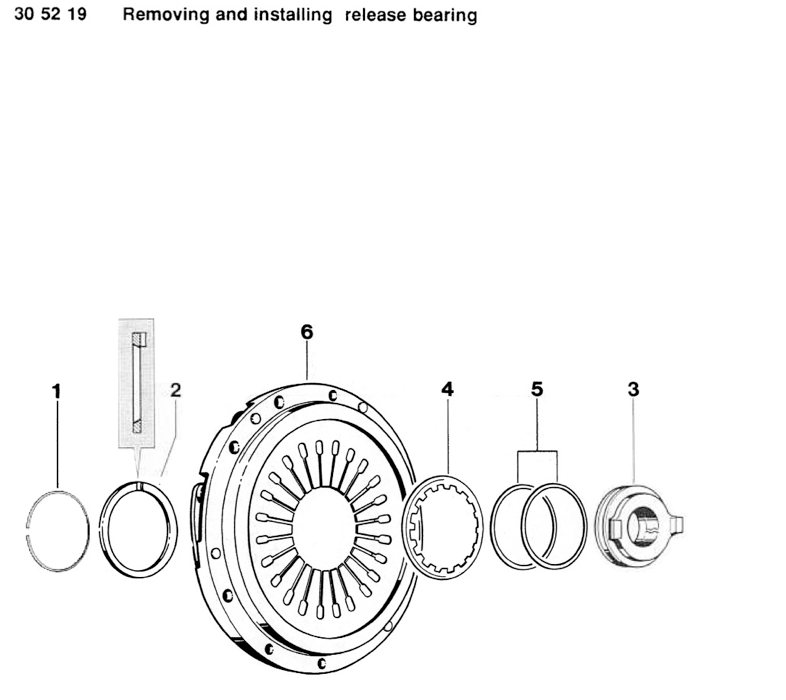
First, set up the shaft on the 6mm bolt as pictured. The new seals are oriented correctly, the bearing is snug on the shaft, and the nut is holding the bearing on the shaft during insertion.
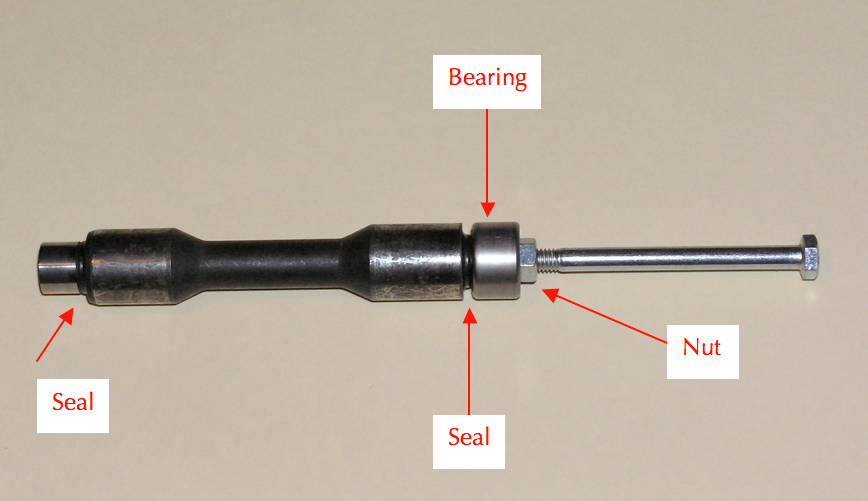

Lying on your back, reach your left hand up on top of the transmission into the inspection port and grab the top of the fork. I actually had to loosen the duct tape so I could move it. Andreas is positioned in the wheel well and he can see both the holes for the shaft in the bell housing and the holes on the fork. Verbal cues to align the holes and with your right hand insert the shaft. Don’t let go of the fork, as you will need a few minute adjustments to align everything. Steady pressure and you can feel it hit home on the other side. Gently unscrew the bolt.
REMOVE THE TAPE
Snug up the 2 bottom bolts to the bell housing.
Stuff a rag in the rear portion of the opening just in case and refit the bearing cap. From the wheel well I took my long extension with a socket and tapped it in. Screw in the hold-down and remove the rag. Nicely Done!
Install the slave; be sure the actuating arm is in the cup of the fork. This is also easily observed from the wheel well.
Install the starter. Properly tighten all bell housing to engine bolts.
Finally, you can raise the engine/transmission assembly as one and secure the front mounting bolts. Torque to specs and reverse the process from disassembly. I marked the half shaft bolts to keep track of those I had tightened. A good time to fill the transmission with Delvac.
That just about does it. If you have any questions or if I can help clarify, please contact me. I cannot emphasize how important it is to have 2 people available for the difficult portions of this DIY. The other recommendation is to have a copy of the 993 manuals. I have one in PDF that was on the forum, and I would be glad to forward a copy. With a little luck this process will be refined as more of us attempt it. Give it a shot!
Good Luck,
Neil
Remember – if you are moving to a LWF this is your last chance to install the correct guide tube!
Reinstall the starter shaft bush. Reinstall a new fork shaft bearing – starter side.
Using about 5 inches of duct tape, position the fork on top of the TOB and plumb to the engine. Don’t wrap the tape over the top of the flywheel, as this could be problematic when removing it. Smear a little Olista in the cup on the fork where the slave fits.
Get the jack back under the engine and lower it just a bit. My reference was to stop about ˝ “ from the sway bar.
Raise the tranny and shim (folded towel) to match the angle of the engine. Once you get the bell housing holes lined up, use the gap between it and the engine to get plumb. Slide/roll the transmission forward on the studs. With about 2 “ to go you will feel resistance. The shaft spline needs to mate with the disc. This was just a little wiggle and push for us. The bell housing should slide up tight to the engine.
Now, the daunting task of inserting the fork shaft is the one aspect of the DIY that everyone warned me about. All I can say is that with a second person this was very straight forward and without drama. I would not even want to attempt this by myself. It is essentially a blind maneuver.
First, set up the shaft on the 6mm bolt as pictured. The new seals are oriented correctly, the bearing is snug on the shaft, and the nut is holding the bearing on the shaft during insertion.
Lying on your back, reach your left hand up on top of the transmission into the inspection port and grab the top of the fork. I actually had to loosen the duct tape so I could move it. Andreas is positioned in the wheel well and he can see both the holes for the shaft in the bell housing and the holes on the fork. Verbal cues to align the holes and with your right hand insert the shaft. Don’t let go of the fork, as you will need a few minute adjustments to align everything. Steady pressure and you can feel it hit home on the other side. Gently unscrew the bolt.
REMOVE THE TAPE
Snug up the 2 bottom bolts to the bell housing.
Stuff a rag in the rear portion of the opening just in case and refit the bearing cap. From the wheel well I took my long extension with a socket and tapped it in. Screw in the hold-down and remove the rag. Nicely Done!
Install the slave; be sure the actuating arm is in the cup of the fork. This is also easily observed from the wheel well.
Install the starter. Properly tighten all bell housing to engine bolts.
Finally, you can raise the engine/transmission assembly as one and secure the front mounting bolts. Torque to specs and reverse the process from disassembly. I marked the half shaft bolts to keep track of those I had tightened. A good time to fill the transmission with Delvac.
That just about does it. If you have any questions or if I can help clarify, please contact me. I cannot emphasize how important it is to have 2 people available for the difficult portions of this DIY. The other recommendation is to have a copy of the 993 manuals. I have one in PDF that was on the forum, and I would be glad to forward a copy. With a little luck this process will be refined as more of us attempt it. Give it a shot!
Good Luck,
Neil
The following users liked this post:
Enso (06-04-2022)
Trending Topics
01-04-2009, 11:54 PM
#10
Addict
Rennlist Member
Rennlist Member
Very nice job and wonderful write up and photos. I am close by in Herndon Va and would be glad to be a "goffer" for you folks in any future adventures.
01-05-2009, 01:12 AM
#11
Excellent documentation of the whole process guys. This will come in handy.
Ken
Ken
01-05-2009, 02:00 AM
#12
Nice writeup. When my clutch is ready to change out this is the path I want to take. Though I will pay someone else to do it. =( How does the car feel? Is the LSD noticeable? Does the flywheel make it pretty easy to stall and hard to drive in traffic?