
DIY Engine Rebuild - Part VIII (8) - Rods and last minute checks before glue ;-)
 02-18-2006, 01:54 AM
#1
Addict
Lifetime Rennlist
Member
Lifetime Rennlist
Member
Thread Starter
Well, here is another installment 0f "how not to save money because of all the tools you end up buying but they are sure fun to play with!". I am slowly progressing and its now turning into a bit of a race since my body shop appointment to install the new Targa roof is coming up and the engine is not close to being done.
Anyways this installment covers some measuring, the installation of the rods and a last check that the main bearings have good clearances.
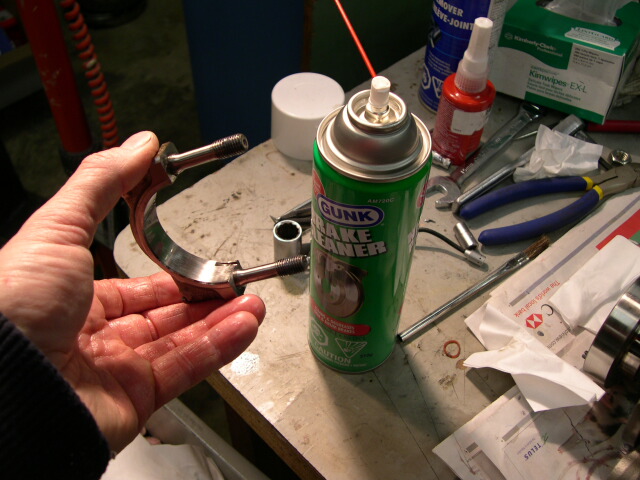
The first part of this installment is the installation of the rods onto the crankshaft. We start with washing the rod and the end cap with brake cleaner. Any of the surfaces are then washed down with isoproply alchol to make sure they are spick and span. I am using clean room wipes through the whole process ; one of my business partners is shutting down a company that had a clean room and tons of these little lint-free napkins...so I have been going through a bunch of them...
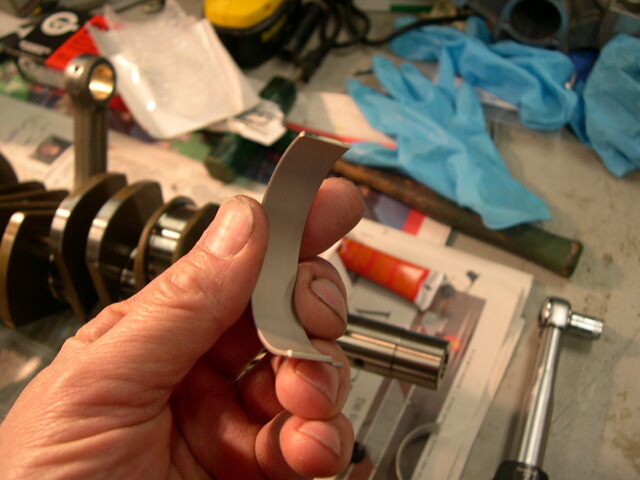
Here is a bearing shell fresh from the box. They are pretty simple and fit into the rod ends really nice. The surface again is wiped down with the alchol before any lube is added.
Oooooops, you caught me! I am using my bare hands, tstk tksk instead of sterile rubber gloves. Well, I actually did the entire crank with gloves but when I am trying to take pictures is harder so I just smeared the stuff on with my fingers ;-) Oh, its break-in lubercant to take the abuse before the oil flows really well on startup.

Here I am carefully slidingon the end cap onto the crankshaft.....
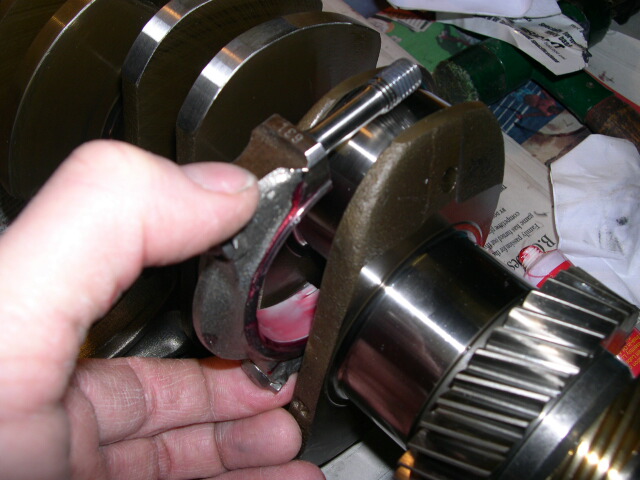
and then sliding on the rod so they are now connected. The two bolts are lubed up with the ARP moly lube and tightend/loosened three times at 35 ft-lbs torque.

Tightening the rod bolts up to torque. Like my fancy little torque wrench? Its one of my favorites and is good from 5 to 40 ft-lbs before I have to break out its bigger brother..

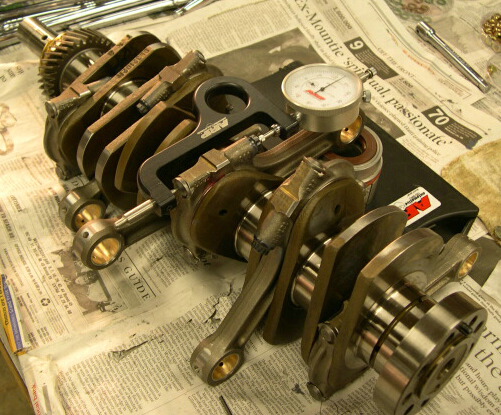
Now here is the right way to do it. I used the stretch specification from ARP for these rods which specifies a total rod bolt stretch of (0.0117 - 0.0122) inches. I pretty well set each and every rod bolt to 0.0120 stretch
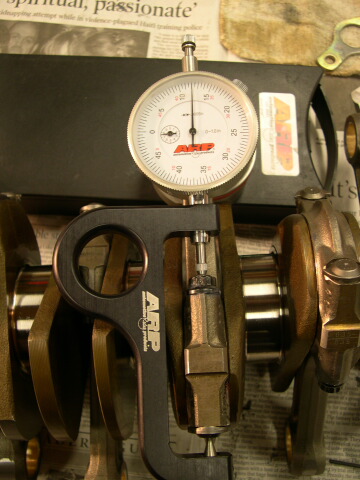
Another shot with the stretch gauge on the crank to give you an overall idea. There are twelve bolts to check for stretch and torque. I found that the stock torque values are a bit lot to get the proper stretch as defined by ARP.
Ahhh, brand new bushings all fitted for the rods with the right clearances...

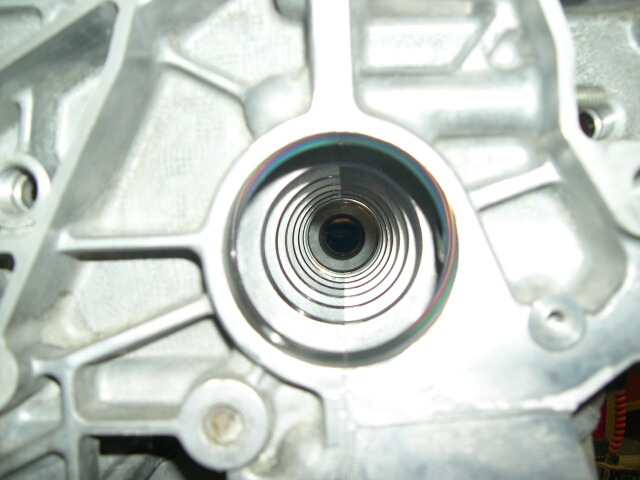
Time to check the bores in the case. I bolted the empty case together but could not resist a shot down the main bore of the case. This might make a good avatar... ;-)
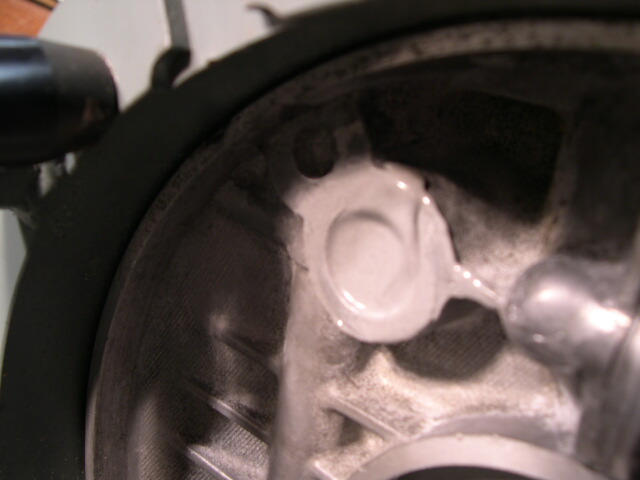
I pulled the main galley plugs out of the block to clean out the main oil passages. I drove in new plugs sealed with case sealer and then covered the plug with good 'ol JB Weld. Not the prettiest but who is going to look behind the clutch?
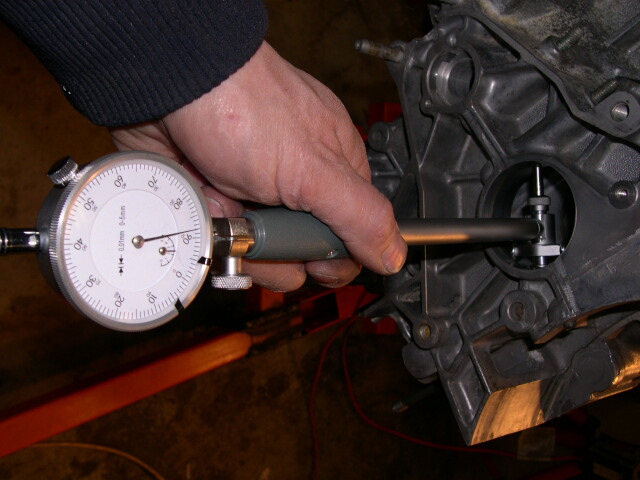
Using a bore guage to measure the bores. I hate these devices and there must be a better way (which I can't afford anyways). The bores checked out OK.
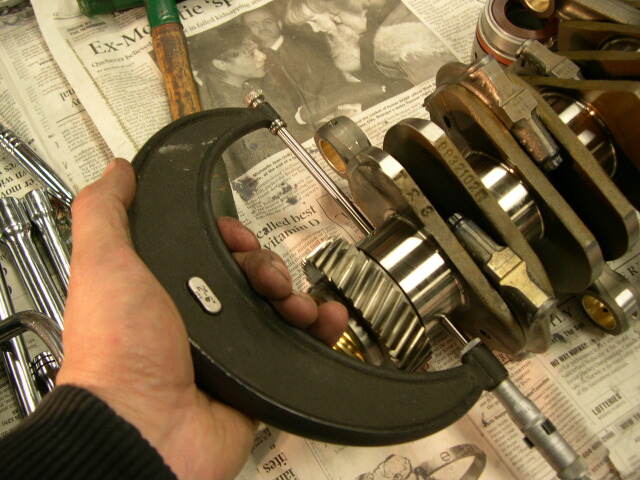
I double checked the main bearings on the crank with my 30 year old micrometer (with was checked a little while ago...its still bang on, gotta like the old stuff!).
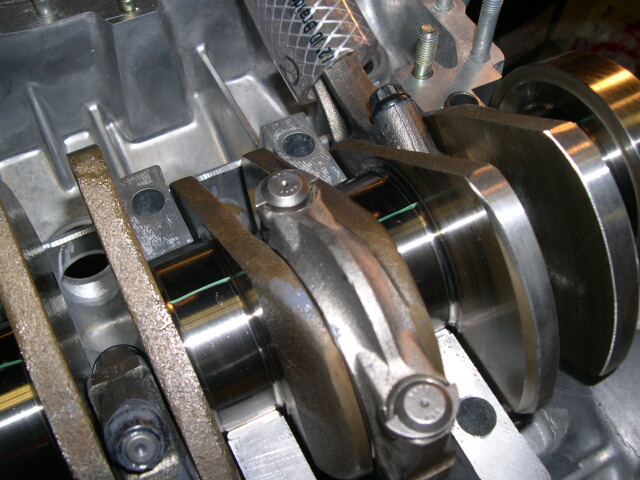
As an extra double check I wanted to Plastigauge the main bearings (I did the rod bearings as well but did not have my camera on the ready). See the little green line...that is the plastigauge. You can see it in place but its not squished out yet...I coated the main bearings and the crank with a light coating of oil to make sure the wax based plasticgauge does not stick too bad to the bearings..
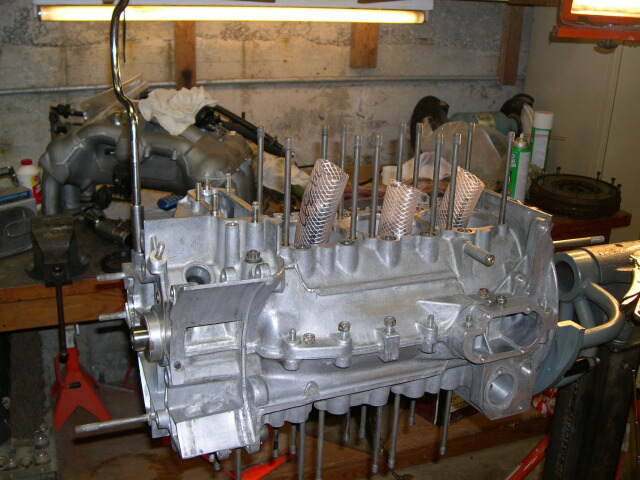
OK, bolt the block together again....notice my nice protective sleeves for the rods. ;-)
Ok, case all apart again (after an hour of work) and here is the plastigauge (see the small green line). You use the chart to read how wide the squeezed material is and it gives a relative clearance figure. My bearing clearance appears to be about 0.002 and its pretty consistant on all the main bearings which is good...

OK, the crank is back out and here are the brand-new bearings ready to go....

Next installment in a few weeks (or maybe sooner) is the fun one--- case sealing and getting the bottom end all buttoned up.
Cheers,
Mike
Anyways this installment covers some measuring, the installation of the rods and a last check that the main bearings have good clearances.
The first part of this installment is the installation of the rods onto the crankshaft. We start with washing the rod and the end cap with brake cleaner. Any of the surfaces are then washed down with isoproply alchol to make sure they are spick and span. I am using clean room wipes through the whole process ; one of my business partners is shutting down a company that had a clean room and tons of these little lint-free napkins...so I have been going through a bunch of them...
Here is a bearing shell fresh from the box. They are pretty simple and fit into the rod ends really nice. The surface again is wiped down with the alchol before any lube is added.
Oooooops, you caught me! I am using my bare hands, tstk tksk instead of sterile rubber gloves. Well, I actually did the entire crank with gloves but when I am trying to take pictures is harder so I just smeared the stuff on with my fingers ;-) Oh, its break-in lubercant to take the abuse before the oil flows really well on startup.
Here I am carefully slidingon the end cap onto the crankshaft.....
and then sliding on the rod so they are now connected. The two bolts are lubed up with the ARP moly lube and tightend/loosened three times at 35 ft-lbs torque.
Tightening the rod bolts up to torque. Like my fancy little torque wrench? Its one of my favorites and is good from 5 to 40 ft-lbs before I have to break out its bigger brother..
Now here is the right way to do it. I used the stretch specification from ARP for these rods which specifies a total rod bolt stretch of (0.0117 - 0.0122) inches. I pretty well set each and every rod bolt to 0.0120 stretch
Another shot with the stretch gauge on the crank to give you an overall idea. There are twelve bolts to check for stretch and torque. I found that the stock torque values are a bit lot to get the proper stretch as defined by ARP.
Ahhh, brand new bushings all fitted for the rods with the right clearances...
Time to check the bores in the case. I bolted the empty case together but could not resist a shot down the main bore of the case. This might make a good avatar... ;-)
I pulled the main galley plugs out of the block to clean out the main oil passages. I drove in new plugs sealed with case sealer and then covered the plug with good 'ol JB Weld. Not the prettiest but who is going to look behind the clutch?
Using a bore guage to measure the bores. I hate these devices and there must be a better way (which I can't afford anyways). The bores checked out OK.
I double checked the main bearings on the crank with my 30 year old micrometer (with was checked a little while ago...its still bang on, gotta like the old stuff!).
As an extra double check I wanted to Plastigauge the main bearings (I did the rod bearings as well but did not have my camera on the ready). See the little green line...that is the plastigauge. You can see it in place but its not squished out yet...I coated the main bearings and the crank with a light coating of oil to make sure the wax based plasticgauge does not stick too bad to the bearings..
OK, bolt the block together again....notice my nice protective sleeves for the rods. ;-)
Ok, case all apart again (after an hour of work) and here is the plastigauge (see the small green line). You use the chart to read how wide the squeezed material is and it gives a relative clearance figure. My bearing clearance appears to be about 0.002 and its pretty consistant on all the main bearings which is good...
OK, the crank is back out and here are the brand-new bearings ready to go....
Next installment in a few weeks (or maybe sooner) is the fun one--- case sealing and getting the bottom end all buttoned up.
Cheers,
Mike

 02-18-2006, 02:11 AM
#3
Rennlist Member
Mike ... I can't help but wonder if the regular, everyday Porsche mechanics are this fastidious ... I need to come over and have another look when you get a bit closer.
Best regards, Doug
Best regards, Doug
02-18-2006, 02:49 AM
#5
Addict
Lifetime Rennlist
Member
Lifetime Rennlist
Member
Thread Starter
Originally Posted by the_buch
Mike ... I can't help but wonder if the regular, everyday Porsche mechanics are this fastidious ... I need to come over and have another look when you get a bit closer.
Best regards, Doug
Best regards, Doug
Cheers,
Mike
Trending Topics
 02-18-2006, 12:51 PM
#9
Addict
Lifetime Rennlist
Member
Lifetime Rennlist
Member
Thread Starter
Originally Posted by pcar964
awesome. How many engines have you rebuilt in your life?
I think most people can do this with enough time, reading and some training. I did take the Bruce Anderson/Gerry Wood's course in December and I have been thining and reading about rebuilding the engine for a few years. i also have all the manuals, shop manual, Bentley books, Haynes, the Performance Handbook, PET, parts manuals and of course the bible for engine rebuilds, Wayne Dempsey's book "How to rebuild and modify Porsche 911 engines". There are also web resources, the best one specifically for 911 engine rebuilding is the Pelican Parts Engine Rebuilding Forum....its very good and I can get my questions answered there.
I could have gotten a pro to do it but I find this more interesting and certainly much more satisfying as a DIY. It is scarey at times though but you have to go at it with a "can-do attitude". When it something that is important to me I would rather do it myself...which means I have way to much to do!
Cheers,
Mike
02-18-2006, 01:48 PM
#10
Burning Brakes
Mike,
Just awesome. I, for one, am impressed to the point where I'm speechless. I truly wish that I had the education and skill set for that type of work. I'm sure I've missed it, but what necessitated the rebuild to begin with?
Cheers,
Dave
Just awesome. I, for one, am impressed to the point where I'm speechless. I truly wish that I had the education and skill set for that type of work. I'm sure I've missed it, but what necessitated the rebuild to begin with?
Cheers,
Dave
02-18-2006, 01:58 PM
#11
Former Vendor
Join Date: May 2002
Location: Tampa
Posts: 6,849
Likes: 0
Received 0 Likes
on
0 Posts
Your doing a great job Mike with all these posts and pics. Great stuff. You seem to really be taking your time, and using all the proper tools, instruments to do the job properly...
 02-18-2006, 02:30 PM
#13
Addict
Rennlist Member
Rennlist Member
You know the TV show idea is a good one. Any TV hot shot producers here? Don't tell me people wouldn't watch this every week if they watch all the chopper and hot rod shows?! Just throw in a bit of drama, personality clashes and dysfunctional family elements and voila! MIke, what's your home scene like? ;-)
02-18-2006, 03:16 PM
#14
Addict
Rennlist Member
Rennlist Member
Mike...I have been following your posts and progress with a big amount of admiration and awe...what an undertaking and you are doing a great job and thank you for sharing your insights and pictures. Do you ever get down here in the Seattle area? Beers are on me! 