DIY Engine Rebuild - Part VII (7) - Cleaning, cleaning, cleaning, cleaning.........
 02-06-2006, 02:30 AM
#1
Addict
Lifetime Rennlist
Member
Lifetime Rennlist
Member
Thread Starter
Well I have not posted in a while mostly due to laziness and partly because I have not had too much progress ( damn, life gets in the way!!). But anyways this installment is about cleaning, reconditioning and cleaning getting ready for putting the engine back together.
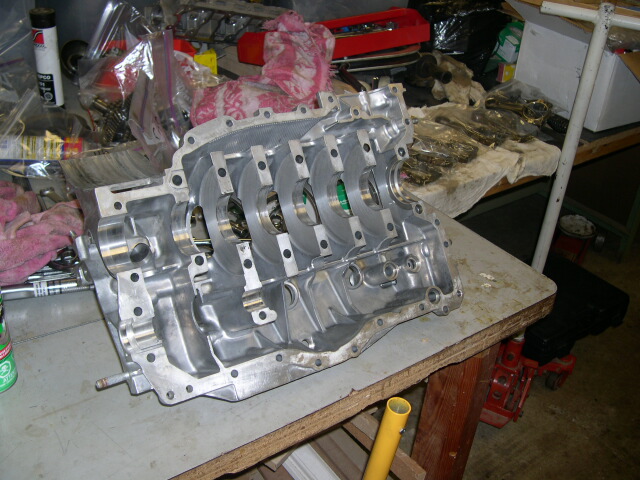
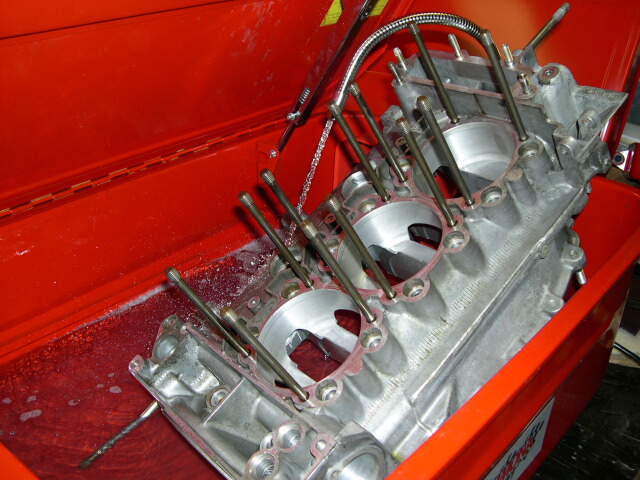
This is the left side of the engine block pretty well stripped down. The studs on the 993 are all steel and mine are perfectly fine. The block actually was pretty clean but of course it all has to be perfect before its put back together.
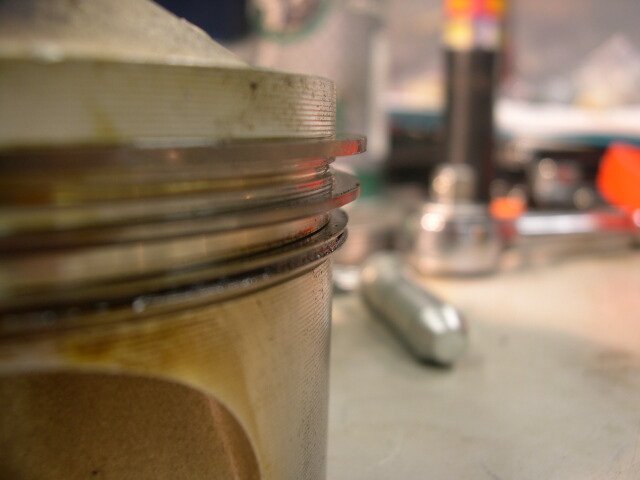
Here is a view of the side of one of the pistons. Notice the three rings. I measured my pistons and cylinders...both are fine and in spec.
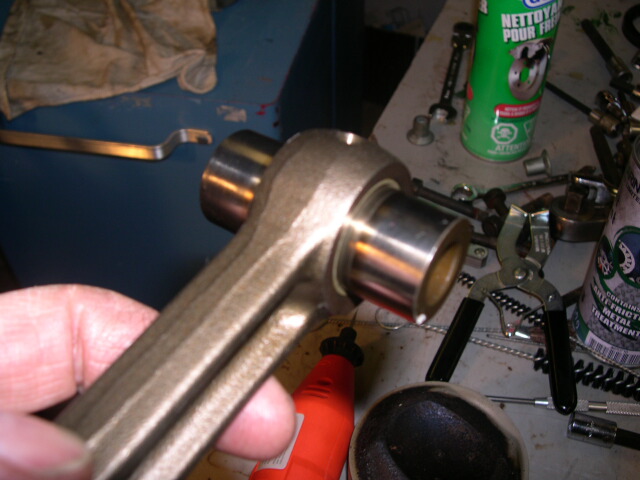
Here are the substantial wrist pins. The wrist pin bushing on the con rods were worn a bit...mostly from the top to bottom as expected.
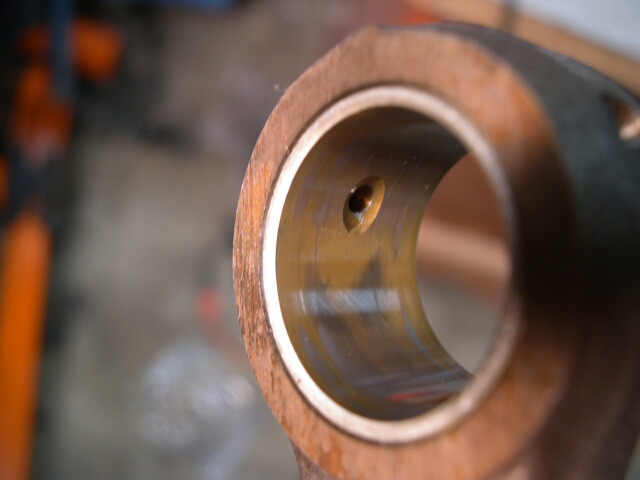
A close up of the wrist pin bushing. Notice the oil hole and the chamfer that allows oil that is being thrown/squirted around the crankcase can be caught by the small hole in the side of the small end of the rod and provides lubrication for the con rod bushing.....I bought new bushings from Porsche and had them replaced and reamed to a new fit...
Ahhhh, new valves. Three of the six old intakes were below spec so I replaced the whole works. All the exhaust valves were in spec but half worn...and there was a sale at EBS so I could not resist. Besides that there is talk of heat cycles on exhaust valves also causing problems so I thought it would be safest to replace the whole works. One of the advantages of DIY is you have a bit more money to play with...

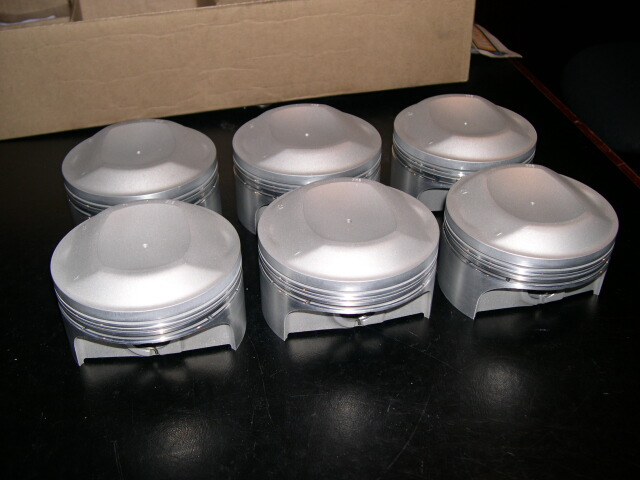
The pistons after they came back from the machinist...nice and clean and ready to be installed.
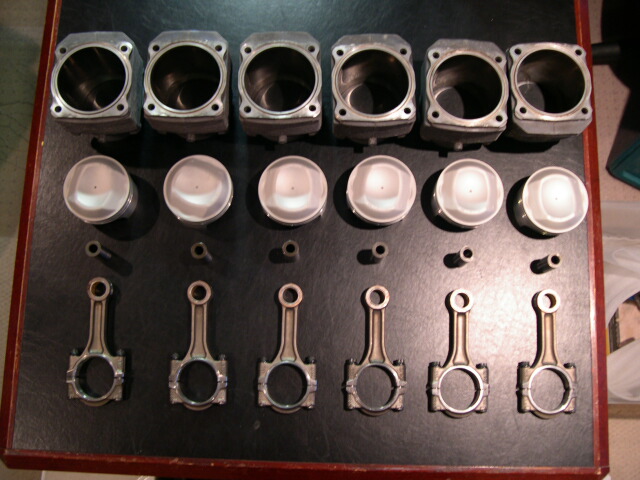
Well here is the whole shooting match. Barrels, pistons, wrist pin bushings and connecting rods. Its a shame to put them back into the engine...and a lot of work!!
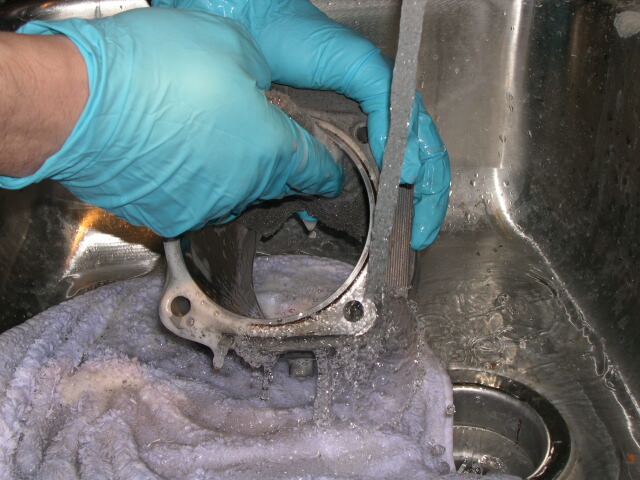
This is interesting. One of the recommended ways to clean the cylinders is to just hot water, soap and a mild scotchbrite pad. I did that although it was interesting to actually "dishwash" my expensive cylinders....my wife had several comments none of which I would mention here....
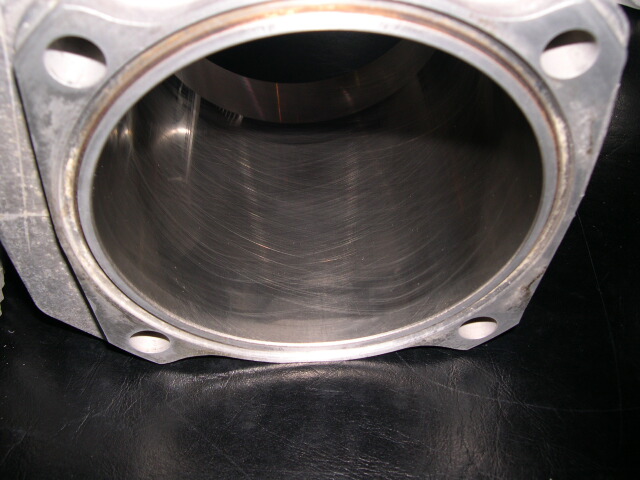
A before shot of one of the barrels. Take a look at the crud at the top of the barrel as well as some mild glazing in the barrel. The barrel itself is in great shape.

After washing all the gunk is gone and the barrel is as good as new.
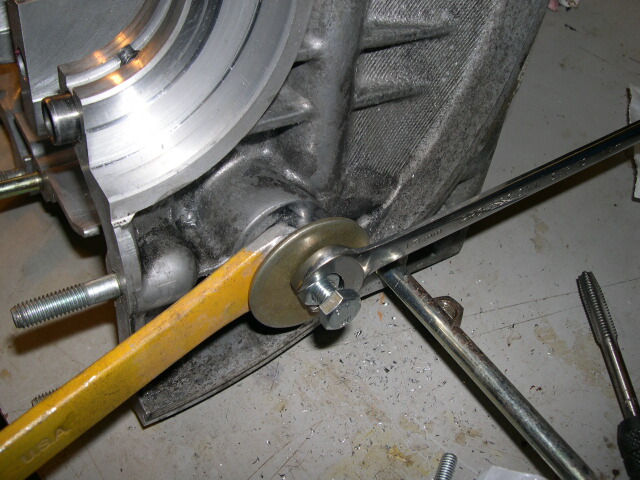
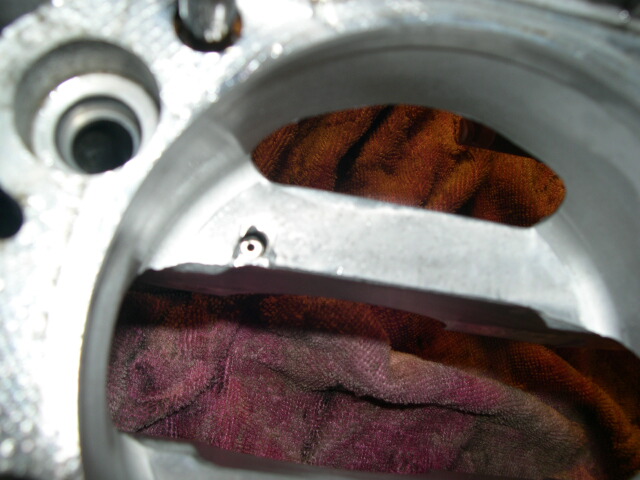
I wanted to check the main oil galley and clean it. In order to do that you have to remove the sheet metal plugs on each end of the galley. The recommended procedure is to drill and tap a hole and use a bolt to pull the plug out..a pain in the *** and in retrospect its was so clean it did not need removal.
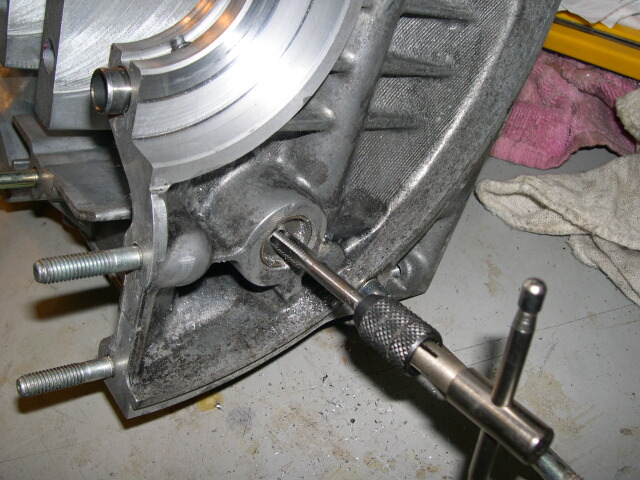
Use the bolt to pull the plug out. The wrench is used as a spacer to allow room for the plug to be pulled.
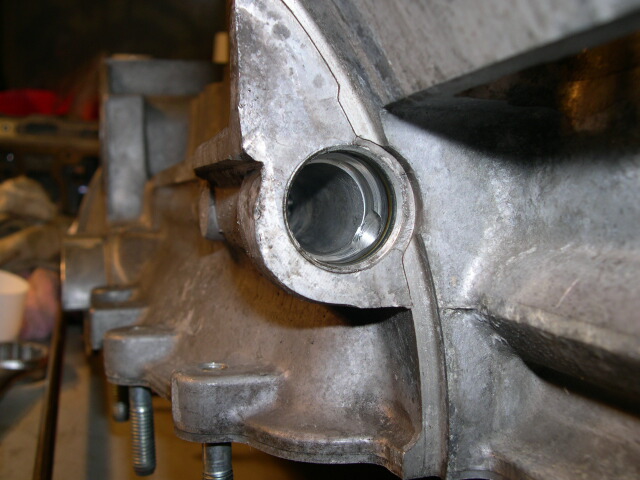
Ah, plugs out. Turns out the passage was quite clean but had a coating of light oil residue.
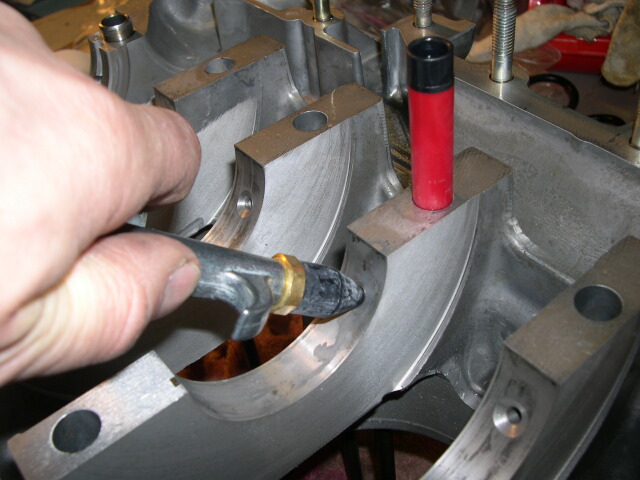
OK, whole block in to the parts washer. I used mineral spirits as the second stage of cleanup (brake cleaner is the third stage...). I used fresh fluids for the flush and tried to get every cavity and opening (there are lots of nooks and crannys in this block!!). Then the block was taken out, wiped down, cleaned with brake cleaner and wiped down again.
I am flushing out the main oil galley tube...this tube feeds the oil to the main bearing galleys and the crank...verrrrry important!

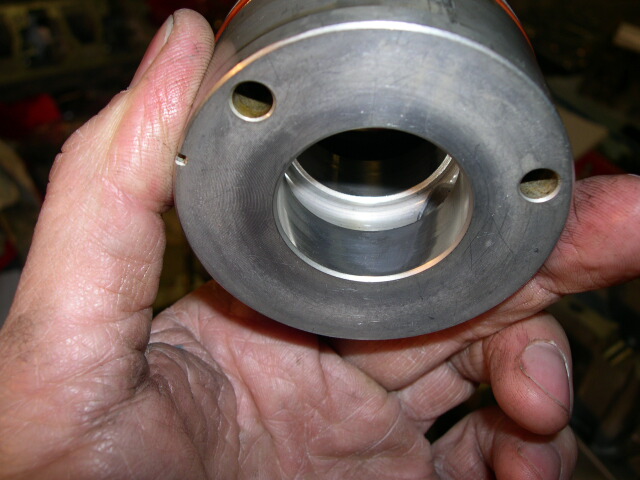
Ok, the famous piston squirters. There are six of them, on for each piston. They shoot oil on the underside of each piston to cool the piston. As part of the cleaning they have to be cleaned and blown out.
I filled the oil passages with brake cleaner and then used compressed air to blow it out. The plastic plug is to plug the exit passage so the compressed air can run from the main bearing oil feed to the squirter. They squirt nice and even and work fine. They take a fair amount of pressure to open (they are spring loaded with a little ball bearing).
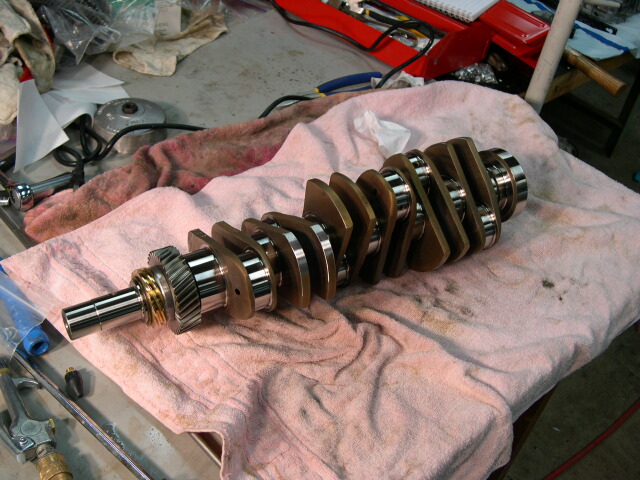
Flushing the crank out for almost final cleaning. I let the fluid run though the crank oil passages for quite a while to make sure its nice and clean. Look closely...you can see the spirts coming out of the rod bearing feeds on both the left and right sides.

Ahhhh, nice and clean after its shower and almost ready for assembly. Before I put the rods on I will clean it again with brake cleaner and clean-room wipes. This makes sure no lint or little particles are on the bearing surfaces.
Here is a shot of the layshaft bearings...see the wear! The main bearings were fine with some minor wear on both the thrust bearing and the nose bearing. But both bearings on the layshaft had worn but the layshaft itself was fine.
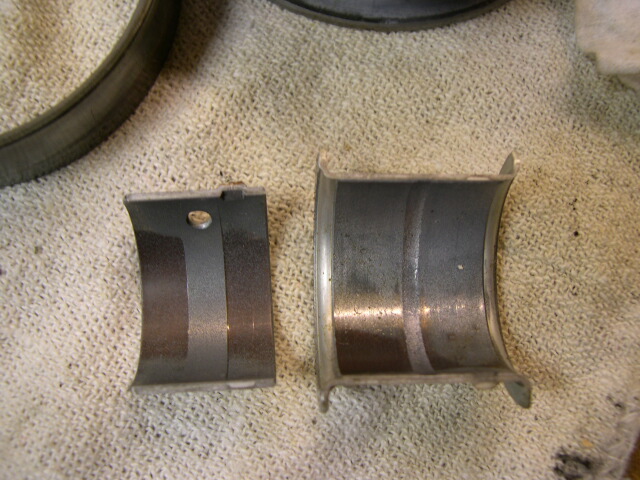
Main bearings are in good shape..its a same to replace them with new ones.
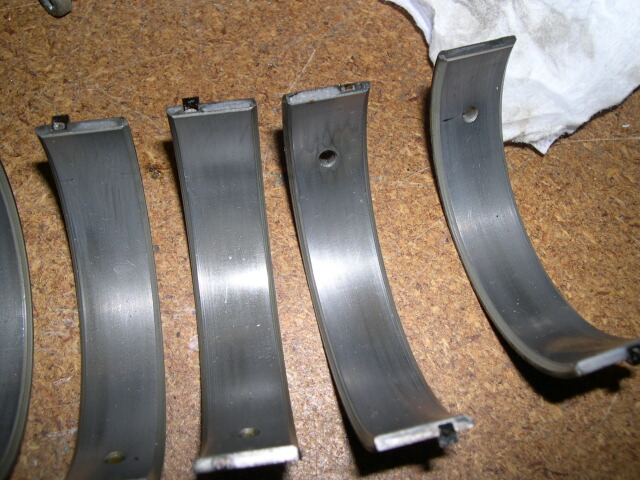
Here is the #8 main bearing. You can see the wear on the surface of the bearing...nothing to worry about but since its all apart a new bearing will be installed..
Next installment....hey we can start to assemble this sucker!!
This is the left side of the engine block pretty well stripped down. The studs on the 993 are all steel and mine are perfectly fine. The block actually was pretty clean but of course it all has to be perfect before its put back together.
Here is a view of the side of one of the pistons. Notice the three rings. I measured my pistons and cylinders...both are fine and in spec.
Here are the substantial wrist pins. The wrist pin bushing on the con rods were worn a bit...mostly from the top to bottom as expected.
A close up of the wrist pin bushing. Notice the oil hole and the chamfer that allows oil that is being thrown/squirted around the crankcase can be caught by the small hole in the side of the small end of the rod and provides lubrication for the con rod bushing.....I bought new bushings from Porsche and had them replaced and reamed to a new fit...
Ahhhh, new valves. Three of the six old intakes were below spec so I replaced the whole works. All the exhaust valves were in spec but half worn...and there was a sale at EBS so I could not resist. Besides that there is talk of heat cycles on exhaust valves also causing problems so I thought it would be safest to replace the whole works. One of the advantages of DIY is you have a bit more money to play with...
The pistons after they came back from the machinist...nice and clean and ready to be installed.
Well here is the whole shooting match. Barrels, pistons, wrist pin bushings and connecting rods. Its a shame to put them back into the engine...and a lot of work!!
This is interesting. One of the recommended ways to clean the cylinders is to just hot water, soap and a mild scotchbrite pad. I did that although it was interesting to actually "dishwash" my expensive cylinders....my wife had several comments none of which I would mention here....
A before shot of one of the barrels. Take a look at the crud at the top of the barrel as well as some mild glazing in the barrel. The barrel itself is in great shape.
After washing all the gunk is gone and the barrel is as good as new.
I wanted to check the main oil galley and clean it. In order to do that you have to remove the sheet metal plugs on each end of the galley. The recommended procedure is to drill and tap a hole and use a bolt to pull the plug out..a pain in the *** and in retrospect its was so clean it did not need removal.
Use the bolt to pull the plug out. The wrench is used as a spacer to allow room for the plug to be pulled.
Ah, plugs out. Turns out the passage was quite clean but had a coating of light oil residue.
OK, whole block in to the parts washer. I used mineral spirits as the second stage of cleanup (brake cleaner is the third stage...). I used fresh fluids for the flush and tried to get every cavity and opening (there are lots of nooks and crannys in this block!!). Then the block was taken out, wiped down, cleaned with brake cleaner and wiped down again.
I am flushing out the main oil galley tube...this tube feeds the oil to the main bearing galleys and the crank...verrrrry important!
Ok, the famous piston squirters. There are six of them, on for each piston. They shoot oil on the underside of each piston to cool the piston. As part of the cleaning they have to be cleaned and blown out.
I filled the oil passages with brake cleaner and then used compressed air to blow it out. The plastic plug is to plug the exit passage so the compressed air can run from the main bearing oil feed to the squirter. They squirt nice and even and work fine. They take a fair amount of pressure to open (they are spring loaded with a little ball bearing).
Flushing the crank out for almost final cleaning. I let the fluid run though the crank oil passages for quite a while to make sure its nice and clean. Look closely...you can see the spirts coming out of the rod bearing feeds on both the left and right sides.
Ahhhh, nice and clean after its shower and almost ready for assembly. Before I put the rods on I will clean it again with brake cleaner and clean-room wipes. This makes sure no lint or little particles are on the bearing surfaces.
Here is a shot of the layshaft bearings...see the wear! The main bearings were fine with some minor wear on both the thrust bearing and the nose bearing. But both bearings on the layshaft had worn but the layshaft itself was fine.
Main bearings are in good shape..its a same to replace them with new ones.
Here is the #8 main bearing. You can see the wear on the surface of the bearing...nothing to worry about but since its all apart a new bearing will be installed..
Next installment....hey we can start to assemble this sucker!!
 02-06-2006, 03:00 AM
#2
Pro
Join Date: Dec 2004
Location: Corona, CA
Posts: 728
Likes: 0
Received 0 Likes
on
0 Posts
Mike,
Your posts truly are awe inspiring.... Living vicariously through you.
When the time comes (hopefully not too soon!) for an engine stripdown and rebuild, well, your documented work will really come in handy.
Bet you can't wait for the "fire up" party!
Clive.
Your posts truly are awe inspiring.... Living vicariously through you.
When the time comes (hopefully not too soon!) for an engine stripdown and rebuild, well, your documented work will really come in handy.
Bet you can't wait for the "fire up" party!
Clive.
02-06-2006, 03:15 AM
#3
Burning Brakes

Join Date: Dec 2005
Posts: 881
Likes: 0
Received 0 Likes
on
0 Posts
Excellent pics and commentary, as usual!
Did you have any trepidation about drilling and tapping into the main oil galley cap? I know you had planned to flush it out later but I would have been worried about ending up with metal bits trapped in a nook or cranny...
What do you do to avoid rusting after the cleanup (eg, the crankshaft)?
Did you have any trepidation about drilling and tapping into the main oil galley cap? I know you had planned to flush it out later but I would have been worried about ending up with metal bits trapped in a nook or cranny...
What do you do to avoid rusting after the cleanup (eg, the crankshaft)?
02-06-2006, 08:43 AM
#4
Addict
Rennlist Member
Rennlist Member
Thank you! 
May I suggest burning DVD with all your excellent photos grouped into folders based on the stage of the process? When I get back into 993 I know I would want it!
May I suggest burning DVD with all your excellent photos grouped into folders based on the stage of the process? When I get back into 993 I know I would want it!


Trending Topics
 02-06-2006, 12:24 PM
#9
Addict
Lifetime Rennlist
Member
Lifetime Rennlist
Member
Thread Starter
Thanks everyone!
I am planning at the end of it all to put together a DVD wth the hundreds of pictures and offer it to other rennlisters. I tend to take too many pictures so there are lots and lots.....too many to post since they are all at high rez (well, not that high but they are about 1Mb each).
Cheers,
Mike
I am planning at the end of it all to put together a DVD wth the hundreds of pictures and offer it to other rennlisters. I tend to take too many pictures so there are lots and lots.....too many to post since they are all at high rez (well, not that high but they are about 1Mb each).
Cheers,
Mike
02-06-2006, 12:50 PM
#10
Addict
Lifetime Rennlist
Member
Lifetime Rennlist
Member
Thread Starter
Originally Posted by YA911Fan
Did you have any trepidation about drilling and tapping into the main oil galley cap? I know you had planned to flush it out later but I would have been worried about ending up with metal bits trapped in a nook or cranny...
What do you do to avoid rusting after the cleanup (eg, the crankshaft)?
What do you do to avoid rusting after the cleanup (eg, the crankshaft)?
I lightly oil the crankshaft after cleaning and store it in a new clean garage bag and then wrapped in a large towel to cushion it. It should be ok.
Cheers,
Mike
02-06-2006, 01:24 PM
#12
Addict
Rennlist Member
Rennlist Member
Wow. Thanks for the pictures. Thanks for the explanation. I have rebuilt a couple engine myself but I just followed a Chilton's publication each time. I washed and flushed parts for no purpose other than removing the dirt. I enjoy following your thoughtful breakdown. What did the machine shop do to the pistons?
Last edited by Dudley; 02-06-2006 at 01:58 PM.
02-06-2006, 01:30 PM
#13
Three Wheelin'
Excellent post Mike!
As pcar964 wrote it:"Makes me want to take my engine apart and clean it... " But you look so well equipped! I'm not sure I could risk that.
I'm using Adobe 6.0 professional to take "pictures" of each of your post and comments, and compose a continuous document with them. Up to now it's a 106 pages and 16.8 Mo. When it's over, if you're interested I could try to find a place to make it available for download.
Cheers
02-06-2006, 09:40 PM
#14
Three Wheelin'
Originally Posted by Mike J
I am planning at the end of it all to put together a DVD wth the hundreds of pictures and offer it to other rennlisters.
 02-06-2006, 09:53 PM
#15
Race Car
Originally Posted by Mike J
I am planning at the end of it all to put together a DVD wth the hundreds of pictures and offer it to other rennlisters.
Put me in your list for the DVD. I'll buy one as well.