

Engine removal phase 1 (bumper)
 12-14-2004, 05:23 PM
#1
Three Wheelin'
Thread Starter
Hi all,
Today I started my project: engine removal and LWF + maintenance where required.
I'll try to do my best in taking pictures during the progress of that DIY job.
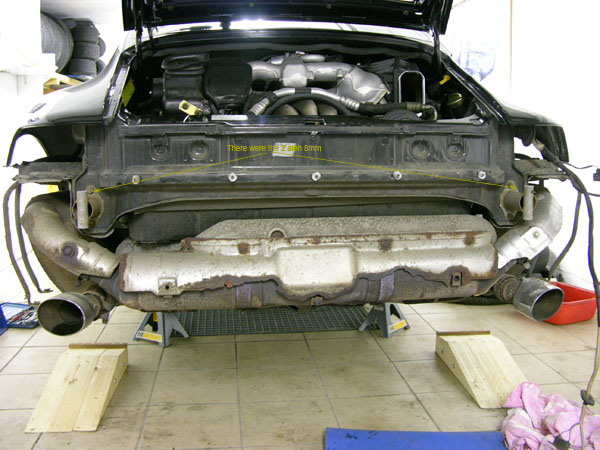
So to start, I removed the rear bumper in order to have a better clearance from the ground. This will be important when trying to pull the engine below the car.
The removal of the rear bumper is not a hard job, but if you don�t know where to look to find the screws and bolts that hold it in place, then it can take a certain time. The workshop manual is not very explicit about that job. But there is a nice drawing that helps.
Start by removing the 2 side markers (hold by a visible screw).
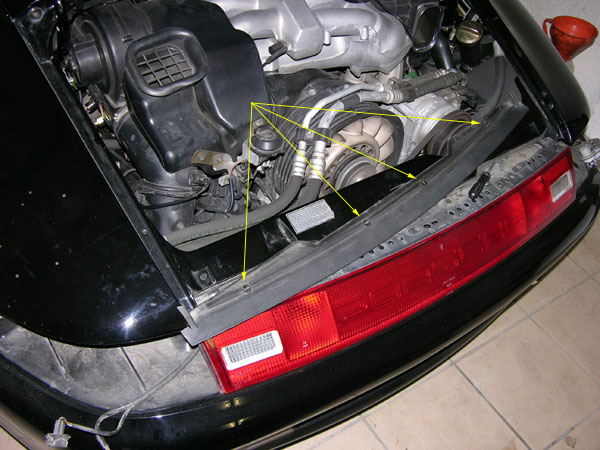
To remove de central reflector:
- remove the plastic cover (4 plastic screws) see pict. above
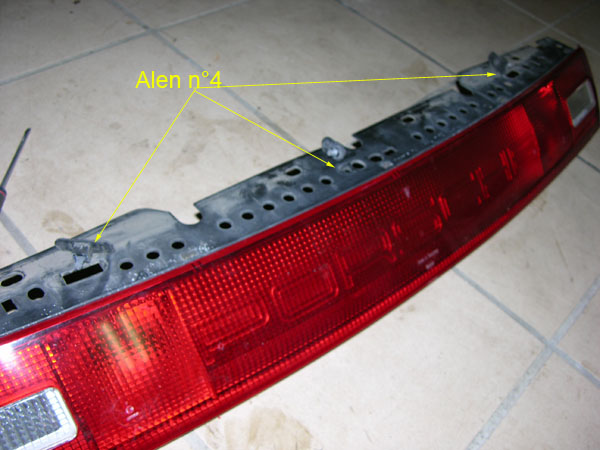
- then you have access to 3 alen screw (n�4) see pict below
Put the car on jacks and remove the rear wheels.
Remove the rear half of the wheel arch guards (4 screws each)
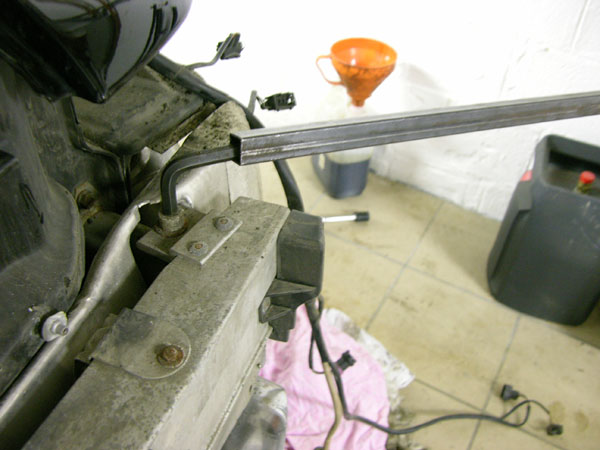
You have access to 3 hexagonal head screws (8mm) and 2 screws (bottom)
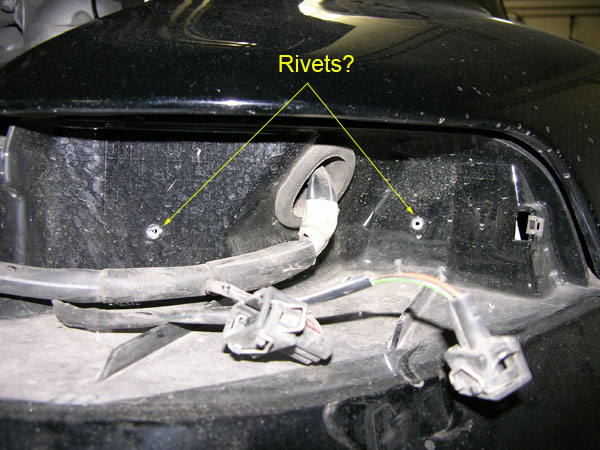
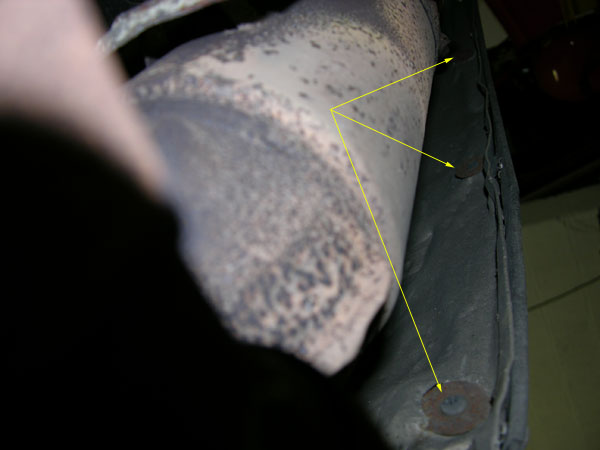
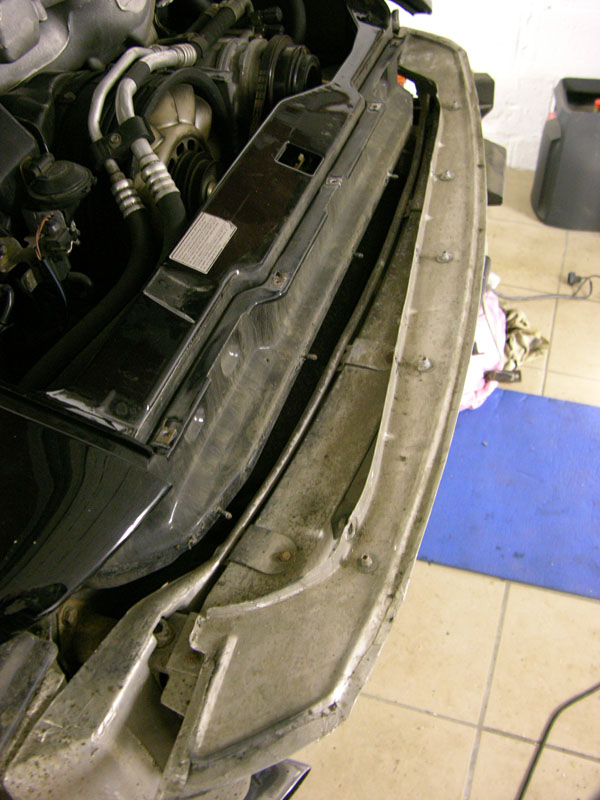
On my car, there were 2 rivets in each side marker location. Those rivets were holding a aluminum protection inside the bumper. I drilled them out. (EDITED BY TOGA: those rivets hold a heat protection which can be removed with the bumper. They don't have to be removed)
go under the bumper. You will have to remove 3 screws that holds the heat protection with the bumper cover.
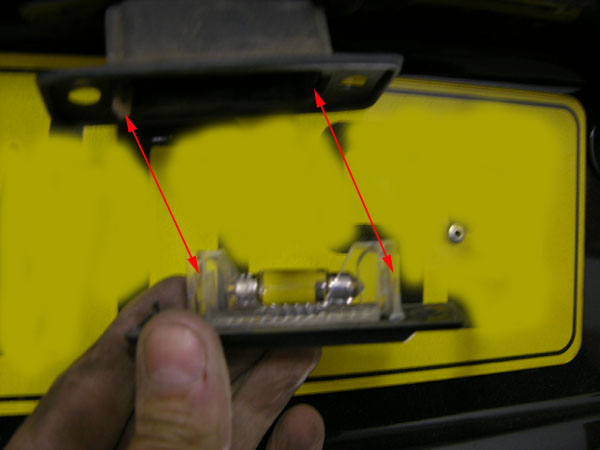
The last thing to remove is the registration plate lighting. 2 screws hold each lighting. Pull the light out. Disconnect the wires underthe rubber cover. The aim is to be able to push the rubber with the wires through the bumper cover to free the electrical line.
That line has also to be freed from a few clips on the bumper cover.
The bumper cover is free. Pull gently taking care not to scratch it. If it hard to pull, check at the markers location. That�s probably where the cover has a difficulty to make it�s way out.
Now you see the 2 aluminum shieldings in each markers location. I took them out.
Now to remove the bumper itself�
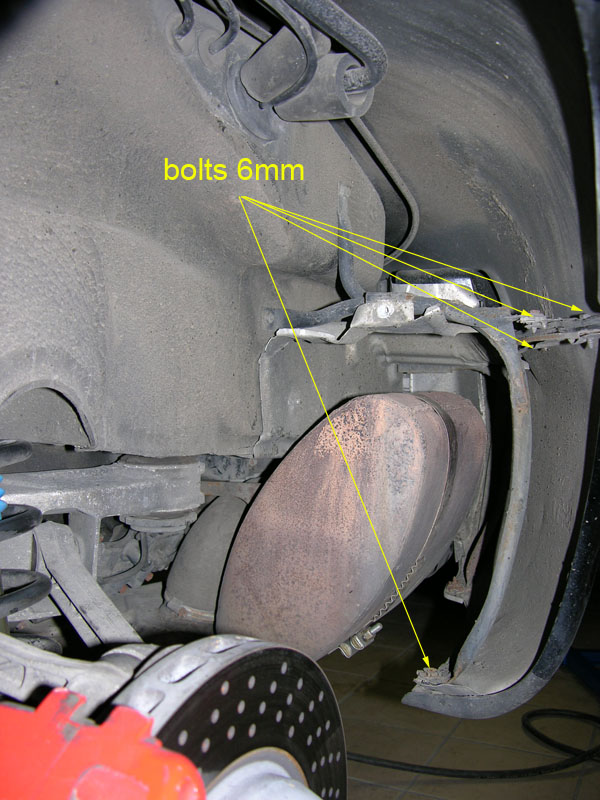
Remove 5 6mm bolts. Hey hold the alu shield.
Here is it removed with the screw lying on it.
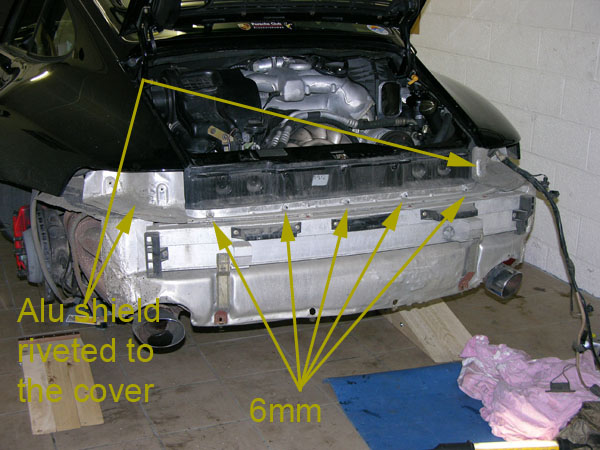
You now have access to the two alen bolts (8mm) which are the main bumper support.
Remove the bumper.
Mmmm may be a new heath shield will be required!
I think the number of pictures attached is limited, I will close this here, and start another thread with the following operations.
Of course any comments welcome!
go to engine removal phase 2
Today I started my project: engine removal and LWF + maintenance where required.
I'll try to do my best in taking pictures during the progress of that DIY job.
So to start, I removed the rear bumper in order to have a better clearance from the ground. This will be important when trying to pull the engine below the car.
The removal of the rear bumper is not a hard job, but if you don�t know where to look to find the screws and bolts that hold it in place, then it can take a certain time. The workshop manual is not very explicit about that job. But there is a nice drawing that helps.
Start by removing the 2 side markers (hold by a visible screw).
To remove de central reflector:
- remove the plastic cover (4 plastic screws) see pict. above
- then you have access to 3 alen screw (n�4) see pict below
Put the car on jacks and remove the rear wheels.
Remove the rear half of the wheel arch guards (4 screws each)
You have access to 3 hexagonal head screws (8mm) and 2 screws (bottom)
On my car, there were 2 rivets in each side marker location. Those rivets were holding a aluminum protection inside the bumper. I drilled them out. (EDITED BY TOGA: those rivets hold a heat protection which can be removed with the bumper. They don't have to be removed)
go under the bumper. You will have to remove 3 screws that holds the heat protection with the bumper cover.
The last thing to remove is the registration plate lighting. 2 screws hold each lighting. Pull the light out. Disconnect the wires underthe rubber cover. The aim is to be able to push the rubber with the wires through the bumper cover to free the electrical line.
That line has also to be freed from a few clips on the bumper cover.
The bumper cover is free. Pull gently taking care not to scratch it. If it hard to pull, check at the markers location. That�s probably where the cover has a difficulty to make it�s way out.
Now you see the 2 aluminum shieldings in each markers location. I took them out.
Now to remove the bumper itself�
Remove 5 6mm bolts. Hey hold the alu shield.
Here is it removed with the screw lying on it.
You now have access to the two alen bolts (8mm) which are the main bumper support.
Remove the bumper.
Mmmm may be a new heath shield will be required!
I think the number of pictures attached is limited, I will close this here, and start another thread with the following operations.
Of course any comments welcome!
go to engine removal phase 2
Last edited by Toga; 12-30-2006 at 01:03 PM.
 12-14-2004, 05:38 PM
#3
Addict
Rennlist Member
Rennlist Member

JP-
Oooo... the journey begins!
Thanks for the very detailed steps and photos you provide. Very well done.
I can hardly wait for the saga to continue!
Mahalo for the time and effort to provide us with your lessons learned.
Oooo... the journey begins!
Thanks for the very detailed steps and photos you provide. Very well done.
I can hardly wait for the saga to continue!
Mahalo for the time and effort to provide us with your lessons learned.
12-14-2004, 05:39 PM
#4
Rennlist Member
I'll probably never drop my engine, but I'm going to enjoy seeing how all the parts fit together. Keep the great pictures and commentary coming, and good luck!
 .
. 12-14-2004, 05:55 PM
#7
Three Wheelin'
Thread Starter
Originally Posted by mike cap
JP,
Thanks for the photos. I wondered what was involved in pulling the rear bumper off. Keep the story coming.
Ciao.
Thanks for the photos. I wondered what was involved in pulling the rear bumper off. Keep the story coming.
Ciao.
Cheers
Trending Topics
12-14-2004, 05:58 PM
#8
Rennlist Member
JP,
I like you're thought process. It looks like it makes it easier to access the engine under-side and you don't have to worry about crunching or scratching the bumper cover. Good idea. I printed off your photos to keep in case I want to pull mine off some time.
I like you're thought process. It looks like it makes it easier to access the engine under-side and you don't have to worry about crunching or scratching the bumper cover. Good idea. I printed off your photos to keep in case I want to pull mine off some time.
12-14-2004, 06:04 PM
#9
Addict
Rennlist Member
Rennlist Member
I did it with the bumper on and it was no problem, though we had to get creative with wood blocks and jack stands to get it high enough for the top of the engine to clear the bumper. Have you removed the engine yet? How did you undo that extra transmission bolt that mounts to the two long rods in the tunnel? We had a bear of time with that one.
12-14-2004, 06:09 PM
#10
Three Wheelin'
Thread Starter
Originally Posted by Rick Lee
I did it with the bumper on and it was no problem, though we had to get creative with wood blocks and jack stands to get it high enough for the top of the engine to clear the bumper. Have you removed the engine yet? How did you undo that extra transmission bolt that mounts to the two long rods in the tunnel? We had a bear of time with that one.
I don't know yet about which bolt you talking. Mmmh some suprise to come then!
Well I relly have to quit!
good gents See you tomorow
12-15-2004, 03:15 AM
#13
Three Wheelin'
Thread Starter
Originally Posted by graham_mitchell
Just one question - was it really necessary to drill out the rivets?
And it's not a big job to put new rivets before replacing the cover.
Thanks to all for your support!
12-15-2004, 06:25 AM
#14
Three Wheelin'
Thread Starter
Originally Posted by Rick Lee
How did you undo that extra transmission bolt that mounts to the two long rods in the tunnel? We had a bear of time with that one.
 I though about the problem and if I think, the only way to make that shaft turn is to make one of the front wheel turn! Am I right on that point?
In that case not to risk the car on one wheel, I'll put it back with the rear on the ground before lifting one front wheel, disconnect the shaft and then put the rear back in the air! The workshop manual talk about that operation when the car is raised, so I assume this is the only way to proceed.
Thanks for comments on that particular point.
Last edited by Toga; 12-15-2004 at 08:13 AM.