When you click on links to various merchants on this site and make a purchase, this can result in this site earning a commission. Affiliate programs and affiliations include, but are not limited to, the eBay Partner Network.
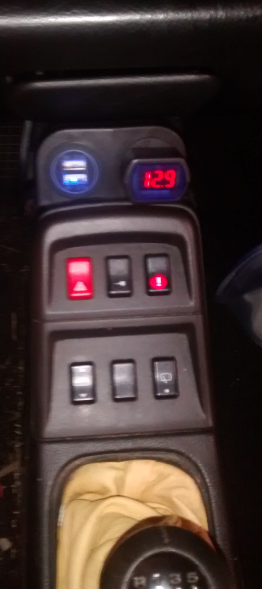
Need some advice on adding cigarette lighter style accessory outlet
Has anyone added a 2nd 12V circular cigarette style power outlet to their dash? How did it work out?
If I open up the unused switch position, see above picture, is there enough room 2"~3" behind it to insert a power socket?
Andy
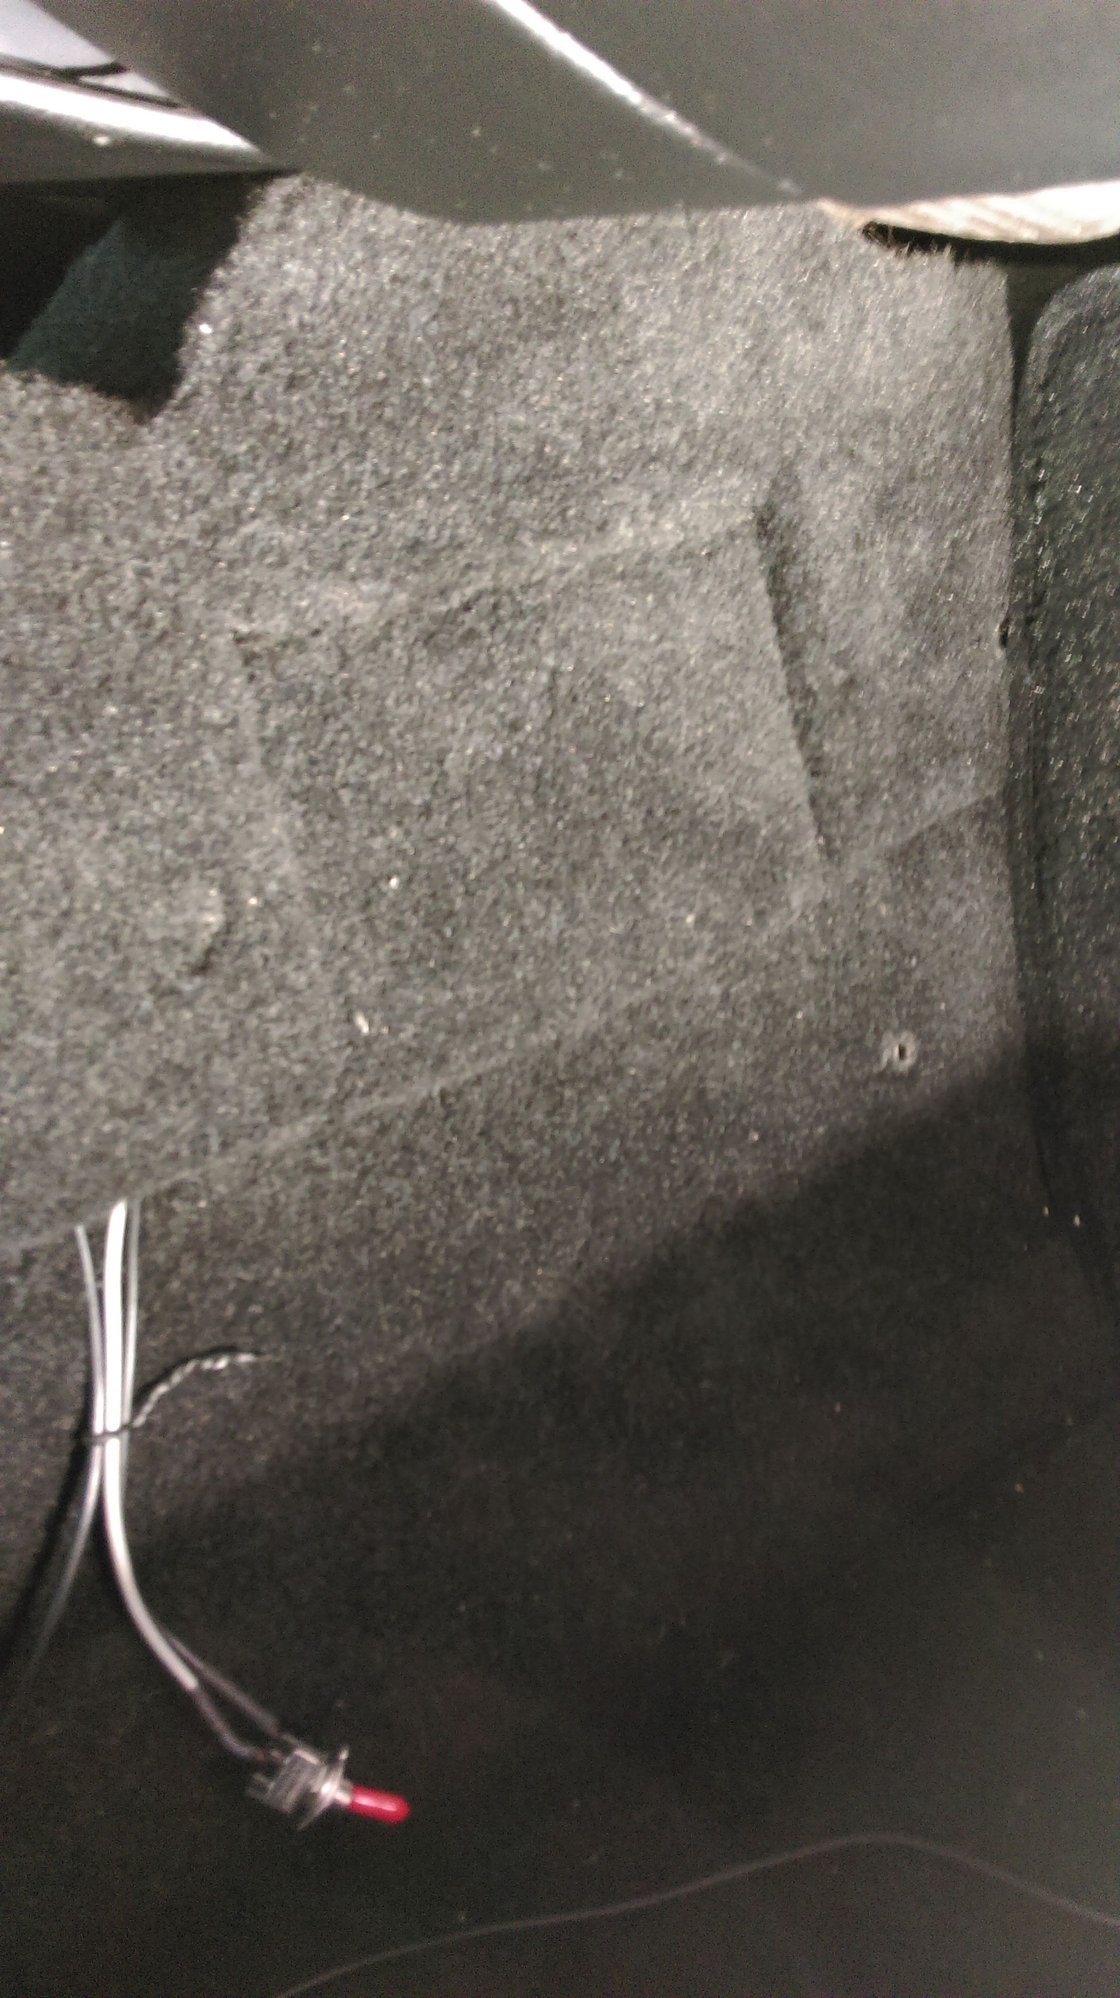
Not exactly what you want - I added an extra outlet down in the passenger footwell.
Here is the original carpet covered panel in the footwell:
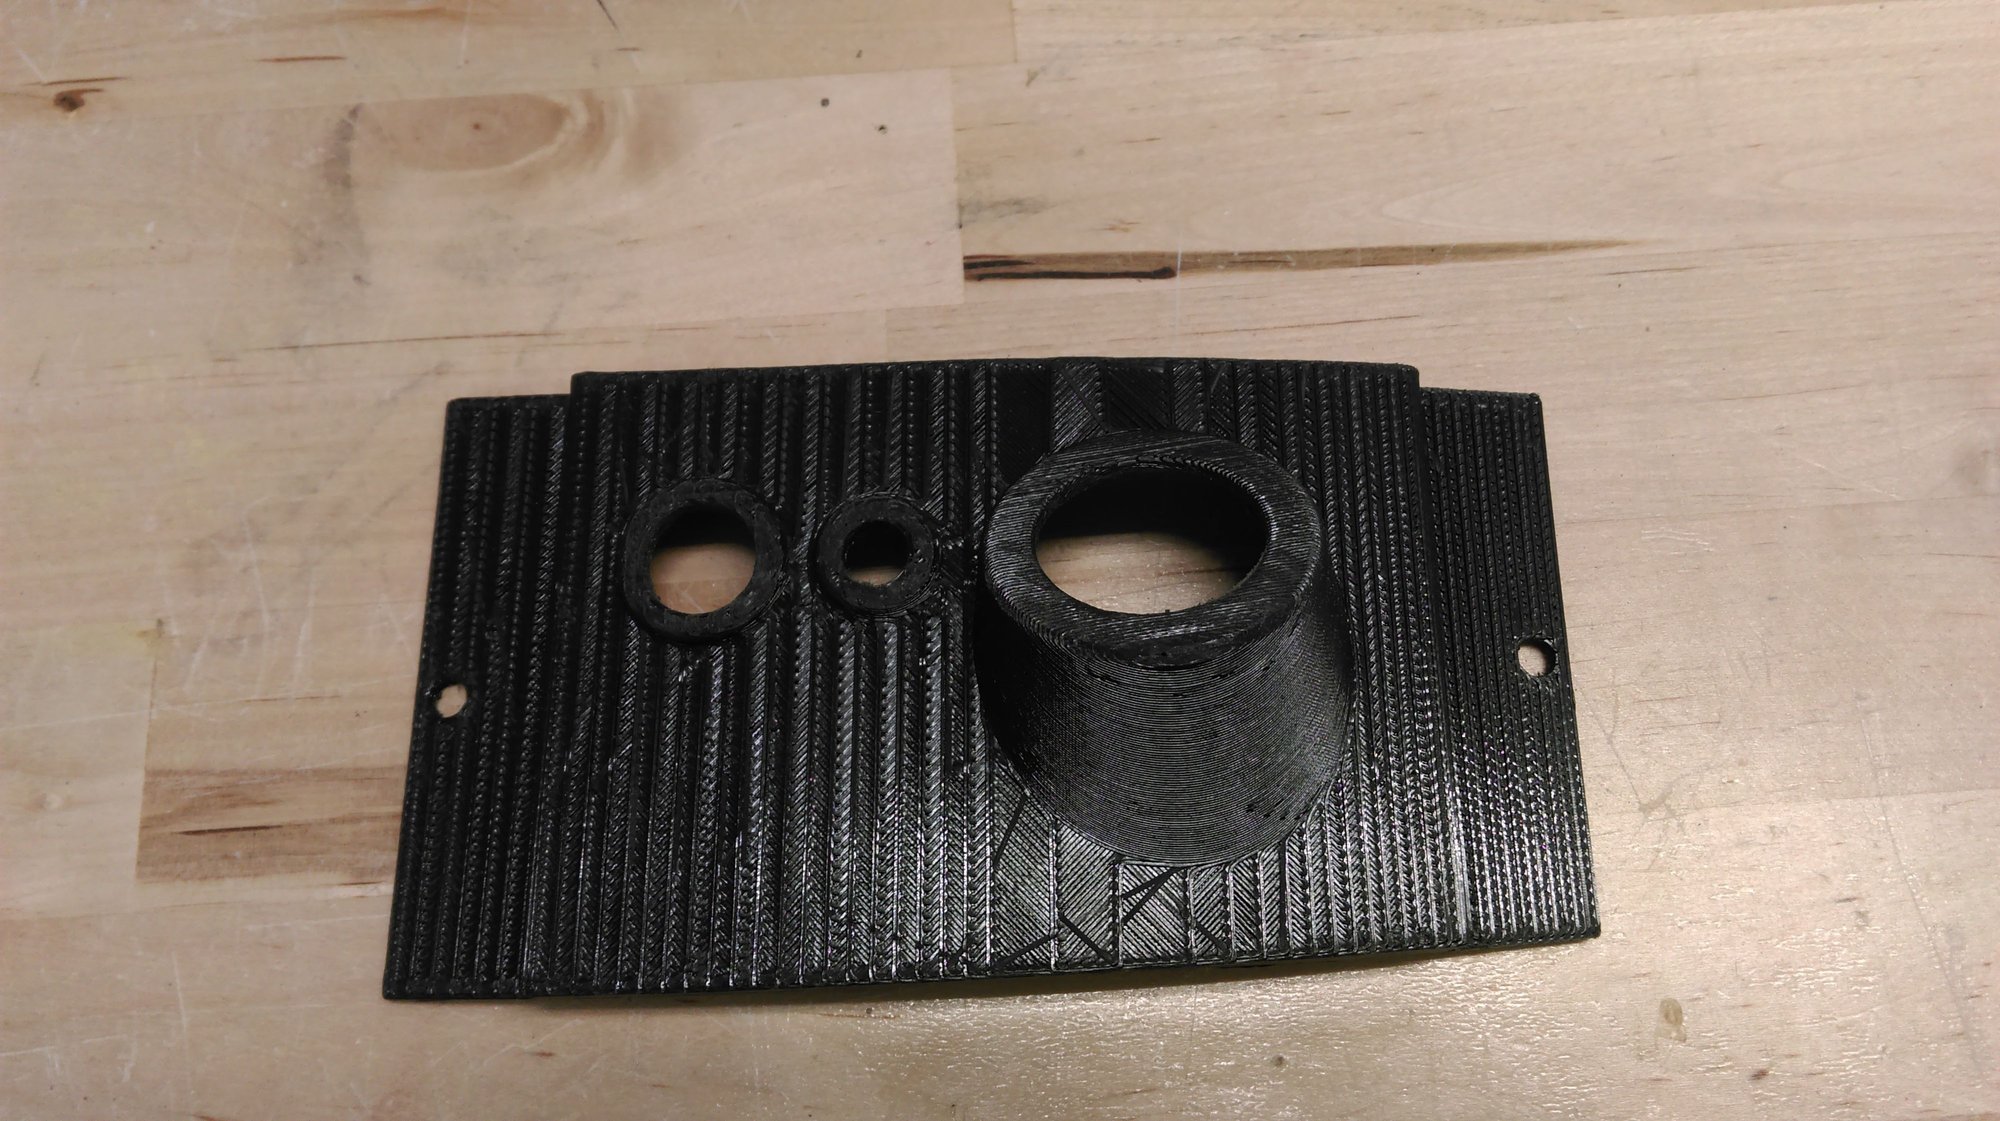
Here is the 3D print part - I used this for my FM modulator (power on and headphone socket) plus a 12v Cig Outlet. The 3D file could be modified to add/remove features:
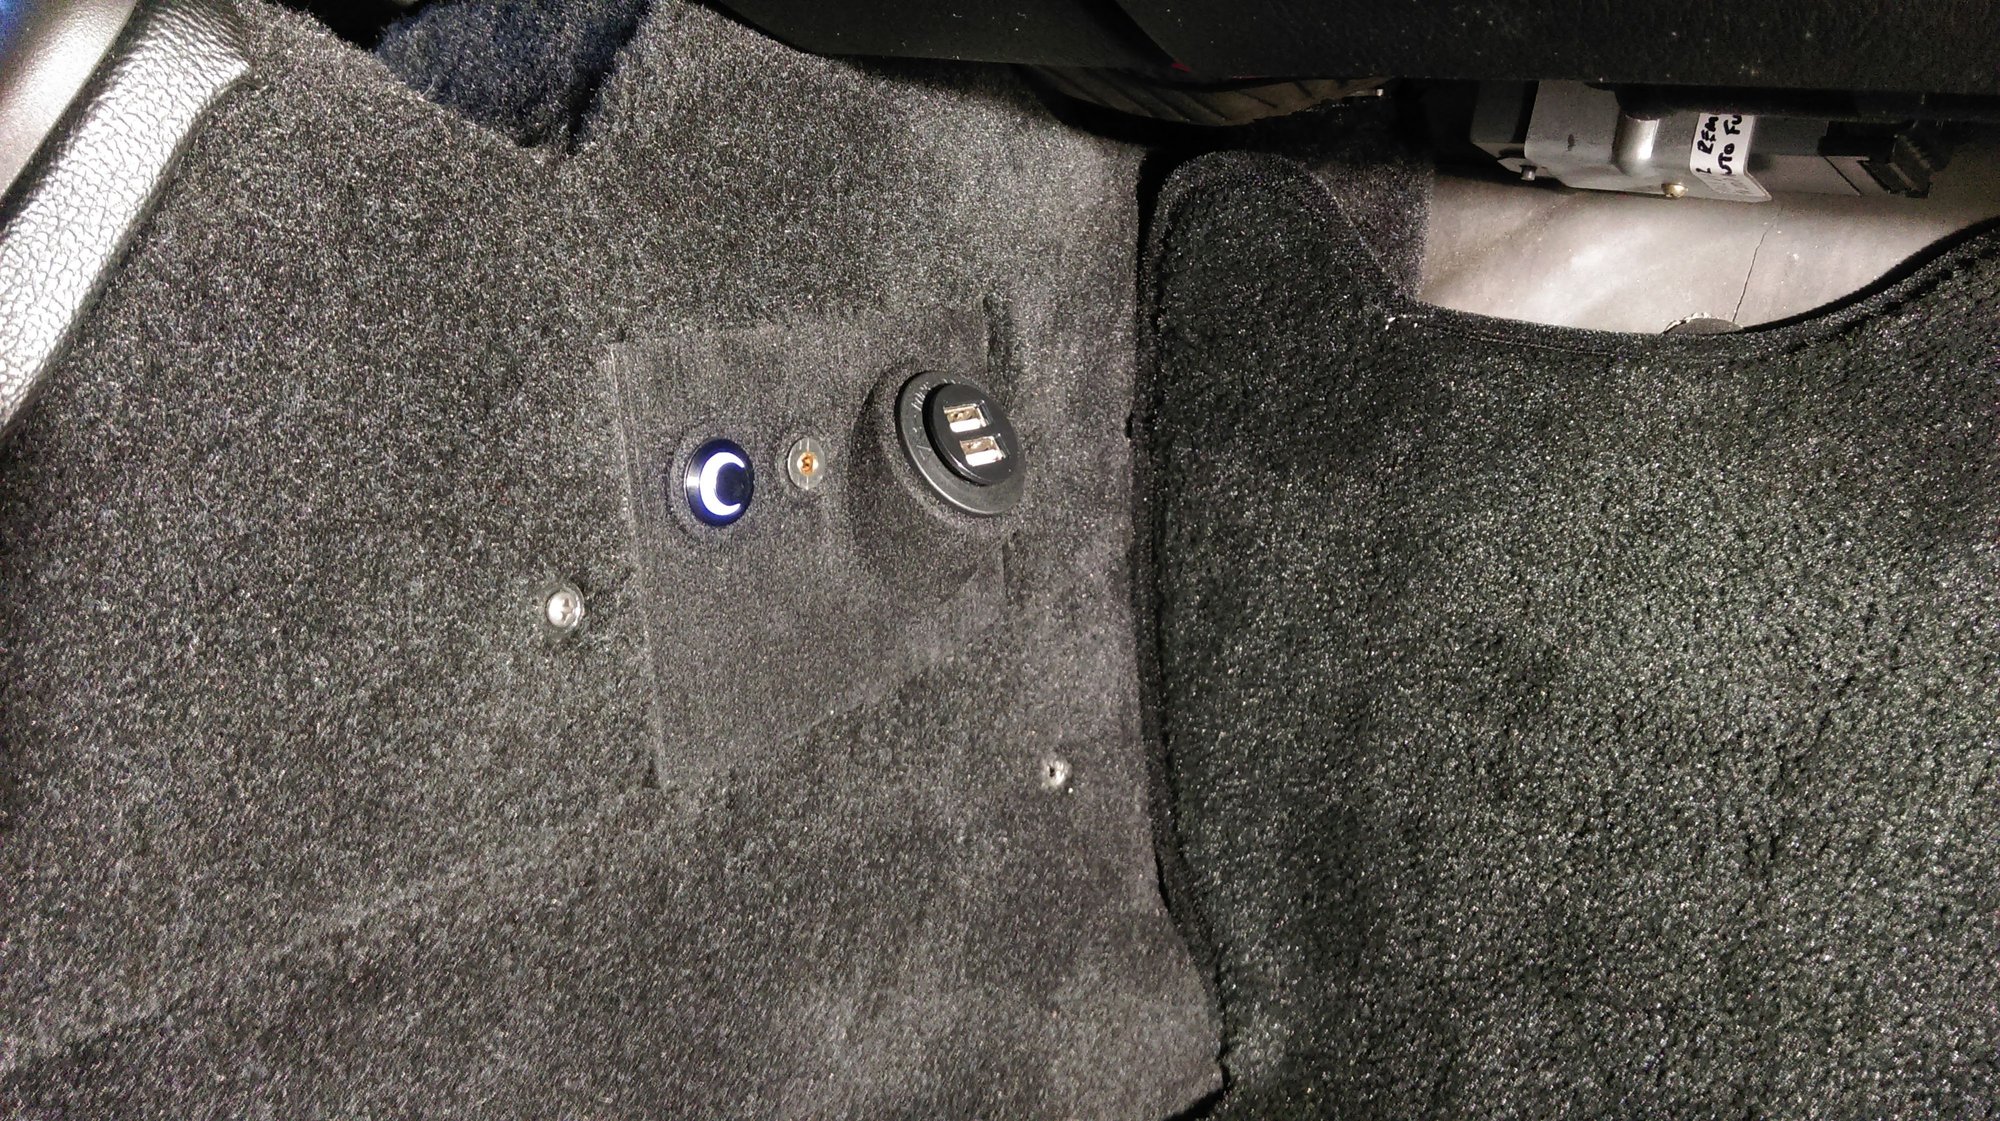
I then flocked it. It looks better in the flesh, it is tricky to photo - it blends almost 100% with the black carpet:
If you are interested, I can get the files uploaded. Let me know.
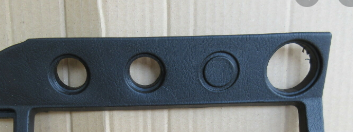
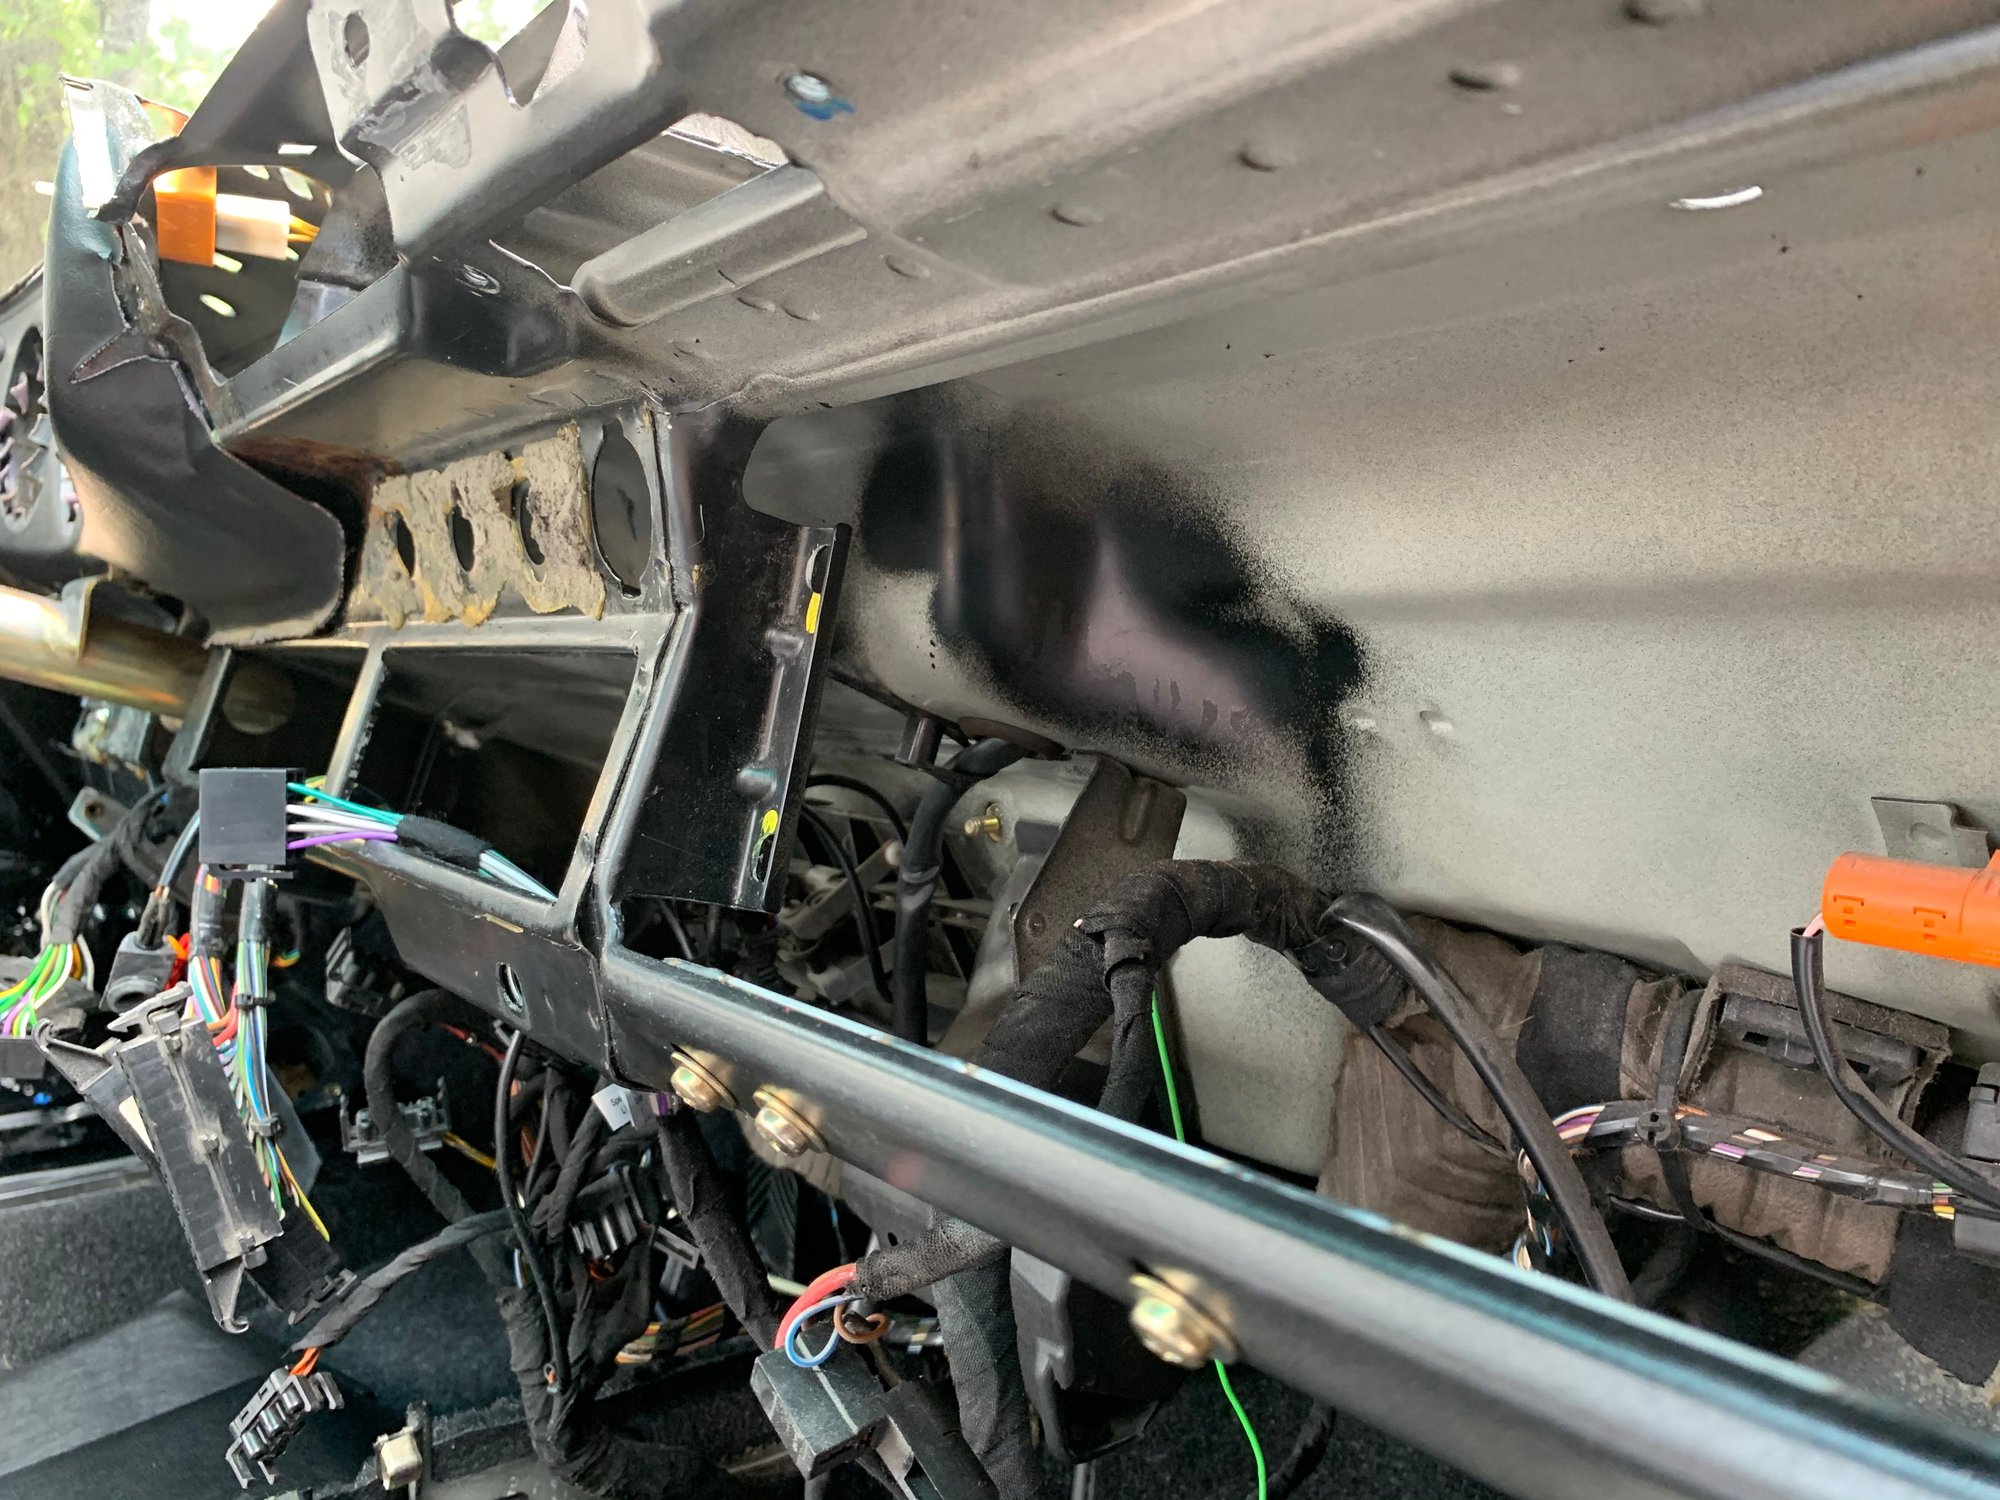
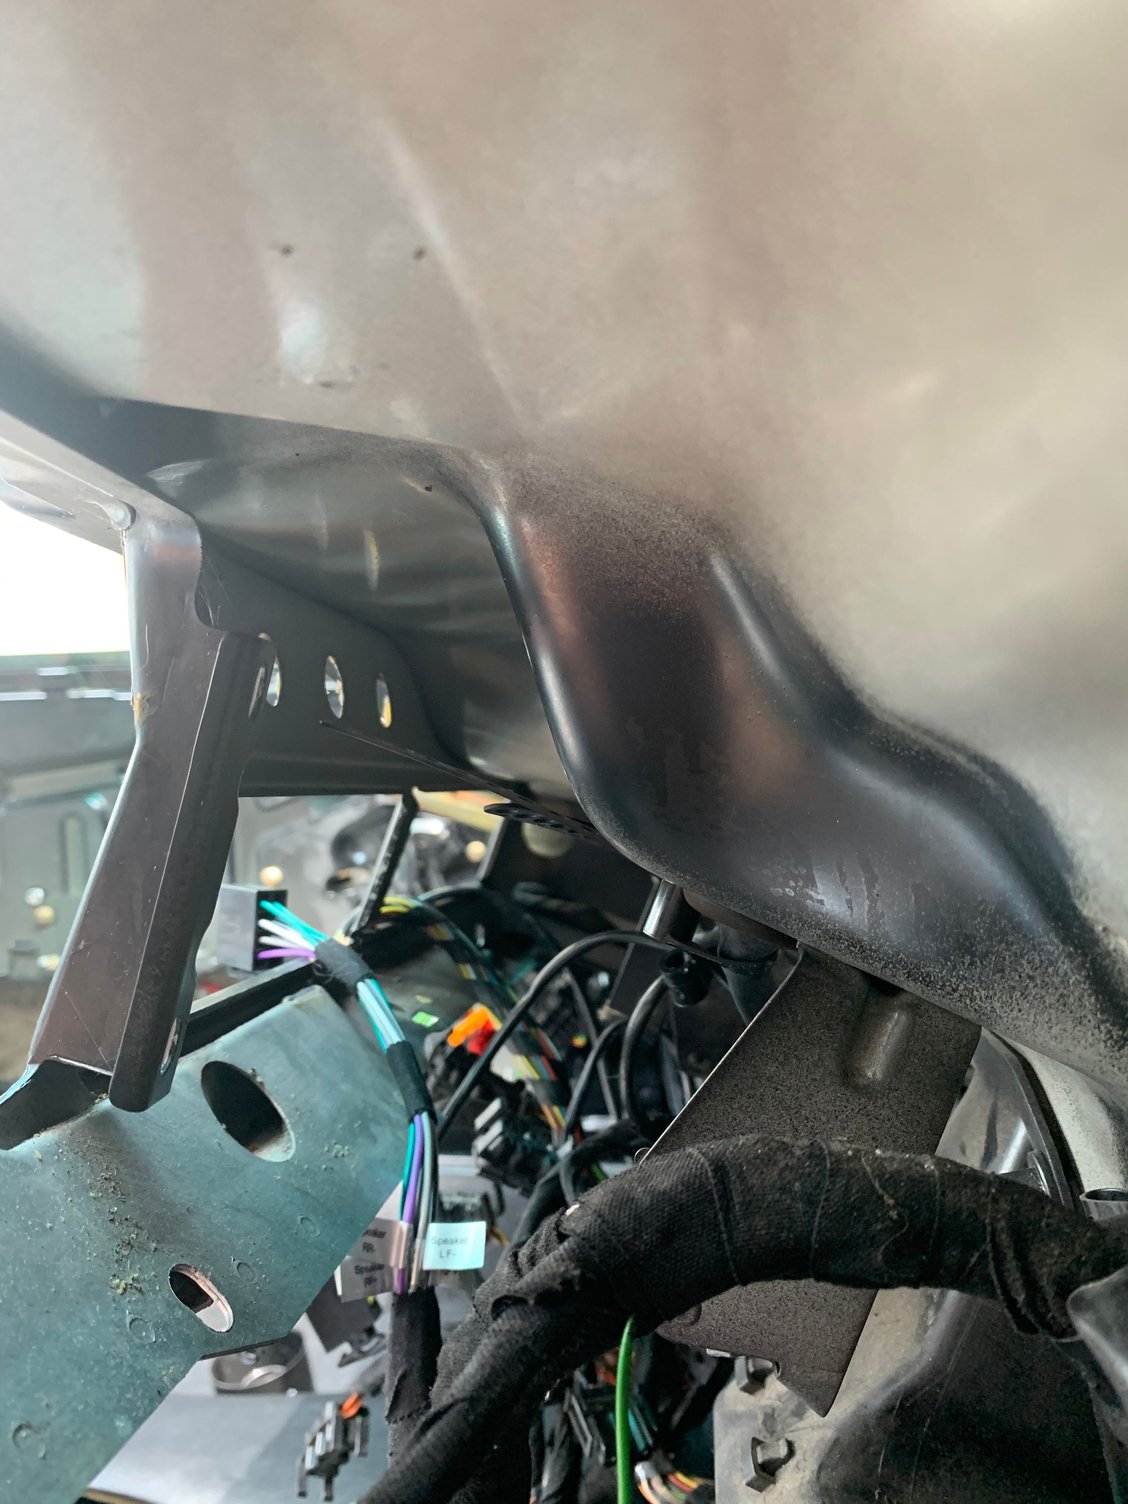
Yep, plenty of room. Here you go, courtesy of my presently gutted interior.
Hi BoomBoomThump,
Thanks for the picture, it helps a lot!
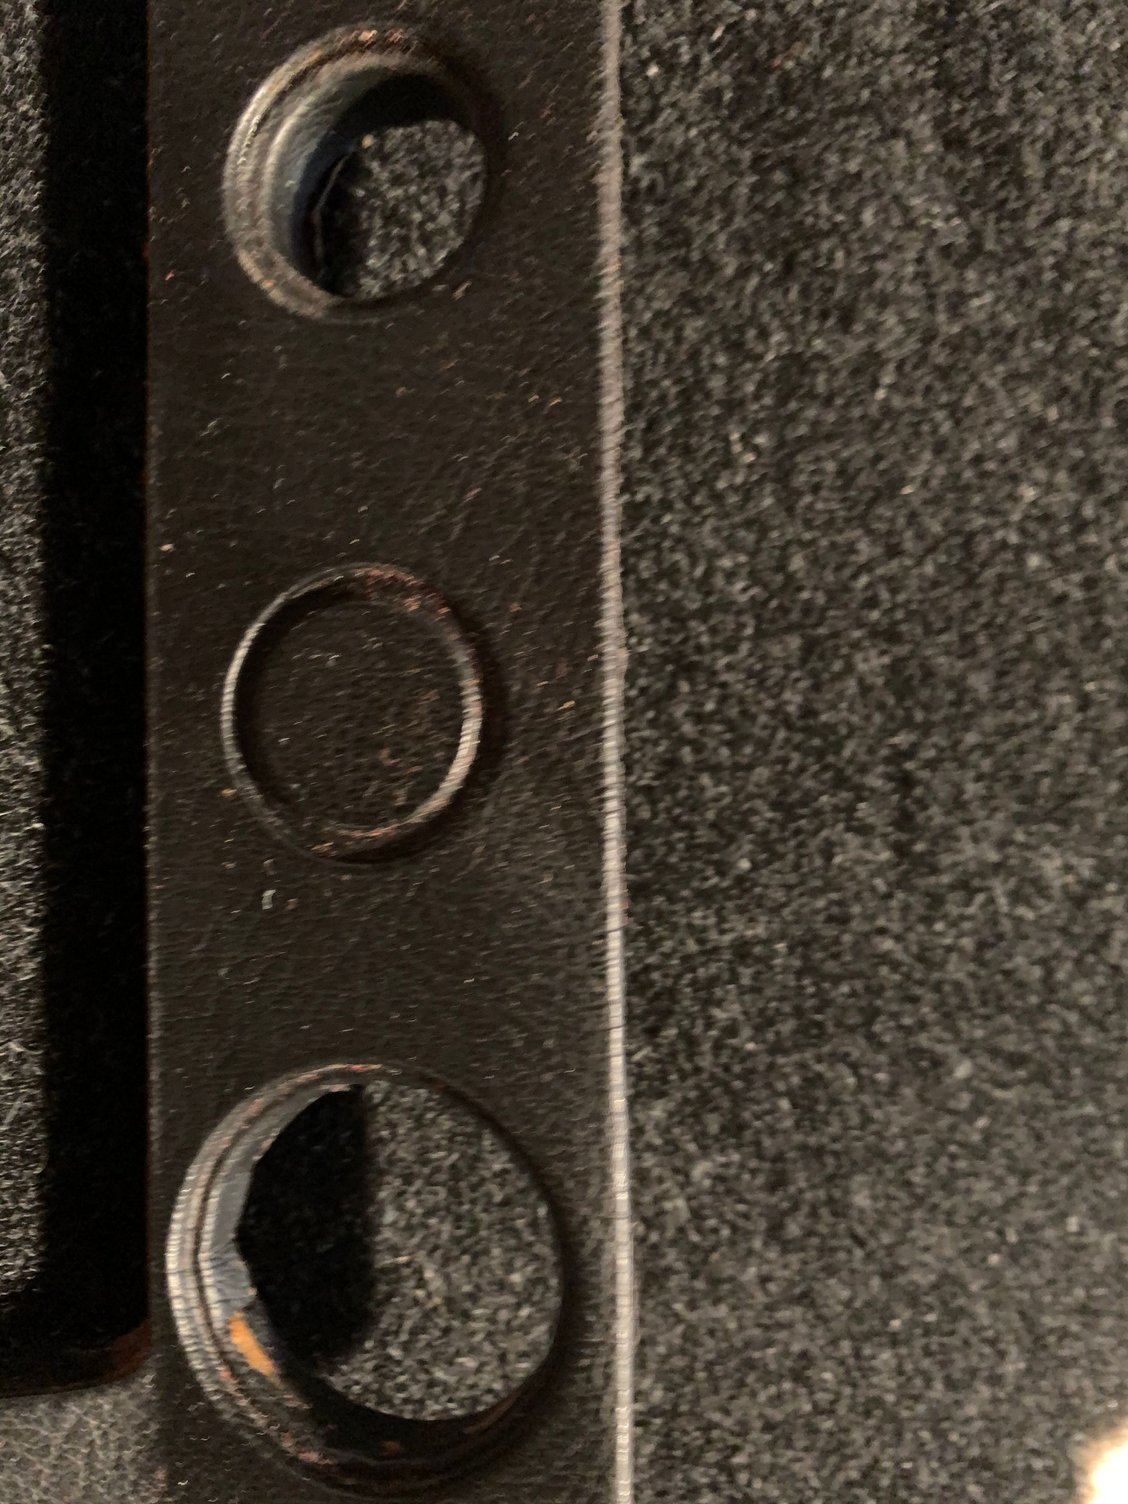
From your picture, it looks like behind the plastic facia are holes in steel the switches mount through.
Looks like I will need to ream out the steel to get the diameter big enough for an additional socket where the extra switch position is.
Do I have this right?
Andy
The vinyl covering has about 1/4" of foam material behind it. Same materials used on the dash pad. Very easy to slice through to remove that material. Sidenote: if you have factory leather wrap over these trim pieces ("S" models?) the leather is actually glued down onto the vinyl material, so there is two layers. When I say vinyl here, perhaps I should be saying "plastic" as you did. It is more like a thin plastic skin.
Behind that lies the steel dashboard sheet metal as shown in my photo. Yes, you would need to enlarge the hole there (stepped Uni-bit?) as the hole would presently be smaller, as intended for the other switches that normally sit next to the cigarette lighter.
Are you planning to fit a "stock" cigarette lighter there or were you going to use something aftermarket? Just wondering about the size difference.
Are you planning to fit a "stock" cigarette lighter there or were you going to use something aftermarket? Just wondering about the size difference.
Great question. I'll keep watching this thread to see what Andy does. The idea of just replacing the stock with a current standard one would be awesome. My resto 964 has the current size and it's so nice not having to modify the plugs to fit the socket.
Not exactly what you want - I added an extra outlet down in the passenger footwell.
Here is the original carpet covered panel in the footwell:
Here is the 3D print part - I used this for my FM modulator (power on and headphone socket) plus a 12v Cig Outlet. The 3D file could be modified to add/remove features:
I then flocked it. It looks better in the flesh, it is tricky to photo - it blends almost 100% with the black carpet:
If you are interested, I can get the files uploaded. Let me know.
Cheers.
Mine is almost the same. I used a socket from a Boxster in the existing removable panel.Except it's on the driver's side and makes it difficult to use a large plug but Iphone or dash cam is fine. The angled position would work better, nice job
Yes I will add the slightly smaller new design that modern accessories fit in.
I will also switch it off the ignition using a Bosch single pull double throw relay so the ignition switch doesn't see the current load
Ok, I decided to go with installing a switched accessory socket in the un-used switch position above the radio. I ordered the tools and supplies to get the job done, the show begins on Wednesday! 1-1/8" hole saw to cut a smooth hole in the plastic facia and maybe the steel if it seems to stay centered w/o the pilot hole. I will have to remove the radio first and will run the shop vacuum while drilling so any metal chips formed while cutting don't get into the radio or other components under the dash. The new accessory socket barrel is exactly 1-1/8" in diameter, who would think! 90-degree connectors for the spades on the back of the accessory socket. I will probably crimp & solder these spade connectors as in a high vibration setting I just lack the comfort that crimping alone will hold the wires to the spade over the long haul. I ordered a graduated sheet metal drill/reamer as BoomBoomThump suggested above to cut the steel if the hole saw above seems to wander once it is through the plastic, Have to use care not to oversize the plastic facia while drilling/ reaming the sheet metal. I want to avoid having to remove the plastic facia to enlargen the sheet metal hole as that will involve a lot more disassembly of the dash switches to do. In the end, I may have to do the last bit of reaming with a small metal file to avoid oversizing the plastic facia with this reamer/drill. 14 AWG copper filament core primary wire to handle up to 10 amp load to the socket may see. I like the twin wire as it makes for a clean install. A fuse socket and fuse to protect the circuit. I find these inline fuses very handy for all sorts of automotive updates. I used one under each front seat when I added heat to the front seats while recovering them with new leather a while back. A Bosh style single pull double throw style relay with socket & pigtail wires so the ignition switch powers the relay primary coil but doesn't carry the load of the actual power socket. I can either pick up power for the socket next door on the existing cigarette lighter socket or run a wire to the 40 Amp power amp feed located under the passenger seat. The new socket as a doner part from this assembly by removing the mounting bracket. The socket has an all-plastic barrel and is threaded along the entire barrel, it comes with a plastic lock nut to hold it in place. I may use the barrel sheath that came with this assembly that covers the spade connectors so the spades are not exposed under the dash.
1) I would definitely not try to use that first drill bit on the vinyl/plastic facia. It is literally, paper thin with just 1/4" of foam behind it. An exatco knife/razor is the way to go. The drill bit will just catch and shred everything potentially ruining the entire piece.
2) The stepped uni-bit is the way to go once you cut the trim by hand. The only issue I see is inevitable next "step" in the bit starting to enlarge the trim as your target "step" diameter is enlarging the sheet metal. Hopefully the insert has a decent side flange to overlap the fascia. The best solution would be to remove the fascia but that is a royal chore.
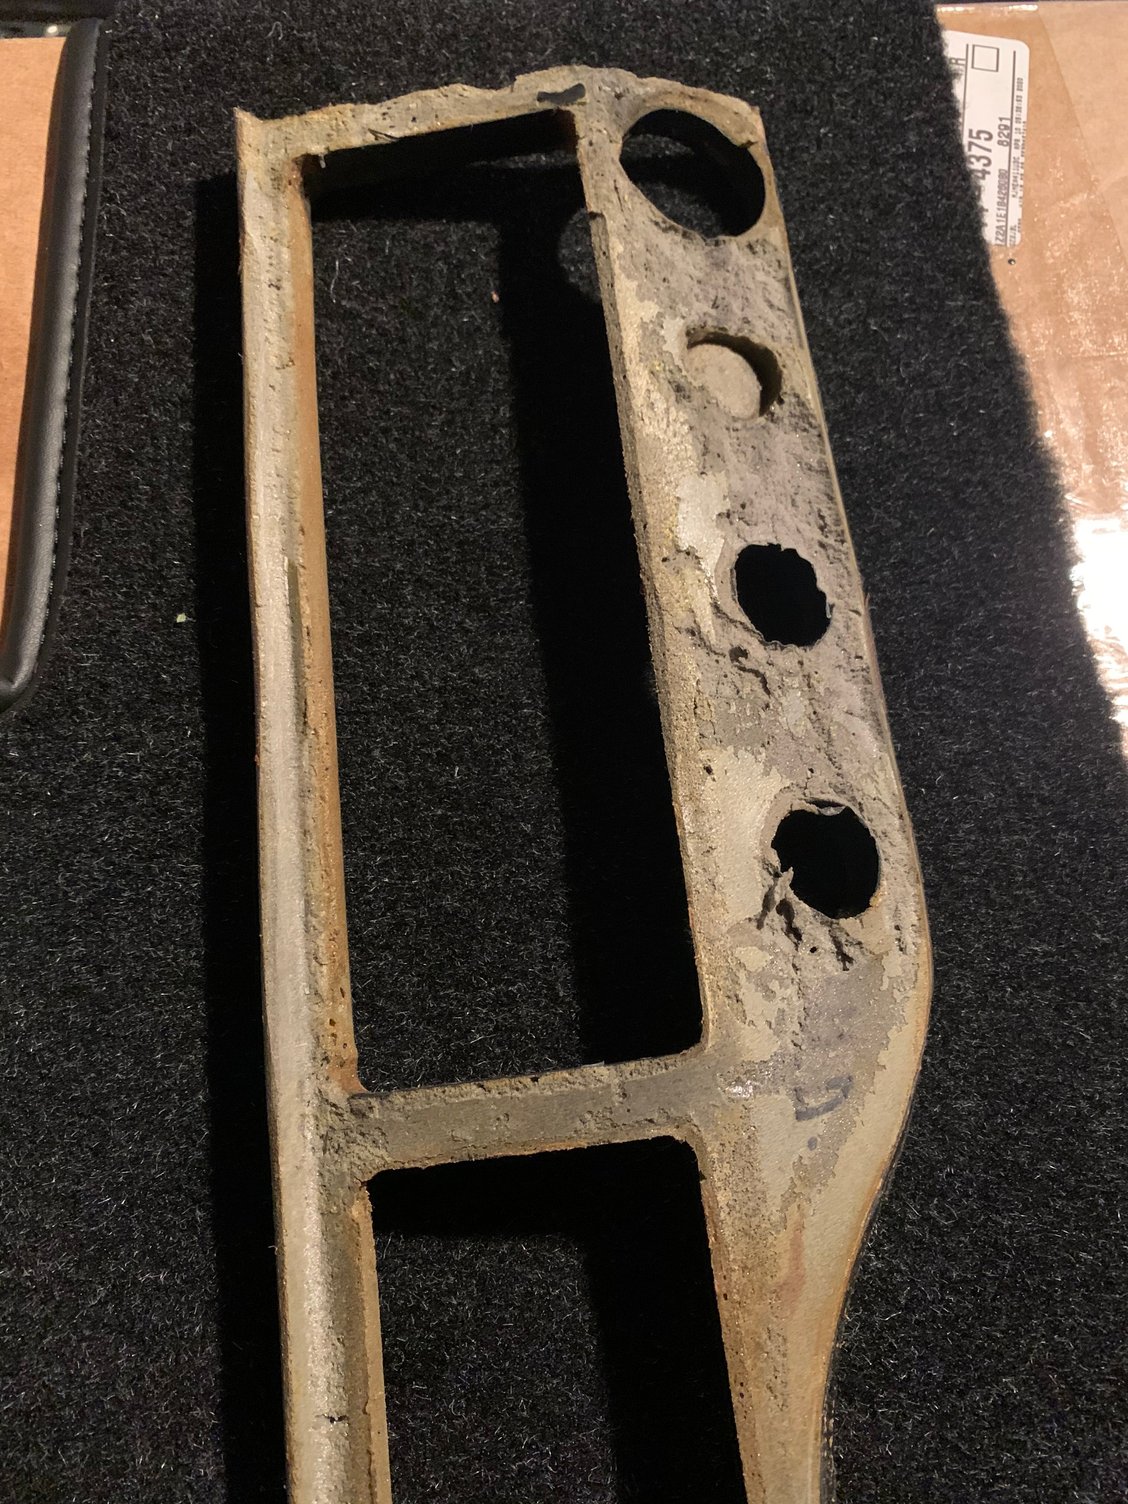
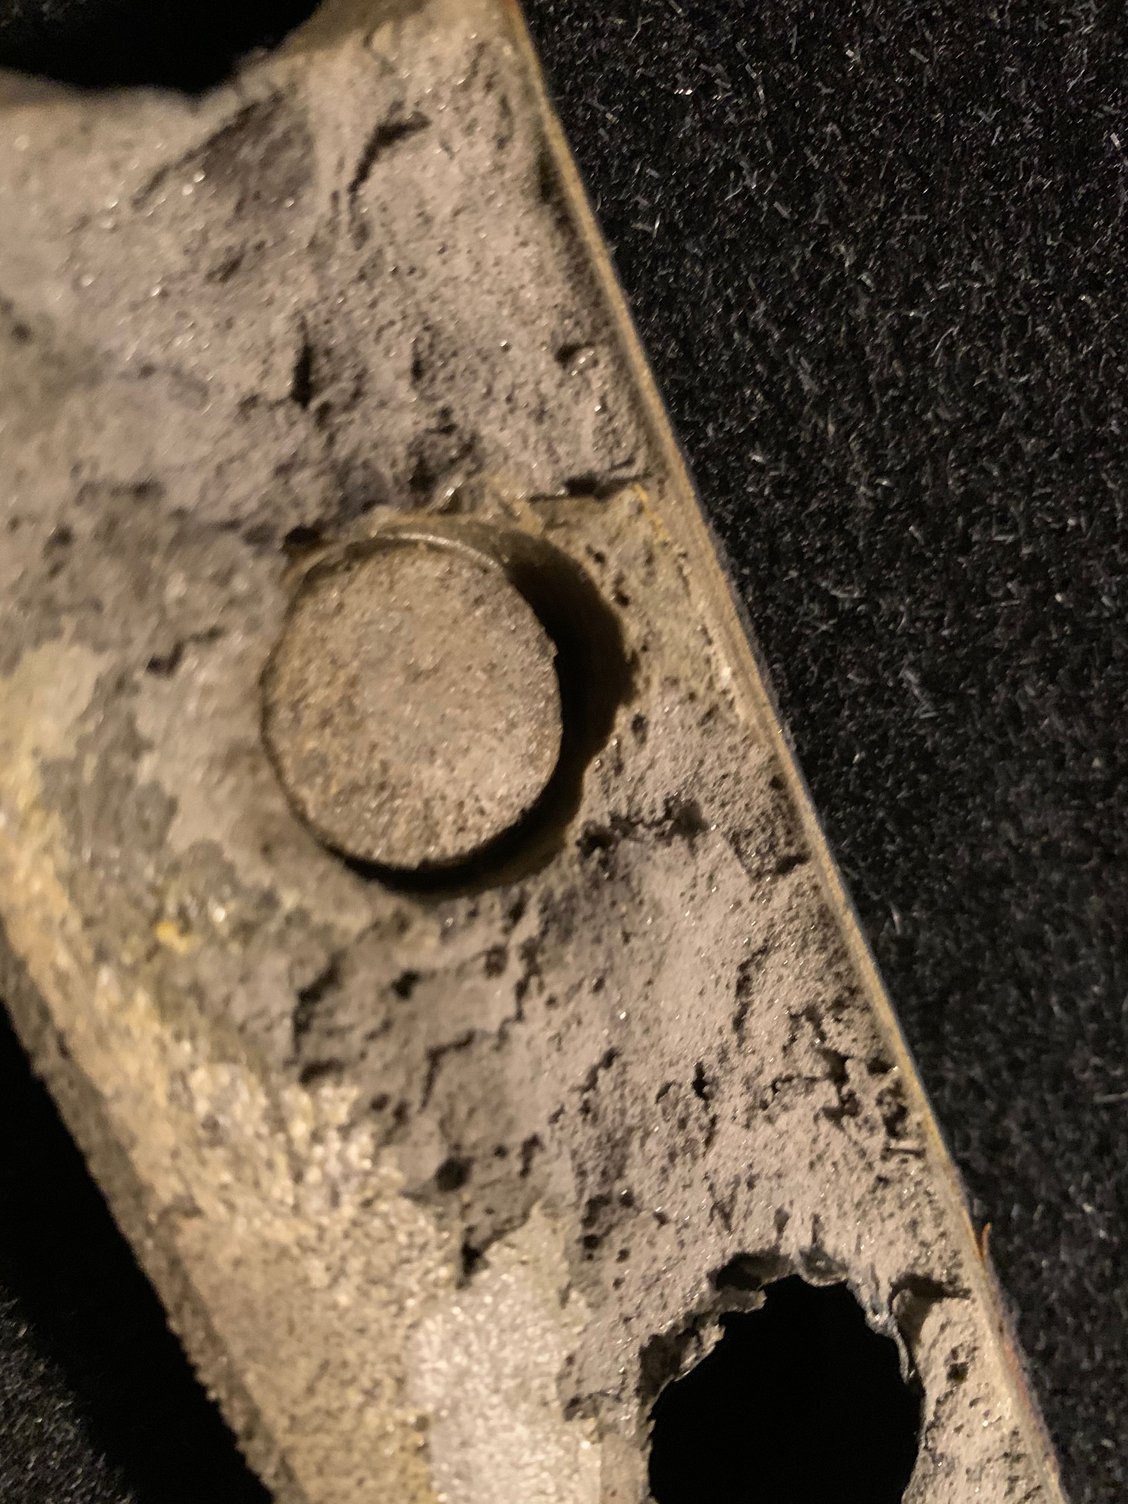
A few more pics if it helps. You can see that a bit of the foam tore off, stuck to the mega epoxy on the sheet metal. I left it in place and will simply use glue to re-key the foam.
Yes you will.Behind that lies the steel dashboard sheet metal as shown in my photo. .
Hi BoomBoomThump,
It seems the metal switch plate backing steel may be the firewall, I am looking at a picture on Pelican of an '80 vintage 911 and the 993 may be laid out differently than the older 911. Your 993 picture seems to show the hole open inside the cabin and I can get behind it through the radio hole?
Can I reach through the radio hole?
Just wondering because once I drill the hole I'm committed and if I can't get back there without major disassembly in the frunk I may have to rethink my approach.
Any guidance you may have is greatly appreciated.
Andy
It's not the firewall. It is the sheet metal that makes up the structure of the dash. You need to pull the stereo headunit out and then you can access that whole area I posted in my first photo.

 05-27-2020, 09:32 AM