When you click on links to various merchants on this site and make a purchase, this can result in this site earning a commission. Affiliate programs and affiliations include, but are not limited to, the eBay Partner Network.
Hi Andy - interesting project. Thanks for taking us along!
This may be what you need. Not cheap but better than a ruined pad. And maybe you can rent it out to those of us who want to follow.
Ron EDIT: Looks like they also have it at HD. More expensive but in stock if you're in a hurry. At least at my store. For some reason, 7/8 and 1 1/8 holes are popular. Must be standard sizes for electrical conduit fittings (and cigarette lighters https://www.homedepot.com/p/Milwauke...9209/204312646
Hi Jrmdir,
Outstanding!
Exactly what I need. Ordered it, yes a ruined facia would be a very unwelcome unintended consequence of trying to make a 1-1/4" reamer/drill work!
When it's is all done I will write up a how-to as it seems adding an accessory port is something that would have wide appeal among 964/993 owners if it can be done without making a mess out of the dash.
I have no problem circulating the magical 1-1/8" bit around the 993 community if the install turns out to be straight forward in nature.
Andy
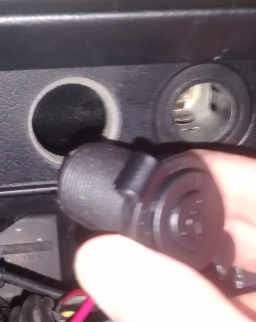
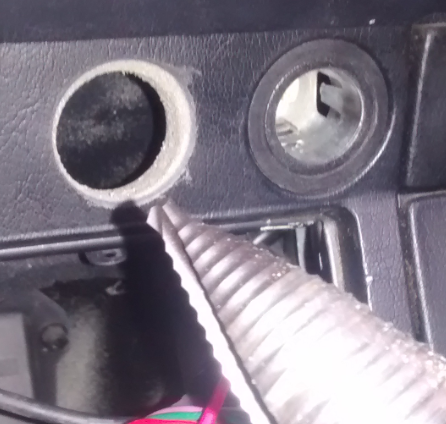
I removed the radio and its mounting frame, the hardest part, who would think?.
I drilled a small pilot hole in the center of the facia ring of the unused switch position.
I then slowly, using a variable speed drill, just drilled through the pilot hole with the stepped drill/reamer that had a maximum diameter of 1-1/8"
I continued drilling slowly until the entire 1-1/8" bit passed all the way through the steel sheet metal
I ran a vacuum cleaner hose below the drilling that captured all the debris during drilling.
The result was very clean with no special attention to avoid damaging the facia other than drilling slowly.
Once the bit engages the steel hole it was not perfectly centered behind the circle on the facia. I just kept on drilling letting the drill center itself in the steel hole. Not a problem it all went very smoothly.
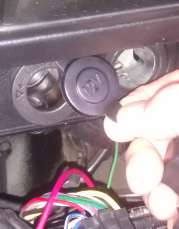
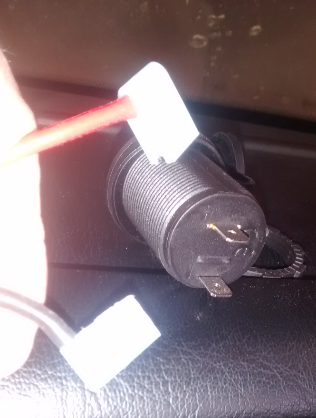
I picked up the switched wire from a pin on the ignition switch that goes hot when the key is turned.
The relay is powered from this wire.
It looked difficult to pick up the existing cigarette lighter hot wire so I picked up the constant hot wire under the passenger seat. used by the power amp.
I use the ground point under the seat for the negative for both the relay coil and the socket.
I don't like using crimp connectors as I feel they can loosen up and the wire may dislodge especially in an amp carrying circuit. so;
I soldered all the wire splices and soldered the crimp connectors for reliability.
The most important part of the job is to use a stepped drill/reamer where its absolute maximum diameter is 1-1/8" exactly the size of the new socket's barrel and not a larger drill where 1-1/8" is just one of the drill's intermediate size steps. This is key in not over reaming the facia as the drill goes further in to drill the sheet metal behind it..
I give this job a 3 or 4 on a 1 to 10 scale, a one being replacing a tail light bulb and a ten being replacing the steering rack. A good beginner DIY project!
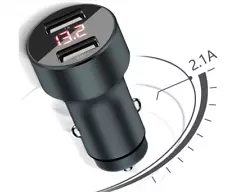
I can now just leave a nice-looking LED voltmeter/usb outlet in this new socket and it will shut off when I remove the ignition key, how cool is that!
Tomorrow is tie-wrap day to hide the wiring.
Nice one Andy, glad you realised your idea This thread has some good reference details as well, thanks.
Just curious, why was pulling the hot from the orig cig socket (which is just couple inches away) harder than from under the seat?
Cheers
why was pulling the hot from the orig cig socket (which is just couple inches away) harder than from under the seat?
Cheers
Good question. My thoughts:
Just seeing the back of the existing cigarette lighter much less tapping into its wire was a problem. It is very tight behind it.
I use a charger through the original lighter outlet as it isn't switched and is designed for relatively high current loads because it powered a cigarette lighter heating element and I didn't want to inadvertently compromise its current carrying capacity by messing with its pigtail wires.
The power under the passenger seat is a 40 amp line that I added years ago with the power amp install and is very accessible and is a short wire run to get to it.
So all this added up to me not using the power in the dash. No reason why others shouldn't use power from the other original socket.
Andy

 06-01-2020, 04:53 PM
 https://www.homedepot.com/p/Milwauke...9209/204312646
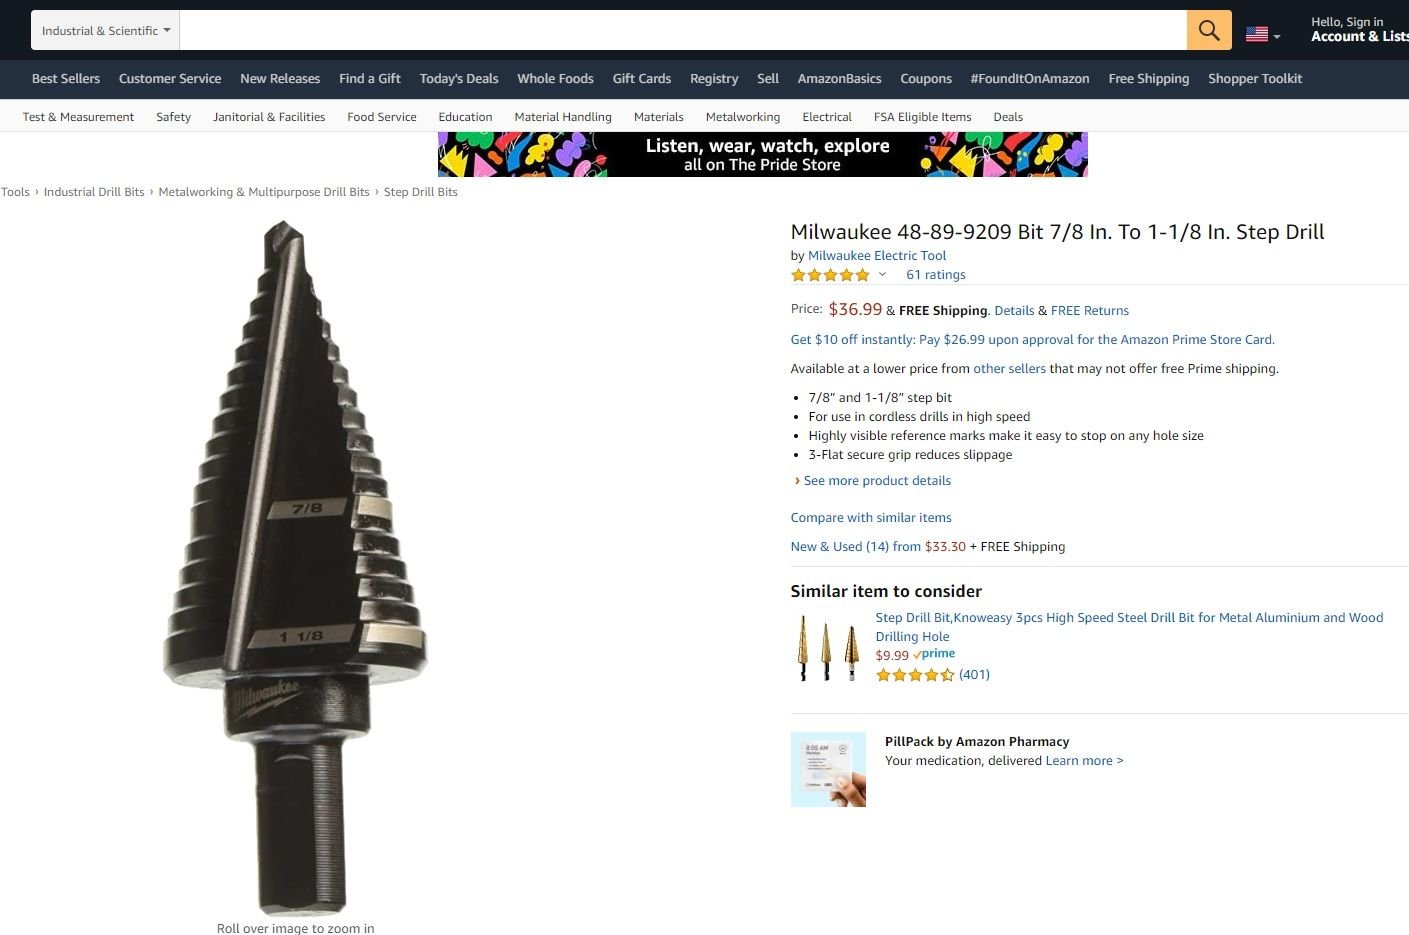


 This thread has some good reference details as well, thanks.