When you click on links to various merchants on this site and make a purchase, this can result in this site earning a commission. Affiliate programs and affiliations include, but are not limited to, the eBay Partner Network.
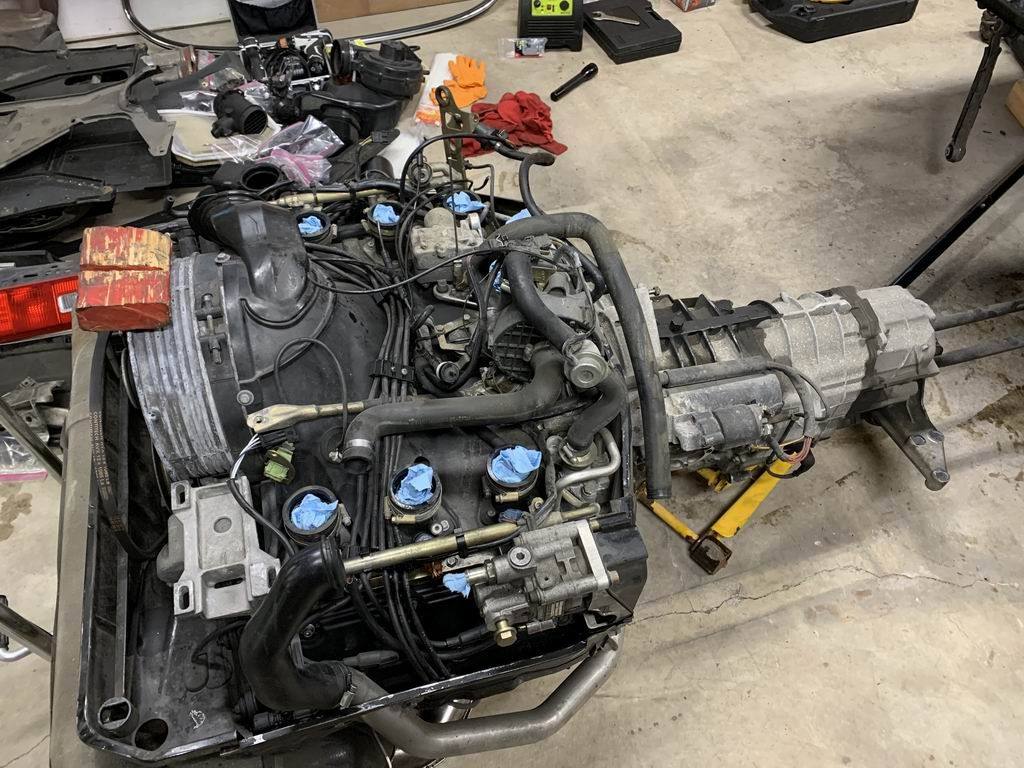
Reaching out to the collective wisdom to help figure out my next steps here. After replacing the clutch, pressure plate, TO bearing, flywheel, RMS, starter, clutch slave, guide tube, release fork, pivot shaft and all seals & needle bearings during an engine out refresh job, I put it all back together, bleed, then depress the clutch pedal and it drops maybe �� then hits an end stop. More force than usual and it still won�t move, it�s hit something and won�t give.
I remove the slave and the outer boot has popped out and the crenellated spring washer falls on the ground. The piston is still in the cylinder. Button it all up again and re-mount slave taking extra care to ensure the piston rod mates the release fork cup, bleed and test. Same thing hits some hard stop. Apply excessive pressure to clutch pedal and something goes thunk, pedal drops and it�s stuck again. Remove clutch slave again and everything looks normal.
My thinking now moves to the release fork and pivot shaft. I can just get a finger behind it and pull it forward. It was stuck somewhere but I was able to break it free with one finger and now it flaps back and forth with no resistance and clacks against the pressure plate at rear. Movement is maybe an inch I�d say, but not much more. Seems to be very loose but only moving in one plane, around the pivot.
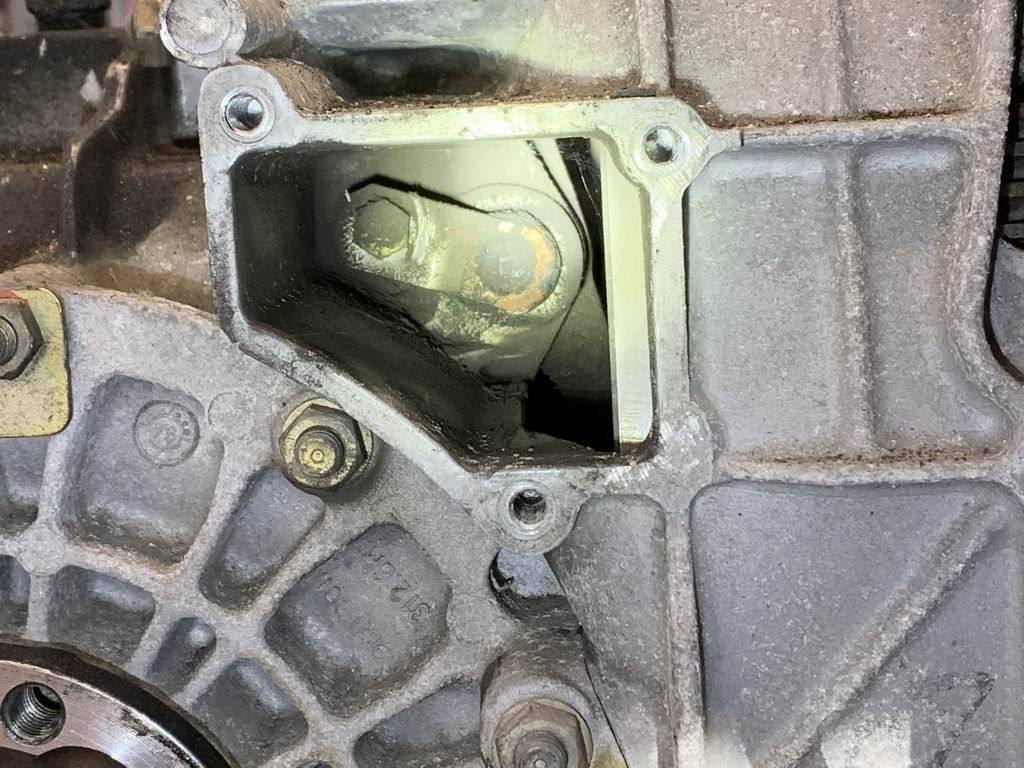
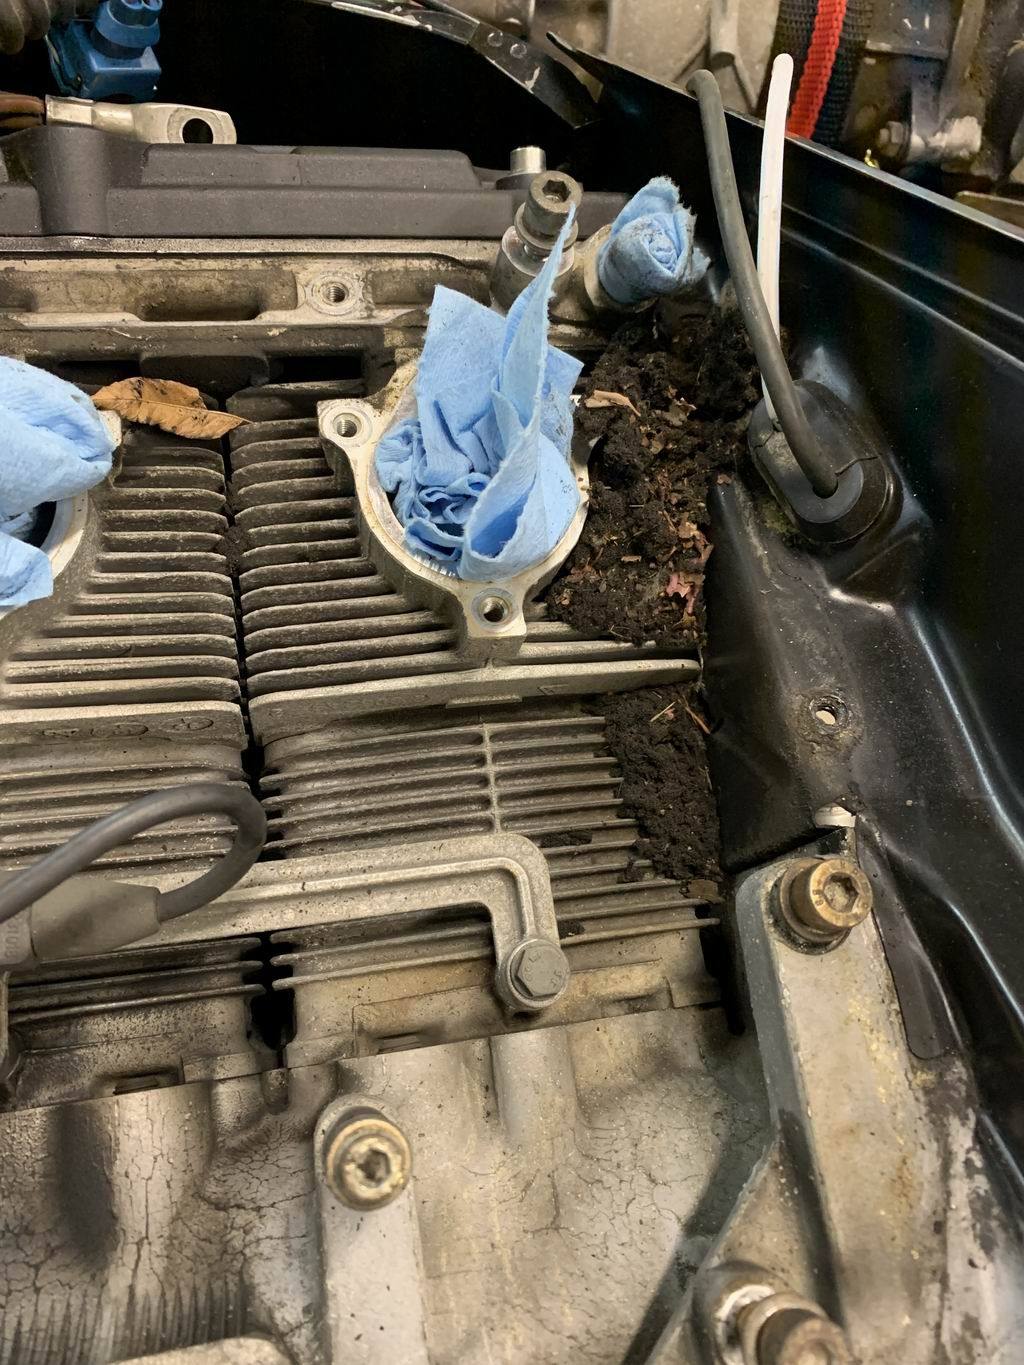
I remember when I was inserting the pivot shaft, it didn�t seem to seat in the far needle bearing. There was some sort of spring pressure to force it to insert, so much so that the little retaining bracket bent as I bolted it in. Prior to assembly, I noted that the far needle bearing had what looked like a leather pad on the inside of the housing.. I assumed this was some preload or oil pad and that it would recess allowing the pivot into the roller bearing. I have a nasty feeling this is wrong; Was that pad a protective cover to be removed before assembly? Wish I had taken a picture of that. Only picture I took was of the pivot shaft before disassembly showing the retaining bracket I was talking about.
At this point I�ve accepted that I need to drop the engine/tranny again to be able to get to whatever is broke or assembled wrong but I�m going to do some research before jumping back in. Mybe there�s something that can be done with drivetrain in situ.
Certainly getting a schooling on this one but enjoy learning more to get her back on the road.
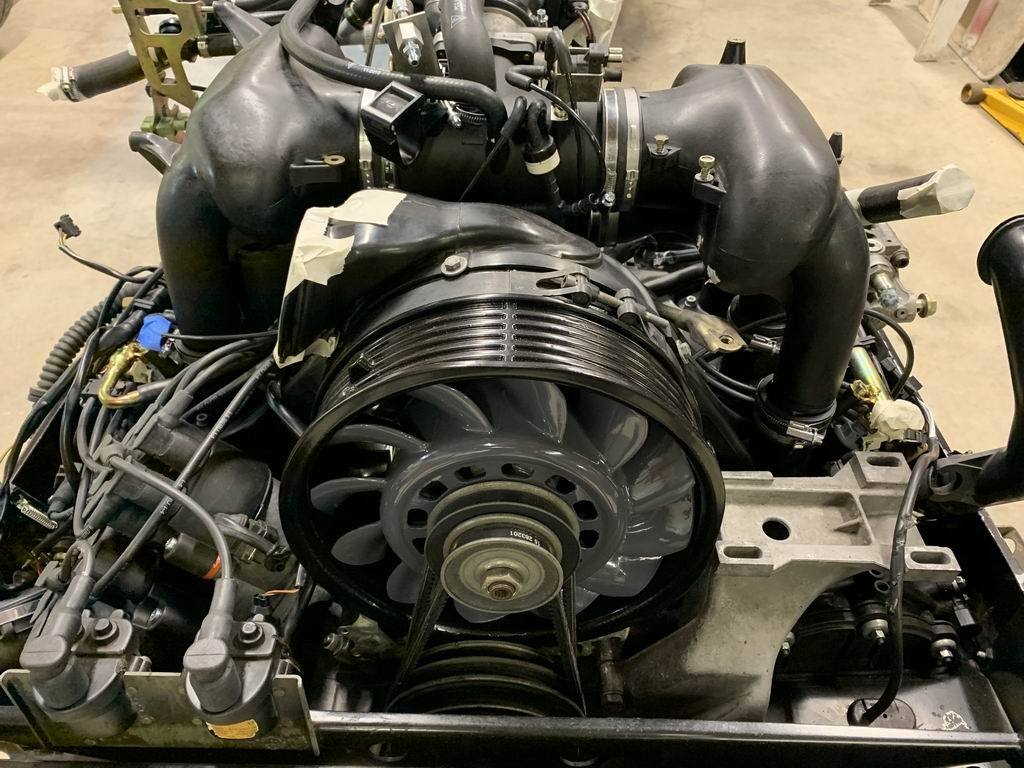
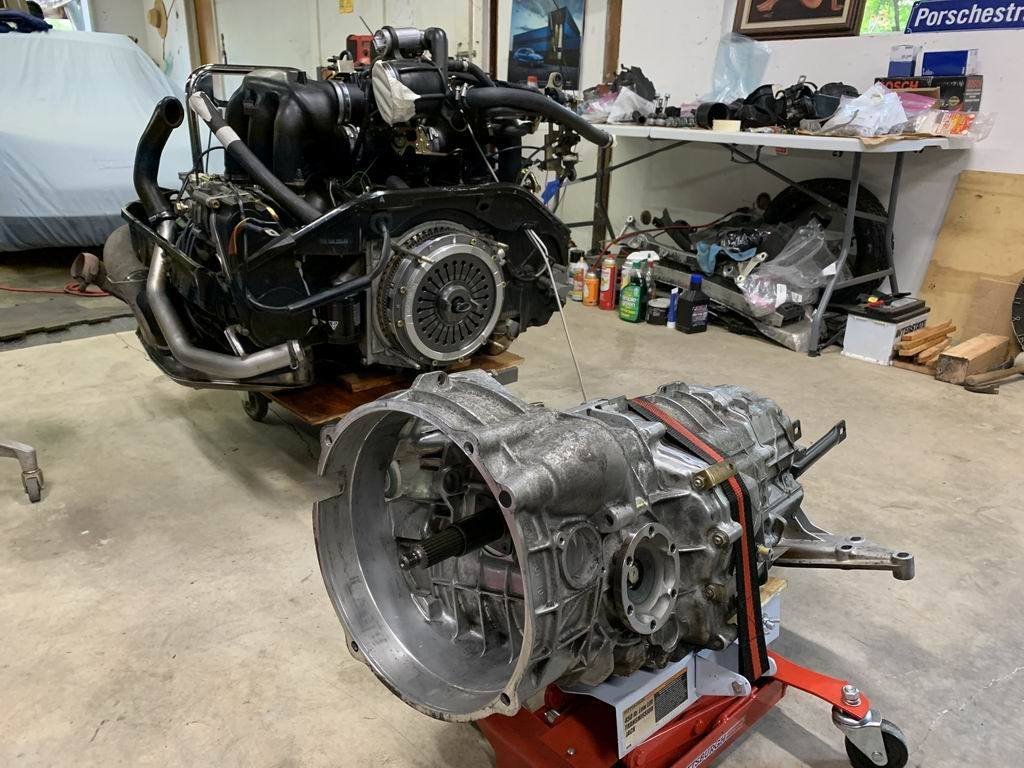
Cheers and here�s the gratuitous eye candy.
Before pics:
yeah, I was pretty stoked that day.
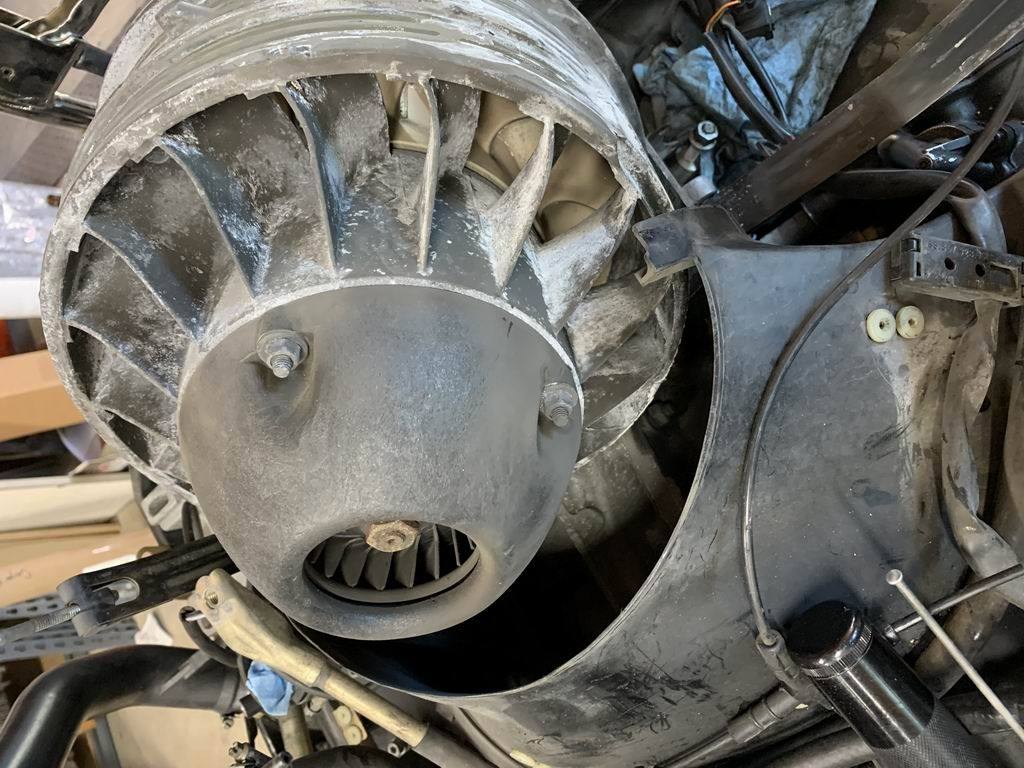
and the discovery that made the whole exercise worthwhile in my mind:
The clutch fork where it engages the pin from the slave will move back and forth with your fingers, but not 1", it's more like 1/4". The clutch fork shaft should cleanly slide into the roller bearing cage on the other side of the fork easily - there is no spring loading, and not sure what that "leather" pad is about. Sometimes, I need to wiggle the clutch fork by holding it using the hole for the slave cylinder and the rectangular access hatch on the other side while I try to steer the clutch fork shaft into the roller bearing. It should slide home easily. The retaining plate should not need to bend, but you need to make sure the plastic plug is seated properly - I usually tap it with a big pin punch. I assume you got the clutch fork in the right position after removing the assembly tape you put on before mating the two sides?
I assume you installed the clutch throw-out onto the pressure plate with the washers the right way around, and the retaining spring is in the groove.,
It does sound like it needs to come apart again and checked.
Darin at FD Motorsports just confirmed that what I thought was fine leather oil pad in the far needle bearing was in fact a foam retainer for the needles and should be removed before assembly. Wow, even the throw away parts are top shelf. As I said, this job has been a thorough schooling. I'm older and wiser.
Mike, thanks for your fast response. Yes, I did double check the TO bearing and washers and clip before assembly after reading some of your posts here. In hindsight, the pivot shaft was the only part of the reassembly that didn't go cleanly and positively with Germanic precision. I should have questioned at that time. Expensive lesson.
I would rebleed and close the bleeder. Then push the clutch down. If it stays down start to pump it up and down with your hand. At some point if the air is out will build pressure and return back to the top most point as it should.
Thanks Rei, Darin confirmed my fears. Now I need to figure out how far I need to disassemble to extract and replace the far-side needle bearing on the release fork pivot shaft. Can it be done through the starter hole? I think it's tranny side of the starter hole - completely blind.
Maybe remove just the tranny? I'm going to learn all the moves.
Yikes! That is not good. Well maybe you can lower the transmission enough where you can have a straight line of sight to the needle bearing and use some long precision tweezers to pull that plug out. Would be tough doing it blind...
it is possible you could lower the engine enough to get a good view of the access in your first picture.
maybe remove cross members, axles, starter ground, wire harness connectors...
one big issue will be can you get a piece of tape inside to hold the fork in place?
I don't think so.
take a day or two to think about strategies, but my guess is just accept a full engine/tran drop.
it will be quicker the 2nd time.
I don't think you'll be able to get the angle needed to push the needle bearing cap out without dropping motor/trans a bit. My bigger concern would be dropping the cap on retrieval so be sure you a have a long magnet retriever when start the withdrawal. Samurai suggestion of long tweezers like 30cm might work. Search on "aquarium tweezers".
I think it's a waste of time to try to get the inside needle bearing out white the transmission is attached. I have changed plenty of these clutches, and with a lift I usually do them with the engine in the car so my time and effort would be less than dropping the entire engine, but in your case I would still do it. Given you want this perfect, and not have possible issues nagging in the back of your brain when you are many miles away from home, no mickey mousing here - fix it right. Sorry about that.
I once replaced the RMS's on two seperate 993 Turbo's, and had to redo them both due to very slight weeping - the seals were just not working right, think I got a defective batch. Anyways, I sucked it up and pulled both transmissions and clutches, replaced the seals again and reassembled. Even with that "wasted" effort, I felt much better on addressing the very slight leak I was getting with the previous new seals, and they have been dry every since. No worries!
Your symptoms do not sound like you just left the plastic in the bearing, but maybe. If you really want to try to pull that bearing out, there is a little access hole on the outside case that allows you to push the bearing cap out (this is on the right side of the engine of course). You can try to push that cap at the same time you pull out the fork shaft. Hard access even on a lift. I assume you have a little bolt that you are threading into the end of the clutch fork shaft to pull it out,. You run a big risk of pulling off the cap when pulling the shaft past both nylon bearings on the clutch fork and the final pull through the left hand side of the transmission case, but it might be possible. If the cap comes off and you lose a roller bearing, I would say you will need to take it apart, you don't want any of those parts to drop into the clutch.
Thanks for all the ideas, it really helps to get a fresh perspective. I was getting tunnel vision there.
I think what happened is the pivot shaft never correctly seated in the needle bearing. When I forced the clutch pedal, the shaft snapped out of the far side bearing, the release fork fell and is hanging on the near side bearing only. The slave piston hit the endstop of the bellhousing to give the dead-stop feel.
I hope I haven't knackered the far side needle bearing.
I don't see any way of fishing the far side bearing through the release fork and back again. Pulling the foam will pull the bearing out of it's seat. The tranny has to come off, minimum.
Unbolt drive axles, heater pipes, rear support bar, tranny tunnel covers,
Support engine and tranny.
unbolt tranny mounts, loosen engine mount to lowest position with bolt still on threads
Lower engine & tranny as much as possible
remove starter & slave, pull out pivot shaft
unbolt tranny and remove
Now with a clear view of clutch I can retape the release fork to flywheel and get inside the tranny bellhousing to fix the far end needle bearing.
reassemble.
What I'm not sure of is can the engine & tranny be lowered enough to pull the tranny forward to remove without hitting the tunnel, without disconnecting all the hoses and cables and without resorting to crazy inclines on the drive axis? (nsully seems to have succeeded)
Is there enough play in the fuel lines, power steering lines, breather lines to lower engine?
Is there enough play in the lower oil line that goes under the tranny to do all this without dumping the oil?
Alternatively, could I drop the engine & tranny without removing the bumper, exhaust and work on it in the lowered but still stuck under the car position. I'd have to dump the oil and unbolt the rear toe links, rear X-member and possibly fuel lines, pwr steering.
Yes, you can remove the transmission leaving the engine - its tighter on a C4 or Turbo, but on a C2, there is enough room - I have done several this way,
If you have RS motor mounts, you can put in longer bolts - I keep a set of longer bolts in my tool drawer which will allow the engine to drop more if needed. You can drop the engine quite a bit, but it will eventually hit the suspension cross bar, which you can remove. Just keep checking topside for limits on lines, electrics, etc.
I will keep the motor mounts loose, support the engine at it's tail, and then use a transmission jack to pull off and lower the transmission. That is with a two post lift though, but I have done it with the car on jackstands but will admit that is quite a bit harder (but doable).,
The lower oil line across the transmission has to come off, it won't leak that much, just bag and zip tie the end, as well as bag and zip tie the engine side. Do not take off the line that feeds the input of the oil pump (the one on the right side), that one will drain the oil tank!
Remove the heating system off the heat exchanges, get that all out of the way.
If you want real room, remove the driveshafts, but that involves getting a torque wrench that can do 340 fl-lbs (have one of course haha).
Honestly though, if I was working on the ground without a good transmission jack, I would go for lowering the entire engine/trans assembly, especially if the alignment has not been done yet. It makes the transmission mating much easier, and you would have good access to install the clutch fork shaft.
Great info Mike, many thanks for your encouraging words. I do have a good tranny jack and the mating of tranny to engine was a breeze with them both out, as you say.
i ordered another needle bearing, just in case so I have a couple more days to plan my attack.
Quick update:
Ended up dropping the engine and tranny because it was just too tight in there, you were right Mike. When I pulled out the pivot shaft, the far side needle bearing was nicely seated on the shaft. The foam piece had squished into the endcap. I took it out.
Peering in I could see the ends of the fingers of the pressure plate. The TO bearing had come off. I'm pretty sure I had the washer with the beveled side out for the ring clip so I guess I'm not quite heavy enough to compress the spring washer.
This time I used a press to fit it and confirmed the ring clipped into the groove and the beveled washer was loose underneath it. Couldn't see any damage anywhere which I found surprising seeing as I ran it for 5 mins or so.
Couple of nice things taking it all apart: When I pulled off the vacuum hose to the rear flapper, I heard a long hiss as the vacuum escaped - it held a vacuum for 5 days! Nice. I hadn't previously heard that sound from this car. And it's all nice and clean in there.
Cheers!


 04-26-2020, 07:55 PM