When you click on links to various merchants on this site and make a purchase, this can result in this site earning a commission. Affiliate programs and affiliations include, but are not limited to, the eBay Partner Network.
993 starter - Nasty Nut removal tip, need bushing removal tip
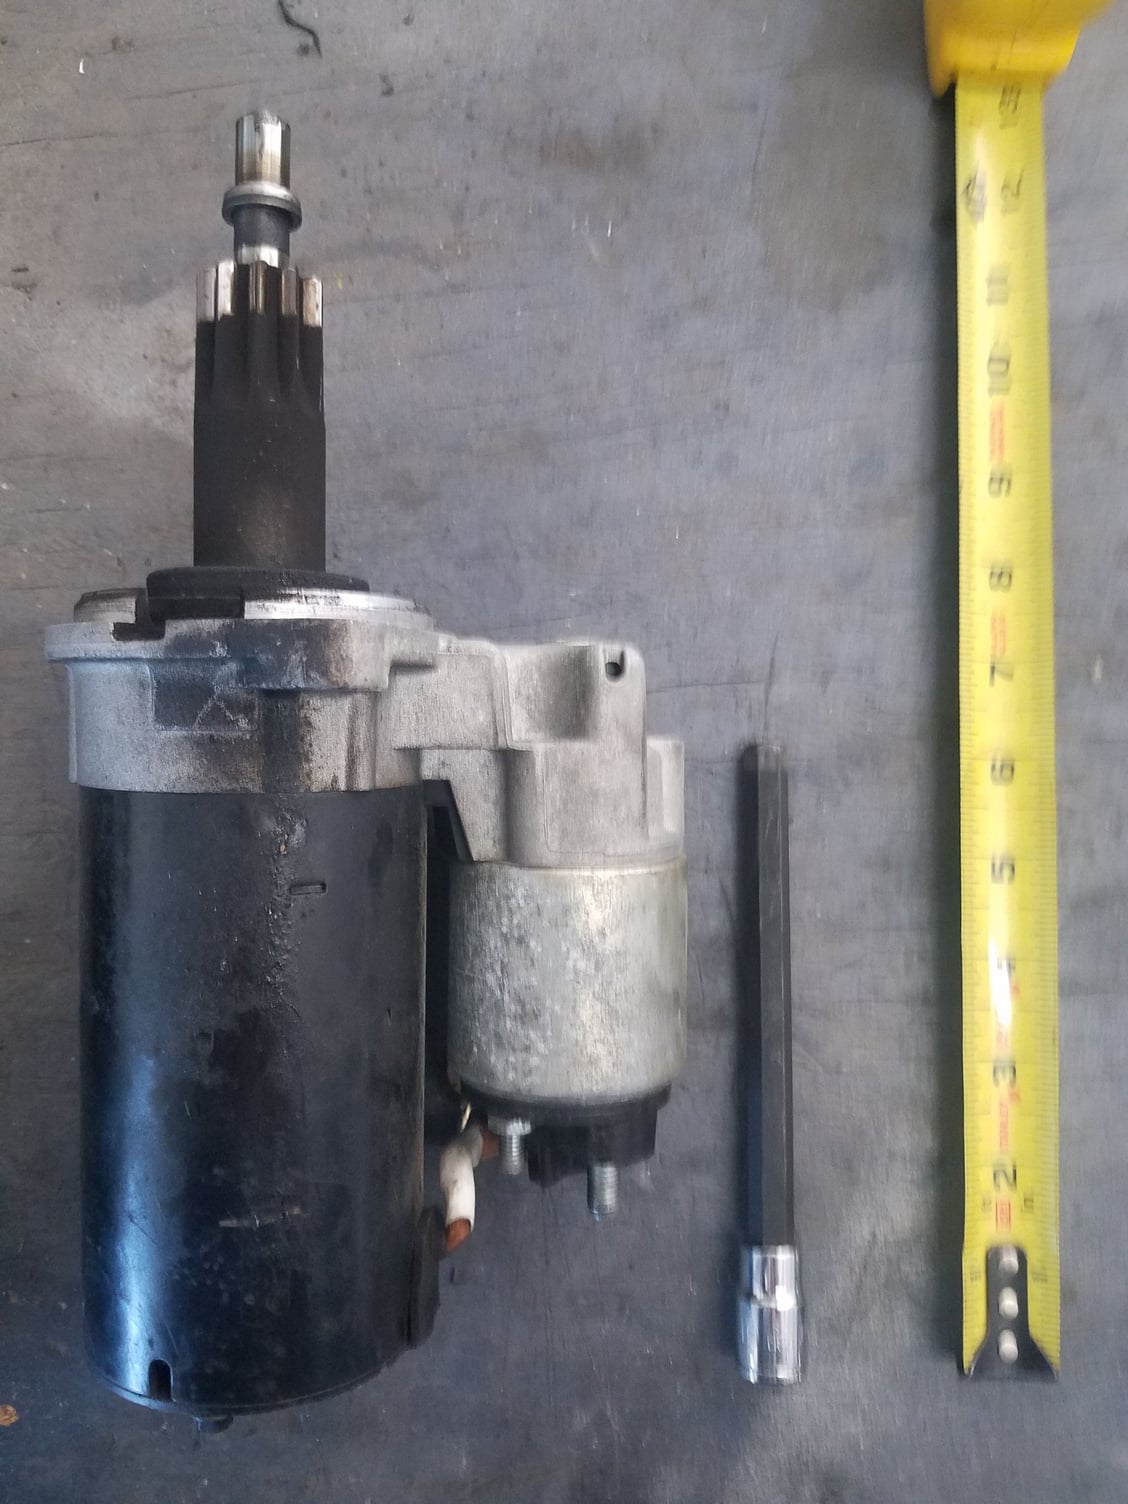
Just pulled my starter in about 1/2 hour. 6" long 10MM hex extension from Harbor freight made the top bolt simple. Seems it's exactly as long as the Rothsport nut extension.
Now, , since I shared that, maybe someone can help me out an tell me how to get the starter shaft bushing out? You can't even see it. And if you drop it???
Unless it is flush with the end of the hole (I haven't had mine out yet) and therefore would not have a step to it, I'd use a blind hole bearing puller.
Shop towels below just in case, the less drop distant the better. Can yo grab an edge wit pinch nose pliers? If so, add a phillips screw (ring finger esc) and pull it on to the screwdriver shaft. Tap sounds the best idea, can't recall how mine came out when I did it, but good that you are replacing it, as that can be key to getting the new one in there just right.
To share and memorialize this for the future searchers, a couple of things to consider:
1) The bushing removal with a tap works perfect. I didn't think a 7/16" straight tap would be big enough as the ID of the bushing is 12.5MM so I decided to use a 1/2" straight taper tap. It worked perfect. With a tap handle I simply screwed it in and it extracted the bushing like a cork. Perfect. I inspected the hole and could see a bunch of trash in there so I used brake cleaner and a small bottle brush to clean it up. To install the new bushing I used a 12MM bolt 120MM long and a nut set just at the bushing length as suggested. Once aligned I simply tapped it into place with a small hammer until the bolt seated to the housing. A mirror confirmed everything was good with the bushing.
2) This bushing seams to be more critical than one would think - do not overlook changing it. I pulled my starter due to intermittent starting, click, click, click, start perfectly, or start first time easily. After doing jumper testing diagnostics while still installed in the car all indications pointed to solenoid. After I pulled the starter and before the new one arrived I took the starter to 2 experienced starter alternator shops. BOTH told me the starter motor and the solenoid were good, but one guy stressed the impact of a worn bushing and how it mimics a bad solenoid. Apparently there is enough play in the starter armature such that when the bushing wears that movement prevents the starter motor from turning/engaging.
3) While all this was going on my new starter came in from Pelican butI was disappointed that it was not the same length as my old starter. There are 2 lengths - I had the short one P/N 996.604.107.00 and they sent the long one P/N 964.604.104.00. You want the SHORT one because it give you an extra 2" on the front end and by using a 10MM 6" long extended hex you can easily use a standard ratchet to remove the top nut. Einmalig sells the short starter.
I may install my old starter and see if that cures my starting issues. If not, I'm either buying the rebuilt 996.604.107.00 from Einmalig or the proper replacement Bosch solenoid my my starter.
you can't drop it off the tap. it threads on like a nut and can't come off. blind bearing puller is ok but it's tight to get in there. also to install take a bolt with a nut on it the size to fit into the bushing and tap it back in.
I took the starter to 2 experienced starter alternator shops. BOTH told me the starter motor and the solenoid were good, but one guy stressed the impact of a worn bushing and how it mimics a bad solenoid. Apparently there is enough play in the starter armature such that when the bushing wears that movement prevents the starter motor from turning/engaging.
You are referring to the bushing in the transmission that the end of the starter shaft spins in...as per your first post.
That bushing has a wall thickness of about 1 mm. Even if it is worn, you would not get enough movement where the brushes are since they are at the far end of the starter motor.
Originally Posted by jellonailer
I may install my old starter and see if that cures my starting issues.
Take it apart and rebuild it. Chances are your commutators are dirty and your brushes may be worn to the point they can no longer extend further.
Here is an example of a starter I rebuilt for my friend's 997. The starters are pretty much the same. Just look at the commutators before and after. His engine would not start or it started intermittently.
Starter armature - BEFORE...
Same starter armature - all cleaned up, especially the commutators...
And a new brush assembly plate...
Nothing to it. All starter parts except for the starter nose casting and carbon brush plate.
Alex:
That is fabulous work! How did you get all those parts as new?
A post on how you did that along with this one above would be fantastic. Thanks for the pictures.
Alex:
That is fabulous work! How did you get all those parts as new?
Its a Porsche mixed in with lots of passion. I took it apart and I cleaned it all with a water based degreaser that I've been using since the mid 80s. The commutator got cleaned up with some 220 and then 600 wet sandpaper and it was then thoroughly washed.
Originally Posted by jellonailer
A post on how you did that along with this one above would be fantastic. Thanks for the pictures.
Pretty straight forward and if you do not have a photographic memory, a digital camera can help. Sorry, not a DIY, but more pics on my site.

 04-14-2019, 03:41 PM


 I took it apart and I cleaned it all with a water based degreaser that I've been using since the mid 80s. The commutator got cleaned up with some 220 and then 600 wet sandpaper and it was then thoroughly washed.