When you click on links to various merchants on this site and make a purchase, this can result in this site earning a commission. Affiliate programs and affiliations include, but are not limited to, the eBay Partner Network.
I don't know if you are aware, but you should have the shell professionally dried, prepped, and E-coated. Water would have gotten inside all the internal cavities of the body shell. All the access plugs should be removed, and the cavities inspected with a scope. There may be major corrosion that is not visible just looking at the bare shell.
My plan is to disassemble the engine completely, control the tolerances of every part (if the cilinders are oval), clean it all the parts: a man in germany told me that the 993 engine crank can be rectified twice before changing it.
I don't know if it will be necessary. It is too early to spend words about what will be necessary to do on the internal parts of the engine.
If I find them too damaged I do not think it is convenient to proceed with a restoration of the engine.
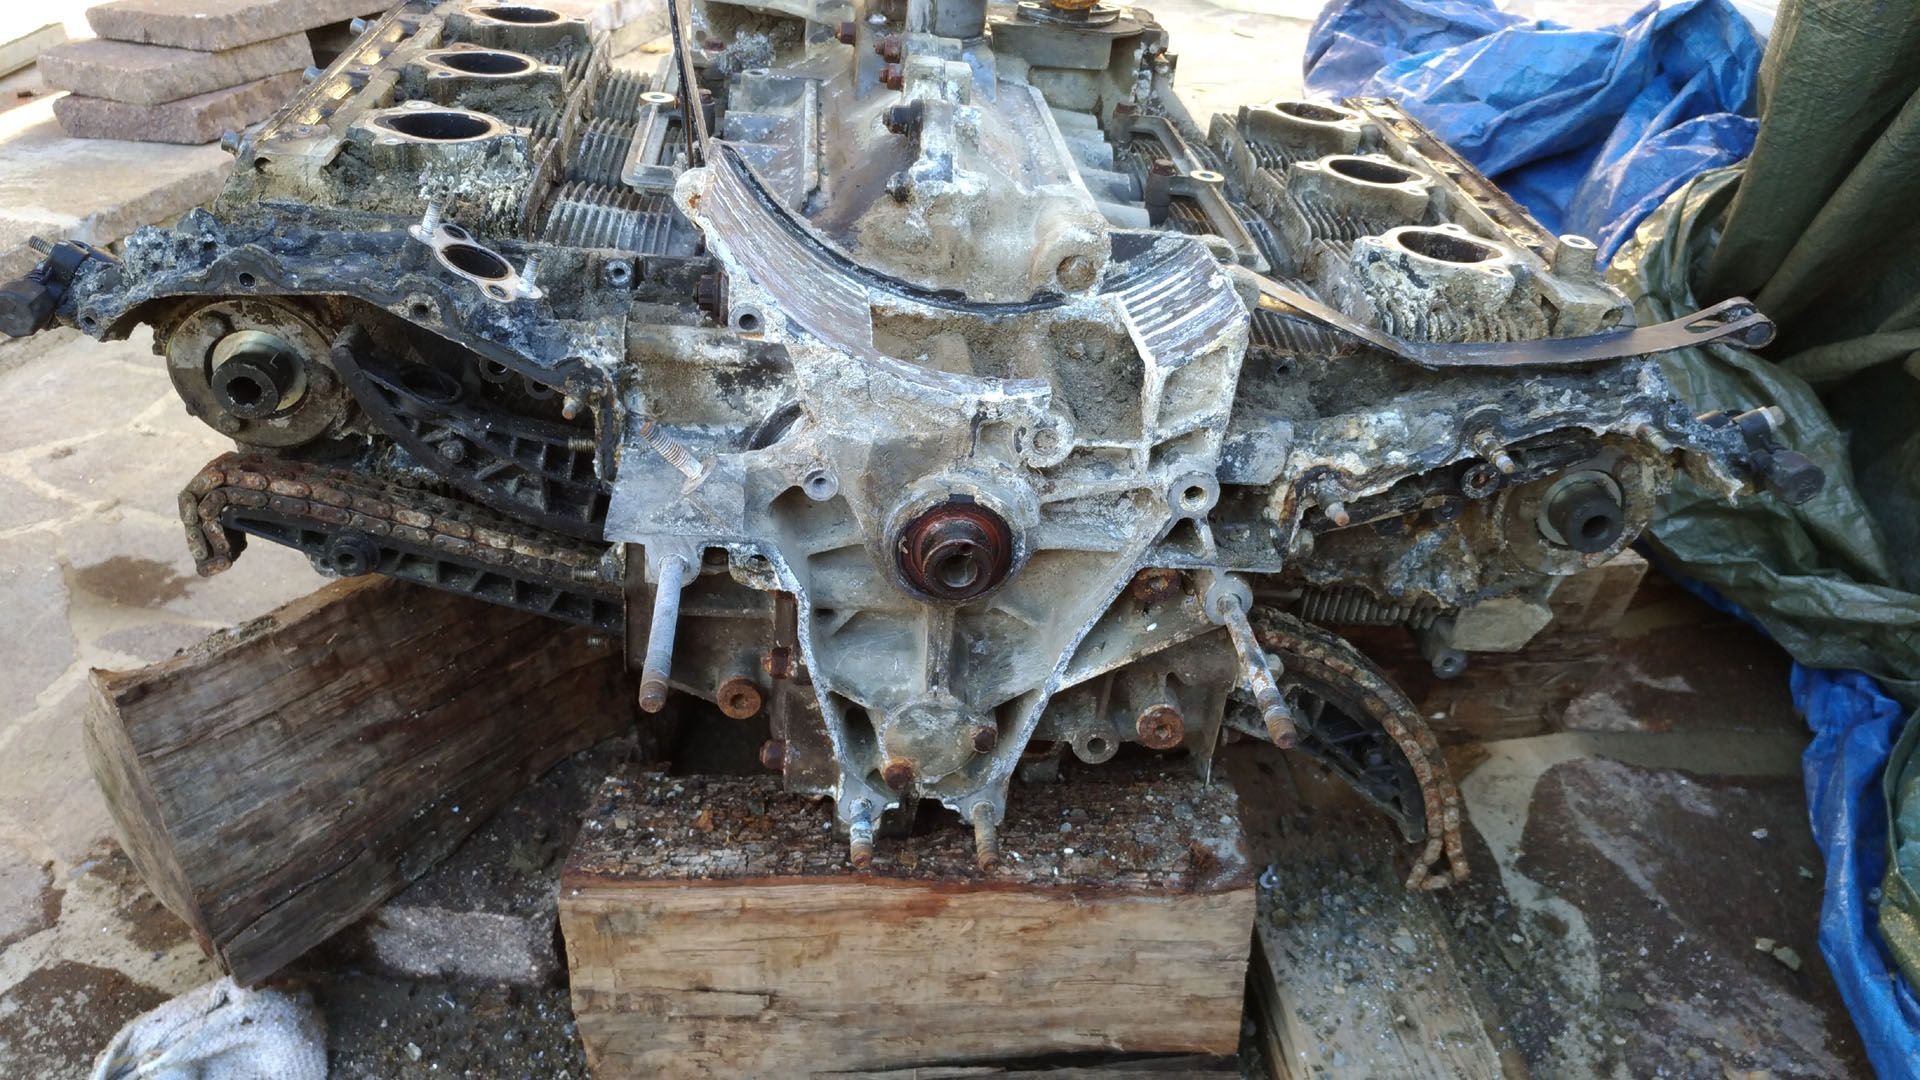
I know for sure that the engine, when the car ended up in the water, had traveled about 130,000km.
1. Chain tensioners
2. Cam sprockets
3. Rocker arms and shafts
4. Slide out cams
5. Head nuts
6. Remove cam housings/heads
7. Slide cylinders off pistons (may take some force as piston rings may be rusted to the cylinder walls)
8. Remove circlips at small ends of connecting rods, slide out wrist pins
9. Remove pistons from rods
10. Split the case
Surfaces can be refinished twice up to a max of .020" or roughly .5mm. It is possible the engine stayed sealed but if it didn't I suspect you will have some great artifacts and story to tell. I am shocked you were actually able to remove some of the fasteners. The real surprise is that the magnesium knock sensor bars look so good.
1. Chain tensioners
2. Cam sprockets
3. Rocker arms and shafts
4. Slide out cams
5. Head nuts
6. Remove cam housings/heads
7. Slide cylinders off pistons (may take some force as piston rings may be rusted to the cylinder walls)
8. Remove circlips at small ends of connecting rods, slide out wrist pins
9. Remove pistons from rods
10. Split the case
W O W
Each number a big discovery (for me), but knowing the order is sooo appreciated! Thank you!
I am shocked you were actually able to remove some of the fasteners.
It is a surprise finding myself doing such a thing, believe me: this is the very first time I put my hands onto an engine to open it.
I am trying to be as prudent and circumspect as possible.
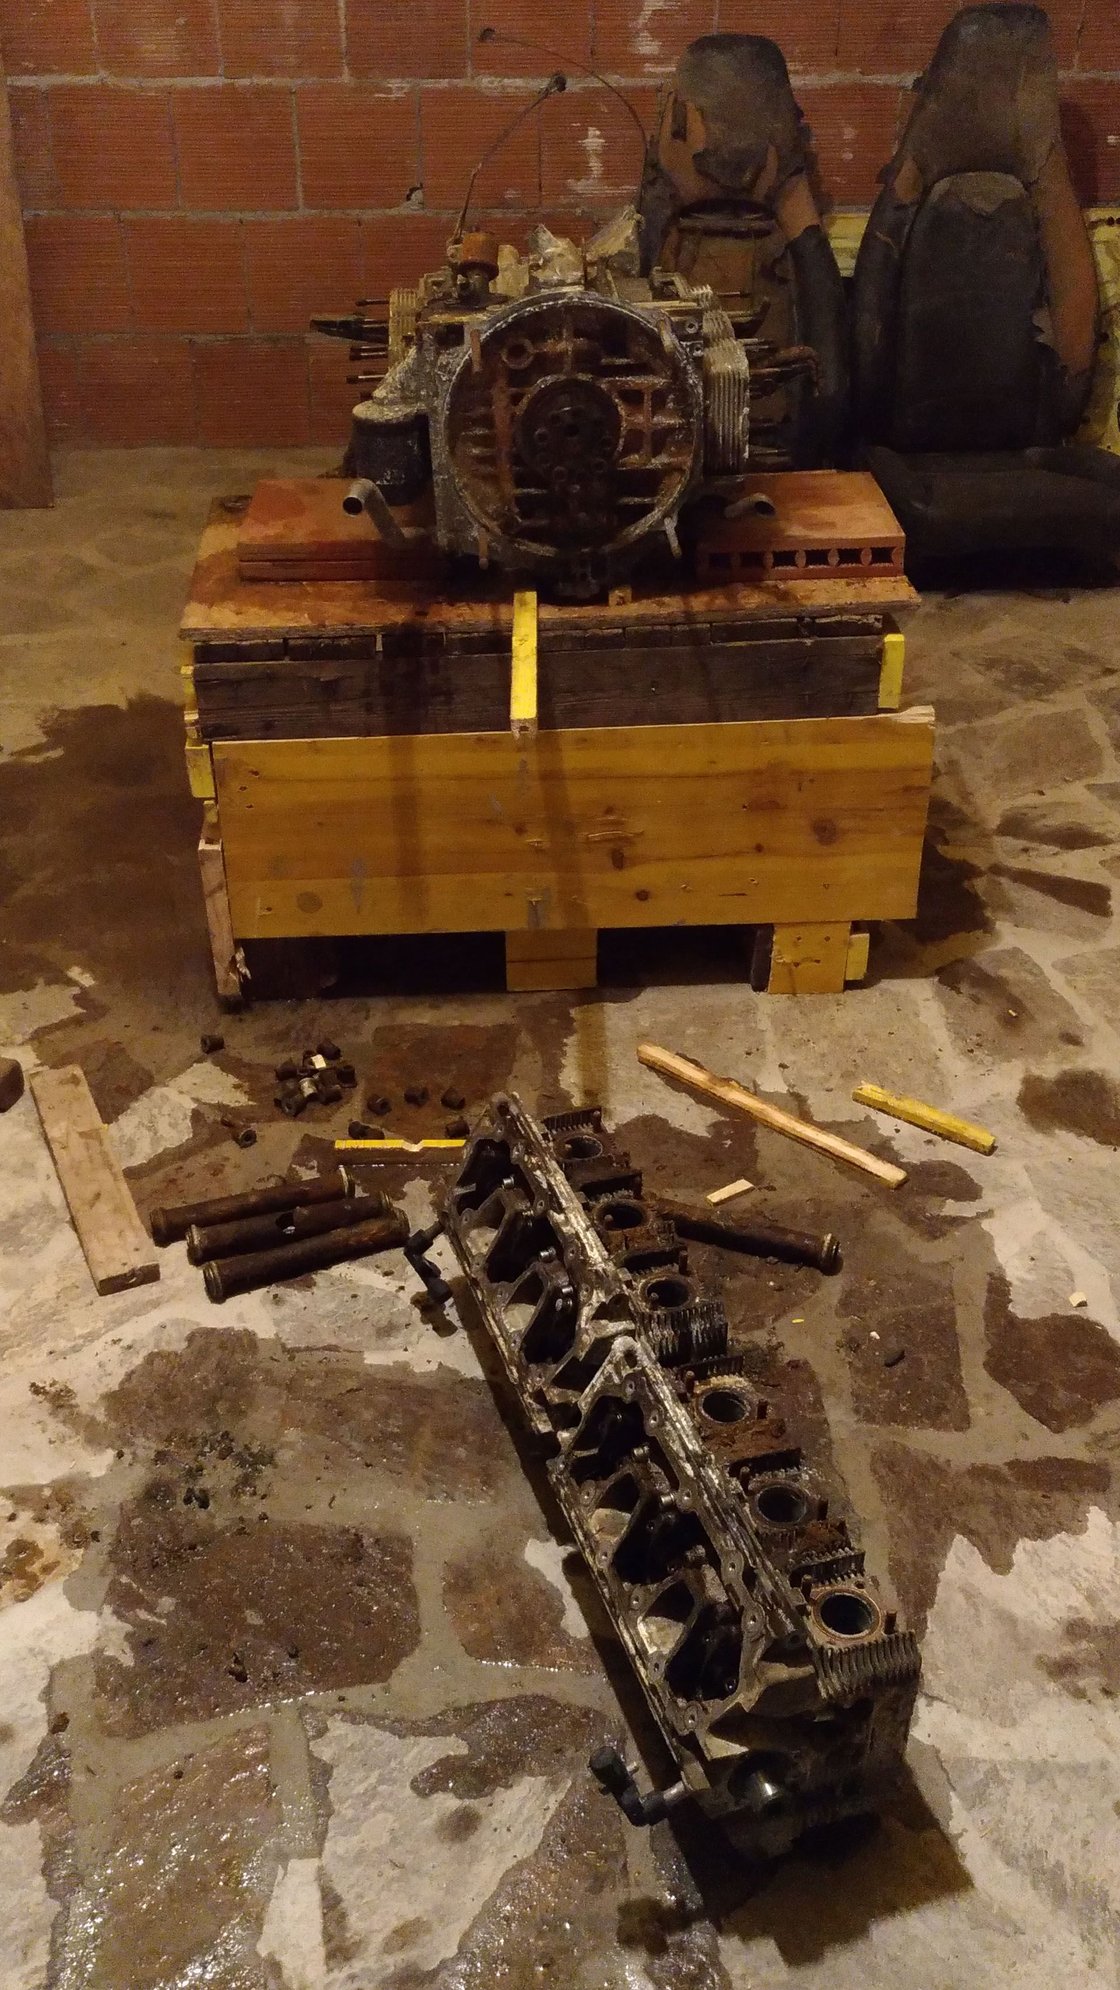
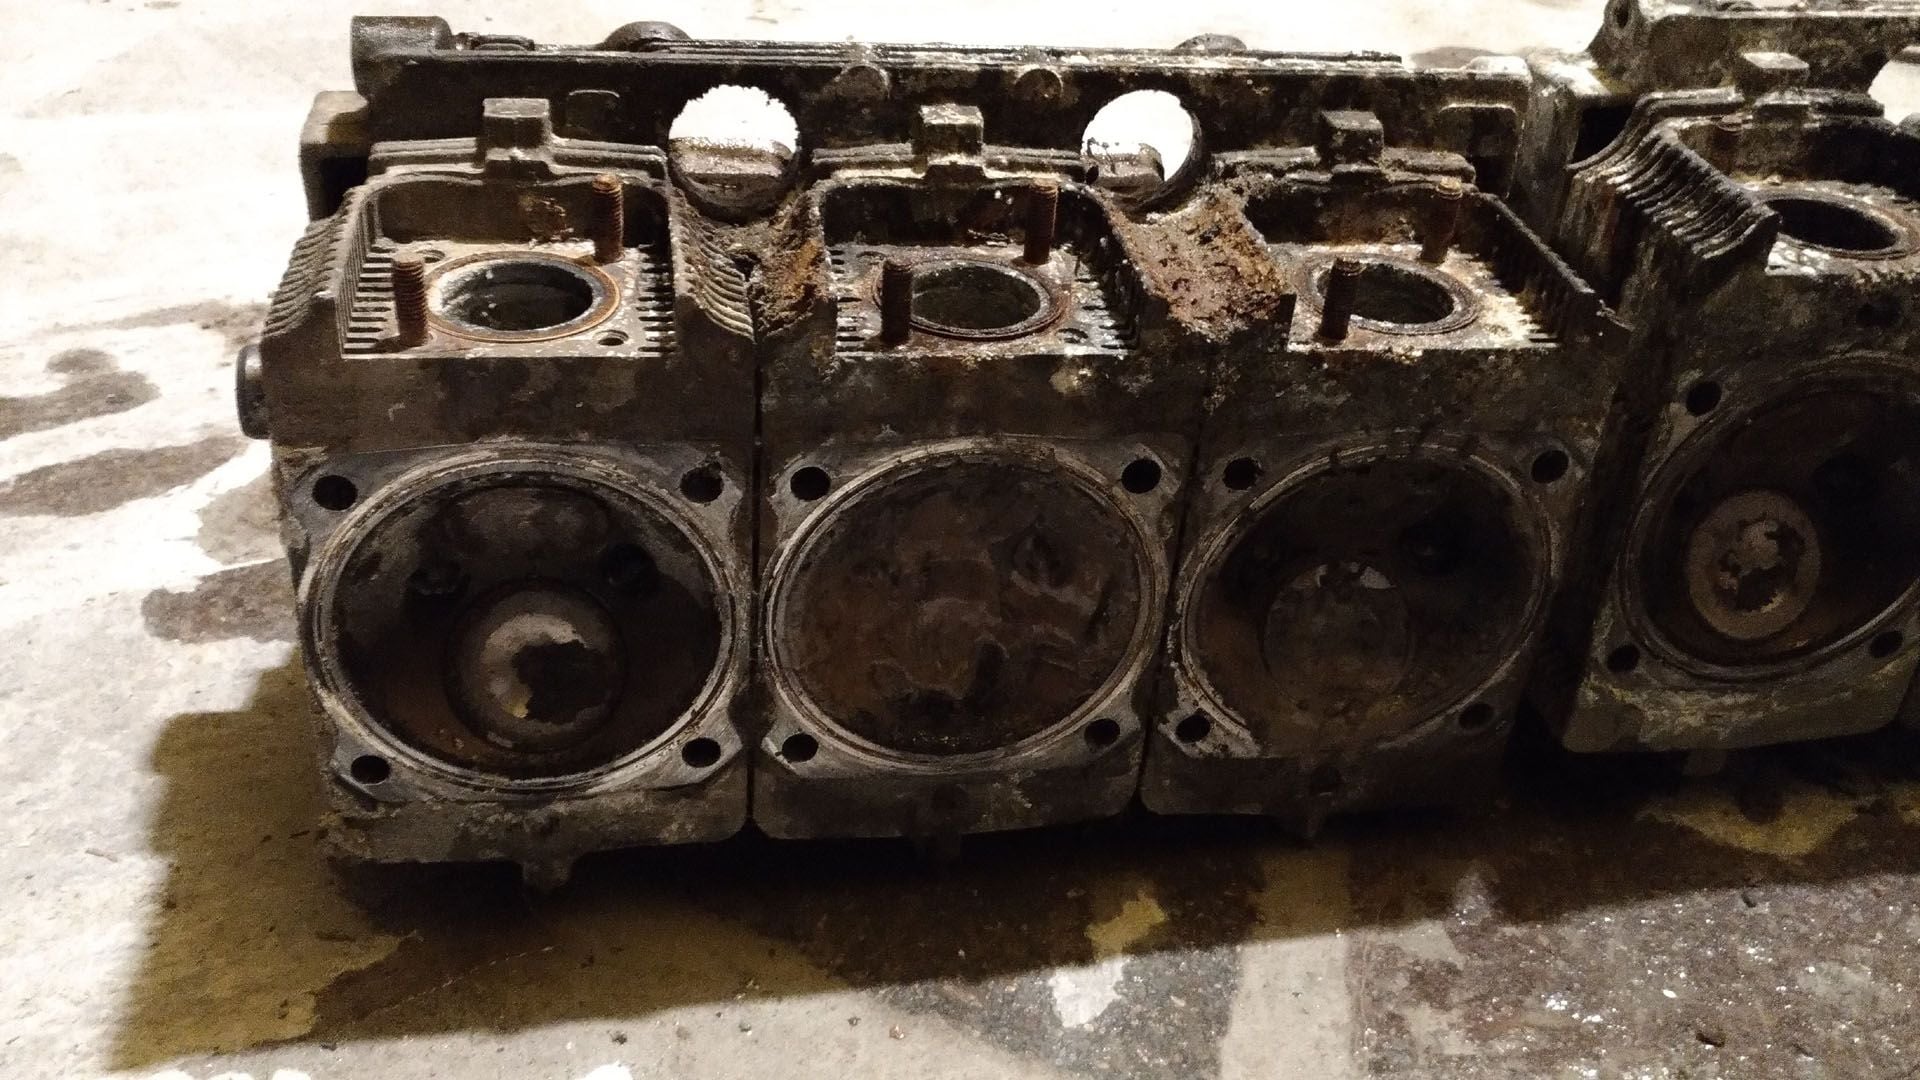
Update from today: engine heads removed, nice to see all the top of cilinders come put so easily, in one single piece.
professional workbench
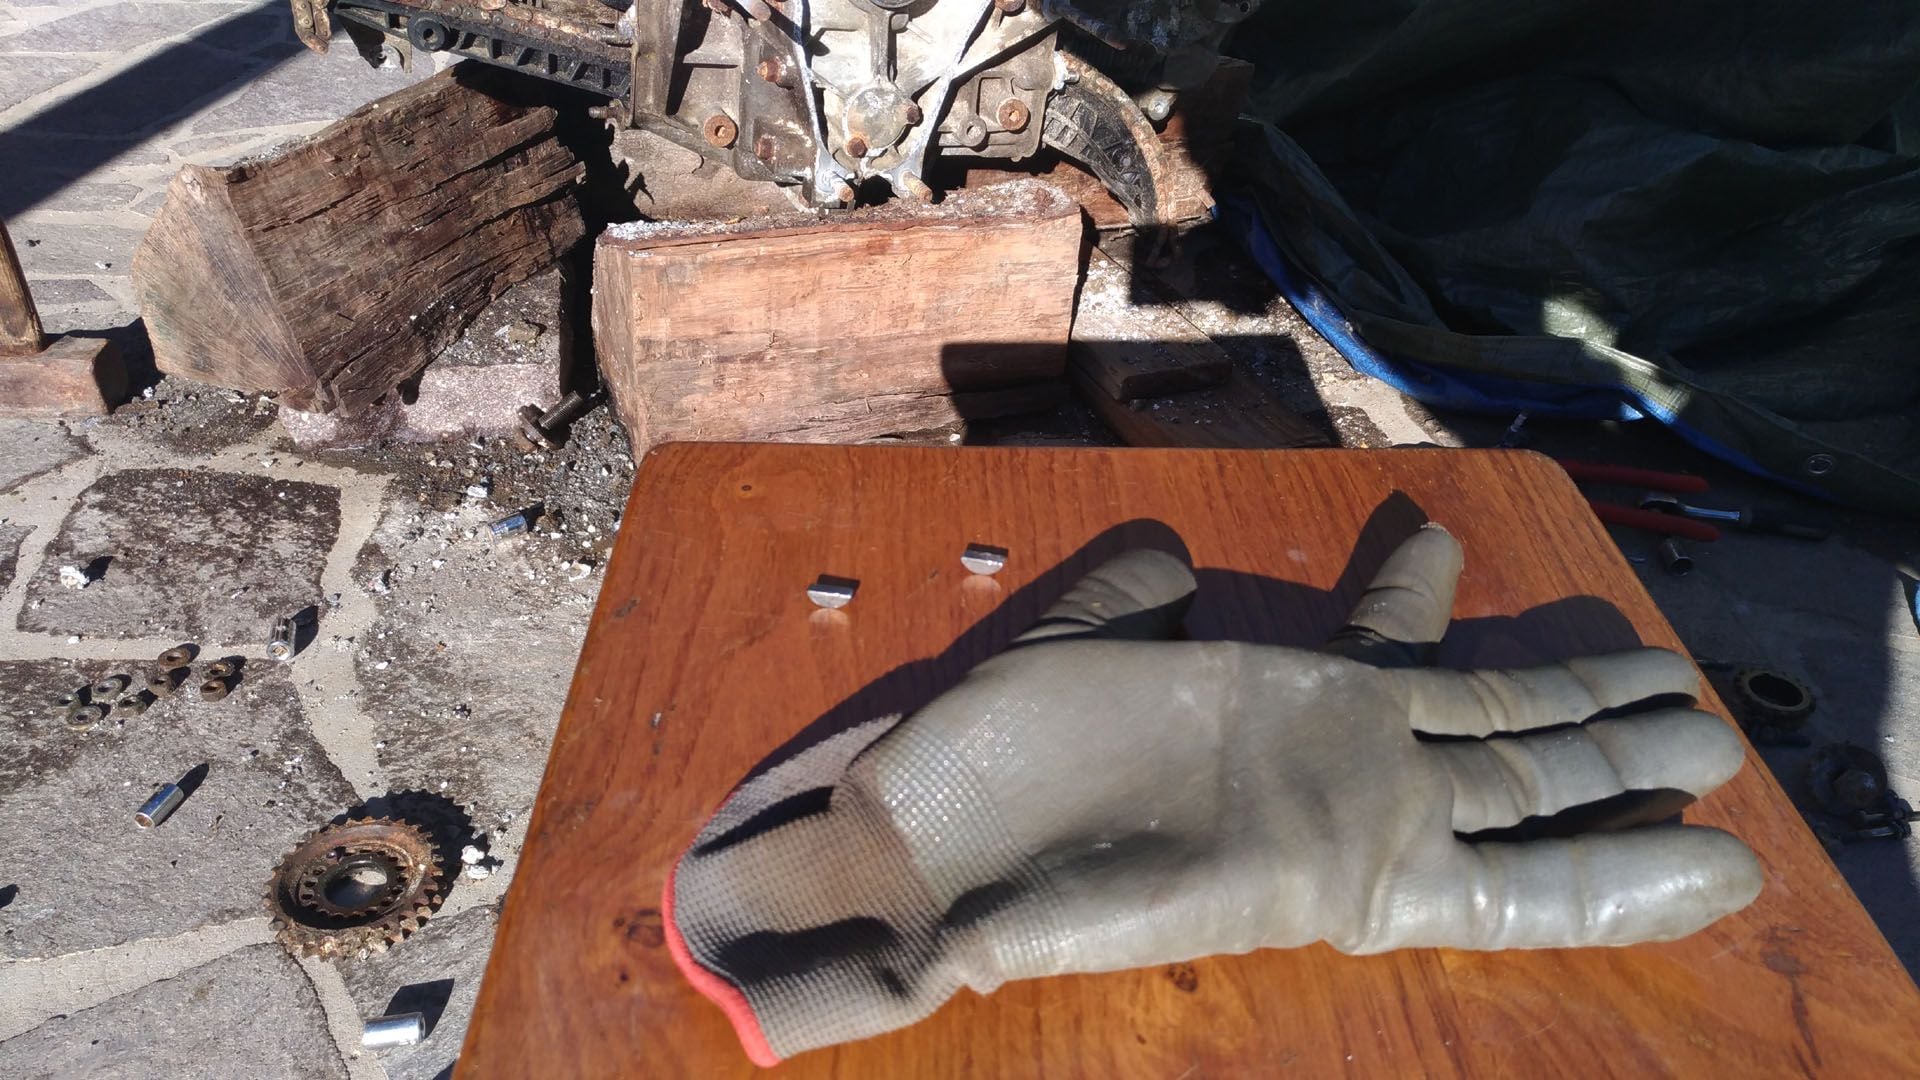
woodruff keys
Next Step is Cilinder Removal.
I'm afraid I can scratch the cylinder walls.
Should I use any precautions? Some kind of lubricant? Is there a technique to pull out the cylinders?
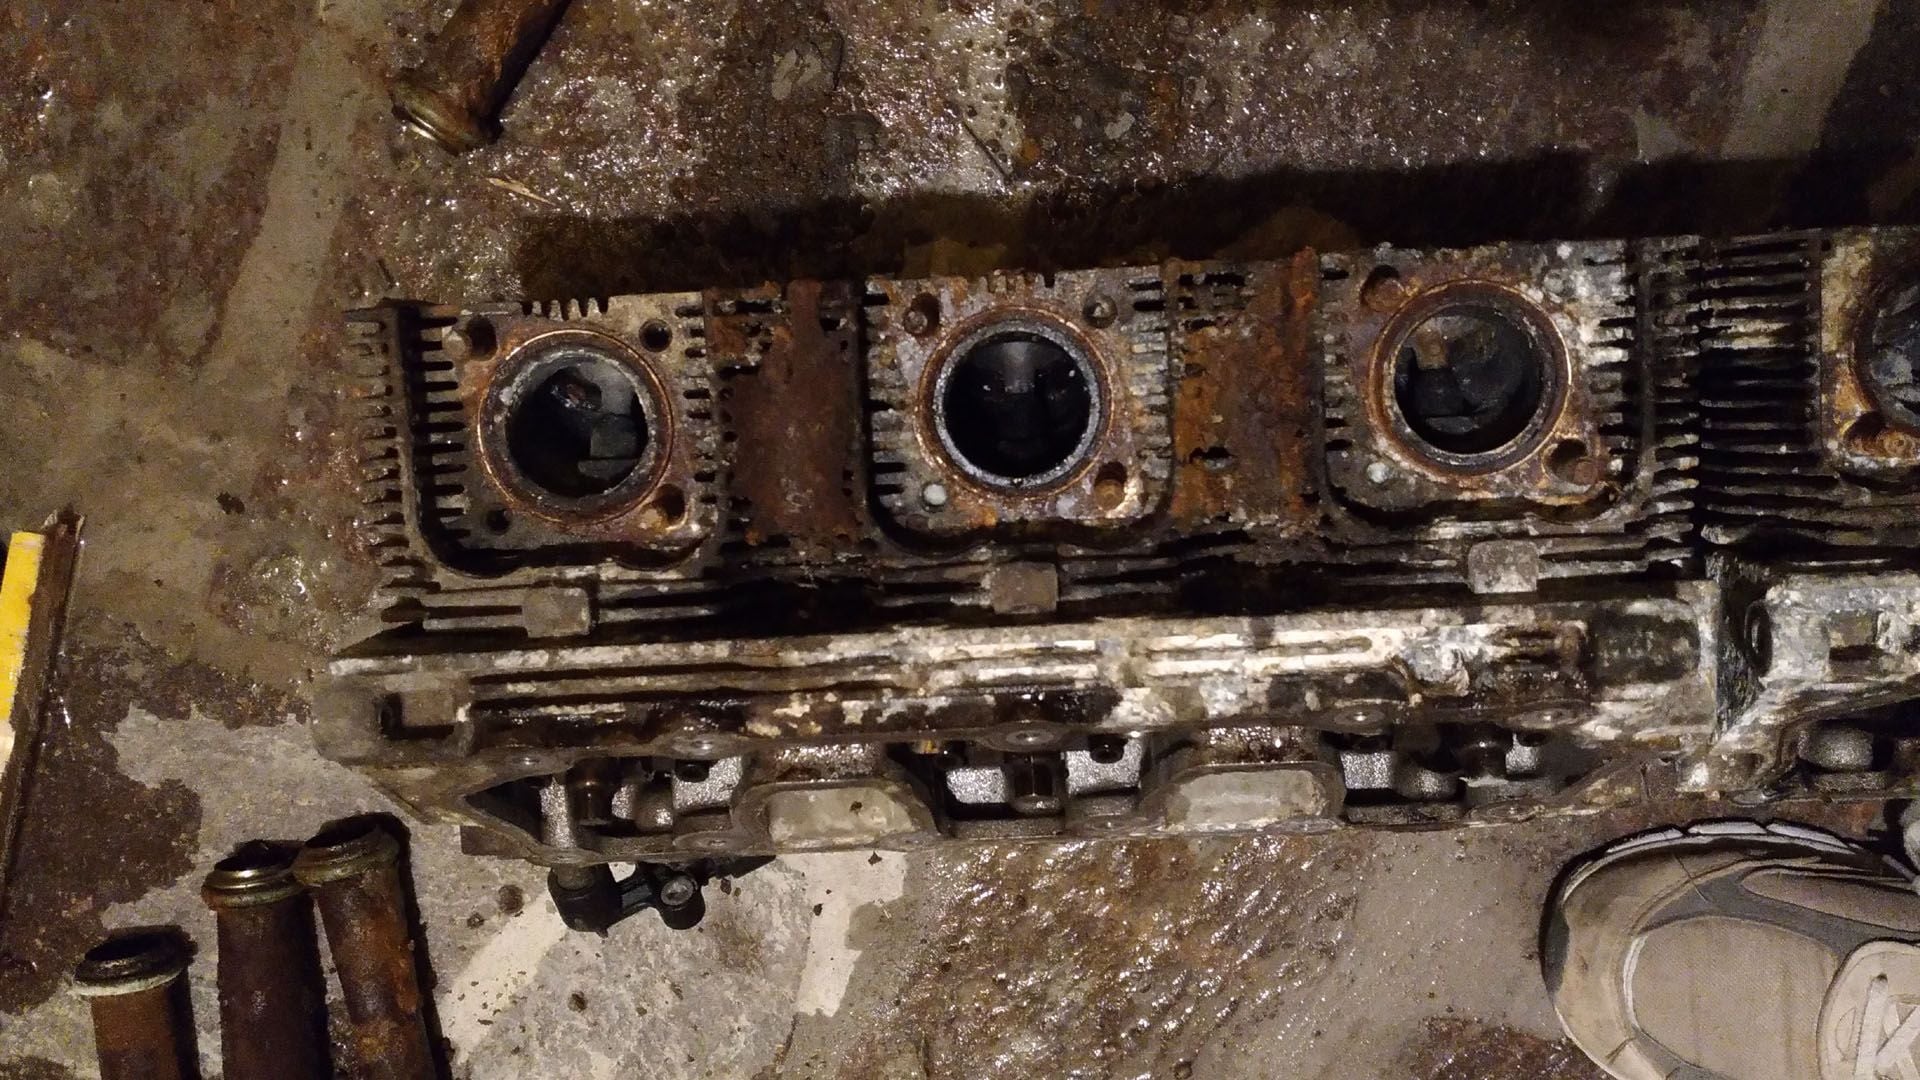
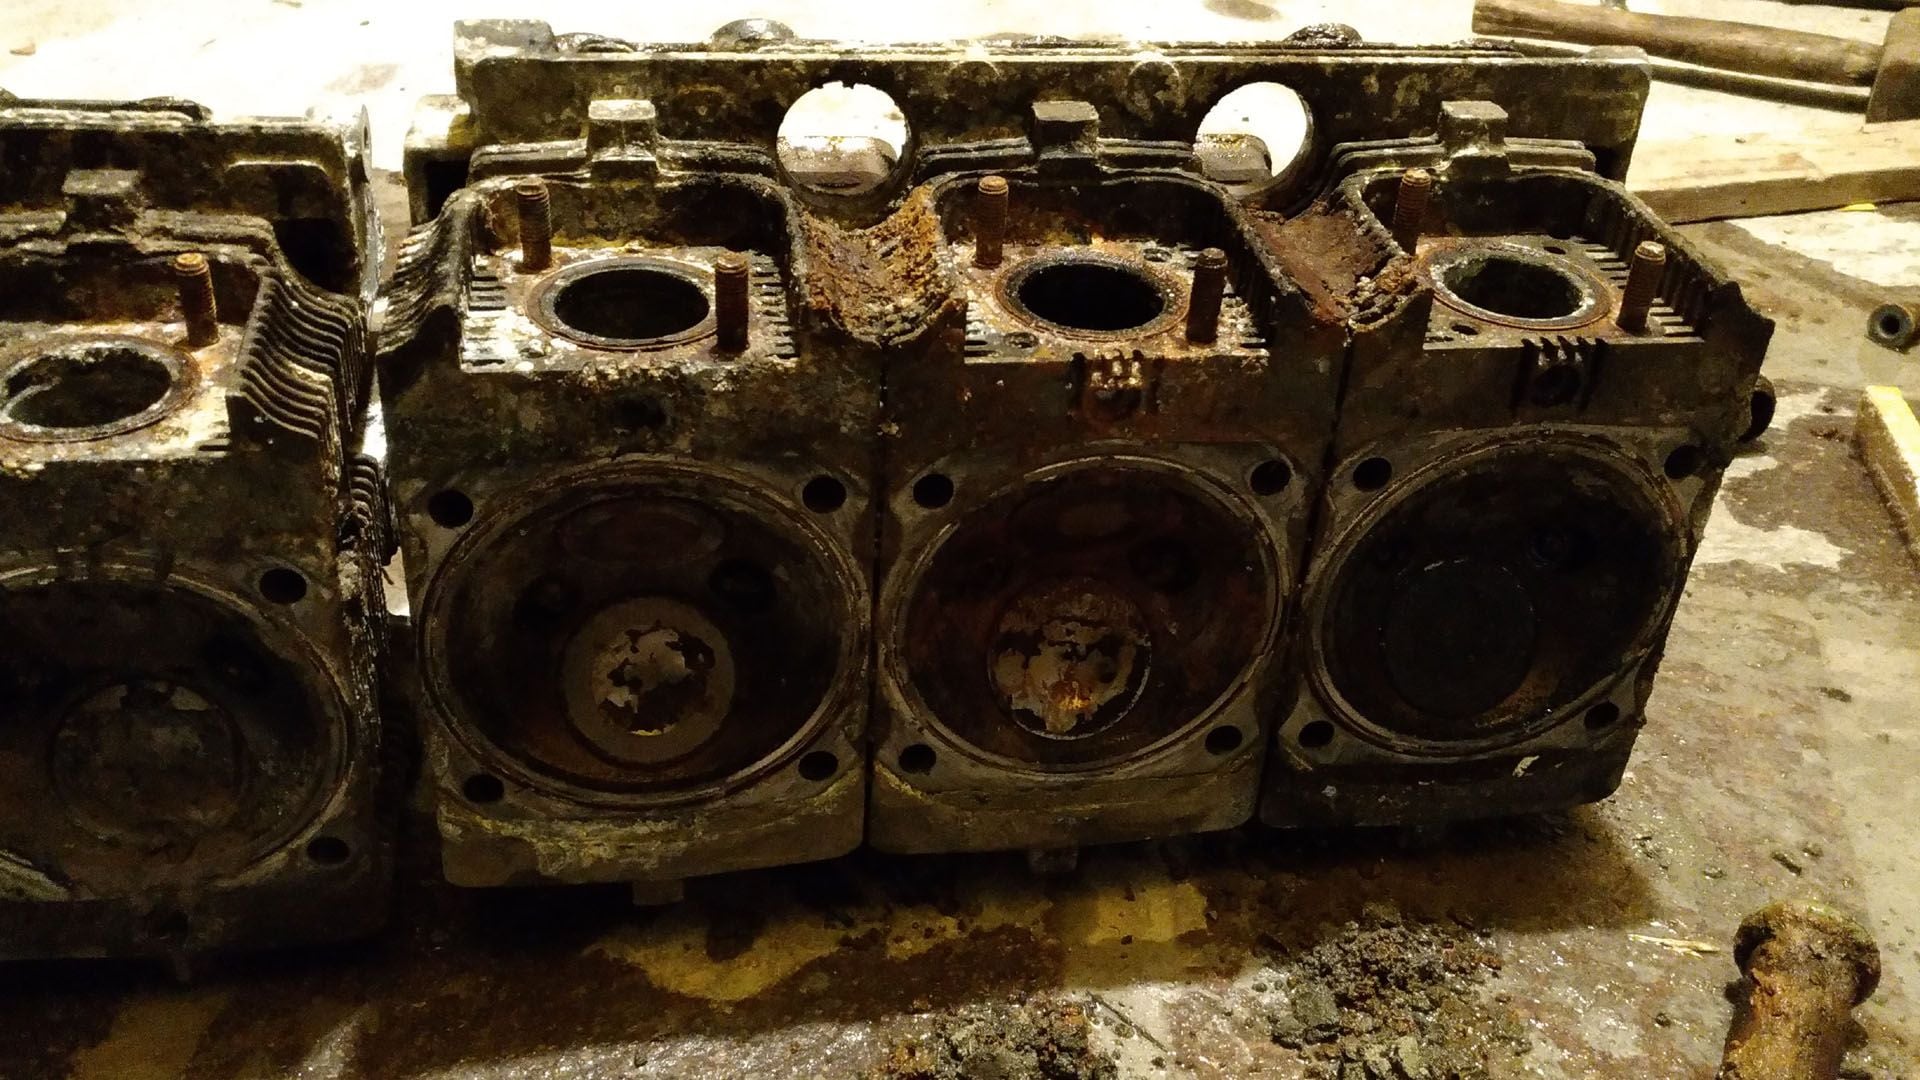
On a normal engine they slide off easily. On your it may take a little more force. Don't worry about scratching the cylinder walls, they will need to have the Nikasyl coating re-applied anyway. The rings on the pistons are very rusty and surely have corroded the walls of the cylinders. Just give the cylinders a pull.
You can separate the heads from the cam housings by removing the nuts/washers holding them together. The heads are individual, i.e. there are six of them, and two cam housings. Look into the cam housings from where the valve covers bolt on, and you'll see the nuts. After you remove all of them (look carefully, some are hidden), use a rubber mallet to carefully knock the cylinders off. They are held on with sealant that will break free pretty easily. Don't hit the heads on any of the cooling fins -- they will break.
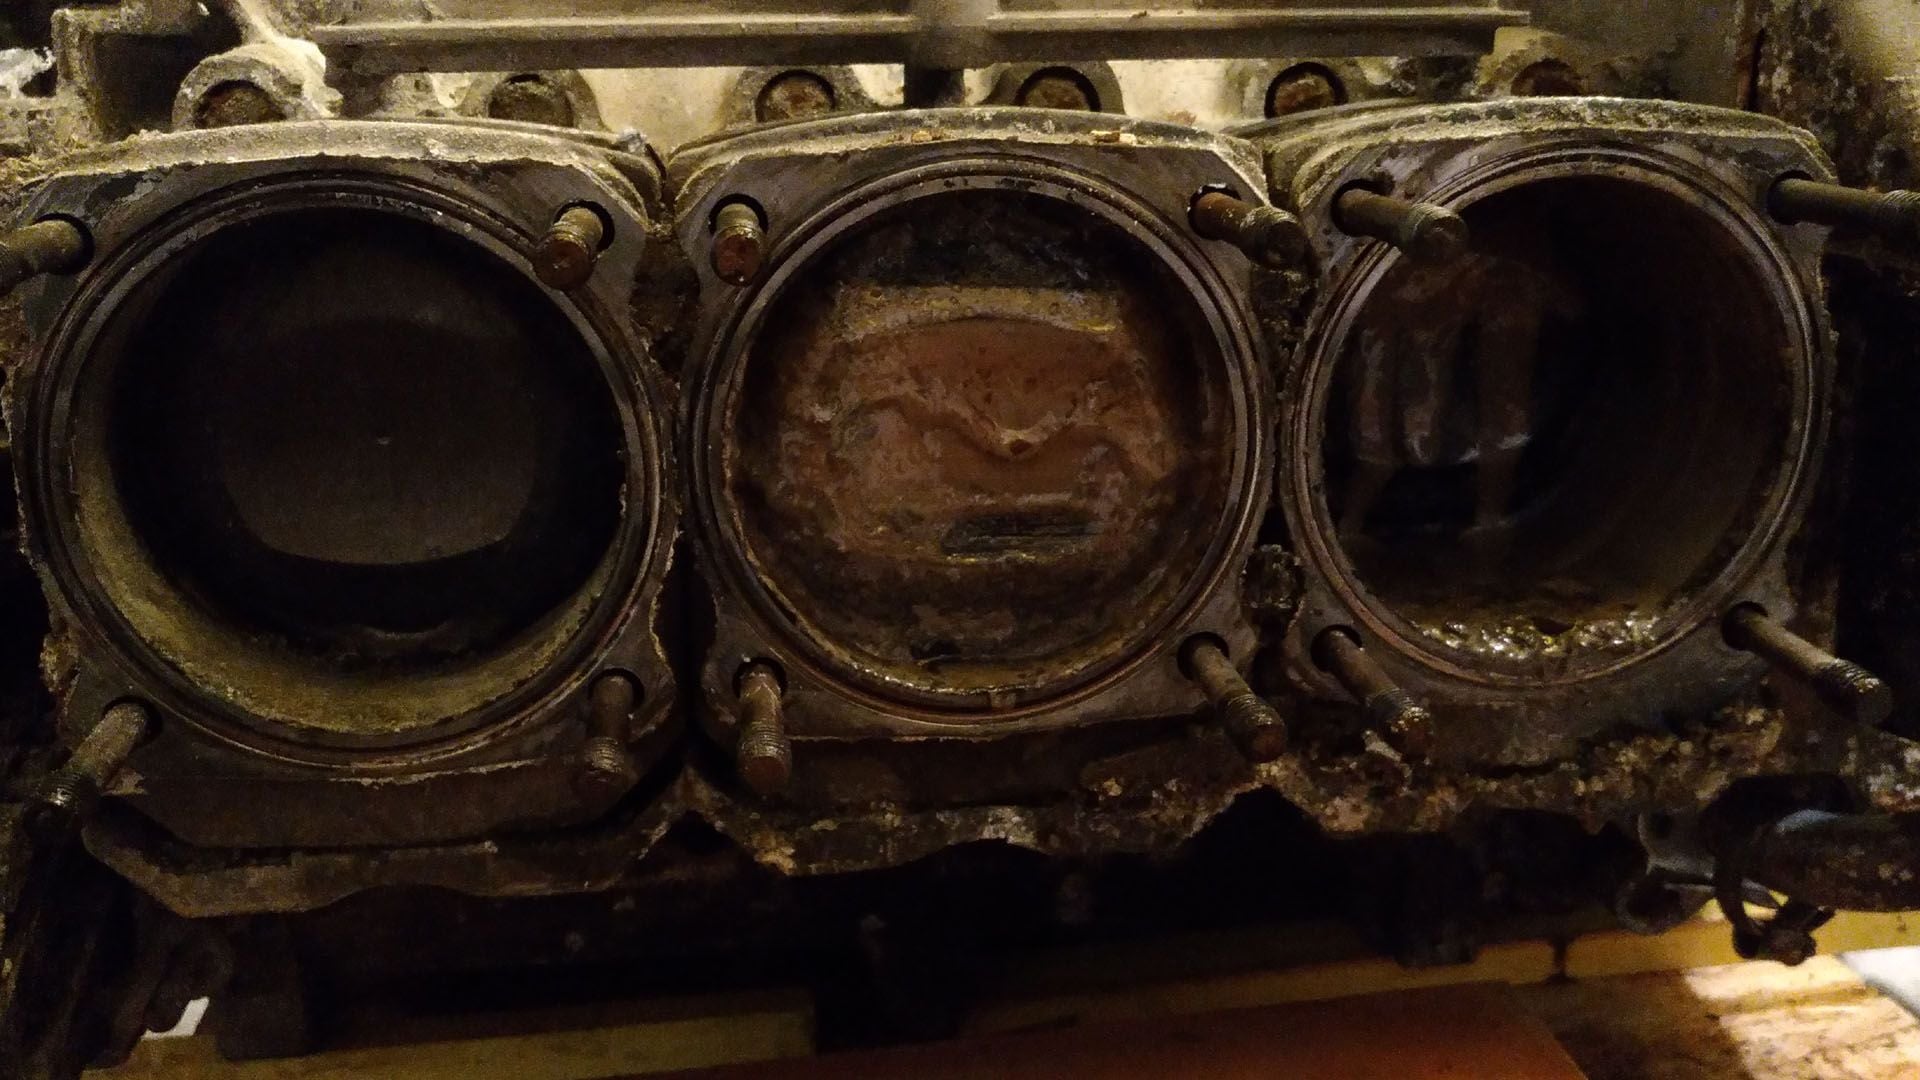
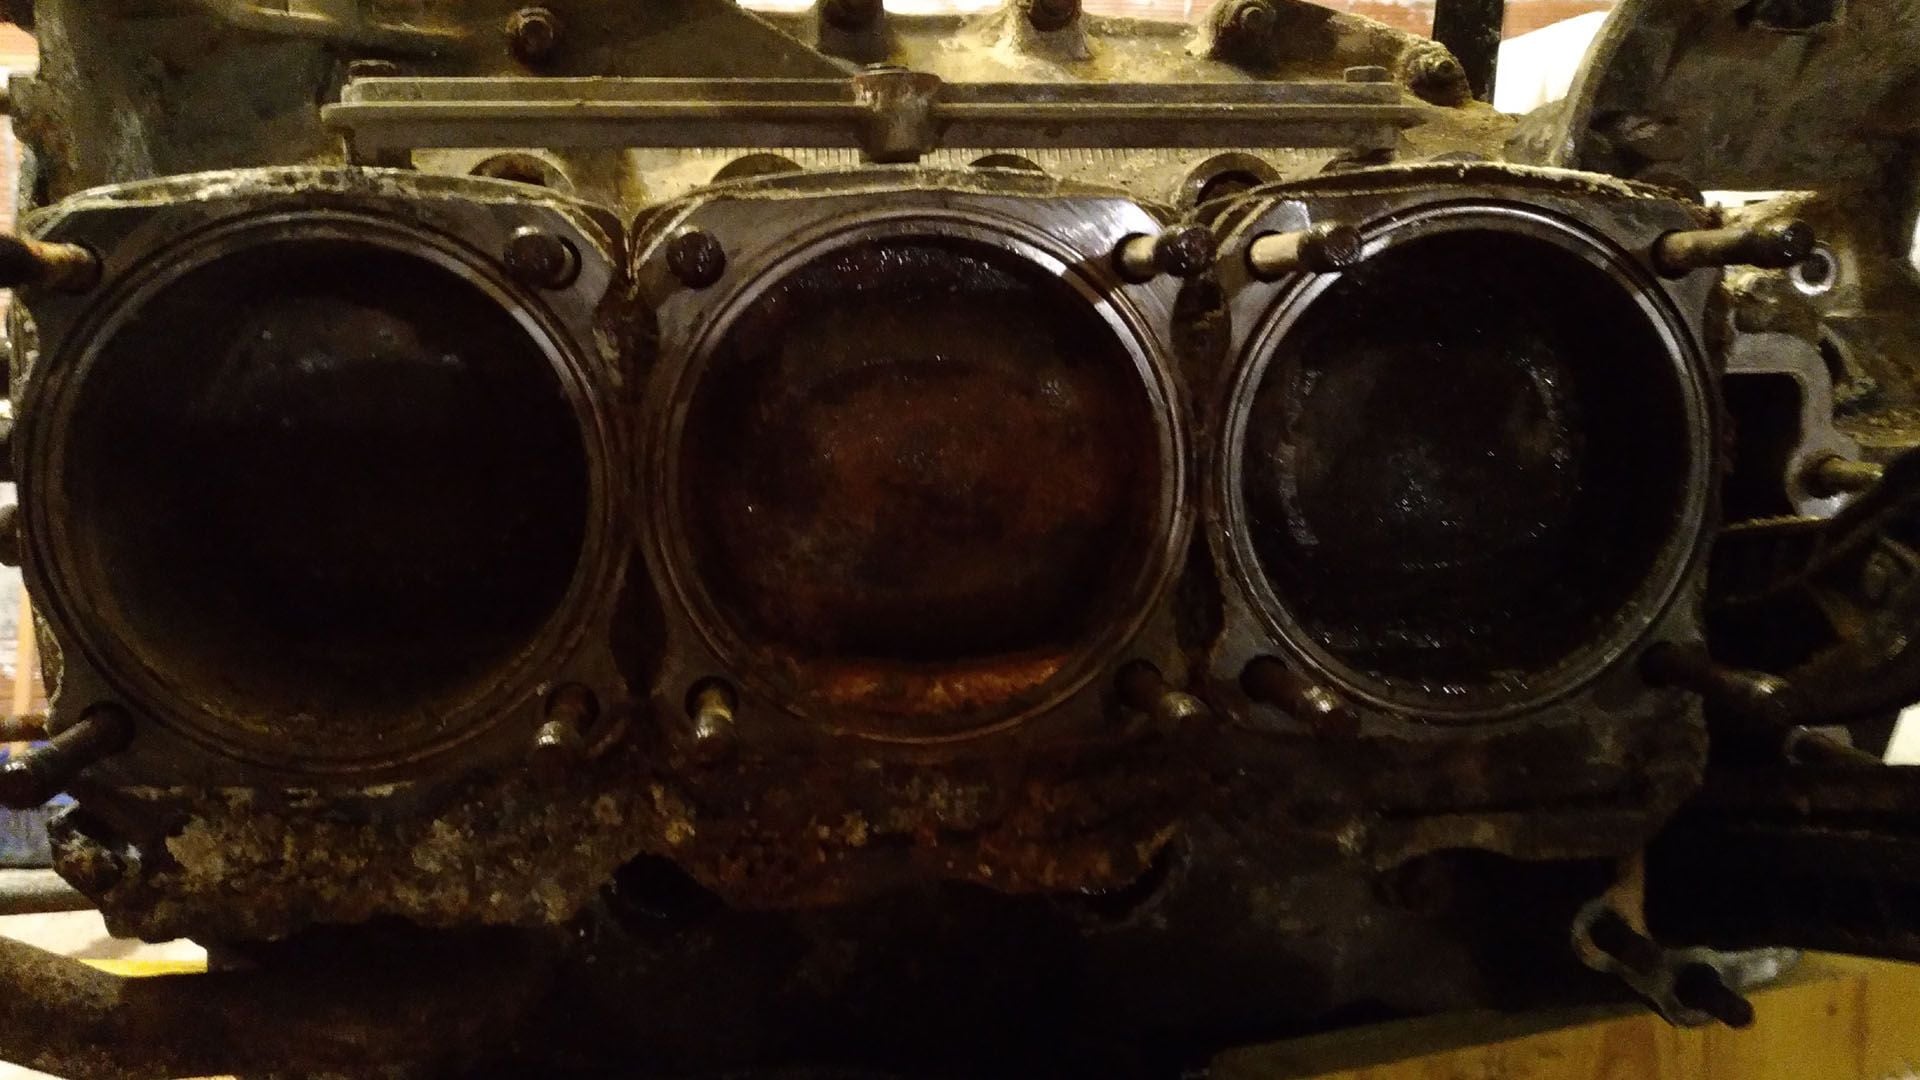
At that point a huge cleaning of the heads and cylinders/pistons with hot high pressure cleaner ... and a good ultrasonic bath for the heads ....could be interesting .
At that point a huge cleaning of the heads and cylinders/pistons with hot high pressure cleaner ... and a good ultrasonic bath for the heads ....could be interesting .
At that point a huge cleaning of the heads and cylinders/pistons with hot high pressure cleaner ... and a good ultrasonic bath for the heads ....could be interesting .
Disassemble the heads first. Remove retainers, springs, valves, guides, seats, so the heads are bare aluminum. Then you can clean them. These heads will need new everything, all the aforementioned is steel and rusted beyond use.
Kind of cool. That fan and housing must have acted like a sacrificial anode. Not enough to save that engine though. You are certainly braver than I. Surely the only thing worthwhile trying to save is the crankcase. The rest must be scrap?


 01-09-2019, 05:24 PM