When you click on links to various merchants on this site and make a purchase, this can result in this site earning a commission. Affiliate programs and affiliations include, but are not limited to, the eBay Partner Network.
This is a guide for installing the Musicar sound damping kit and tweeters, but I figured it would be useful info for anyone needing to get into the doors or remove the A-Pillars on a 992.
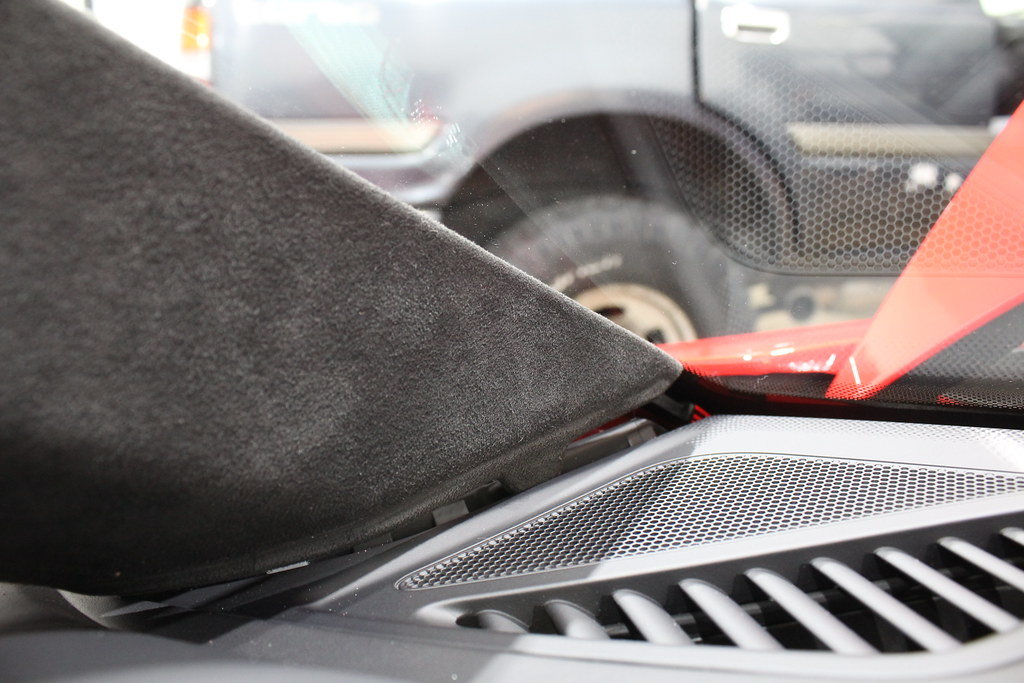
Rather than making the grilles a superficial and easily removal part, Porsche decided to nest the A-Pillar into the side of the grille. That said, removal is still a fairly simple task, but some of the steps are not intuitive so this guide should help mitigate confusion/frustration of the process. Being that they're a symmetrical job, I'm only going to show the one side.
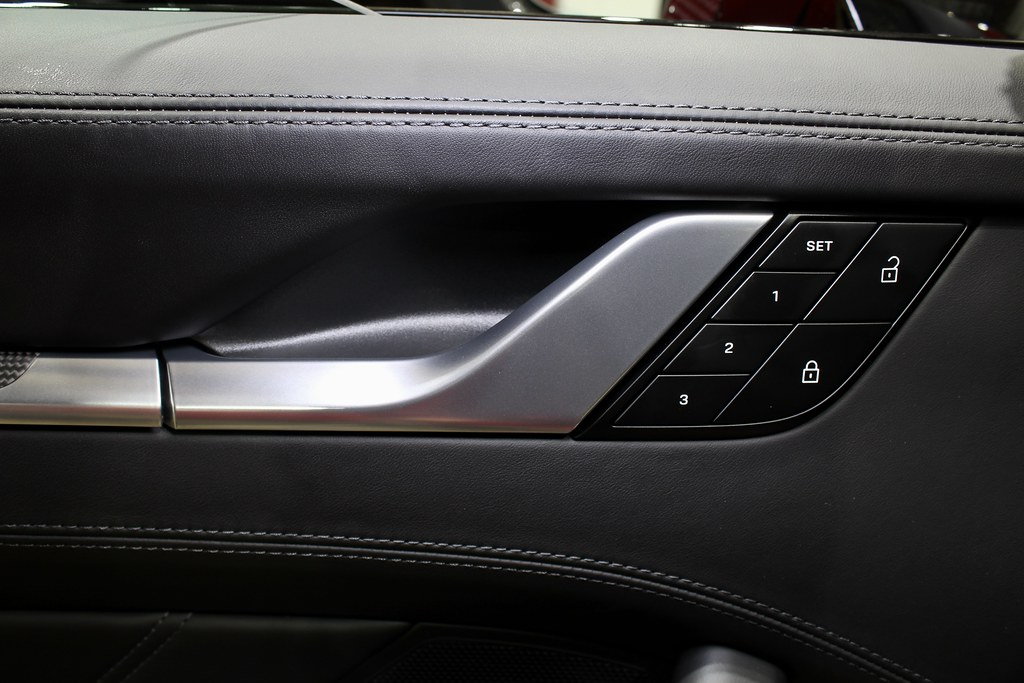
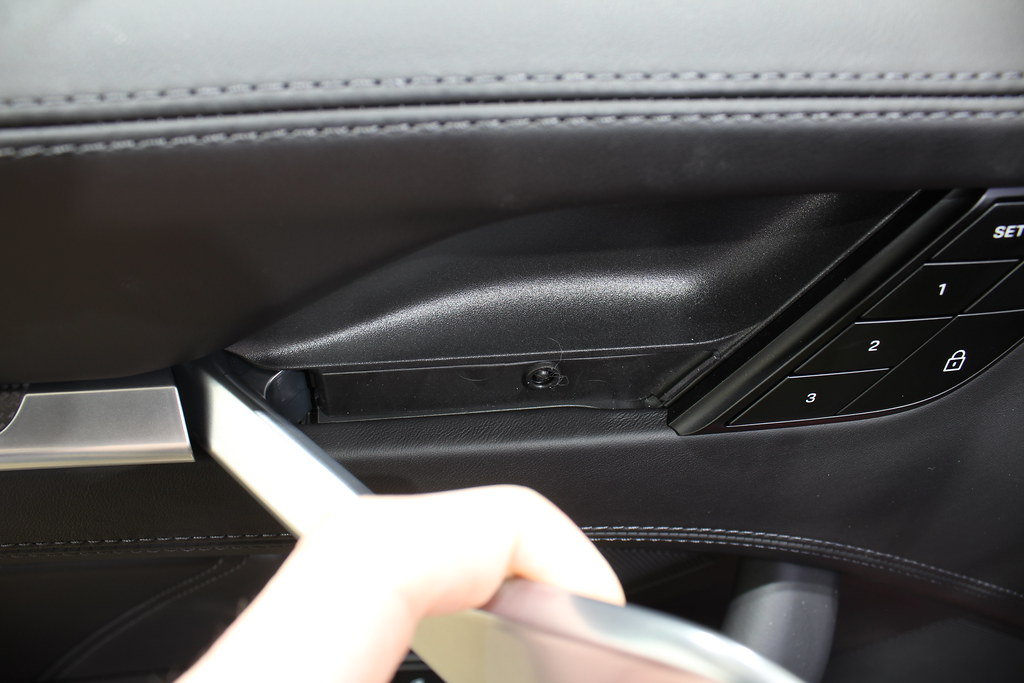
1.) Remove Side Panel — The side panel is only held in with a few snap clips. Insert your trim removal tool just below the AC-Vent trim to get behind the panel. (here's a link to the tool I recommend:
) Pry out to release. Once released, you should be able to swing the panel out and maneuver the back of the panel out from its channel. Careful not to lose the white guide-pin covers show in the photos.
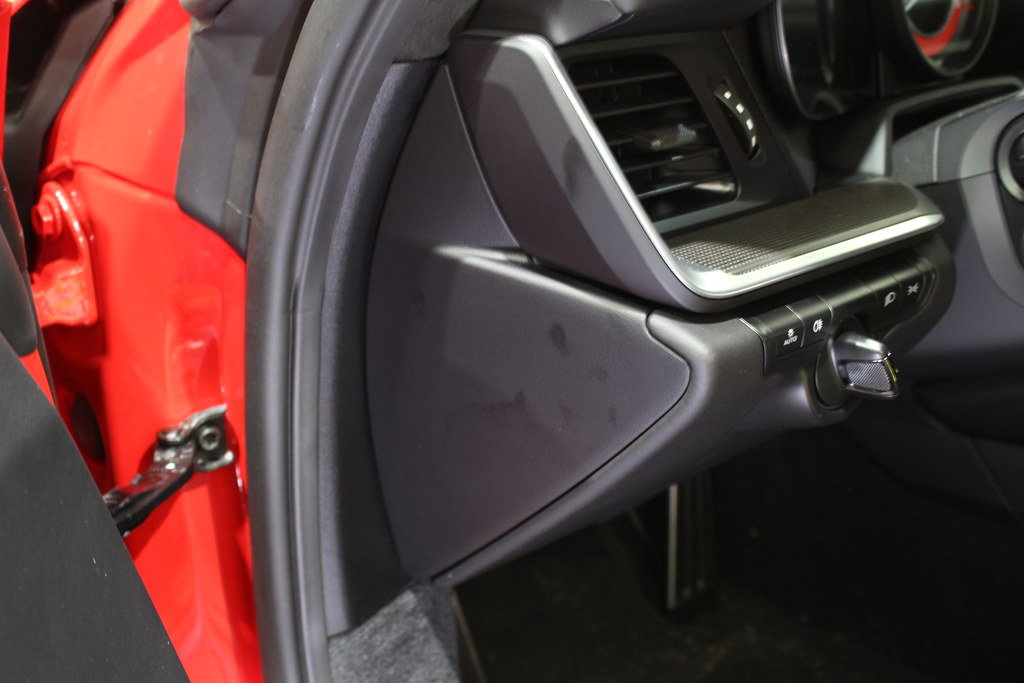
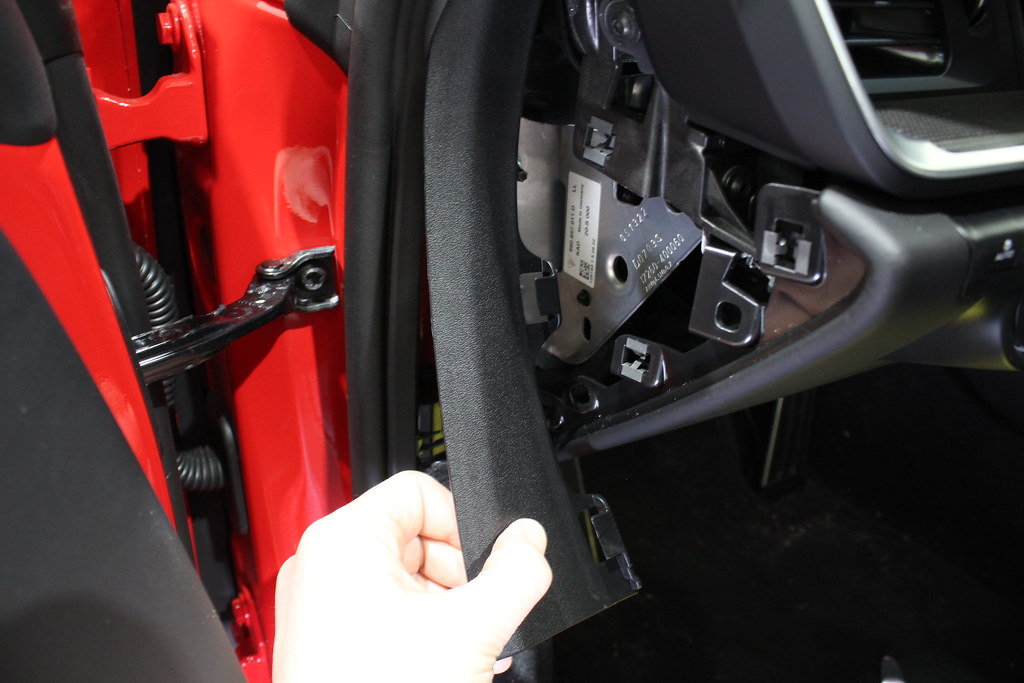
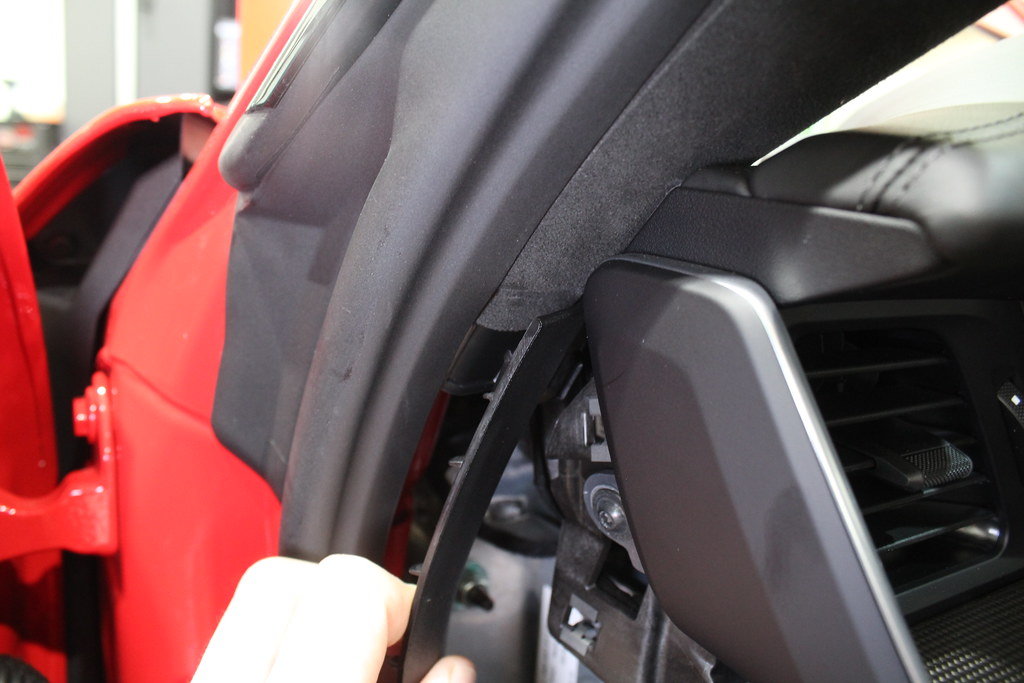
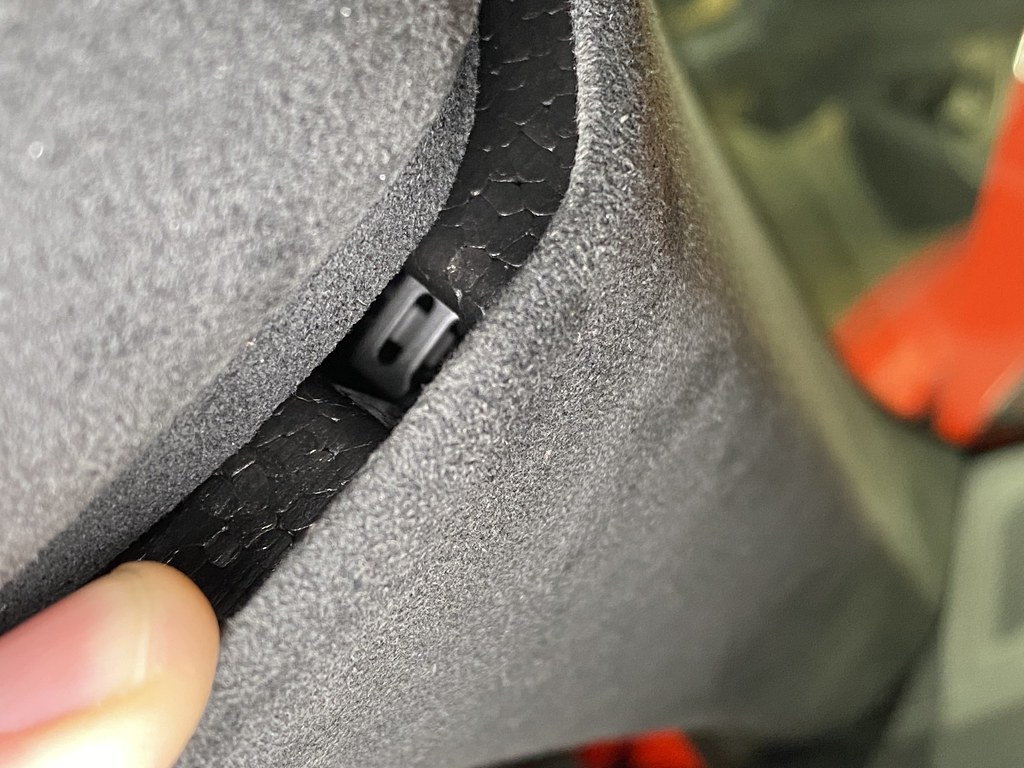
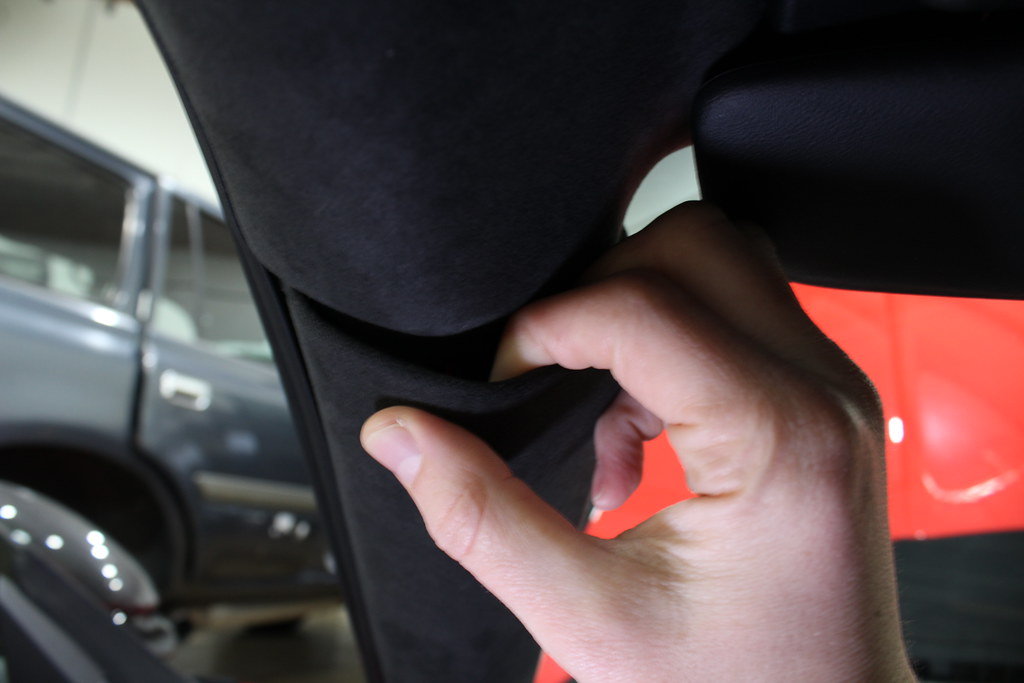
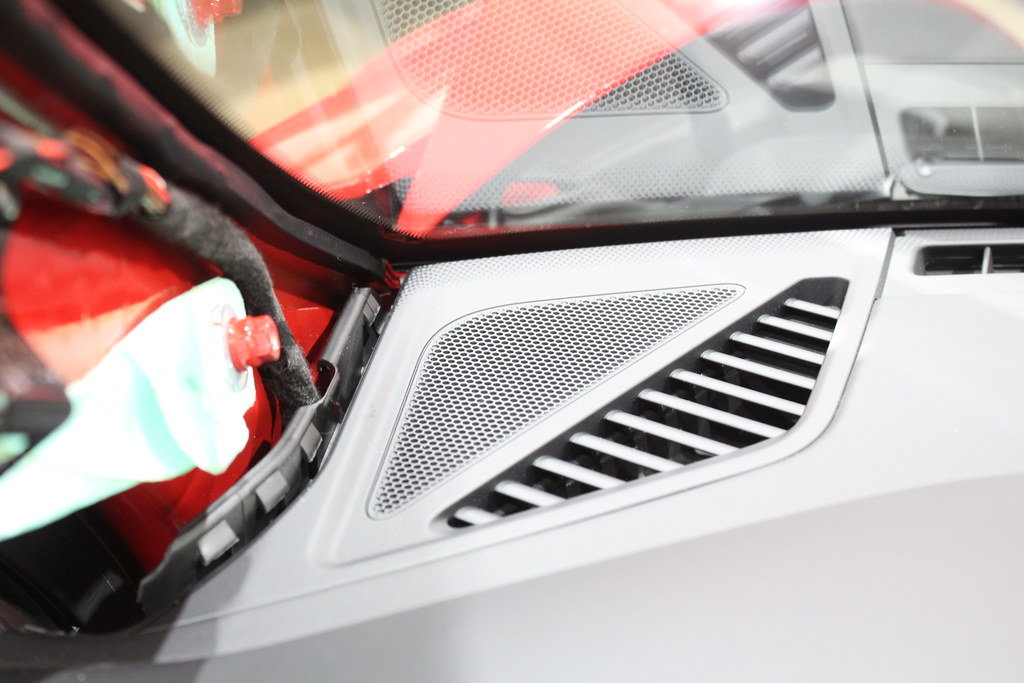
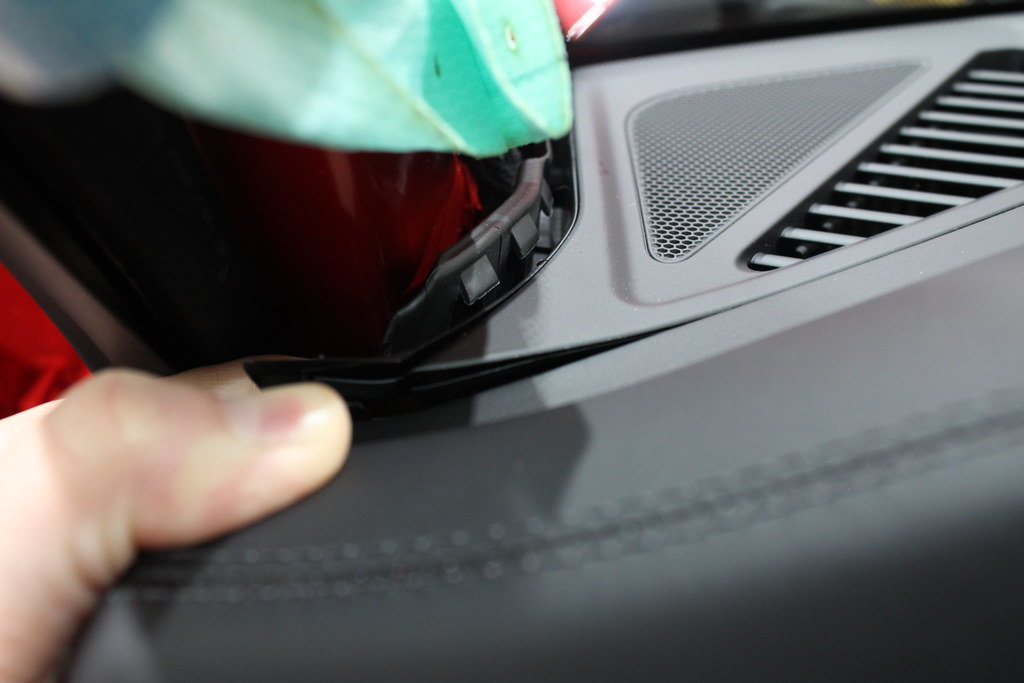
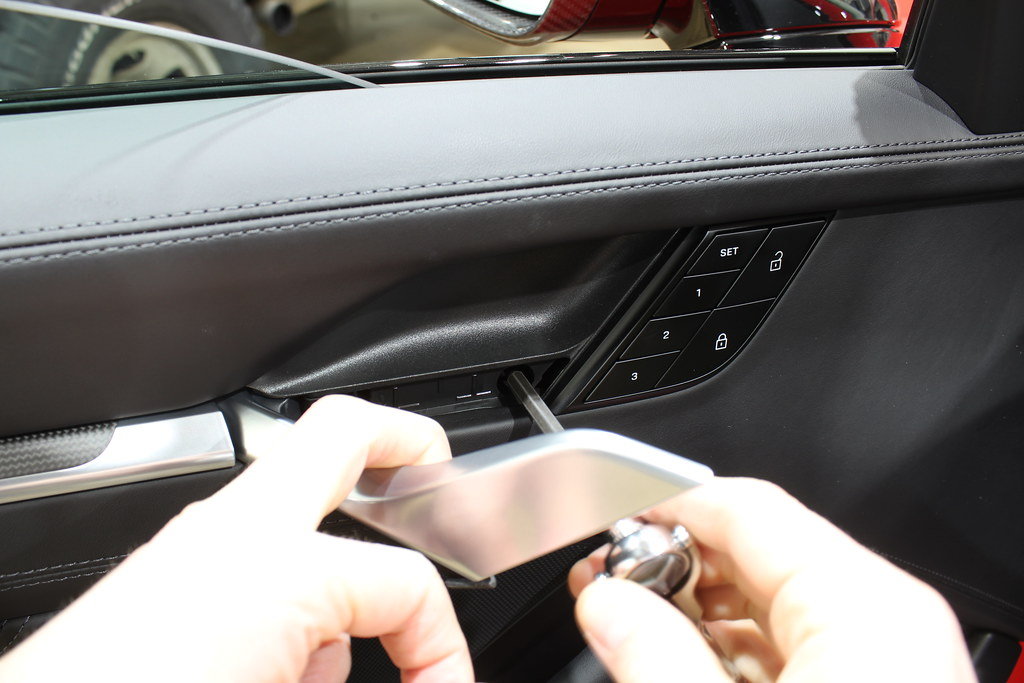
2.) Remove Vertical Side Trim — This tall and skinny trim panel is attached to the A-pillar, which we also need to remove. This trim piece is also just snapped in place, but be cautious not to break the clips on the door gasket side. They're small, integrated plastic wedges that are easily broken if forced out or into place.
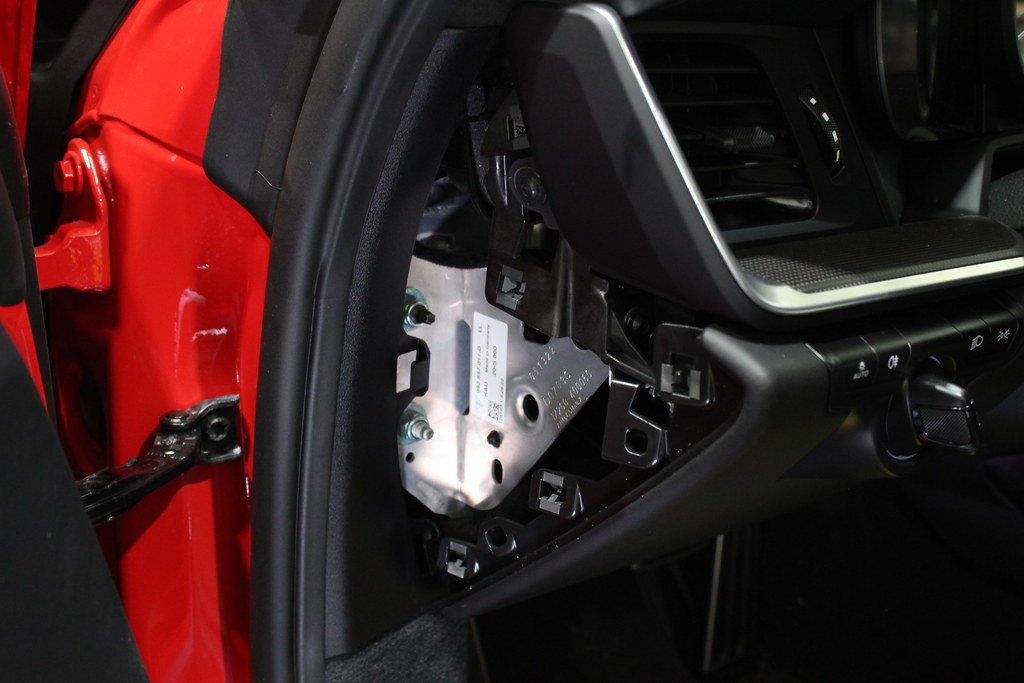
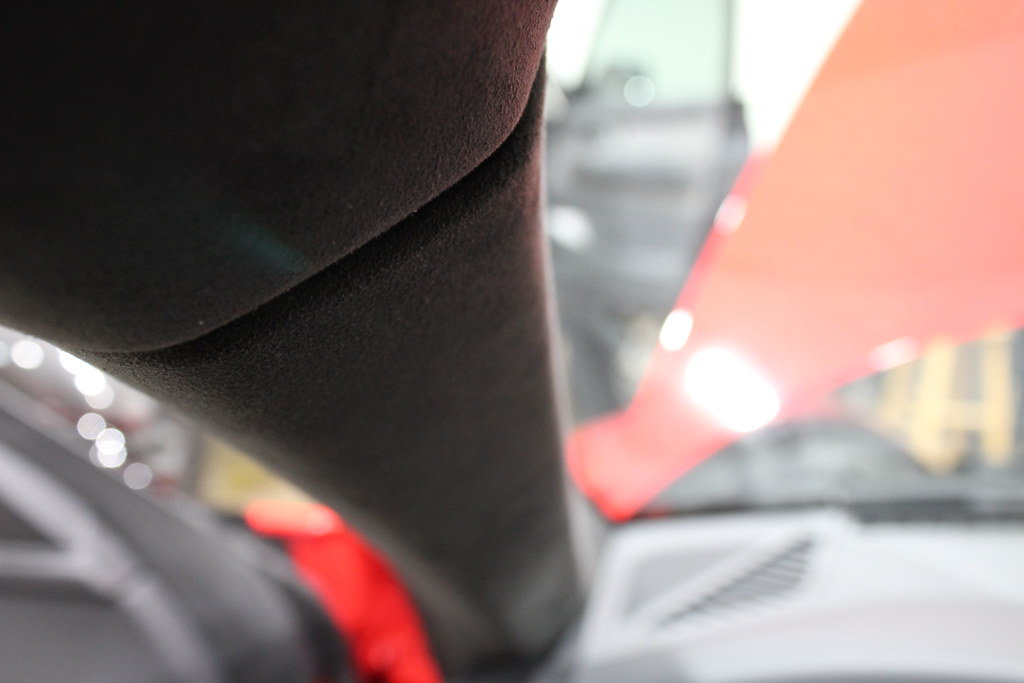
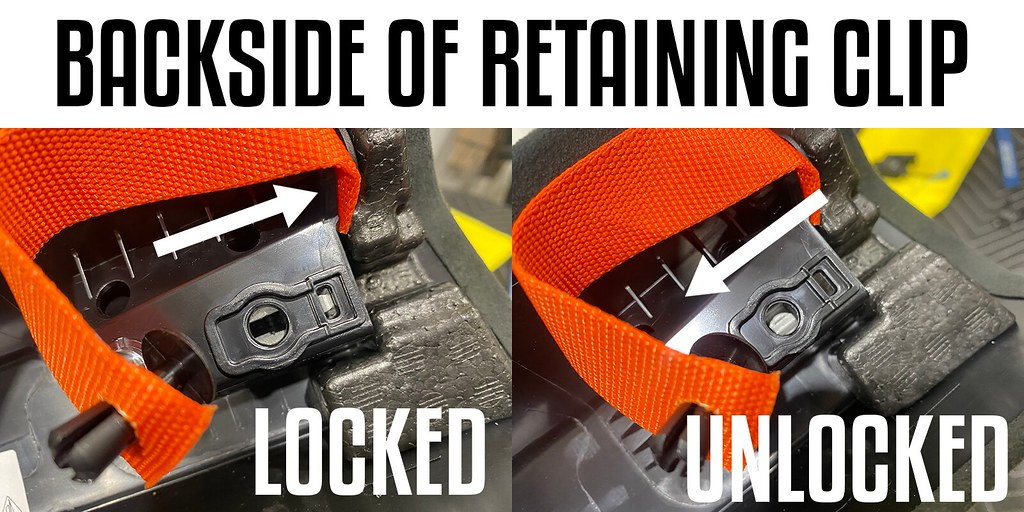
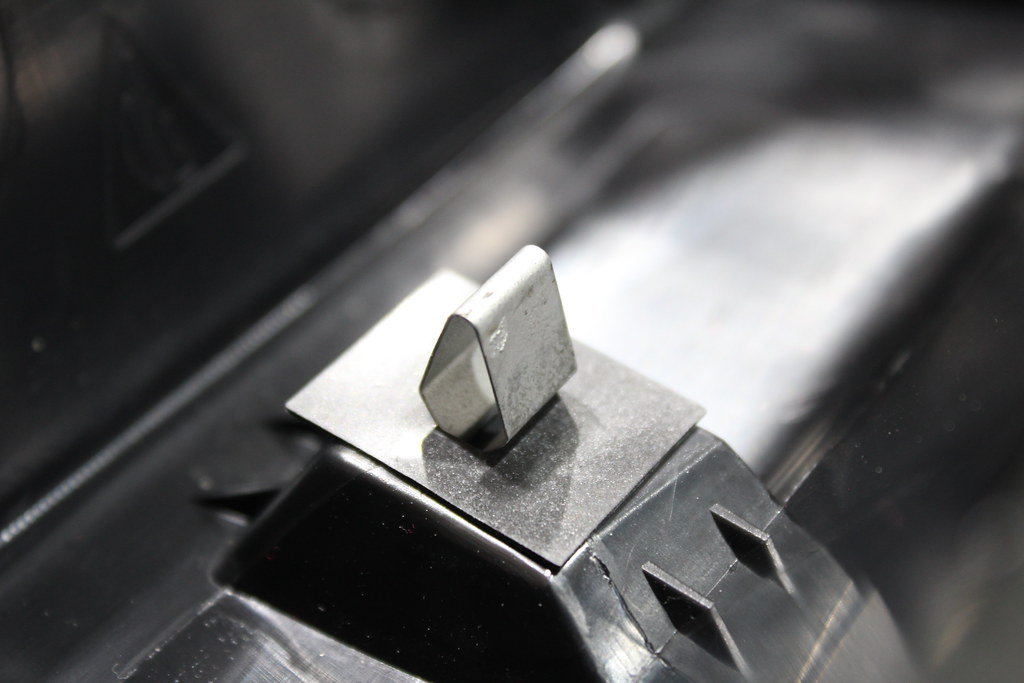
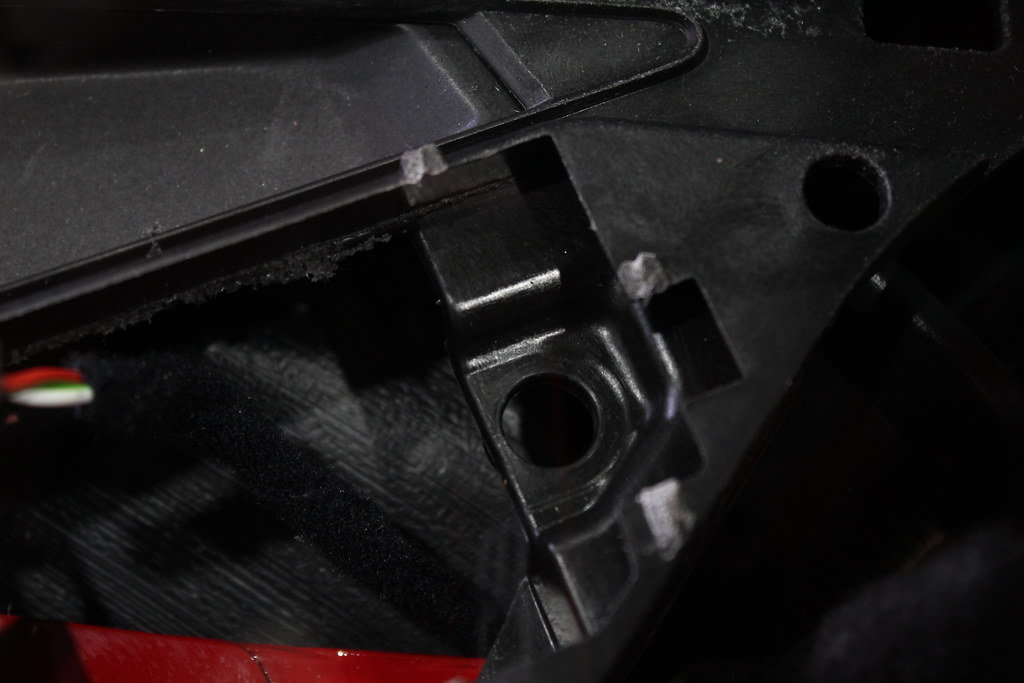
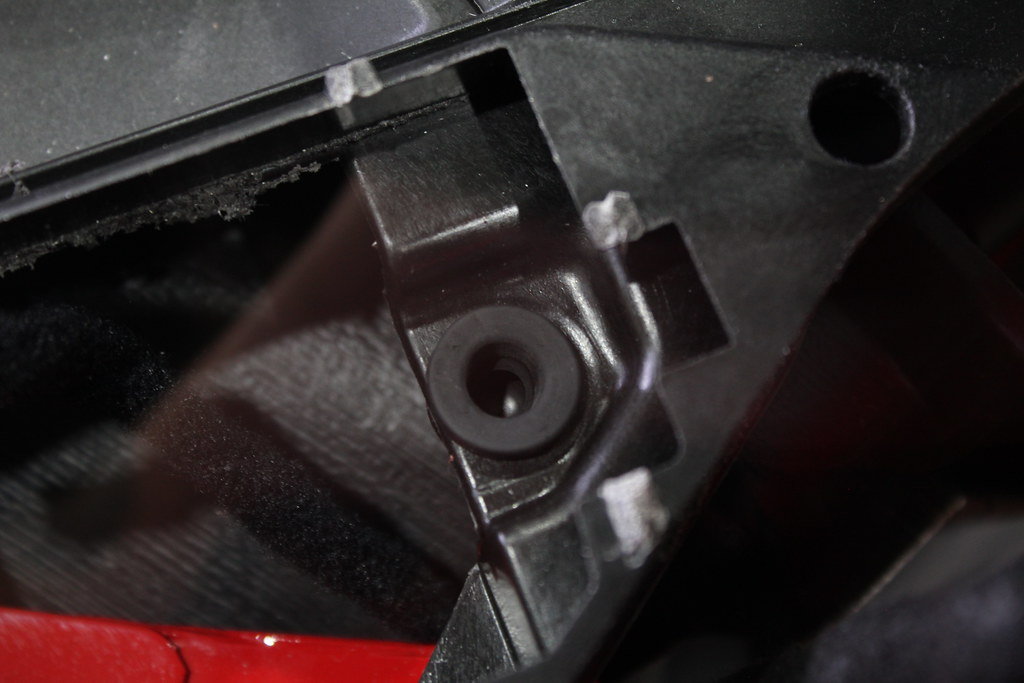
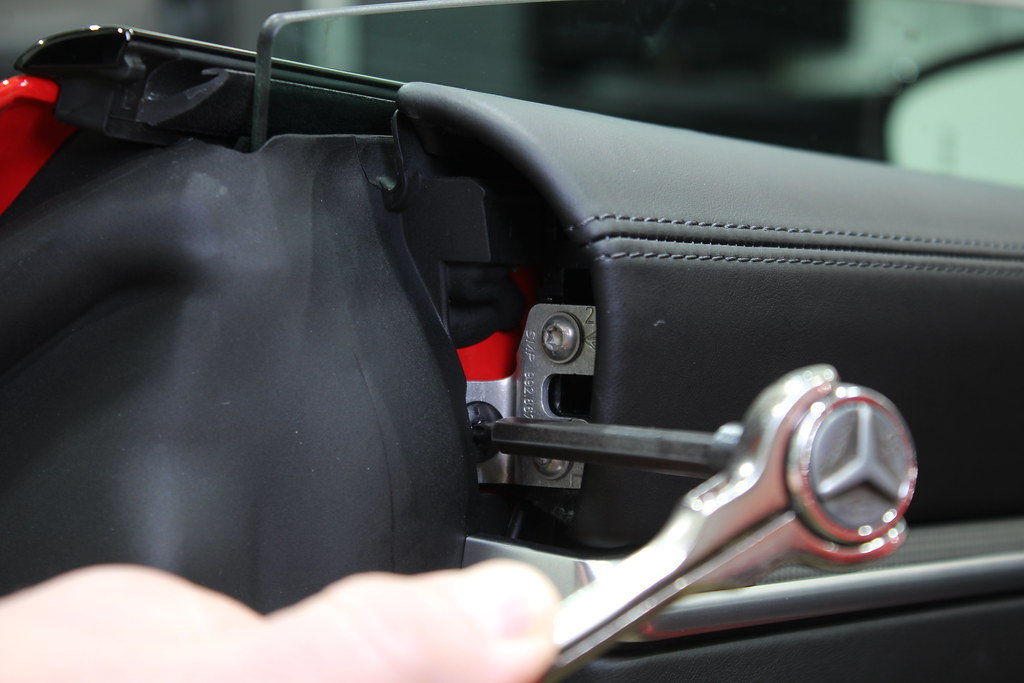
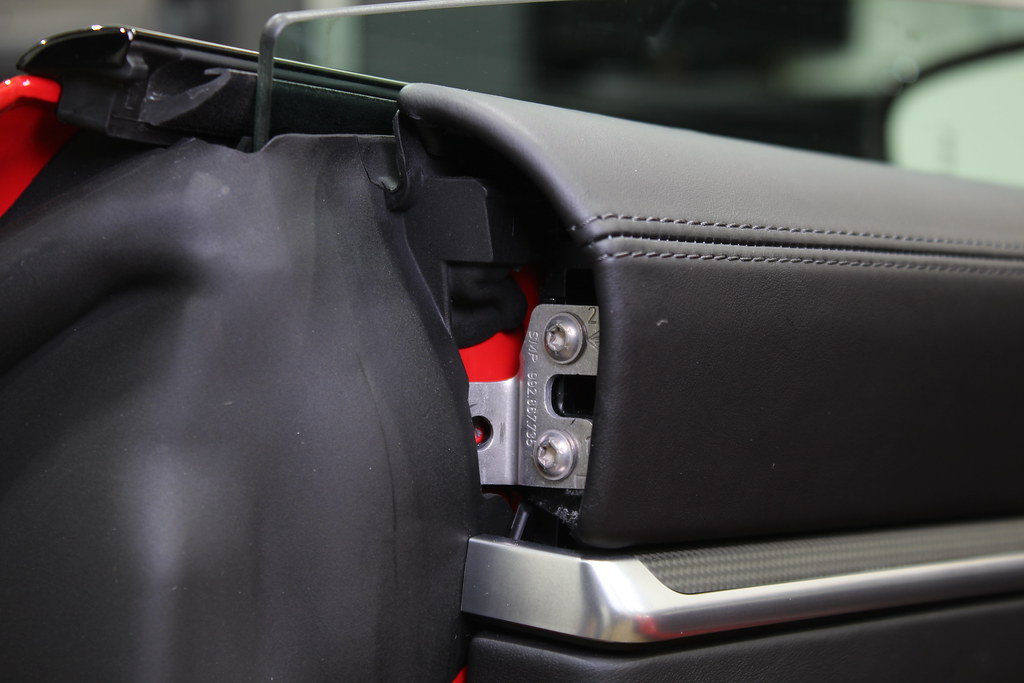
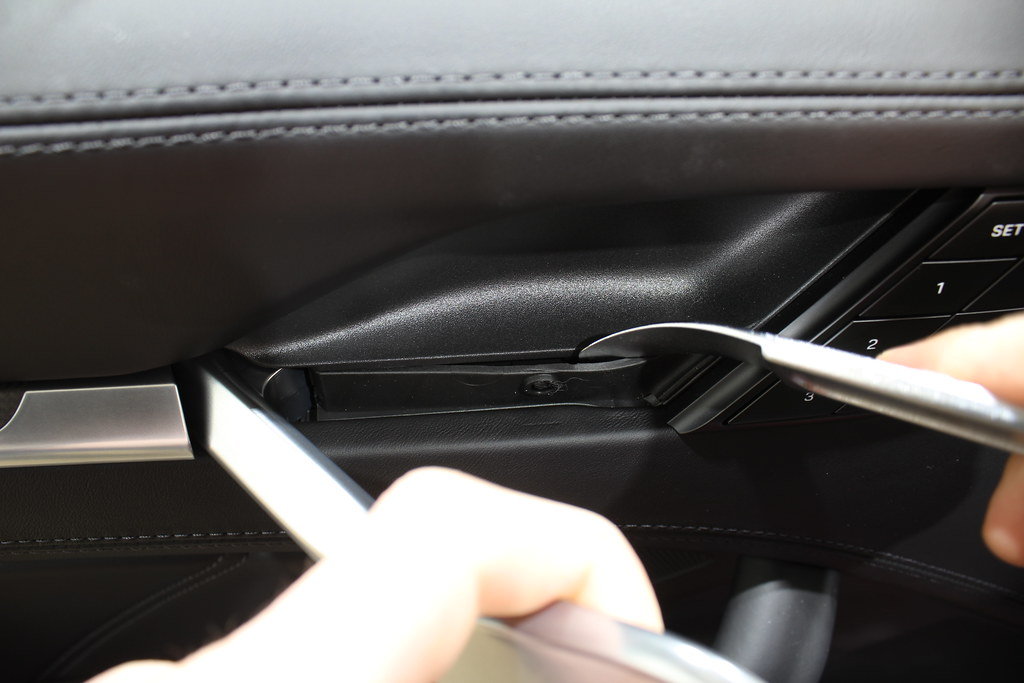
3.) Release A-Pillar Retainer — At the top of each pillar is a retaining pin with a slide-lock clip. To release, pull back on the top of the A-pillar just enough to reveal the clip. With a flashlight, you should be able to easily see this from above. Using a long flat-blade screwdriver or similar tool, push down on this clip to slide it out of place. Once released, you should have more movement at the top of the pillar. There is still a pressure clip holding the middle of the pillar, but a quick tug outward should release that as well. Make sure you slide the clip lock back into it's "locked" position before you re-install the pillar. The assembly is somewhat like a fish-hook, so the pillar will snap back on in the locked position but won't come back off.
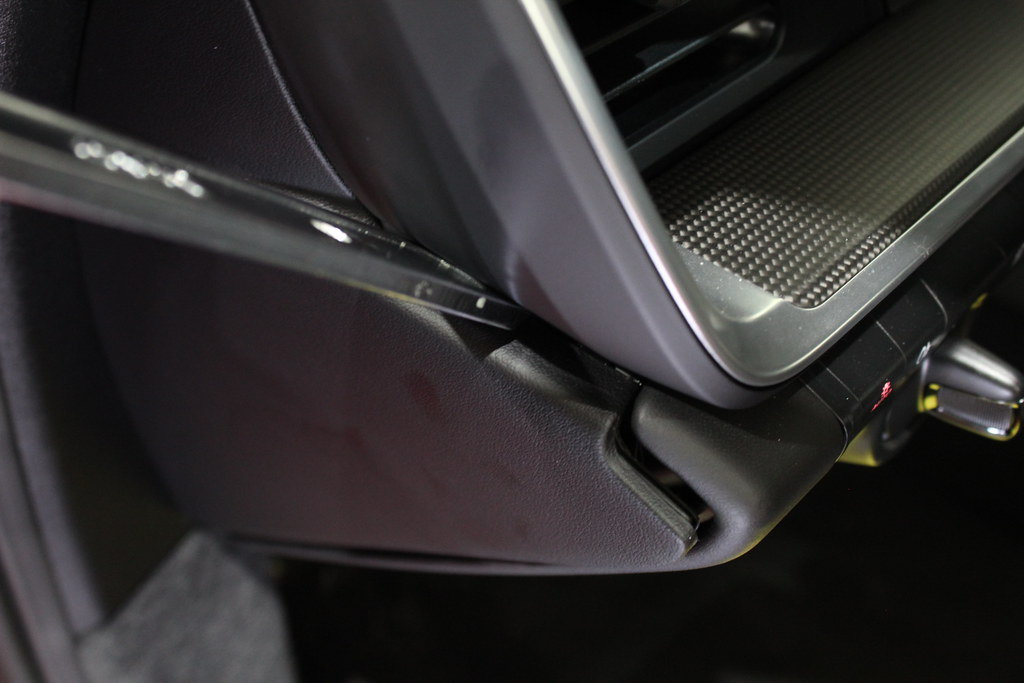
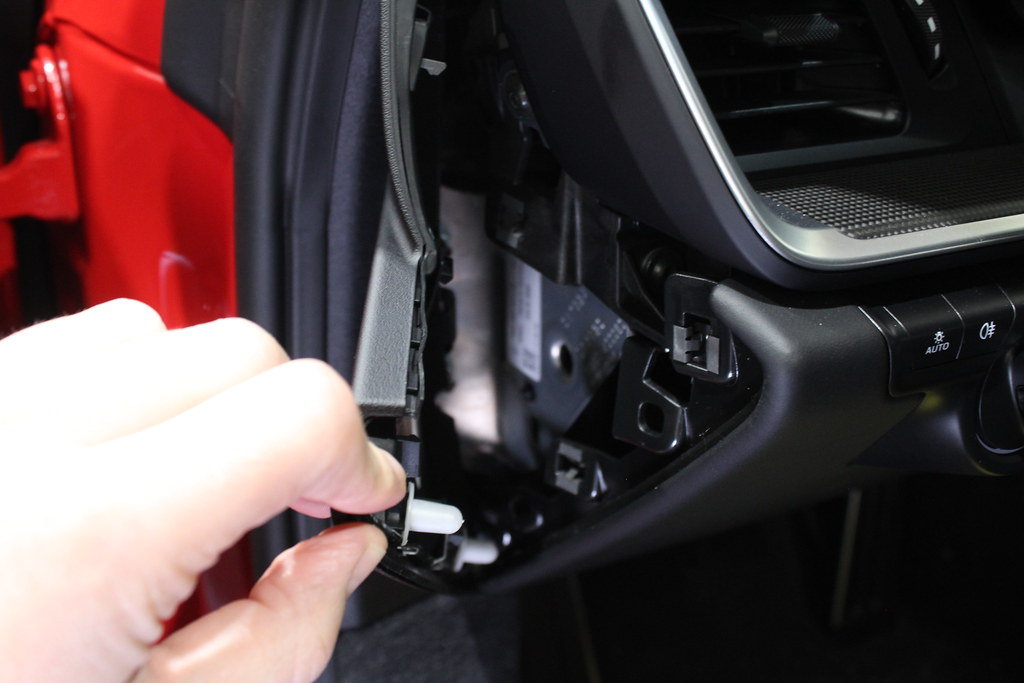
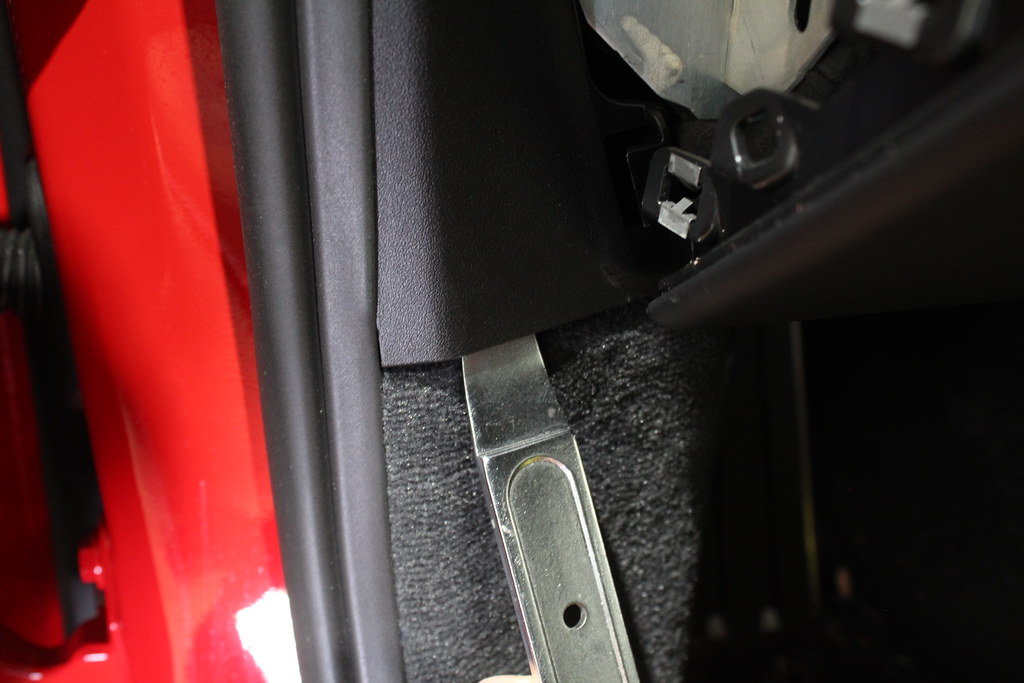
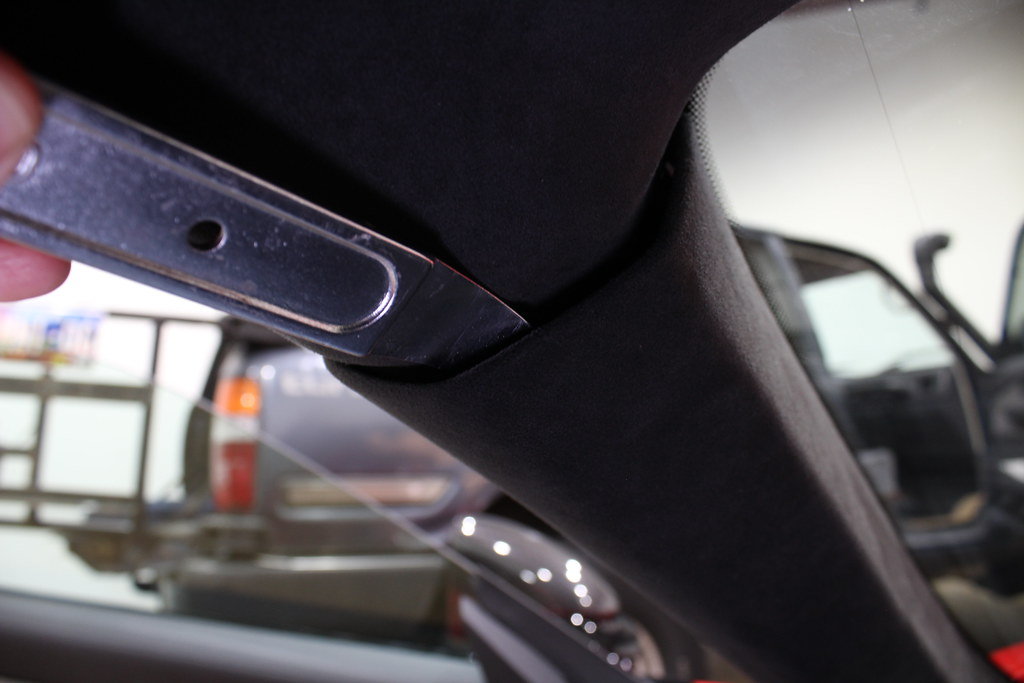
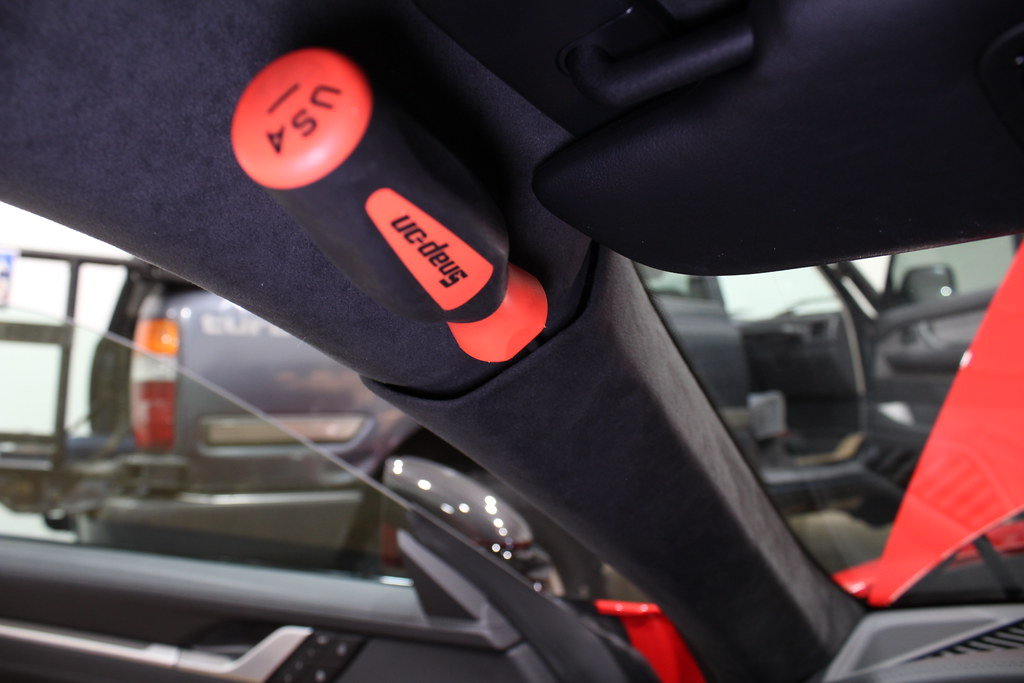
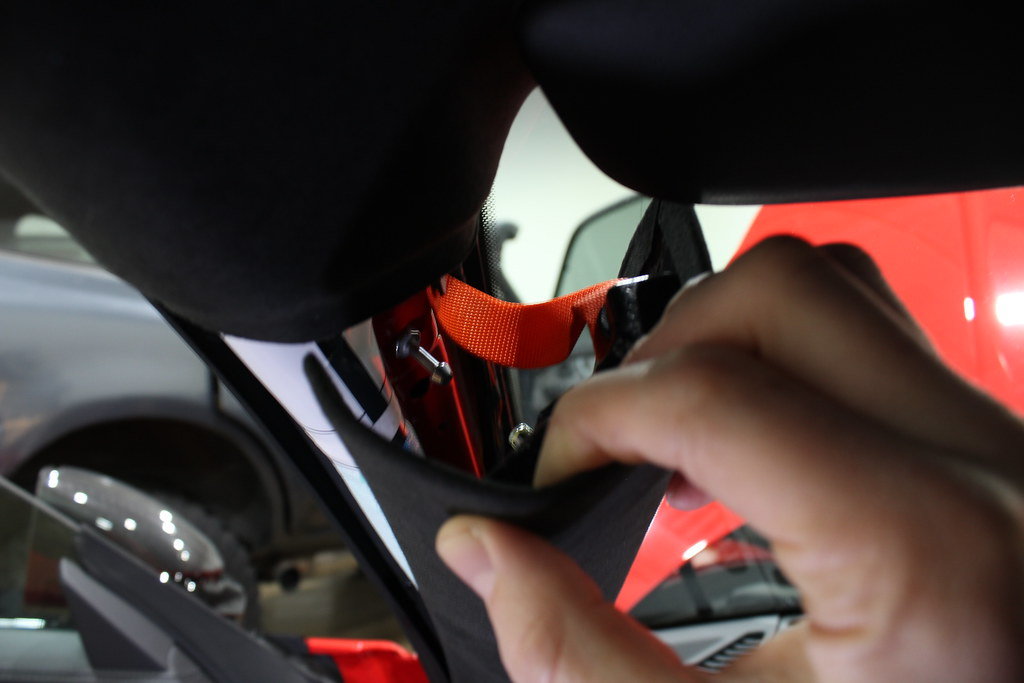
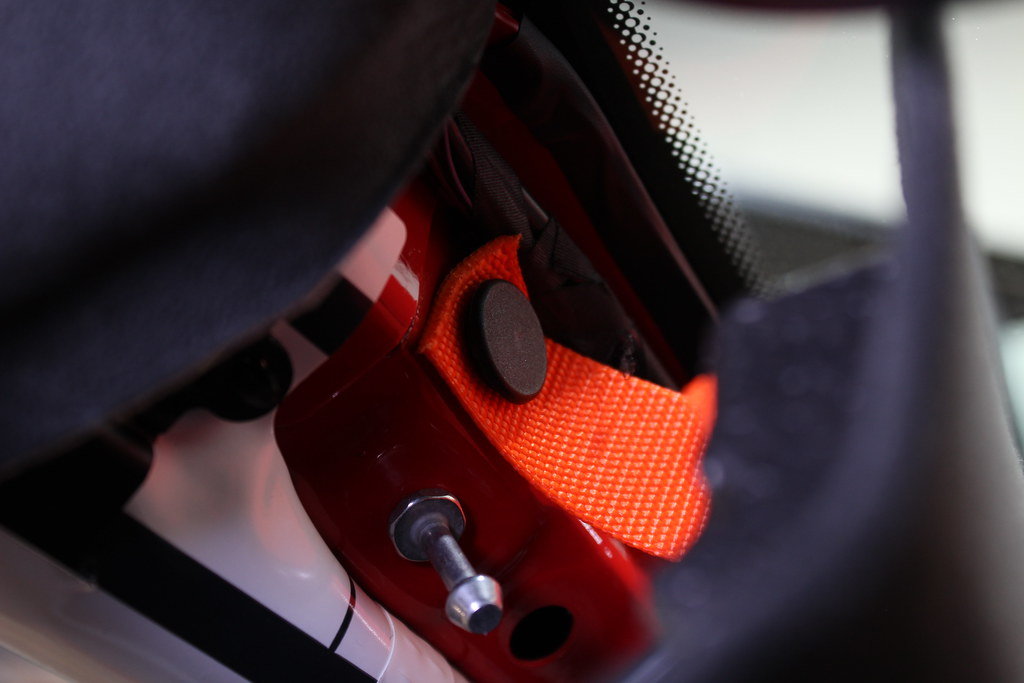
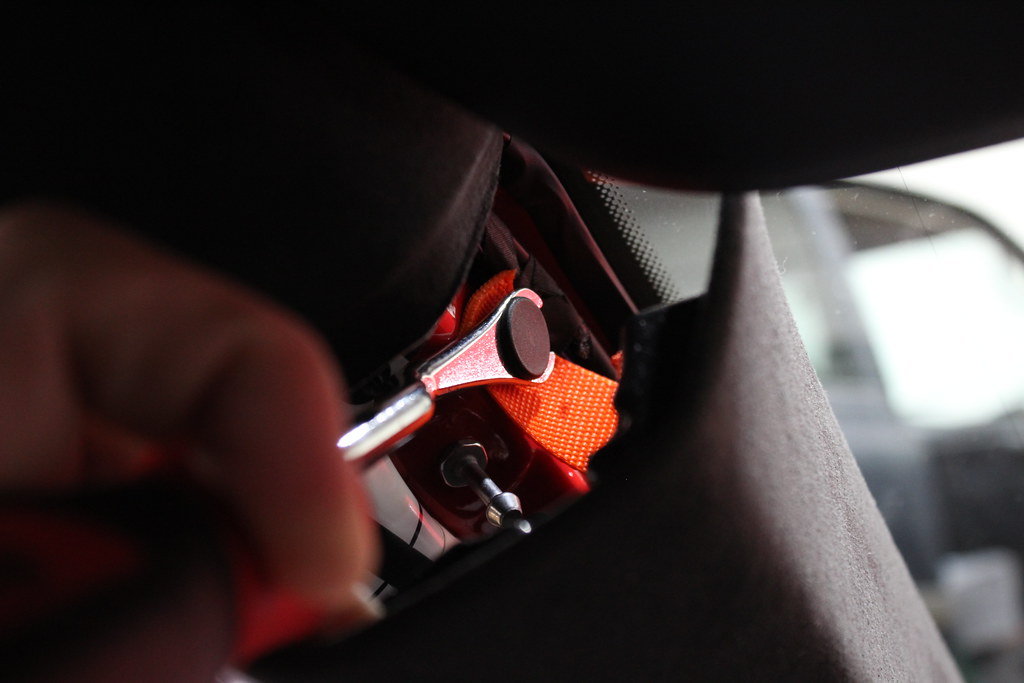
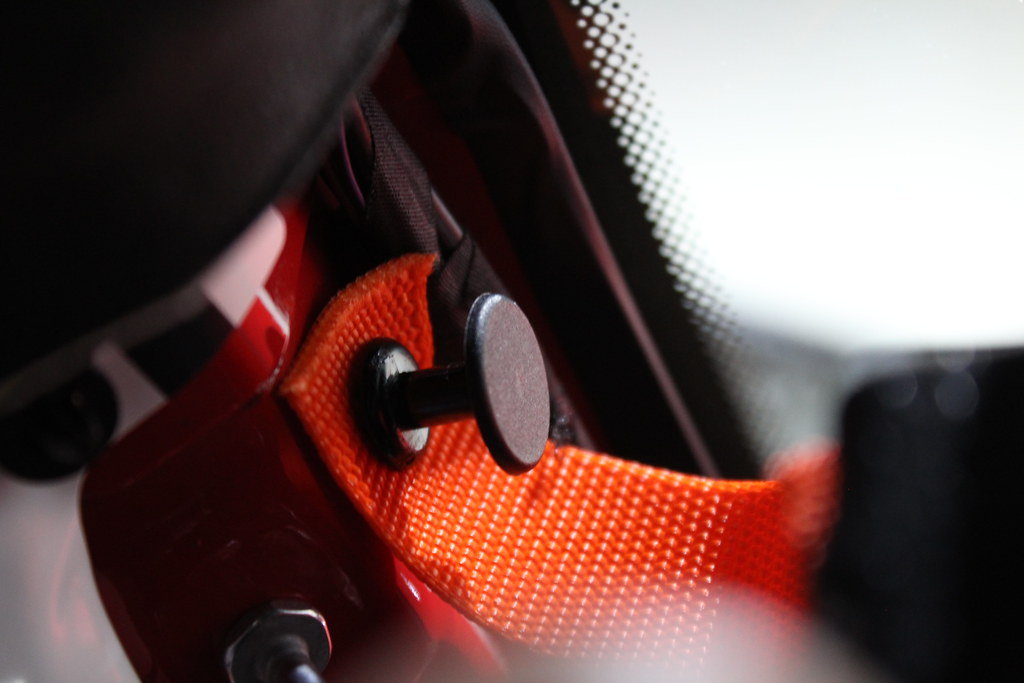
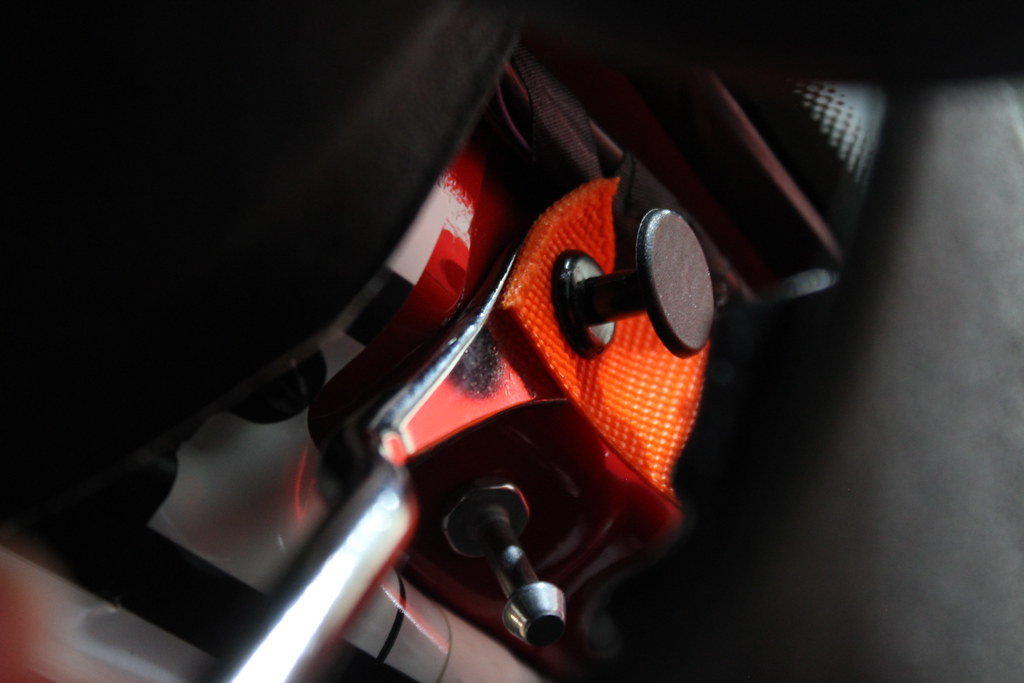
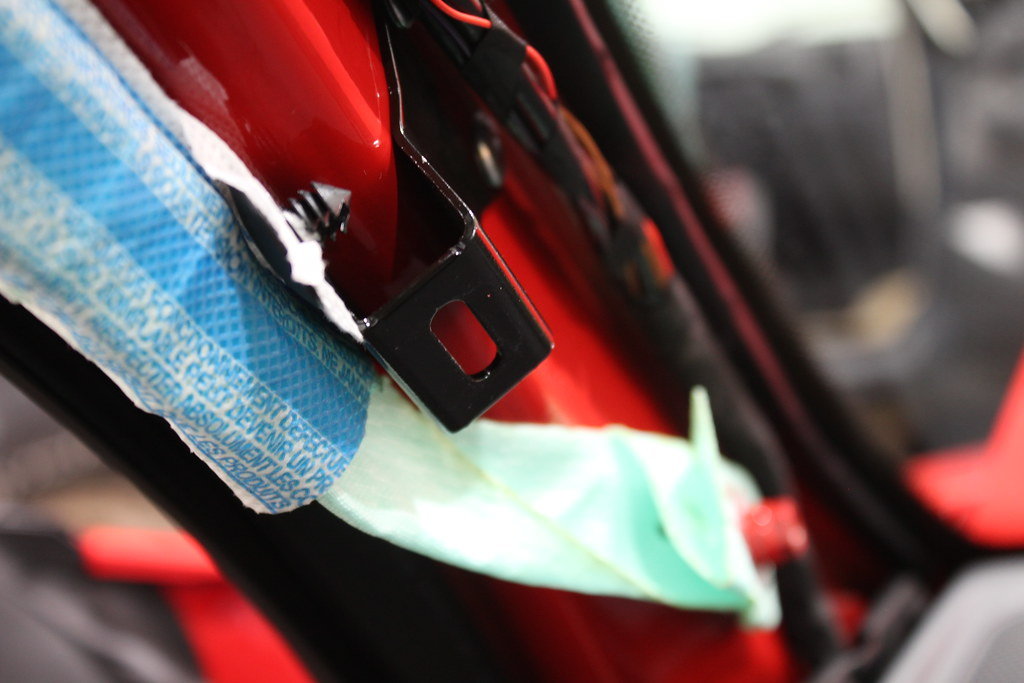
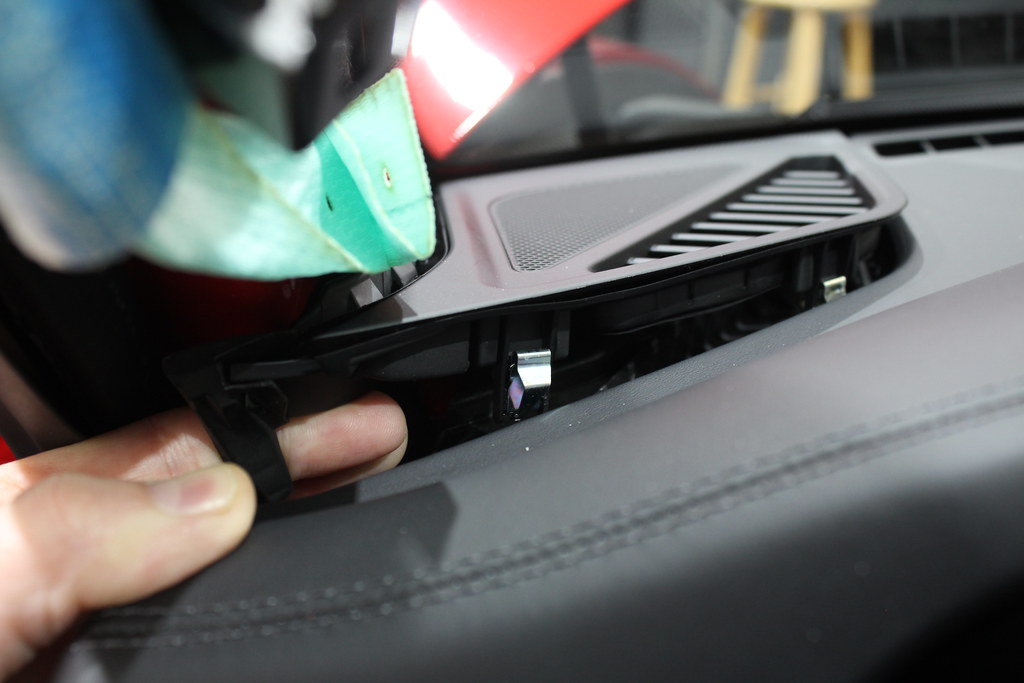
4.) Release Strap and Remove Pillar — Even after all this, the pillar is still held on by a safety strap. This is used to hold the pillar to the car in an accident. Make sure you reattach this when you reinstall the pillar! To release, use a panel clip tool(or flat blade screwdriver if you don't have one of these. But you should get one. They're useful and cheap. Here's an amazon link:
) and release the first part of the 2-part clip. This will loosen the clip so you can get it out from behind the strap. Again, don't lose this clip and make sure it goes back in. Once you've released the strap, you can pull the A-pillar out of the car. Make sure you check for the metal spring clips in case they fell off or stayed on the car side.
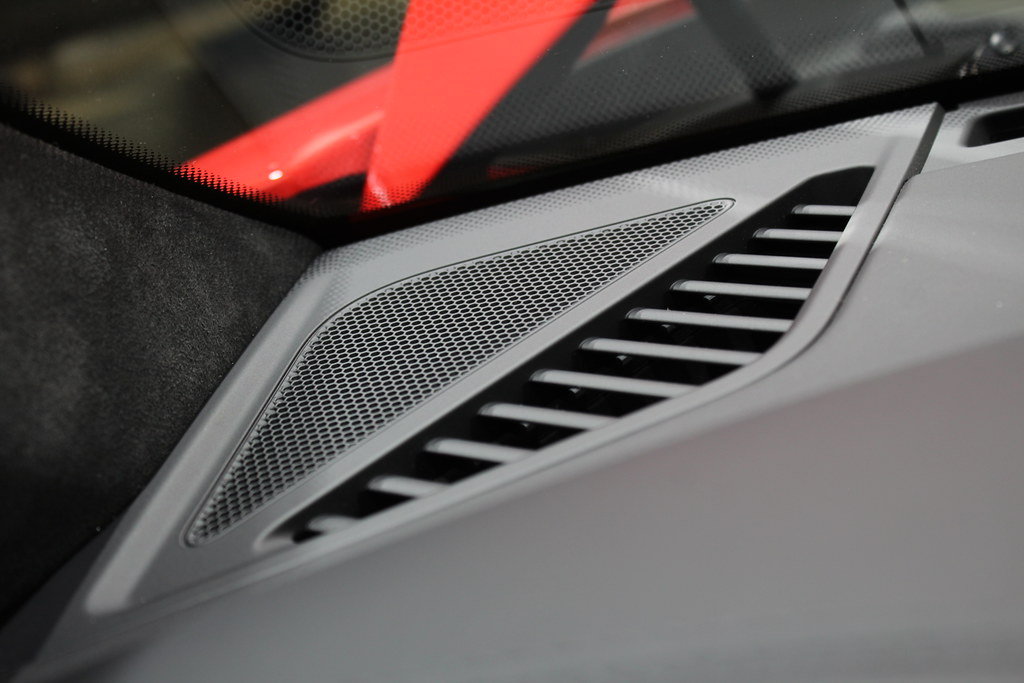
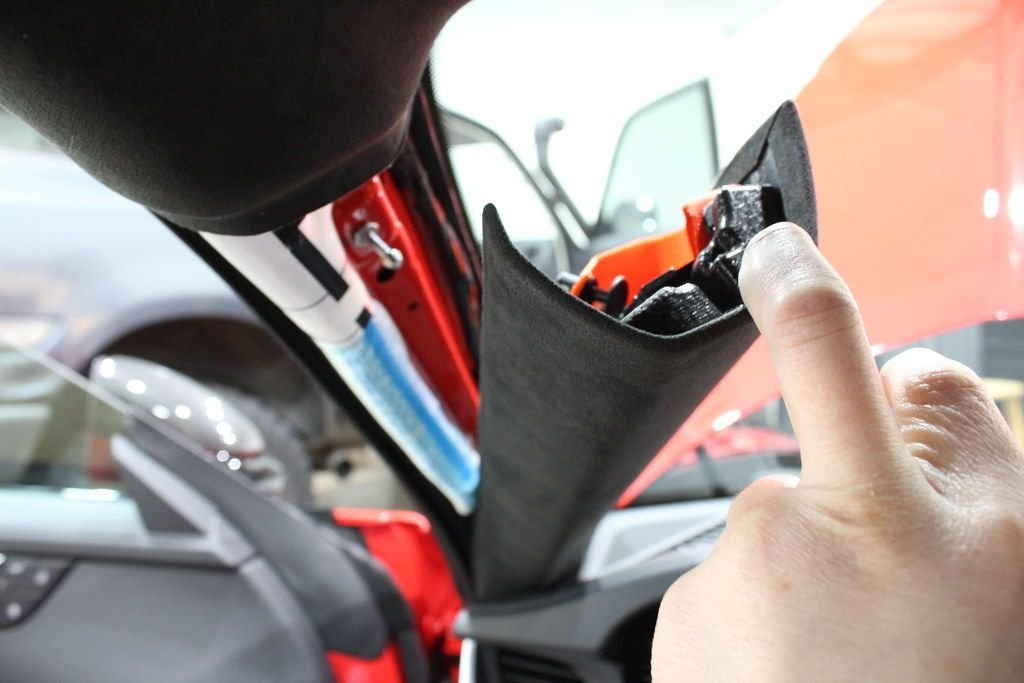
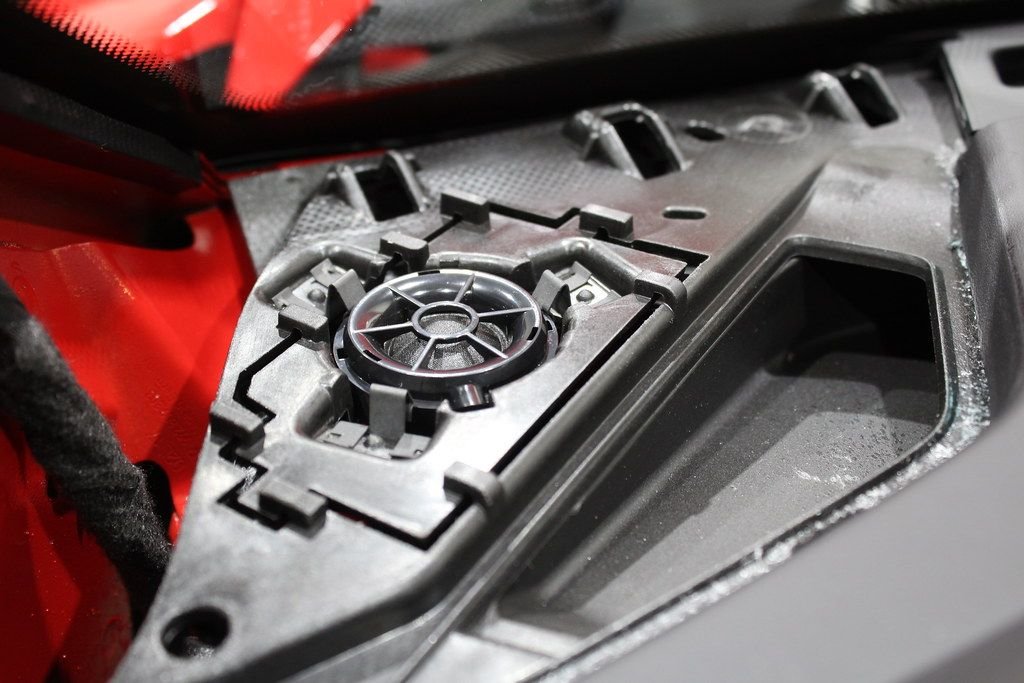
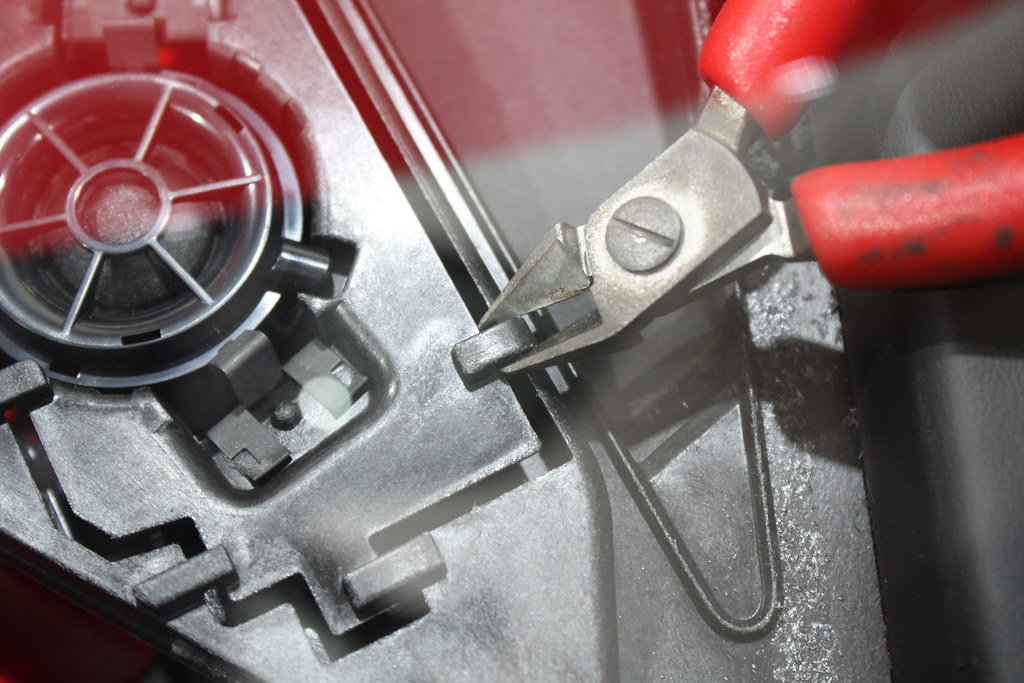
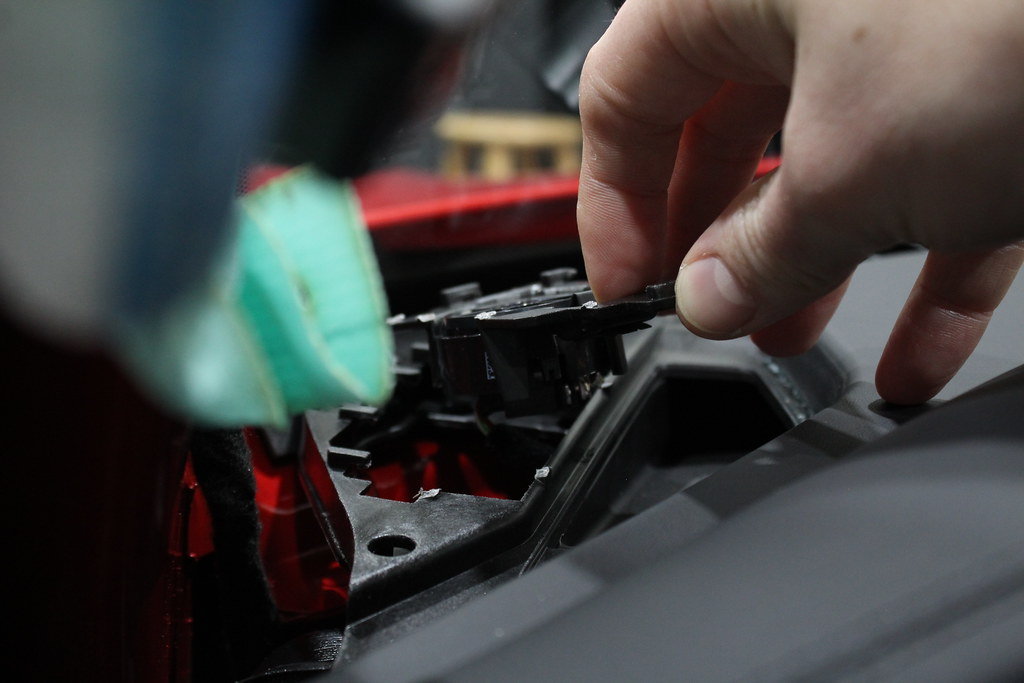
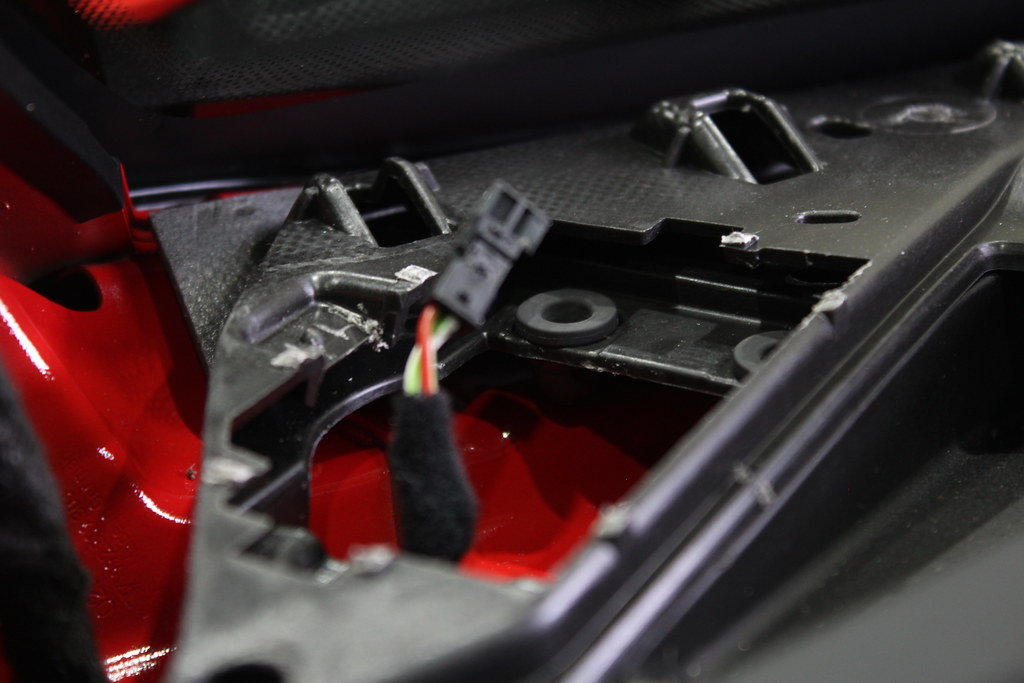
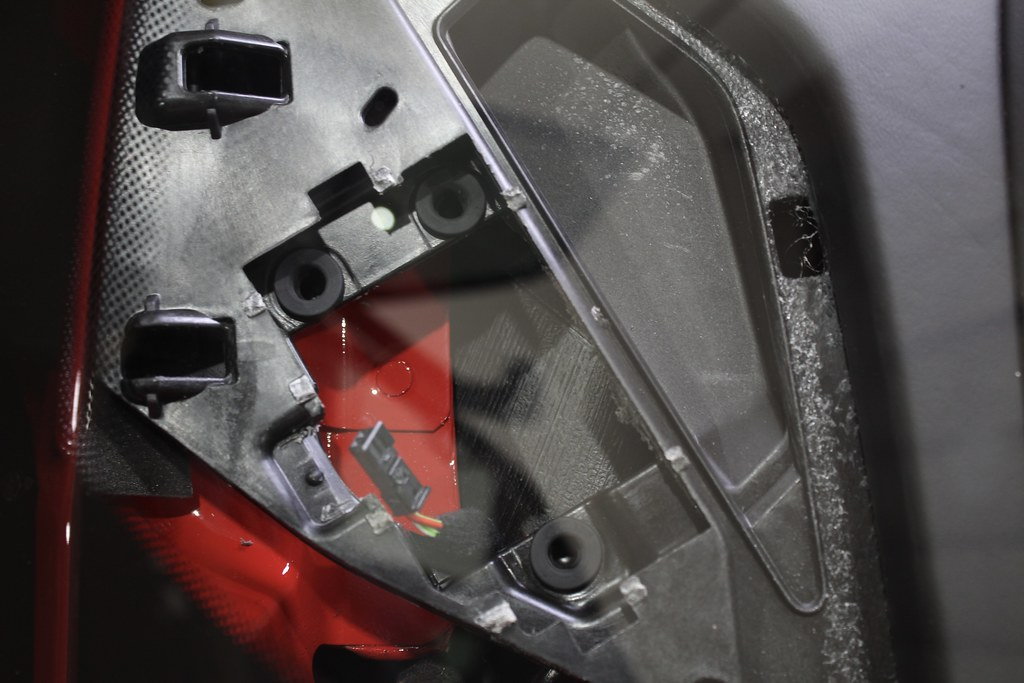
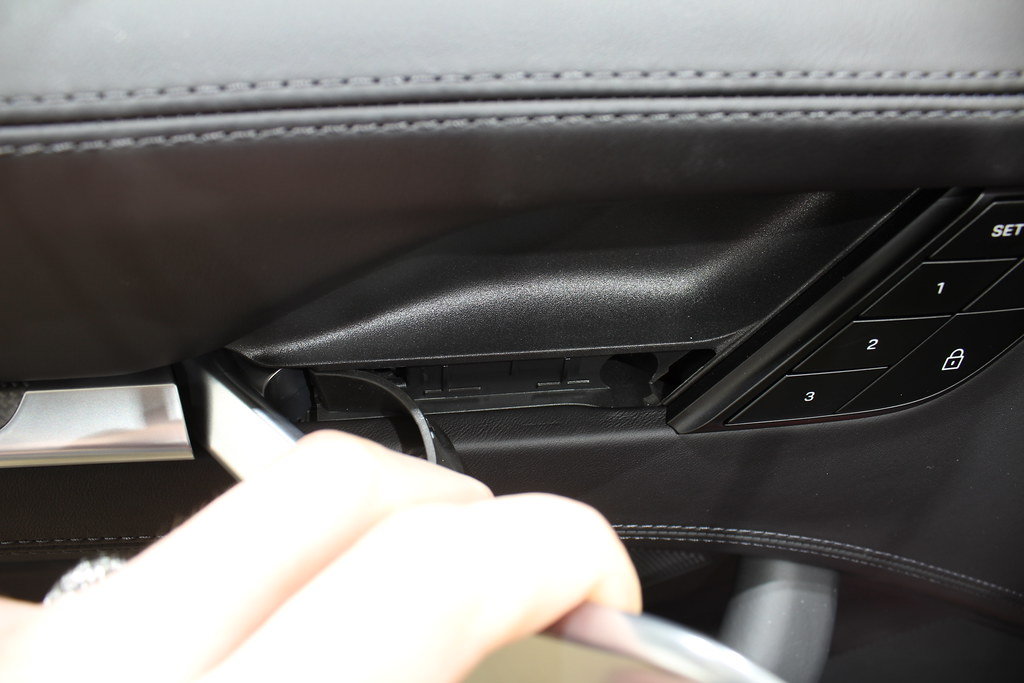
5.) Remove Tweeter Grill — This is now only held in by clips. Start on the pillar side by getting your hand under the grille and pushing up from the bottom. If needed, you can use a trim tool, but I found that the whole piece released by hand fairly easily.
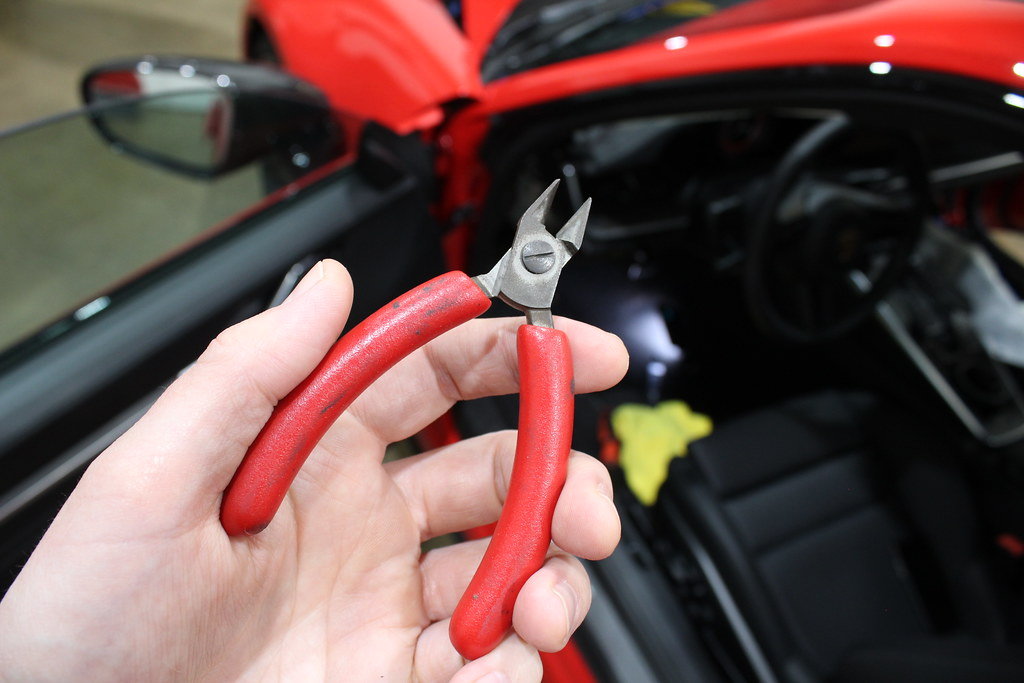
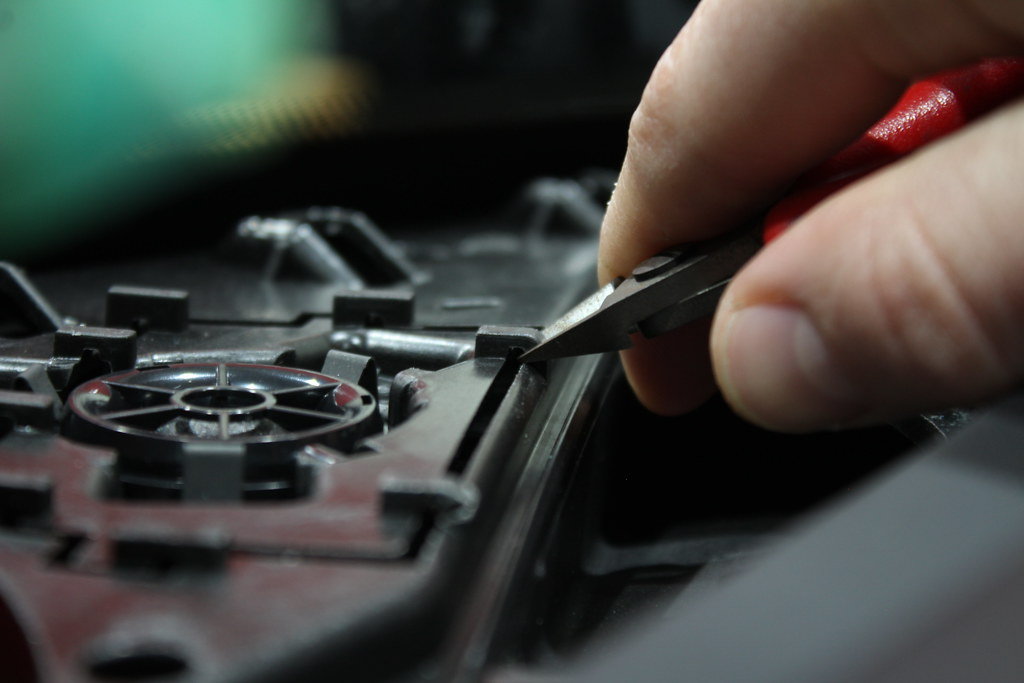
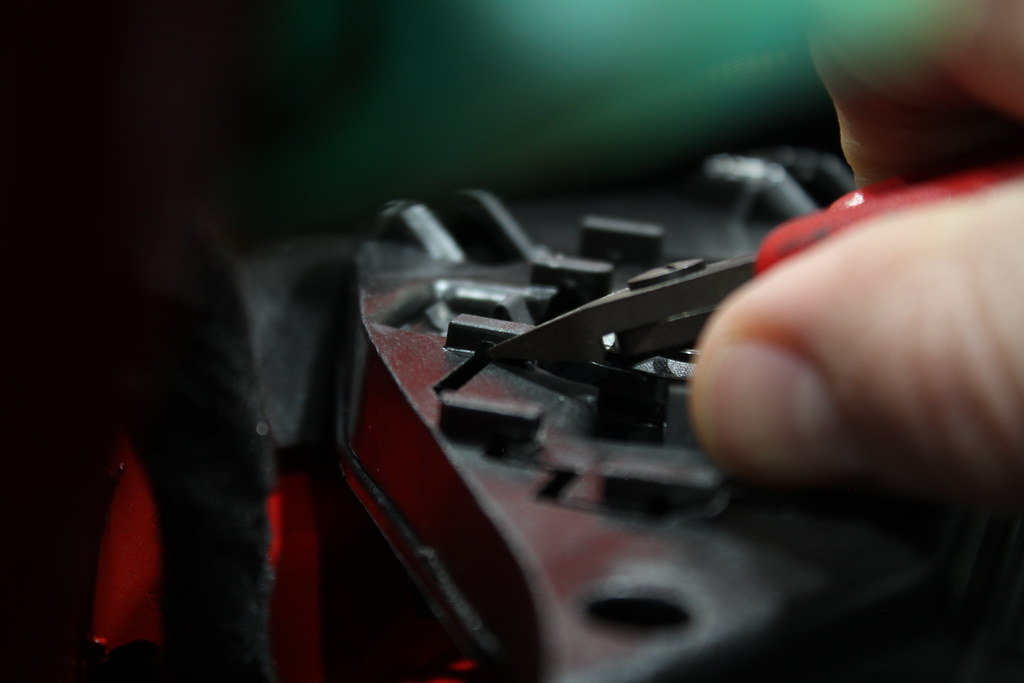
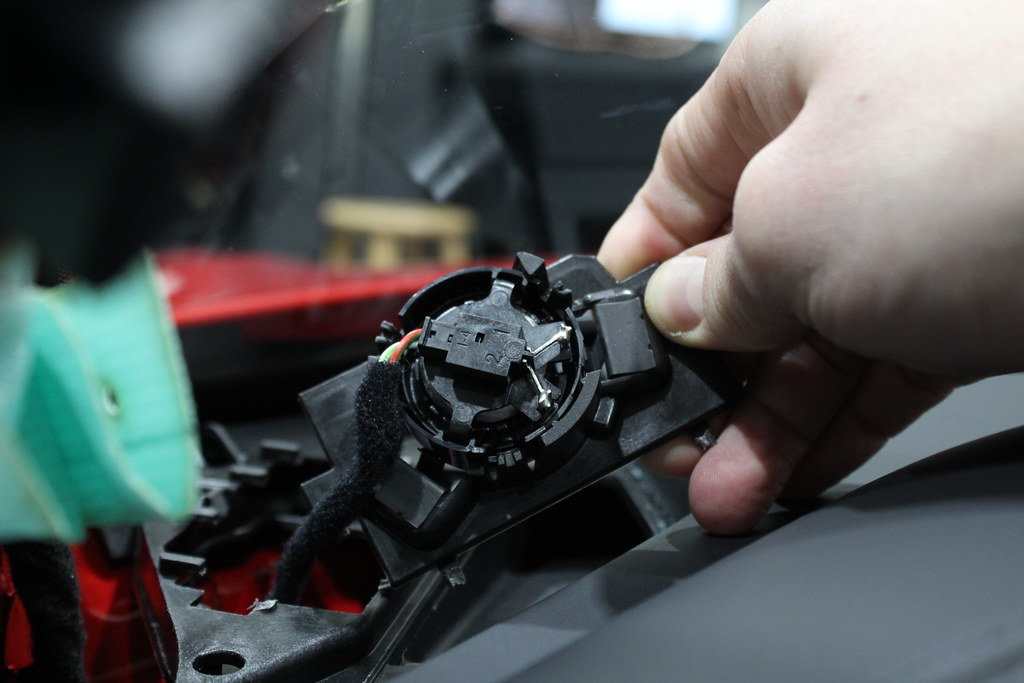
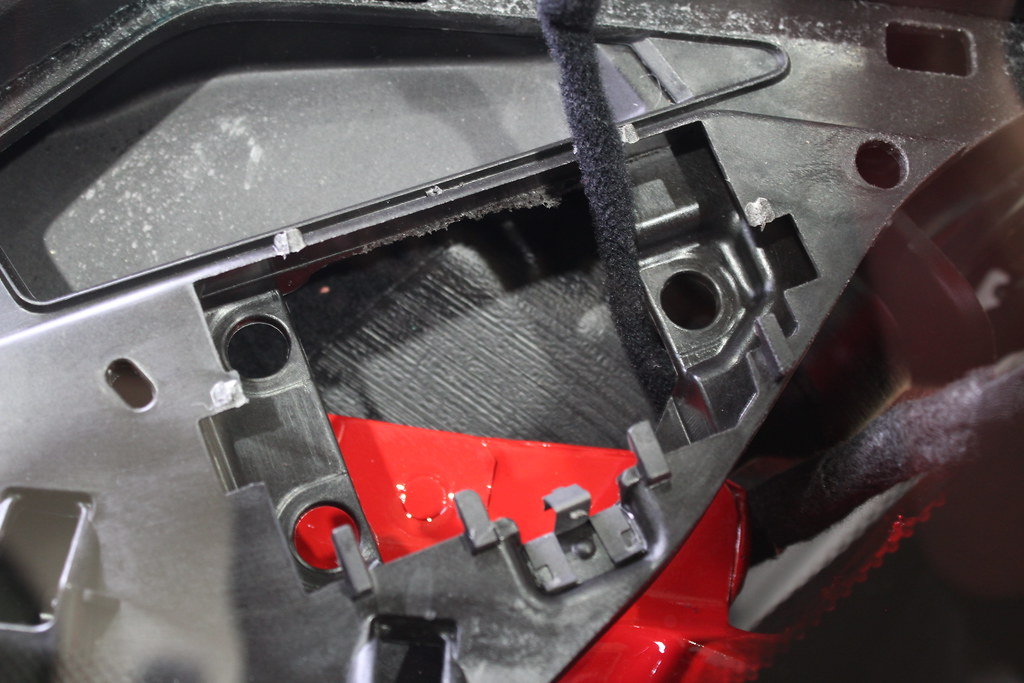
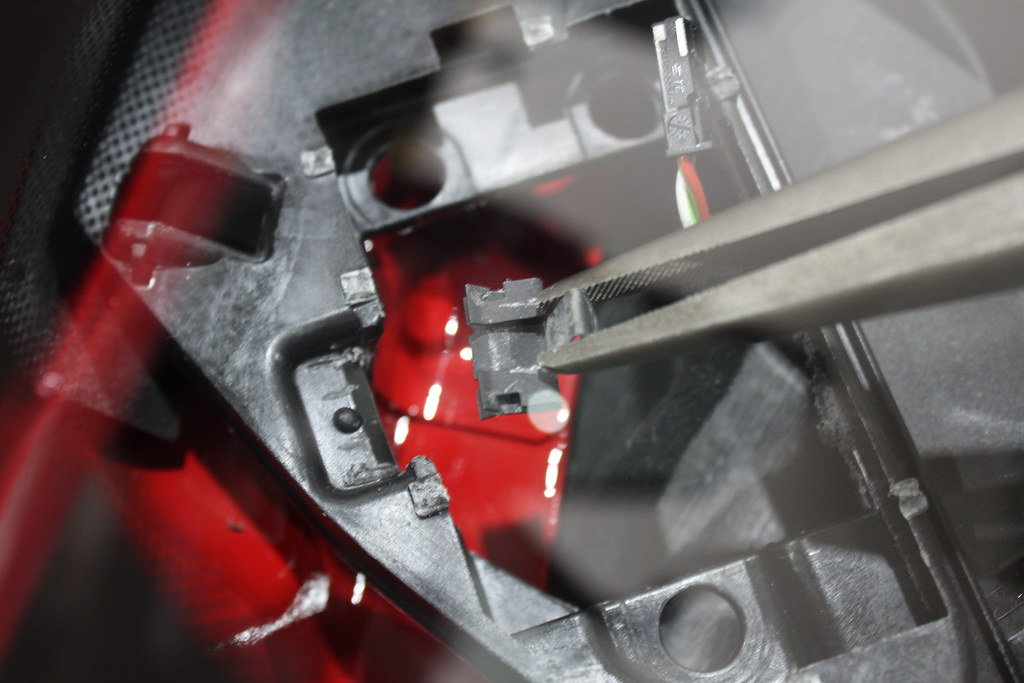
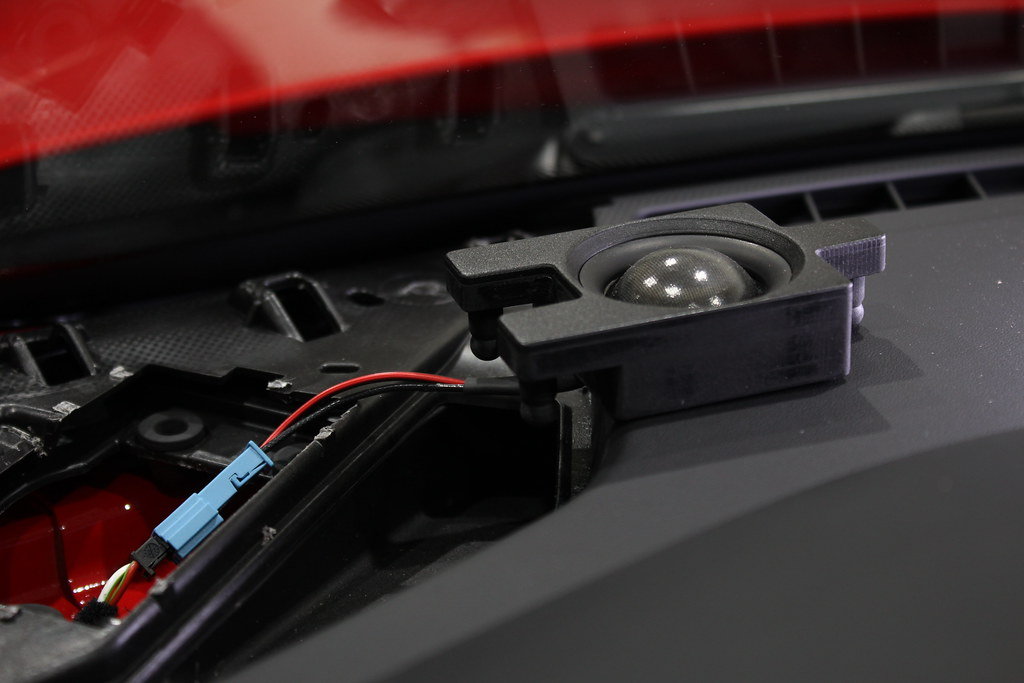
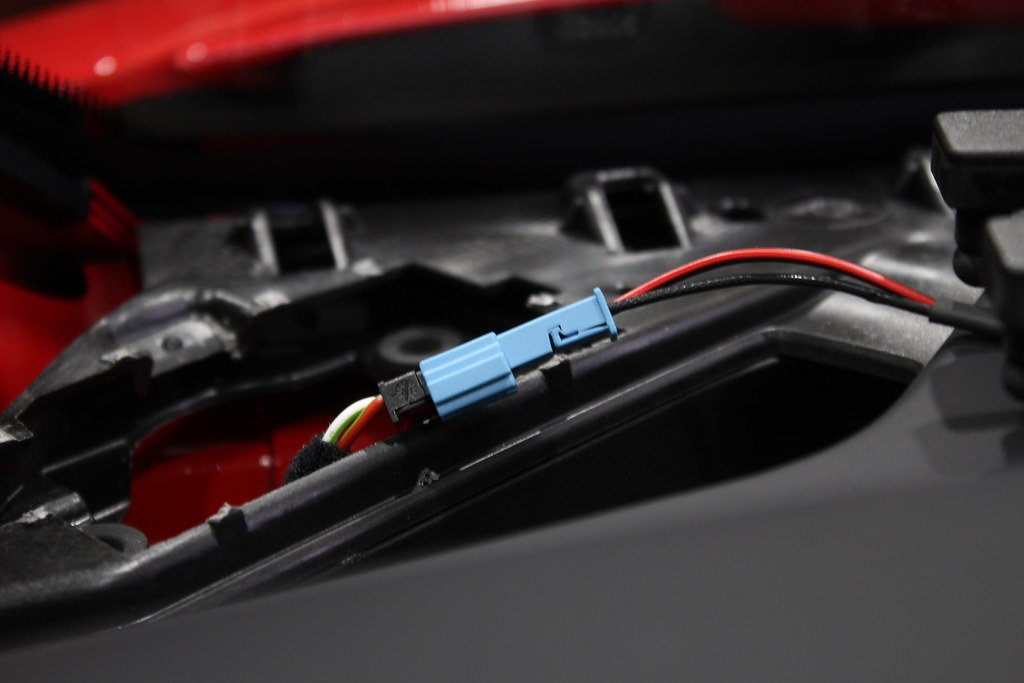
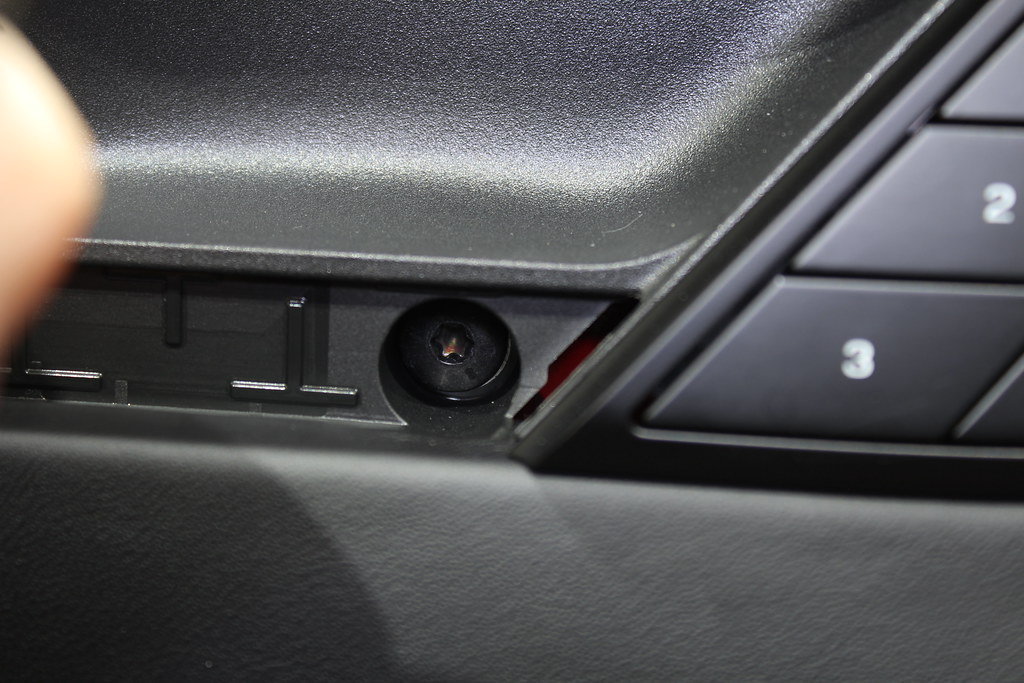
6.) Snip OEM Plastic Tabs — The Bose tweeters are built into an odd cradle that is tacked into the dash with small tabs. Using a side-cutter, clip those tabs fully, being cautious not to lose any buts into the dash that might cause future rattles. Once free, flip over and disconnect wiring to remove from car. Note: the wiring is much easier to remove usuing the supplied pick-tool in your tweeter kit. Insert the end into the small square hole at the back of the tweeter housing and push out towards the wiring harness to release.
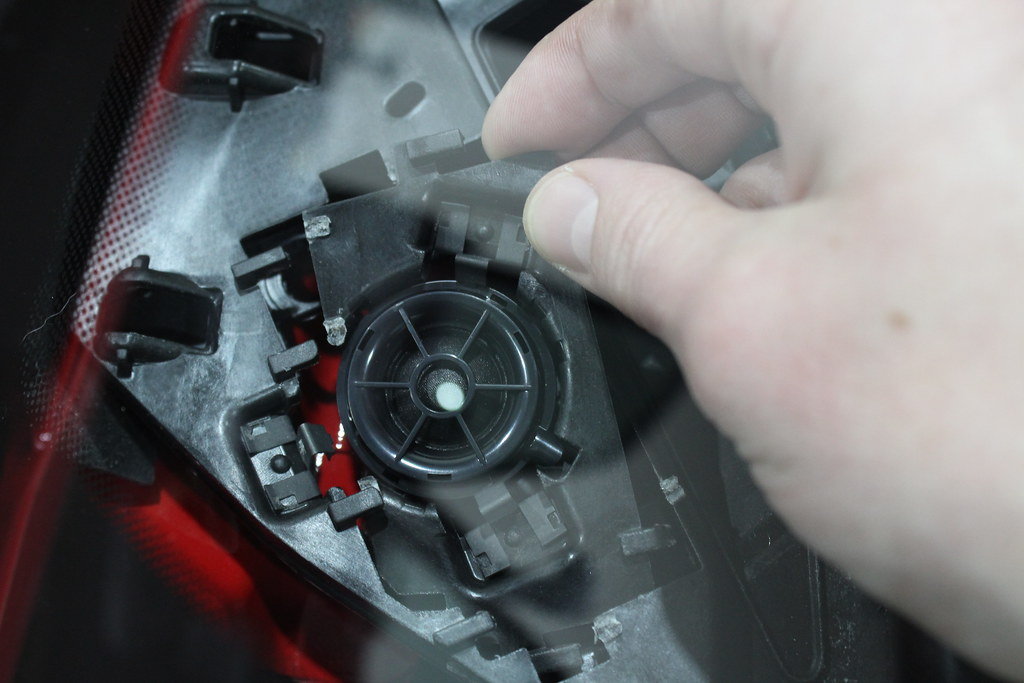
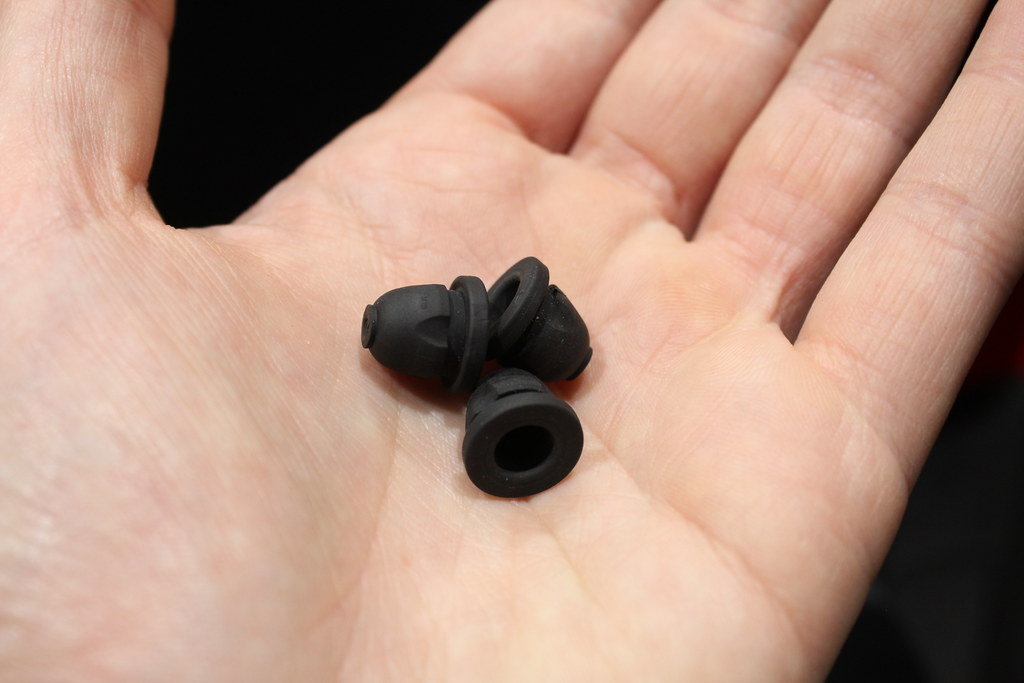
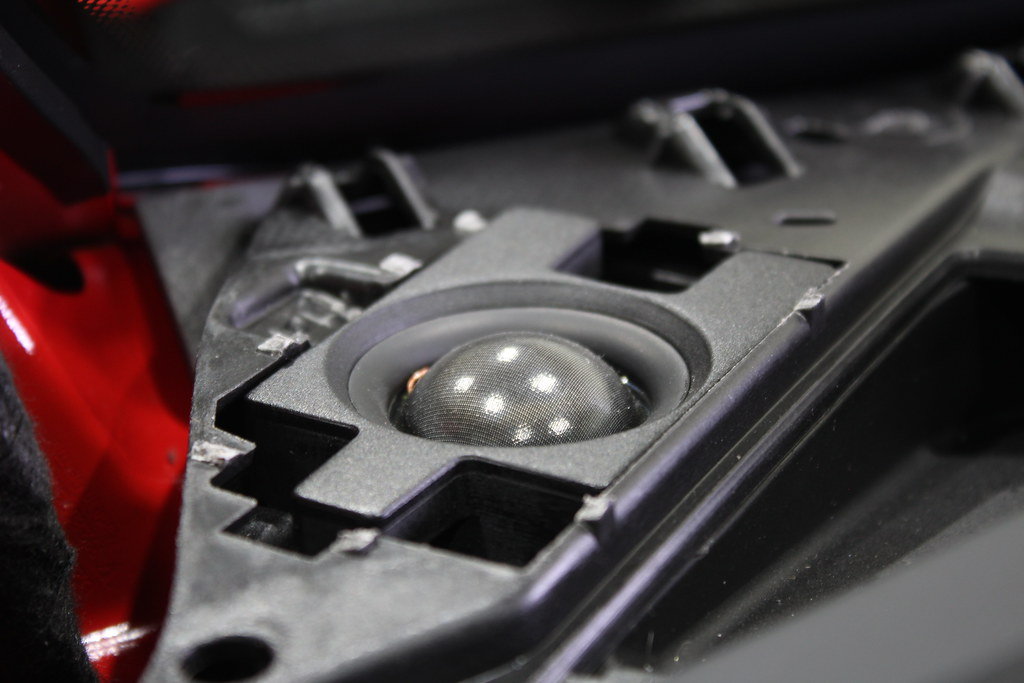
7.) Install New Tweeters — Once all of the tabs and metal clips have been removed, you can now install the supplied rubber receivers into the respective holes in the dash. Once those are fully seated, you can plug the tweeter wiring in and then push the tweeter assembly into place. The mount should sit fairly flush with the dash, so you may need to appy more pressure than you think. Do not touch the tweeter domes. Once instilled, you can begin reassembly, which is the reverse order of the steps above.
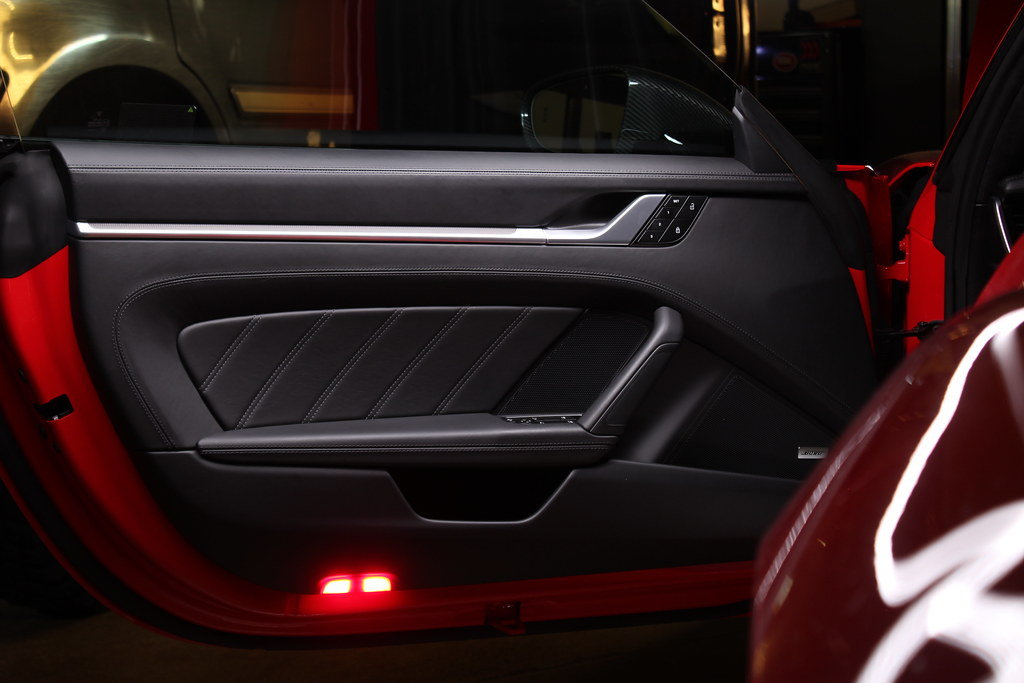
DOOR PANEL REMOVAL
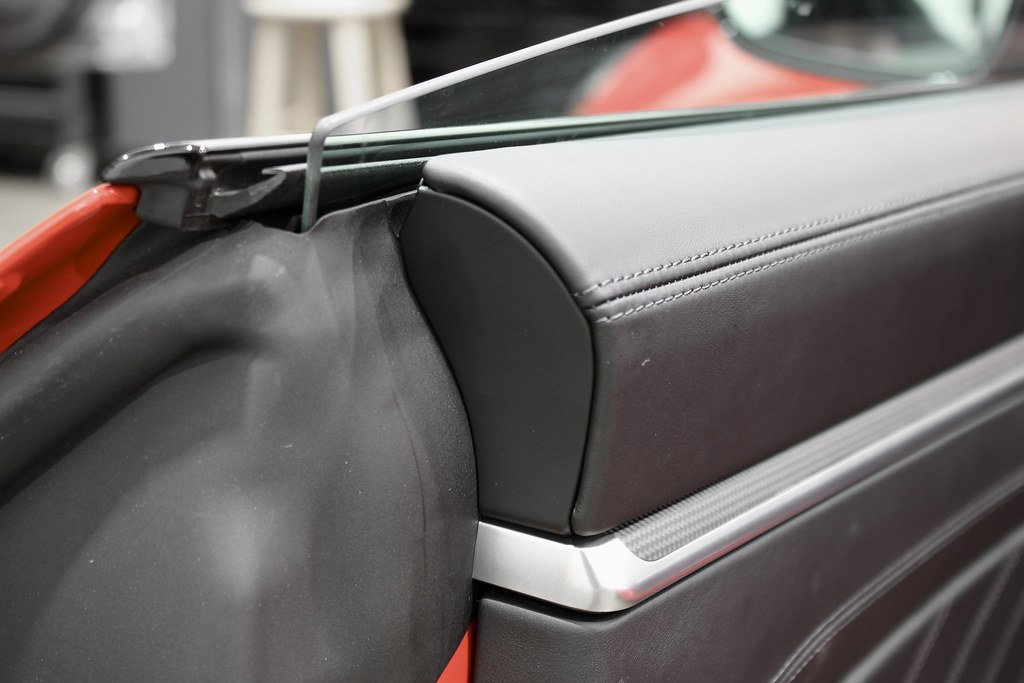
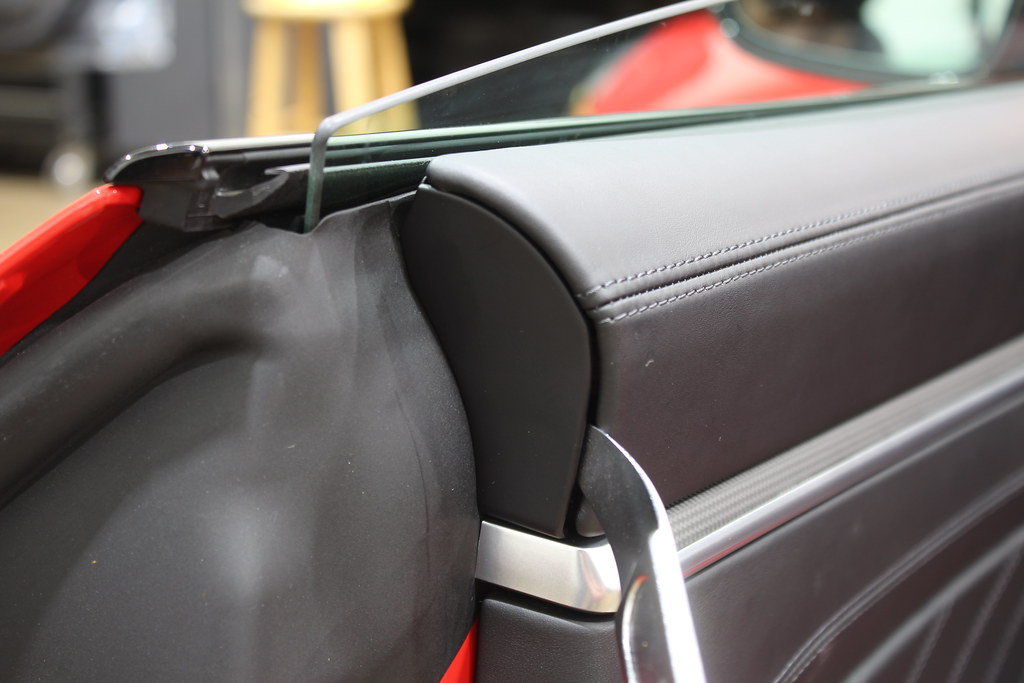
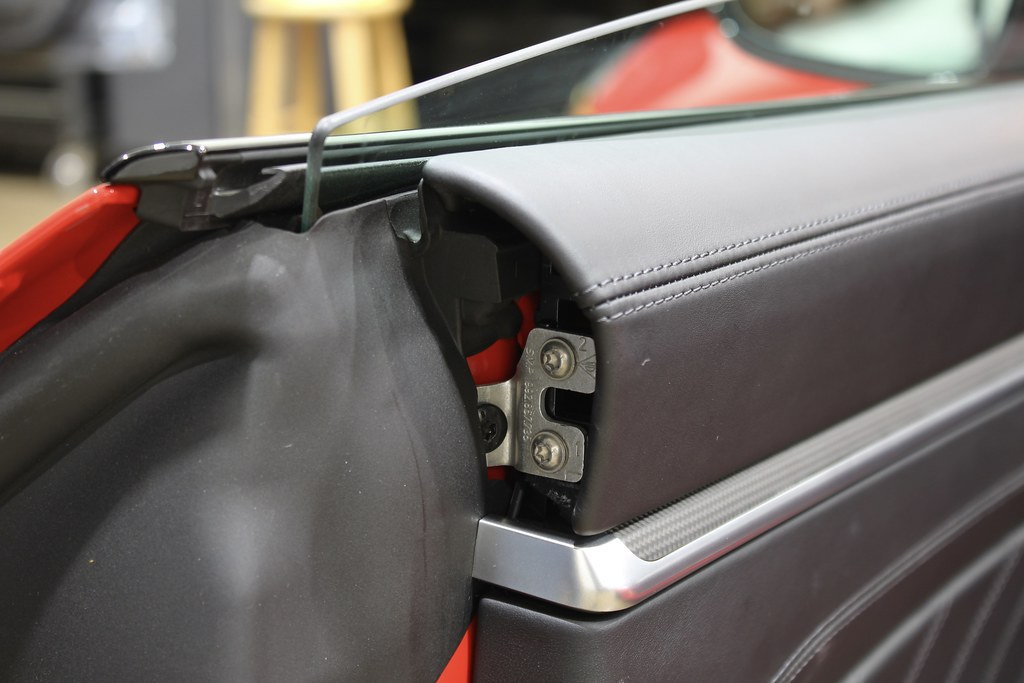
1.) Remove End Cap — Using thin panel removal tool, unclip the plastic cap as pictured below.
2.) Remove Hardware — Remove single black T25 Torx screw.
3.) Handle Hardware — Pull out on handle to reveal rubber strip. Peel back rubber strip using small pry tool to get started. Once removed will reveal single T25 Torx.
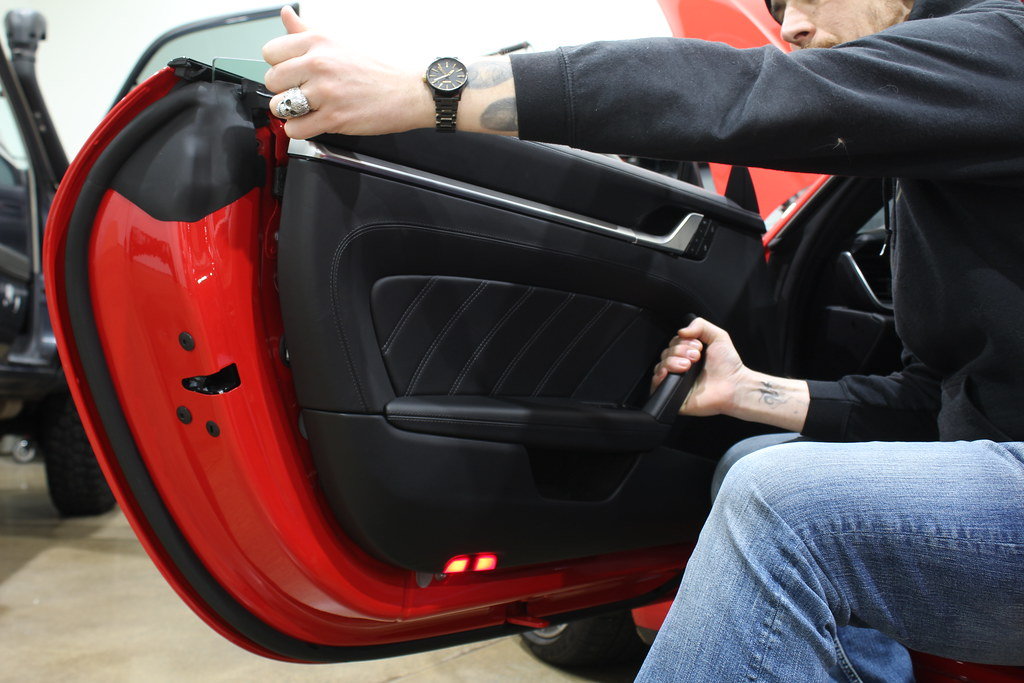
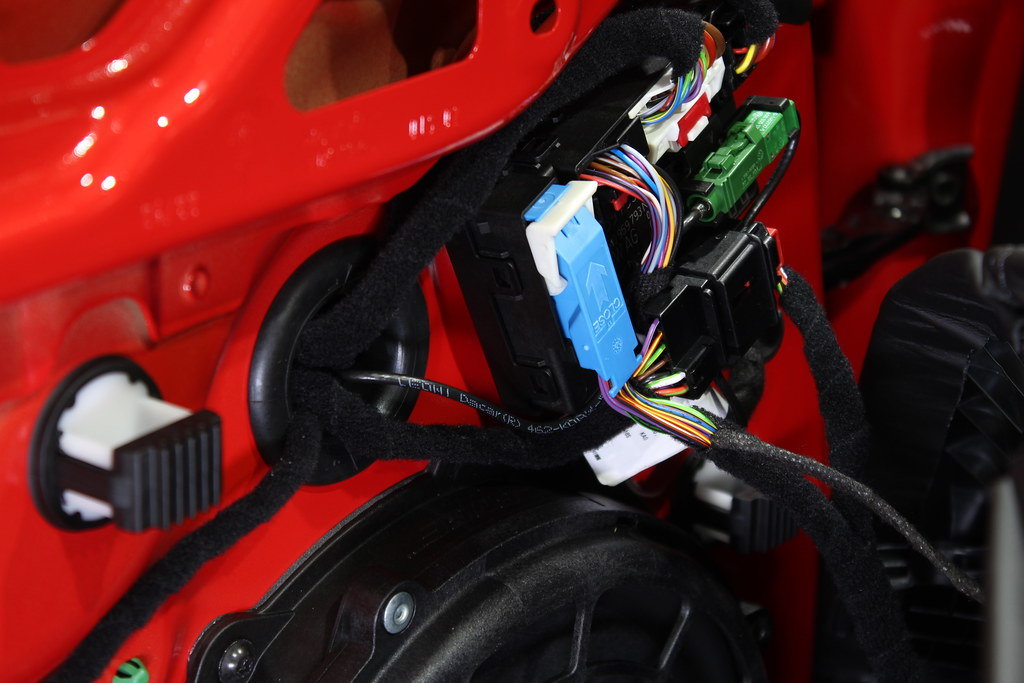
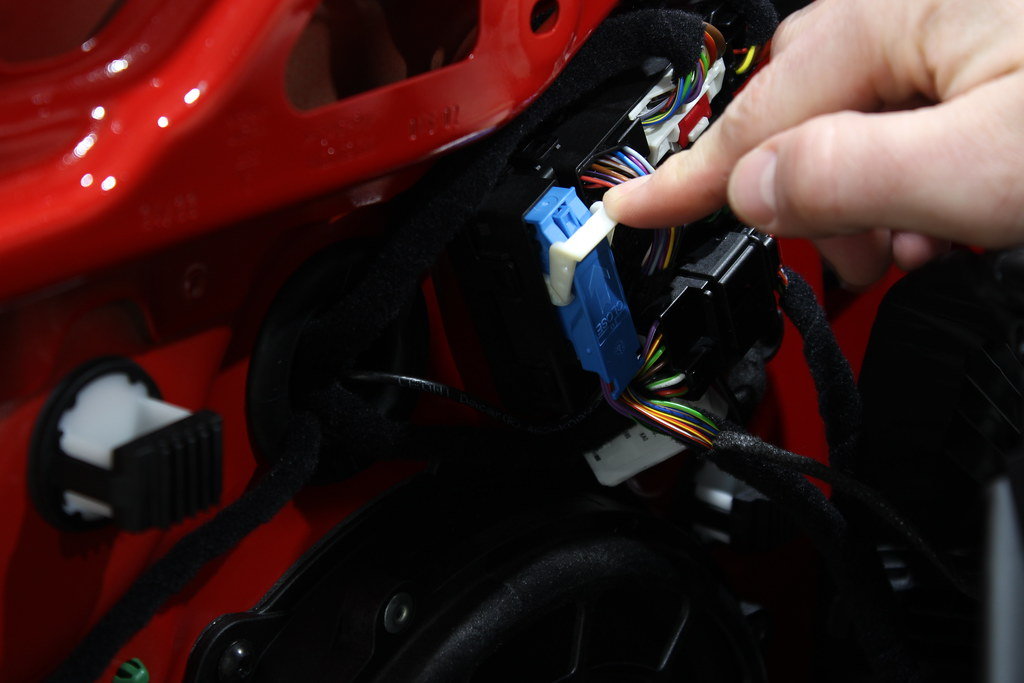
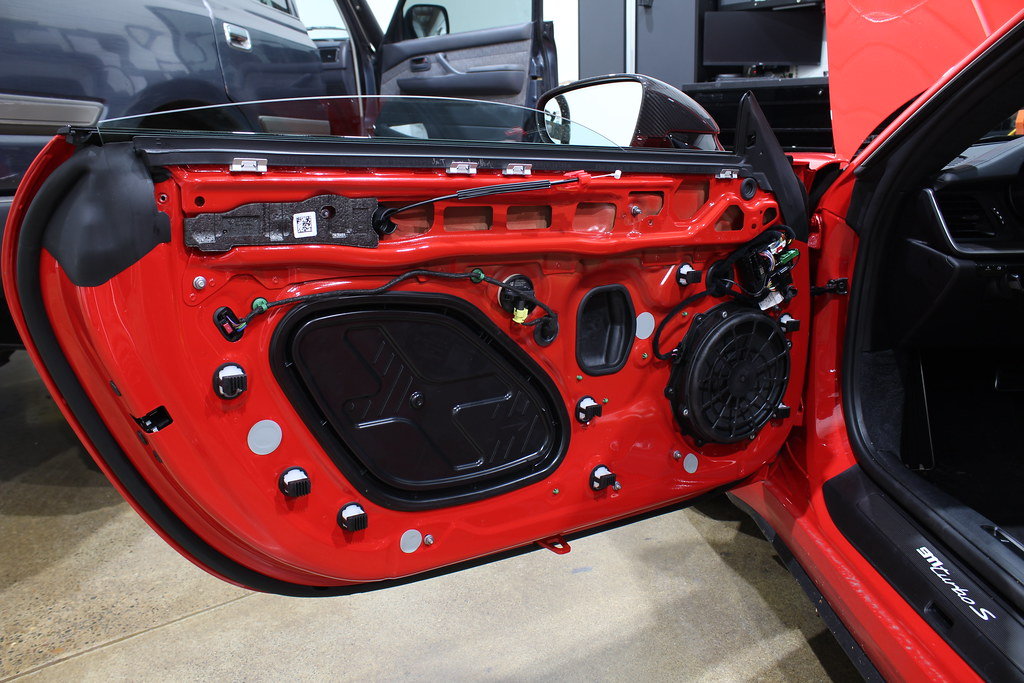
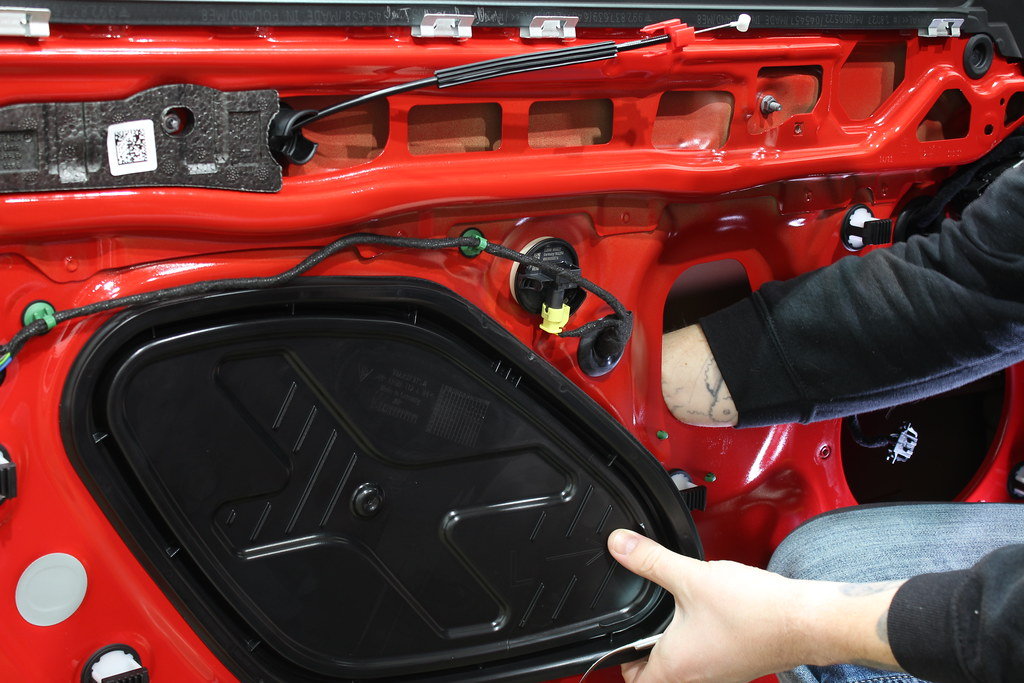
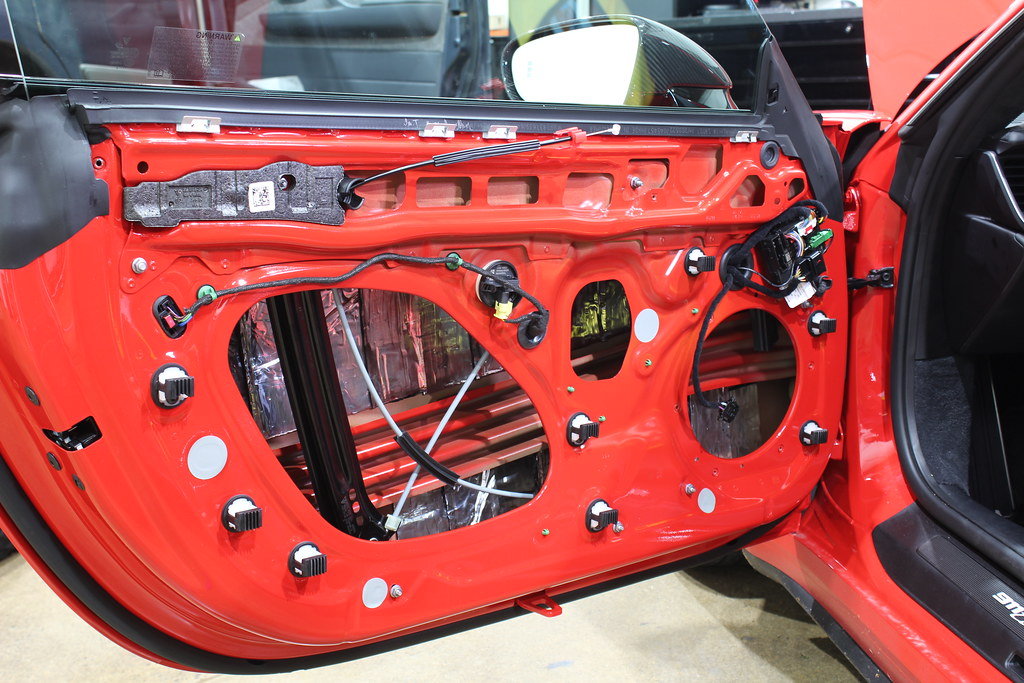
4.) Remove Panel — If your window is down, roll it up before moving on. Next, grabbing the pull handle and end cap opening, pull straight up on the door panel to release it from the guides. Once loose, disengage door pull cable by pinching red lock tabs to release from door panel and remove ferrule from door pull assembly by pulling up on cable. Finally, disconnect wiring harness by disengaging lock lever and pulling straight out. (NOTE: DEPENDING ON YOUR OPTIONS, THERE COULD BE AN ADDITIONAL WIRING HARNESS. PULL PANEL AWAY FROM CAR WITH CARE)
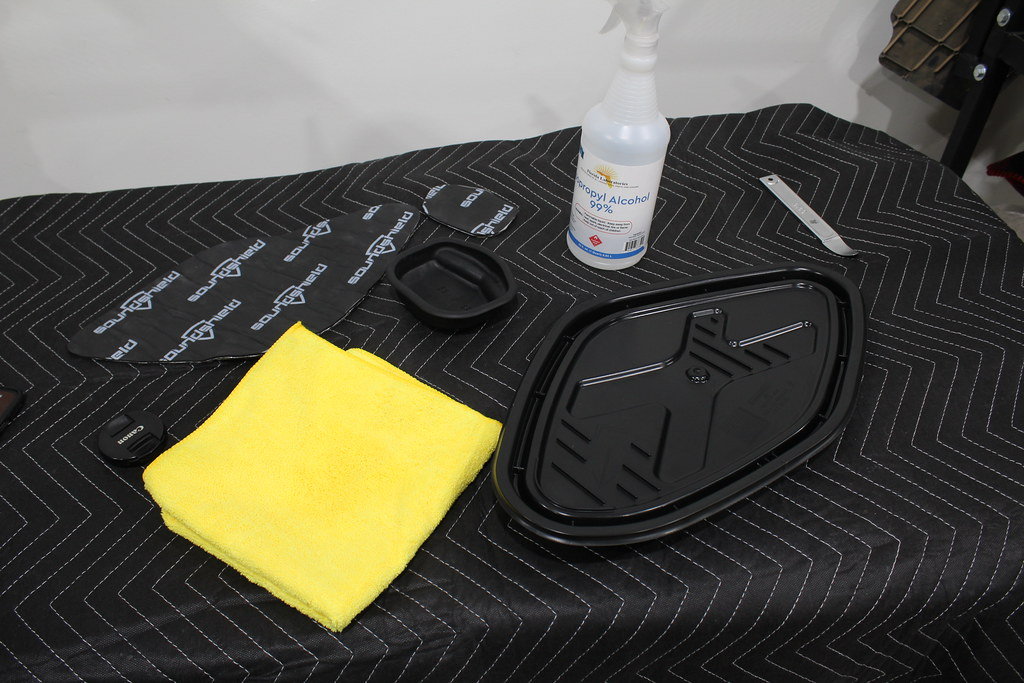
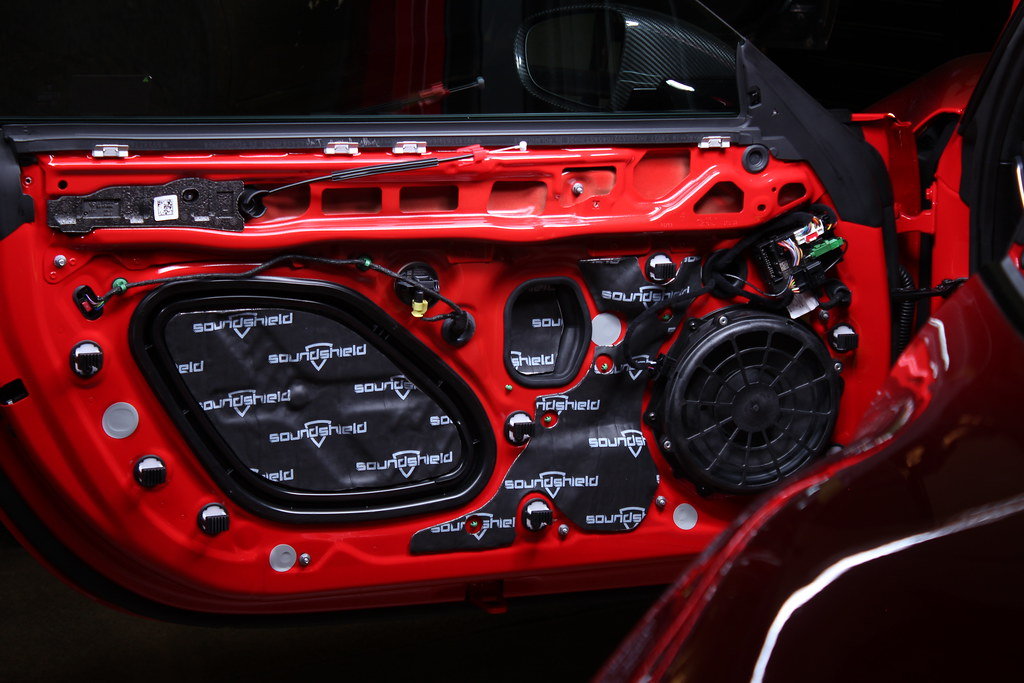
SOUND DAMPING APPLICATION
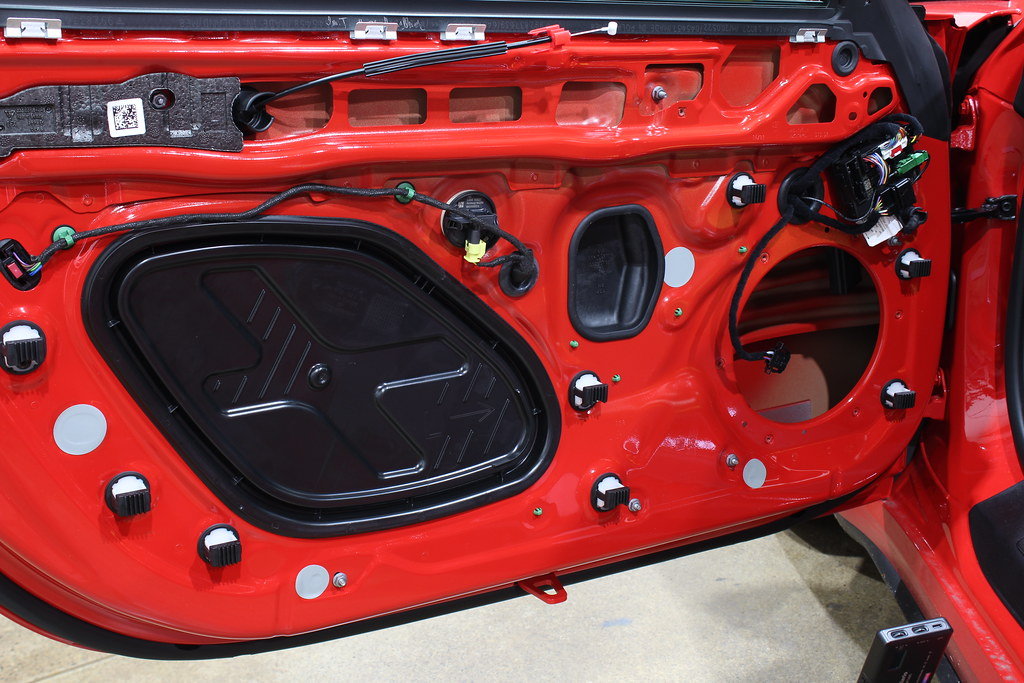
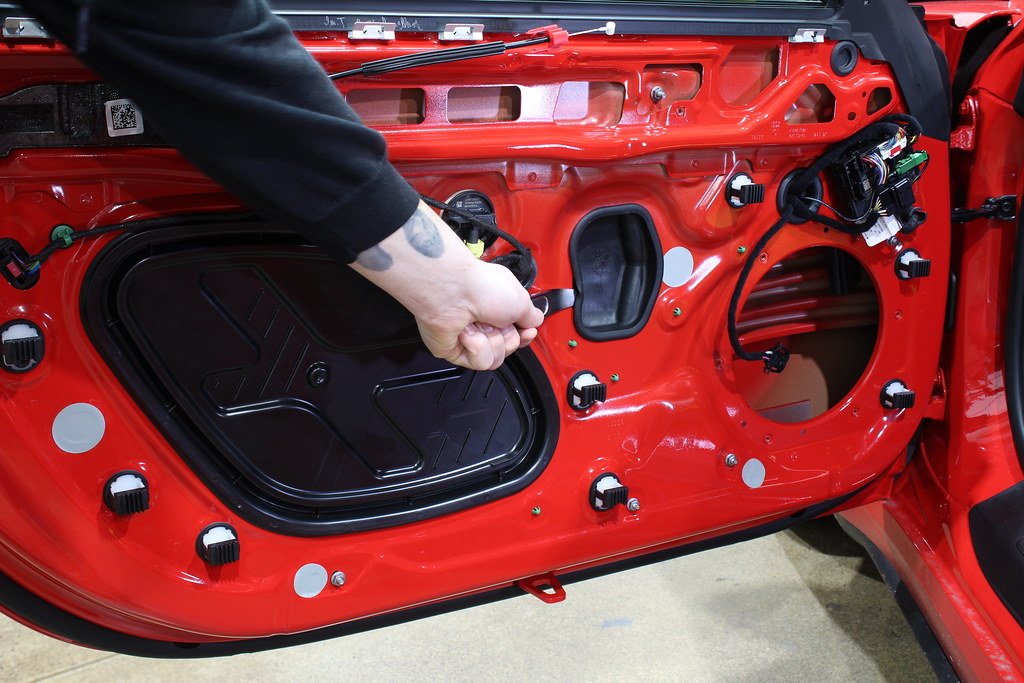
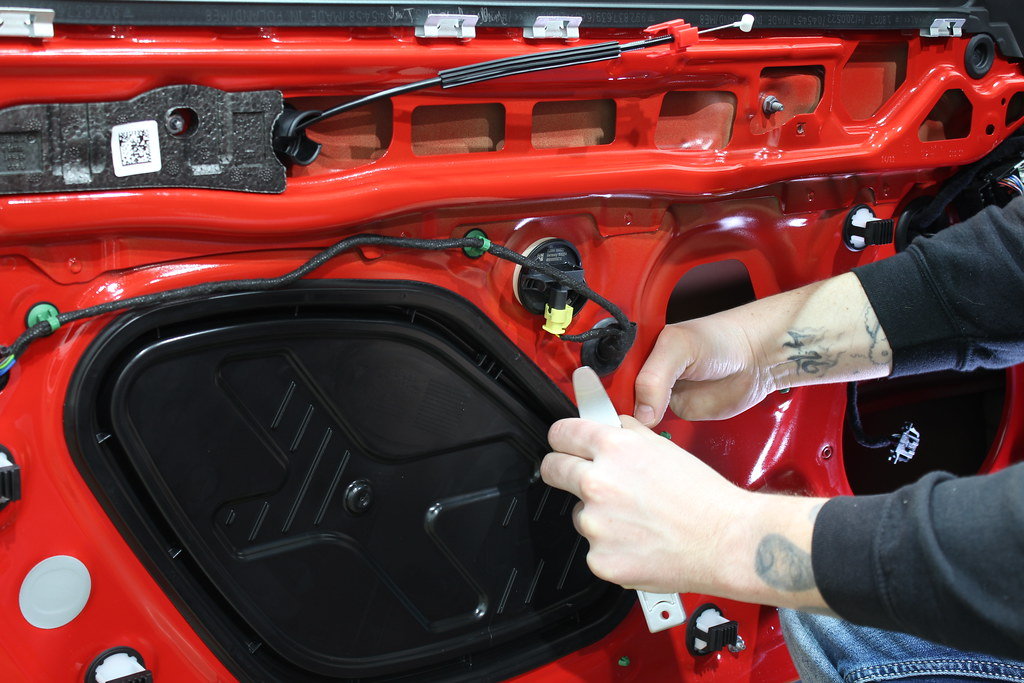
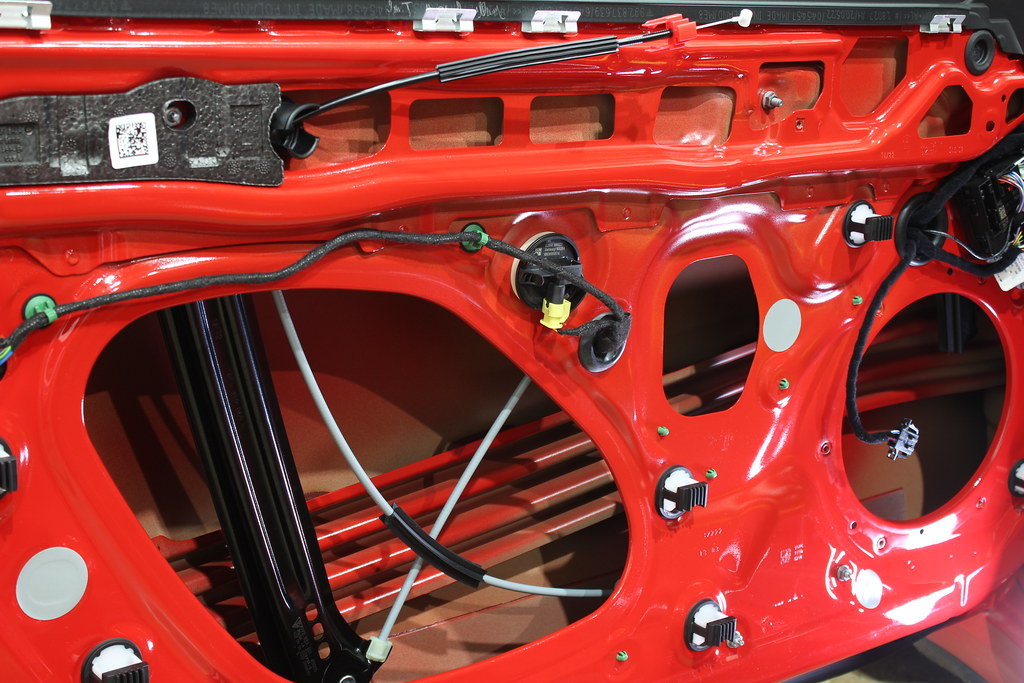
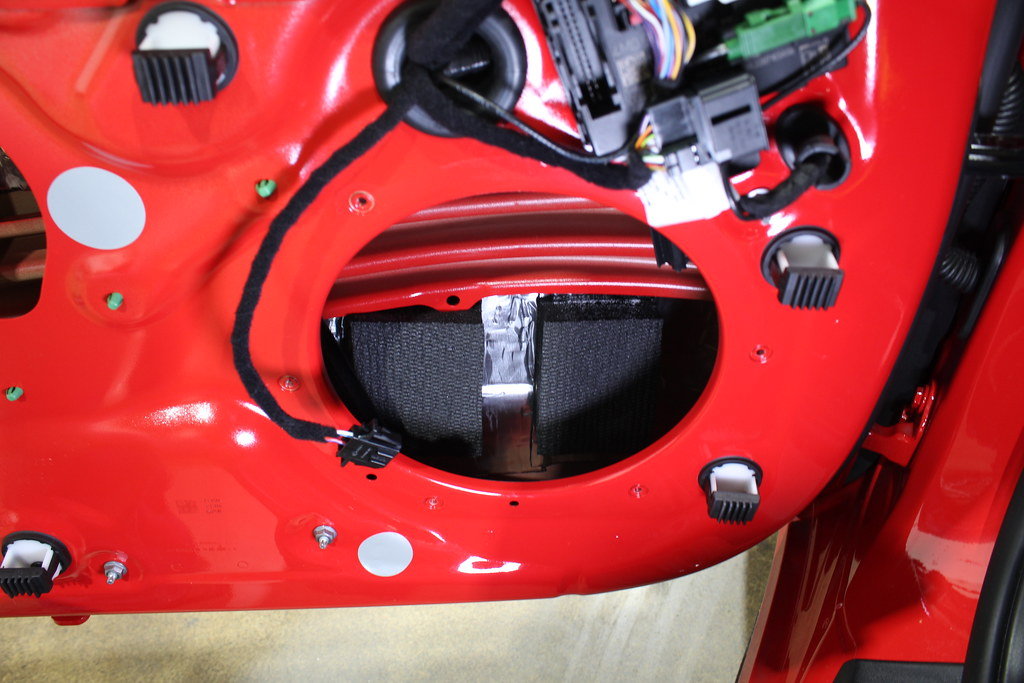
1.) Preparation — Prepare for the sound damping by removing the door woofer(T25 x6 w/ one wire harness) and both plastic panels for easier access. The panels are easy to remove by using a pry tool and pushing out with your other hand from inside the door cavity.
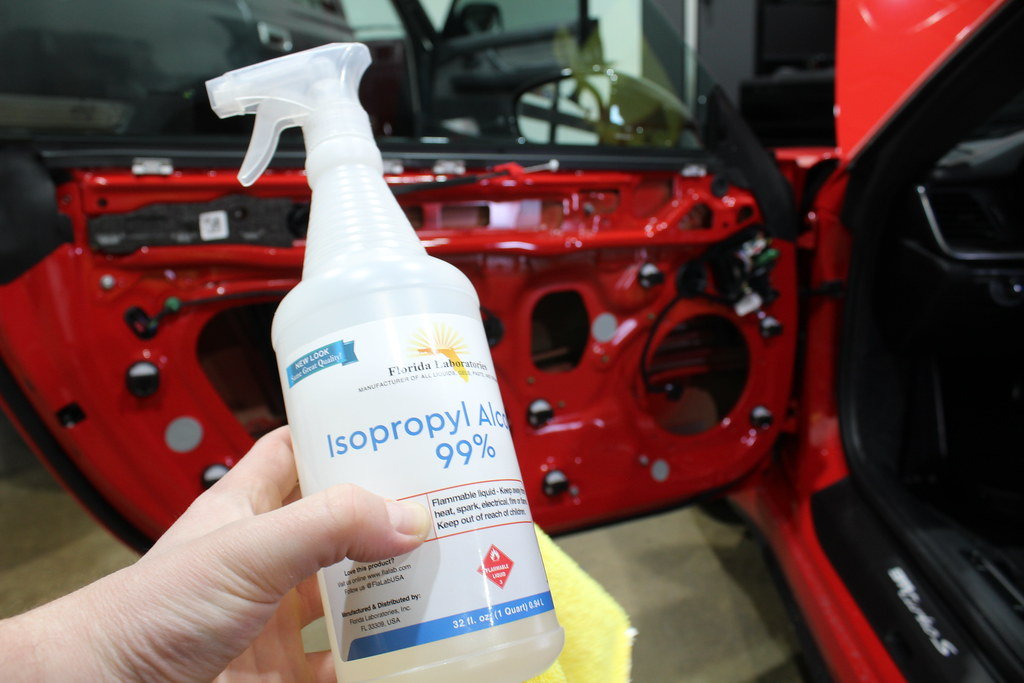
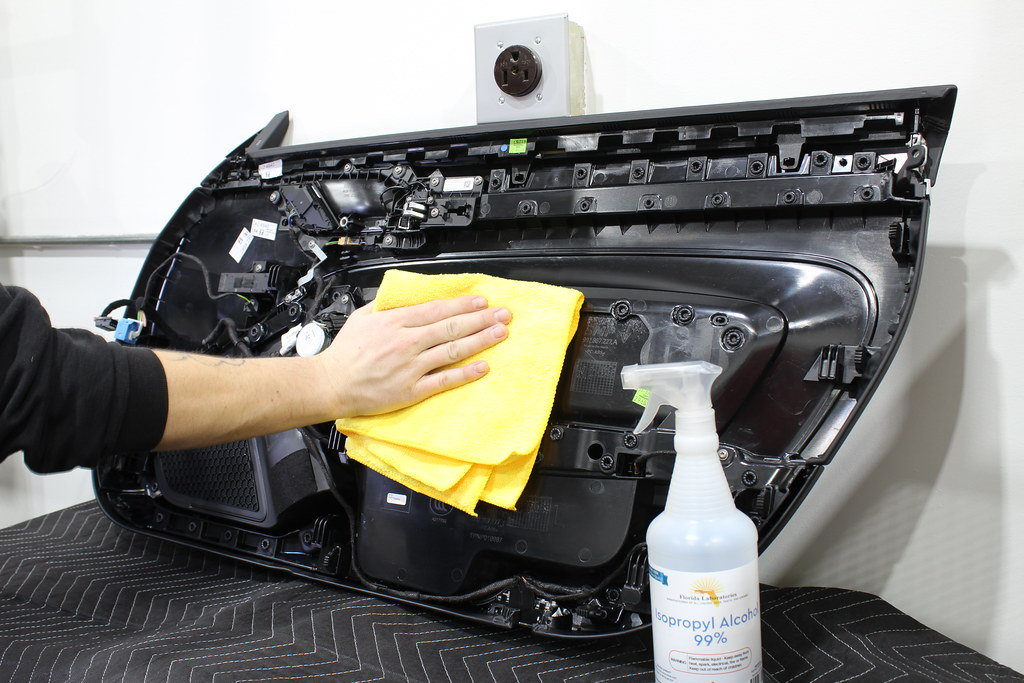
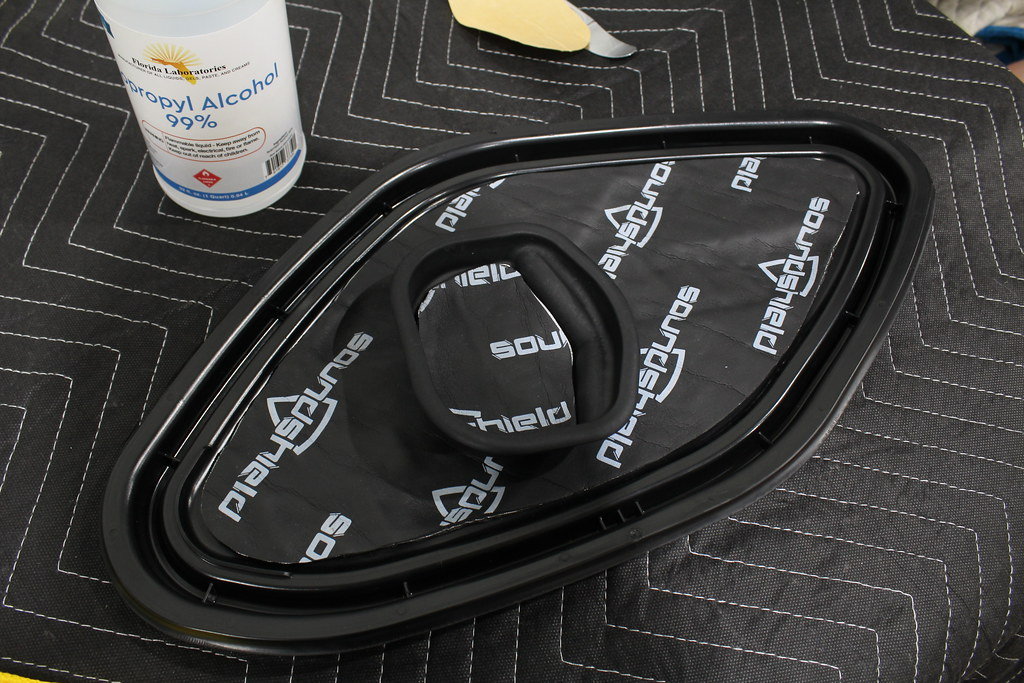
2.) Clean Surfaces — using clean microfiber and isopropyl alcohol, clean all of the surfaces to be treated. This includes the inside of the door, the door face and the back of the door panel.
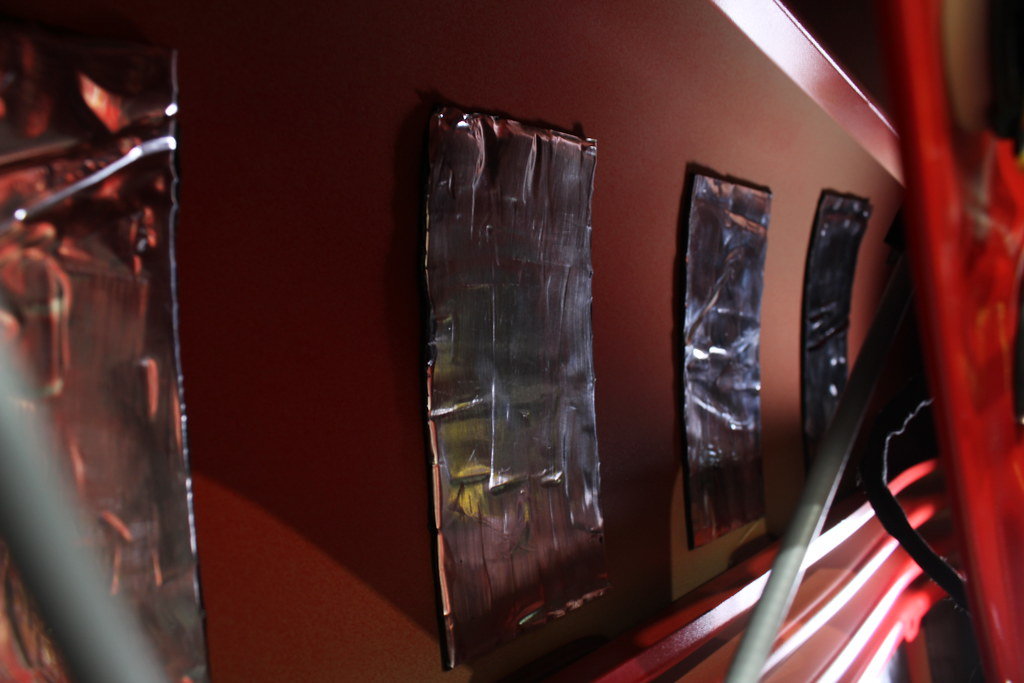
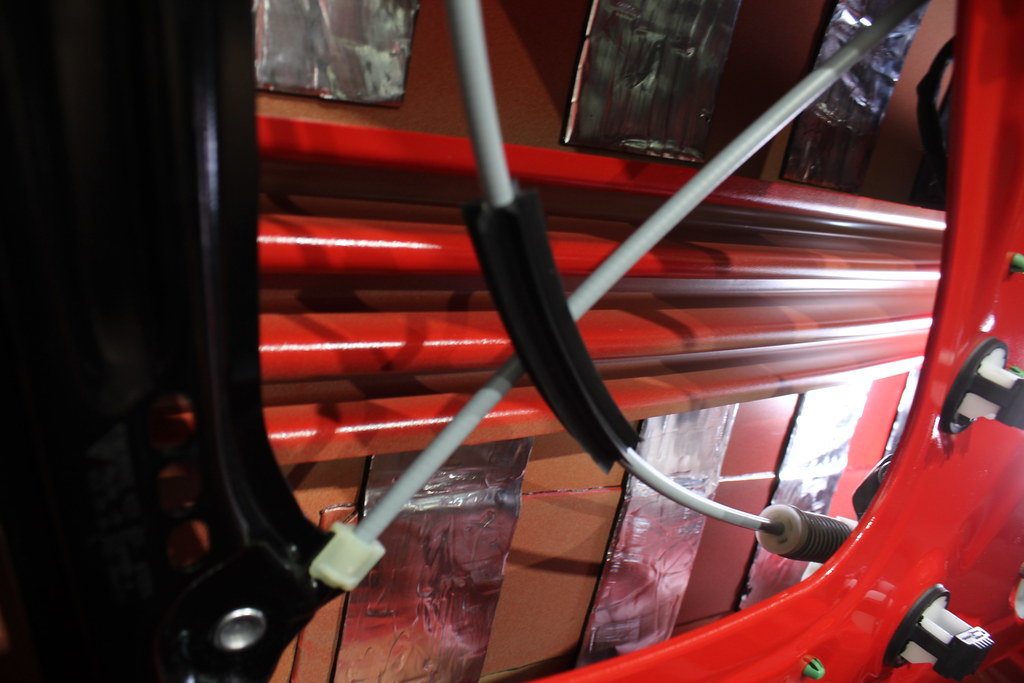
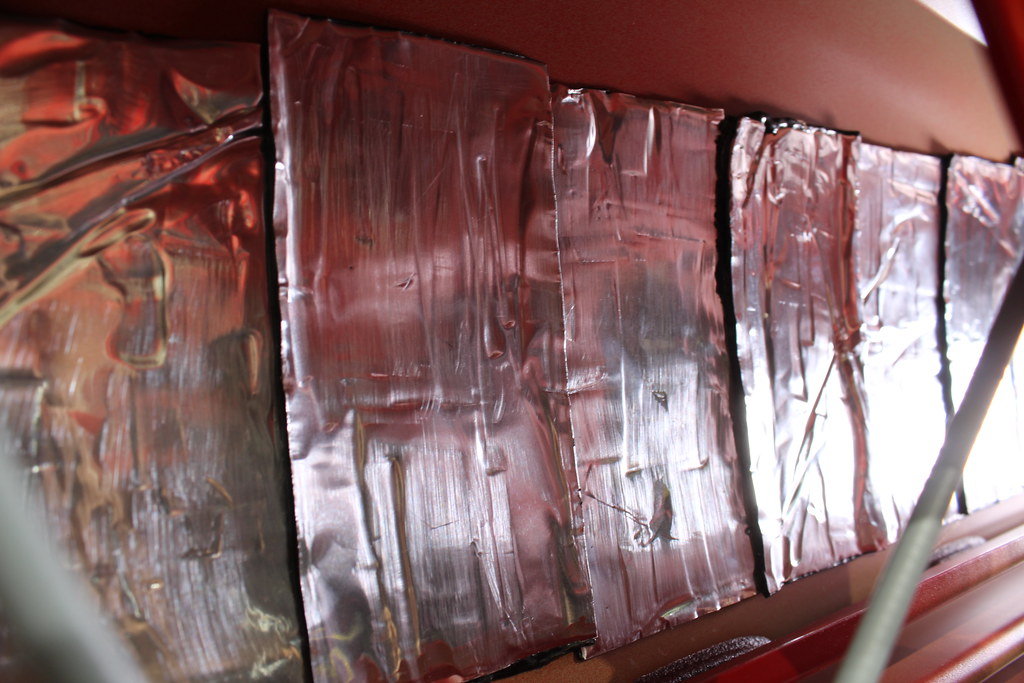
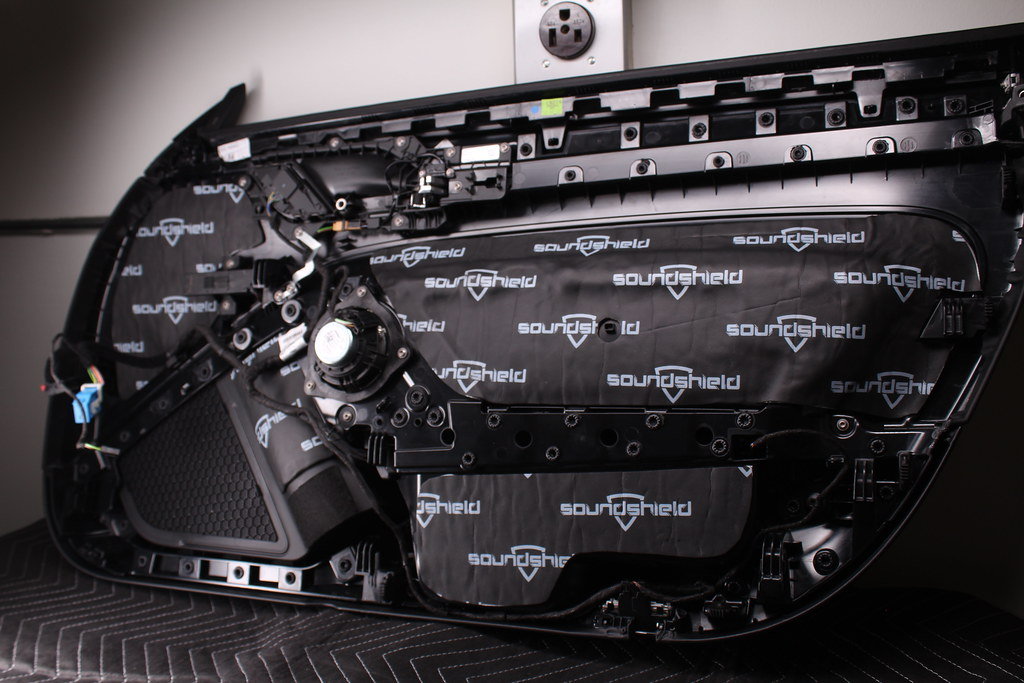
3.) CLD Application — Apply the CLD tiles to the inside of the door cavity in two rows. One above the crash bar and one below. Place them vertically, about 2.5" apart. The pieces themselves are 3" wide, so we want to make sure we can place another piece in the gap with about 1/4" overlap on both sides. It's like laying bricks. Each bag has 9 pieces, and each row will have 5 base tiles and 4 connecting tiles. To stick a tile to the door, peel the paper backing to reveal the adhesive and place it in its respective position on the door. You want to make sure the entire piece is bonded, so use the blunt end of your trim panel tool to press the material down firmly across all of its surface area.
4.) Blackhole Tile Application — Two tiles per door placed directly behind the woofer. Peel the adhesive backing and firmly press into their position on top of the CLD Material as shown below.
5.) SoundShield Application —There are pre-cut pieces labeled for the passenger and driver's doors. Peel the adhesive backing and press firmly into position across the entire surface area, using your hand/finger to press into contoured edges. Use the photos below for placement.
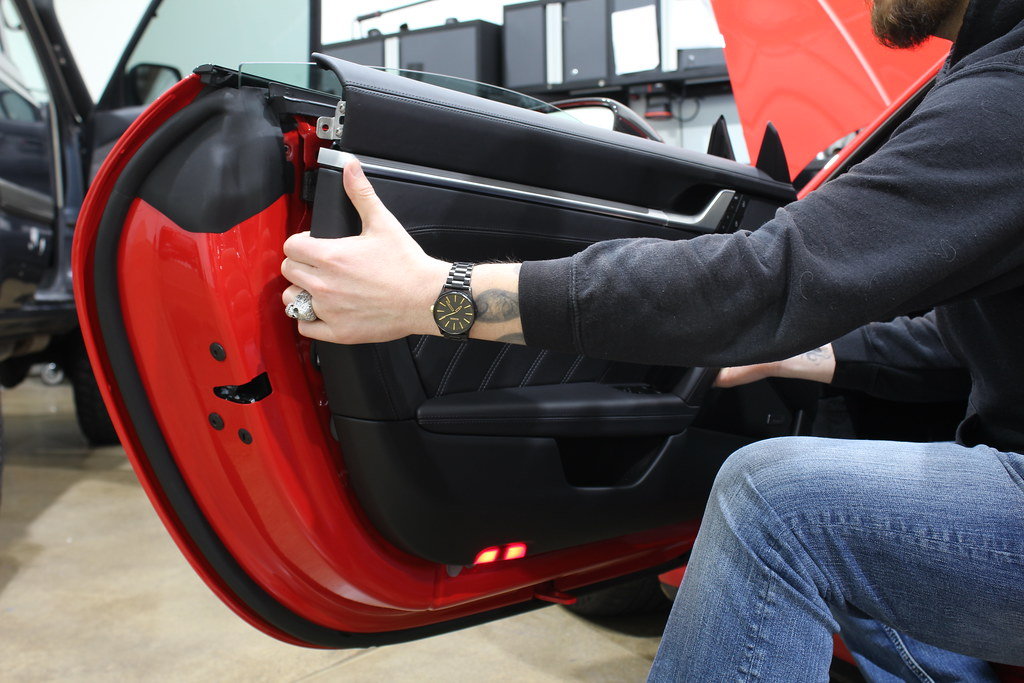
REINSTALL DOOR PANEL
After reinstalling the woofer and inset pieces, reinstall the door panel int he reverse order, being sure to reconnect the wiring harness and door pull cable. The door will need a firm downward push to reseat into its guides with the added thickness of the SoundShield. This is a good thing and helps act as a positive pressure on the panel to reduce audible vibrations.
Hopefully that helps!
It's late so I'll work on the tweeter replacement tutorial tomorrow!
Thanks for sharing. I am surprised that there are only two screws involved for the door panel.
Best of all is no dreaded plastic clips. The door comes off easier than any door panel I ever removed. After putting in the sound deadening it will be a little bit of work getting it back on though. It will be a much tighter fit. Once installed though I can say nobody that does this mod will be disappointed. Bang for buck is 10/10.
So, this is intended to improve the audio situation... Any impact to road noise at highway speeds? I've found that at 75mph+, it's difficult to have phone calls. People on the other end hear as much background noise as they do my voice. Sometimes I regret not speccing the lightweight/noise insulating glass. I wonder if this would help significantly.
Fantastic write up and I assume this is a kit. Please include additional information regarding where to order it and how much it costs. Thanks so much.
Whats the install time on the tweeters first time around? DIY Difficulty rating from 1-10?
It'n not very difficult once you know the steps. I would probably estimate 30-45min for the first side and then 20-30min for the second side. Maybe a 3 or 4 out of 10 as far as difficulty.
I'm hoping to put together some install videos that will illustrate the process a lot more effectively. Should have those posted by the end of next week.
@12v Nick My tweeter upgrade and door sound dampening have shipped with ETA early next week. Thank you! I'm having it professionally installed by a reputable shop in my town. How many hours should I expect to be quoted for labor?

 01-09-2023, 11:49 PM