

My Baby was very good this year
 12-26-2015, 10:26 PM
#1
Instructor
Thread Starter
Join Date: May 2012
Location: Texas
Posts: 123
Likes: 0
Received 0 Likes
on
0 Posts
So Santa brought her a surprise! BMC air filters like the ones on the GT3RS. The only problem now is she thinks she is a GT3 - more sound and at least one more HP (per the Butt Dyno, of course)!
[ATTACH][ATTACH][ATTACH][ATTACH][ATTACH][ATTACH][ATTACH][ATTACH][ATTACH]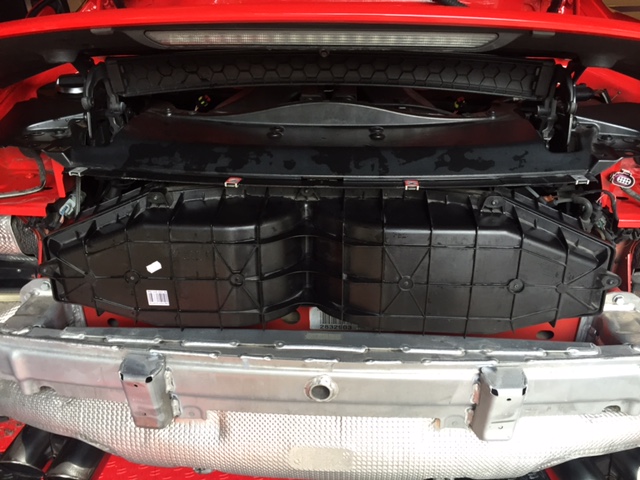 [/ATTACH][/ATTACH][/ATTACH][/ATTACH][/ATTACH][/ATTACH][/ATTACH][/ATTACH][/ATTACH]
[ATTACH][ATTACH][ATTACH][ATTACH][ATTACH][ATTACH][ATTACH][ATTACH][ATTACH]
[/ATTACH][/ATTACH][/ATTACH][/ATTACH][/ATTACH][/ATTACH][/ATTACH][/ATTACH][/ATTACH]
 12-27-2015, 09:10 AM
#4
Drifting
Nice job! I've toyed with the idea of getting those. Can you describe specifically what kind of noise you get? And is it noticible around town cruising or only when you are really on the throttle? And I see that there is a lot of debris in the filter boxes, how many miles are on your car?
12-27-2015, 10:49 AM
#5
Instructor
Thread Starter
Join Date: May 2012
Location: Texas
Posts: 123
Likes: 0
Received 0 Likes
on
0 Posts
12-27-2015, 11:01 AM
#6
Instructor
Thread Starter
Join Date: May 2012
Location: Texas
Posts: 123
Likes: 0
Received 0 Likes
on
0 Posts
Nice job! I've toyed with the idea of getting those. Can you describe specifically what kind of noise you get? And is it noticible around town cruising or only when you are really on the throttle? And I see that there is a lot of debris in the filter boxes, how many miles are on your car?
- Remove eight screws on bottom of bumper
- Remove three screws under each wheel. I did not remove the wheels but you do need to jack up so that the rear wheels drop down some.
- Remove four screws in the center (under the spoiler)
- Remove plastic tail light covers and remove two screws each side
- Remove the tail light and disconnect wiring connector and remove one screw underneath (one size larger T)
- Remove bumper cover by pulling each side out and then back
- Disconnect license plate light as you remove cover.
- Remove screws on air box and remove old filter, clear air box and replace with new filters.
That's it! Now I could do it in about an hour other than the time I took to clean everything underneath while I had the opportunity. Remember to reconnect the license plate light when you reinstall the bumper cover - ask me how I know!
Good luck!
12-27-2015, 08:12 PM
#7
Three Wheelin'
Car turned 21K miles while I was test driving after the change. This is not a difficult thing to do. Removing the bumper requires you:
- Remove eight screws on bottom of bumper
- Remove three screws under each wheel. I did not remove the wheels but you do need to jack up so that the rear wheels drop down some.
- Remove four screws in the center (under the spoiler)
- Remove plastic tail light covers and remove two screws each side
- Remove the tail light and disconnect wiring connector and remove one screw underneath (one size larger T)
- Remove bumper cover by pulling each side out and then back
- Disconnect license plate light as you remove cover.
- Remove screws on air box and remove old filter, clear air box and replace with new filters.
That's it! Now I could do it in about an hour other than the time I took to clean everything underneath while I had the opportunity. Remember to reconnect the license plate light when you reinstall the bumper cover - ask me how I know!
Good luck!
Trending Topics
12-27-2015, 08:18 PM
#8
Instructor
Thread Starter
Join Date: May 2012
Location: Texas
Posts: 123
Likes: 0
Received 0 Likes
on
0 Posts
I was concerned removing the bumper cover but now I realize that it is no big deal.
12-27-2015, 09:02 PM
#9
Rennlist Member
I was watching "How its made: 918 Spyder" and they use oiled cotton filters on that car too ... very cool!
12-28-2015, 10:40 AM
#13
Instructor
Thread Starter
Join Date: May 2012
Location: Texas
Posts: 123
Likes: 0
Received 0 Likes
on
0 Posts
There was more trash in the intake than I thought and the filters were pretty dirty. I know that it was not time to change per the Porsche schedule but glad I did.
12-28-2015, 10:41 AM
#14
Instructor
Thread Starter
Join Date: May 2012
Location: Texas
Posts: 123
Likes: 0
Received 0 Likes
on
0 Posts
12-29-2015, 09:40 AM
#15
Burning Brakes

Congrats. I did the bumper removal myself for the 40K service and have helped another Houston local do his. I agree it looks much more complicated than it is.
Pro tip: have a variety of Torx tools available. I used sockets, t-handles, and a small multi tool to reach the various fasteners. There is a pictorial on the Fabspeed site that shows where all the fasteners are.
Pro tip: have a variety of Torx tools available. I used sockets, t-handles, and a small multi tool to reach the various fasteners. There is a pictorial on the Fabspeed site that shows where all the fasteners are.