When you click on links to various merchants on this site and make a purchase, this can result in this site earning a commission. Affiliate programs and affiliations include, but are not limited to, the eBay Partner Network.
Hey guys,
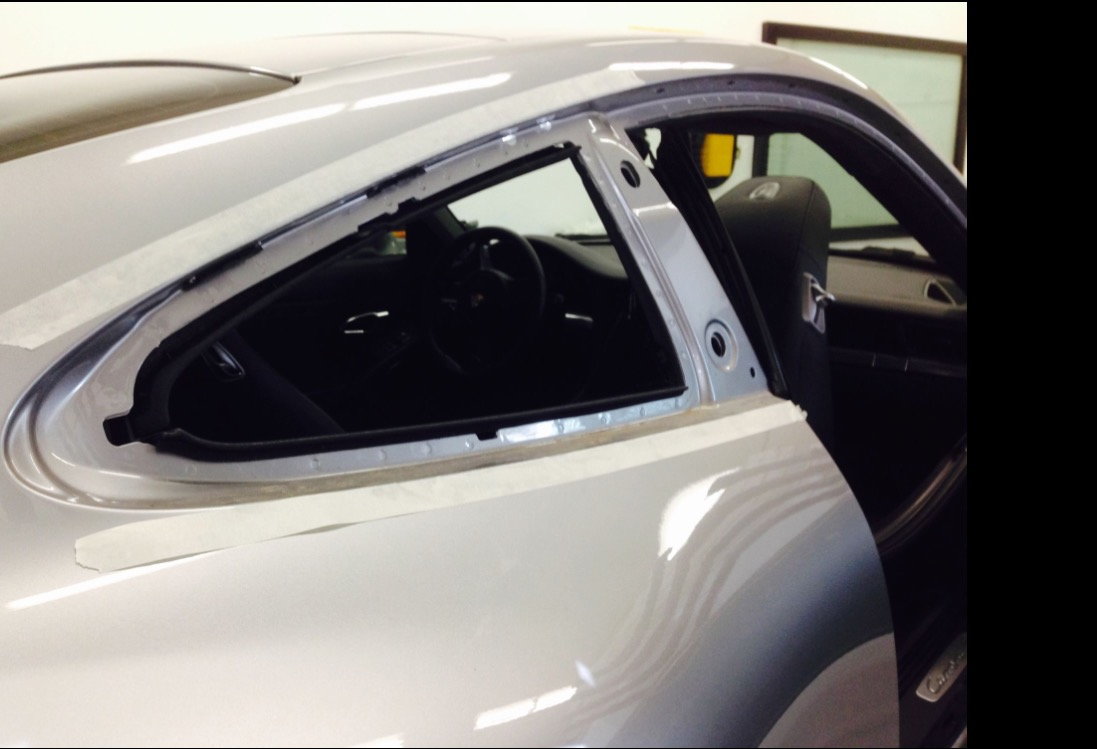
unfortunately my car arrived with a little dent on window trim (must happened during transportation, please see attached pic). My dealer is replacing it with a new piece free of charge.
I am wondering if it's a straight forward part to replace, should I tell the dealer tech any precautions to avoid damage to surrounding painted surfaces and parts? I just want the car to come out perfect and not wanting to take chances.
Haha Thanks for the reply. The car is a RS, I thought I would get better response in the 991 section instead of the RS section because cars have been around much longer.
So..... Good news, thank goodness whatever hit, got the trim and not the paint! Close call. Trim is one piece as you can see above whole drivers window. Pops off easily. Can bend easily too, but you're getting a new piece anyway. There's quite a few white clips holding it on. Good to get a few extras incase they break taking it off.
Good idea to get some blue painters tape and cover the upper painted area INCASE there is a slip up. You don't want a paint scratch obviously.
Overall, you got lucky and an easy fix. I know dealer is doing it, but good you have info too.
Thanks for the info STG991!
I am glad it's an easy replacement; now I feel a lot better about it. Should off to the dealer in a few days once the part is in!
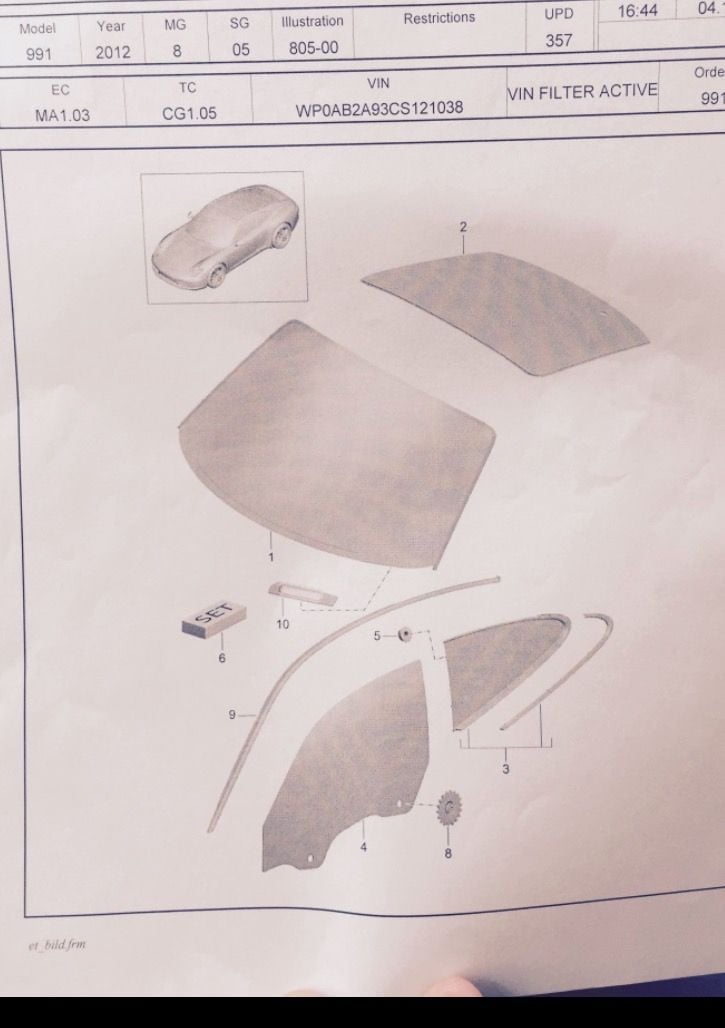
As an FYI to anyone, the black aluminum piece on the lower rear window is actually part of the window unit (#3 on diagram). If you need that piece, it's part of the whole glass unit. Around $500, I forget the exact amount. I had some sort of etch mark on the trim that bothered me, and bought the whole unit. To get that window out, the upper trim piece (#9) has to come off first.
I picked up a similar ding on my trim. The cost of the part is reasonable enough, $273, and another $20 or so for spare clips. Can anyone comment on the effort to replace it?
You need to remove the roof trim moulding that runs from the windshield back to the rear window. This is a single piece. Blue arrows in pic below indicate the trim piece to remove...
To do this you will need to do the following:
Pull down, and near the door corner begin pulling towards front of the car as you pull down... Small plastic fasteners are easy to break -- gently turn them 90 degrees. After pulling rubber door gasket down, the moulding fasteners are along edge inside the gap. There are a total of 8 small plastic fasteners for just the front section of moulding. Circled the joint in the trim where front section separates from trim fixed to window.
Pull rubber door seal from the areas indicated in the next picture. The rubber seal comes away from the frame very easily -- no adhesives or anything to worry about. You need to pull it down and out of the way, and completely off if you want to protect it. It is a single rubber piece that could easily get crimped if you are not careful;
Get a Torx tool with T-20 tip. Along the front section of the moulding that you just exposed by pulling the rubber door gasket down there are 8 small clamps that you need to turn 90 degrees to release the moulding. These are small plastic parts that break easily so take your time and don't force or you will need to replace them;
Once you release all 8 clamps, start at the front, and slowly pull the trim down towards the ground, away from the roof -- NOT forcing it or bending, just free from the clips you loosened in step 2. As you pull the trim down, get a body trim tool plastic wedge and put it between the trim and the car body to keep it away.... The moulding is stiff.
At the rear section of the trim, there are (3) three larger clamps. Sorry I don't have a picture of these.... You need to release these to get the trim fully removed. They are like hangar-clips that the trim piece snaps down onto. Starting at the B-pillar, begin pulling the trim free of the clamps, at the same time sliding it forwards, away from the joint where the upper trim connects to the lower part. Be careful with the trim piece as you pull it away from the car entirely, as it is somewhat flimsy. Find a safe, soft place to put it, and perhaps even cover it with a nice comfy blanket or something!
Installation:
All of the removed parts are installed by simply reversing the steps outlined above. The re-installation of the roof trim moulding is a bit difficult, as you have to get it aligned perfectly to avoid having a crappy-looking external joint near the back of the side window. I've seen a few cars on the dealers lot that look a tiny-bit "crooked" or not fully aligned. So take your time and hopefully you'll have a good time with it!
When re-installing the rubber door gasket, take your time and make sure that it is slotted properly around the entire perimeter. The tricky section is the right-angle between the B-pillar and roof line. You may need to force it in a bit, but make sure it is not folded-over or creased when doing so.
Last edited by 519Kris; 12-21-2020 at 03:32 PM.
Reason: Found answer elsewhere
Just adding another data point this thread for future ref, esp the previous DIY steps.
I was using the flat trim plastic tool trying to stuff part of the rubber seal back into the moulding and for the longest time could not figure how they fit into the groves, with some left hanging outside the moulding.
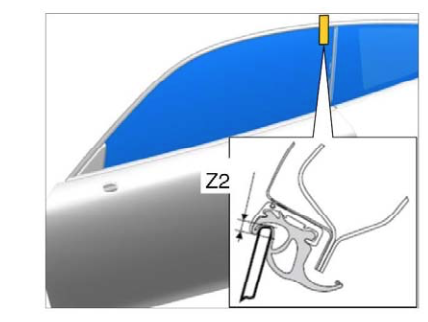
Then, I found this cross section picture z2 from the Porsche service manual. Totally helpful.

 12-01-2015, 06:52 PM