When you click on links to various merchants on this site and make a purchase, this can result in this site earning a commission. Affiliate programs and affiliations include, but are not limited to, the eBay Partner Network.
Bose to High End Custom Audio System from Apicella Auto Sound - Background and Review
Introduction: So I’ve spent a lot of time on the various audio threads here as I considered a DIY project for my 991.2 C4S, before ultimately going with a full custom install from a local (NYC area) installer – Nick Apicella at Apicella Auto Sound. I think we ended up with an awesome system that I wanted to share and answer any questions on the thought process and results. I also wanted to review my experience with Apicella Auto Sound as I know people are always looking for someone to trust with our cars. To cut to the chase, I couldn’t recommend Nick and his team enough for anything car audio or electronics related.
Background and Goals: While some people are fine with it, I felt the Bose left a lot to be desired from what I otherwise view as the perfect car. It’s well known how bad the tweeters are, but I just had a problem with the entire imprecise system in that at lower volumes there is no detail whatsoever and you quickly get distortion at higher volumes, to say nothing of the complete lack of imaging. While there are times I just want to hear the flat six, I also listen to music often and the listening experience just doesn’t match the perfect steering, throttle response, driving dynamics, seating position, etc. we all love.
As mentioned before, I originally thought of doing a DIY install and did a lot of research on components and taking everything apart. Was focused on DIY to (i) save on labor, (ii) thought it would be a fun project, and (iii) have had some mixed experiences with high end shops in the NY area and was not willing to ship my car to somewhere I do trust like Musicar given it’s my only car. Unfortunately the more research I did the more I realized there wasn’t any point in switching all the components if the DSP wasn’t tuned correctly, especially given I wanted a real stage with discernible imaging. I also got increasingly uncomfortable with my ability to install everything in a timely fashion and not end up with some issue between running power and messing with the doors. Break something and I probably end up undoing any of the savings from labor I was trying to achieve in the first place. This led me to speak to a bunch of shops on the east coast and eventually to Nick Apicella at Apicella Auto Sound.
Maybe it’s a NY thing, but I’ve found a lot of high-end auto businesses make you feel like they’re doing you a favor parting you with your hard-earned cash. Communication is poor, quotes are either impenetrably dense or have no detail at all, and they are generally inflexible. I found Nick to be the exact opposite. He responded to my initial outreach promptly (like in less than 5 minutes) and we setup a call in the next couple days to talk through my goals and his approach. Starting with my goals, I was looking for:
Complete OEM install (no sail panels, nothing out of place in stock Porsche design language) and retention of Carplay and PCM functionality
Improve sound quality and detail across frequency range, particularly the harsh, fatiguing highs and muddy lows I was getting with my stock Bose
Create as wide of a soundstage as possible with discernible imaging, in contrast to the stock Bose with its too narrow stage and lack of imaging
Get rid of some troublesome door rattles and improve the soundstage with some sound deadening in the doors
Ability to easily revert to factory
Looking to keep <$10k including labor
I originally had a bias towards not having an external sub as I thought it would be hard to make look factory and I didn’t want to lose any functionality (I use the rear tie downs a fair amount to keep stuff flying around when I have the car fully packed) or space (didn’t want something jamming up the footwell). We ultimately went with an external sub that addressed all these concerns as you’ll see below!
I also was planning to forego use of the rear speakers and center channel.
System: Below is the system we ultimately agreed on –
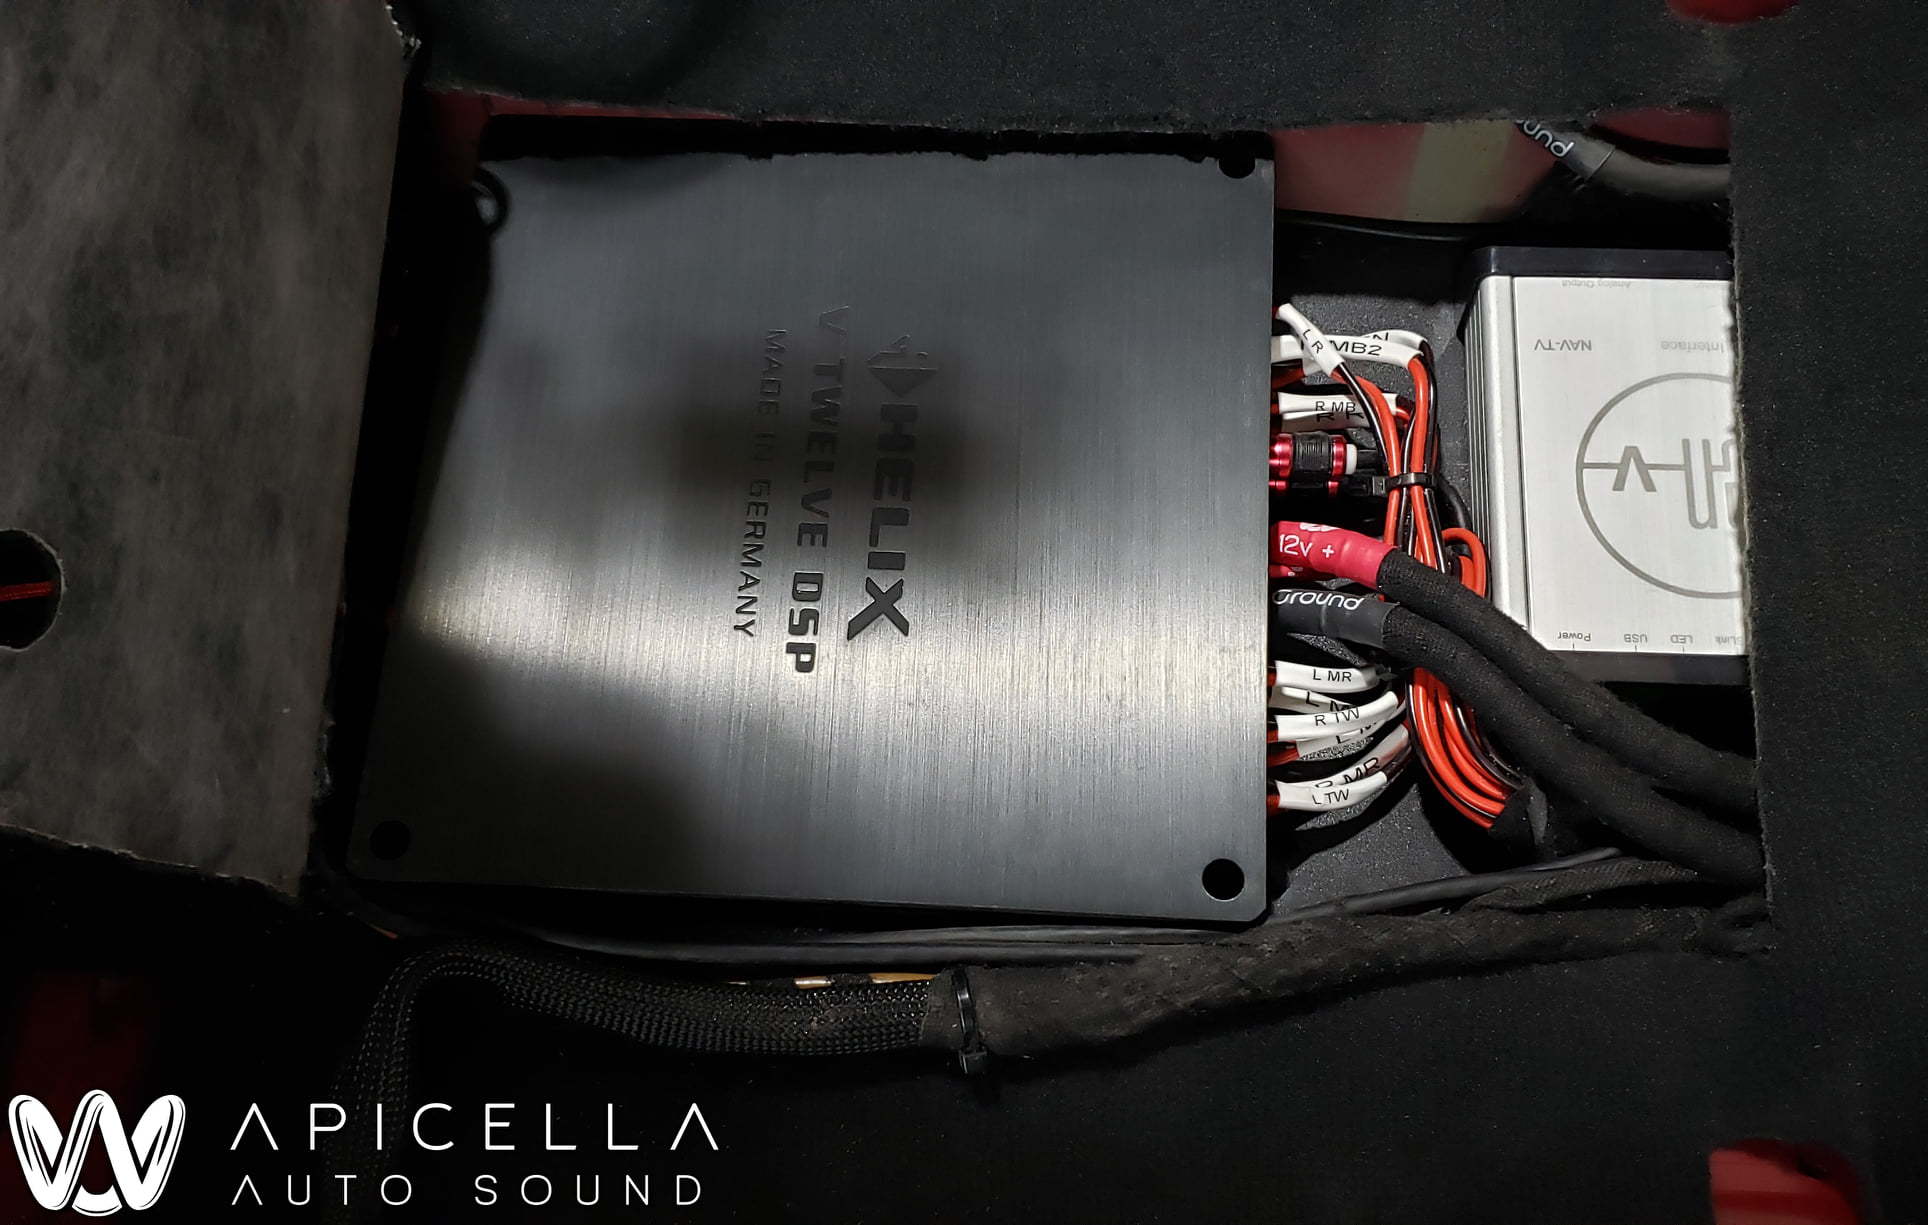
Helix V12 Amp and DSP – Powers L/R tweeters, L/R midbass, L/R midrange, L/R real (fill), center channel and DSP for all that plus sub control. Integrated amp and DSP saves space and offers plenty of power for this application in our cars.
Helix M One Amp – Separate amp for sub on the rear parcel shelf
Tweeters – Dynaudio Esotec MD 102 from Rennspec; I had ordered this before I engaged with Nick and we just decided to use them rather than return
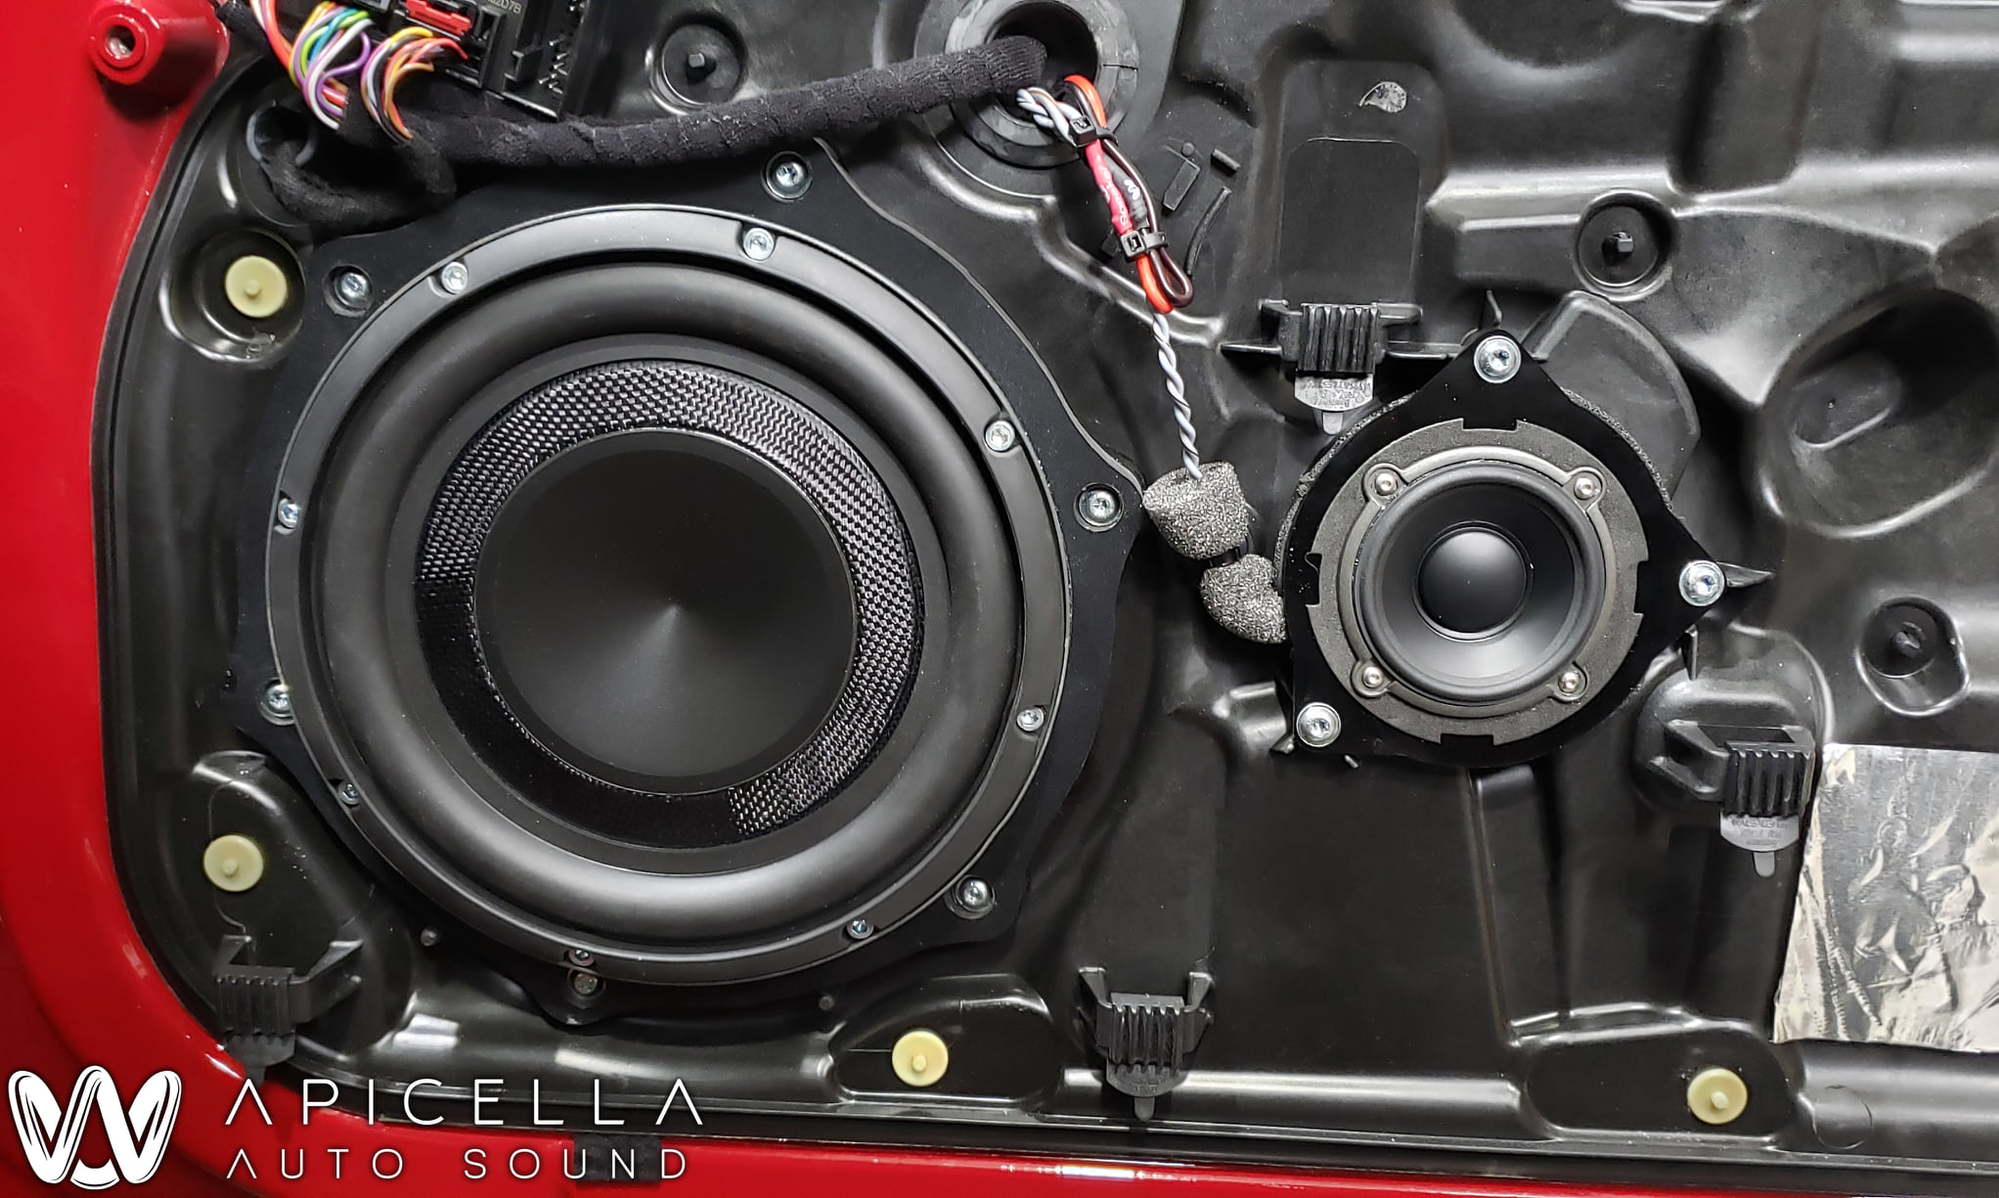
Midrange – Audiofrog GB25
Midbass – Audiofrog GS8ND2; these have dual 2-ohm coils which allow 300w per driver and provide incredible output and low-end response relative to any other solution
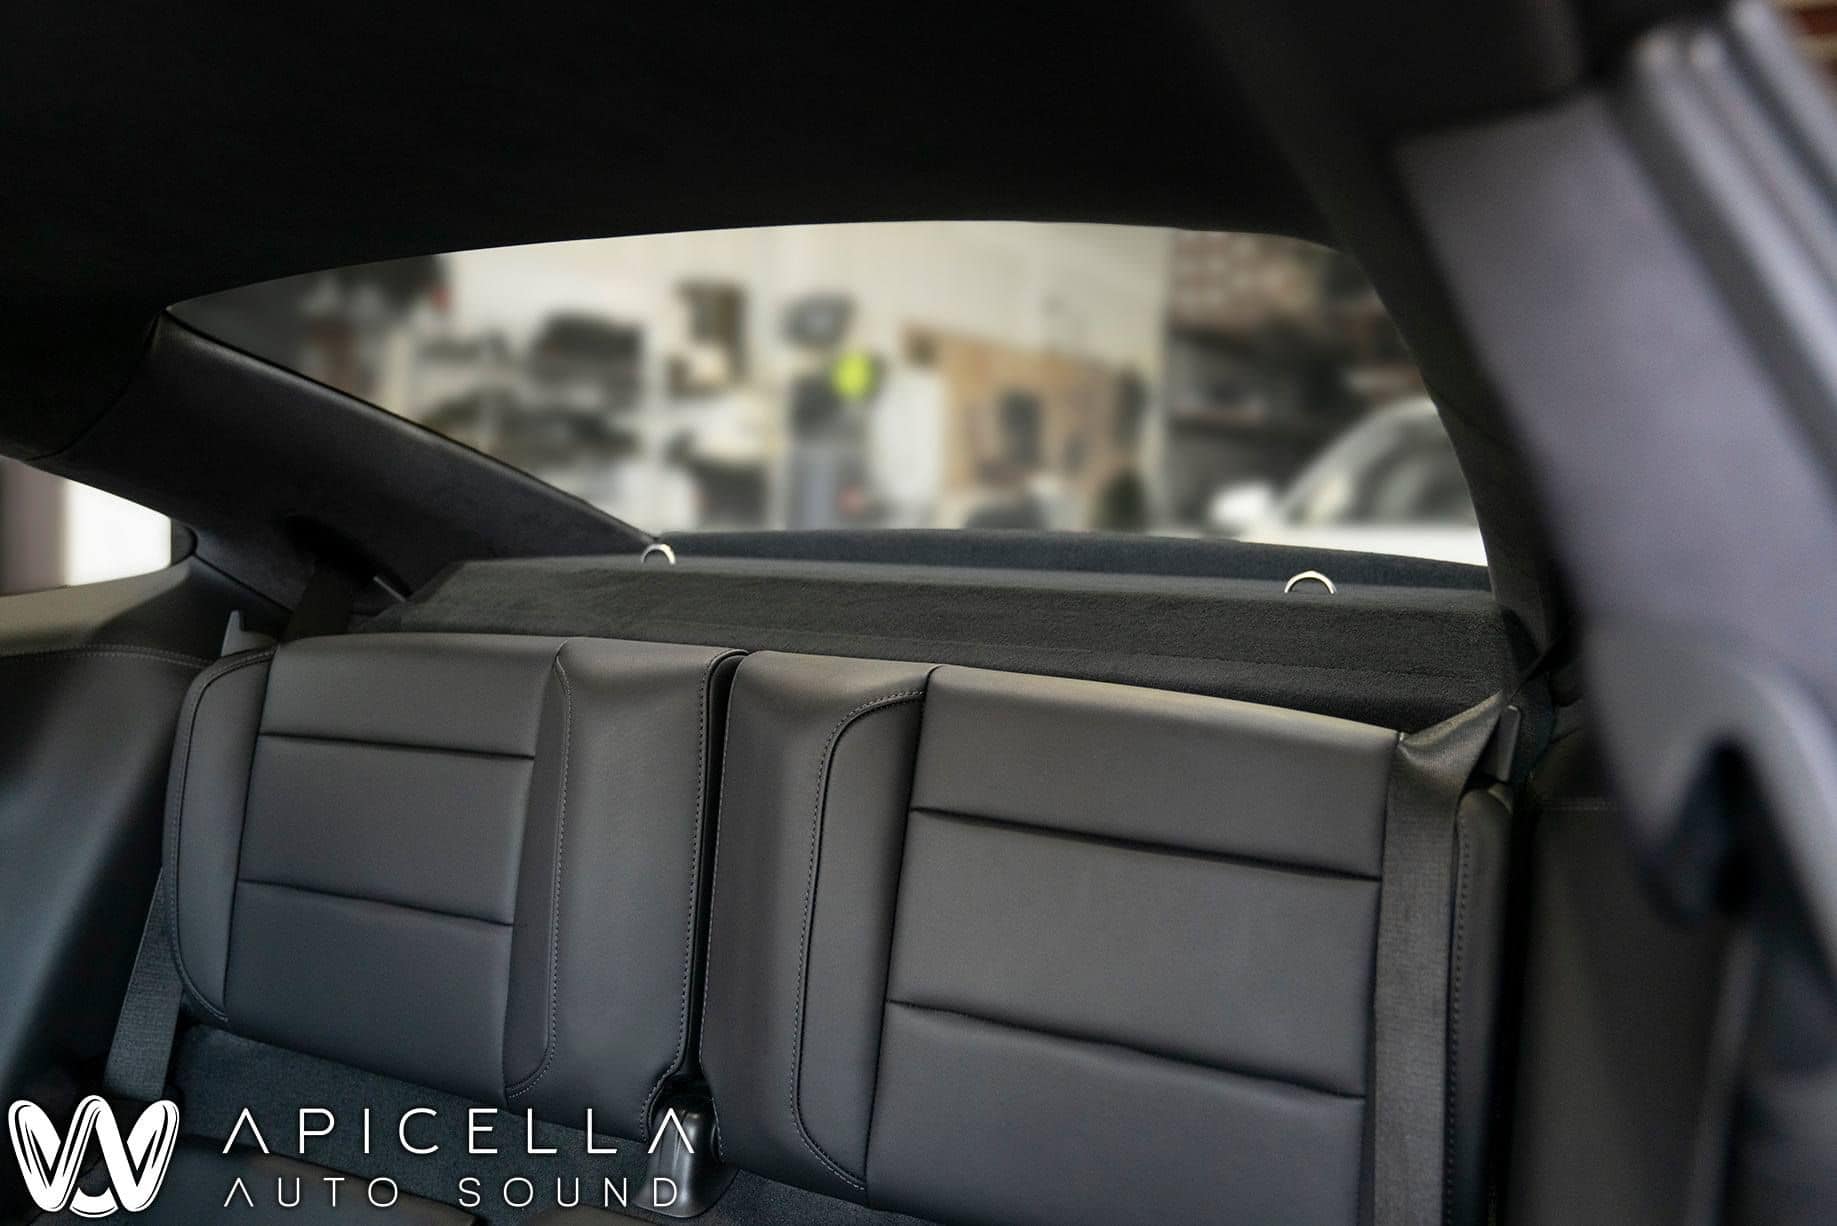
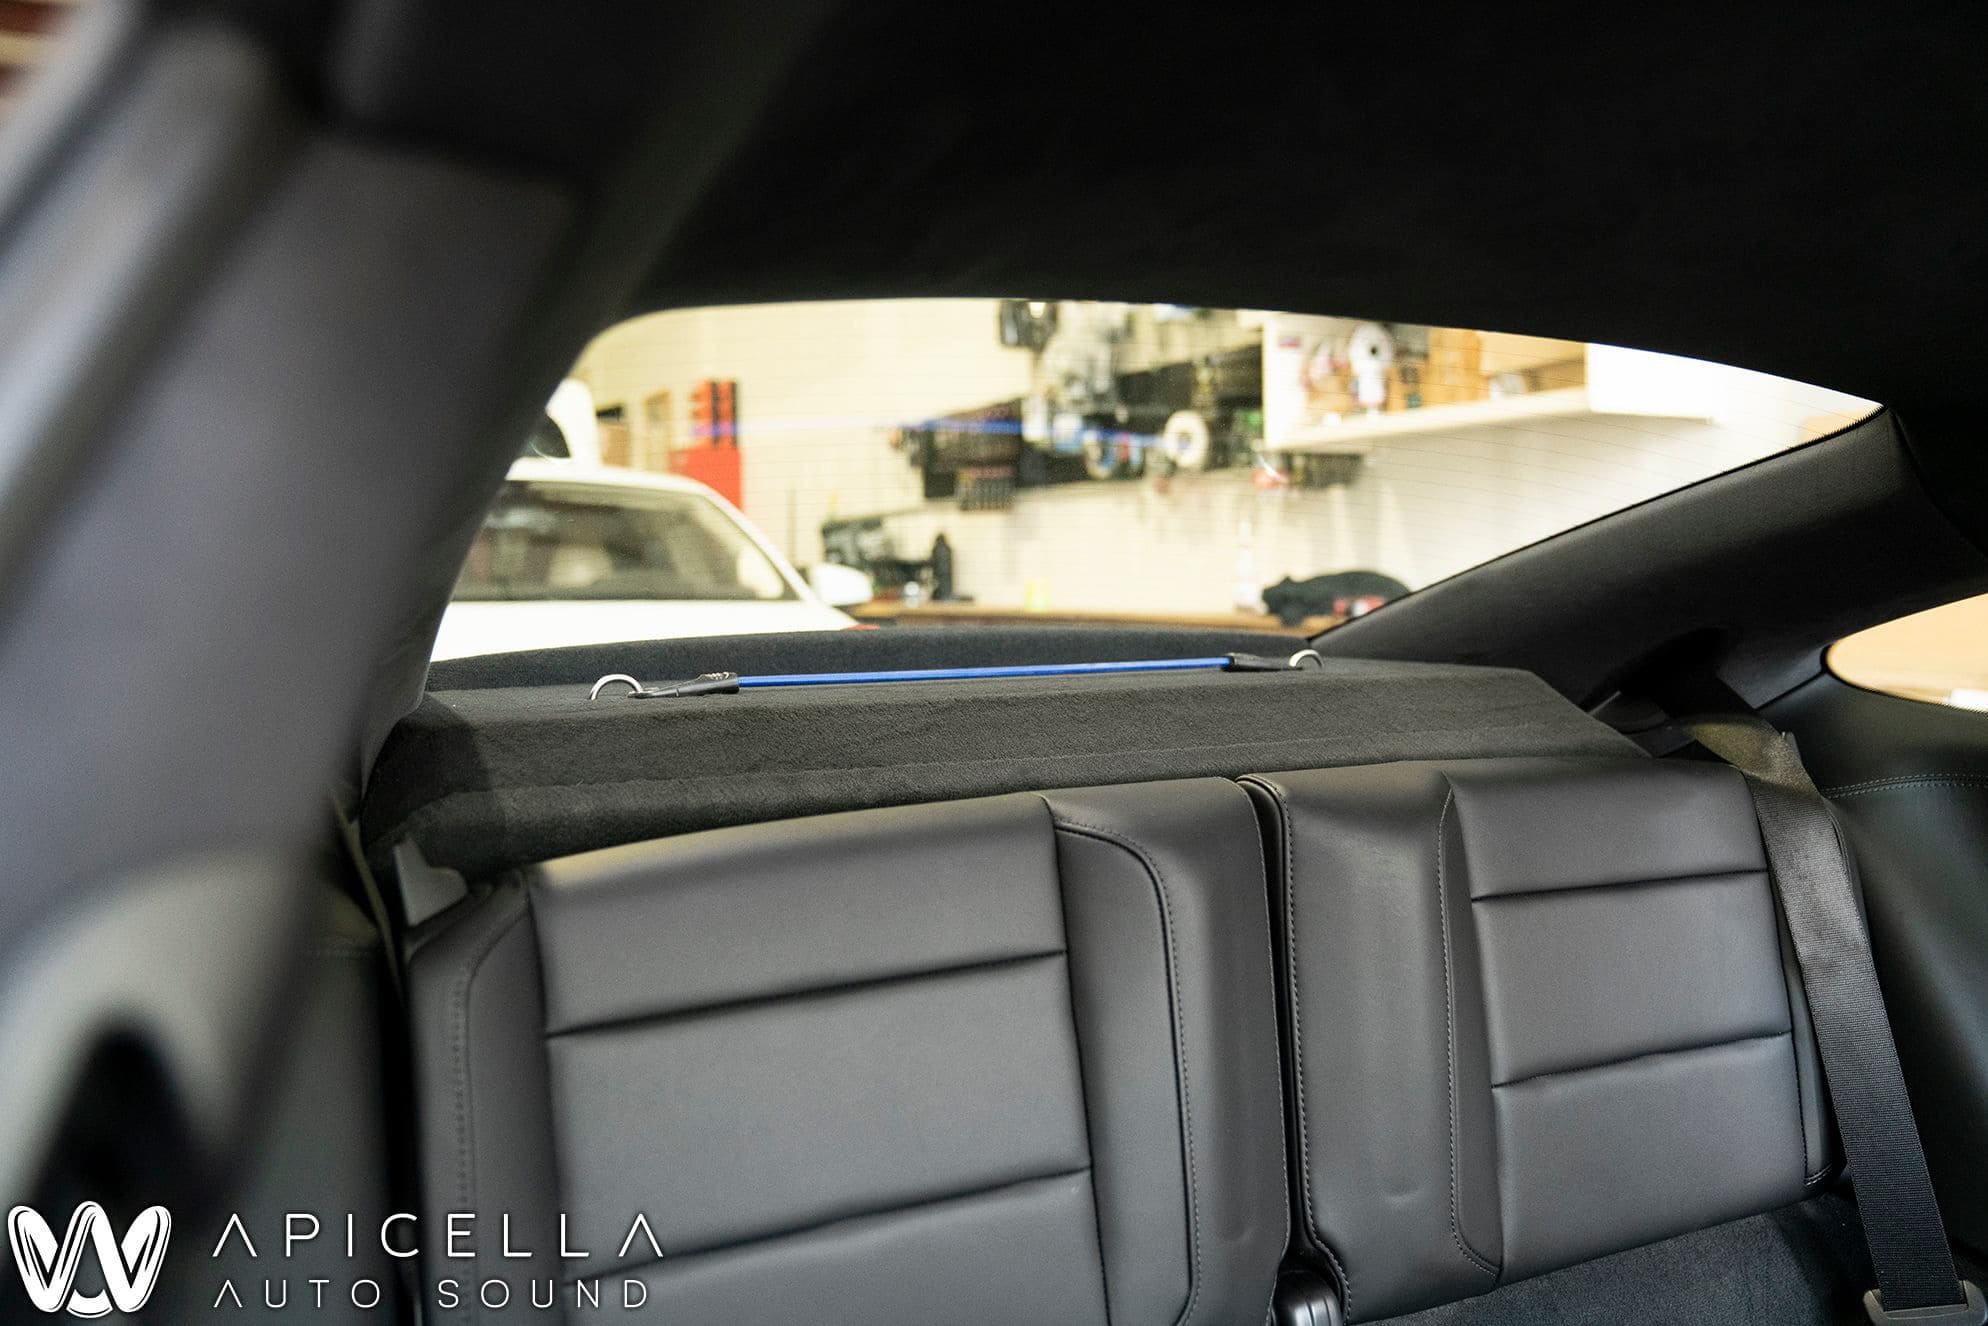
Subwoofer – Illusion C10; this is a very shallow subwoofer that allowed us to create a shallow enough subwoofer enclosure on the parcel shelf to not obstruct the rear window
NavTV Zen-V – required if you want retention of Carplay and PCM and have Bose or Burmester systems based on the MOST150 interface out of the head unit. If you just have the Sound Package Plus you can get around this, but my car came with Bose, so had to get this to use any other amp. Not the most fun component, but don’t really have a choice unfortunately.
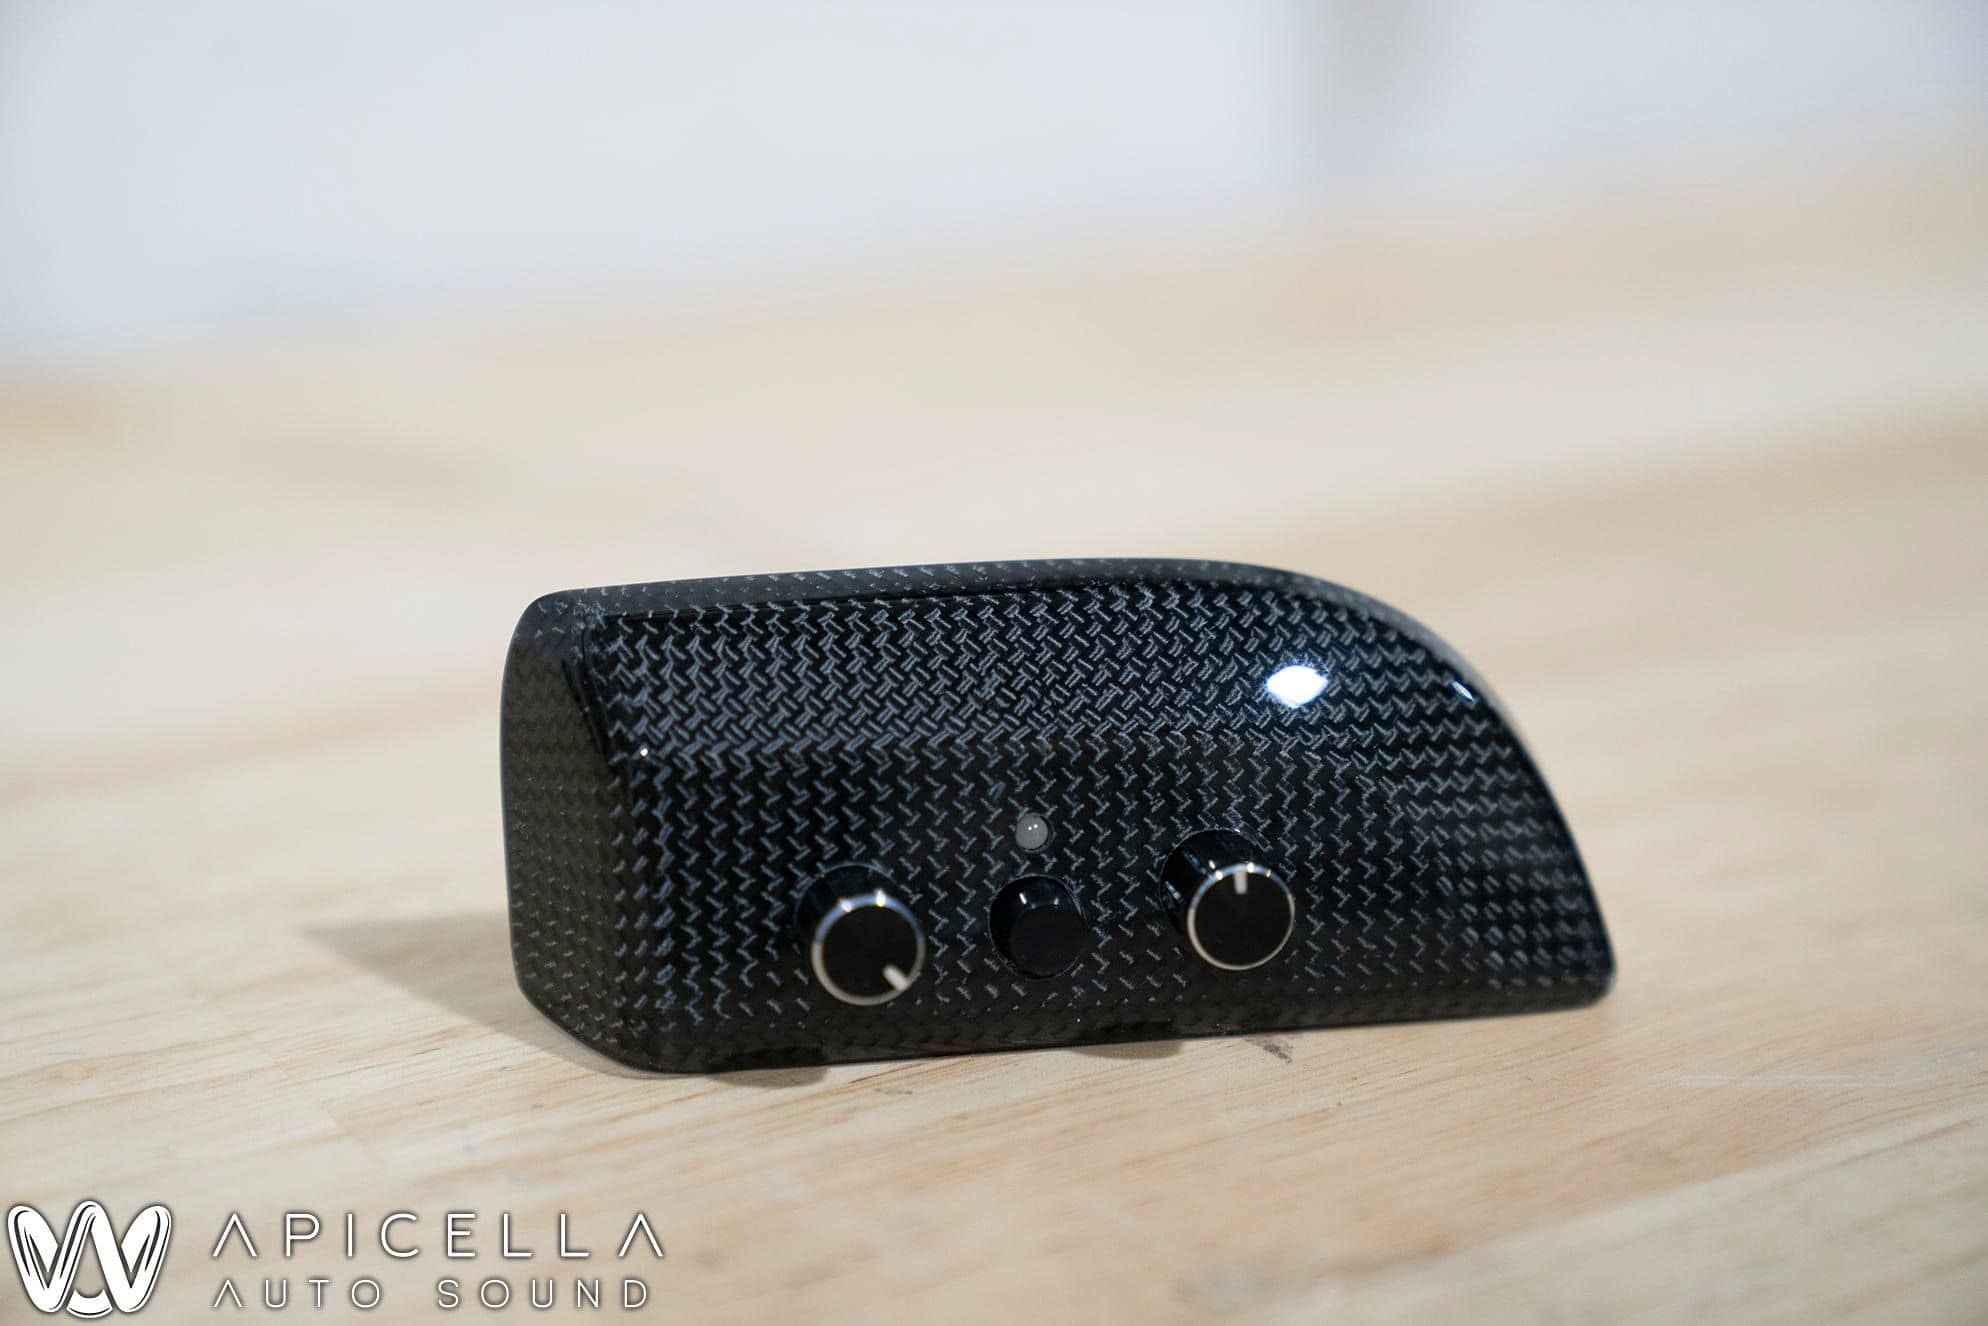
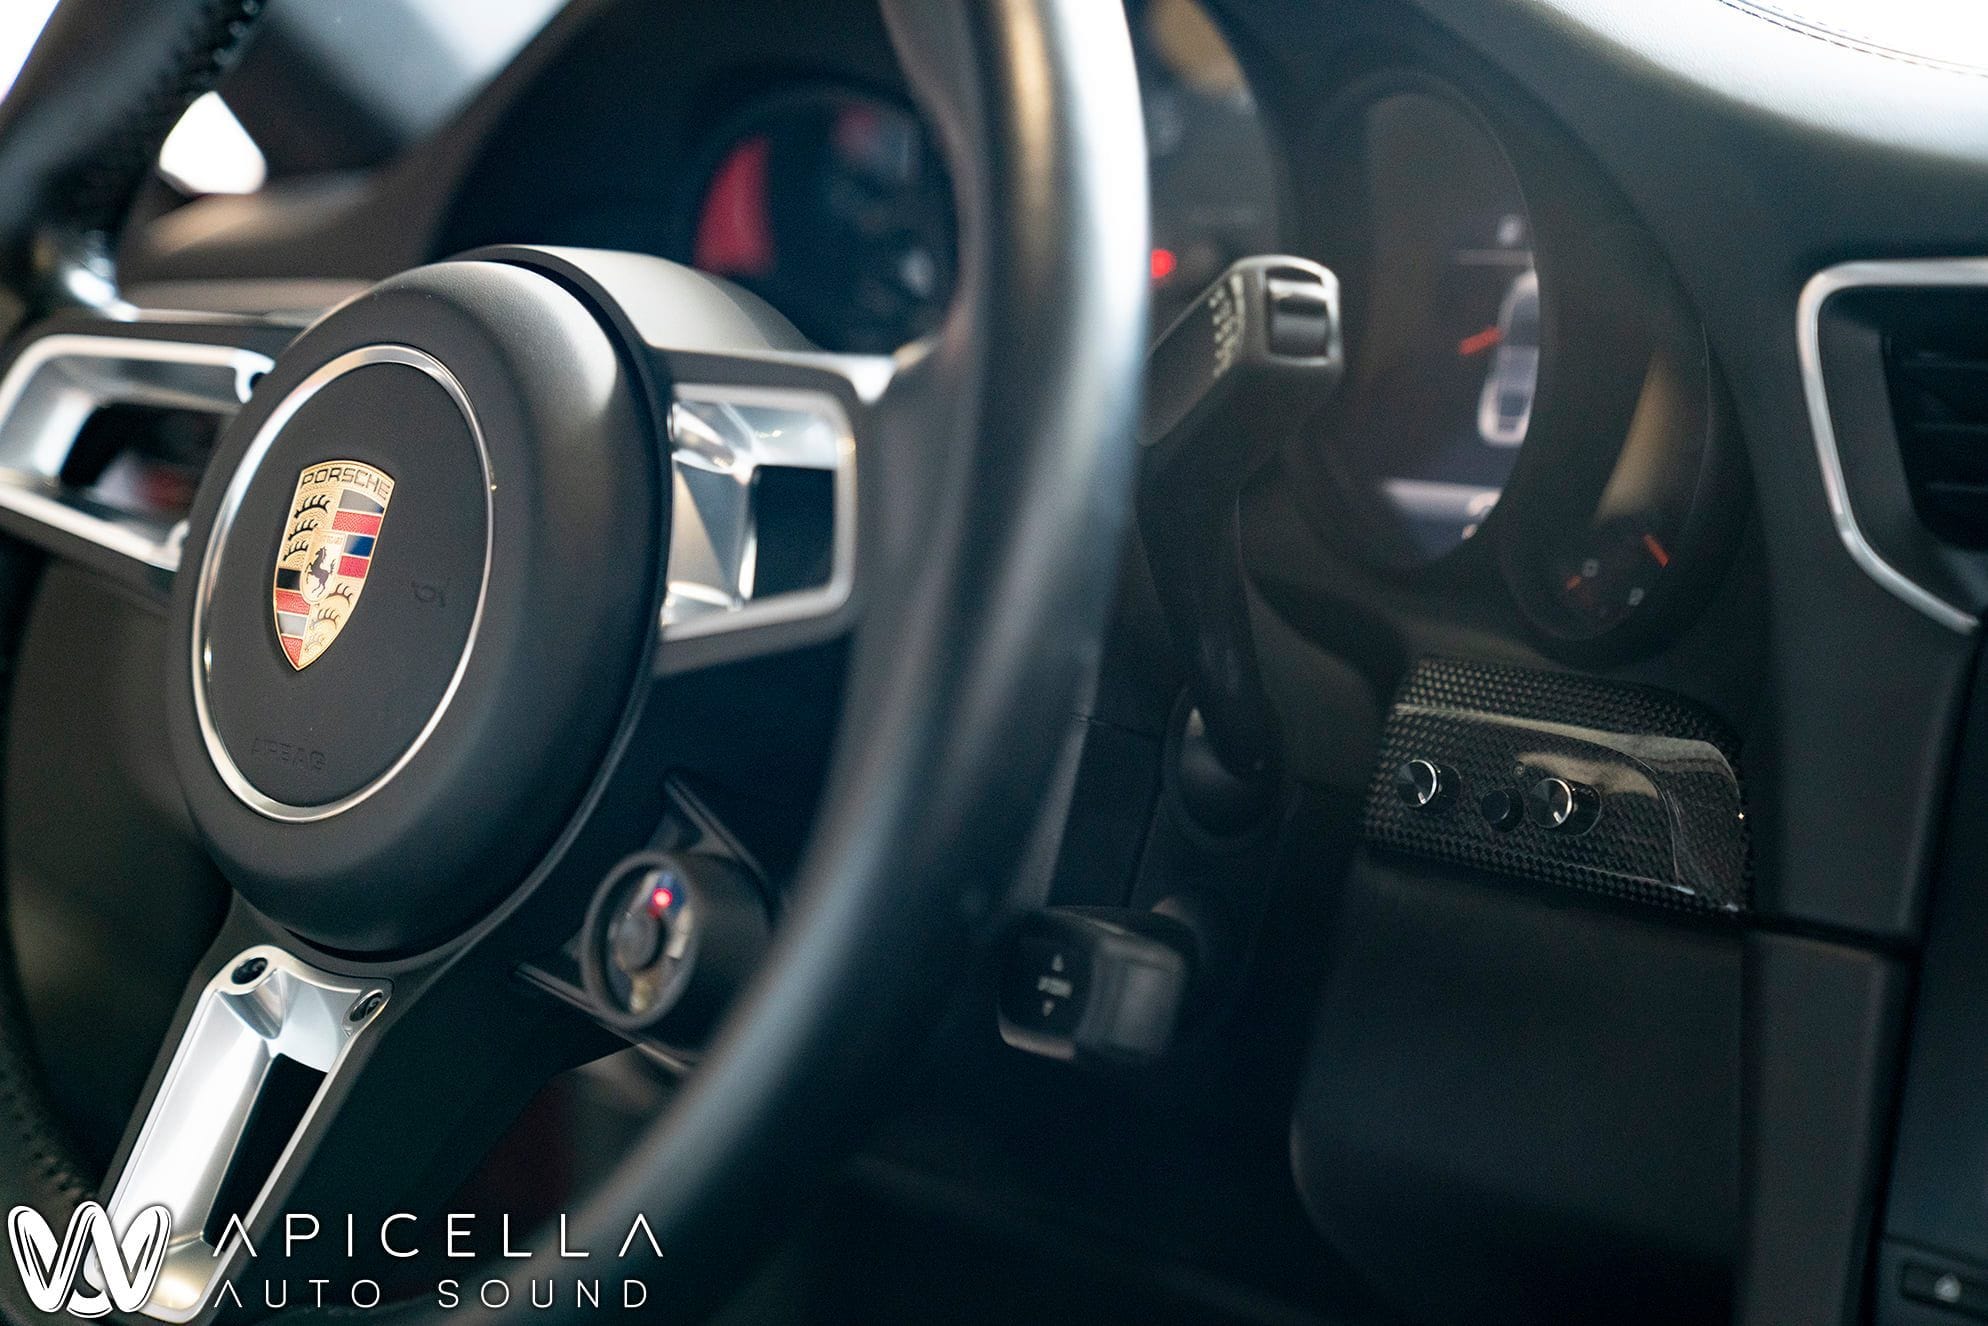
Helix URC.3 Controller – small controller to switch presets and control system volume (turn down for valets) and bass; this can be configured in other ways, but this made the most sense for us
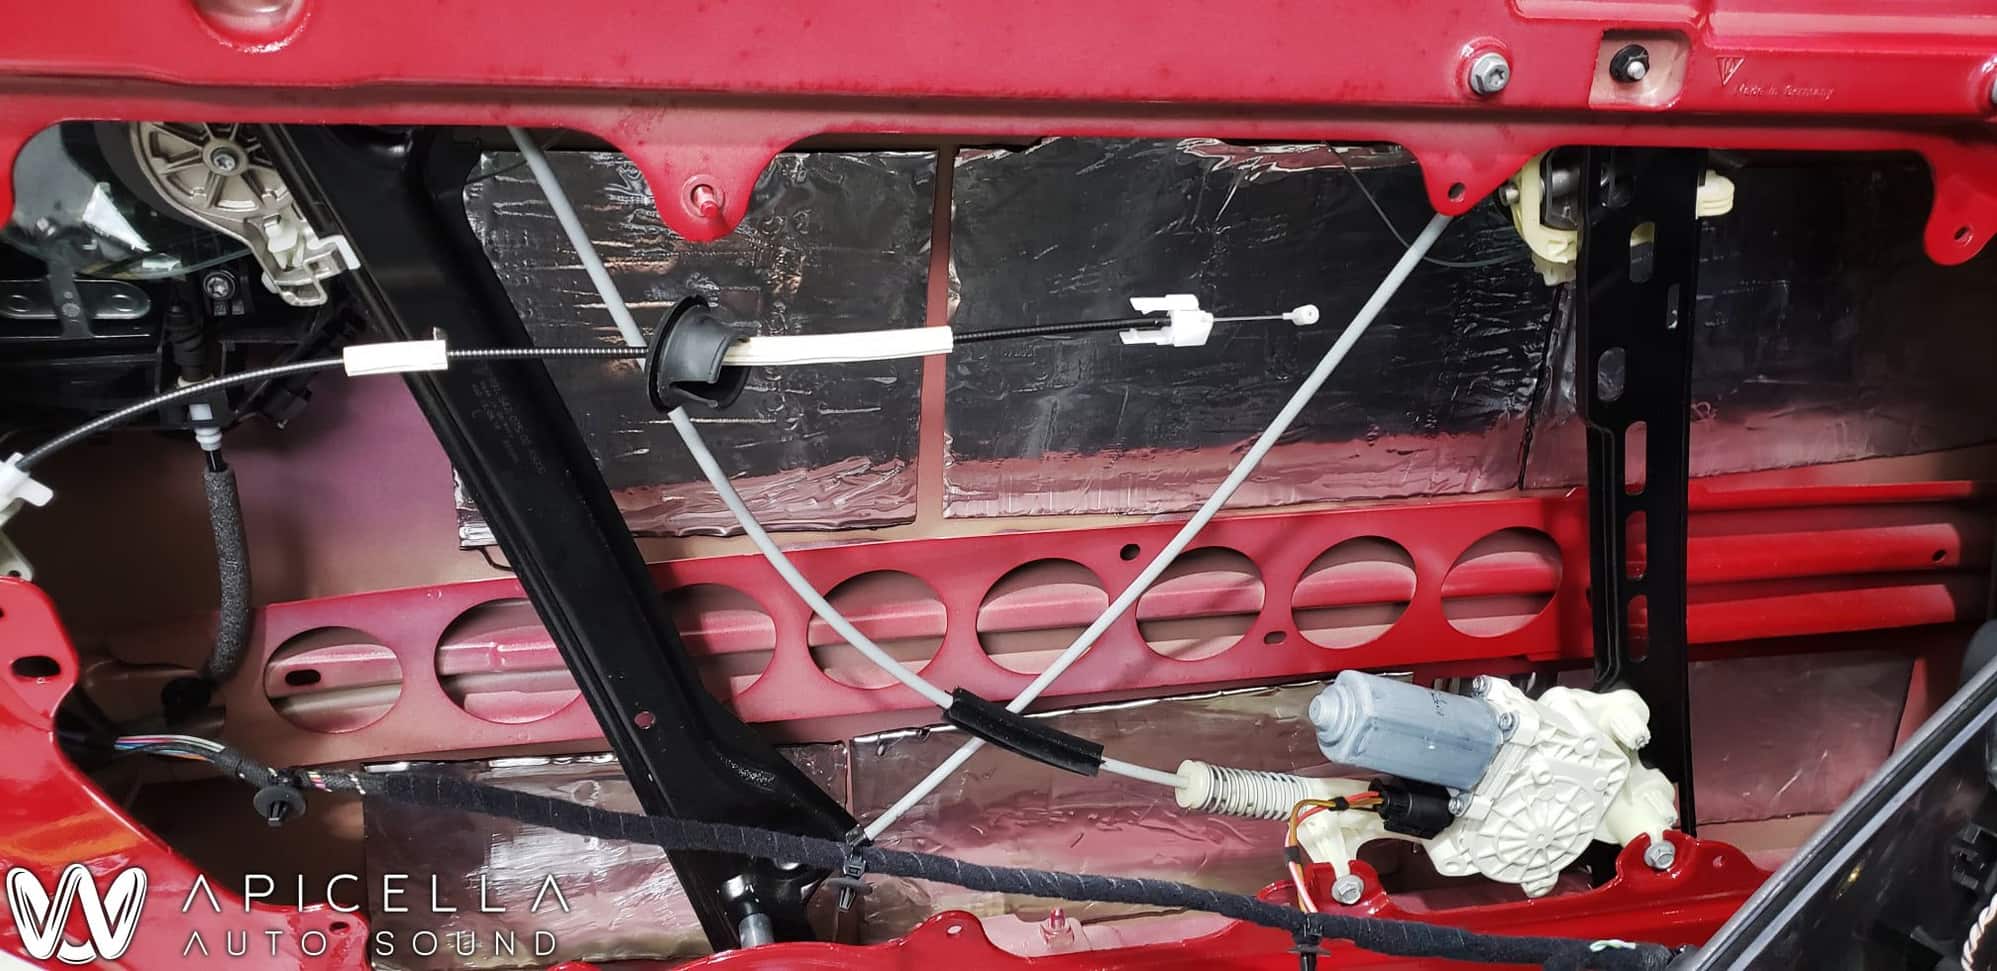
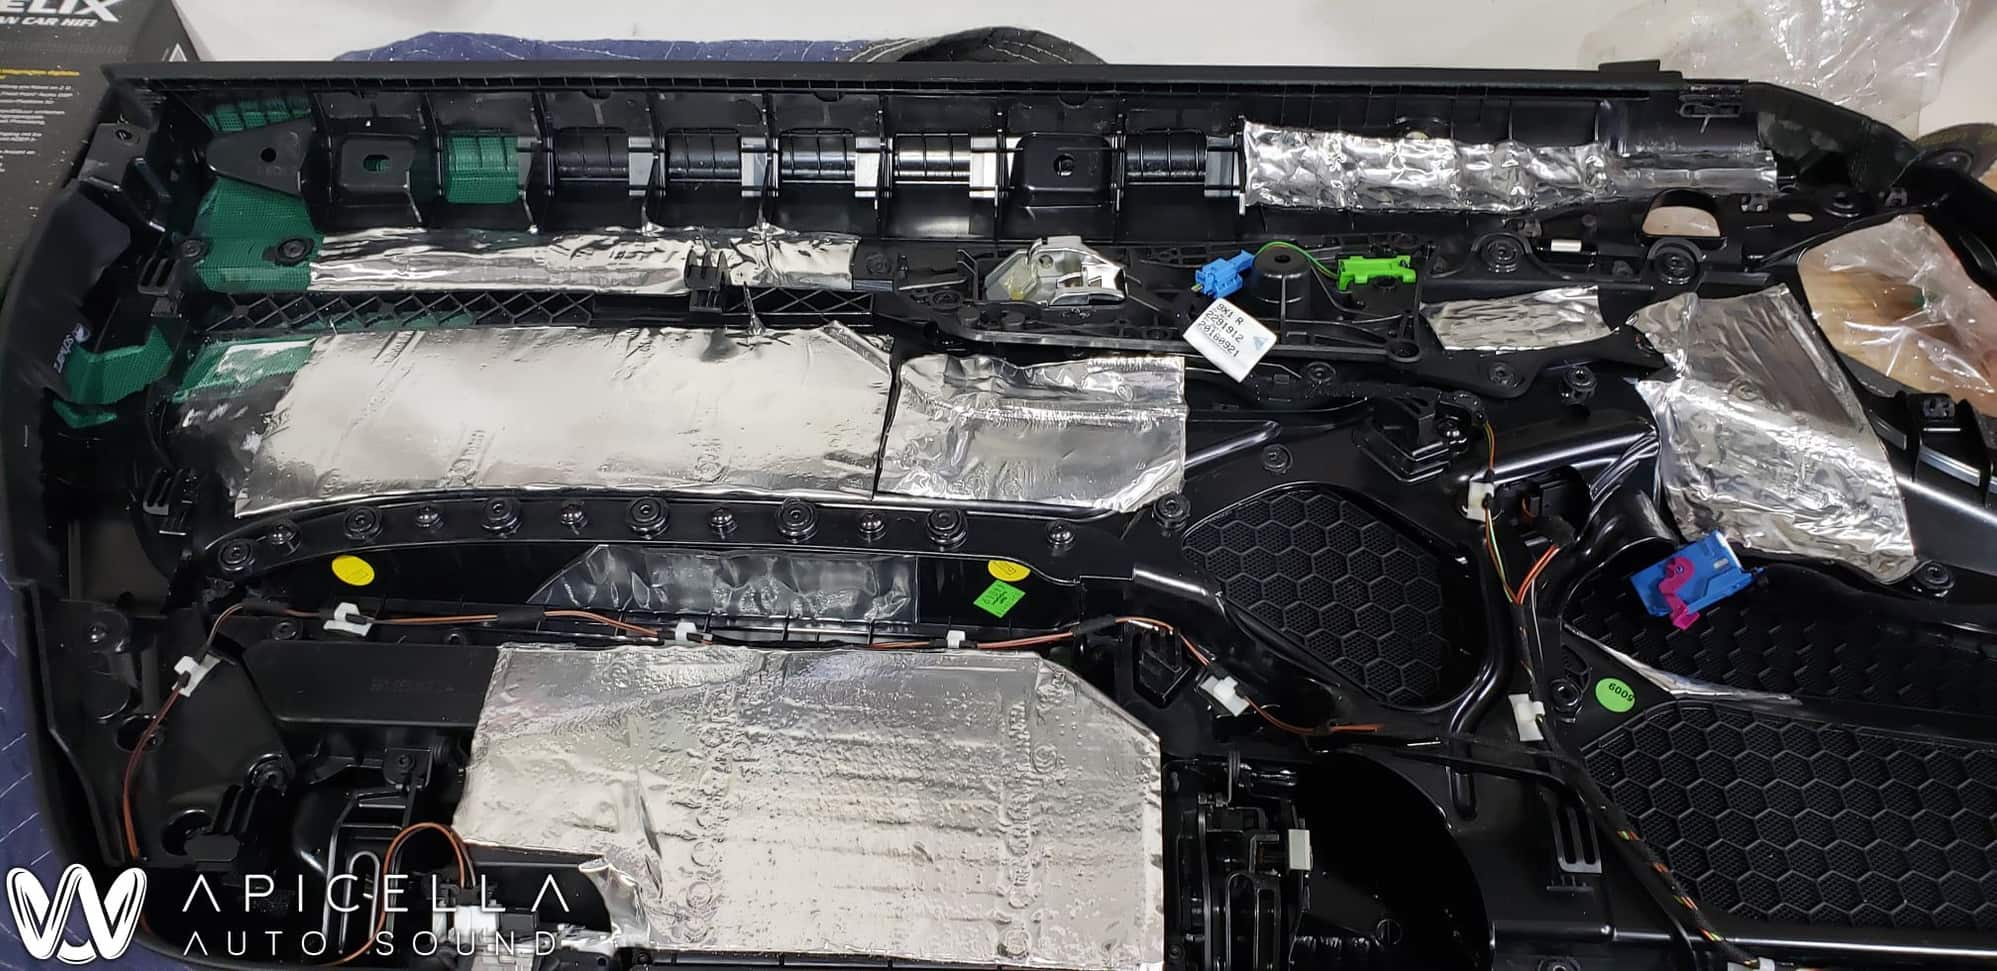
ResoNix Sound Deadening – this is a brand that Nick created himself and sells after being unhappy with the alternatives in the market (google “melted sound deadener”). I’m not an expert on sound deadener, but comparing side-by-side with some of the popular brands on Amazon and it’s clear that it’s a much higher quality product with the bonus that it doesn’t smell like tar.
Two notes on the system design:
Nick originally proposed using an eight channel amp/DSP (Helix V8) based on my goals and budget, but I actually upsold myself into the twelve channel in order to have the extra channels to (i) utilize the rears for differential rear fill, helping create the illusion of a slightly wider soundstage and (ii) create a two-seat tune for which you need the center channel. This can be turned off (so just driver tune) with a preset.
We ultimately went with a sub as the alternative is to high-pass the midbass at 50hz. While you can fit shallow subs with lower frequency response in our doors (and the GS8ND2s we used can get down to 30hz), the problem is that below ~50hz its impossible to prevent rattles even with all the sound deadening in the world. This also allows the midbass to focus on the upper bass and lower midrange where you want it to rather than trying to cover too broad of a range into the lower bass.
Sound/Install Review: So obviously the sound quality will improve dramatically going from the dinky Bose components to audiophile grade speakers. I love the how crisp and airy the highs are relative to the tinny, fatiguing Bose. Improvement in detail is particularly noticeable in the upper midrange and treble. Midrange as a whole is full and smooth and the low-end is perfectly punchy and controlled. Overall a much more accurate and dynamic experience as you’d expect.
What I was most impressed with was the soundstage and imaging despite the obvious limitations in our cars. Nick is well known in car audio circles for his tuning, and he’s somehow managed to create a stage as wide as the far edge of the A-pillars using all factory locations besides the sub. The imaging is spot on. You feel like you’re 3 feet stage right looking up at the lead singer and can identify every instrument or voice across the stage in any decent recording. I simply didn’t think this was possible in car audio as I’ve never heard anything besides OEM audio.
Finally the fabrication is top notch. All you’re going to see in this system is the power off the battery in the frunk (very clean), the sub enclosure (just look below), and the controller (also see below). You don’t see the inside of the doors obviously, but there isn’t a rattle even above comfortable listening volumes, which is is some feat given all the plastic in these doors, especially all the outer-panel components around the seat presets and window controls.
Ultimately, couldn’t be more impressed with the sound and install and am happy to let anyone around NYC have a listen if considering a system like this.
Thoughts on Apicella Auto Sound: I don’t want this to sound like an ad for Nick and his shop, but this has simply been the best experience I’ve had on any major purchase. Beyond being a car audio nut who will fabricate, install, and tune your car to the highest standards, he was just great to work with. Nick’s a young guy, but in the best way - he’s clearly hungry to build a leading car electronics business and not just riding a reputation earned a long time ago. He’s a great communicator whether you want to chat on the phone, email, or text and he’ll promptly give you an honest answer in straightforward fashion. You can tell the commitment he has to making sure every interaction you have with him and his work is top notch and he will go above and beyond to make sure your experience is perfect (including driving me to the train station 30 minutes away in the exact opposite direction from his house at 9pm after I couldn’t get an Uber!). If you're looking for car audio or radar/laser on the east coast run, don't walk, to Nick (or ship him your car if you're further).
Here’s his own build log that I cribbed the pictures from:
ResoNix sound deadening on the outer door panel ResoNix sound deadening on the inner panel. Hard to see, but there is this butyl cord wrapped around all the plastic bits that could possible rattle. Audiofrog GS8ND2 and GB25 with foam between the baffles and speakers to prevent any air leaks Helix V Twelve DSP and NavTV Zen-V under the passenger seat. Tight, but fits and doesn't interfere with the seat at all. Helix URC.3 controller mounted in the trim piece to the right of the steering column. This is the only place I made a compromise on cutting an OEM piece as its just the best solution for the controller and still looks totally factory. Controller mounted. Notice the LED is blank in the "driver" tune and then lights up when you press the center button which switches to the "two-seat" tune. This results in a narrower stage, but still retains imaging for both driver and passenger. Sub enclosure being fit. The Illusion C10 fits on the left side and fires down while the Helix M One amp is on the right side. Sub enclosure fully installed with OEM carpet. I requested the hooks as I use them with bungie cords to keep stuff from flying around when I have the rear seat shelf full when I'm traveling with my wife and dog. Another shot of the sub enclosure. How OEM does this look!
Wow! Very glad to see this review. Since we love what we do, what you experienced comes easy, but it still feels great to see/hear it. Thank you for the kind words!
+1 for Apicella. Nick knows his stuff and is a great guy to work with!
Ayyyy thanks guys! Just for anyone else reading, the recommendation goes both ways. The guys here at Torrent are incredible. Highly recommended to anyone in the Tri-State area to anyone looking for anything from simple maintenance to full-blown performance upgrades.
Last edited by ResoNix Sound Solutions; 03-08-2021 at 05:06 PM.
NY9112: I hope Nick gives me props for figuring out that carbon trim piece can be made into a sub ****. I am the first guy I know who came up with the idea, but Nick implemented it perfectly. I actually decided to buy an aluminum trim piece and wrap it in carbon fiber vinyl rather than drill the factory piece.
If you are out tomorrow driving, I would love to hear your system compared to mine. Not to see who's is better, just to hear another 991.2 system and how it compares to mine and mine to yours. Nick installed them both, so the tuning should be excellent. He tried to steer me towards Helix but, I wanted JL Audio. Our speakers are different and so is the sub. Love to hear it. PM me..
Nice. Would have been great to reuse or get the same hold downs that are on the rear deck to make it look OEM.
I agree! This is something we discussed. Let me know the best way to contact you so you can pay for the extra labor hours and I'll give OP a call to schedule
Originally Posted by PTS-BRG
NY9112: I hope Nick gives me props for figuring out that carbon trim piece can be made into a sub ****. I am the first guy I know who came up with the idea, but Nick implemented it perfectly. I actually decided to buy an aluminum trim piece and wrap it in carbon fiber vinyl rather than drill the factory piece.
If you are out tomorrow driving, I would love to hear your system compared to mine. Not to see who's is better, just to hear another 991.2 system and how it compares to mine and mine to yours. Nick installed them both, so the tuning should be excellent. He tried to steer me towards Helix but, I wanted JL Audio. Our speakers are different and so is the sub. Love to hear it. PM me..
Ayyy what's up! Just to clarify, we didn't install your system. We just fixed a combination of 5 other shops work to get it up to par lol. Replaced blown midbass drivers, added the JL controller, and tuned the DSP. I'd say yours and OP's car both sound great. Let me know when we're doing your frunk build
Where did you install your sub amp?
I'm debating between Helix P Six 3way only setup or adding sub on the rear deck.
I would recommend biting the bullet and doing a sub. The doors will not allow much low-frequency content to be played from them without rattles no matter how much deadening you do. The sub amp was mounted next to the sub. Looking from the driver seat back, the sub is off-center to the left, and the amp is to the right of it.
For what it’s worth, in my targa I didn’t have the luxury of having a flat useable rear deck so space was a premium. Nick installed the sub amp below the drivers seat and the 8 channel and NAV under the passenger seat. Worked out good for me.
I would recommend biting the bullet and doing a sub. The doors will not allow much low-frequency content to be played from them without rattles no matter how much deadening you do. The sub amp was mounted next to the sub. Looking from the driver seat back, the sub is off-center to the left, and the amp is to the right of it.
BTW there is TINY bit of space under the drivers seat to fit a one channel amplifier. I fit this discontinued JL 500/1 not my first choice of amp, but it fit the space and power needs. Price was pretty good too.
BTW there is TINY bit of space under the drivers seat to fit a one channel amplifier. I fit this discontinued JL 500/1 not my first choice of amp, but it fit the space and power needs. Price was pretty good too.
If you get something with those dimensions AND make sure the connections are on the ends NOT the sides you can make this work.
Not in this particular situation. That's where some of the Radar/Laser stuff was installed. We didn't do that install as the OP didn't know we existed at the time of his install

 03-07-2021, 06:22 PM