When you click on links to various merchants on this site and make a purchase, this can result in this site earning a commission. Affiliate programs and affiliations include, but are not limited to, the eBay Partner Network.
still not sold huh? mine are coming in tomorrow, I'll post pics when i install them. here are better pics with the skirts installed from another member in case you missed it
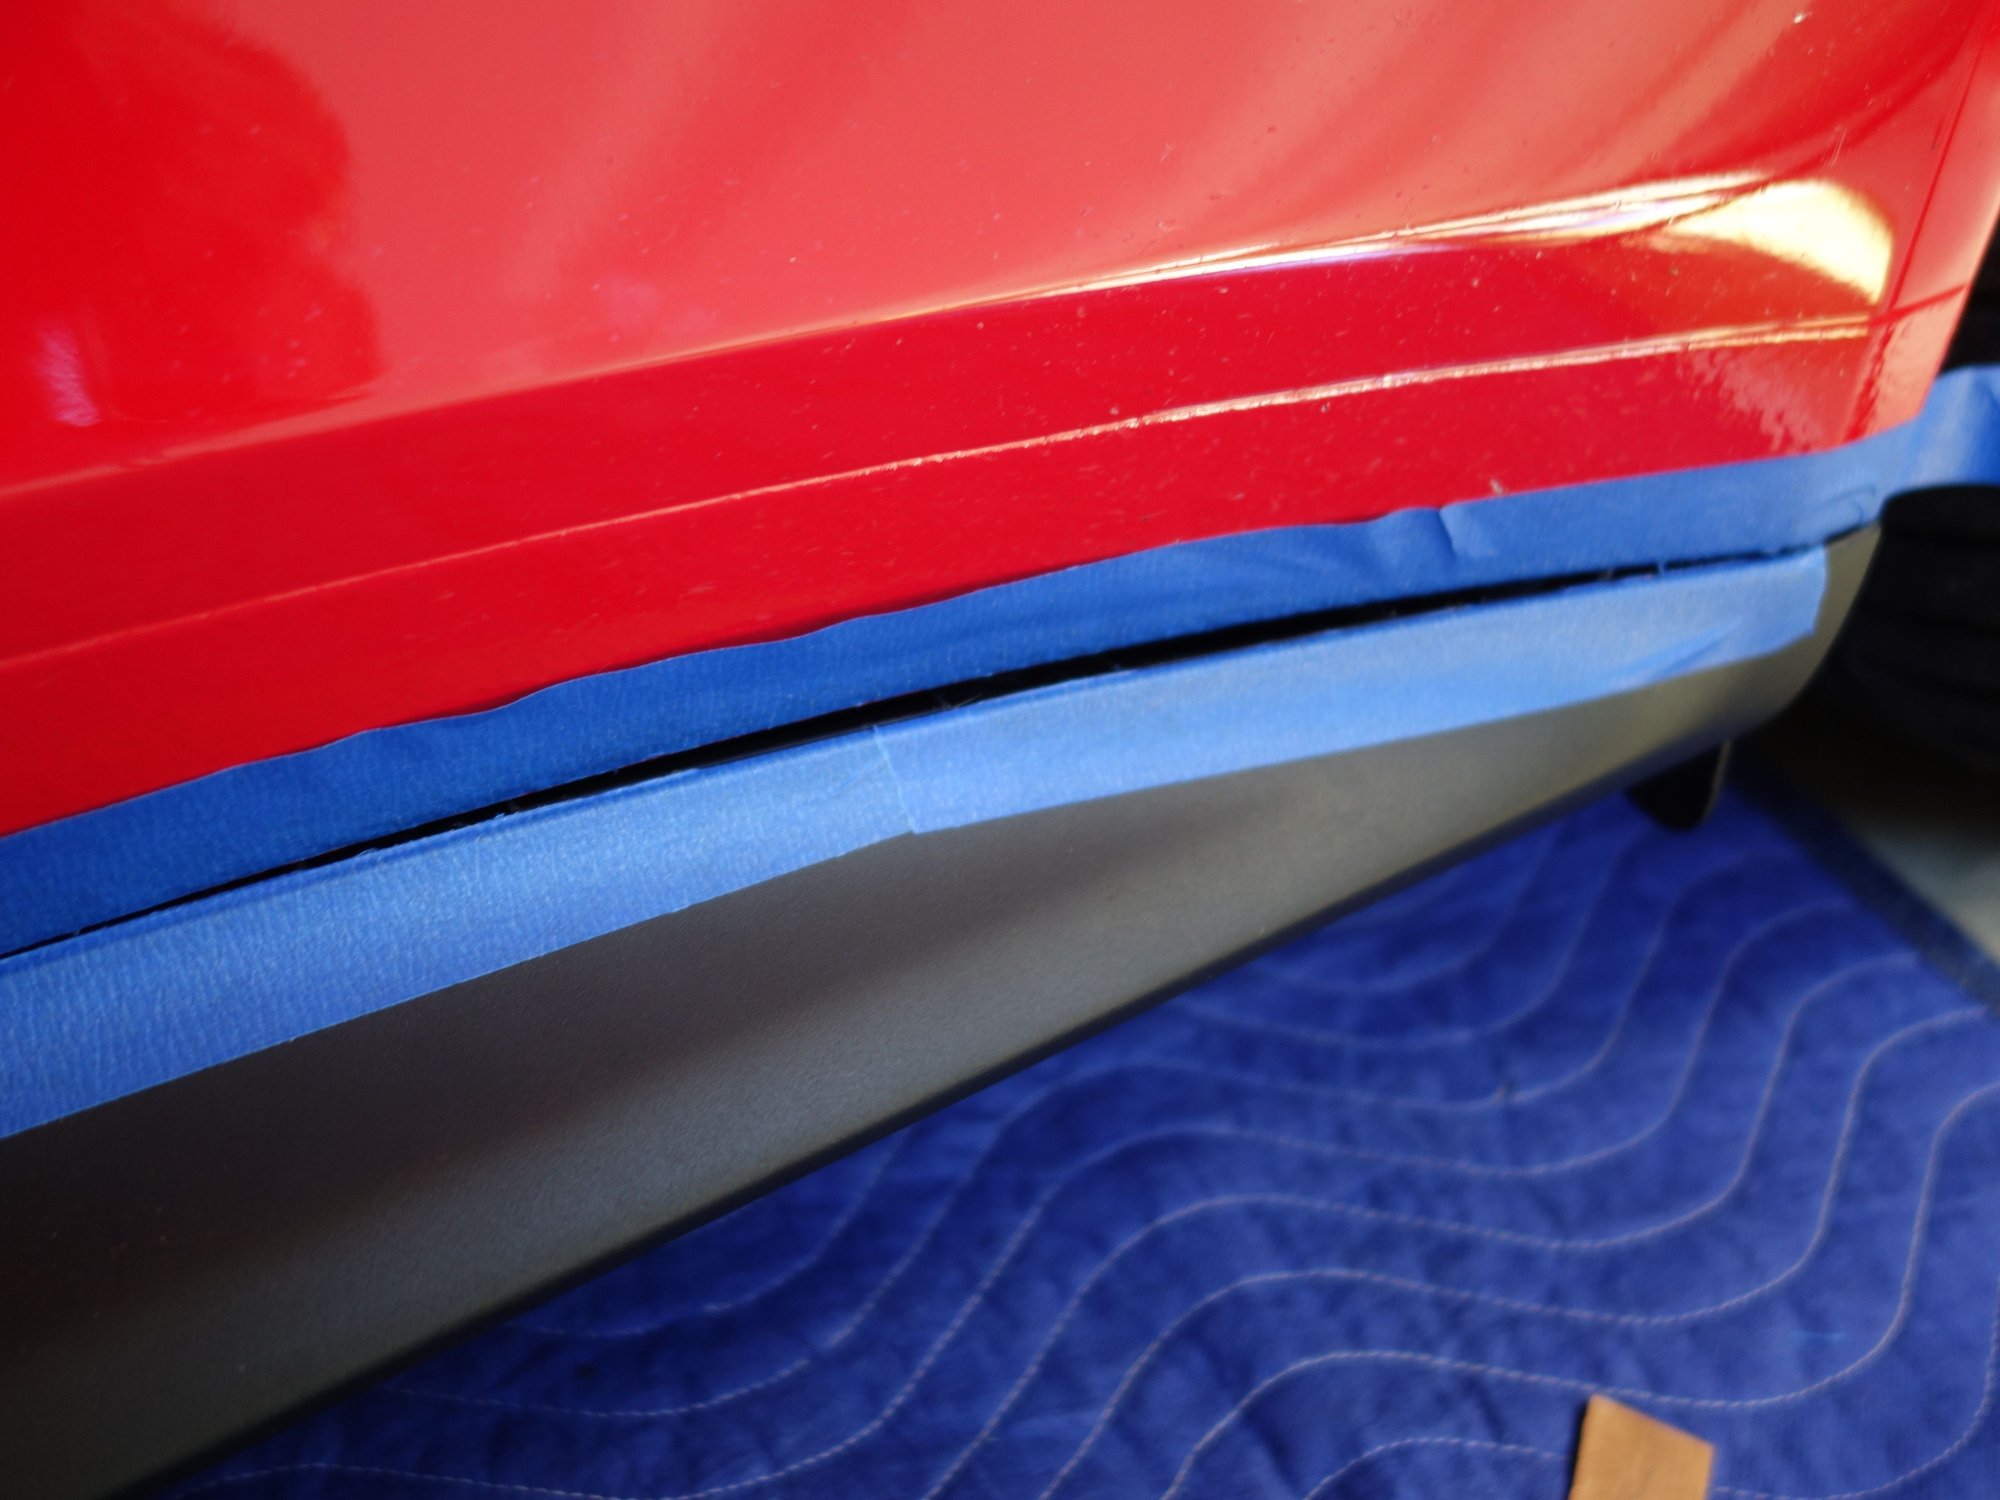
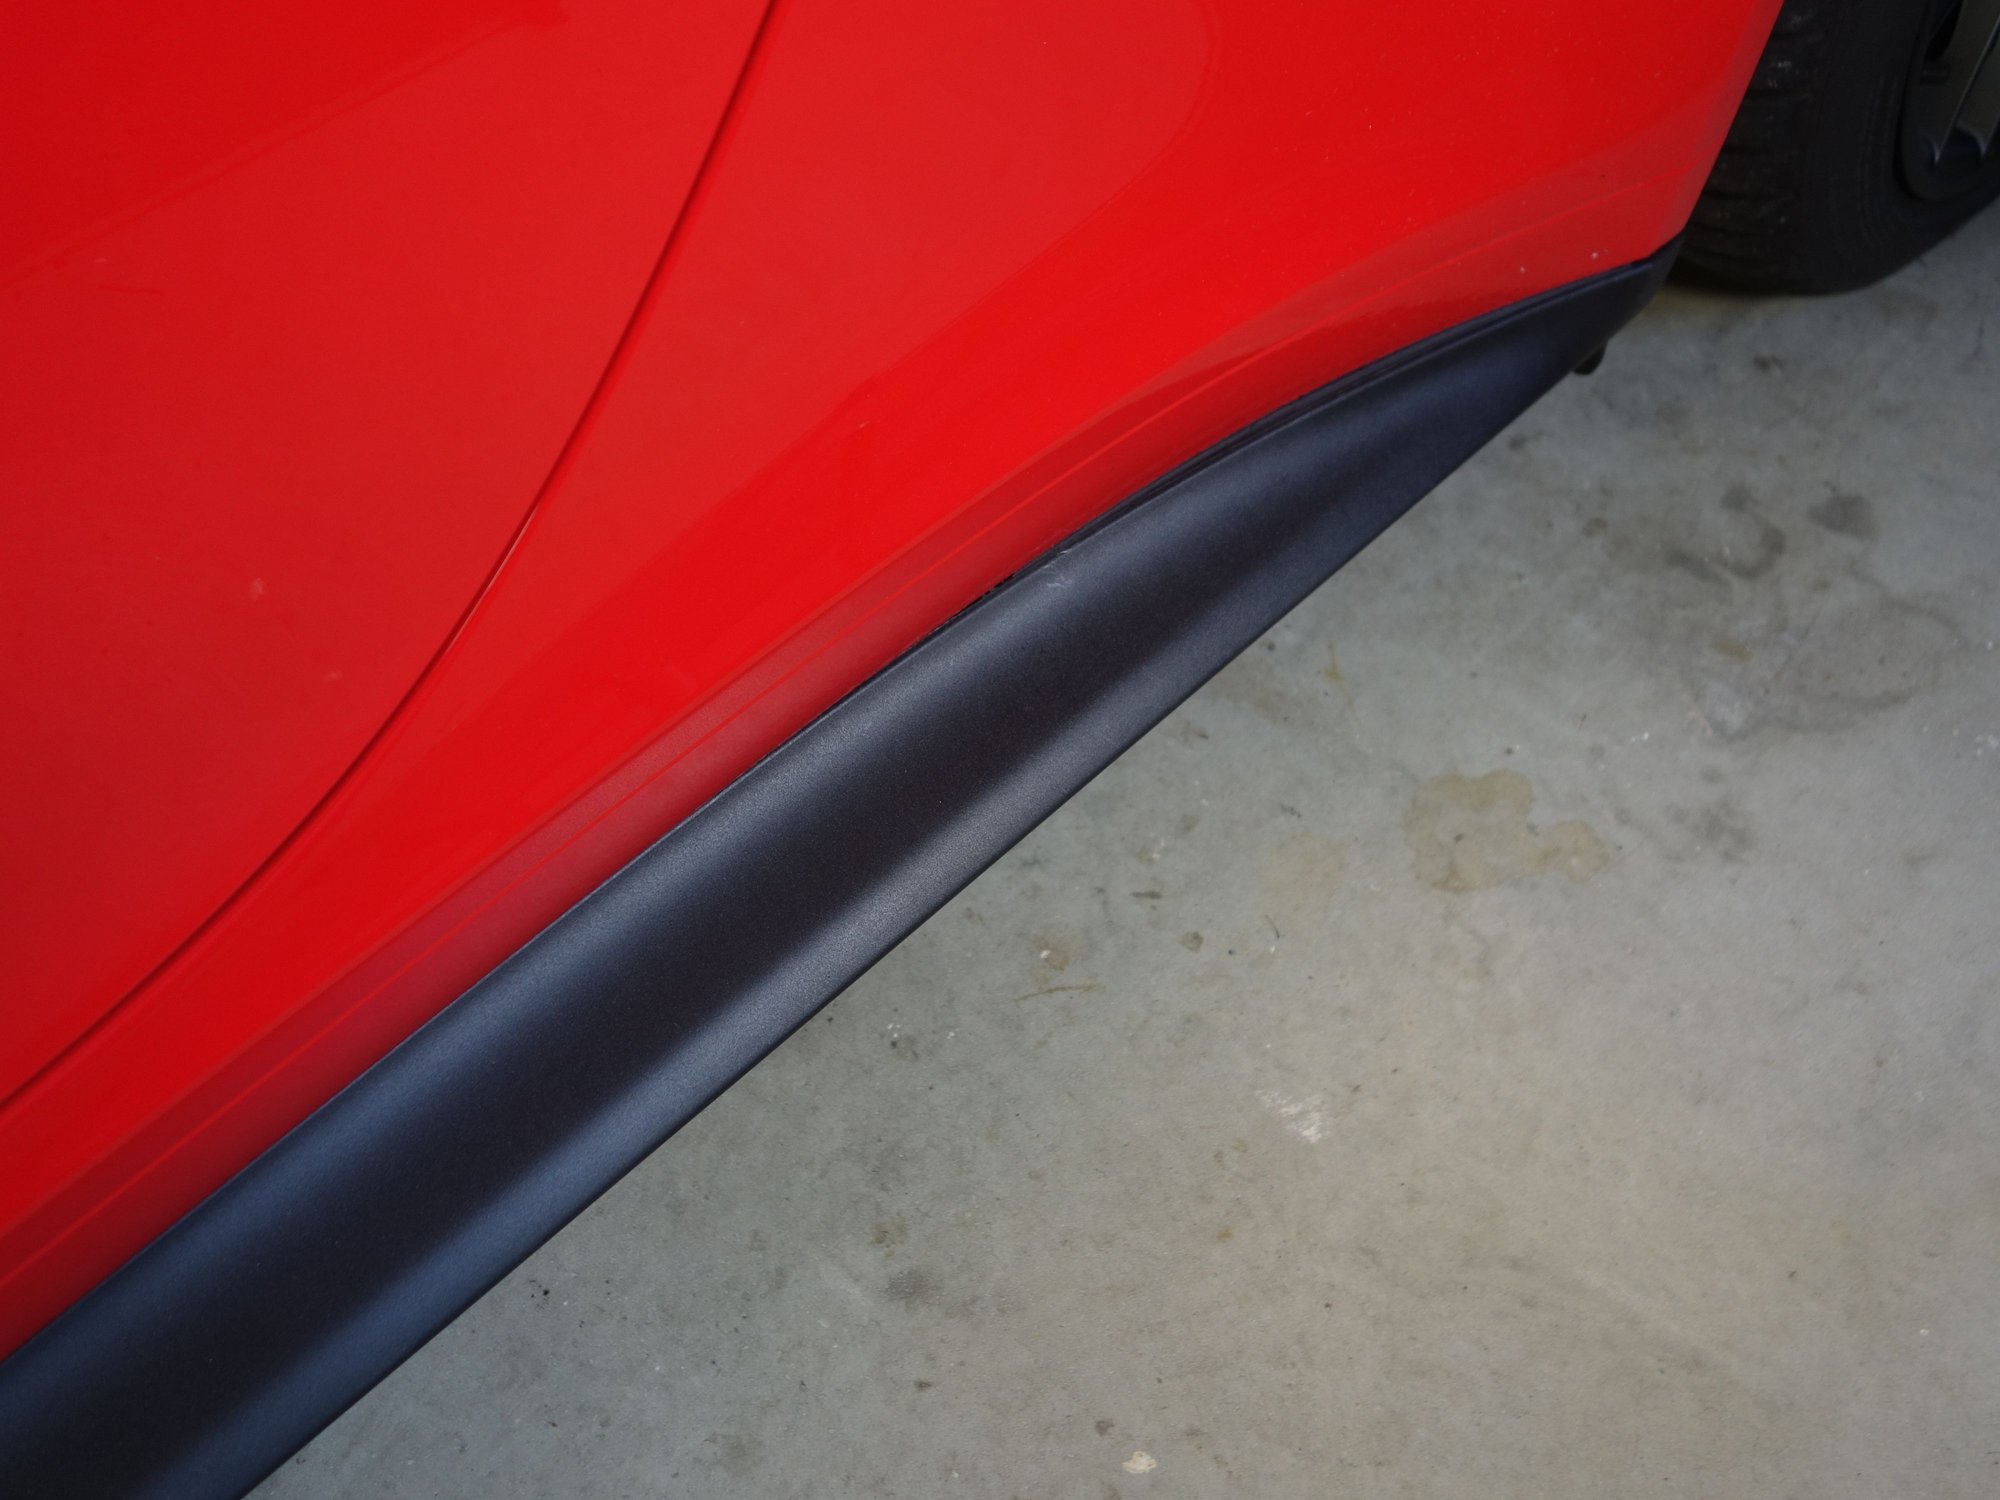
For those who can not deal with the gap between the side skirt and body these pictures show a solution you might want to consider. I'm of the opinion that any heating of or manipulation of the skirt to conform more closely to the body of the car is not going to work. So my next thought is to fill the gap which I did using Midnight Black ColorFast Tile & Grout Caulk. This was relatively easy and did a good job of making the gap disappear. The caulk matches the skirt quite closely in both color and sheen. Obviously, if you want to take the skirt off in the future you'll have some difficulty but clean up and replacement should not be a big deal. Hope this helps, Doug
Huge improvement and looks great but I have a couple questions if you don't mind.
1. Was it necessary to use masking tape?
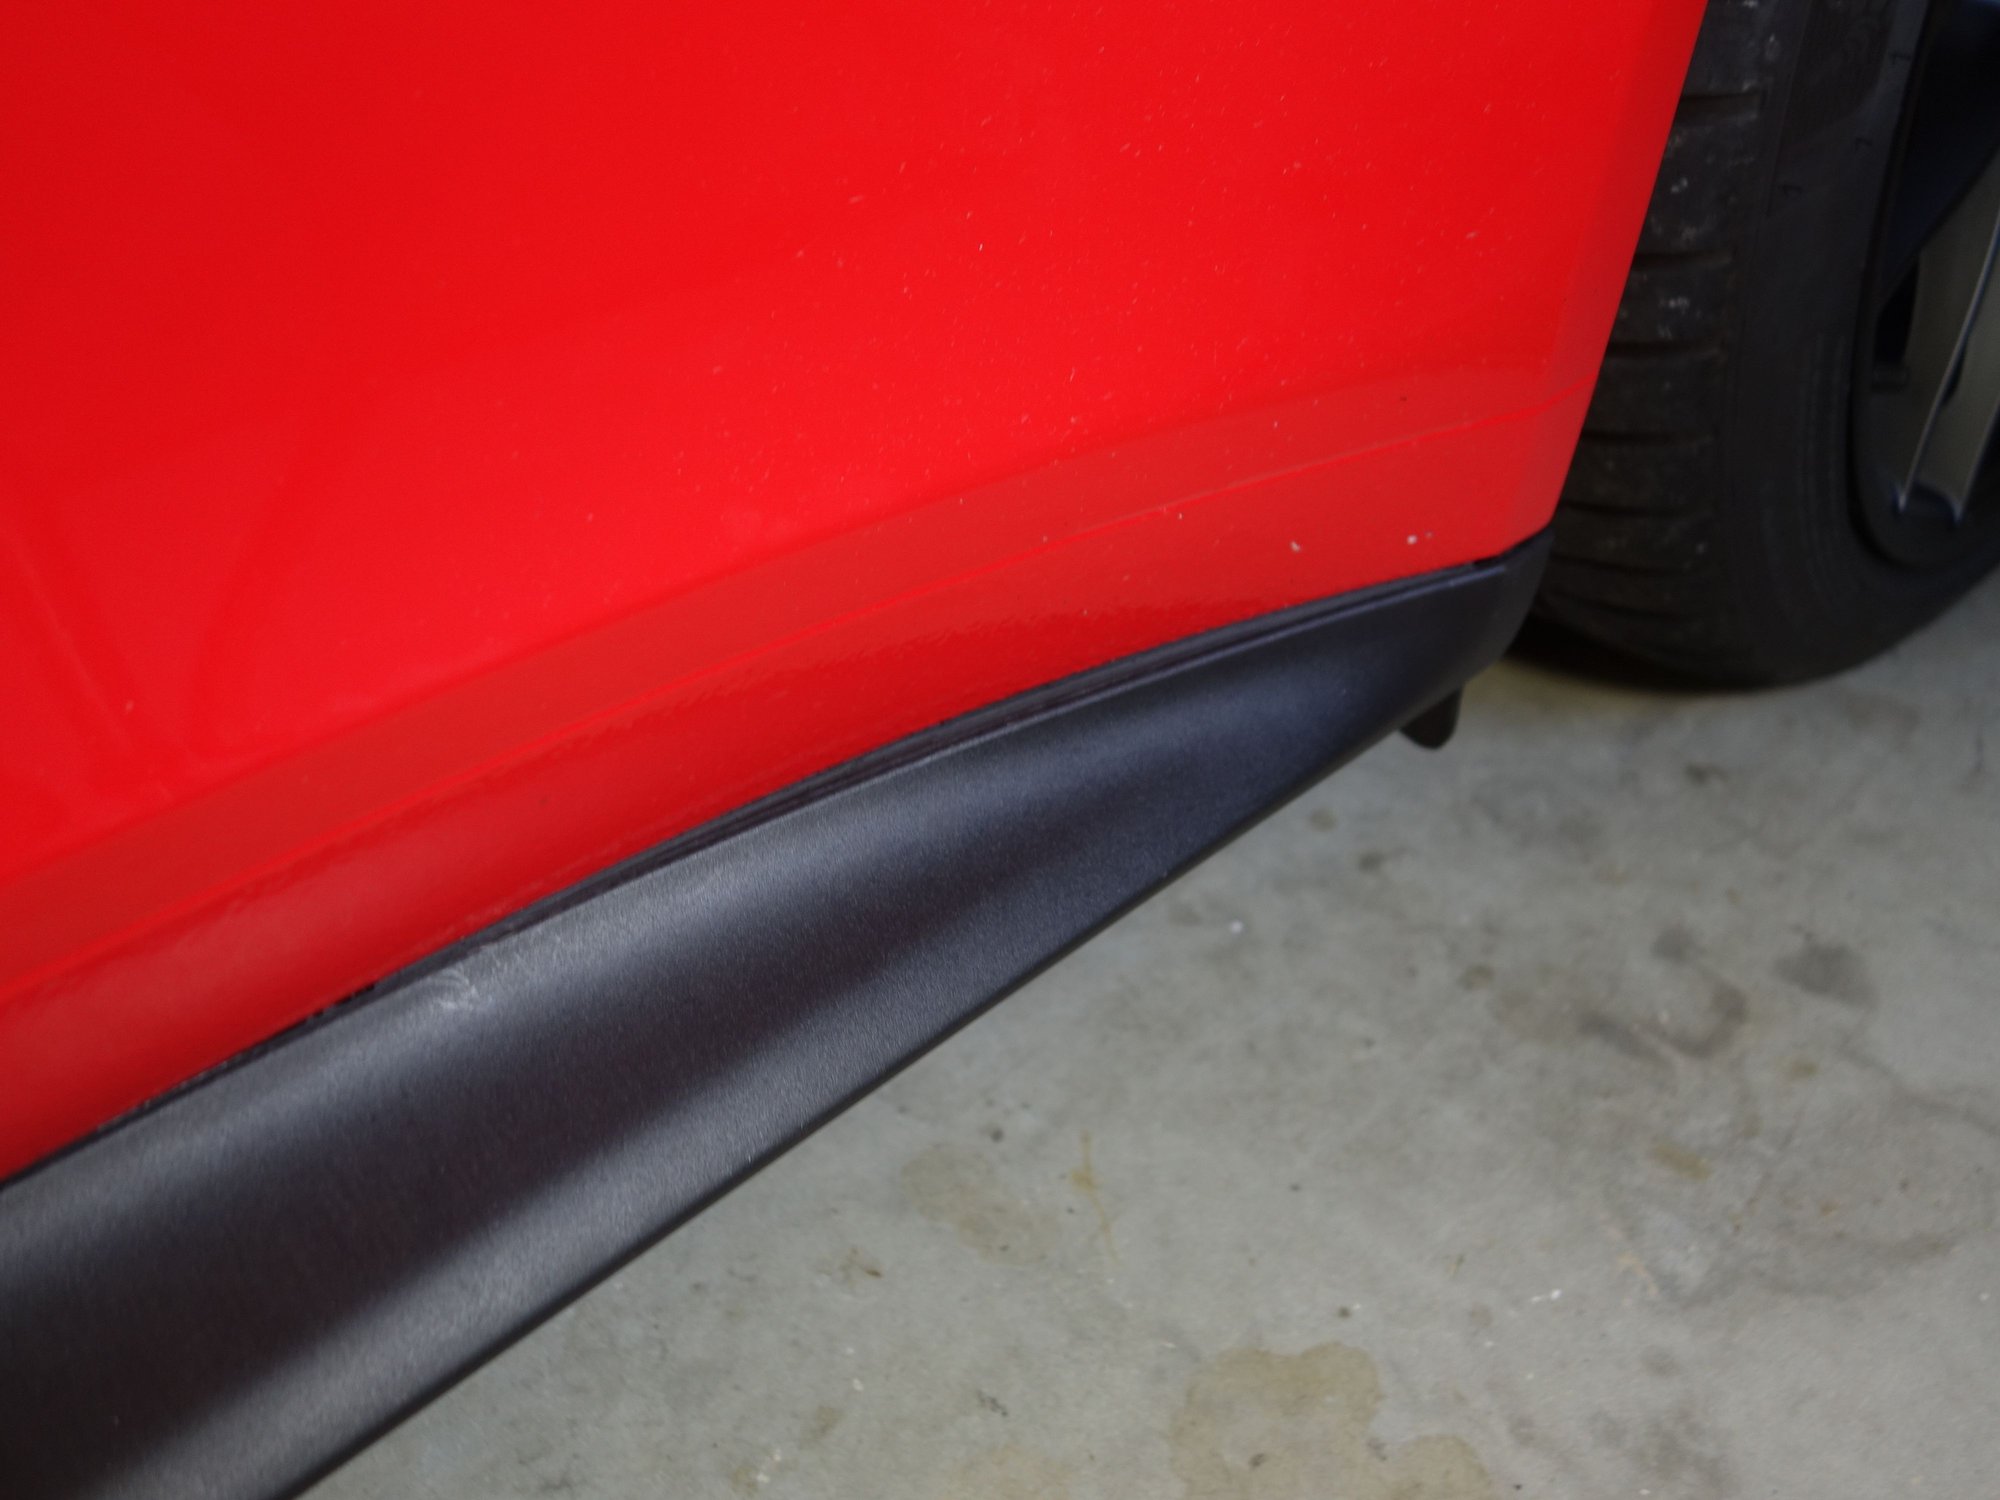
2. It appears toward the front of the car where you stopped with the caulk there are a couple of small hole/air gaps in the caulk. Did you try to hit it once more with the caulk before it dried?
Theres no doubt i'm doing the same i'm just curious if I(or my painter which applies caulk on a daily basis) can get it a tad closer to perfect.
#1 Since I don't believe you can run a perfect bead of caulk for this application it is better to use tape in order to keep the majority of caulk off the car and skirt. You want to get a good amount of caulk into the joint and clean the excess off and tool the joint to make a flat top on the caulk, instead of a dip that you may get by using your finger, especially in the wider portions of the joint. Be sure you remove the tape carefully right after you are done with tooling the caulk. After leaving the first application to dry over night I repeated the process a second time to improve the finished product.
2# You are correct there are couple of small holes present. No, you should wait for the caulk to dry before making any additional repairs. The holes can be easily filled.
Hope this helps.
The link the to C2S Cab above is my car. I ended up using body panel gasket for small gaps. I highly recommend using them as it looks cleaner and less messy to use than caulking.
The link the to C2S Cab above is my car. I ended up using body panel gasket for small gaps. I highly recommend using them as it looks cleaner and less messy to use than caulking.
Where does one buy some body panel gaskets and how exactly is it held in place?
Where does one buy some body panel gaskets and how exactly is it held in place?
Originally Posted by gwporsche
The link the to C2S Cab above is my car. I ended up using body panel gasket for small gaps. I highly recommend using them as it looks cleaner and less messy to use than caulking.
Yes, what are body panel gaskets and where do you get them? Also, you have pics?
#1 Since I don't believe you can run a perfect bead of caulk for this application it is better to use tape in order to keep the majority of caulk off the car and skirt. You want to get a good amount of caulk into the joint and clean the excess off and tool the joint to make a flat top on the caulk, instead of a dip that you may get by using your finger, especially in the wider portions of the joint. Be sure you remove the tape carefully right after you are done with tooling the caulk. After leaving the first application to dry over night I repeated the process a second time to improve the finished product.
2# You are correct there are couple of small holes present. No, you should wait for the caulk to dry before making any additional repairs. The holes can be easily filled.
Hope this helps.
Can you point me in the direction of the Midnight Black ColorFast Tile & Grout Caulk please.

 10-16-2019, 10:15 AM