When you click on links to various merchants on this site and make a purchase, this can result in this site earning a commission. Affiliate programs and affiliations include, but are not limited to, the eBay Partner Network.
I should have done this sooner but didn't get the opportunity until now. Today, I was fortunate to have the opportunity to install a DSC Sport V3 controller on 991.1 4S Cabriolet. And then do a 4-wheel alignment on this car with GT3 control arms for AutoX.
Here's the installation step for a 991.1 Cabriolet. The installation took approximate 15 minutes.
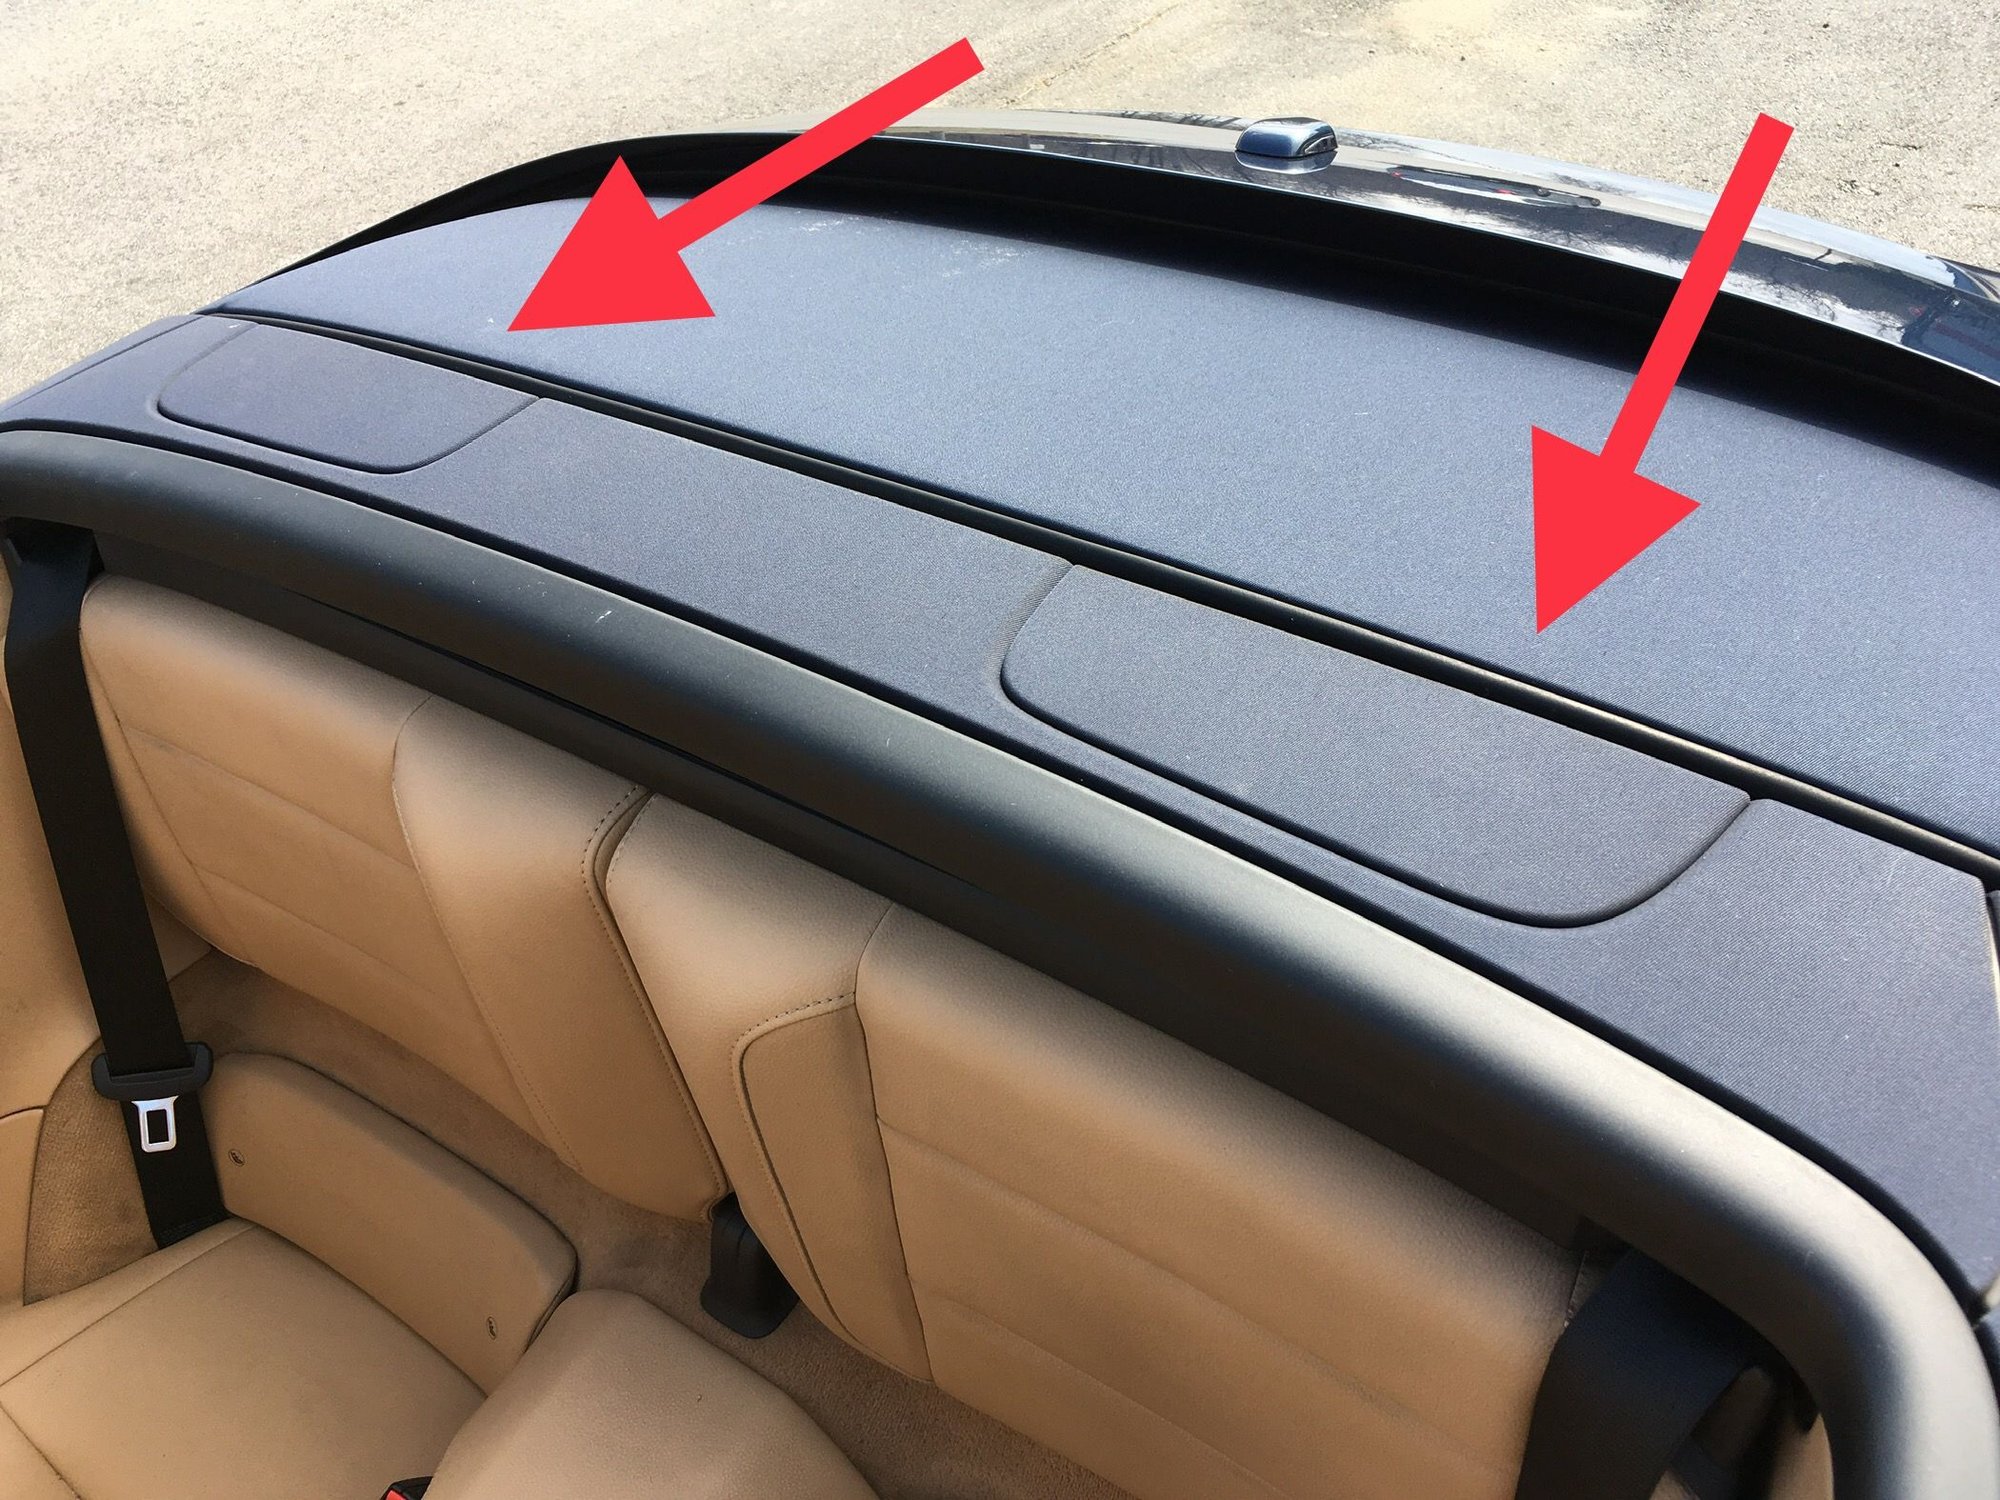
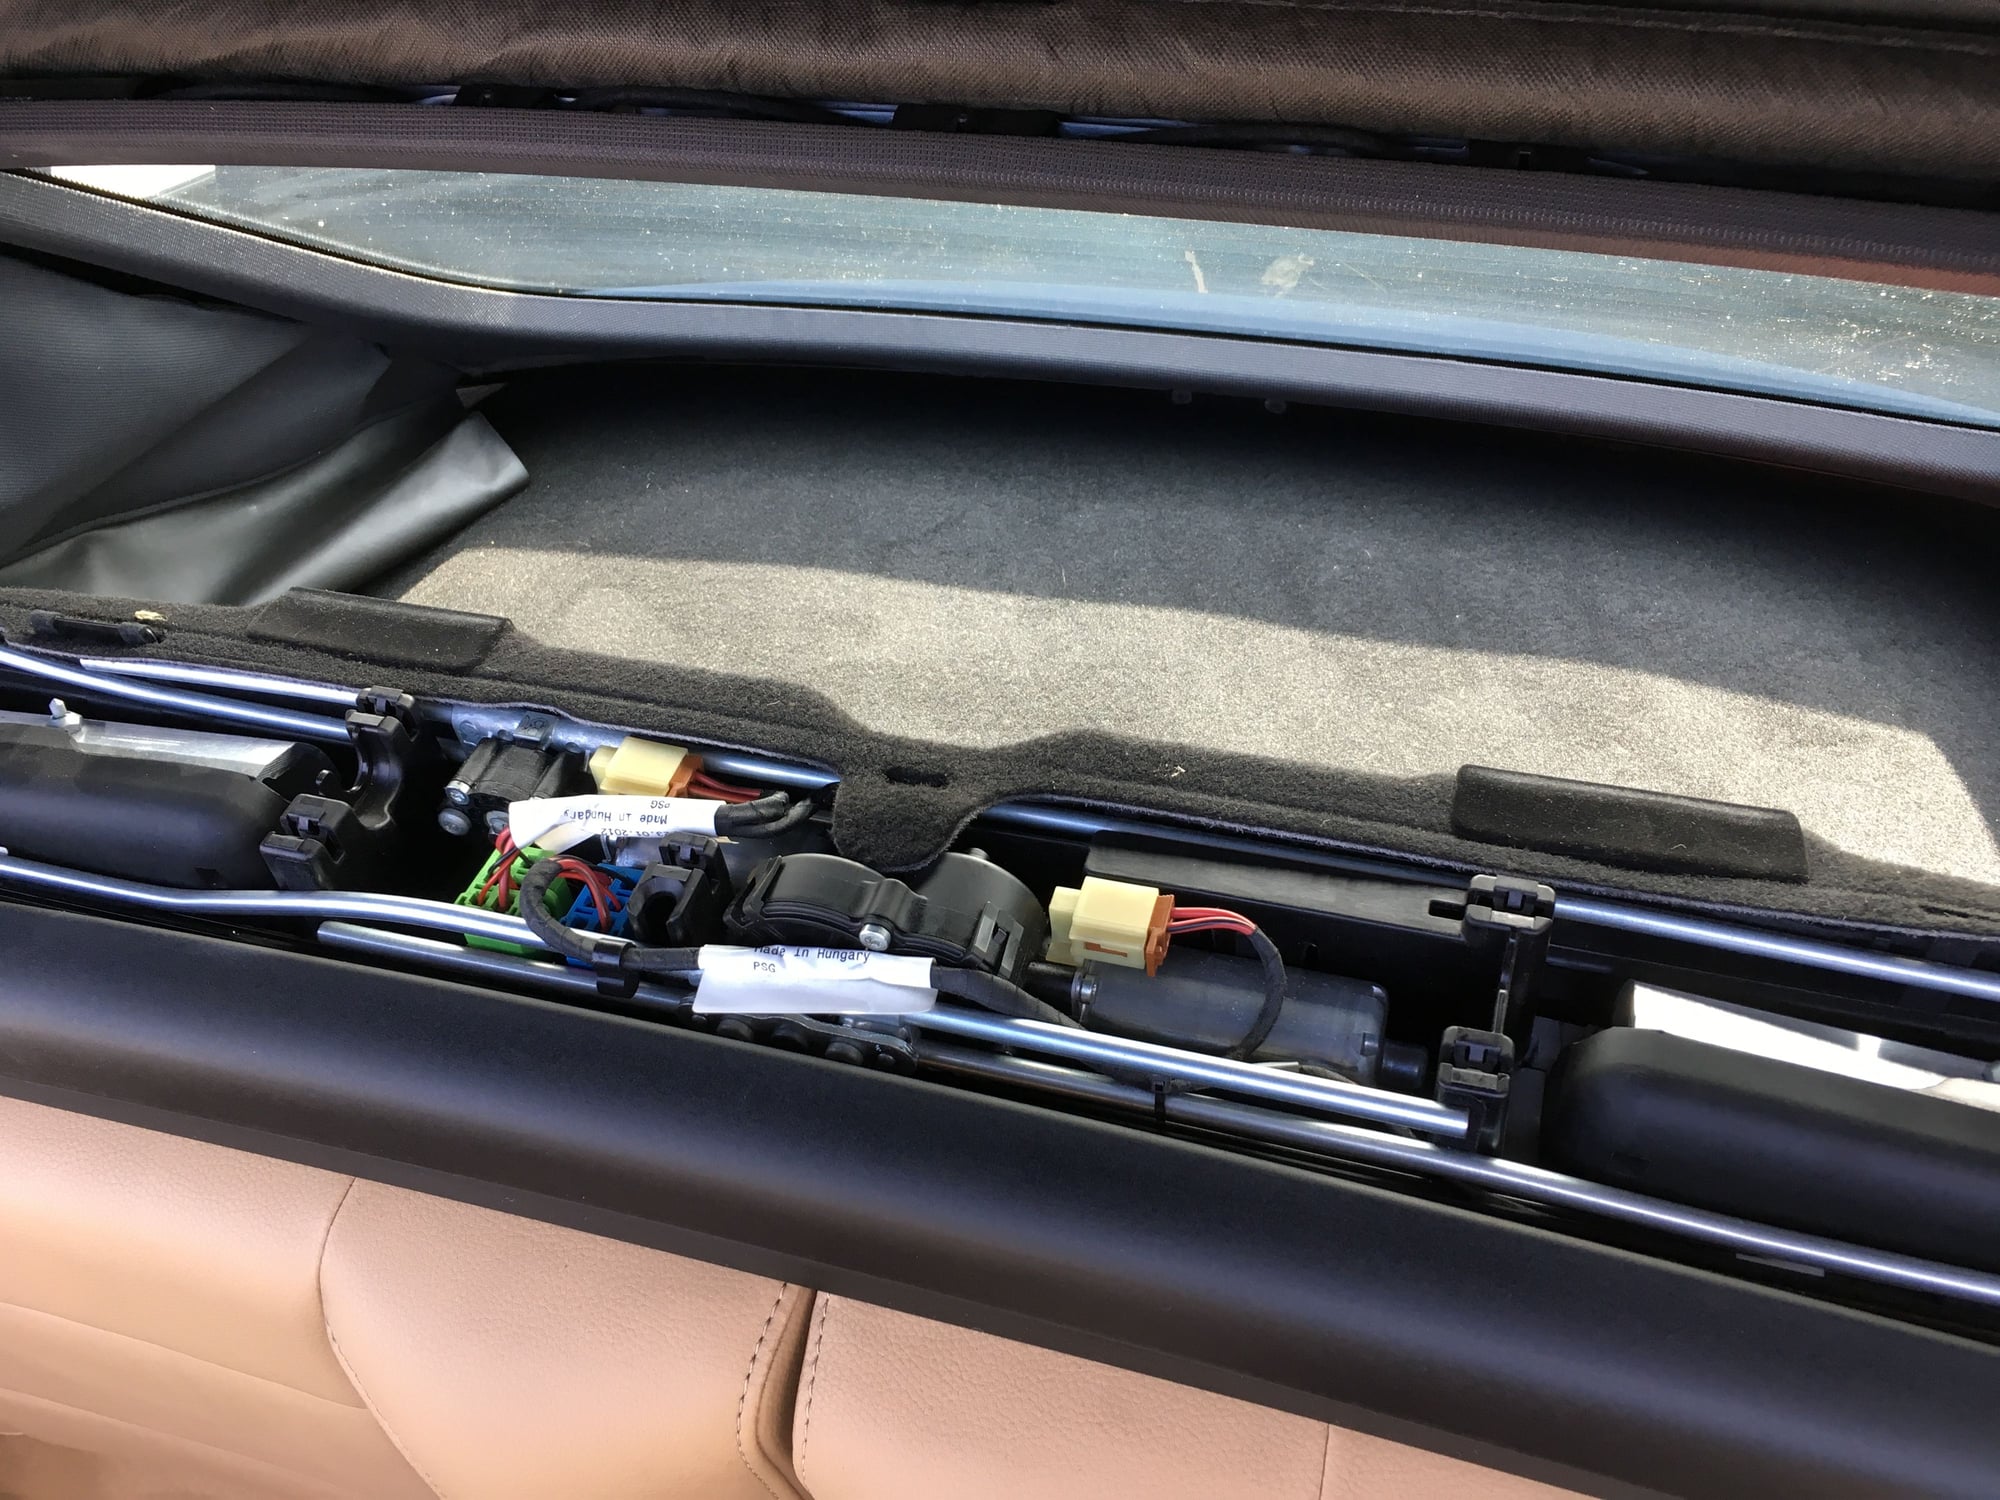
1. Open the convertible top all the way to expose these two small trim panels shown in the image.
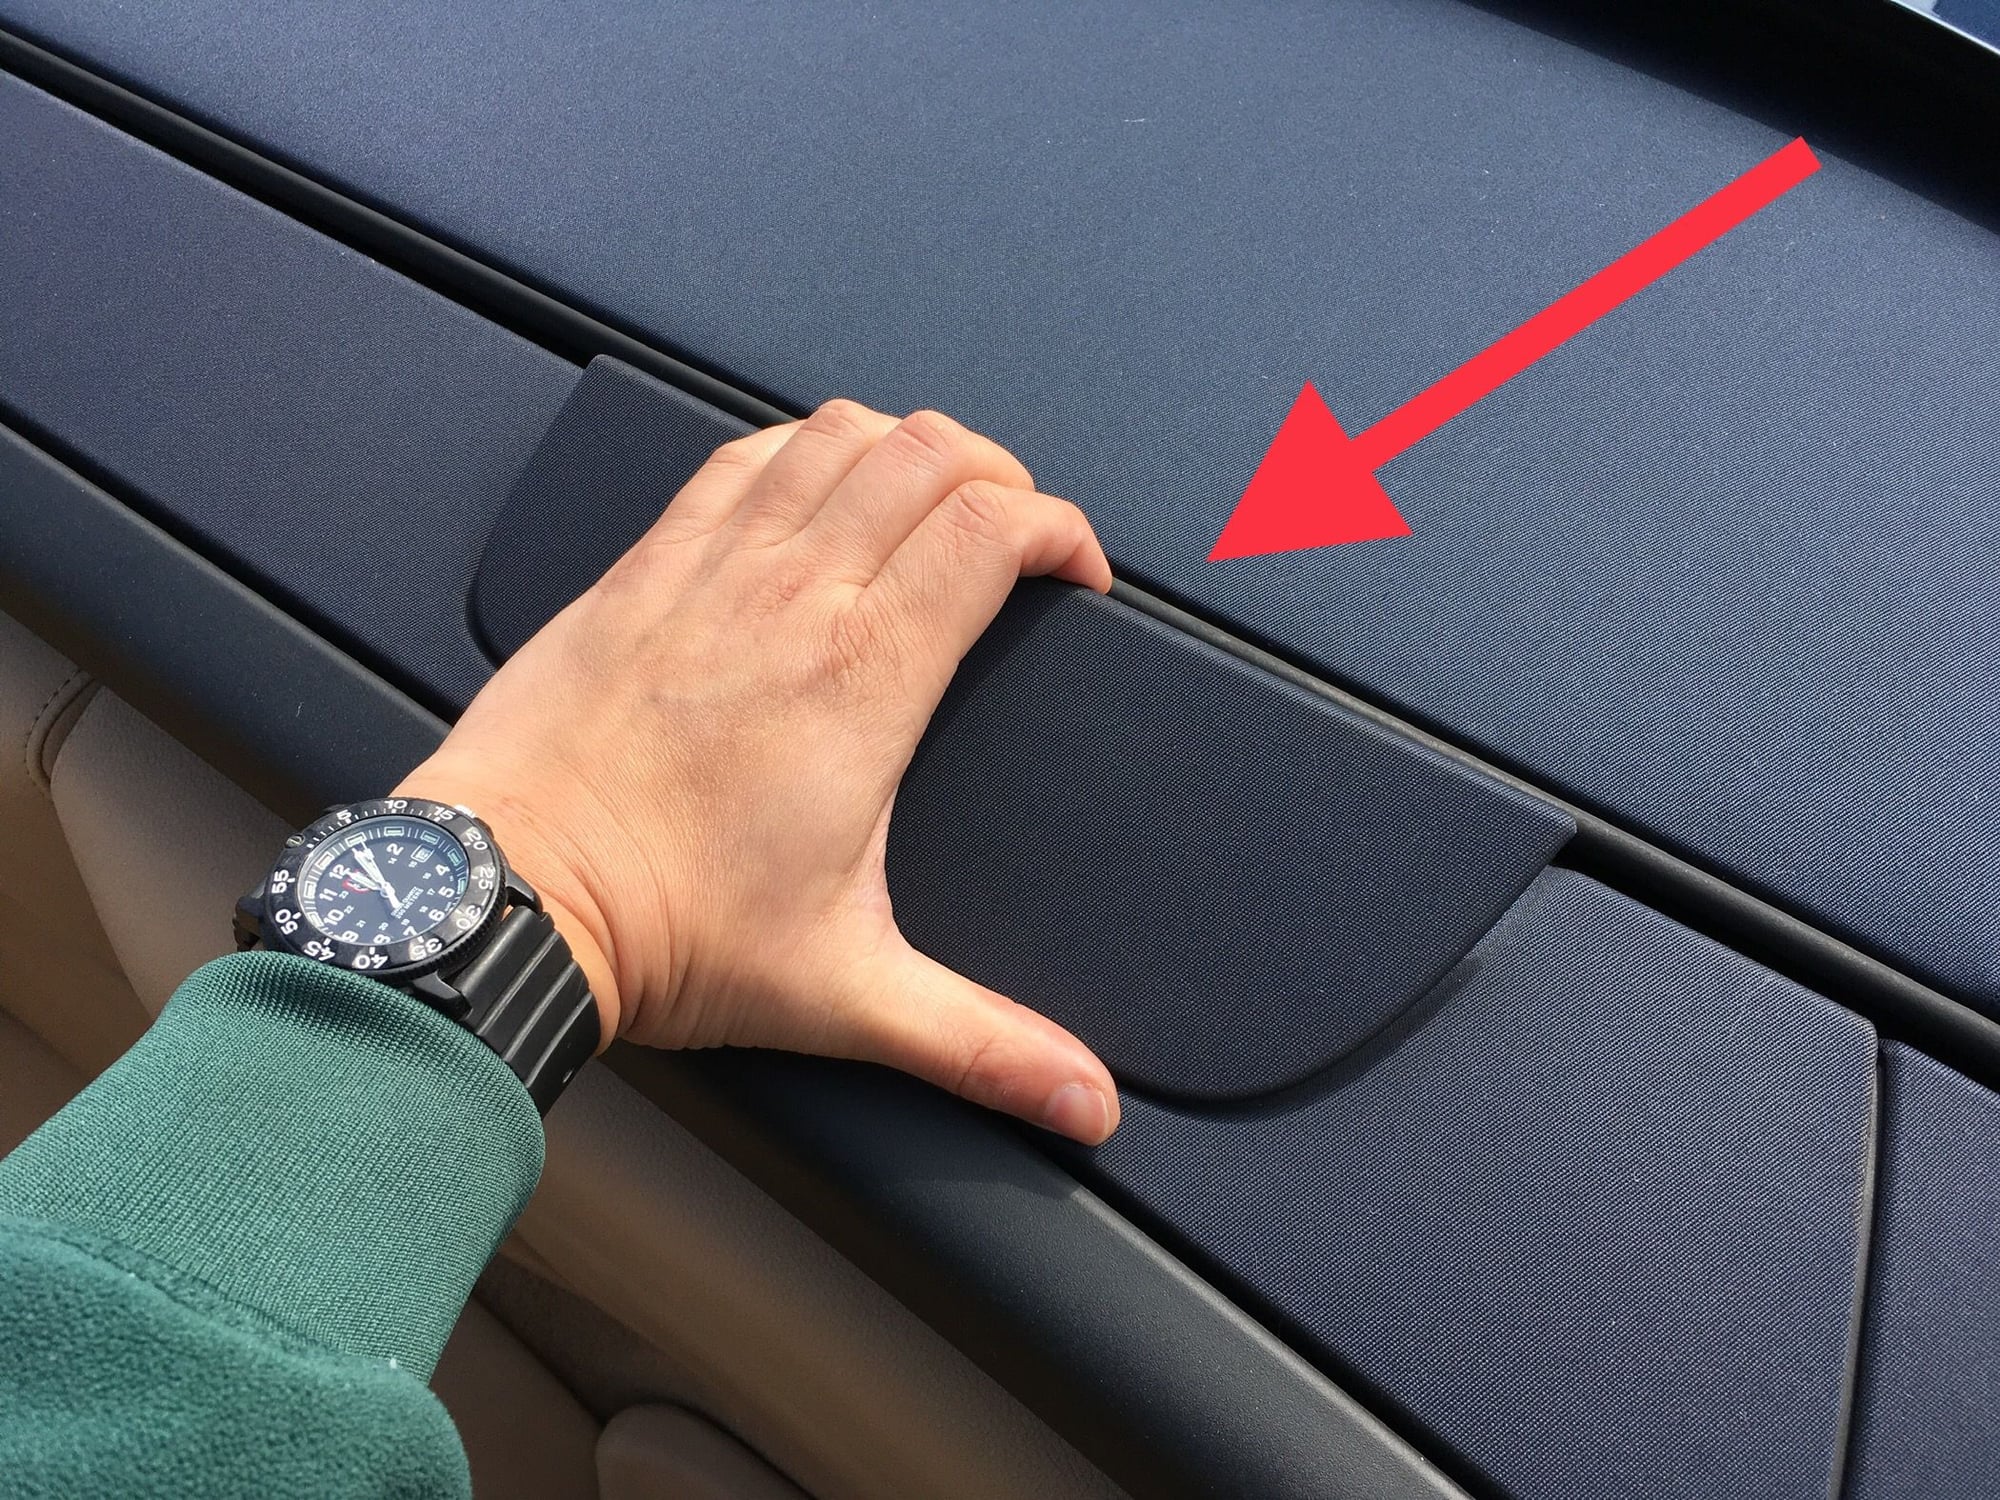
2. Carefully remove the two small trim panel by lifting by the rear edge. A plastic wedge tool may be used to "pop" up the rear edge. I found that using only my fingers worked fine. (Do not lift by the front edge! They will break by lifting by the front edge!)
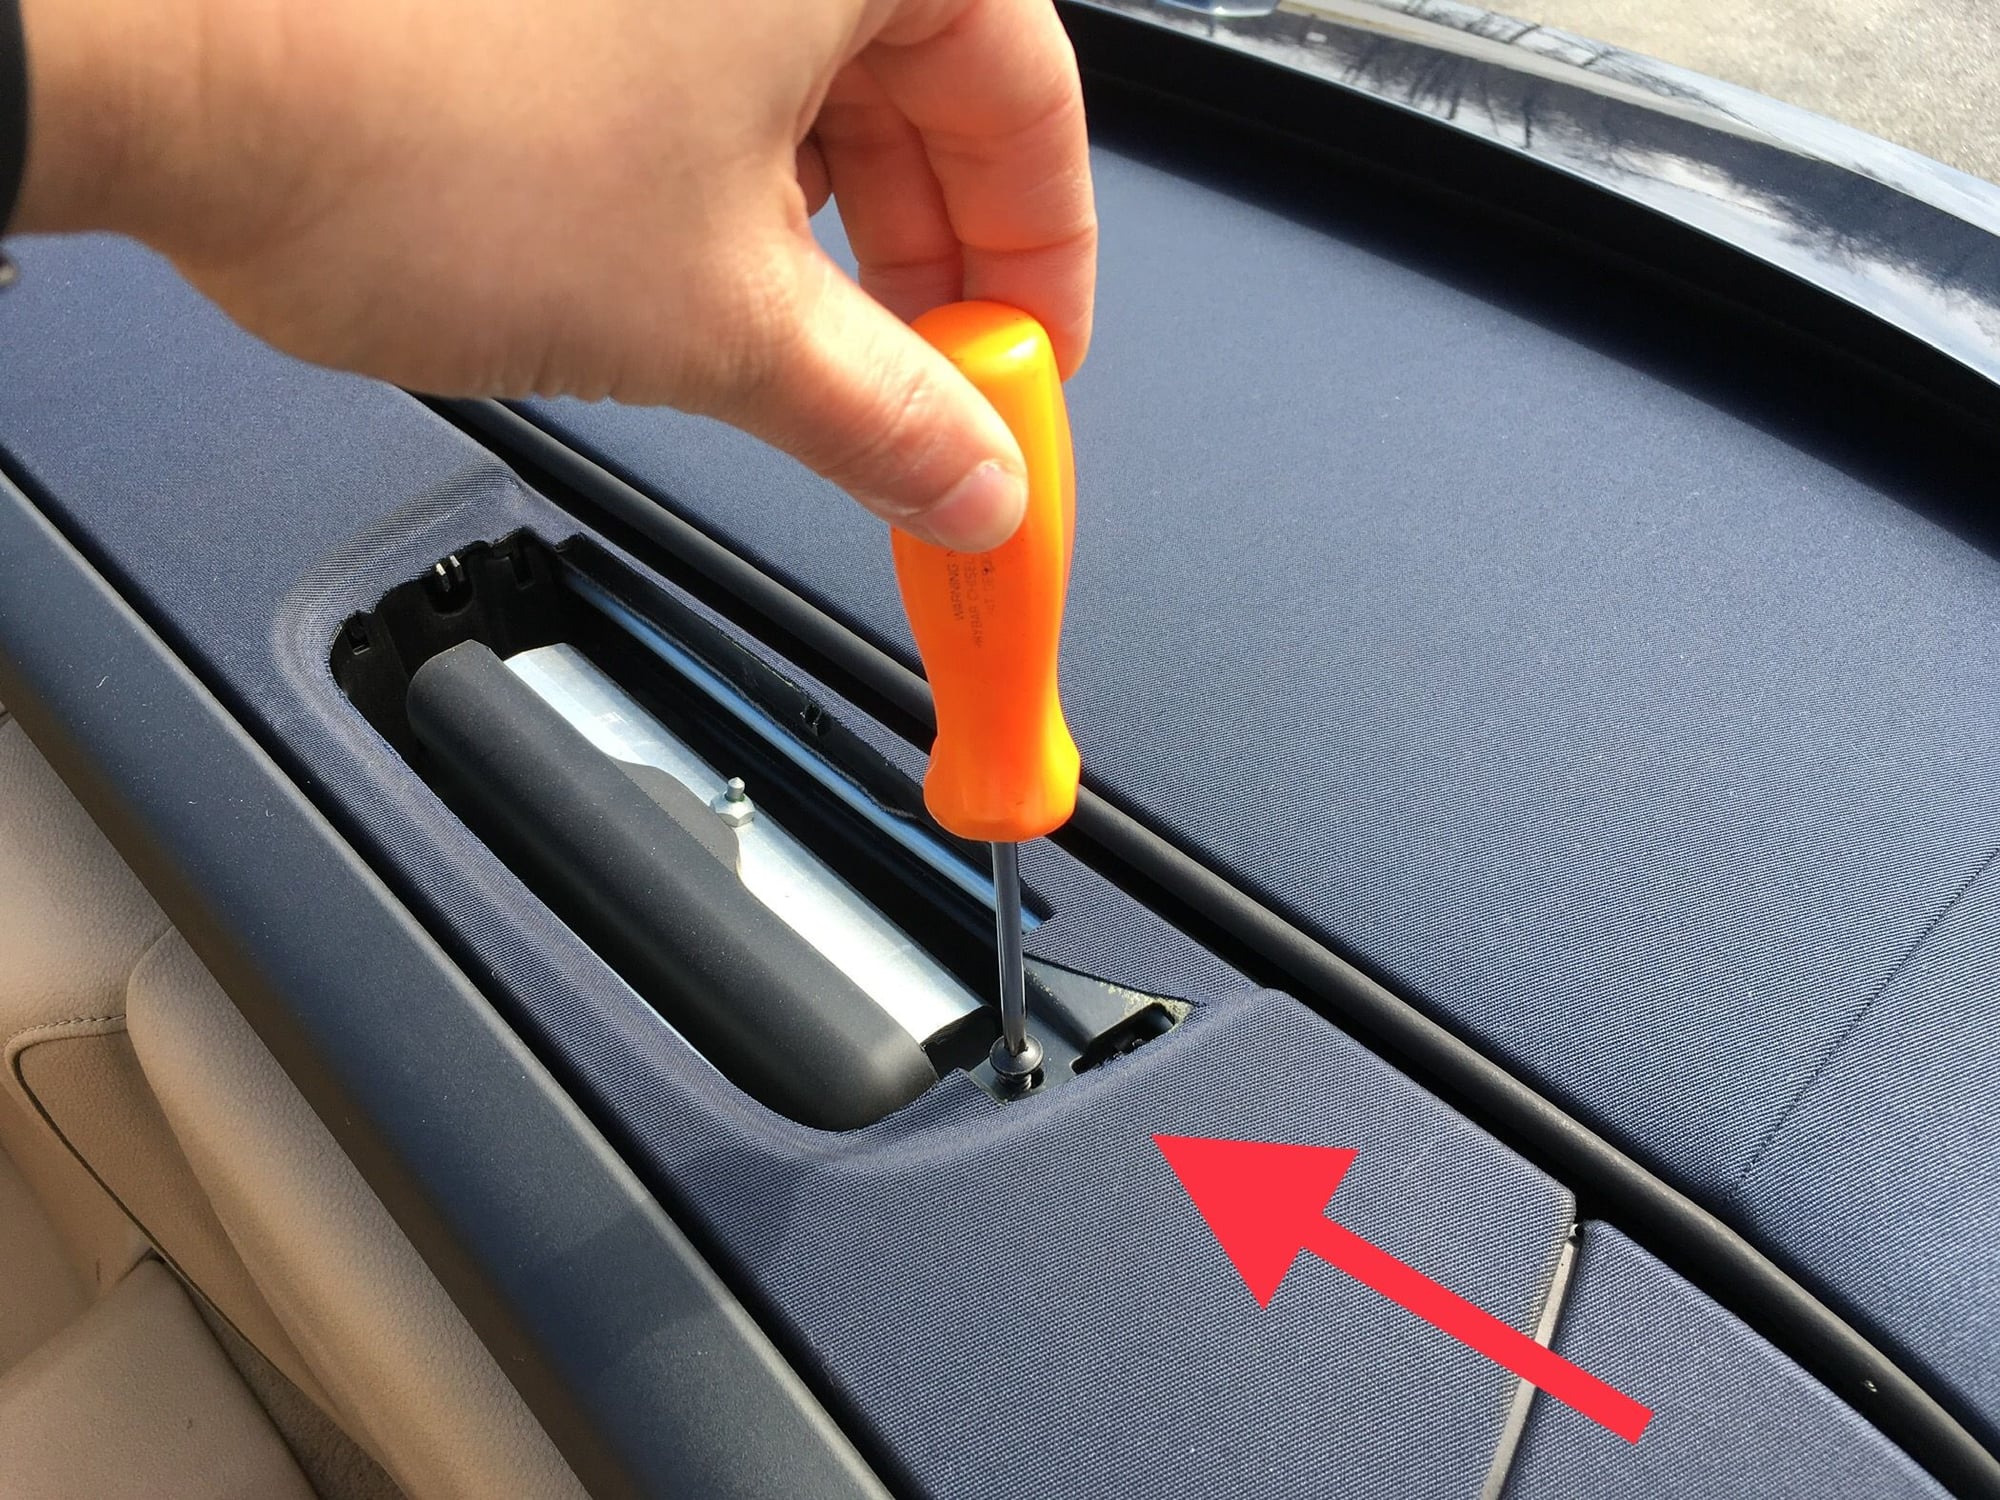
3. Remove the Phillips screw on each side of the trim panel. There's 2 screws(one on each side).
4. Remove the large trim panel by gently lifting the panel upward one side at a time.
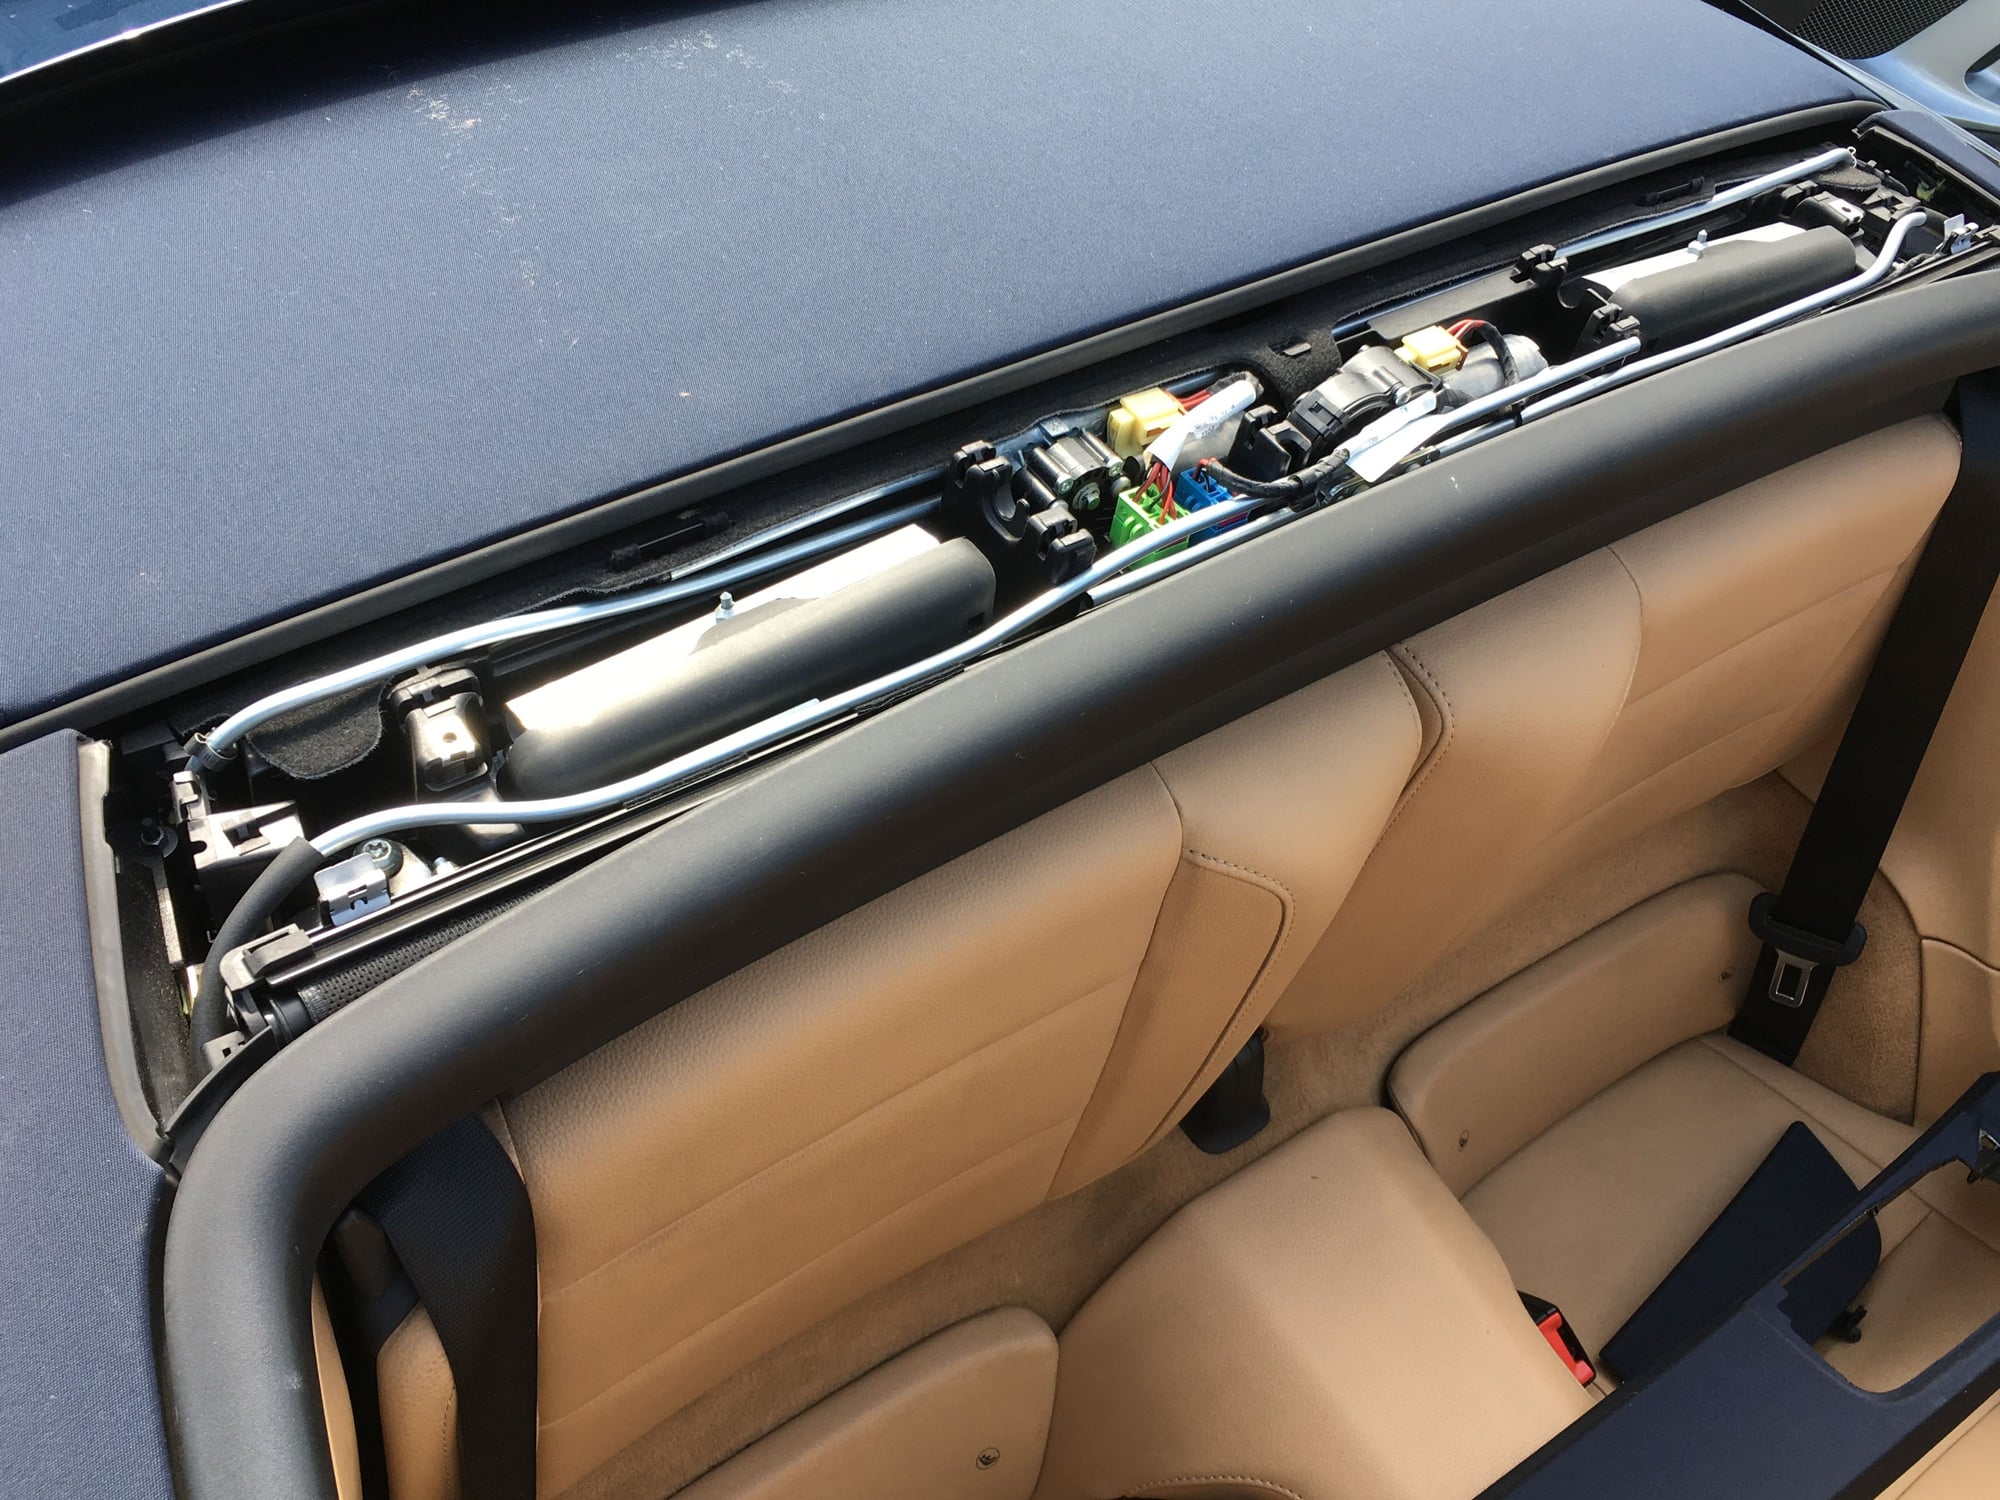
4a. With the large trim panel removed it will look like this.
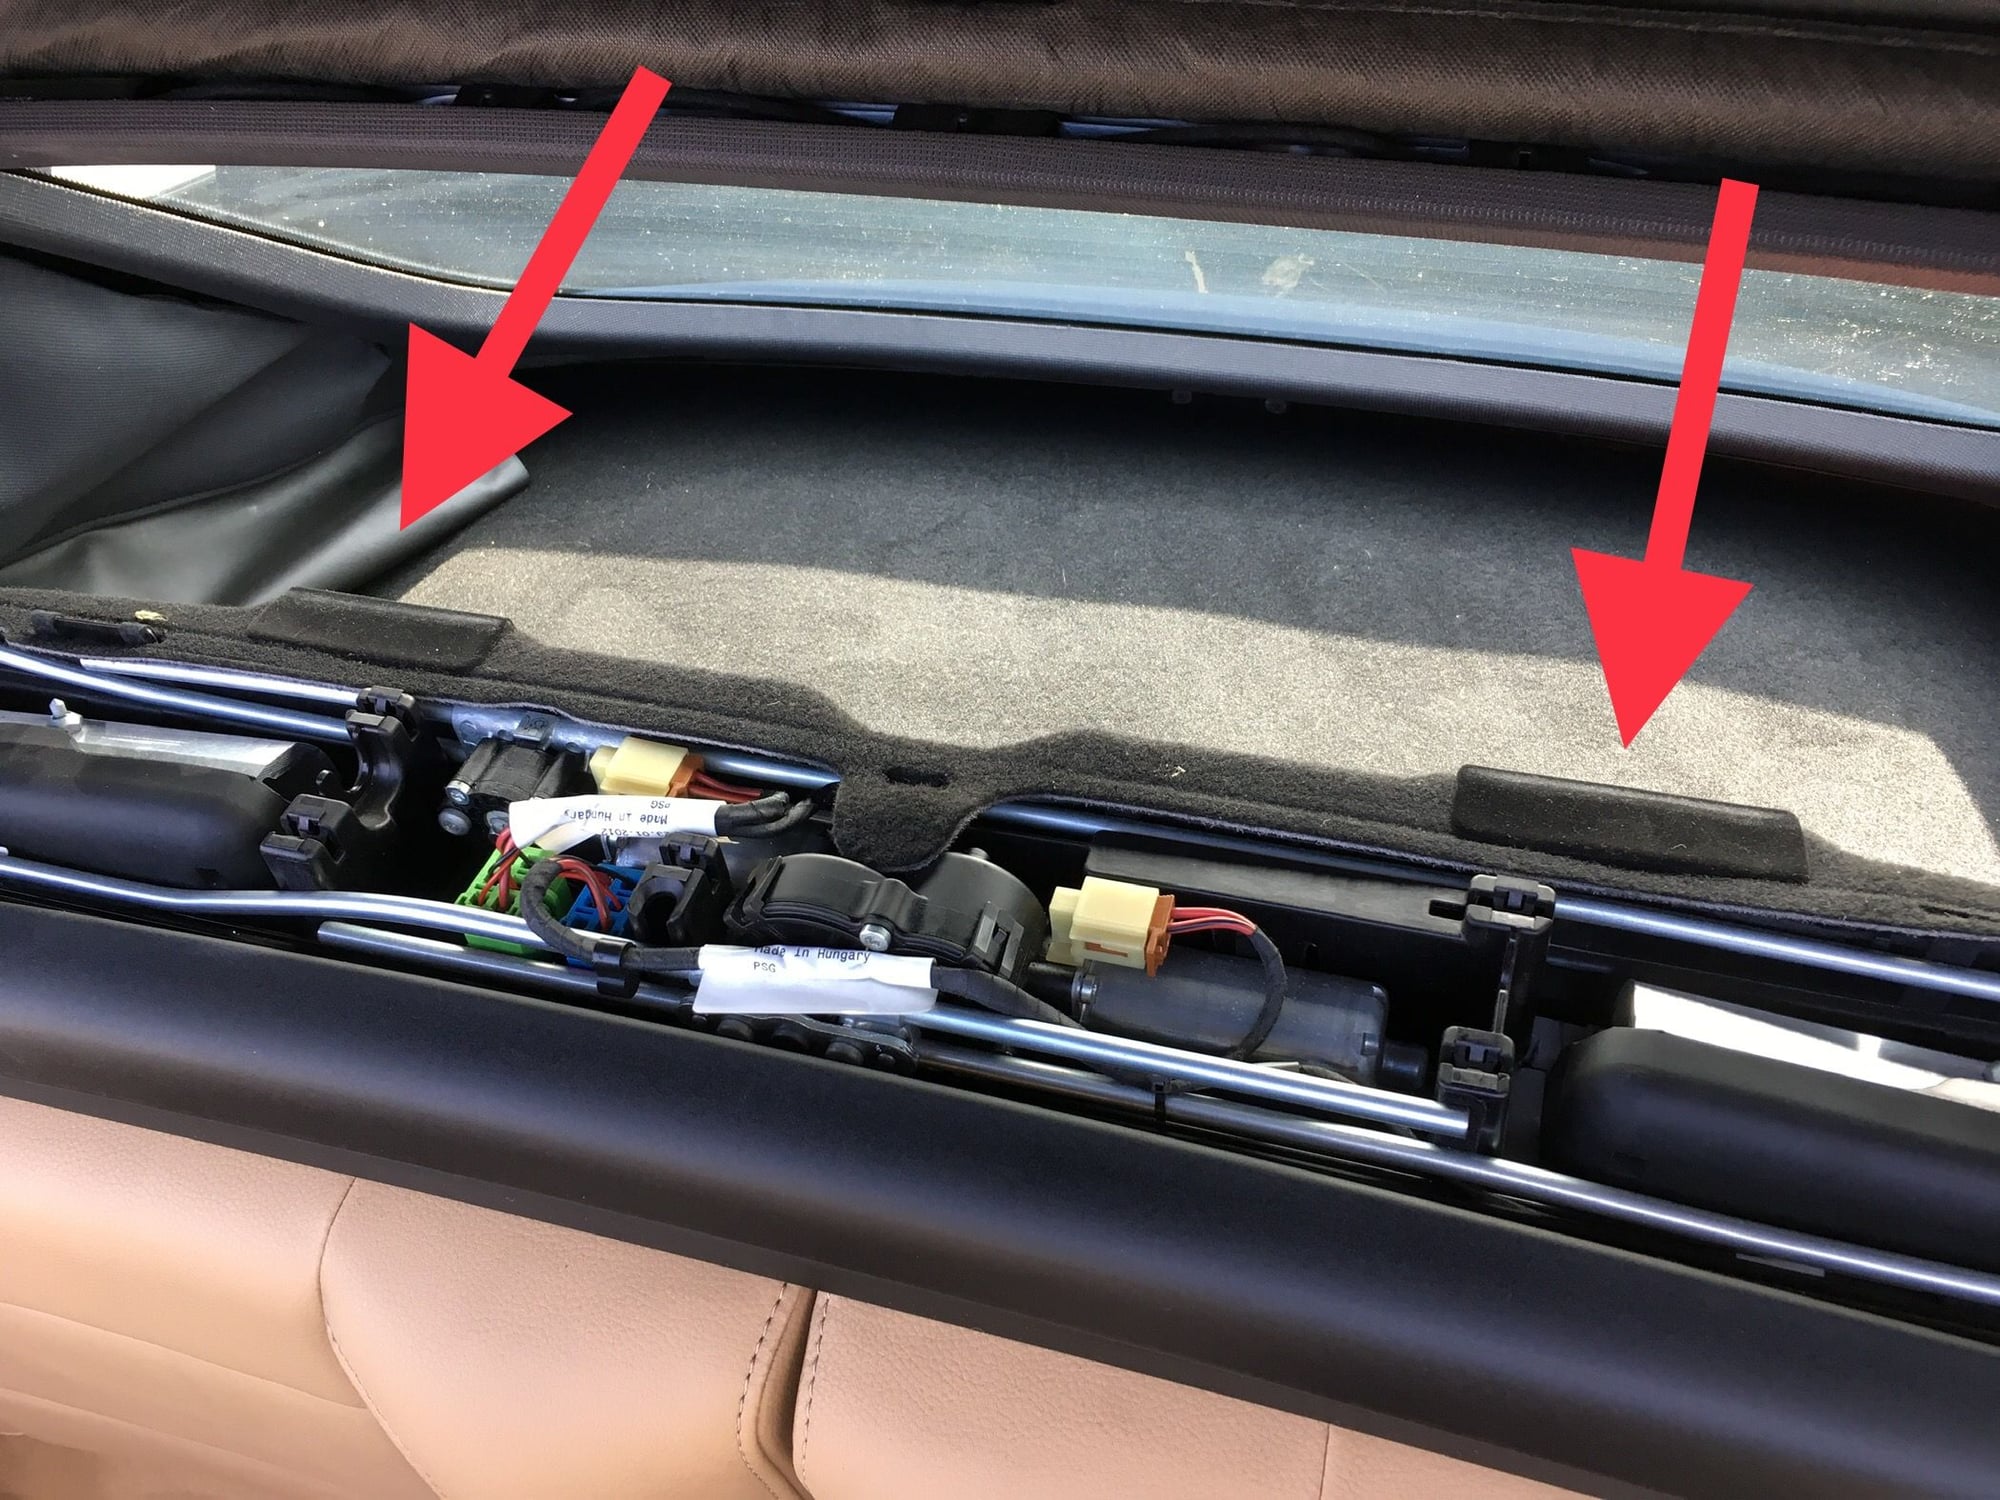
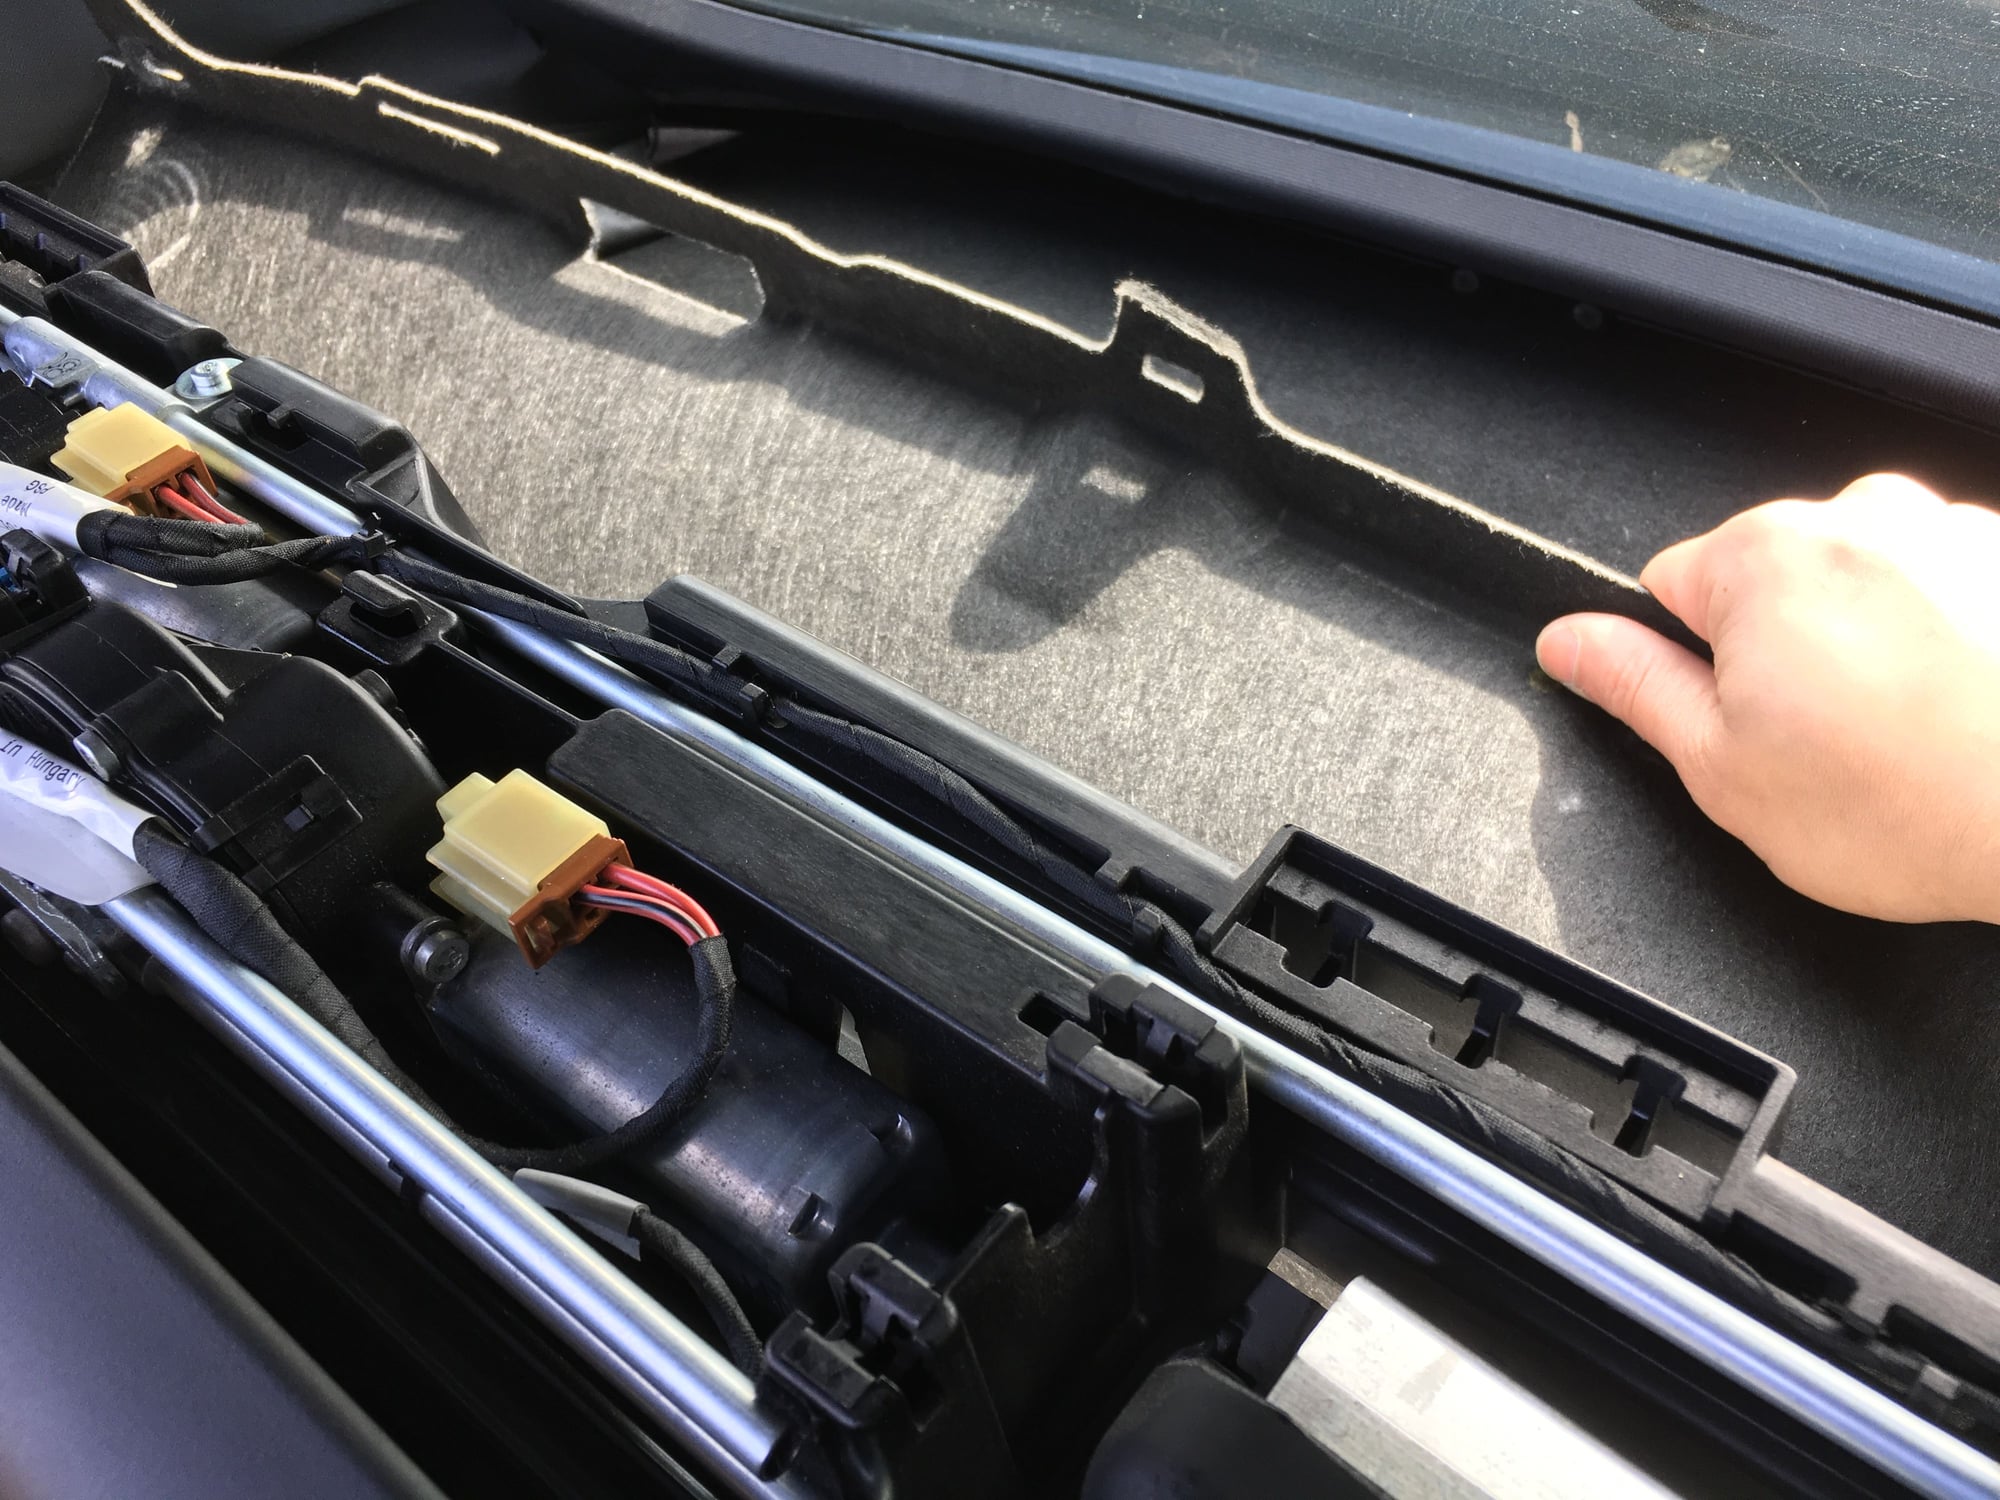
5. Put the convertible top halfway up to gain access to the rear carpet. At this time, make sure the car's ignition switch is turned OFF.
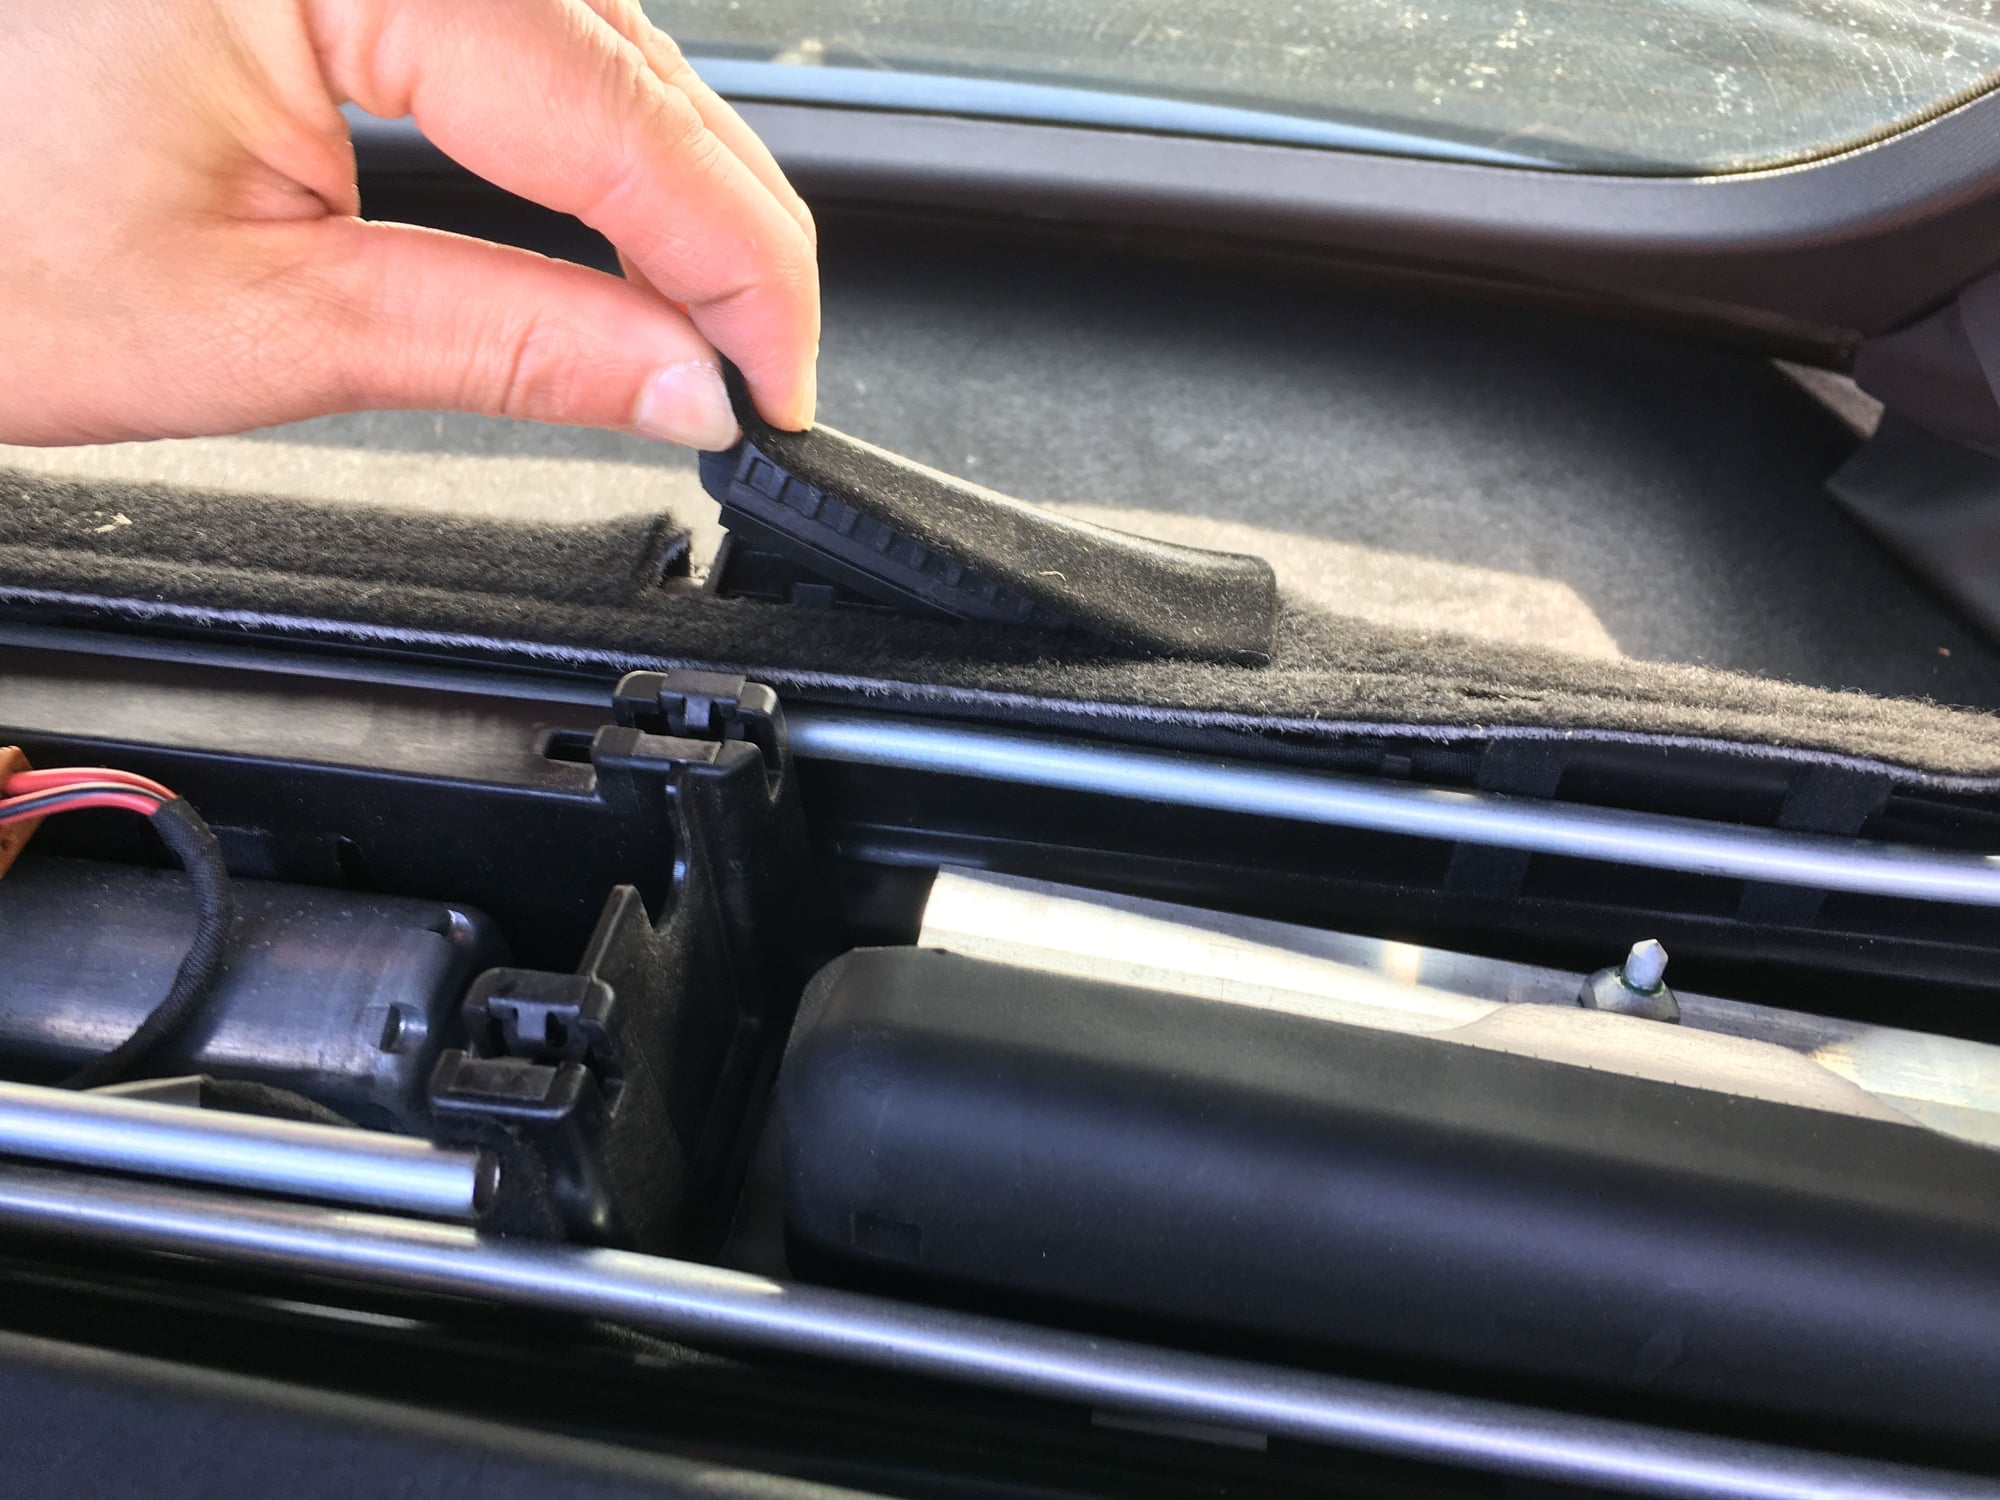
6. Remove these two rubber inserts(see 6a).
6a. The rubber inserts will come off by lifting upward.
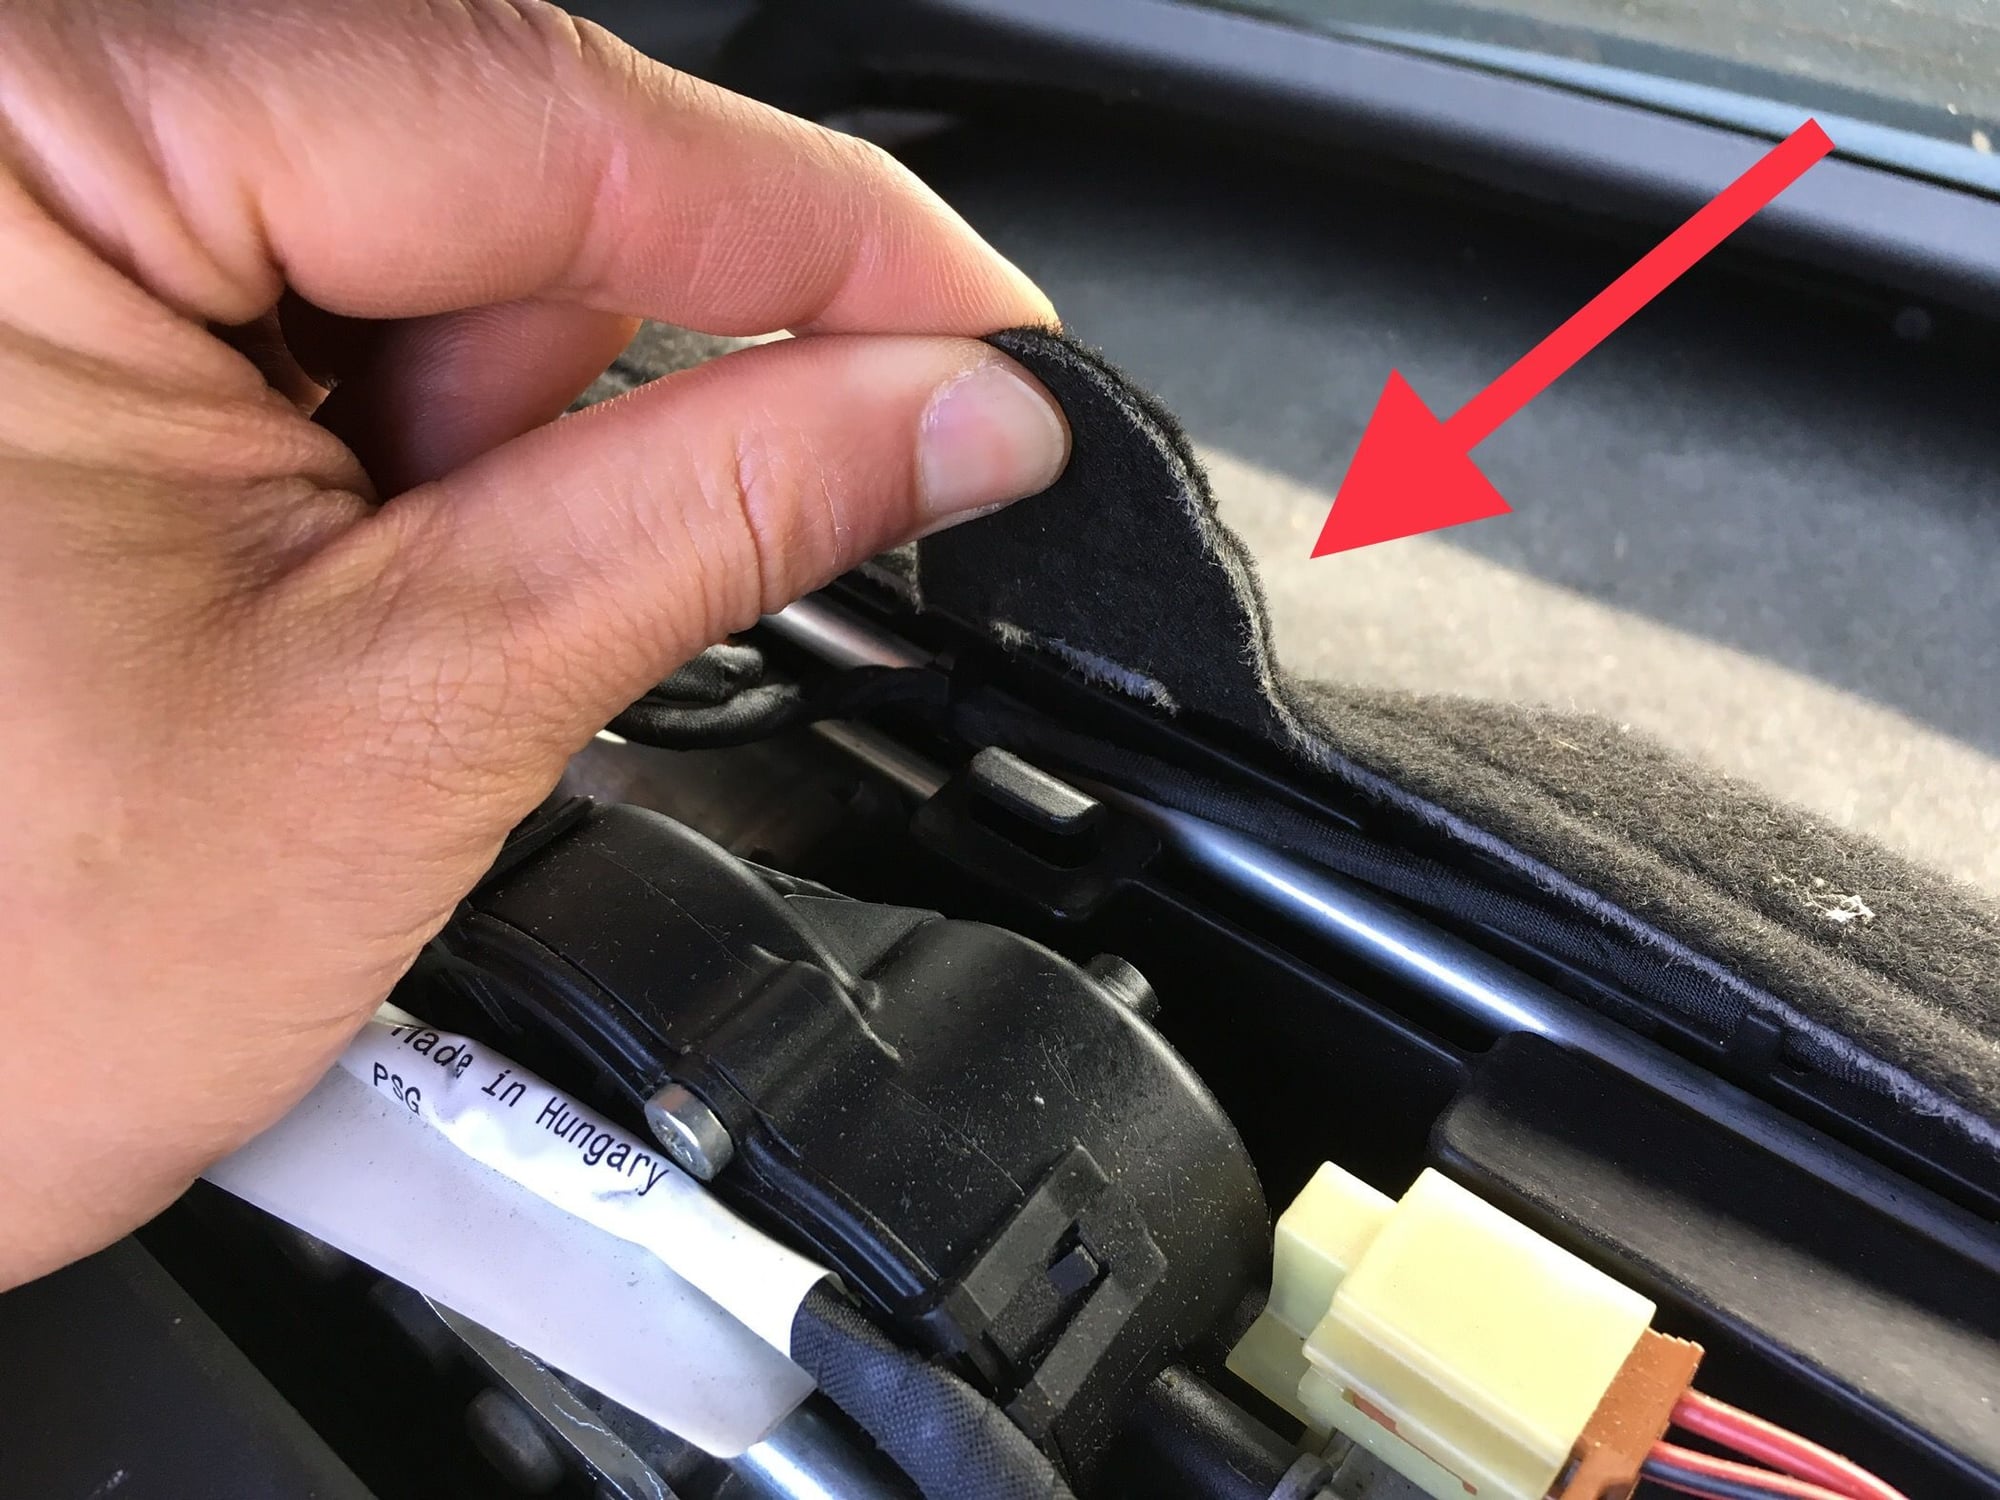
7. Release the "hooks" that hold the rear carpet. There is a total of 3 hooks(one in the middle, and one at each end).
8. Push the carpet towards the back of the car.
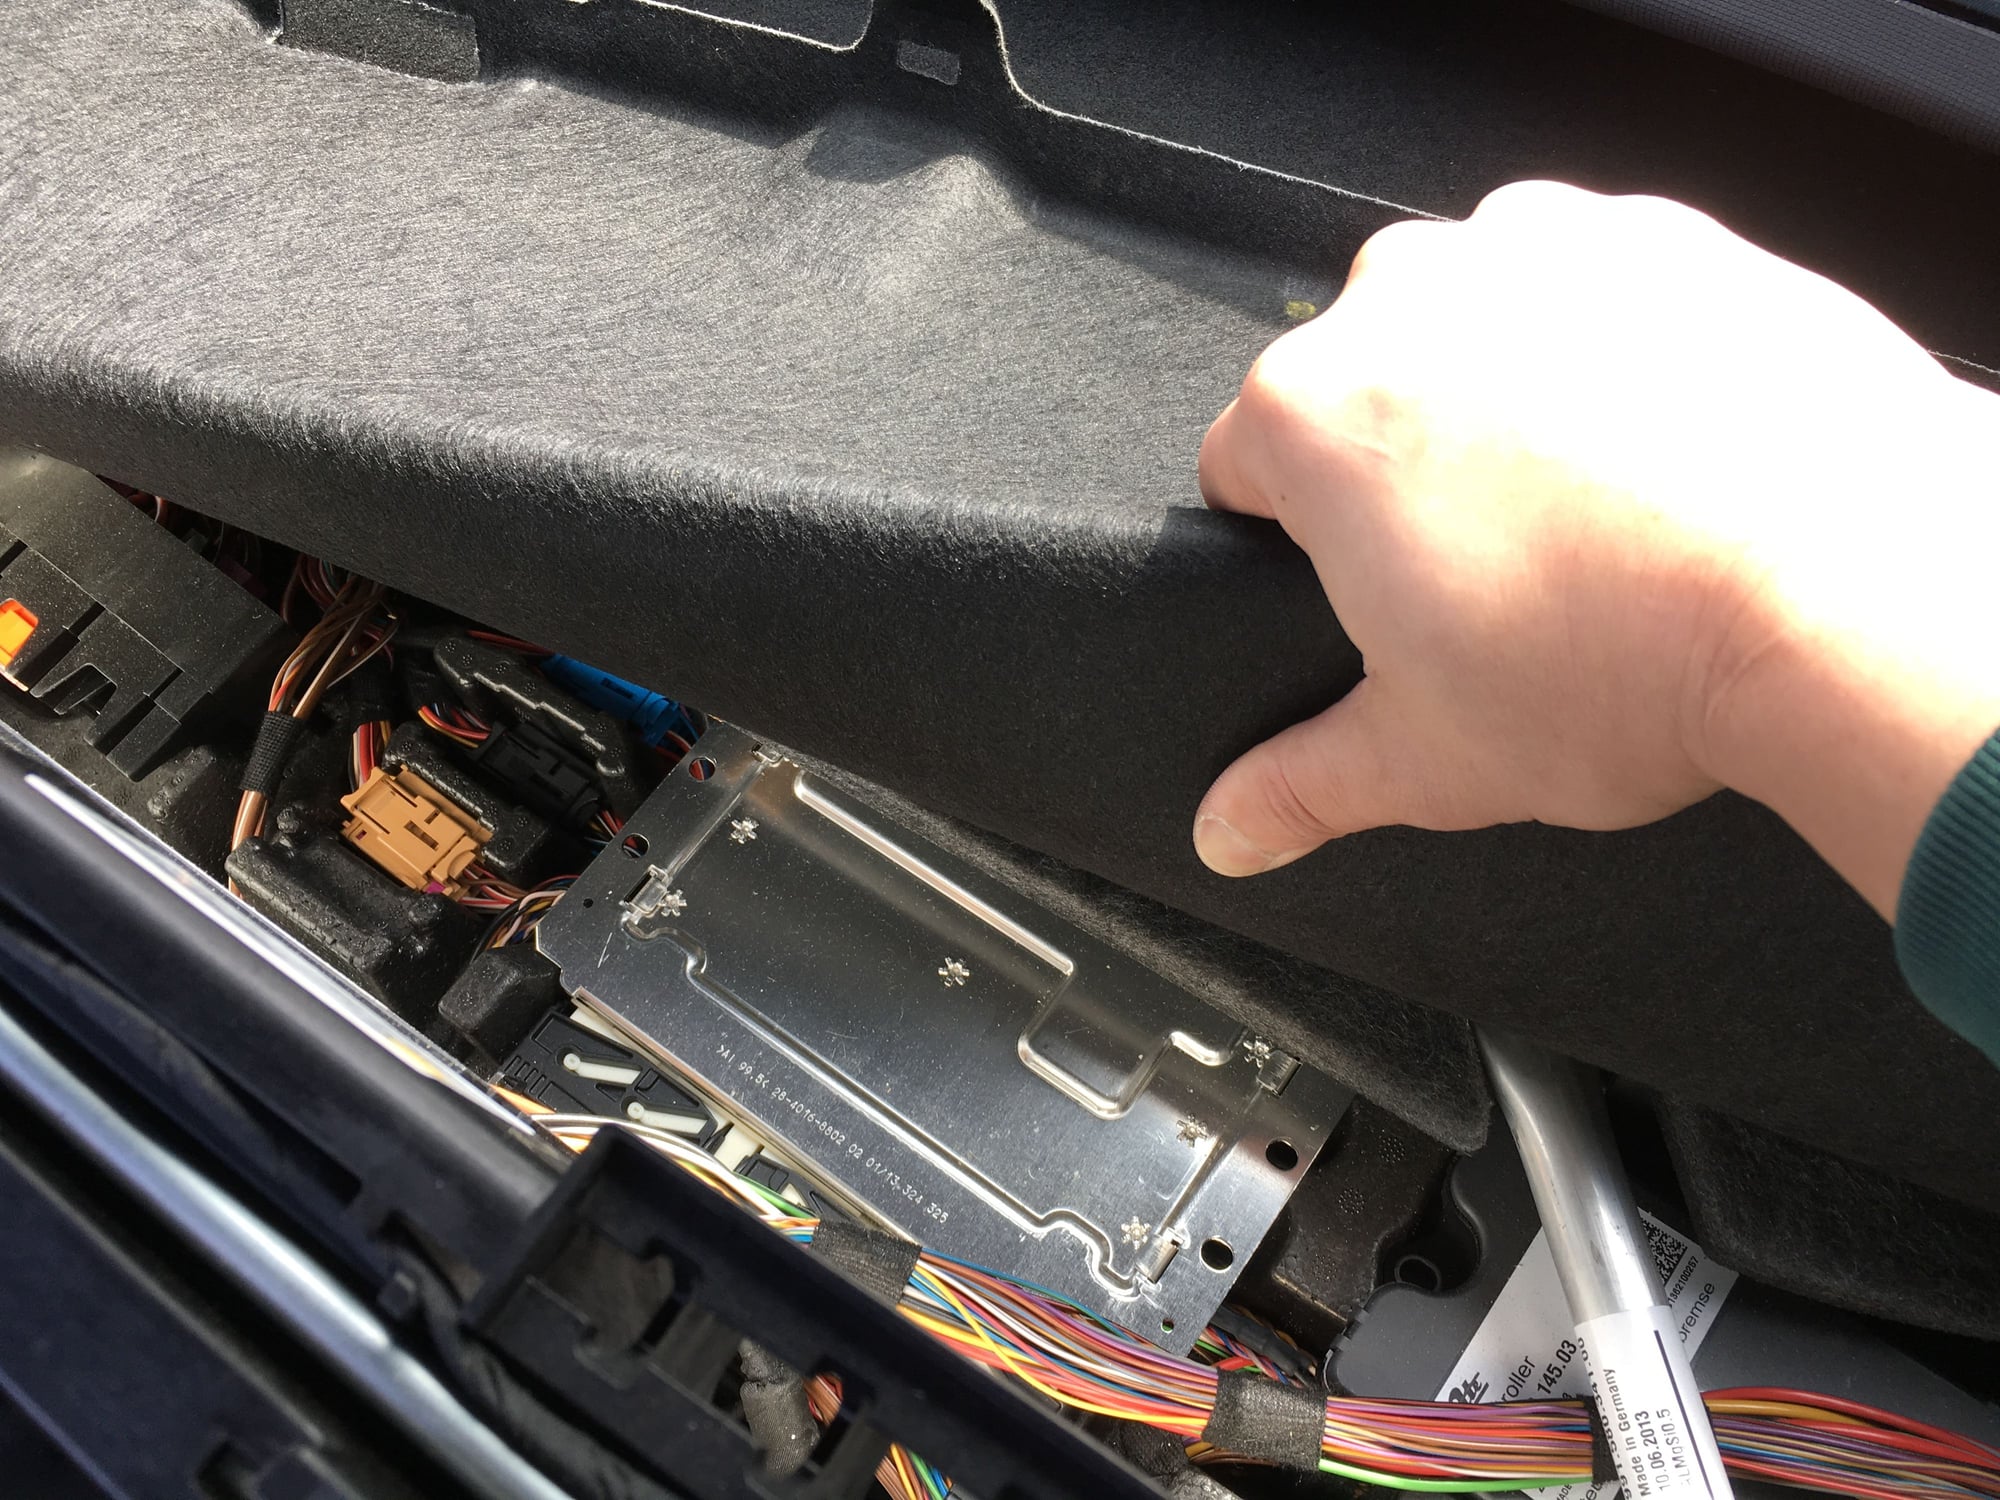
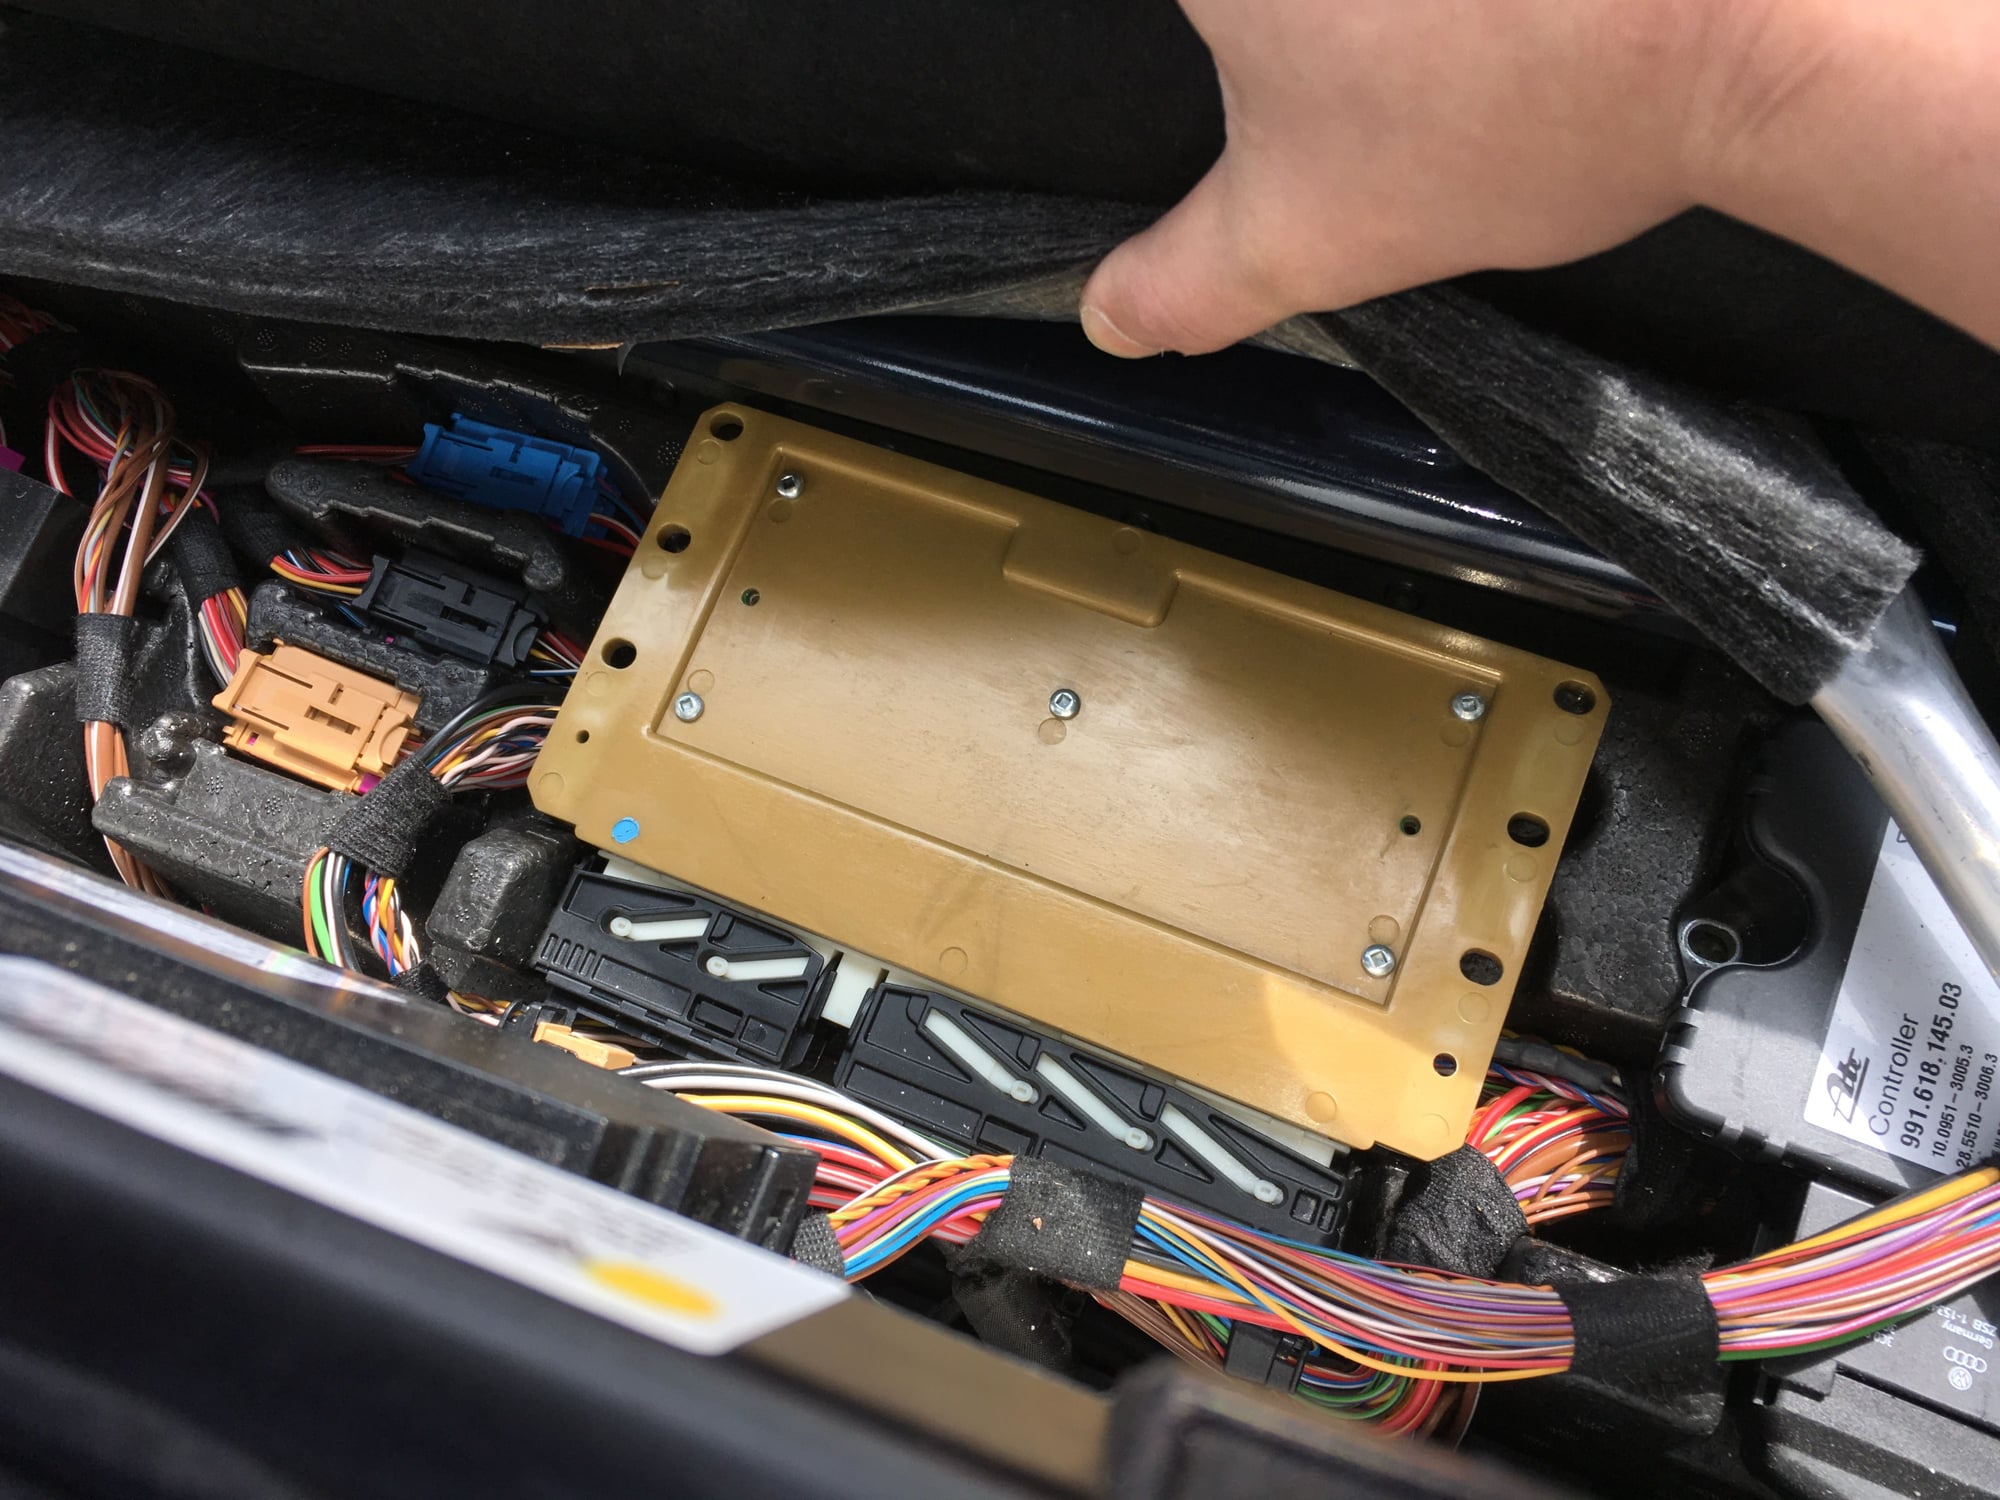
8a. With the carpet pushed back the OEM PASM controller will be exposed (it is the silver color box). The controller is seated on molded foam tray. There's nothing else holding it in place.
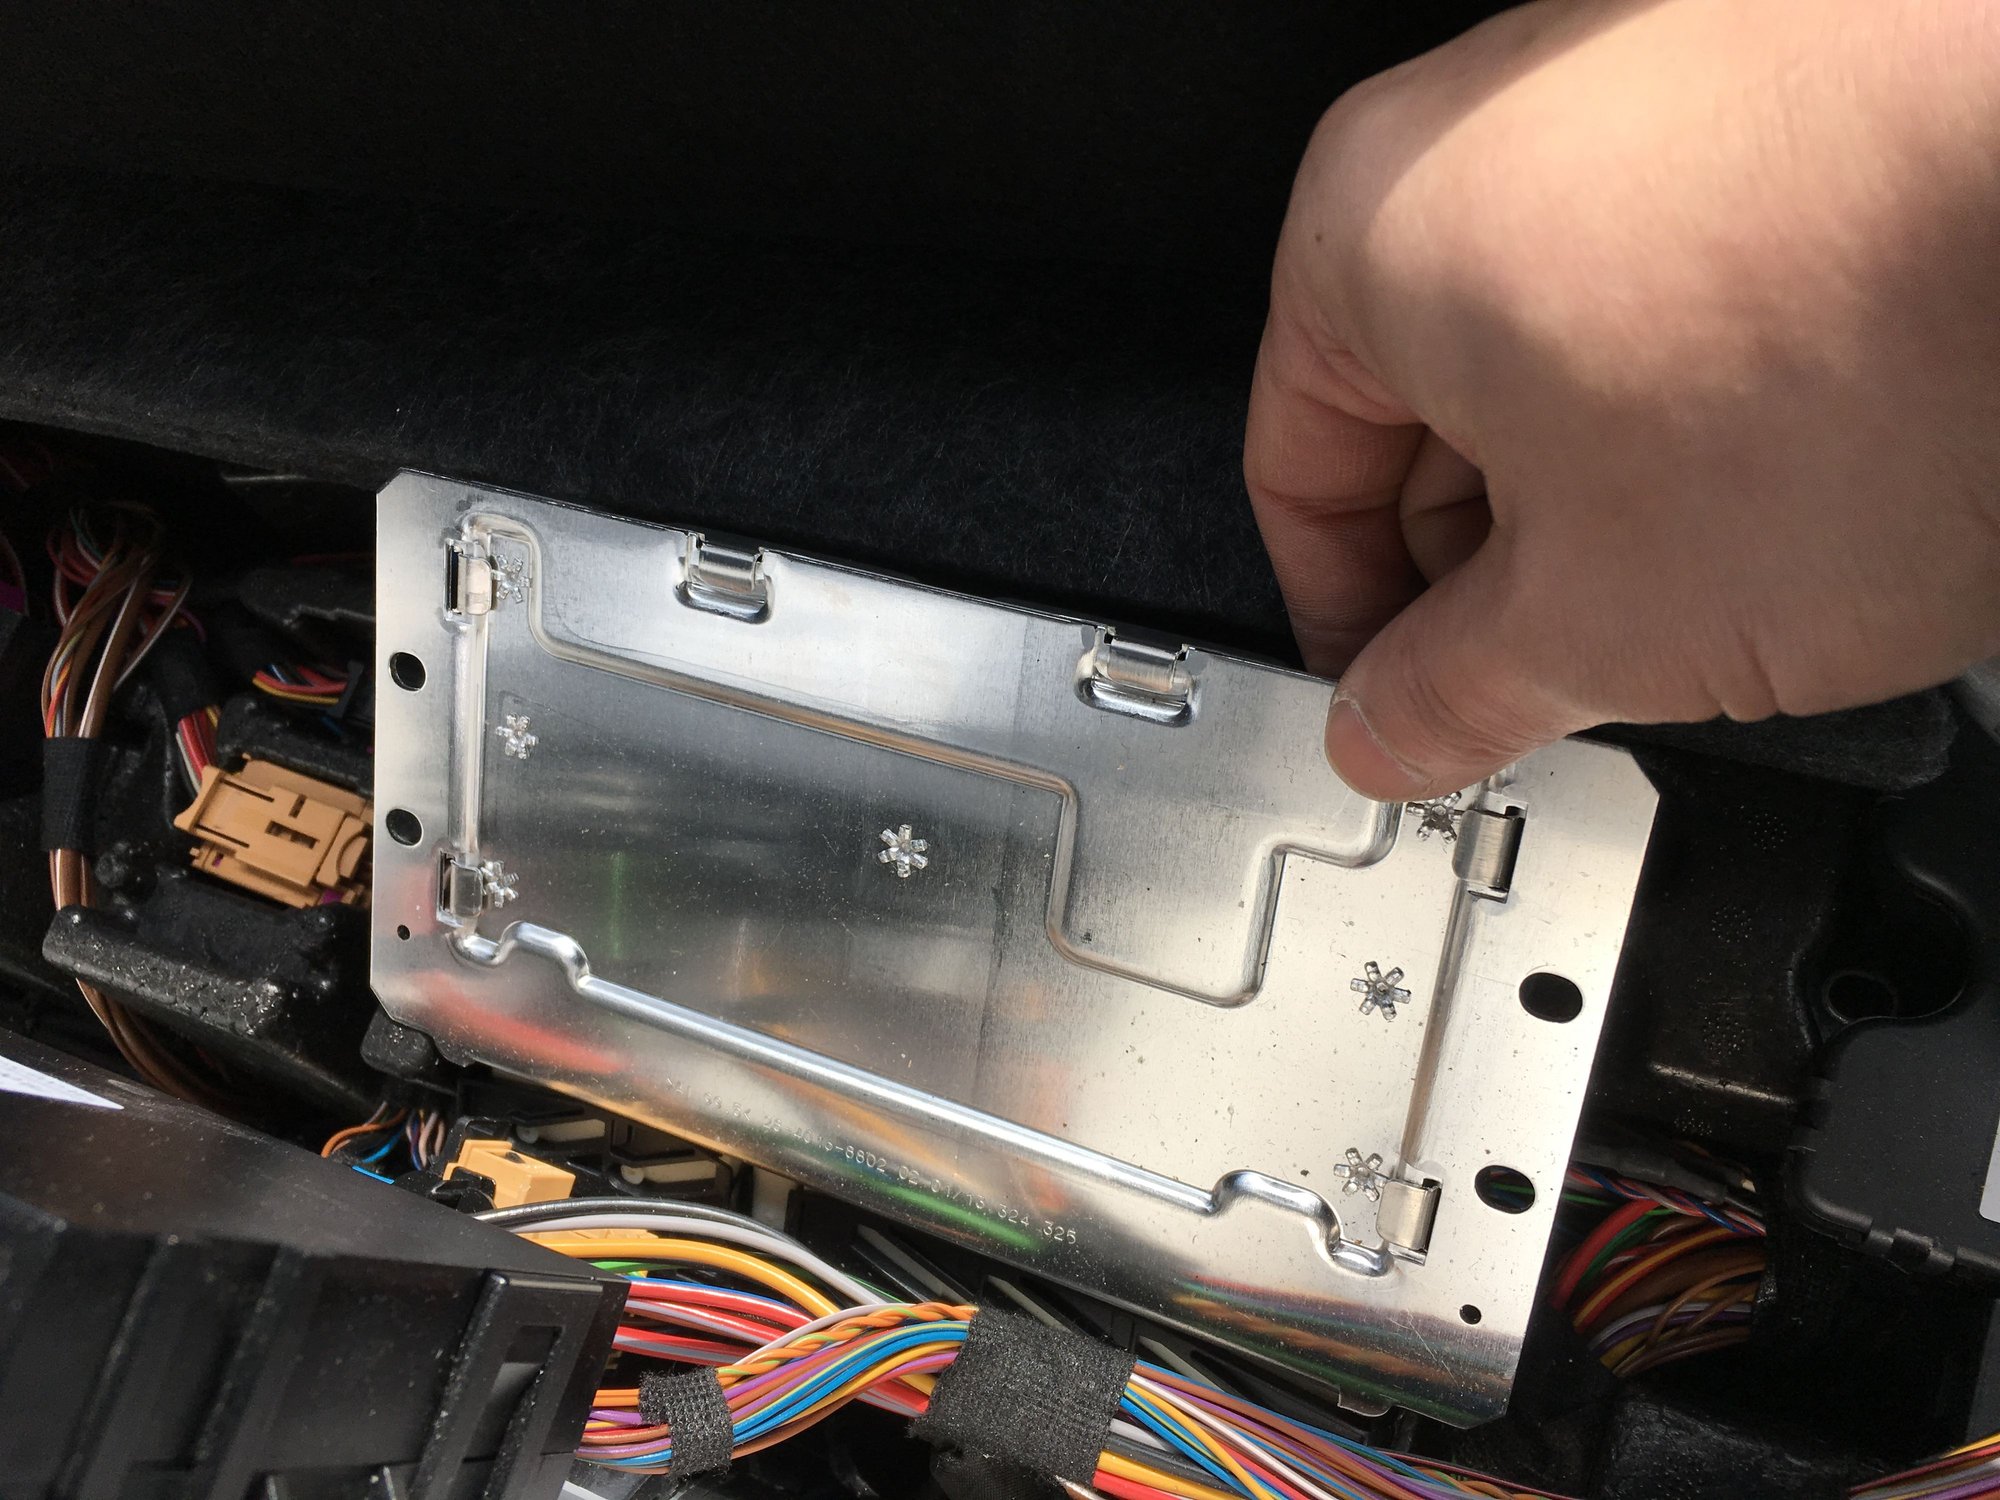
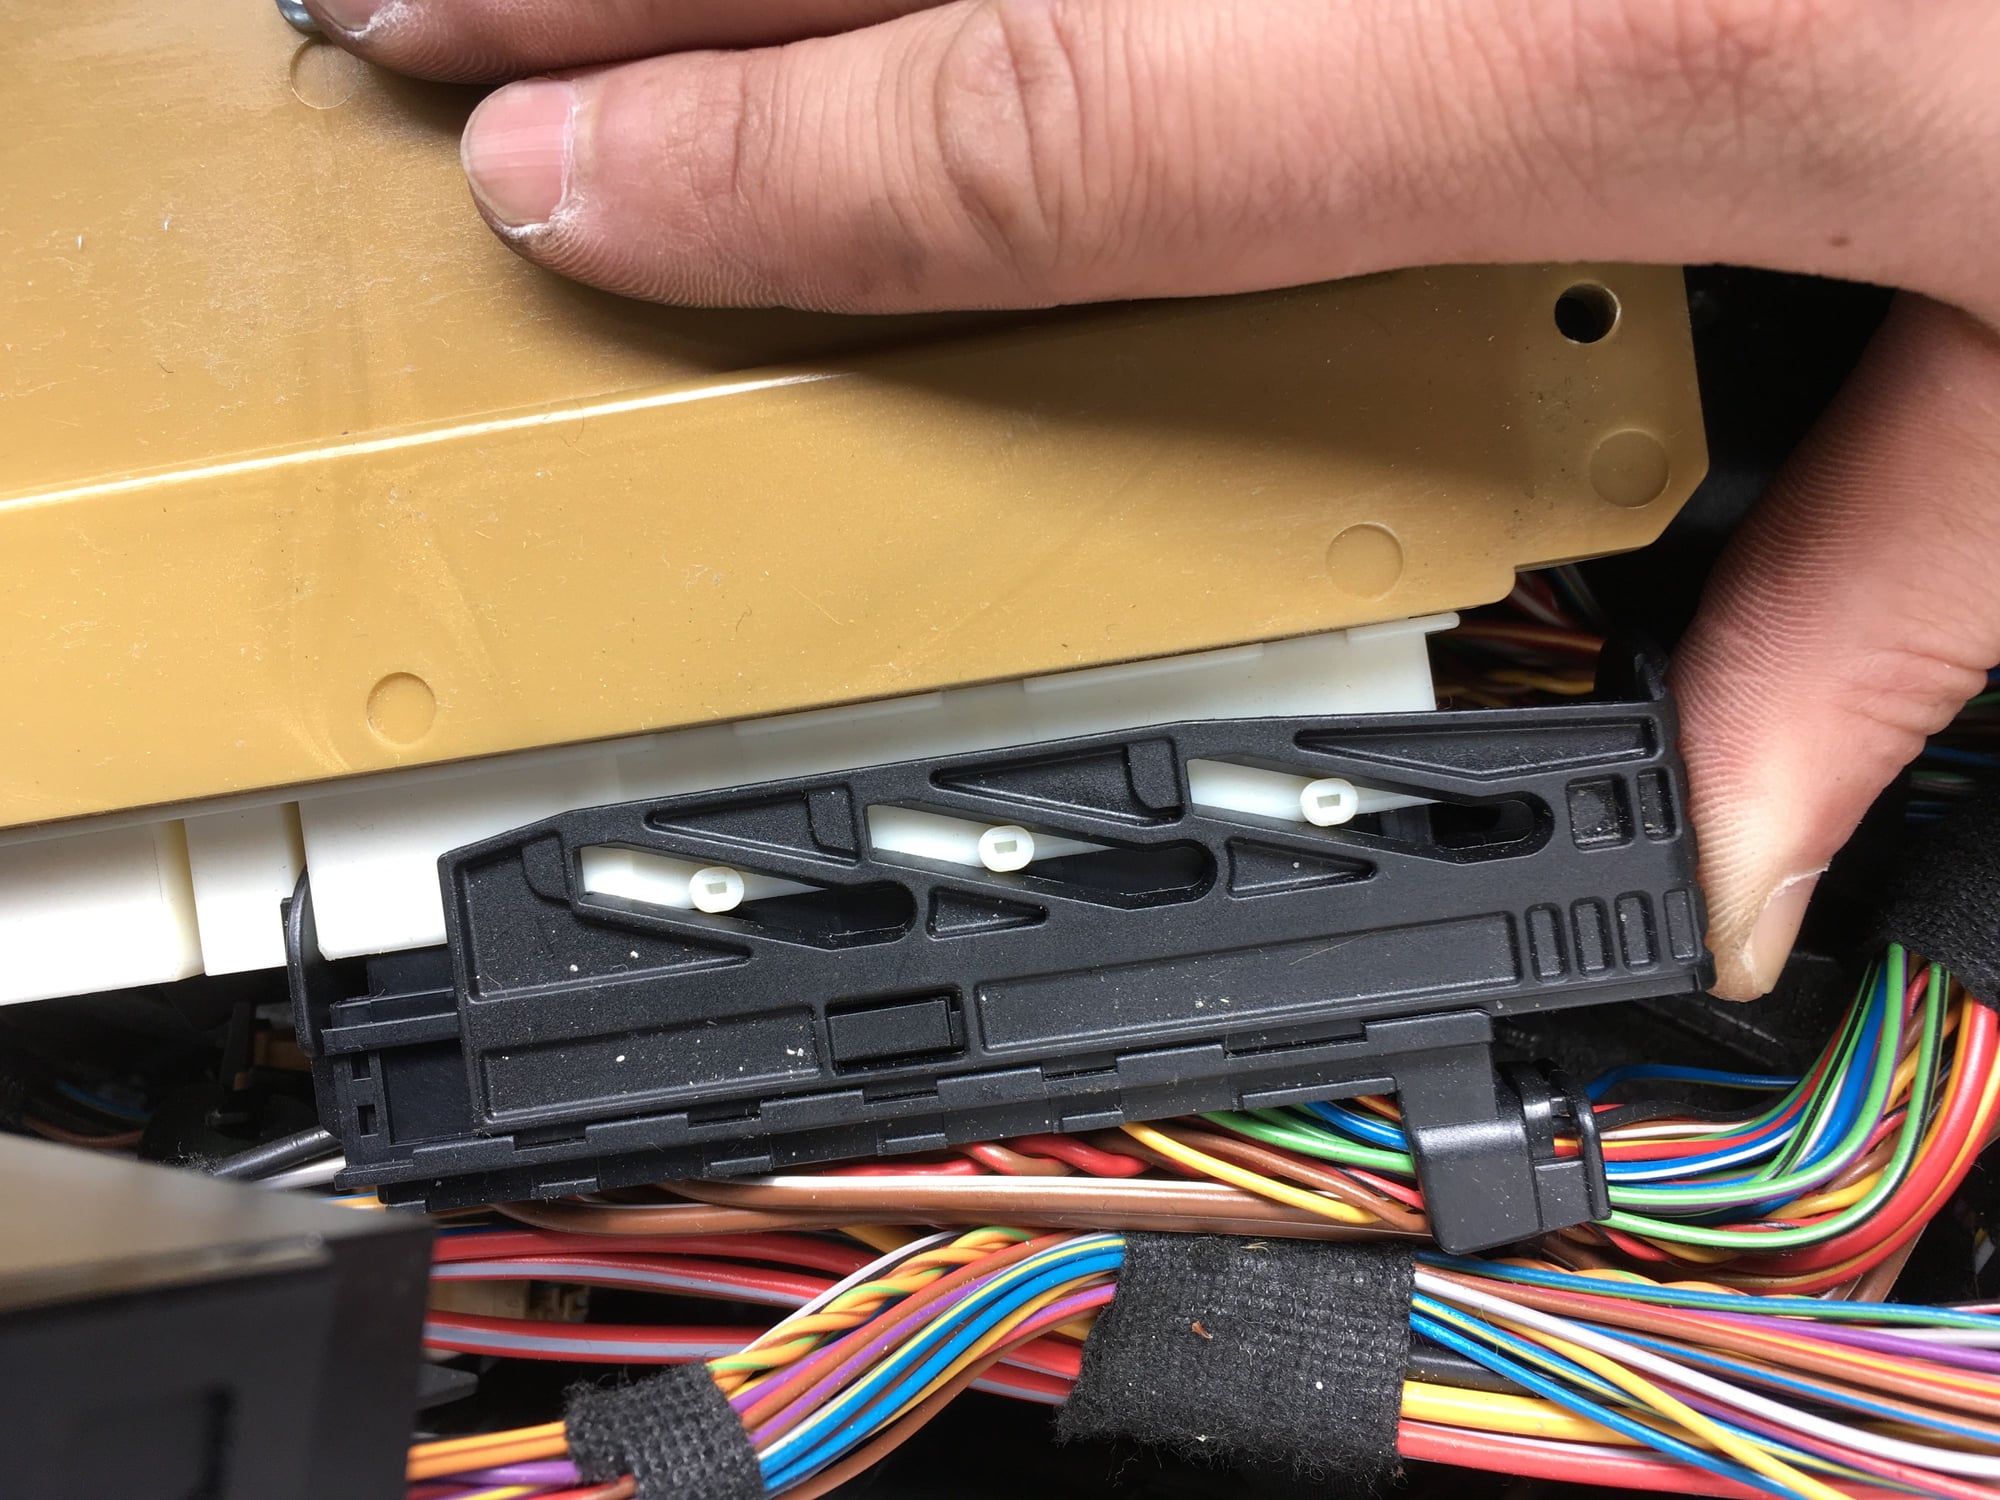
9. Lifting the controller up from the molded foam tray and then carefully remove the two slide-lock connectors(see 9a).
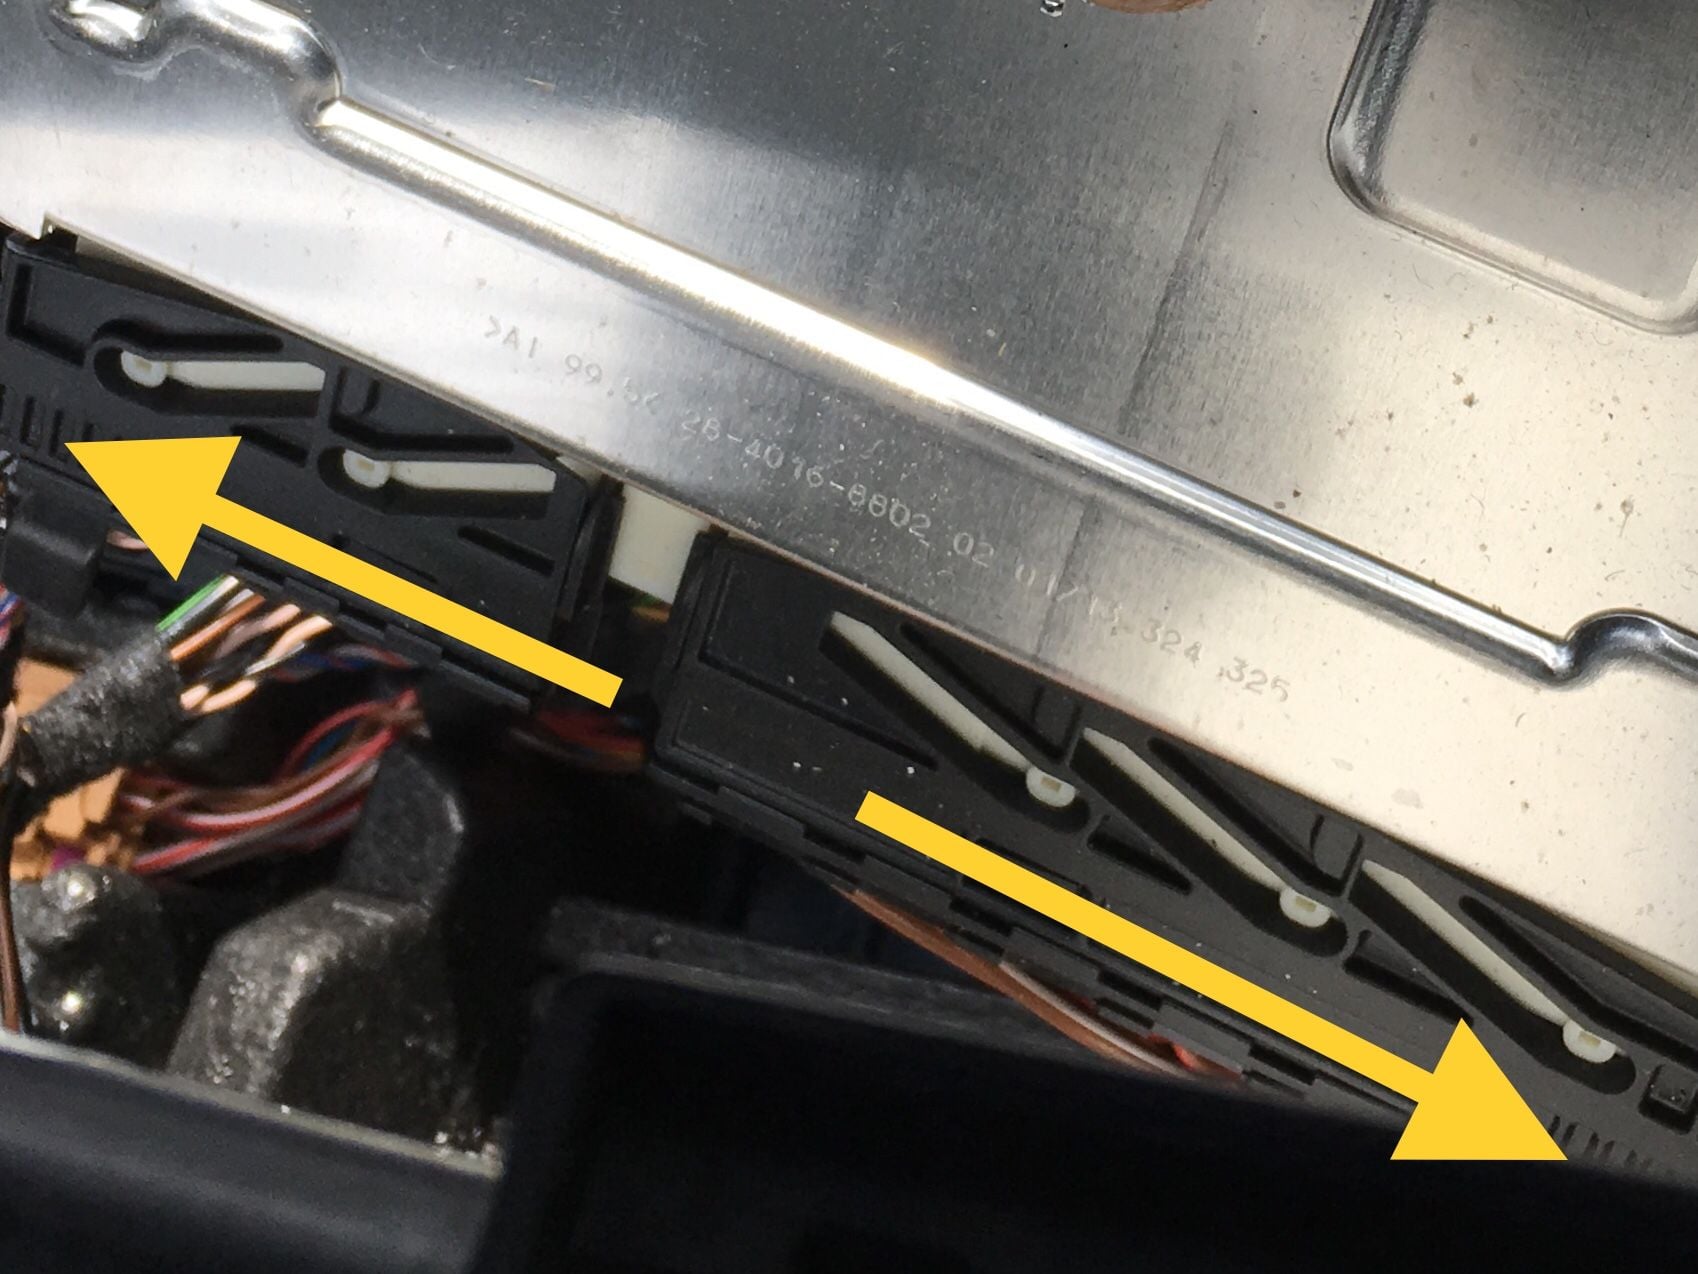
9a. Unlock one slide-lock connector at a time by gripping the connector and sliding it to the direction of the arrow in the image. Again, unlock only one connector at a time. Once the two slide-lock connectors are released the controller can then be removed from the car.
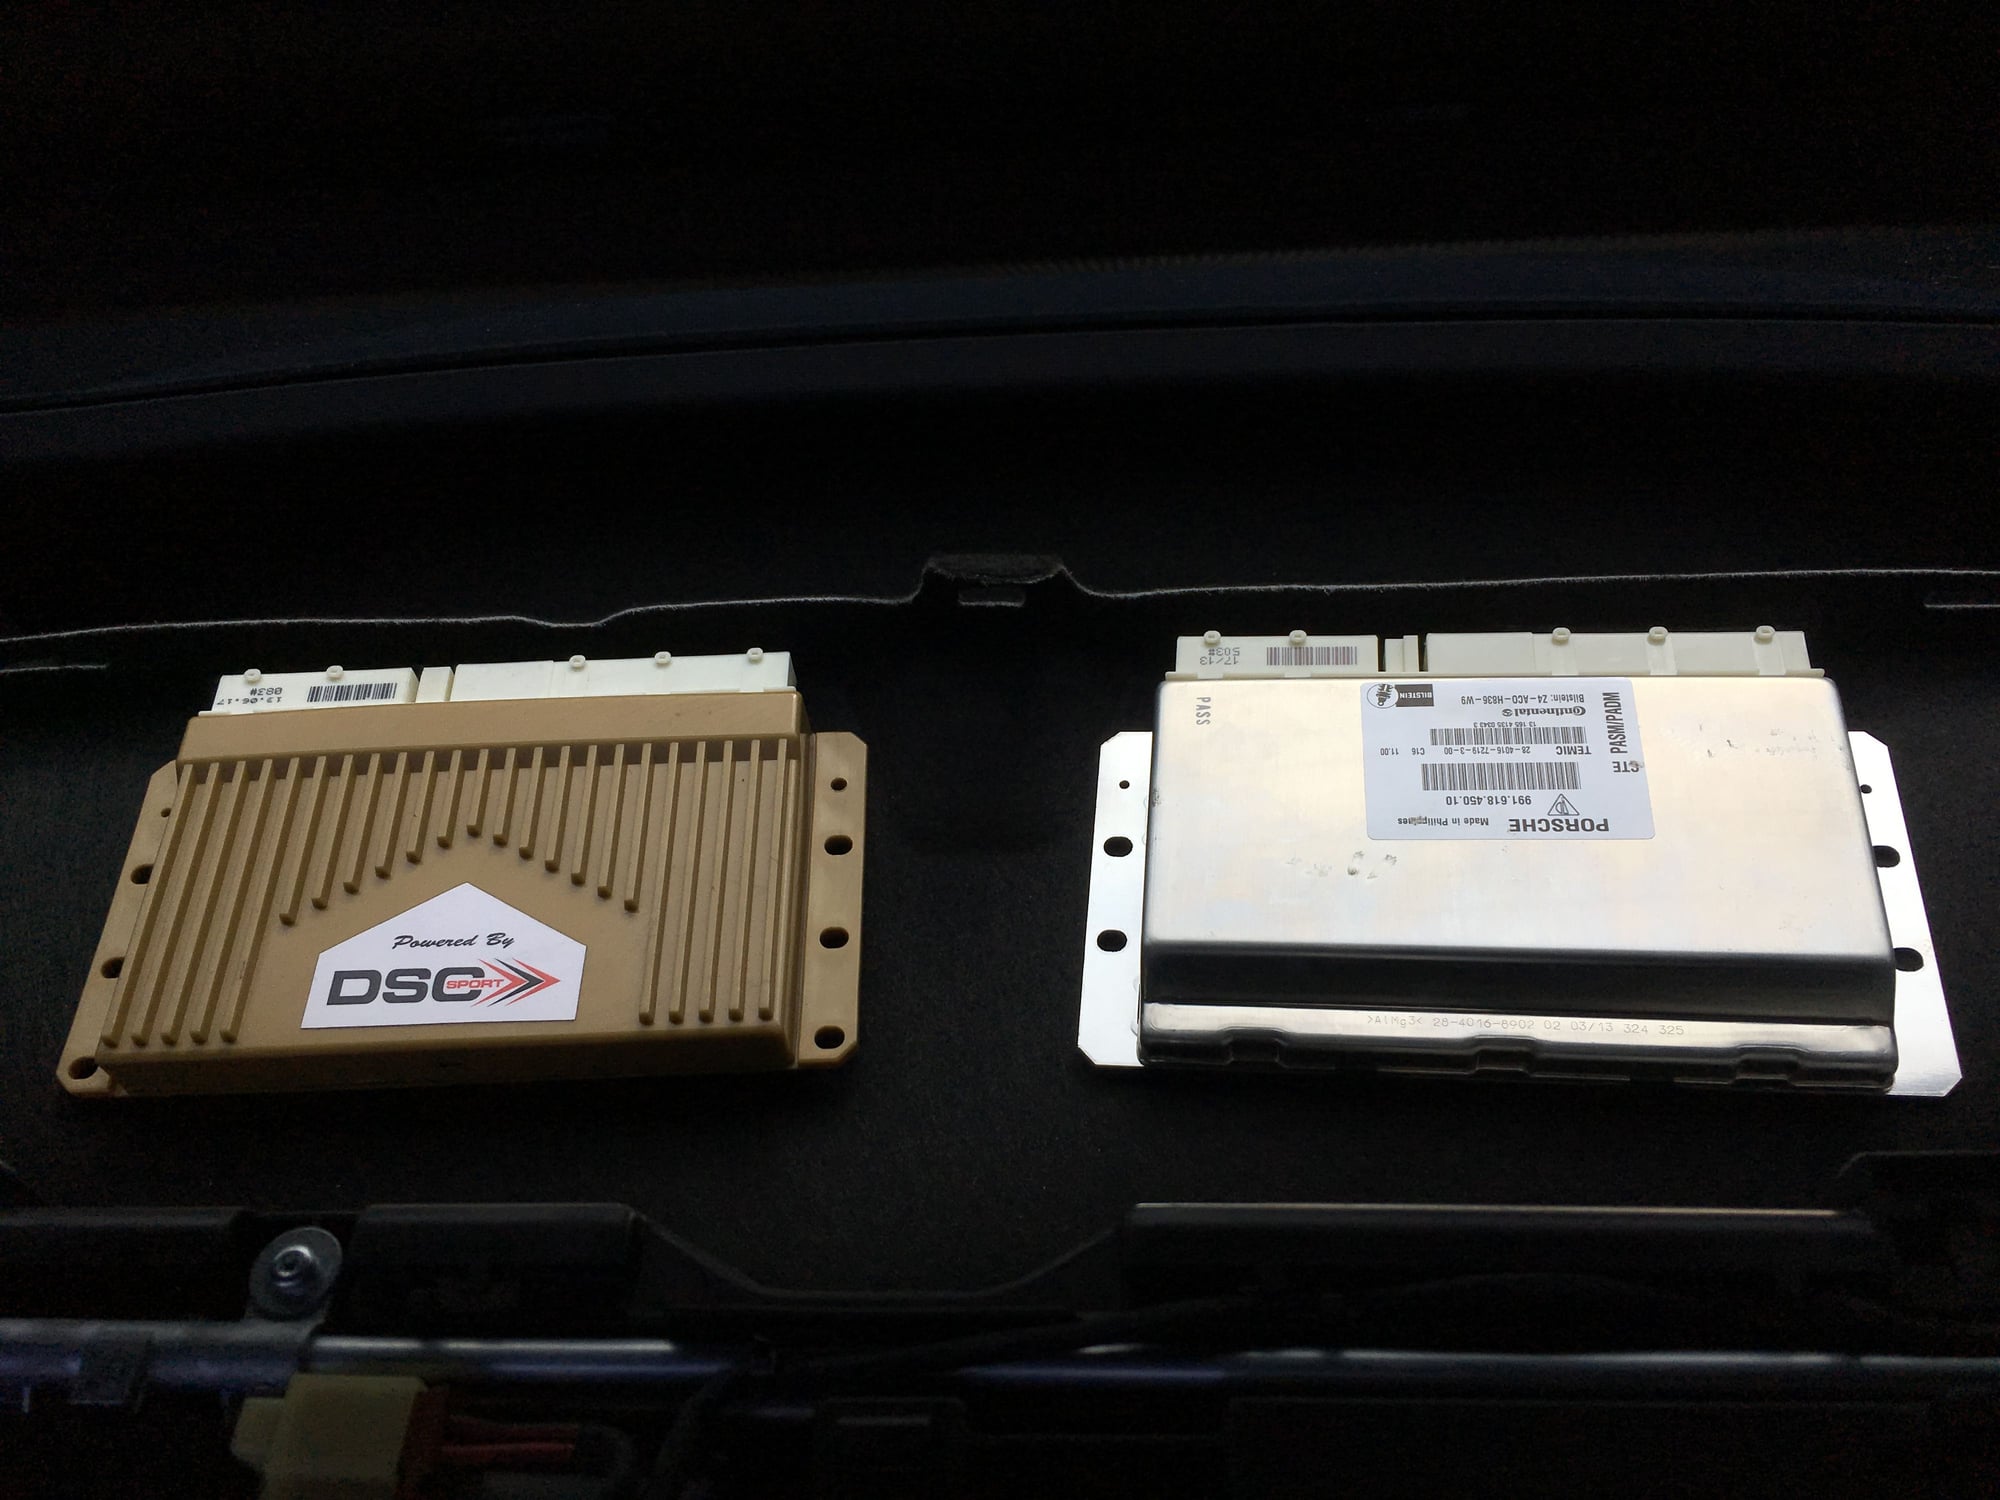
Here is the DSC Sport V3 controller(Left of image) sitting next to the OEM PASM controller(Right of image).
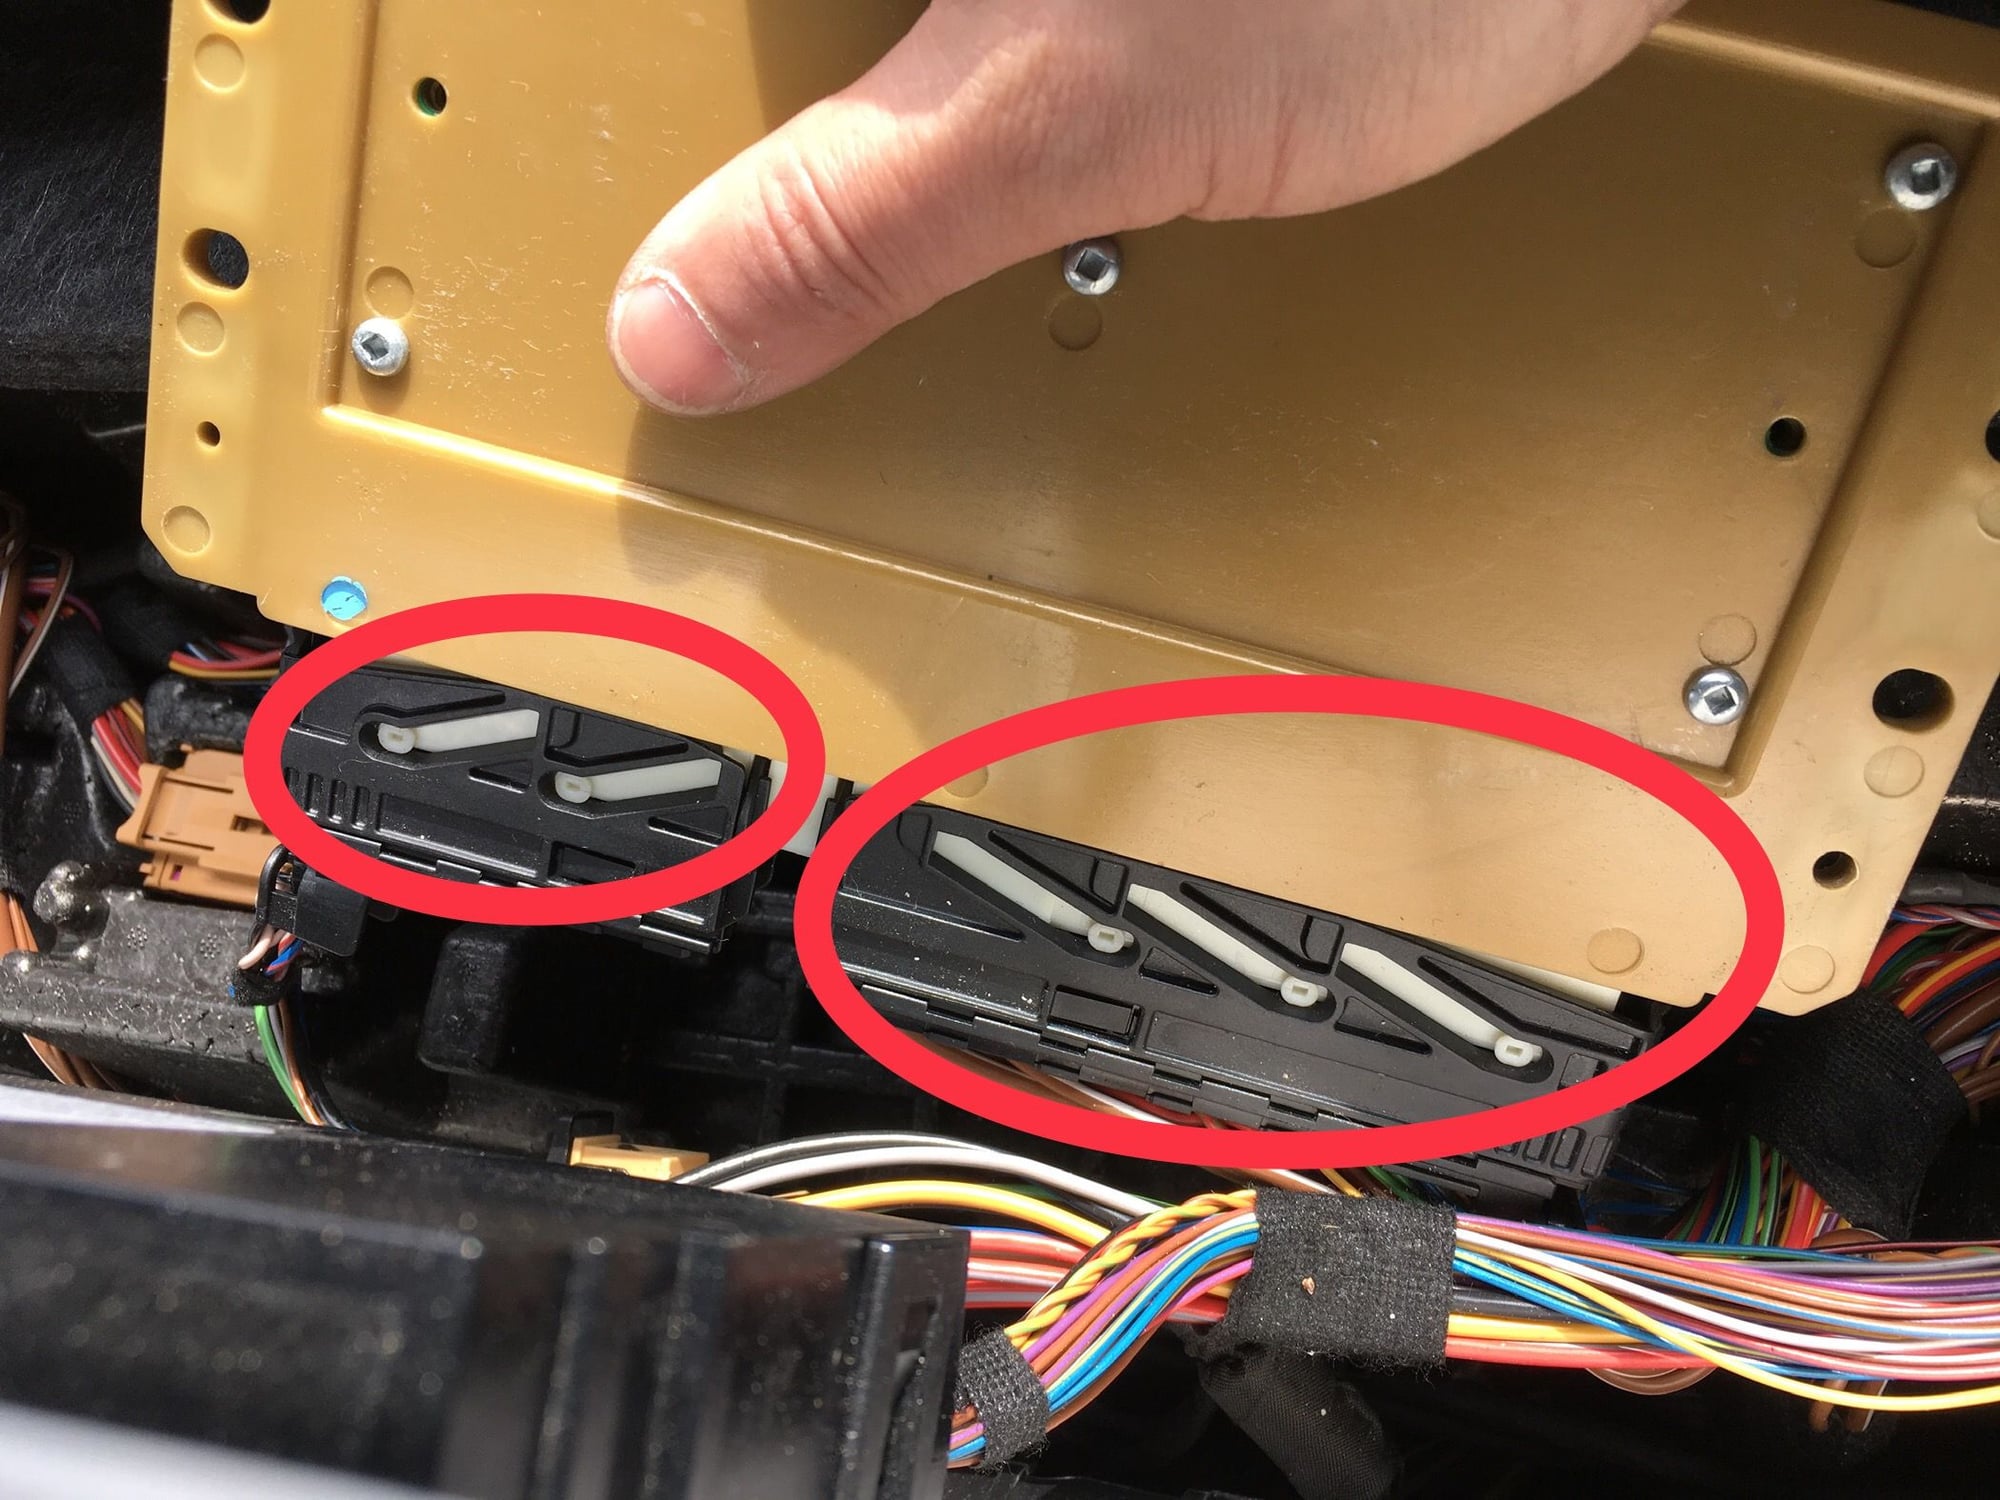
10. Carefully line up one slide-lock connector at a time onto the DSC Sport V3 controller. The connectors are plastic so take your time to do this to prevent damage. Once the slide-lock connector is lined up correctly then push the connector tab "inward" with your thumb to lock it.
10a. Make sure the slide-lock connectors are fully engaged shown in this image by the pegs in the diagonally slots.
10b. Rest the DSC Sport V3 controller on to the molded foam tray.
11. Reverse the steps for the rear carpet, rubber inserts and the trim pieces to complete the installation.
Thank you for reading this thread.
__________________
PCA National Instructor
TPC Racing stats:
2023 Porsche Sprint Challenge 992 Cup Am Champion
2023 Porsche Sprint Challenge GT4 Pro-Am Team Champion
2022 Porsche Sprint Challenge 992 Cup & 991 Cup Champion
2020 IMSA GT3 Cup Challenge 2nd Championship
2018 IMSA GT3 Cup Challenge 2nd Championship
2016 IMSA GT3 Cup Challenge Champion
2013 IMSA GT3 Cup Challenge Champion
2006 Rolex-24 @ Daytona GT Champion
2004 Grand-Am SGS Class Champion
you are right, it is pretty straightforward thing to do .... and very worthwhile in my opinion ..... did mine about 2 years ago (which I would have had these photos back then) .... the hardest part was getting the %^# connectors to pop off the old unit.....
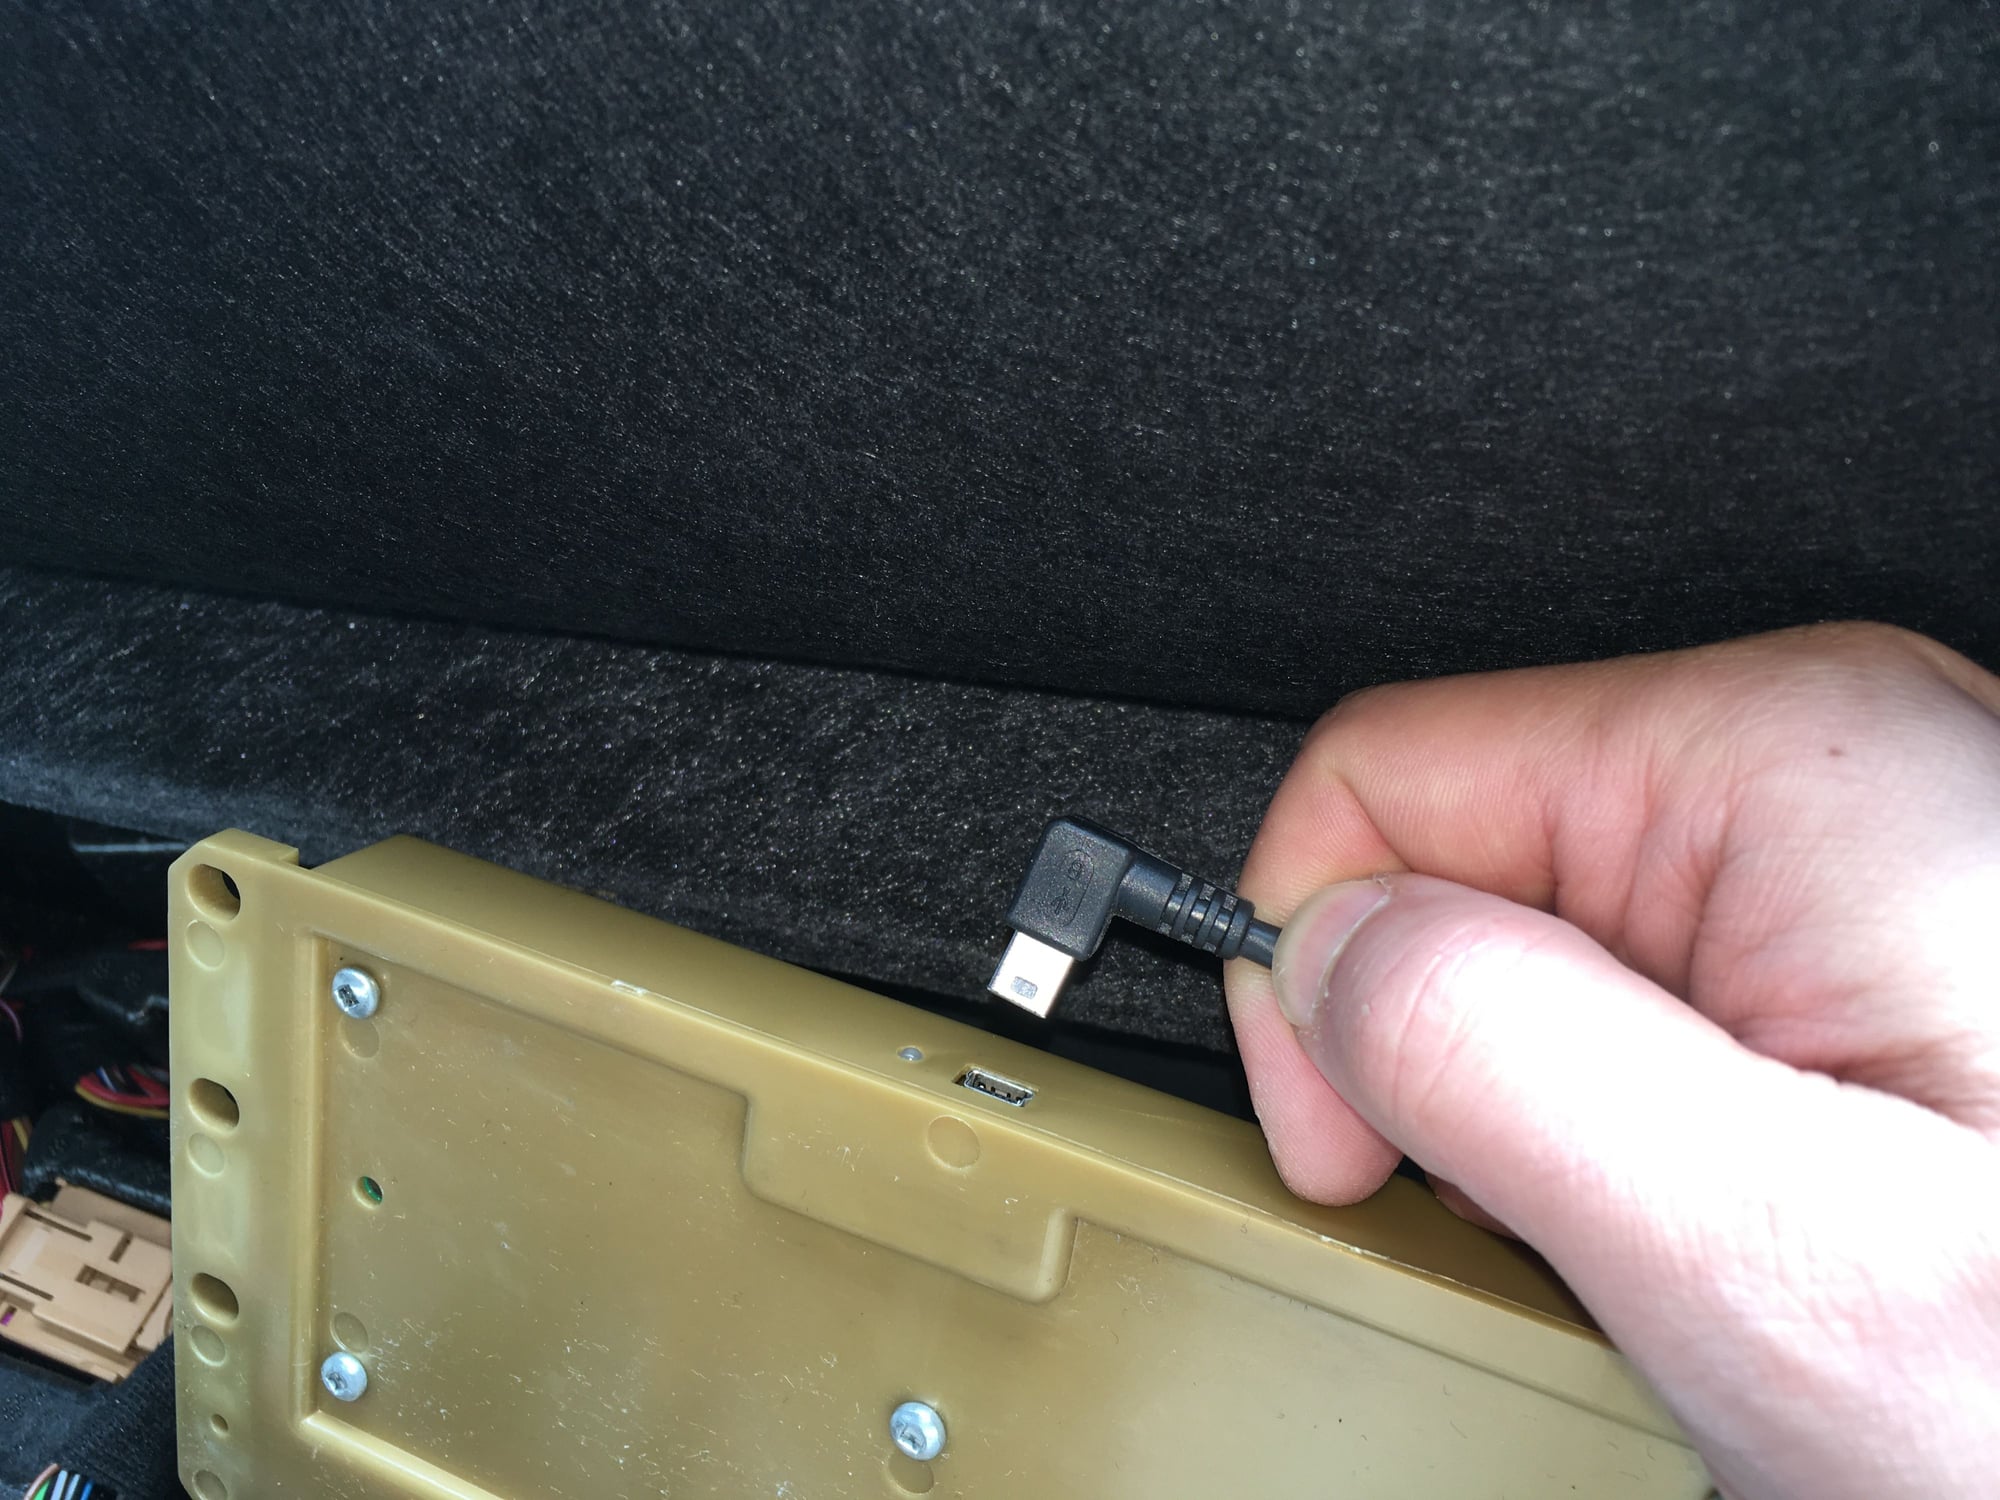
On this car we have opted to install a USB-mini cable to communicate with the DSC Sport V3 controller for possible future custom tuning and data logging. As you see from the images it only took an extra 5 minutes to run the cable.
1. Connect the USB-mini cable end to the DSC Sport V3 controller during the installation of the controller.
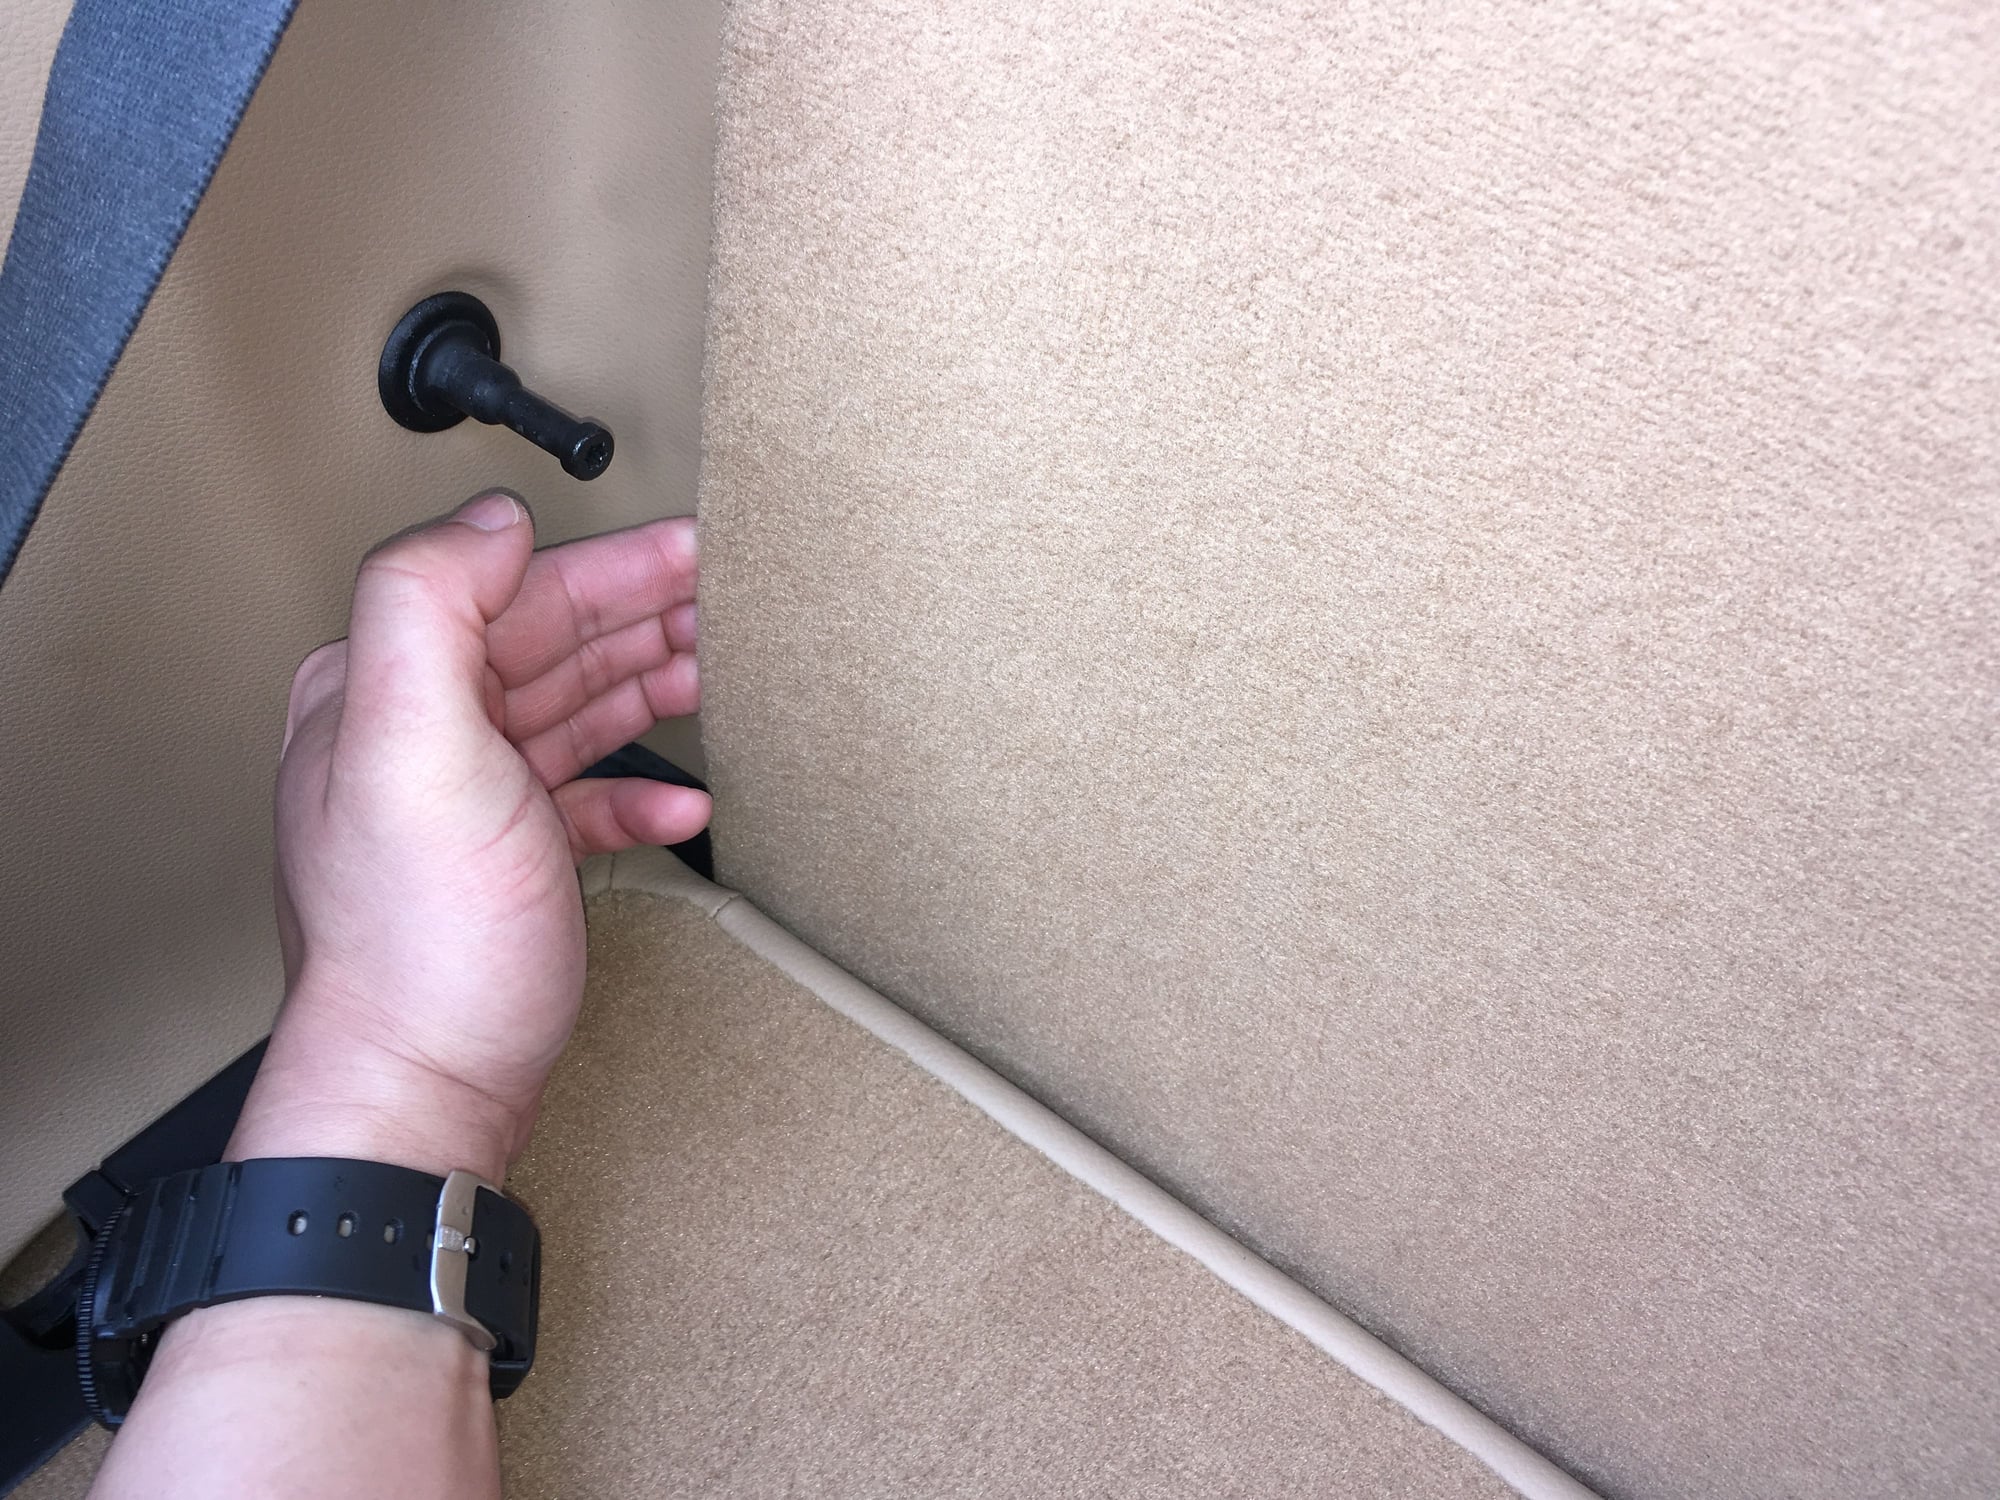
2. Fold the rear seats down.
3. Remove the vertical carpet panel by carefully wedging your fingers into each side to release the holding tabs.
3a. Remove the panel from the car.
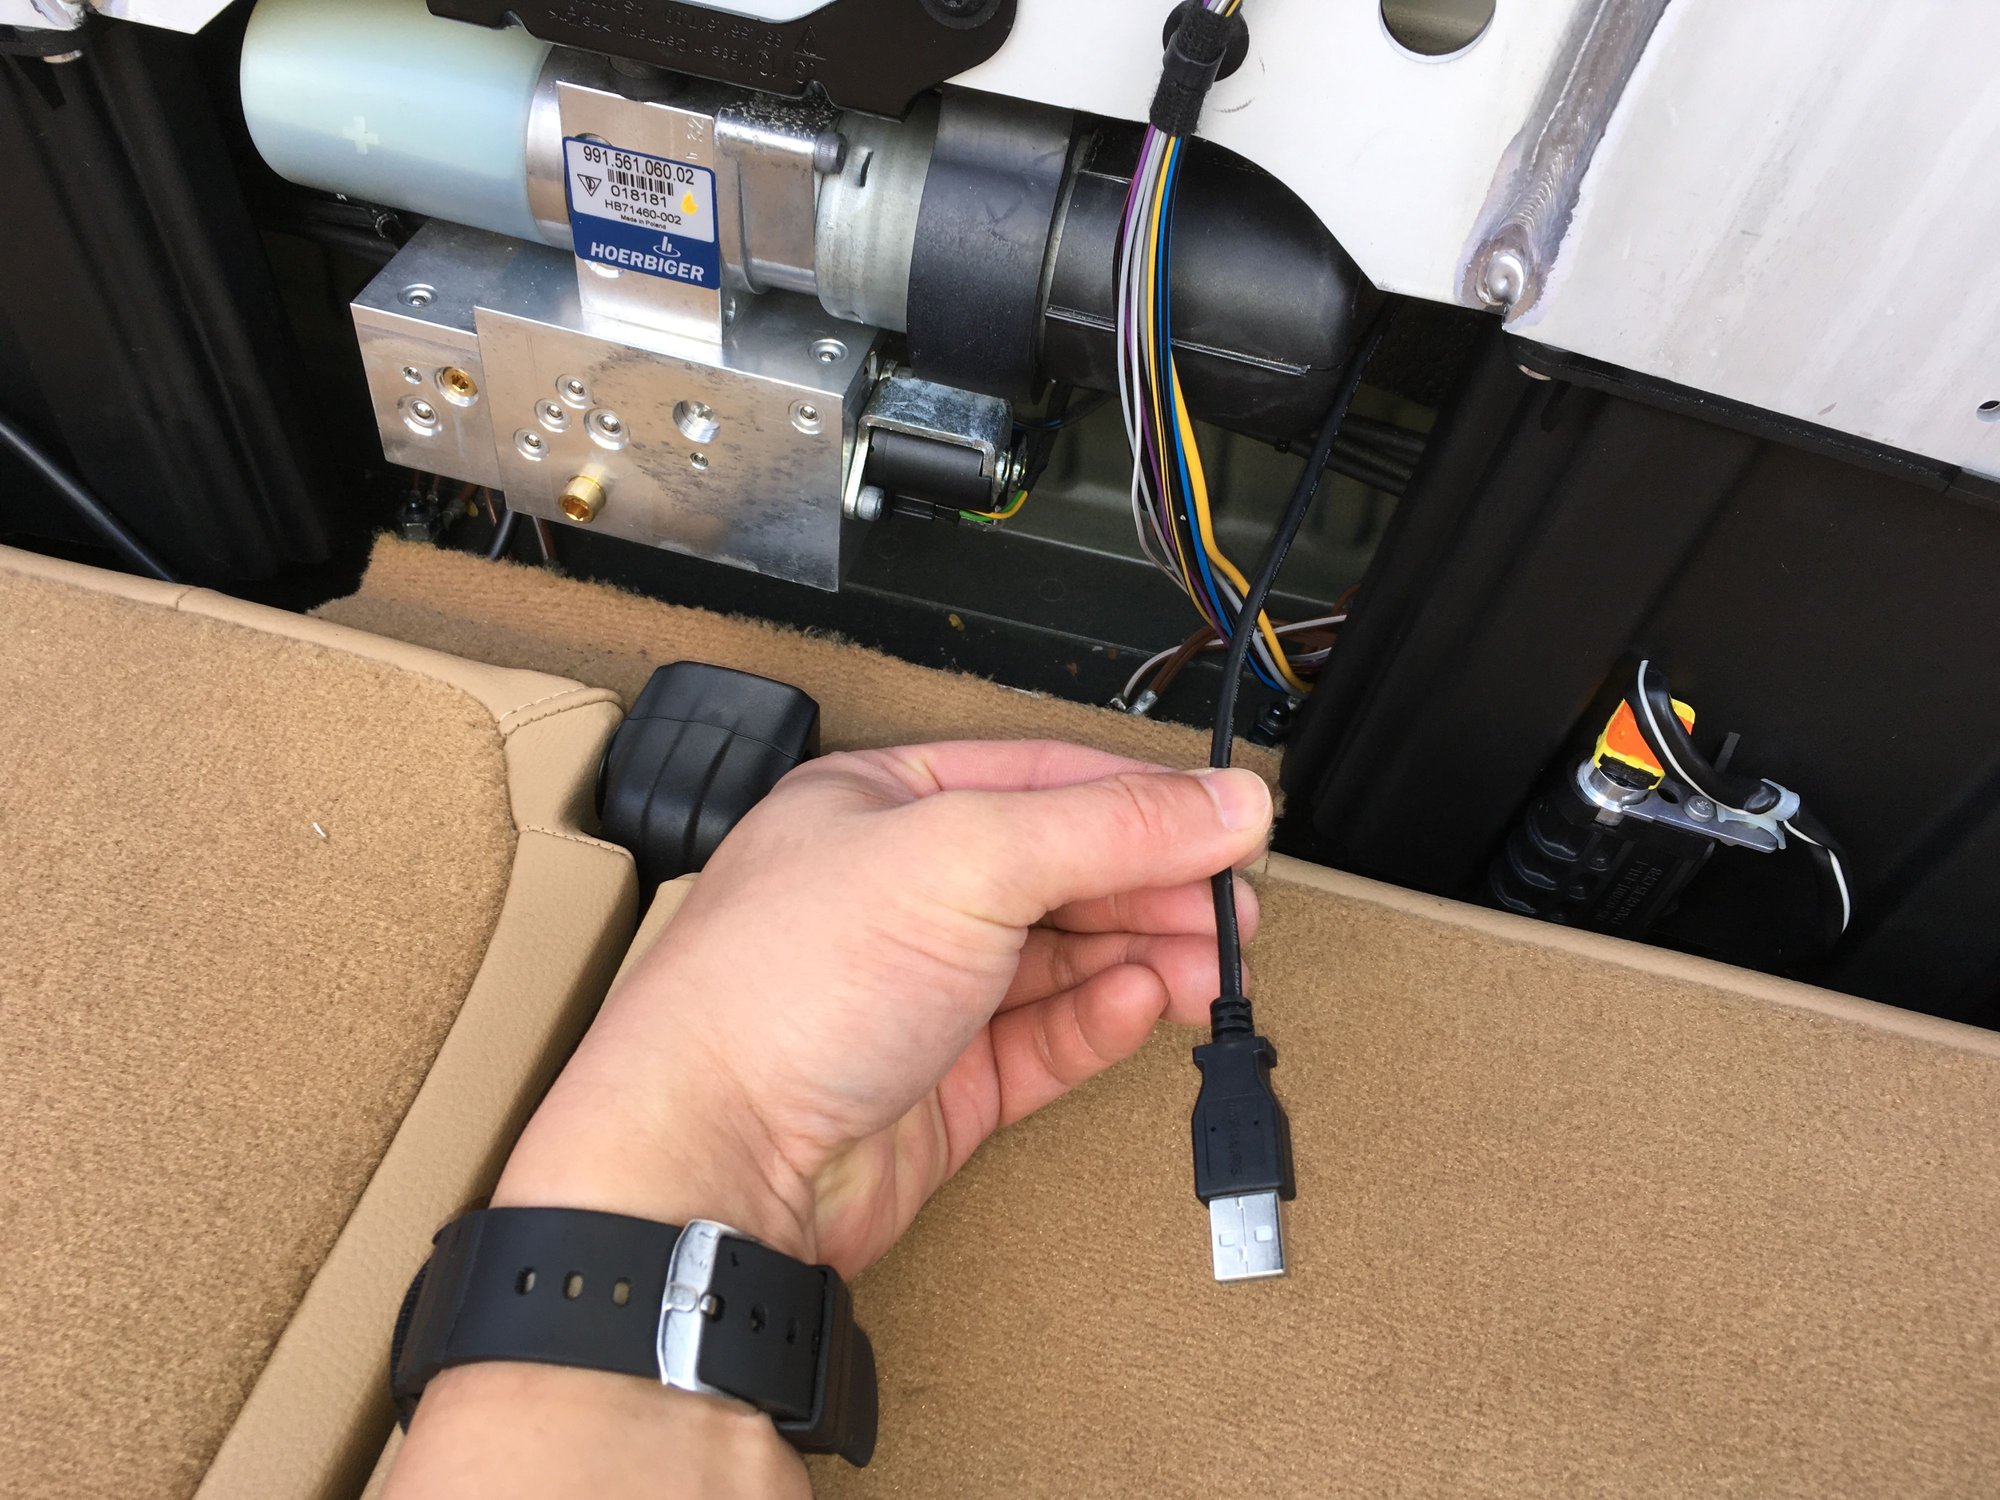
4. Route the cable through the opening as shown. Be sure not to disturb any electrical items in the surrounding area.
you are right, it is pretty straightforward thing to do .... and very worthwhile in my opinion ..... did mine about 2 years ago (which I would have had these photos back then) .... the hardest part was getting the %^# connectors to pop off the old unit.....
Sorry we didn't have these photos sooner. In our local area not too many people do any mods on Cabriolet's. Which is a shame because they are beautiful cars with great potential, and they can all benefit from the improved ride quality and handling performance of the DSC. Thank you for using DSC. We are thrilled to know that you have been enjoying it!
will this much negative camber severely compromise tire life for mostly street use? I am running street tires MPS4 and do 4-5 DE's/ year
It has been my experience that if you do 5+ DE's a year the tires will heat cycle out long before they cord from having upper 2-ish negative camber on street.
It's definitely a great upgrade. I'm very happy my purchase with a year and a half of mixed track/street use.
I'm wondering if you've fine tuned the default file a bit more since I bought mine, which was back in late 2017. Would the file I get for a 4S be the same as what you guys use on all 991s? I really like the soft mode (I prob wouldn't mind a tad softer given roads around here are horrible) but more importantly I wonder if the stiff mode could be a bit stiffer. I did a few days on track with PASM fully disconnected (which defaults to full stiff mode, passive) and it felt a little better on track, which made me think there was a bit of extra room there.
Separately speaking, are you getting all that camber from the control arms on the AWD car, without camber plates? Isn't it stretching the axle out too far? When I tried those types of camber numbers, axle was frequently popping out of the diff so had to add camber plates to pull the struts in up top.
This box is awesome. Changed the behavior of my car on track significantly. Somewhat difficult to perceive on day to day, but the car leans on the bends far less. Less squatting on bar braking as well.
Let's hope Porsche is lazy enough to keep the PASM box untouched for the 992. Seems unlikely as there's new hardware coming.
It's definitely a great upgrade. I'm very happy my purchase with a year and a half of mixed track/street use.
Thanks for your feedback. We are very glad to know you are happy with your DSC!
Originally Posted by erko1905
I'm wondering if you've fine tuned the default file a bit more since I bought mine, which was back in late 2017. Would the file I get for a 4S be the same as what you guys use on all 991s?
The DSC standard file for 991's were the same in 2017. We have since added a file for 991 Turbo/S for the increased front axle weight. You should try this file to see if you like it. The Turbo/S file is available to download from DSC Sport website > Downloads > Calibration Files.
Originally Posted by erko1905
I really like the soft mode (I prob wouldn't mind a tad softer given roads around here are horrible) but more importantly I wonder if the stiff mode could be a bit stiffer.
The Default Rate(minimum damping value) in Normal Mode is 10%. It can easily be changes to 5% or even down to 1%. The change is made via DSC Tuner software. The DSC Tuner software is free on the DSC Sport website.
Originally Posted by erko1905
I did a few days on track with PASM fully disconnected (which defaults to full stiff mode, passive) and it felt a little better on track, which made me think there was a bit of extra room there.
The DSC calibration does leave a little bit of headroom for mechanical safety. So if you want, you could feed another 100mA on to Sport Mode or change the calibration curve to more progressive. If you find that on certain tracks the car can benefit from more stiffness with the dampers already full hard then its time to consider stiffer dampers, springs, and sway bars.
Originally Posted by erko1905
Separately speaking, are you getting all that camber from the control arms on the AWD car, without camber plates? Isn't it stretching the axle out too far? When I tried those types of camber numbers, axle was frequently popping out of the diff so had to add camber plates to pull the struts in up top.
This car has OEM front top mounts, with the struts tower slots all the way inward(which made the front camber -1.5 deg.) And then GT3 LCA's and shims were added to achieve -2.7 deg. Usually around -2.7 deg. of front camber is the most we prefer to run on AWD car to prevent premature wear of the CV joints.
We make front axle spacer kit to prevent axle pop out after increasing front track width and negative camber increase.
This box is awesome. Changed the behavior of my car on track significantly.
Thank you! Very glad you like the DSC!
Originally Posted by John Mclane
Somewhat difficult to perceive on day to day, but the car leans on the bends far less.
Like I said in the previous post, if you're up for it the comfort level for day to day can be adjusted to be softer without compromising aggressive cornering and braking.
Originally Posted by John Mclane
Less squatting on bar braking as well.
That's the Dynamic in DSC!
Originally Posted by John Mclane
Let's hope Porsche is lazy enough to keep the PASM box untouched for the 992. Seems unlikely as there's new hardware coming.
you are right, it is pretty straightforward thing to do .... and very worthwhile in my opinion ..... did mine about 2 years ago (which I would have had these photos back then) .... the hardest part was getting the %^# connectors to pop off the old unit.....
From what I am reading here and elsewhere it seems that this is more beneficial for cars that see track time, right? I am wondering if my street driven Targa GTS, without PDCC, would benefit from this unit.
From what I am reading here and elsewhere it seems that this is more beneficial for cars that see track time, right? I am wondering if my street driven Targa GTS, without PDCC, would benefit from this unit.
that's not the case; I did not like the behavior of the OEM PASM on my 2015 GTS Cabriolet, so I installed a DSC on it and now run the 991 GT3 maps and I love the DSC's performance.
Installed mine today. Couple of observations hardest parts of the install were getting the carpet unhooked at the ends, a small long screwdriver helped tease it free. The other hard part was the larger of the two cables that fitting did not want to come open. Finally got it and install of the new one was easy.
Also so got a test ride in. Definitely more compliant overall than factory even in sport mode. Car was flatter through turn transitions and u set moderately hard breaking. Test route was Blue Ridge Parkway and RT 215 (think Tail of the Dragon twisties). Pushed the car within reason PDK manual, Sport Chassis, Sport Plus, vs PDK manual sport mode comfort chassis. Noticed real difference. Comfort mode definitely more comfortable until you push it then stiffens up.
Overall first impression is worth it. Now for some more mountain roads and track time.