When you click on links to various merchants on this site and make a purchase, this can result in this site earning a commission. Affiliate programs and affiliations include, but are not limited to, the eBay Partner Network.
Step 1 - Plug in your Battery Tender and remove all the stuff out of your frunk. You will be standing IN the frunk to perform this task.
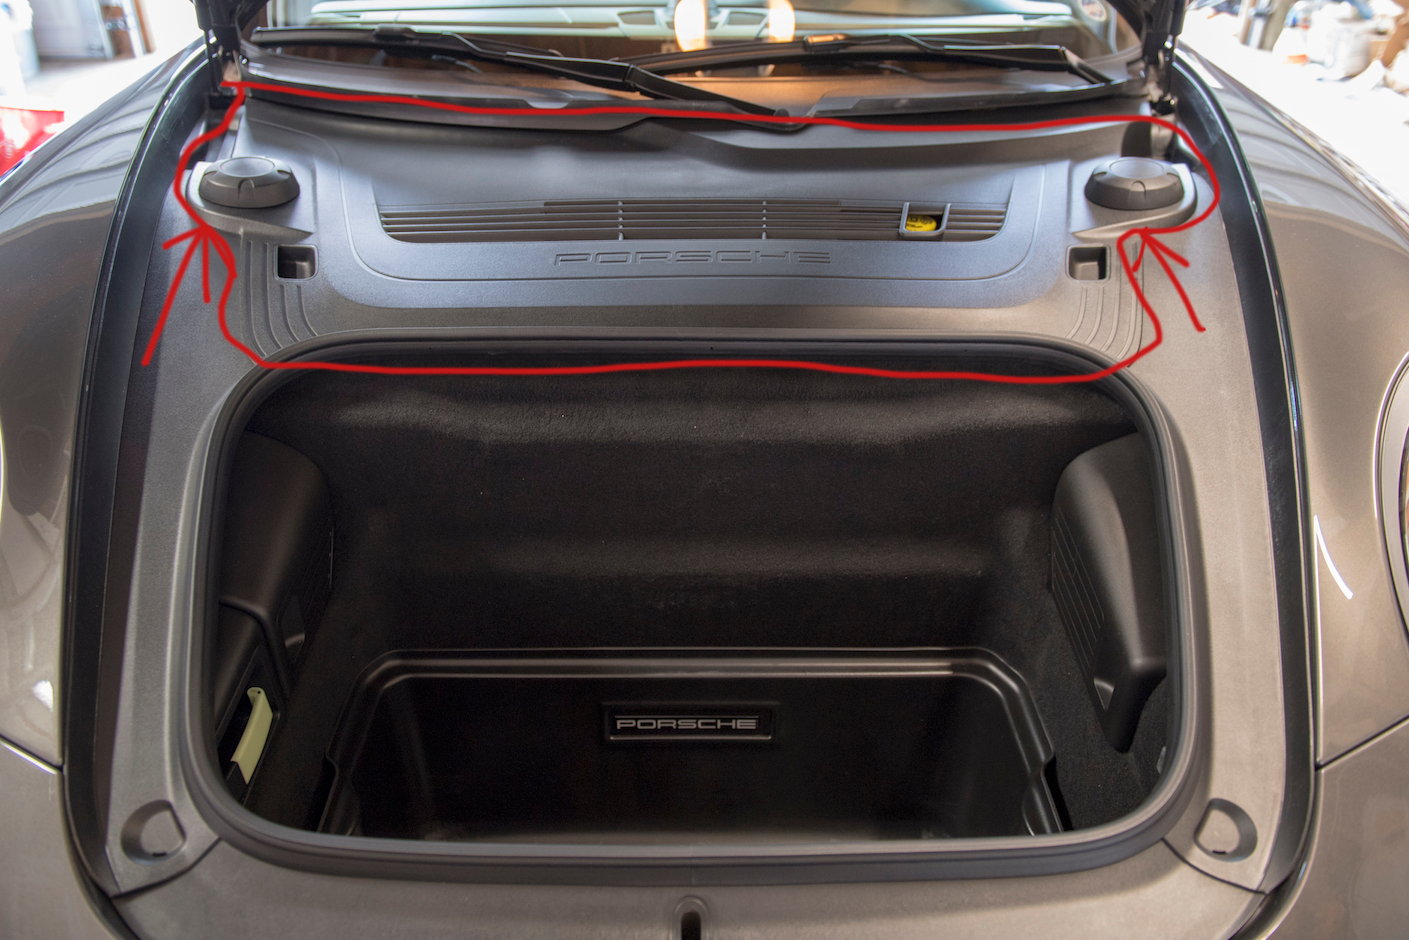
Step 2 - Open the Frunk and remove the top cover with the Porsche stamp on it.
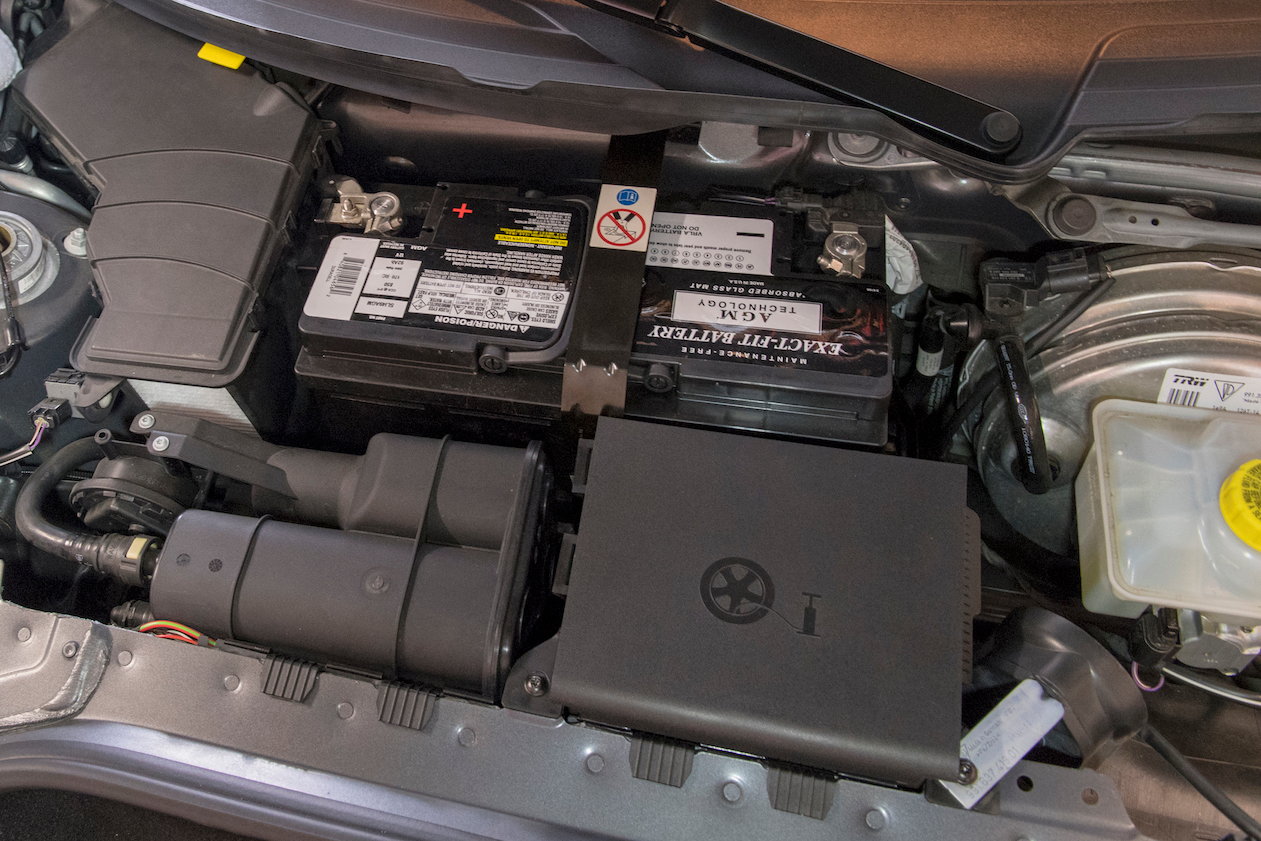
Step 3 - Unlatch by hand the tire pump cover clips (right side of box) and lift out the pump.
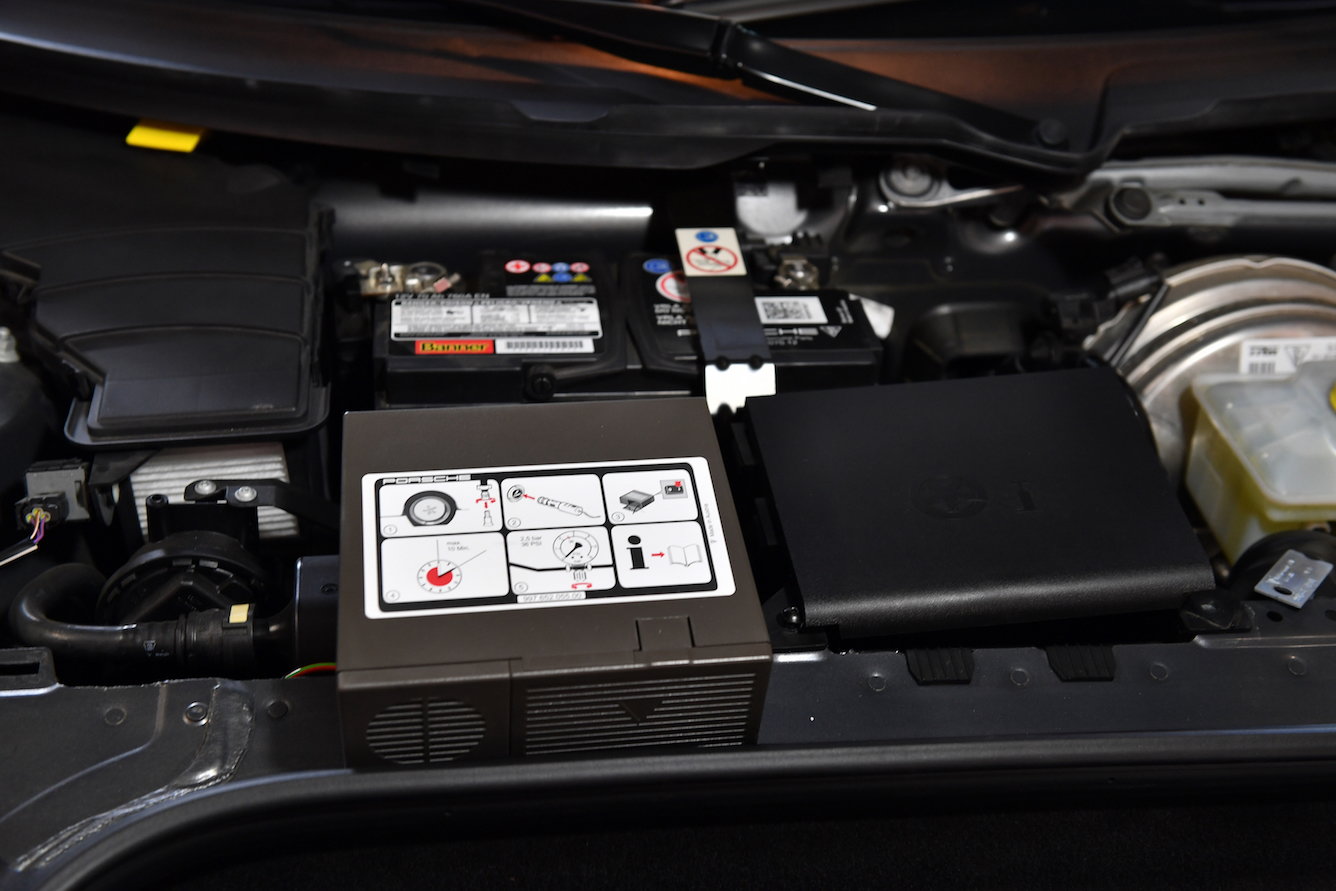
4. Remove the tire repair pump cover by unhooking the two hinges on the left side of the box. Using T20 Torx, remove the two screws that secure the tire repair pump housing case. The horn falls to the side once the torx screw is removed; you'll see how the metal tab sits on the pump housing case. Note - photo shows one screw already removed.
5. Once the two T20 screws are removed, lift the tire repair kit housing out of the frunk. It is secured by four metal tabs at the bottom of the case. Lift straight up and out.
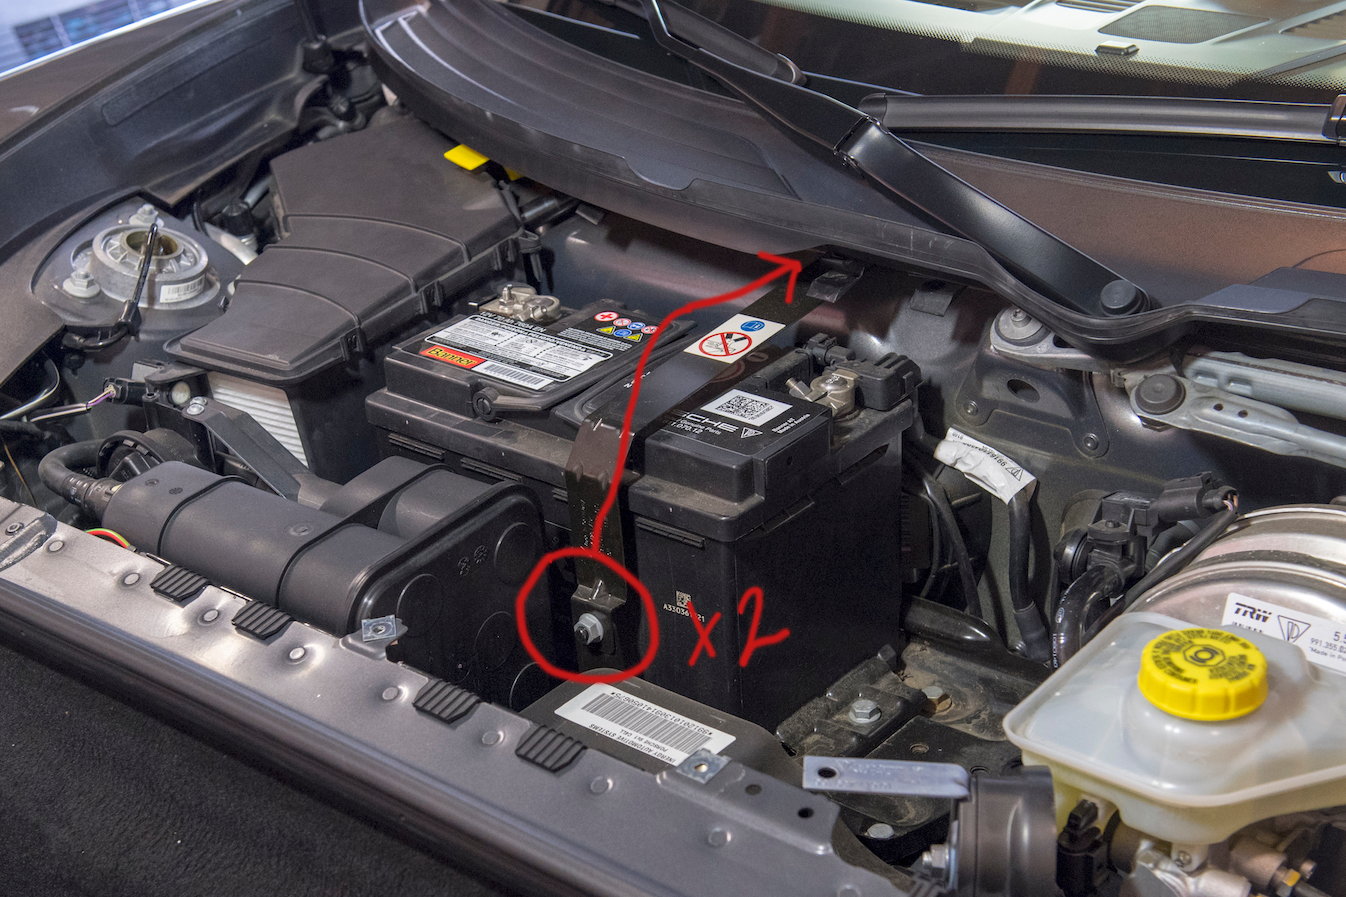
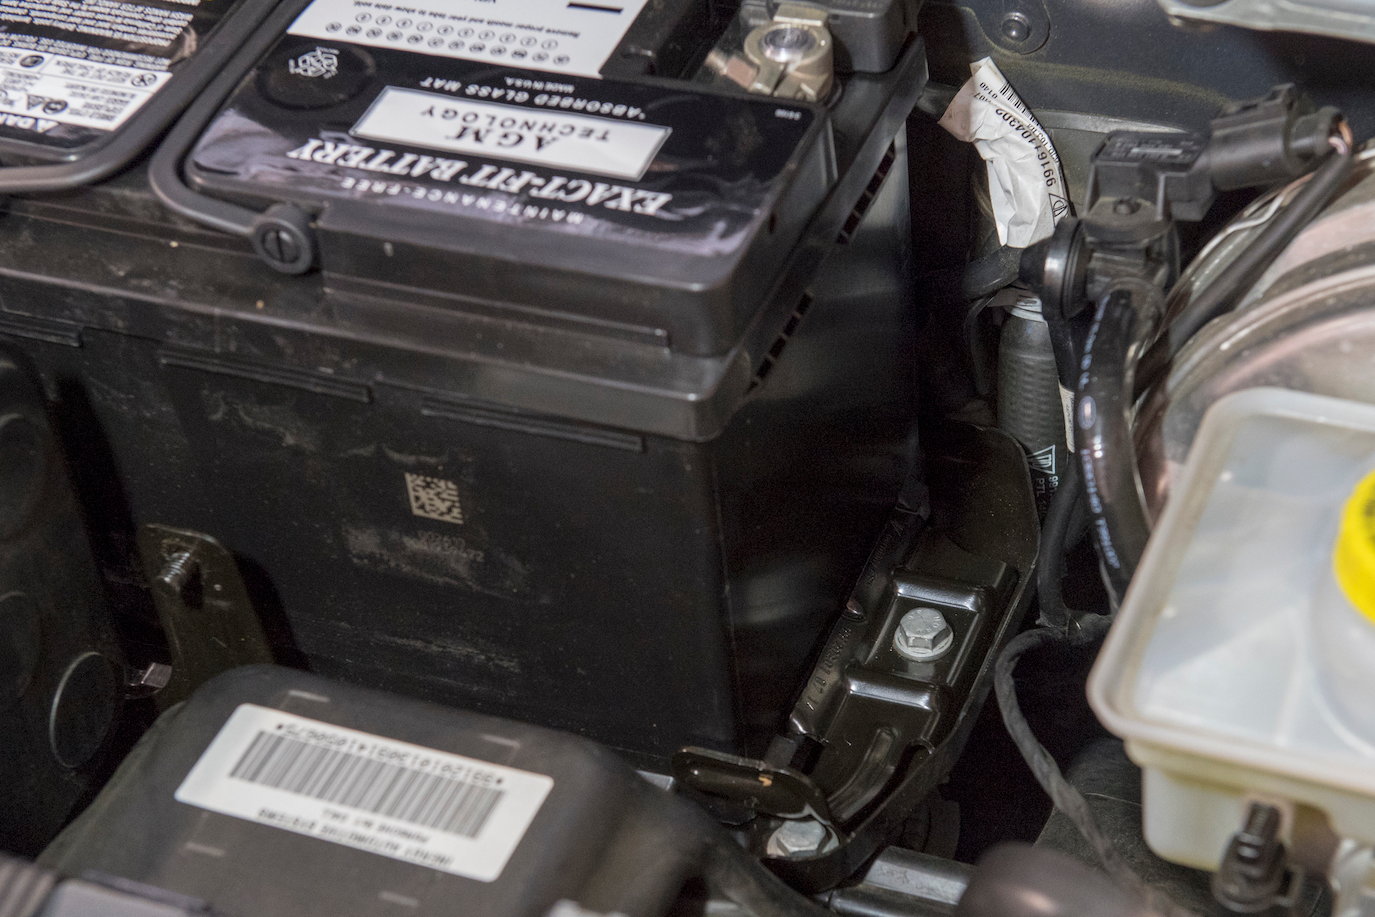
6. Using a 13mm socket, remove the two nuts that secure the bracket over the top of the battery. If you have Presidential sized hands, you should have no issue getting out the hidden 13mm nut, otherwise just take care that it doesn't fall behind the battery. :-)
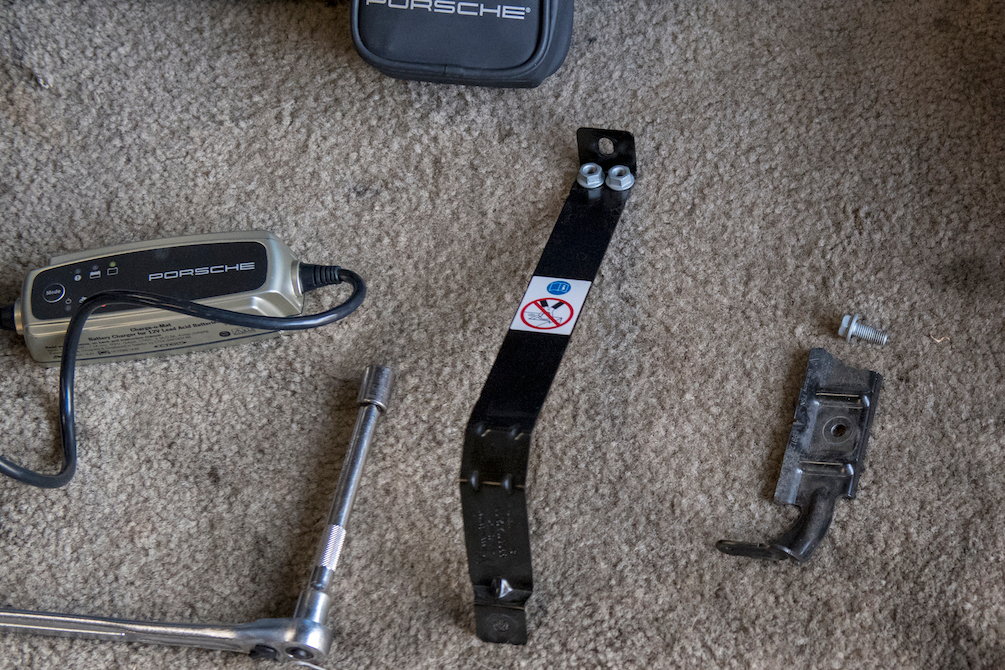
7. Using 13mm socket, remove the Battery base securing bracket.
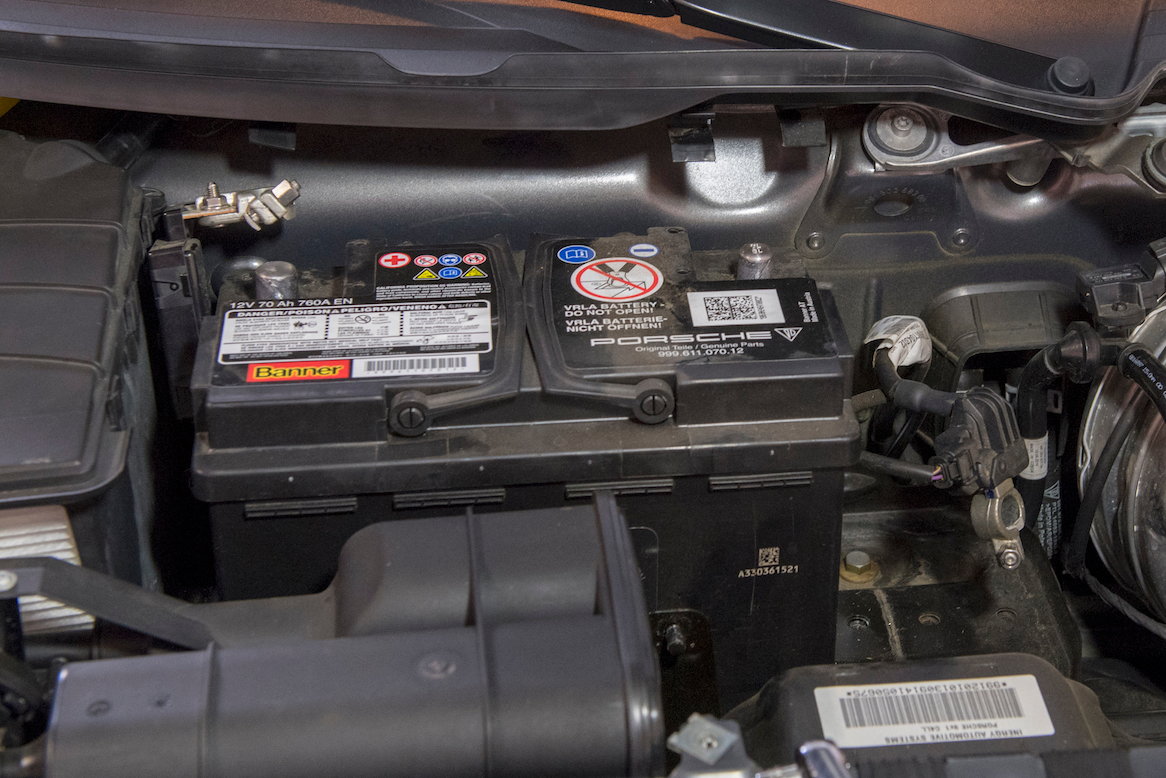
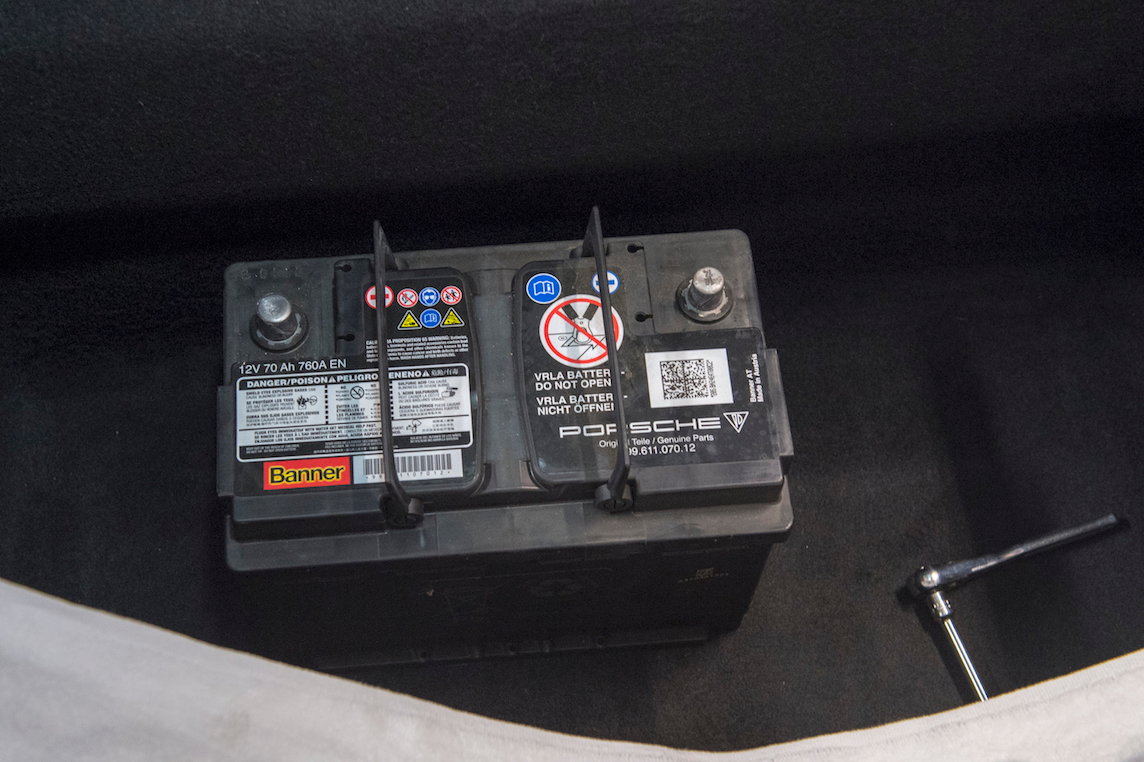
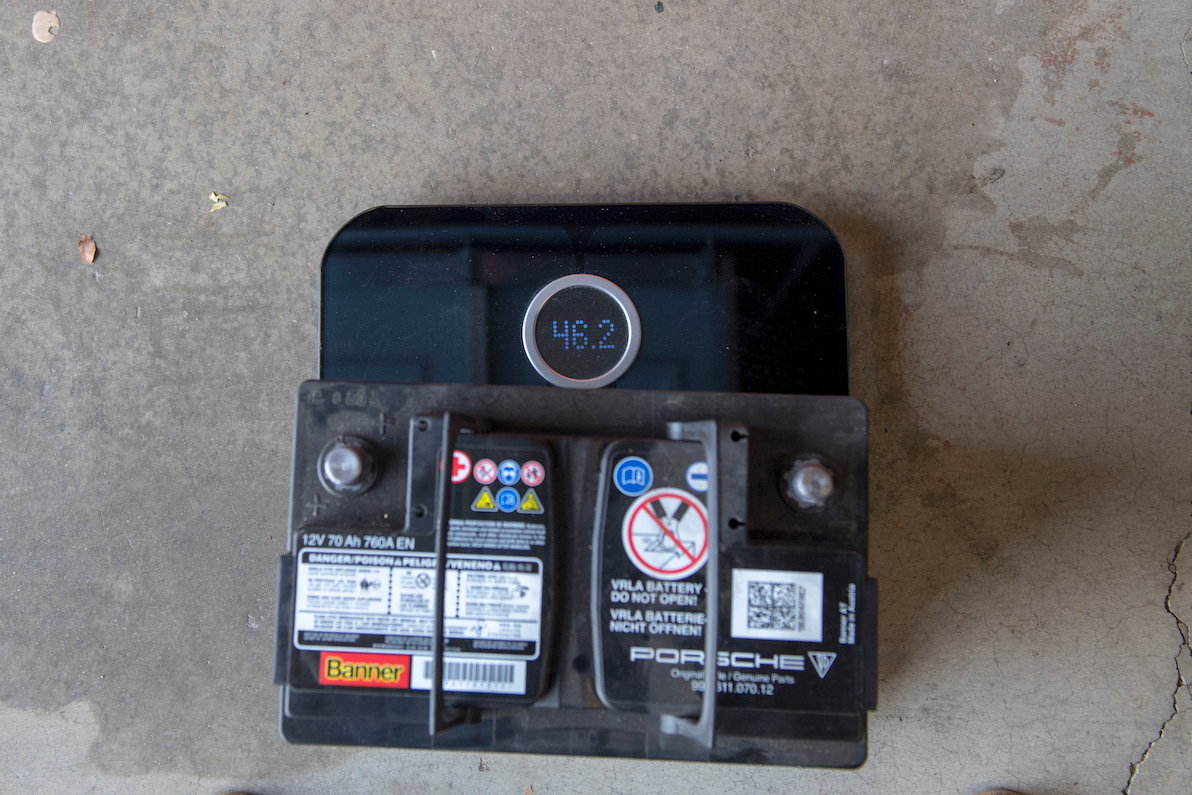
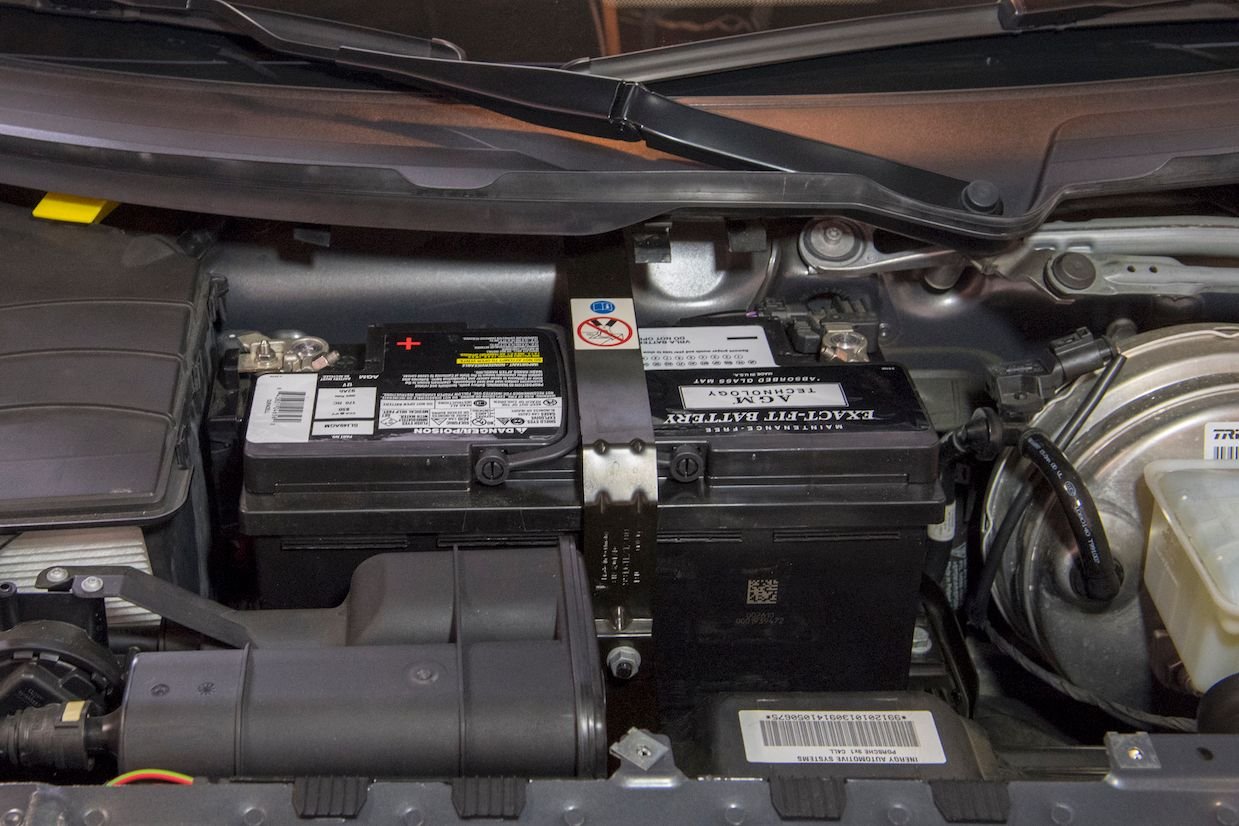
8. Time to remove the Battery. Take off any rings on your hand and using a 10mm socket, first loosen the angled NEGATIVE battery cable nut and lift the NEGATIVE cable away from the battery lead. This is the cable closest to the drivers side door. Then loosen the POSITIVE battery cable nut which is the cable closest to the passenger side door. Lift POSITIVE cable away from the lead. While standing in the Frunk, lift the battery with it's integrated handles straight up and out. Place battery at your feet. Take care not to hurt your back. Battery weighs a bit over 46 lbs. Step out of the Frunk and lift the battery out of the car.
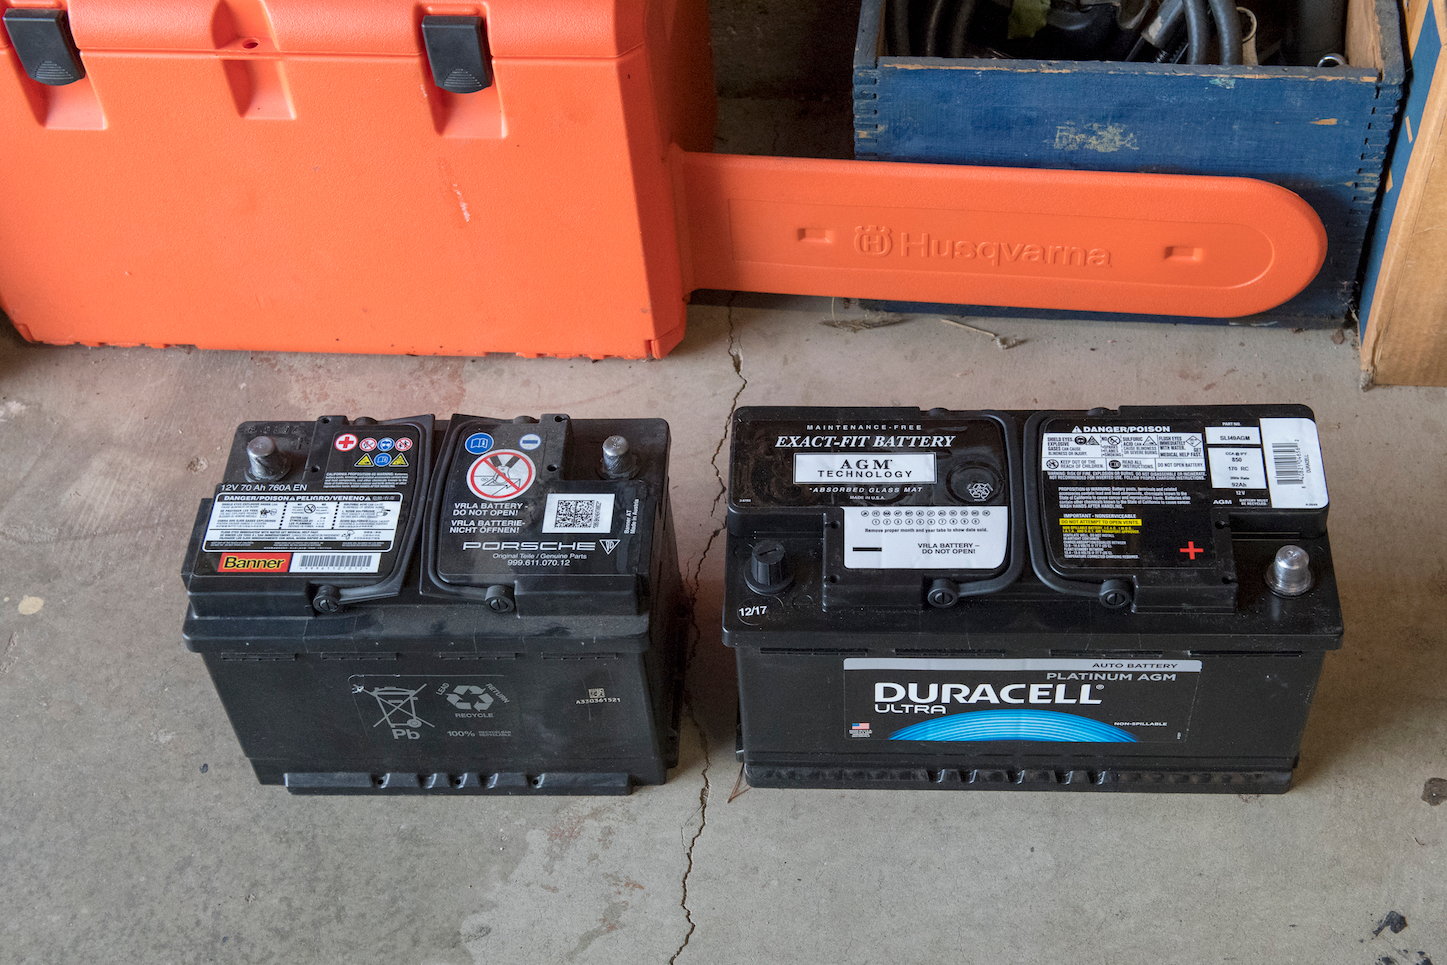
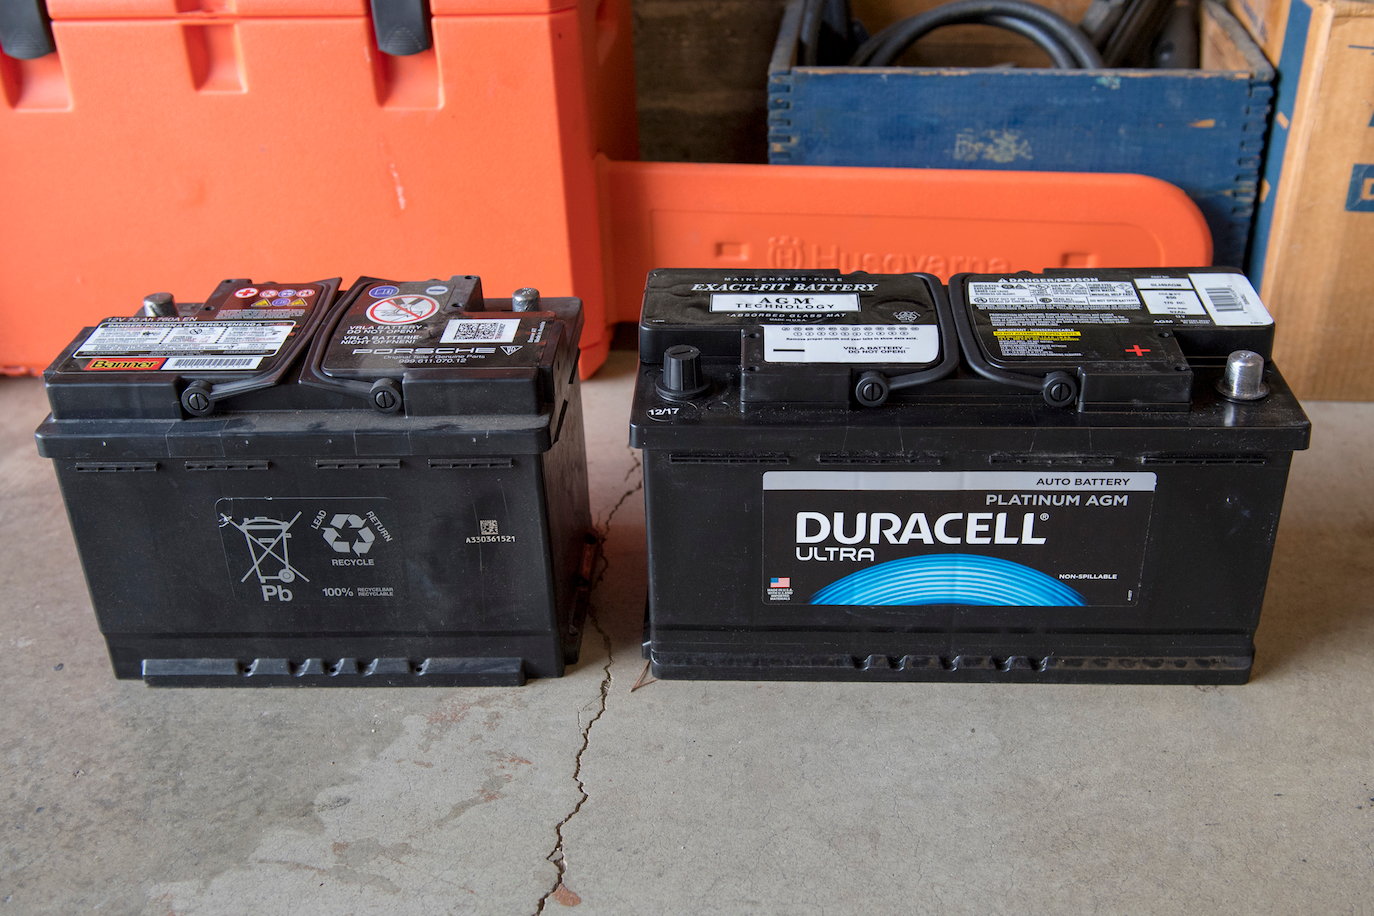
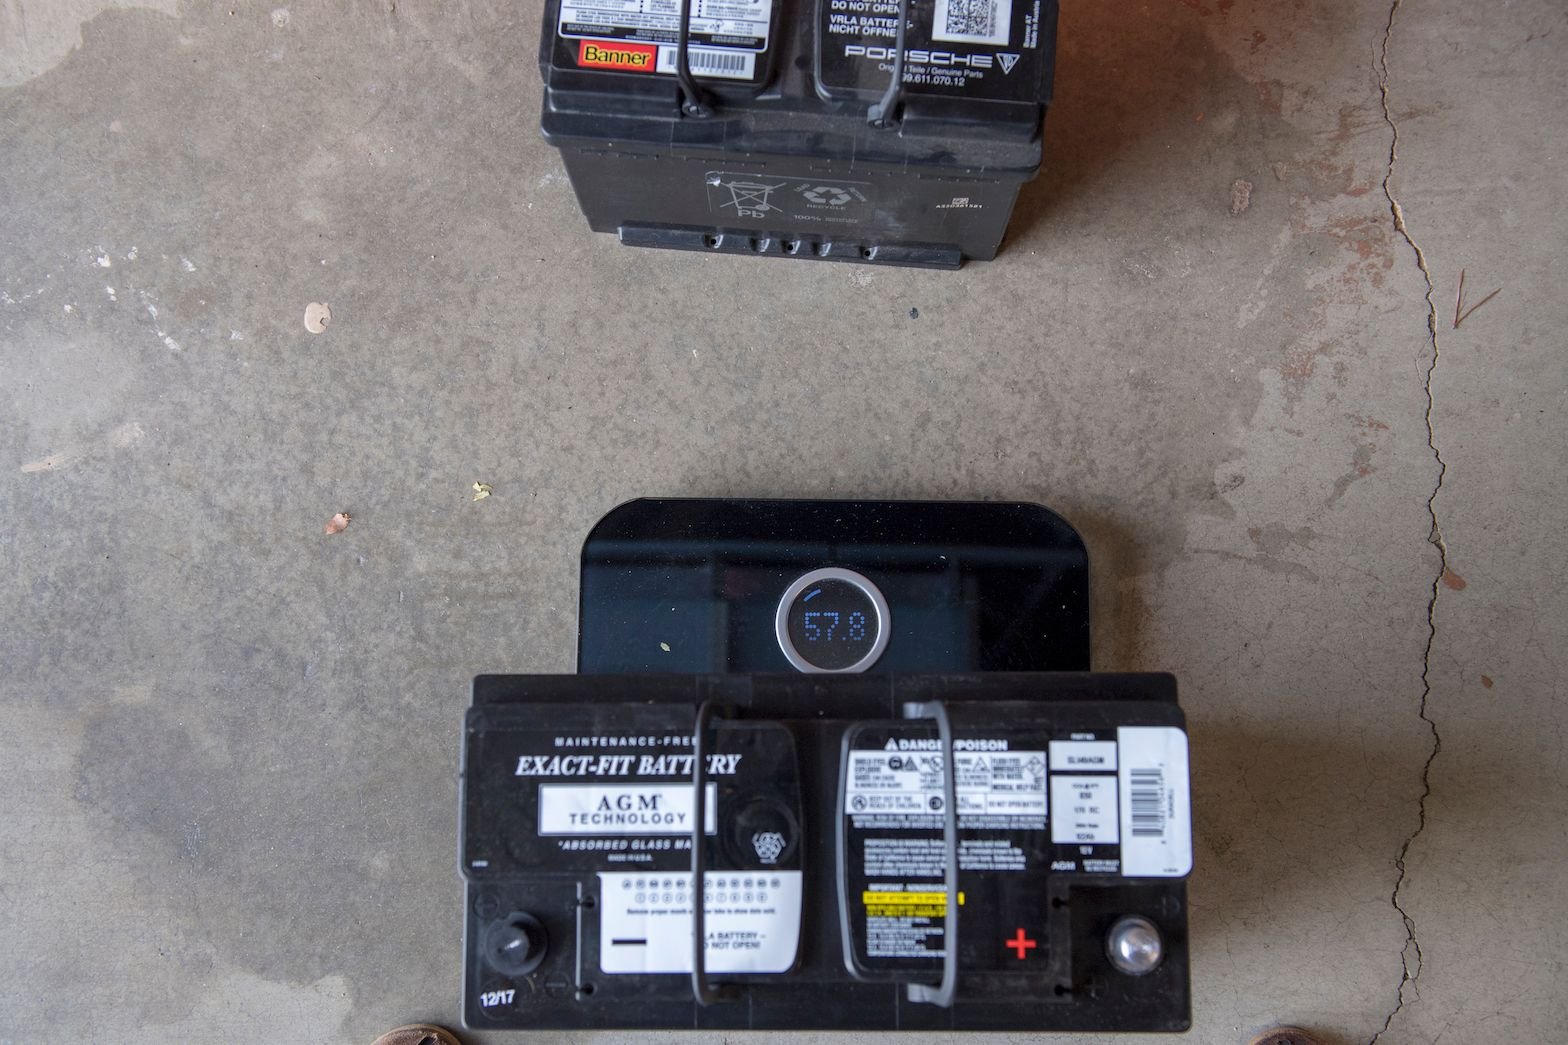
9. Battery comparisons.
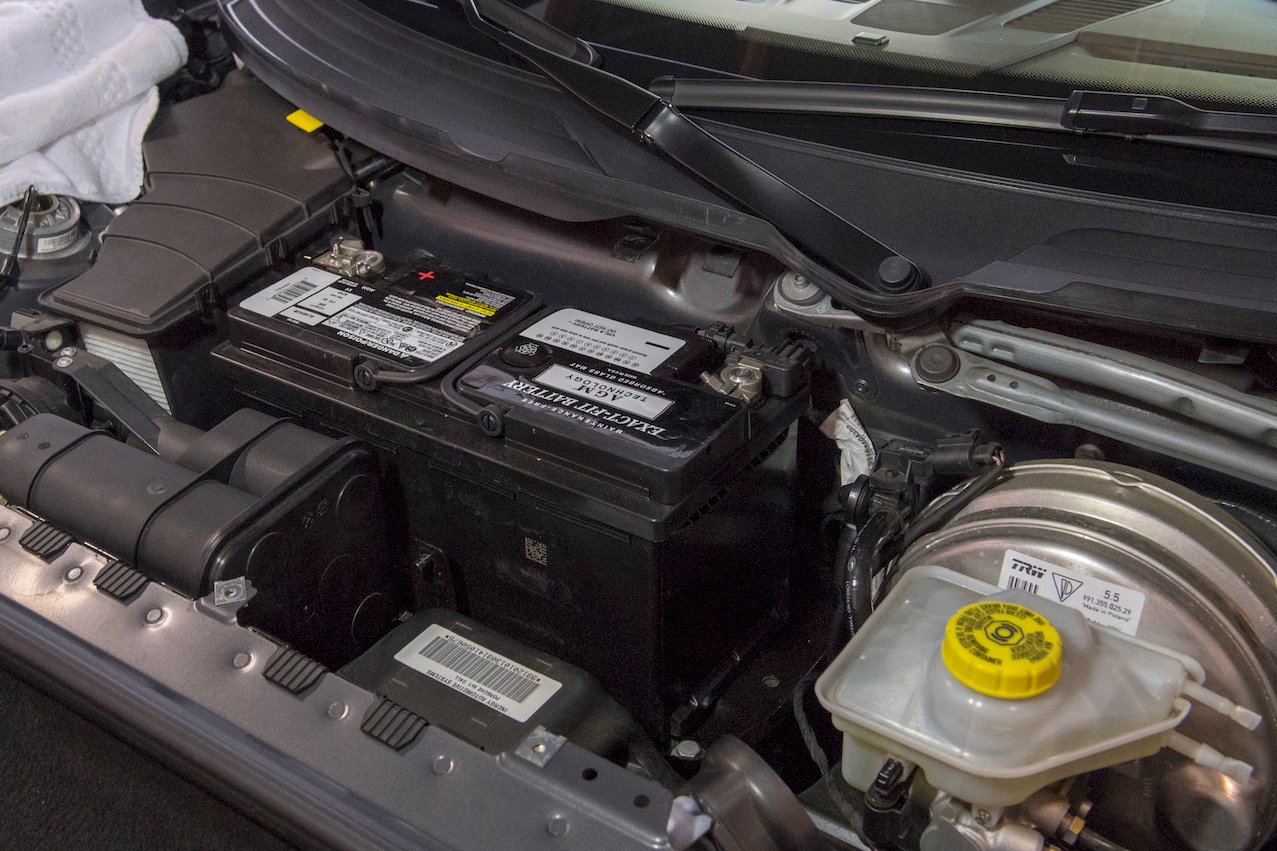
10. Time to install new battery. Take care again not to hurt your back by doing this in two steps. Using the integrated handles on the new battery, lift the pig of a Duracell battery and place into the Frunk. Step into Frunk and lift the battery into place on the battery tray. NOTE - The proper orientation of the new battery with positive lead closest to the passenger door has the labels facing away from you (upside down). Connect and tighten down the POSITIVE lead first and then the NEGATIVE lead.
11. Install the base bracket. Note that the last hole is used to secure the bracket and fits perfectly.
12. Reinstall the bracket over the top of the battery, no clearance issue.
13. Next put the tire pump box and kit back into the car; pay attention that the lower tabs seat properly. Re-attach the two T20 torx screws.
14. Put the Tire Pump cover back on.
15. Put the Porsche cover back on, disconnect the tender, and boom you are done. Miller time. NOTE - this procedure resulted in NO car equipment memory loss. No alerts on the dash, no need to have windows re-learned, etc.
Yikes! 58 lb battery up high? I'll be looking at Braille batteries when mine needs one, not sure which size I will need however I will dig into it when the time comes:
Yikes! 58 lb battery up high? I'll be looking at Braille batteries when mine needs one, not sure which size I will need however I will dig into it when the time comes:
For old battery removal, I always thought you are supposed to remove negative terminal first, then positive terminal to avoid shorting something out. Then for the replacement battery, the opposite -- positive terminal connection first and then negative terminal connection. .
For old battery removal, I always thought you are supposed to remove negative terminal first, then positive terminal to avoid shorting something out. Then for the replacement battery, the opposite -- positive terminal connection first and then negative terminal connection. .
You are correct. I had mine backwards in the write up. You should remove the NEG first, and install the NEG last. Corrected now in write up.
Thanks for the write up. What was the reason you chose that Duracell AGM battery? Although it obviously fits fine it is larger and heavier. Does it have greater capacity or?


 12-31-2017, 05:13 PM


