When you click on links to various merchants on this site and make a purchase, this can result in this site earning a commission. Affiliate programs and affiliations include, but are not limited to, the eBay Partner Network.
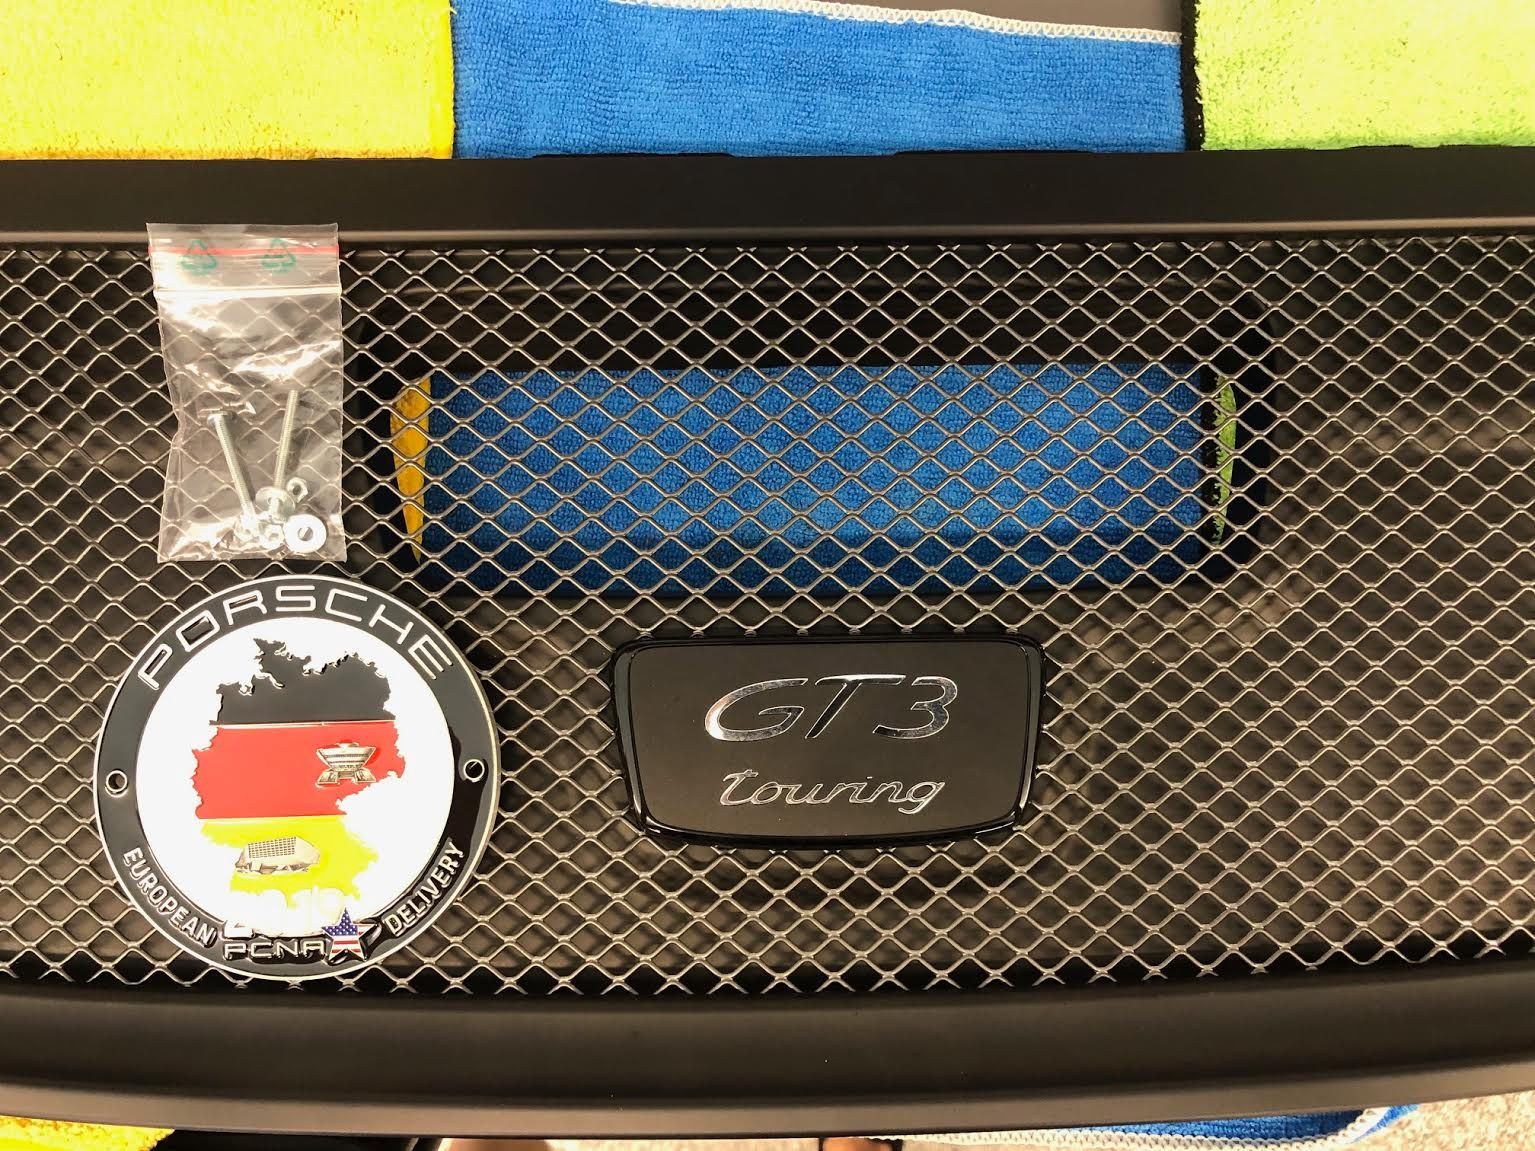
Porsche gave me a sweet European Delivery Grille Badge right before we picked up the car in Stuttgart a couple months ago. Now that the car has made it back to the states, I am trying to figure out how to install it to the rear grill of the touring. Removing the grill from the rear deck is easy, but getting the actual grill part separated from the plastic bits looks to have a high risk of breaking fragile plastic. I can't seem to figure out how to make it work without taking the grill all apart. I found a pic on Instagram of another car that has a couple of these installed on the back, but haven't been able to get an answer on how If anyone has any recs, I'd appreciate it. Thanks!
Porsche gave me a sweet European Delivery Grille Badge right before we picked up the car in Stuttgart a couple months ago. Now that the car has made it back to the states, I am trying to figure out how to install it to the rear grill of the touring. Removing the grill from the rear deck is easy, but getting the actual grill part separated from the plastic bits looks to have a high risk of breaking fragile plastic. I can't seem to figure out how to make it work without taking the grill all apart. I found a pic on Instagram of another car that has a couple of these installed on the back, but haven't been able to get an answer on how If anyone has any recs, I'd appreciate it. Thanks!
I did this. Used stainless screws and washers and nuts. I carefully held a nut with needle nose vice grips in the vent opening from below and screwed the bolt in from above. Lots of loctite.
I did this. Used stainless screws and washers and nuts. I carefully held a nut with needle nose vice grips in the vent opening from below and screwed the bolt in from above. Lots of loctite.
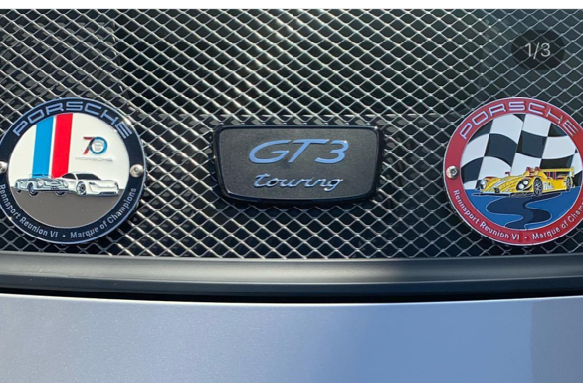
Nice. I just got the white 70 year Porsche badge.
But dont you think it shouldn�t be right above the fan vent?
Hi! Thanks for the picture! (I posted in the official pictures thread but we can continue here). What's the spec of the new net? Do you have a link to where you bought it? Did you cut it yourself? What did you do with the "steering pin"- holes in the inner skin? They look covered now in some way? Thanks in advance!
Can you supply some details please? Did you get new mesh? Did you cut the rivets? How was it done?
Originally Posted by erik_plus8
Hi! Thanks for the picture! (I posted in the official pictures thread but we can continue here). What's the spec of the new net? Do you have a link to where you bought it? Did you cut it yourself? What did you do with the "steering pin"- holes in the inner skin? They look covered now in some way?
Below is the photo of the original parts (which I kept, easily reversible). As you can see the original mesh has a profile to it. The badge itself was on a double sided sticky tape. You remove the cassette (the black plastic trim you see around the mesh), and the mesh is sandwiched inside. We were able to carefully prize open the clips on one side of the cassette and fish out the mesh.
We've bought new mesh, it's not a perfect match but close enough. Powder coated it satin black to match other meshes around the exterior of the car. New mesh doesn't really have the profile that the original did, unfortunately.
The two wholes for the pins in the badge are covered with a cutout of black plastic, also stuck down with double sided tape. Looks close enough to original, I feel, and a bit more "hot rod"!

 06-08-2019, 02:51 PM