Notices
987 Forum Discussion about the Cayman/Boxster variants (2004-2012)
Sponsored by:
Sponsored by:

2012 CAYMAN R "RS" BUILD THREAD

Thread Tools
 
Search this Thread
 
Old 11-27-2021, 05:22 AM
  #16  
Kuro Neko
Three Wheelin'
 
Kuro Neko's Avatar
 
Join Date: Dec 2018
Location: Tokyo
Posts: 1,569
Likes: 0
Received 1,769 Likes on 669 Posts
Default

Originally Posted by EHP Racing

Snap!


Loving the rest of the pics too, I really enjoy the details...
The following users liked this post:
EHP Racing (11-27-2021)
Old 11-27-2021, 09:41 AM
  #17  
NAMR6MT
Racer
 
NAMR6MT's Avatar
 
Join Date: Jan 2020
Location: Chester County, PA
Posts: 348
Received 148 Likes on 97 Posts
Default

An R paired with a VO 1M...Is there anyone else on planet earth with this combo?
Old 11-27-2021, 12:57 PM
  #18  
EHP Racing
Rennlist Member
Thread Starter
 
EHP Racing's Avatar
 
Join Date: Aug 2020
Location: Los Banos, CA
Posts: 295
Received 186 Likes on 83 Posts
Default

Originally Posted by joseph mitro
You're a brave man to permanently modify a Cayman R. Very nice attention to detail
Haha I’ve been getting that a lot. Really, if I wanted to go back to 100 % stock I could but would just have a couple extra holes drilled here and there 😆
Old 11-27-2021, 12:58 PM
  #19  
EHP Racing
Rennlist Member
Thread Starter
 
EHP Racing's Avatar
 
Join Date: Aug 2020
Location: Los Banos, CA
Posts: 295
Received 186 Likes on 83 Posts
Default

Originally Posted by stjoh
Great build, very similar to mine. You're going to love it.

https://rennlist.com/forums/market/1273191

Suggest you take a close look at the Ohlins for shocks, really good. Then you just need to get the 3.8...
Great build! A 3.8 would be the last piece of the puzzle. Maybe later down the line it may be feasible for me
Old 11-28-2021, 06:25 PM
  #20  
EHP Racing
Rennlist Member
Thread Starter
 
EHP Racing's Avatar
 
Join Date: Aug 2020
Location: Los Banos, CA
Posts: 295
Received 186 Likes on 83 Posts
Default


Rennline pedal set installed, so much better! I simply followed the provided instructions. I didn’t find it necessary to remove the throttle pedal as others suggested but it does make lining everything up perfectly a bit awkward. Remember, measure 100 times drill once !

Last edited by EHP Racing; 12-05-2021 at 12:12 AM.
The following 2 users liked this post by EHP Racing:
fouckhest (11-29-2021), palestar (11-29-2021)
Old 12-01-2021, 12:41 PM
  #21  
EHP Racing
Rennlist Member
Thread Starter
 
EHP Racing's Avatar
 
Join Date: Aug 2020
Location: Los Banos, CA
Posts: 295
Received 186 Likes on 83 Posts
Default

Finally got my paint estimate but the parts won’t be getting painted until the end of the month due to how busy all shops are at the moment. In the meantime, I will be paint correcting the car, ceramic coating it, re coating the interior, and bringing all the exterior plastics back to life.

I’ve also been triple checking all of the gaps to ensure they’re as close to perfect as I can get them since the shop will be just prepping and painting the parts off the car and not doing any refitting. I forget these parts are meant for race cars and my OCD wants to kick in for the small imperfections that 99% of people won’t notice but I know are there.

I need to find a place in the Bay Area that does anodizing to refinish my uprights in the factory RS silver finish so if anyone has a recommendation please let me know!


Last edited by EHP Racing; 12-16-2021 at 04:01 AM.
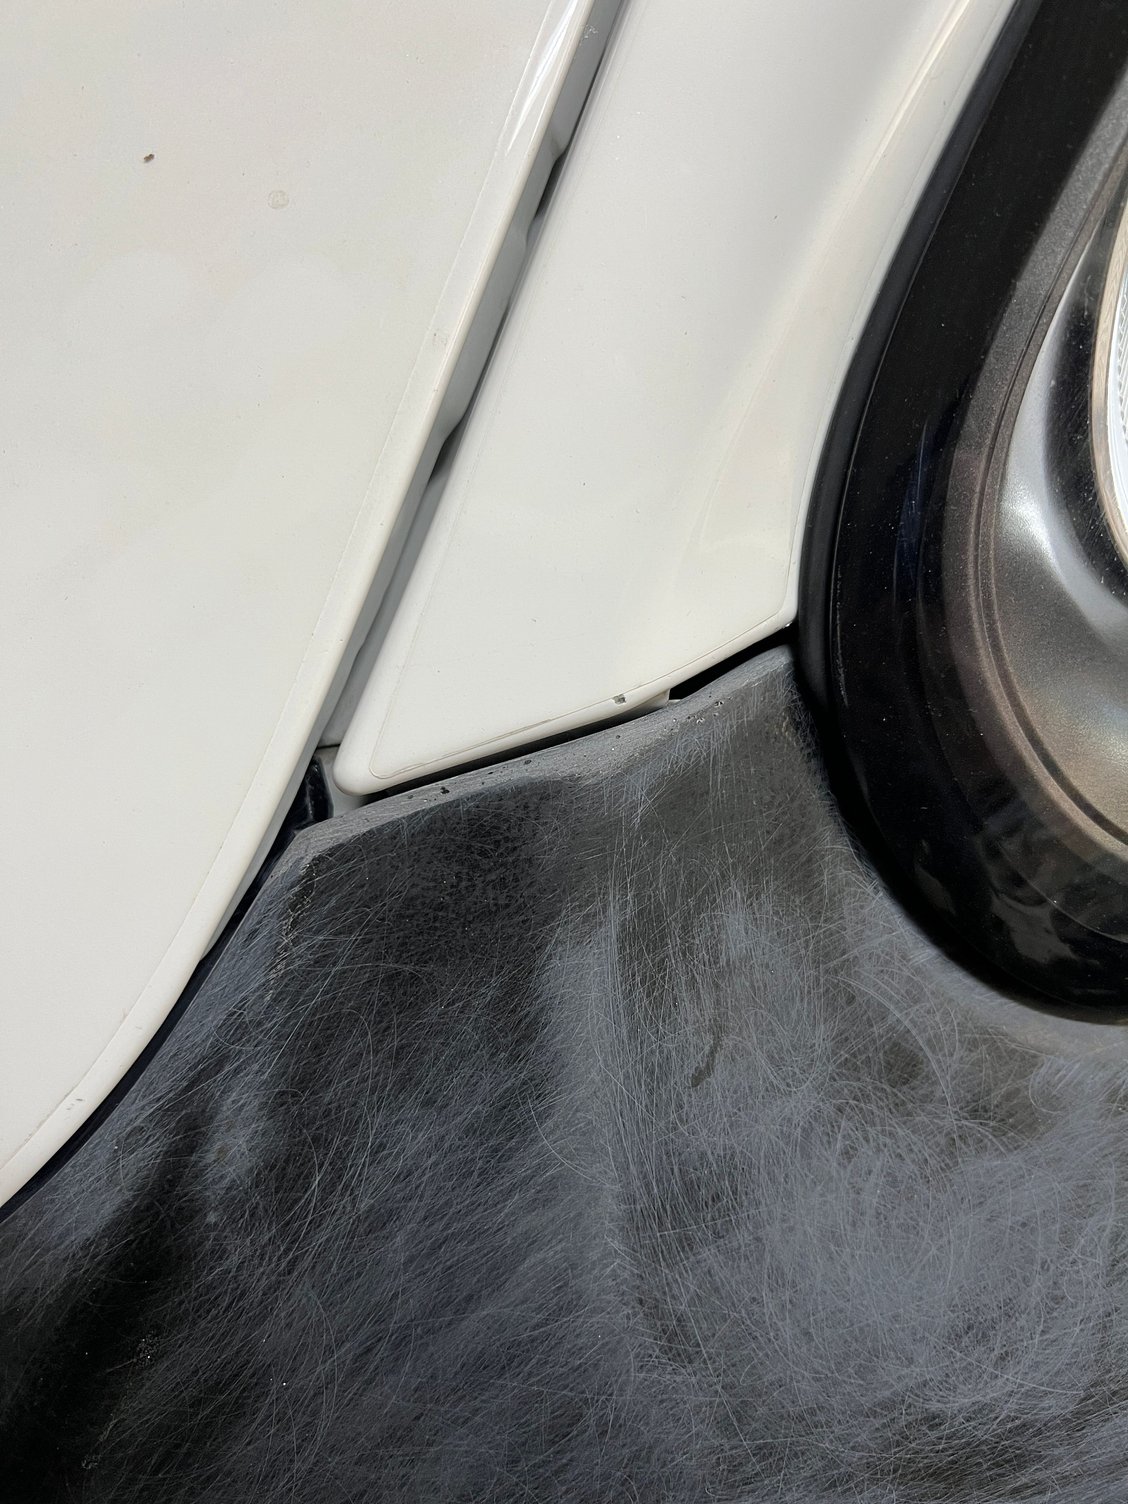
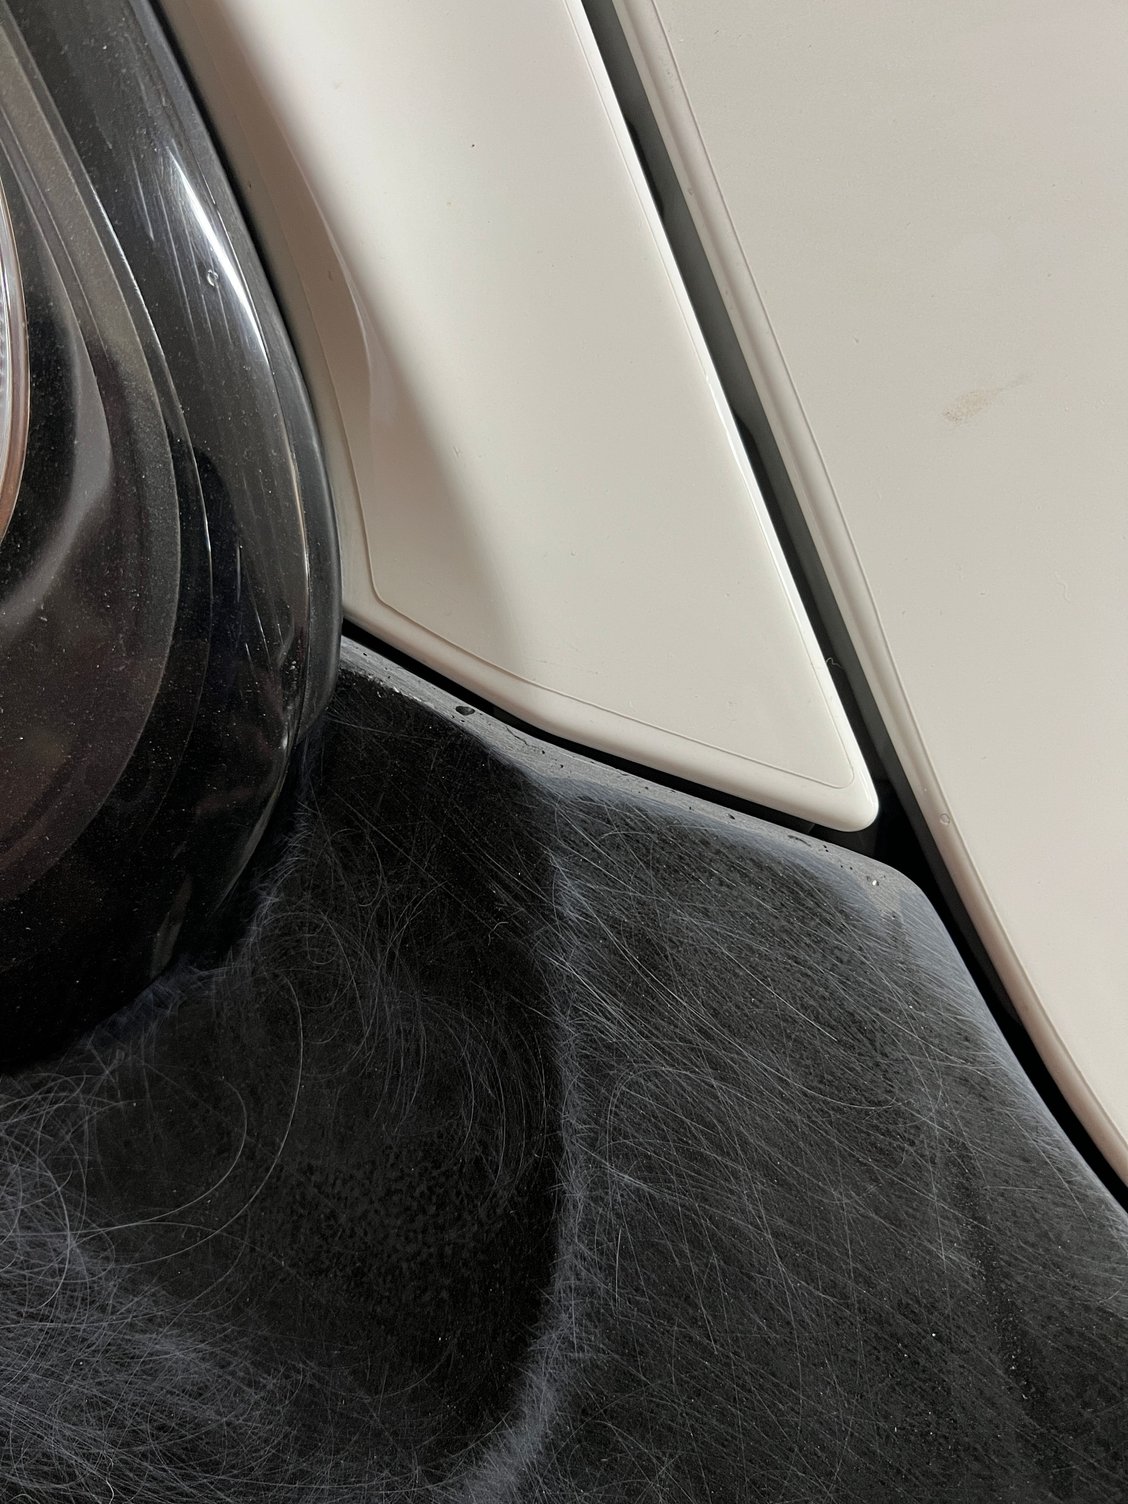
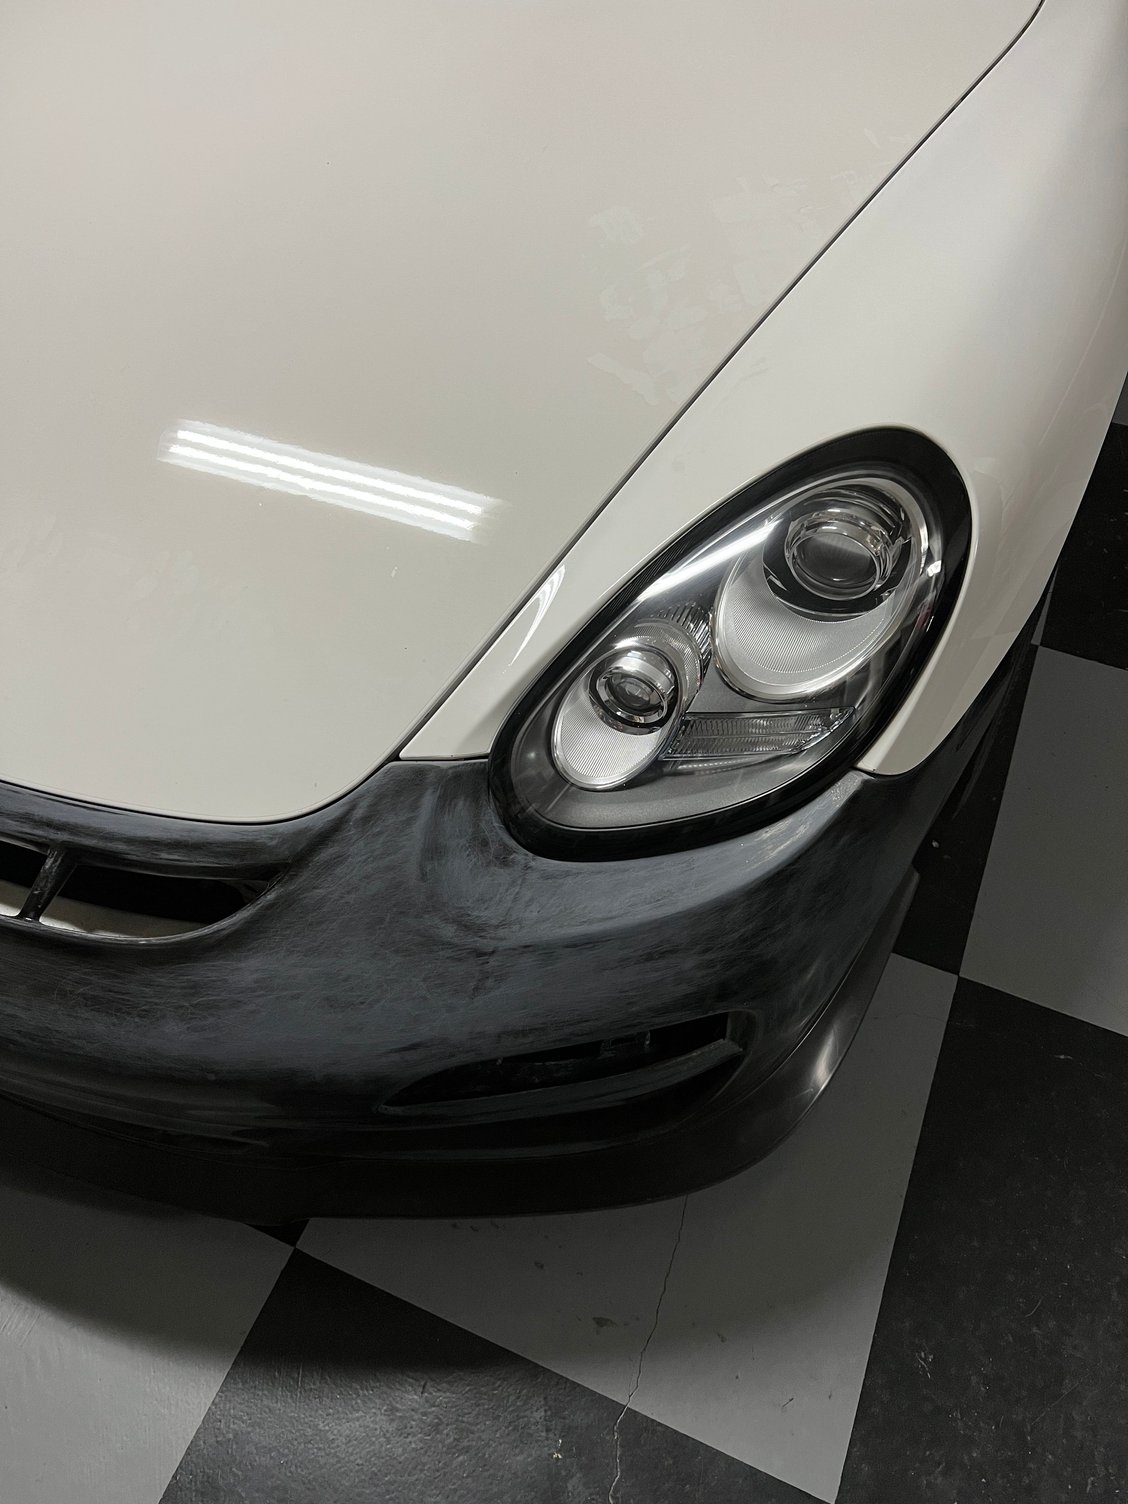
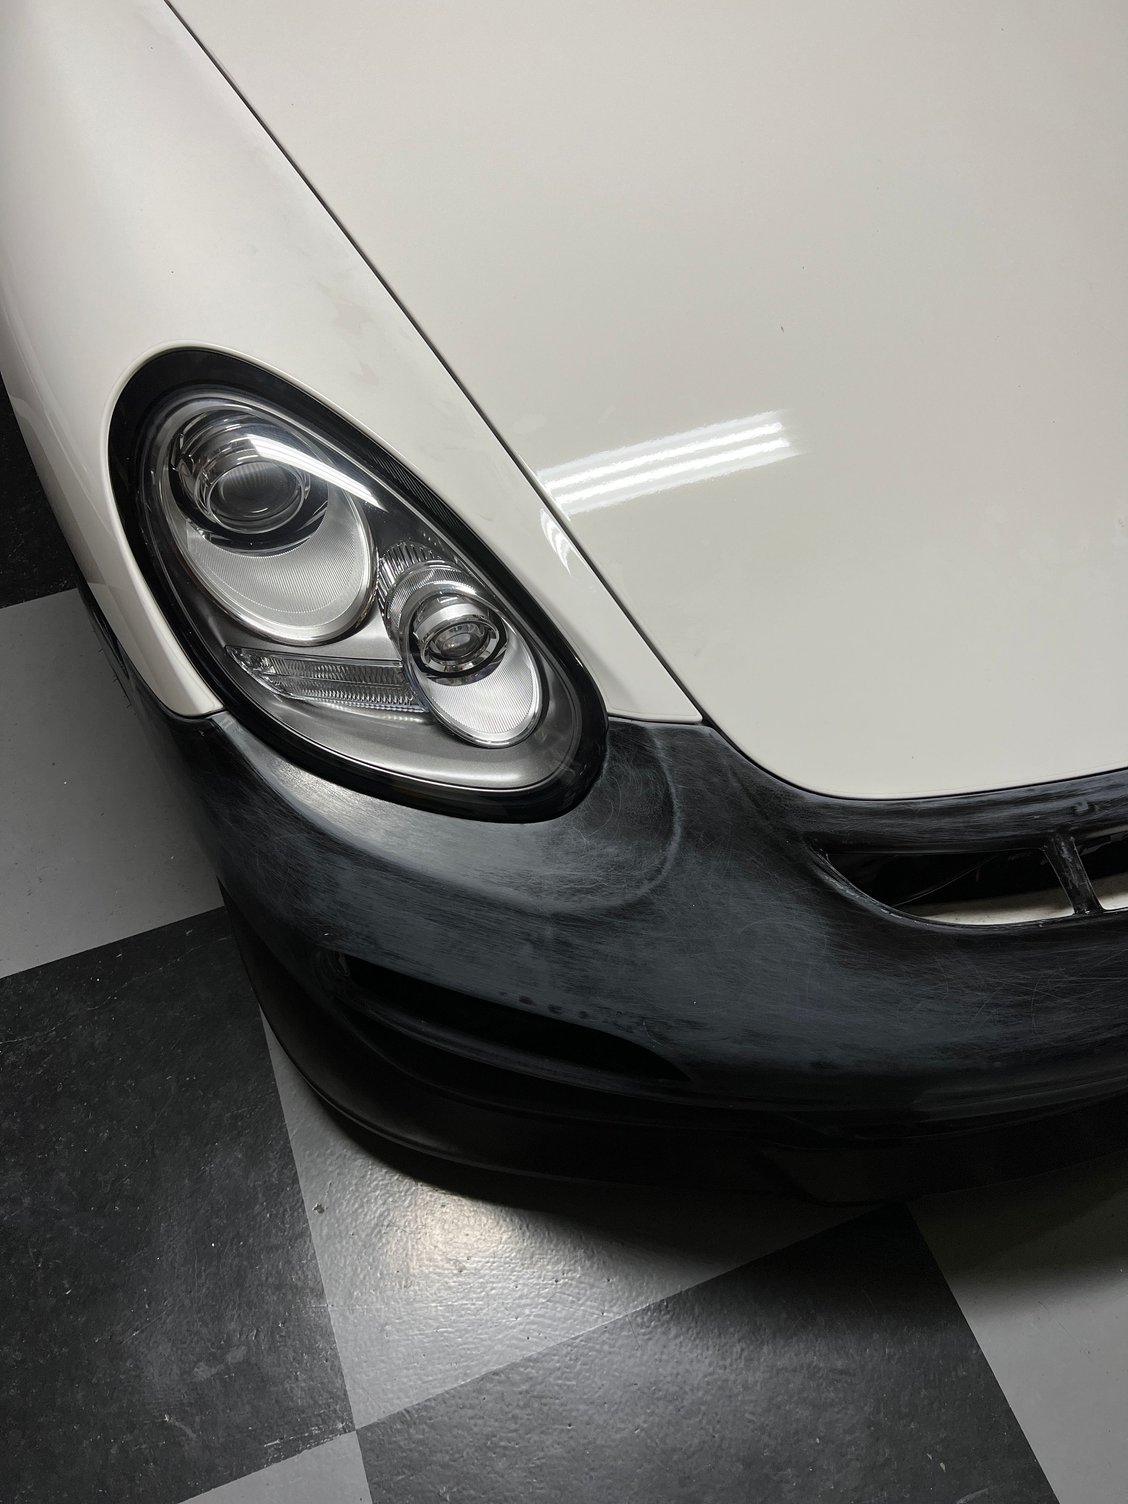
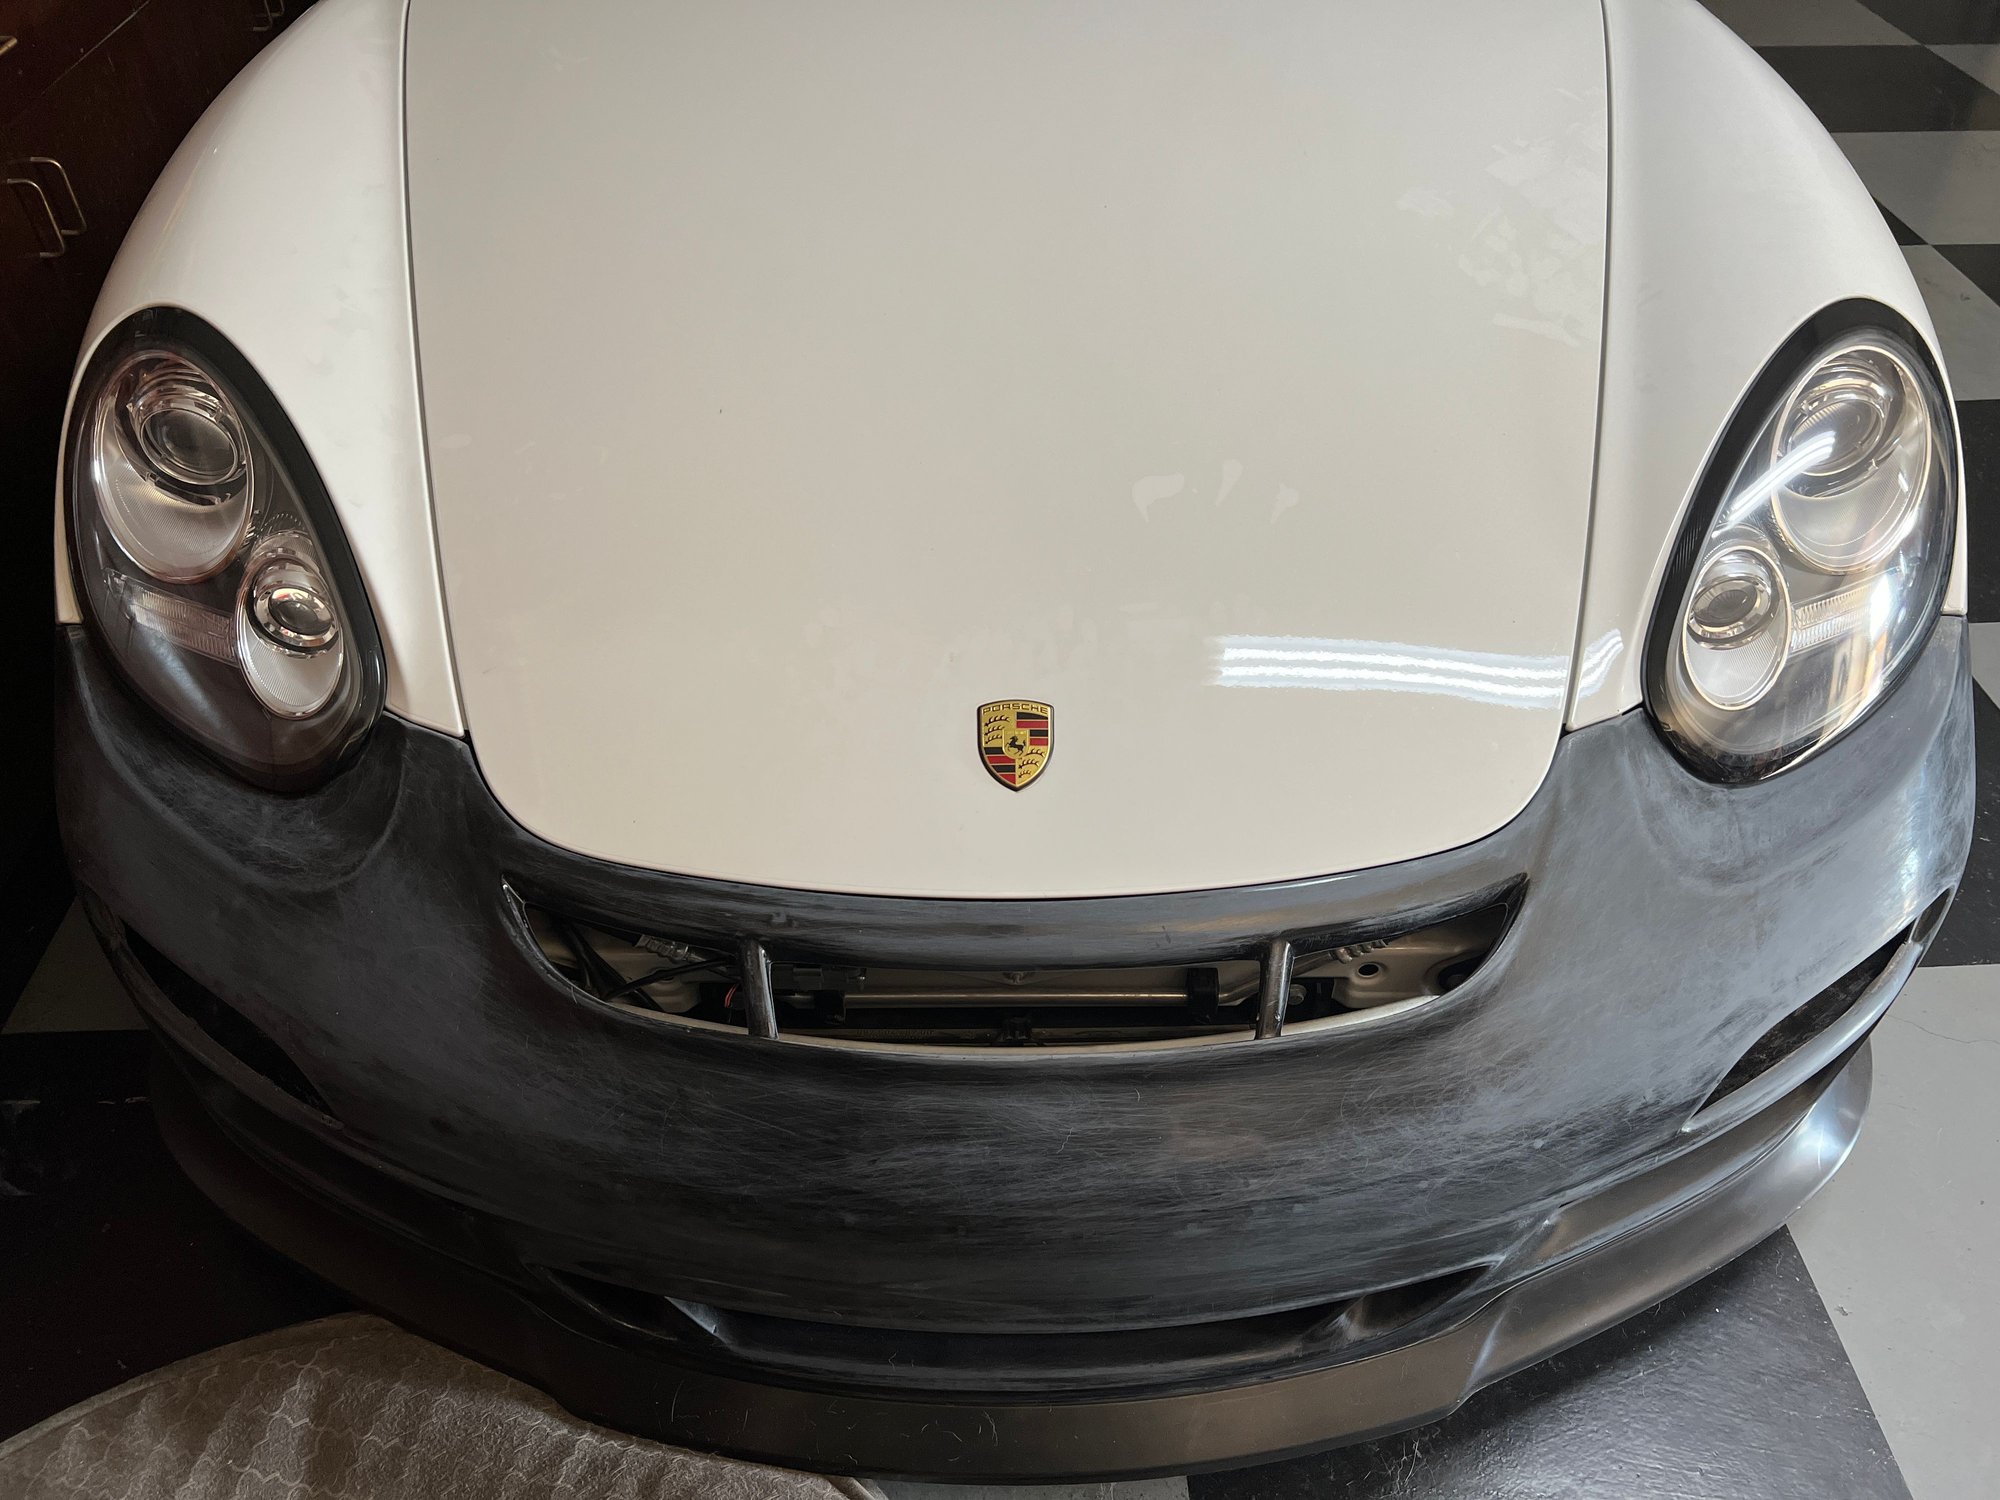
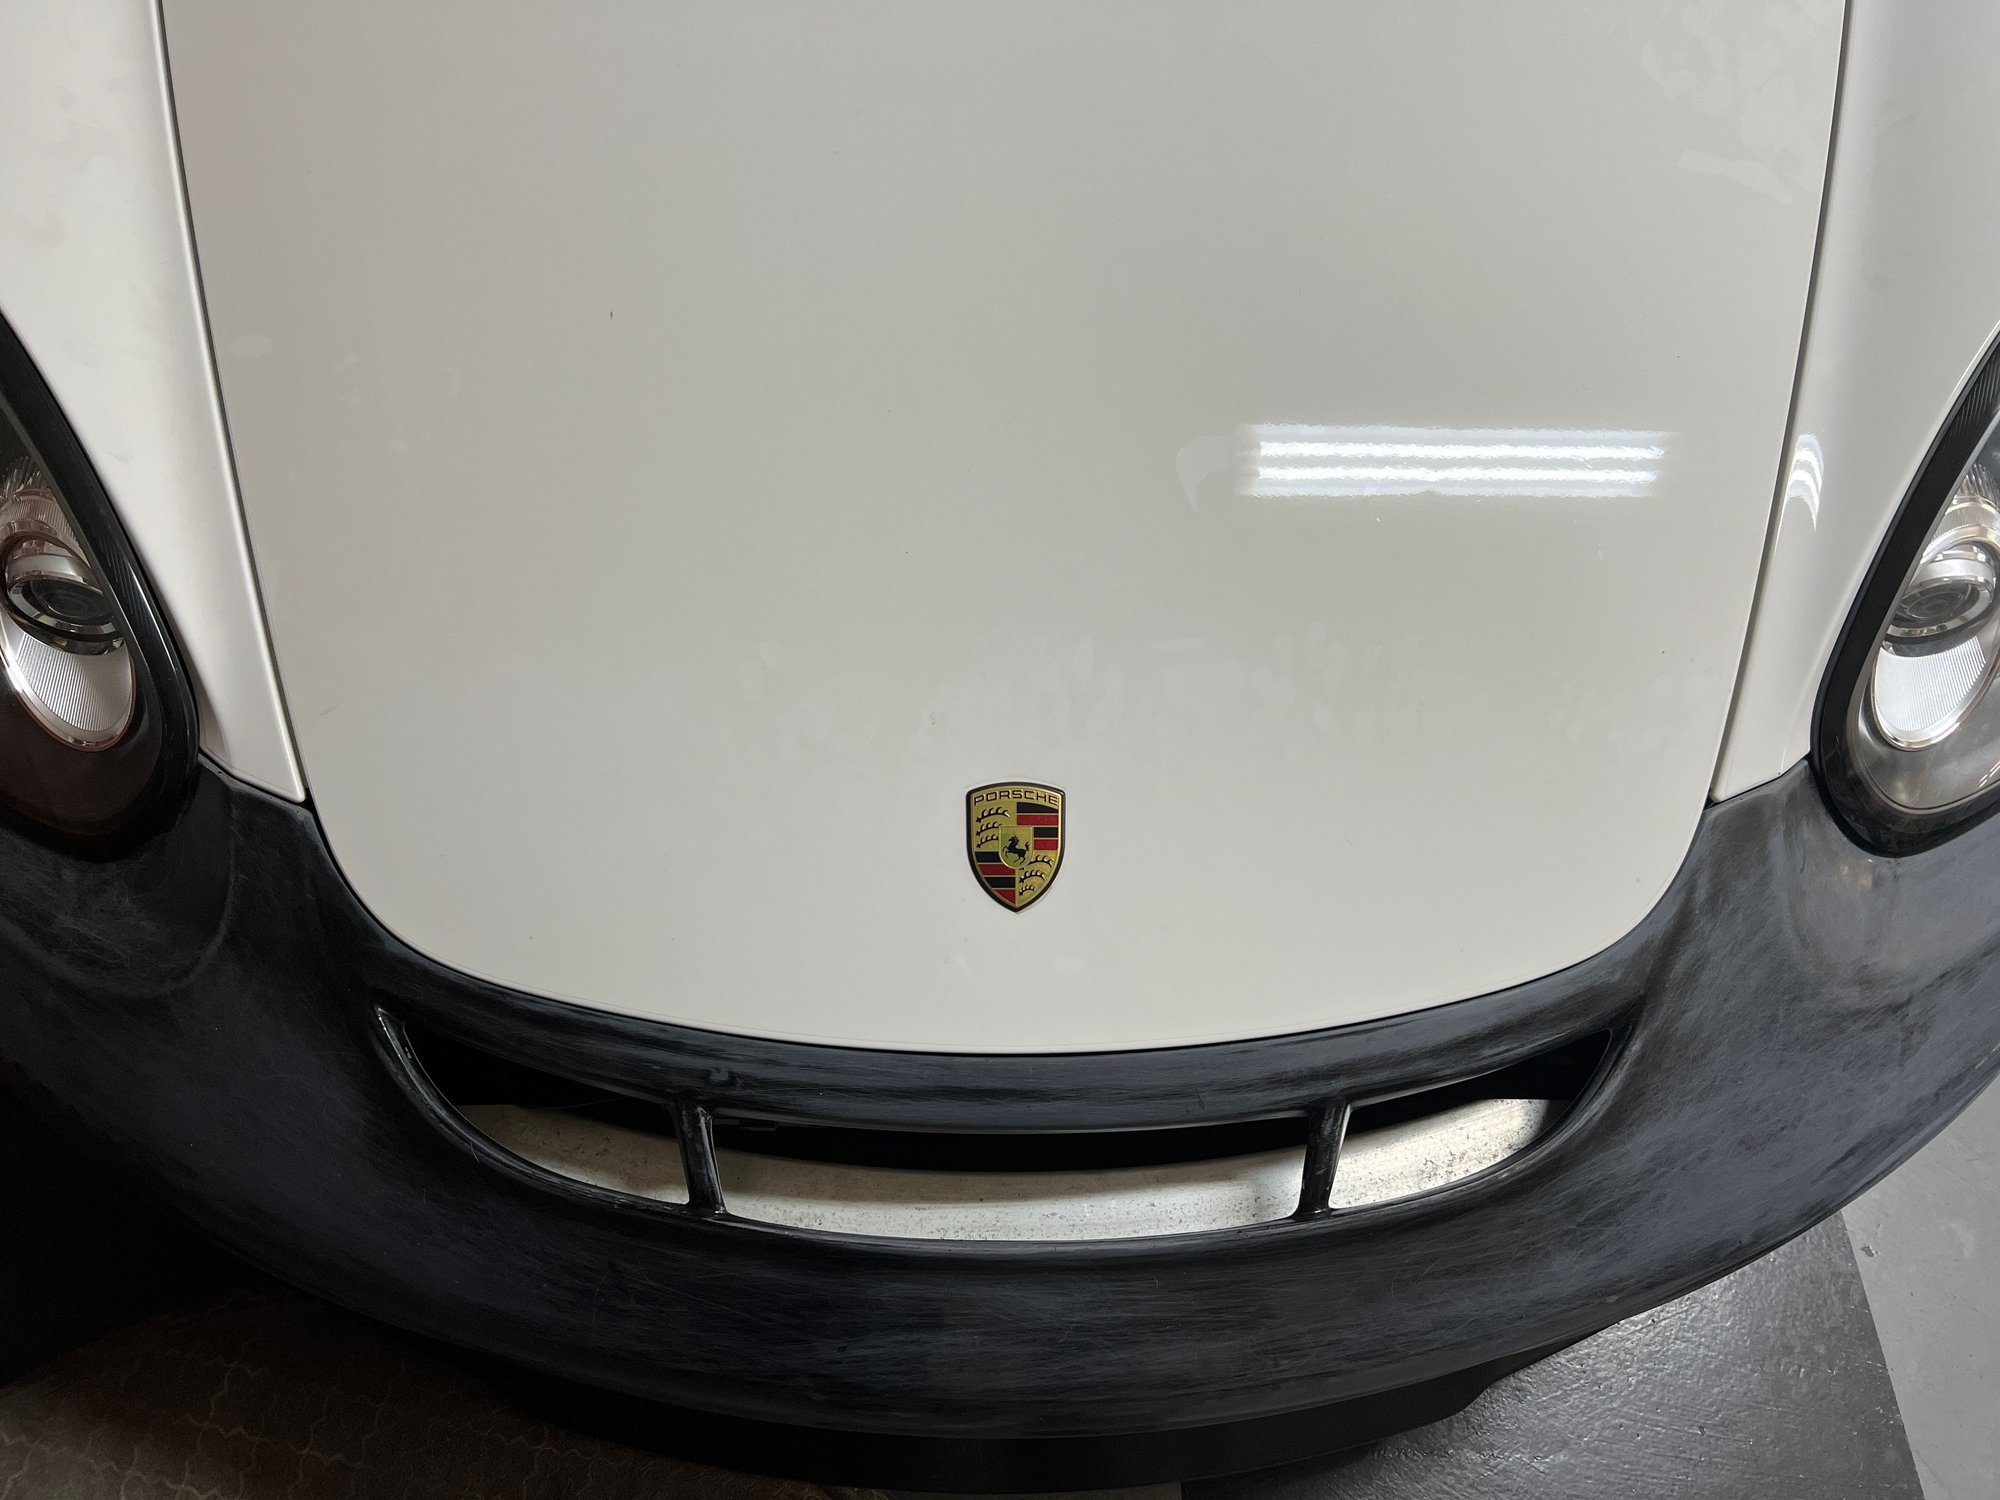
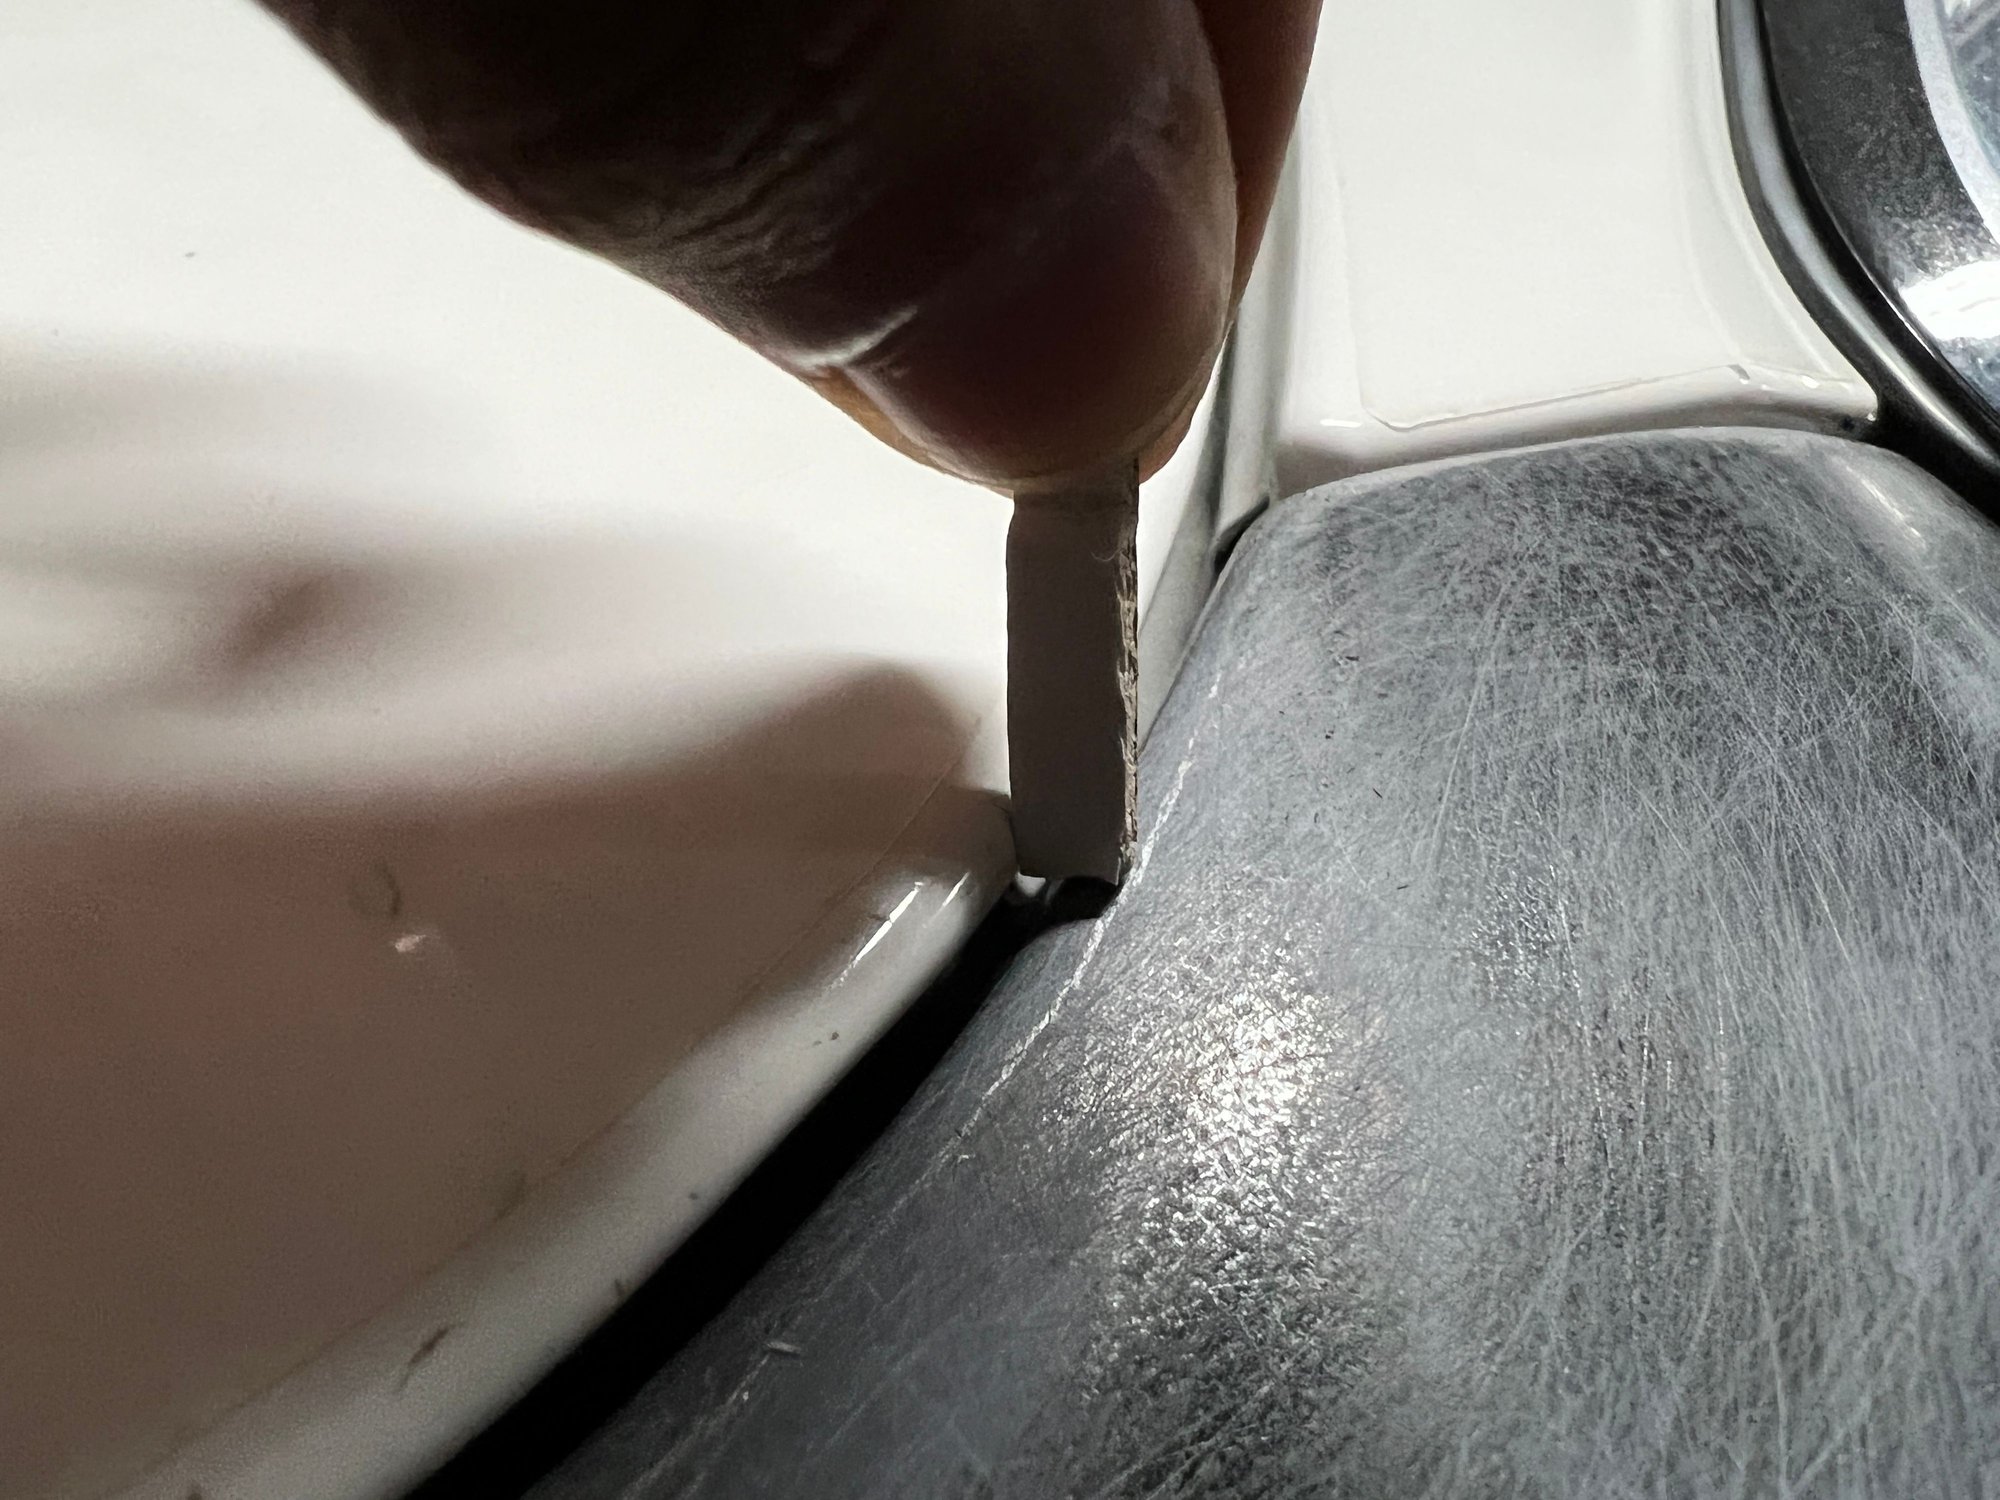
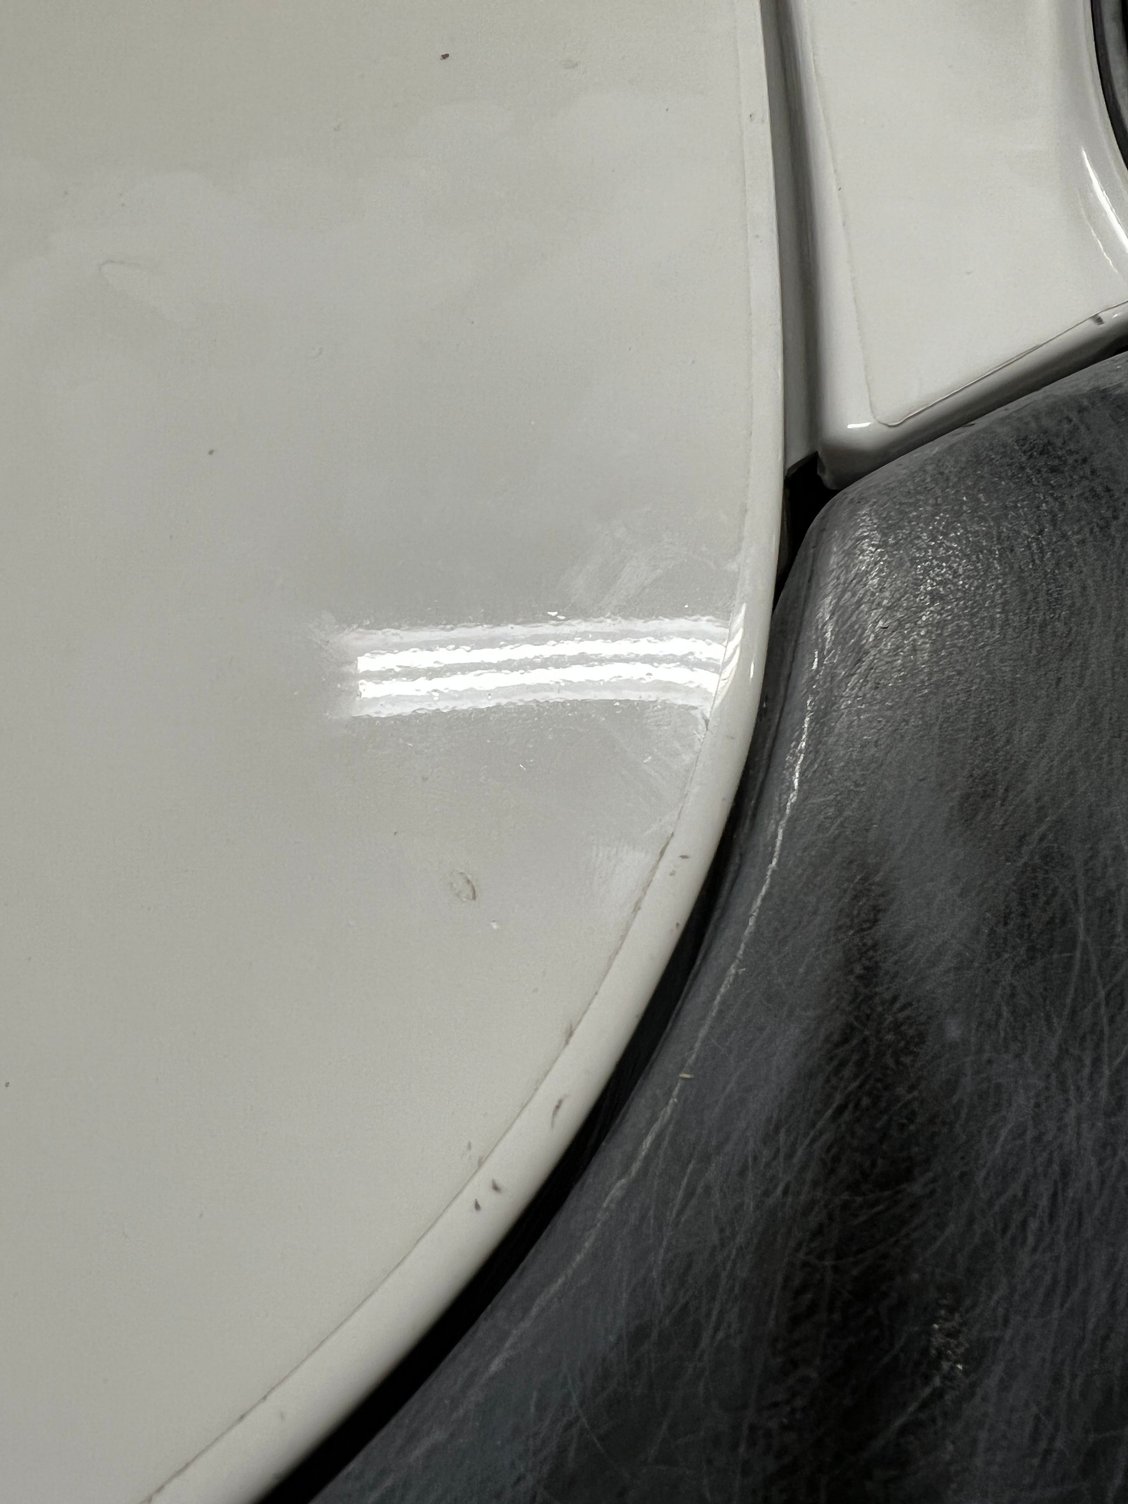
The following 3 users liked this post by EHP Racing:
fouckhest (12-01-2021), RussellJay (12-02-2021), The Duke (12-01-2021)
Old 12-02-2021, 01:57 AM
  #22  
EHP Racing
Rennlist Member
Thread Starter
 
EHP Racing's Avatar
 
Join Date: Aug 2020
Location: Los Banos, CA
Posts: 295
Received 186 Likes on 83 Posts
Default

Well the OCD Kicked in…
I noticed that in pictures, the hood to fender gap is supposed to match the hood to bumper gap. The bumper to fender gap is the tighter one but I had trimmed the bumper to match the wrong gap.

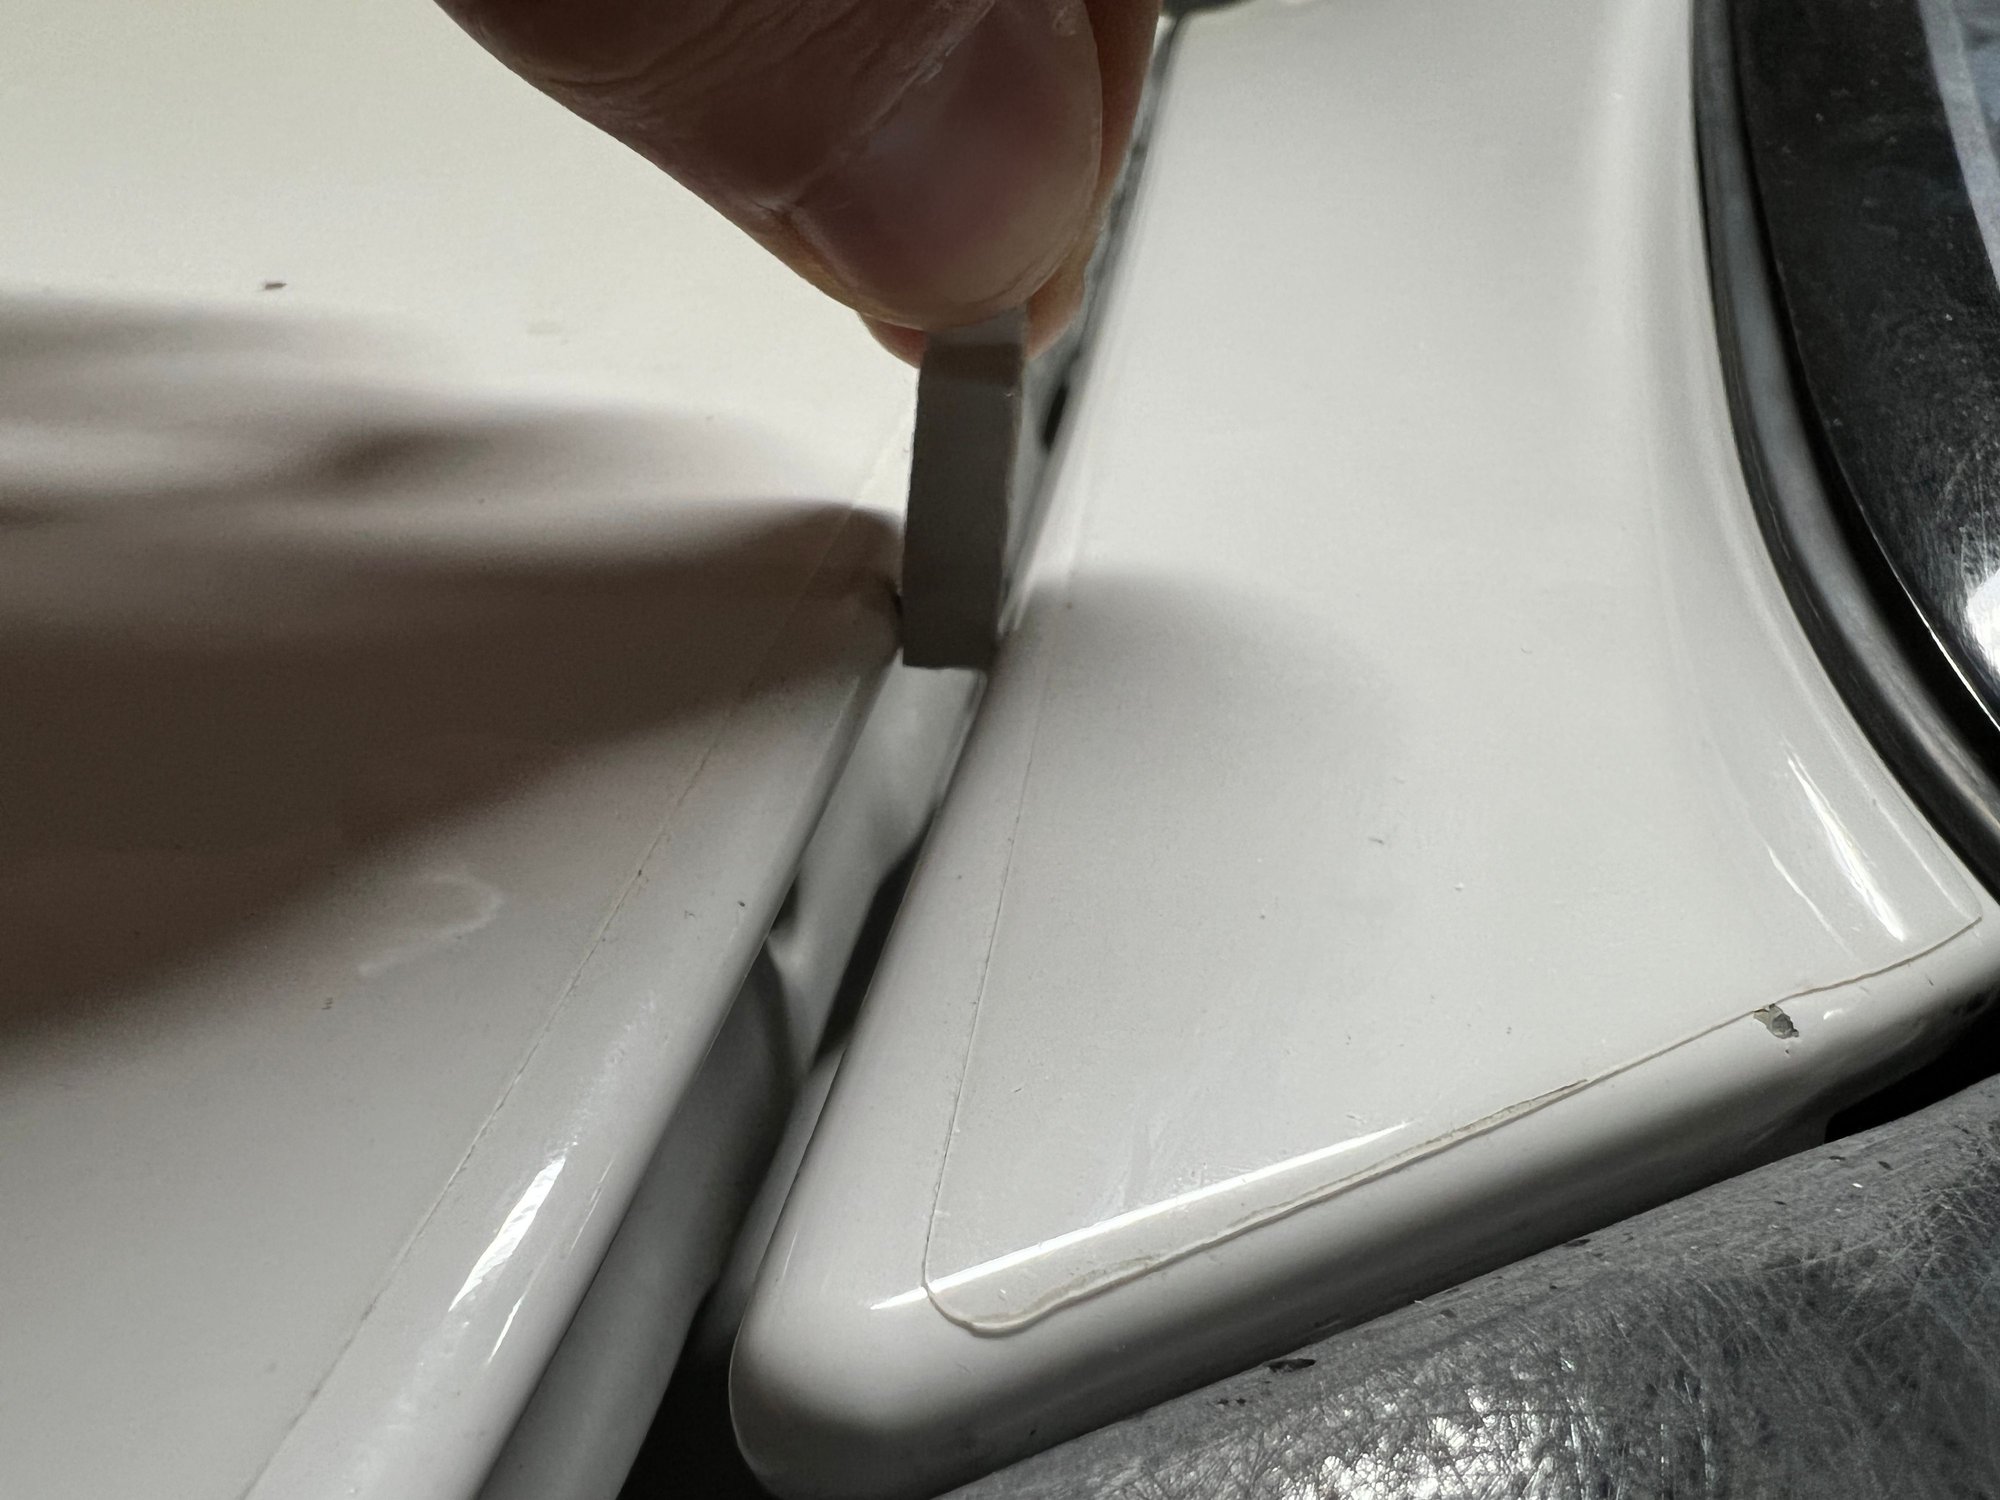
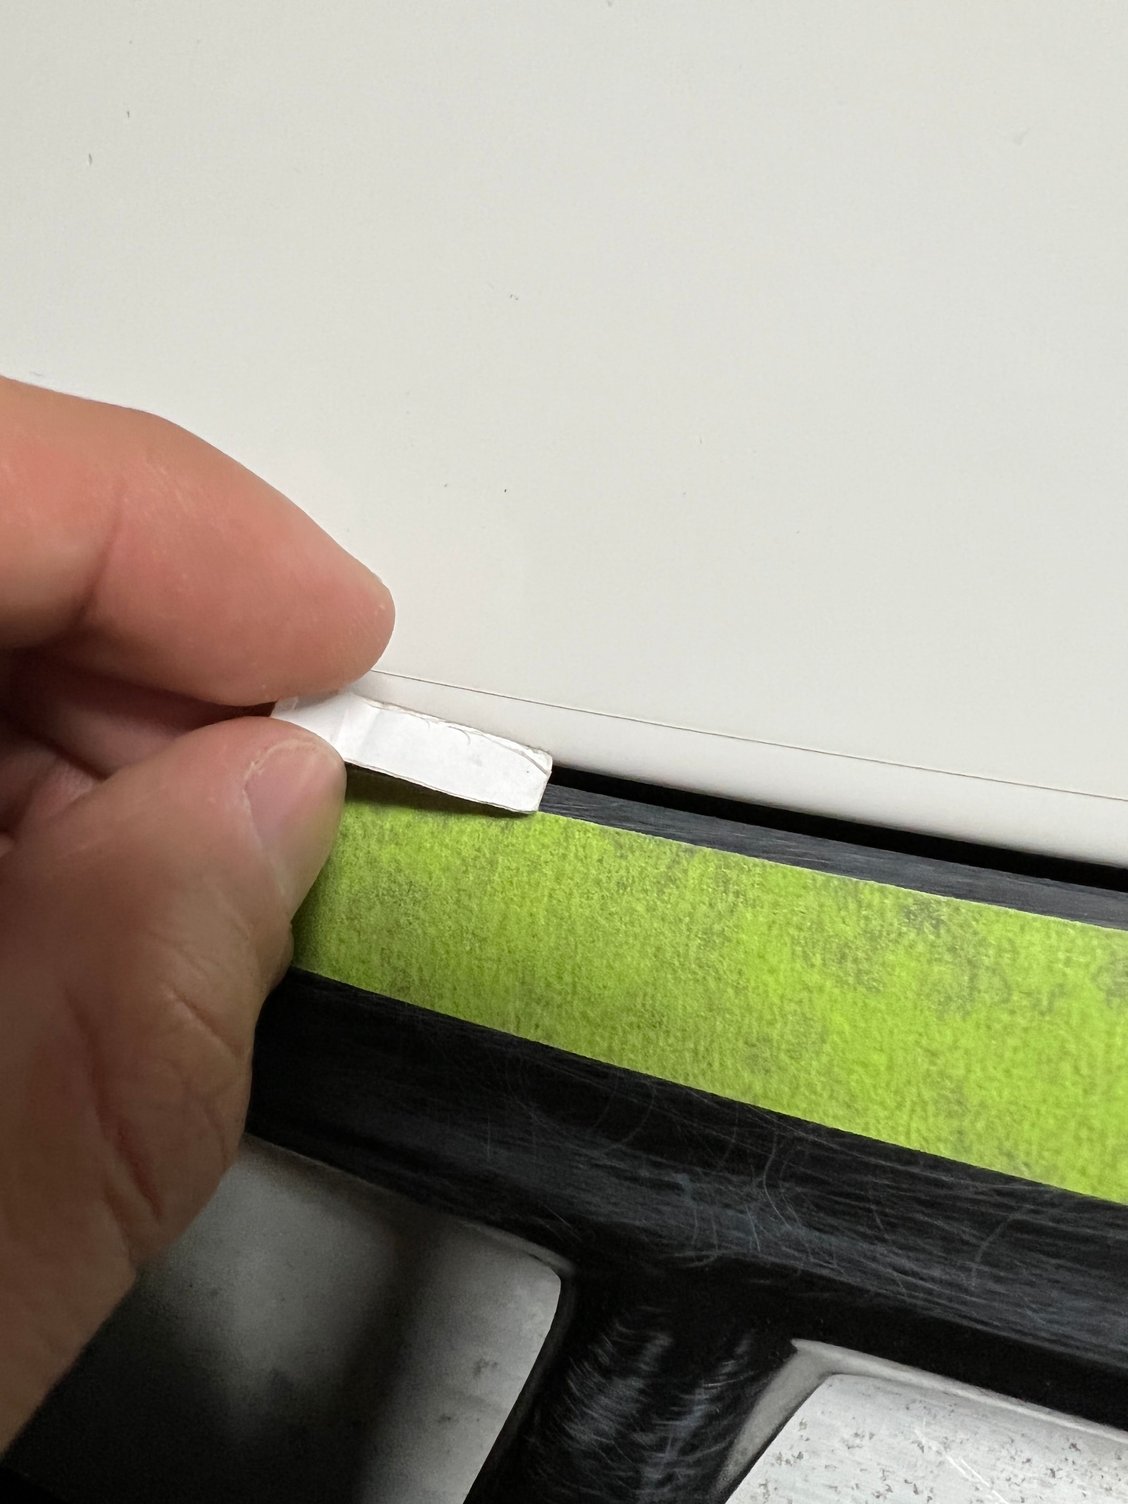
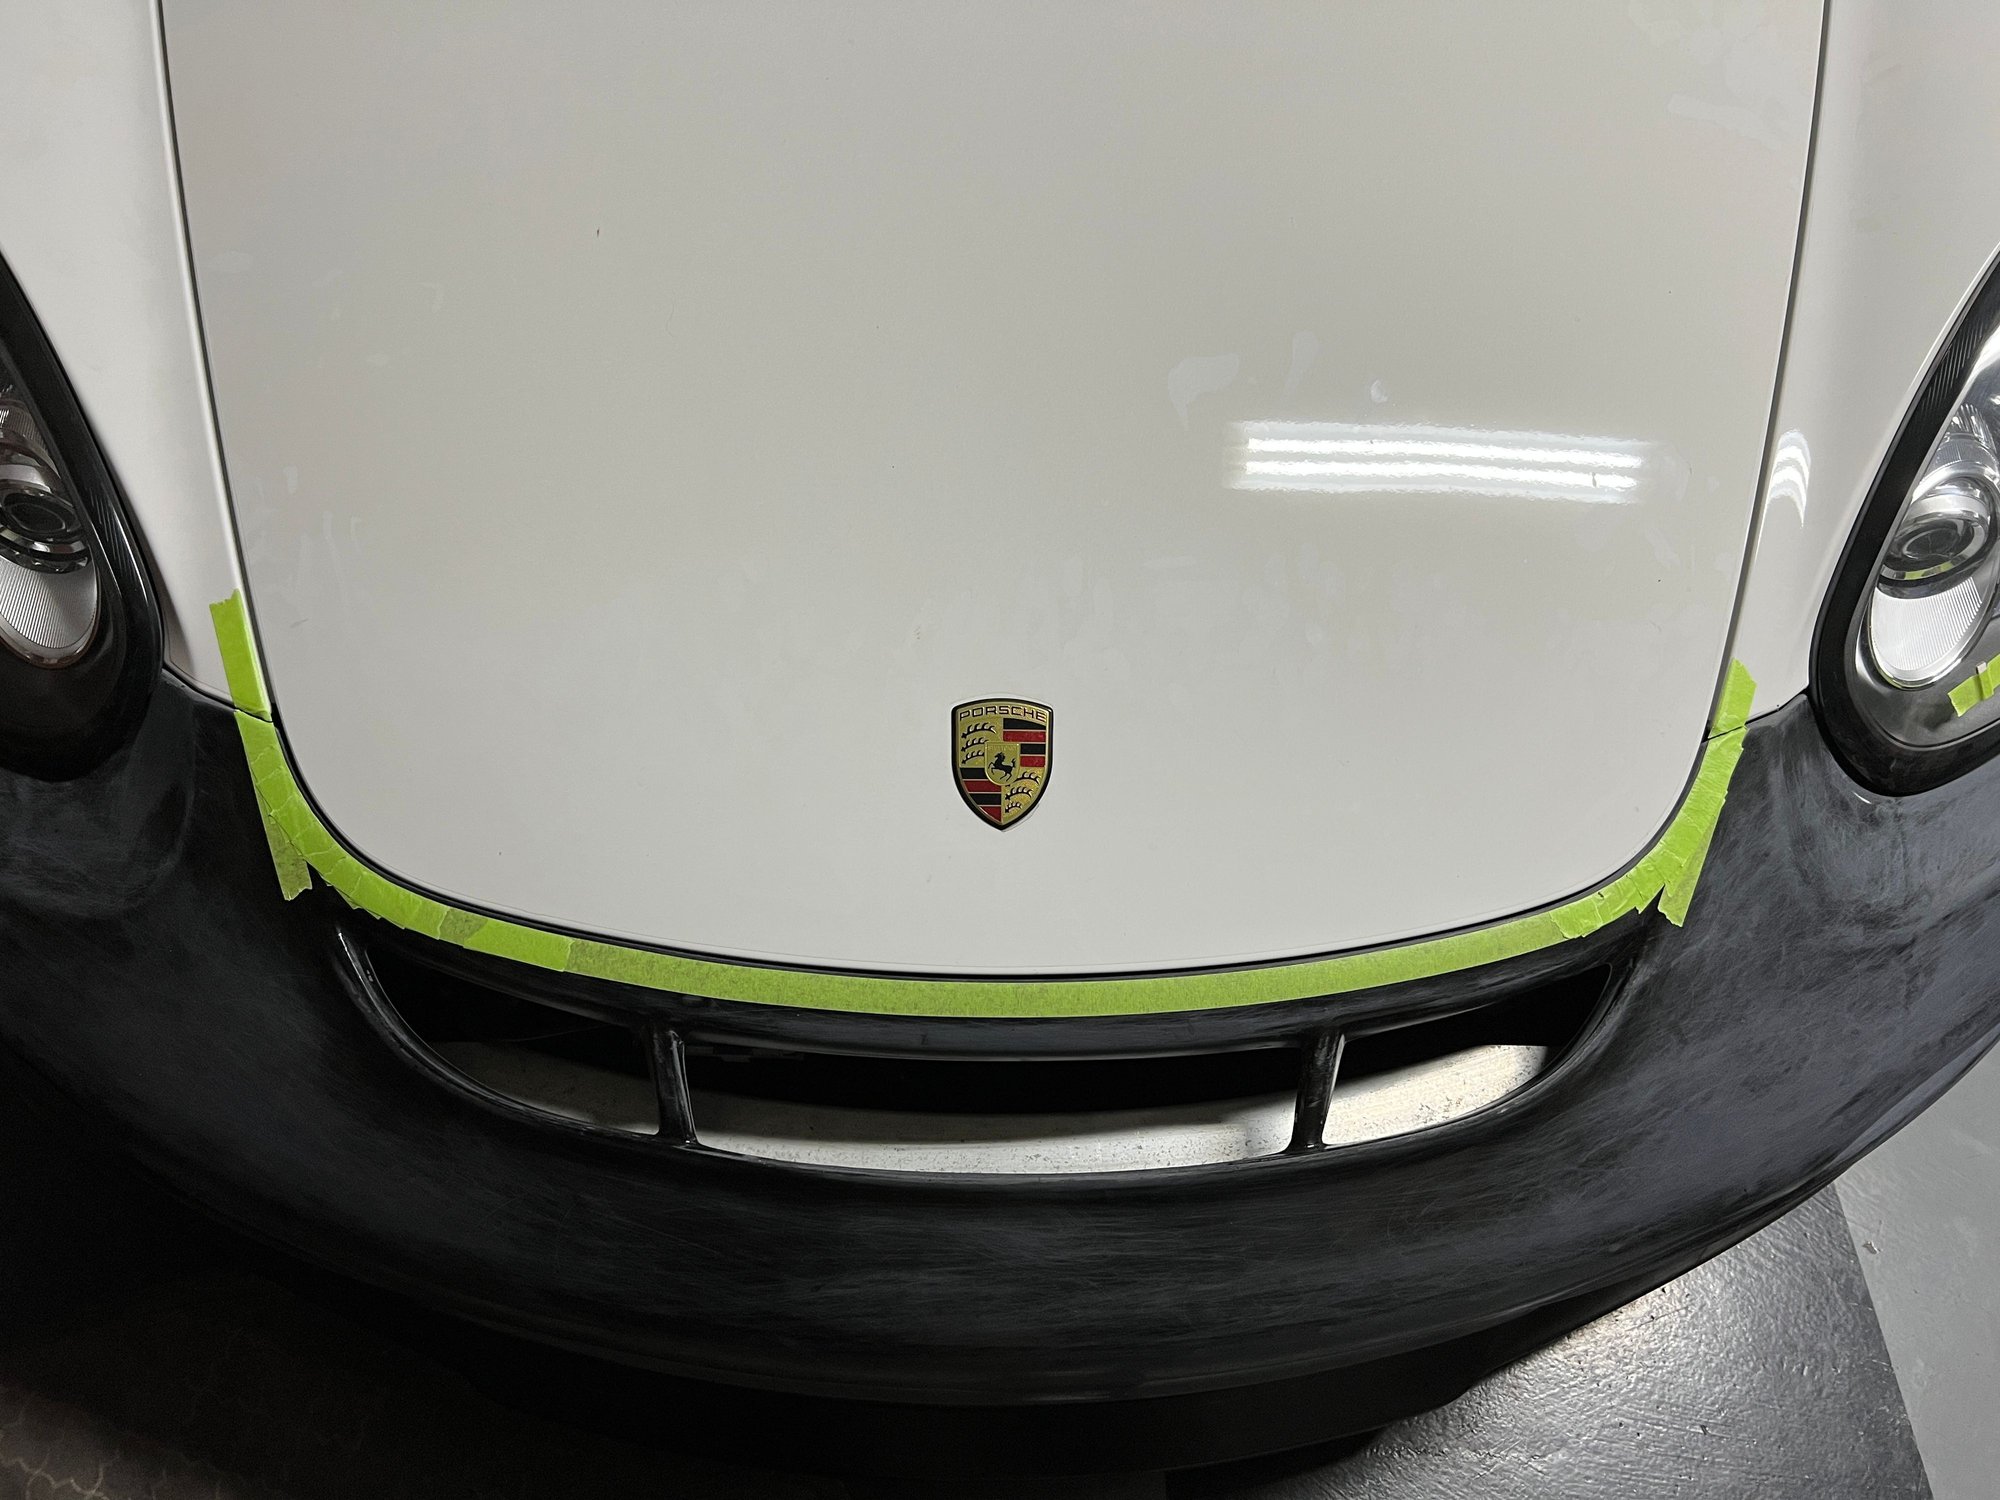
Using a small piece of cardboard that acted as my gap indicator, I went along the hoods edge and marked dashed lines with a pencil to use as a guide for when I lay tape down. This would act as the line I will be sanding up to. I purposely left some room for error in case I over sand and for when doing the final sanding on the edge that will have to be rounded. Gap will now match what it’s supposed to be from factory.


The following 2 users liked this post by EHP Racing:
Miggytosh (12-02-2021), mileage (12-03-2021)
Old 12-02-2021, 12:45 PM
  #23  
RussellJay
Rennlist Member
 
RussellJay's Avatar
 
Join Date: Dec 2018
Location: NY
Posts: 11
Received 11 Likes on 7 Posts
Default

First time viewing this build thread rabbit hole...and man this is coming along so sweet. Can't wait to see it painted. There are so few Cayman Rs out there and thus starting to become collectible which is OK, but I like customizations/modifications/upgrades and this may be the last Cayman R we get to see go thru a modification like this ever again so thanks for all of that my man - great job.
The following users liked this post:
EHP Racing (12-02-2021)
Old 12-02-2021, 01:20 PM
  #24  
EHP Racing
Rennlist Member
Thread Starter
 
EHP Racing's Avatar
 
Join Date: Aug 2020
Location: Los Banos, CA
Posts: 295
Received 186 Likes on 83 Posts
Default

Originally Posted by RussellJay
First time viewing this build thread rabbit hole...and man this is coming along so sweet. Can't wait to see it painted. There are so few Cayman Rs out there and thus starting to become collectible which is OK, but I like customizations/modifications/upgrades and this may be the last Cayman R we get to see go thru a modification like this ever again so thanks for all of that my man - great job.
Thanks! This has always been my vision since the first day I bought the car. Good for those who want them in OEM spec and keep them as collectibles. I however believe the car should have been much more special, especially considering it was given the R badge. I’m hoping to make the car what it should’ve been from factory!

Last edited by EHP Racing; 12-02-2021 at 01:55 PM.
The following 4 users liked this post by EHP Racing:
cakM3 (03-24-2022), dancingwhale (08-24-2023), Miggytosh (12-02-2021), RussellJay (12-05-2021)
Old 12-02-2021, 02:43 PM
  #25  
ttt123
Burning Brakes
 
ttt123's Avatar
 
Join Date: Jun 2017
Location: michigan
Posts: 1,145
Received 201 Likes on 129 Posts
Default

cool stuff
The following 2 users liked this post by ttt123:
EHP Racing (12-04-2021), RussellJay (12-05-2021)
Old 12-02-2021, 09:09 PM
  #26  
hemicuda1313
Track Day
 
hemicuda1313's Avatar
 
Join Date: Aug 2006
Posts: 16
Received 8 Likes on 5 Posts
Default

Love this! Great to see the focus on details and you doing a lot of work yourself to make it your own. The cars should be driven and enjoyed.
The following 2 users liked this post by hemicuda1313:
EHP Racing (12-04-2021), RussellJay (12-05-2021)
Old 12-03-2021, 12:24 PM
  #27  
mileage
Advanced
 
mileage's Avatar
 
Join Date: Feb 2021
Location: Sparks, NV
Posts: 84
Received 31 Likes on 23 Posts
Default

Love the attention to detail. Cant wait to see it painted!
The following 2 users liked this post by mileage:
EHP Racing (12-04-2021), RussellJay (12-05-2021)
Old 12-03-2021, 07:59 PM
  #28  
hemicuda1313
Track Day
 
hemicuda1313's Avatar
 
Join Date: Aug 2006
Posts: 16
Received 8 Likes on 5 Posts
Default

Forgot to ask in my post yesterday but what type of floor tiles do you have? They look great. I have the Race Deck flow through and I haven't liked them as much as I thought I would.
The following users liked this post:
RussellJay (12-05-2021)
Old 12-03-2021, 08:42 PM
  #29  
Kuro Neko
Three Wheelin'
 
Kuro Neko's Avatar
 
Join Date: Dec 2018
Location: Tokyo
Posts: 1,569
Likes: 0
Received 1,769 Likes on 669 Posts
Default

Originally Posted by EHP Racing
Well the OCD Kicked in…
I noticed that in pictures, the hood to fender gap is supposed to match the hood to bumper gap. The bumper to fender gap is the tighter one but I had trimmed the bumper to match the wrong gap.
Yup!
Some manufacturers call that a 'slam gap', and is typical for openings to allow over compression and allowance for moving parts.
It is often most noticeable on tail lights the run from body to trunk openings...

Originally Posted by EHP Racing
Thanks! This has always been my vision since the first day I bought the car. Good for those who want them in OEM spec and keep them as collectibles. I however believe the car should have been much more special, especially considering it was given the R badge. I’m hoping to make the car what it should’ve been from factory!
I am sure no one would mind if you appended your 'R' with an 'S'?

Nice work!

Last edited by Kuro Neko; 12-03-2021 at 08:44 PM.
The following 2 users liked this post by Kuro Neko:
EHP Racing (12-04-2021), RussellJay (12-05-2021)
Old 12-04-2021, 08:11 PM
  #30  
Zach L
Rennlist Member
 
Zach L's Avatar
 
Join Date: May 2011
Location: Austin, TX
Posts: 1,258
Received 487 Likes on 314 Posts
Default

Current R owner following this. Love what you're doing! And thanks for the detailed explanations in you posts 👍
The following 2 users liked this post by Zach L:
EHP Racing (12-04-2021), RussellJay (12-05-2021)


Quick Reply: 2012 CAYMAN R "RS" BUILD THREAD


All times are GMT -3. The time now is 11:13 AM.