When you click on links to various merchants on this site and make a purchase, this can result in this site earning a commission. Affiliate programs and affiliations include, but are not limited to, the eBay Partner Network.
I installed an Android Head Unit from Dasaita in my 981 over the past weekend. I used to have a JoyeAuto unit complementing my based radio CDR 3.1 but when I felt the need to mess with it, I burnt out the screen of my original head unit.
The reason I went with an android head unit over one of the bigger name brands such as Sony, Pioneer or Kenwood was the seamless connectivity that the unit from Dasaita could offer and the wireless android auto. This was also the initial reason I got the JoyeAuto. I also wanted to be able to use apps like Waze while driving. I know I will get flamed for installing an android head unit as their reliability is a bit questionable but I will provide an update in 6 months and in a year to see if it is still working. Also, the UI of the android head unit is less clunky and much faster and more responsive than the head units from the bigger name brands.
For this, you're going to need the following:
1. Metra Dash Kit - 95-9607B - I got this off eBay and it arrived damaged - so I got a refund from eBay and kept the dash kit and repaired it
2. Euromotorspeed adapter wiring harness - I got this off eBay as well. The first one "got lost" as the tracking was never updated for 20 days and I got a refund and then I ordered a second one which arrived promptly. The first one then proceeded to show up at my door. So if anyone is looking for an aftermarket adapter harness I'm selling one!
3. 7 inch Android Head Unit from Dasaita - I got it from Amazon
The unit I went with has 4 GB + 64 GB and the newest PX6 rockchip processor. I got it from amazon. The customer service was really good and once you buy it they will reach out to you and ask what car you will be putting it into as they have some direct plug and play wiring harnesses for some cars. Unfortunately, they don't have one for the Cayman. However, they sent me a wiring diagram and it was pretty easy to splice it into the Euromotorspeed Harness from eBay.
The dash kit however, required a significant amount of trimming to get it to fit and I had to drill additional holes to make sure that the head unit lined up correctly in the frame included in the dash kit.
Since my car only had front right and front left speakers those were the only ones I wired in and for the 12v accessories fuse, I used slot 4 in row D of the passenger side fuse box. Other things I had to wire in included, the battery source, the ground and antenna control switch where were all spliced into the adapter harness. I did not splice into any of the OEM harness at all. One thing I would like to add though is an illumination source which I will need to tap into the OEM harness for. For people that have installed an aftermarket head unit, where did you tap into for the illumination source?
To repair the metra dash kit, I used perfect plastic putty and then painted it using SEM interior trim paint.
Here is a photo of it running waze:
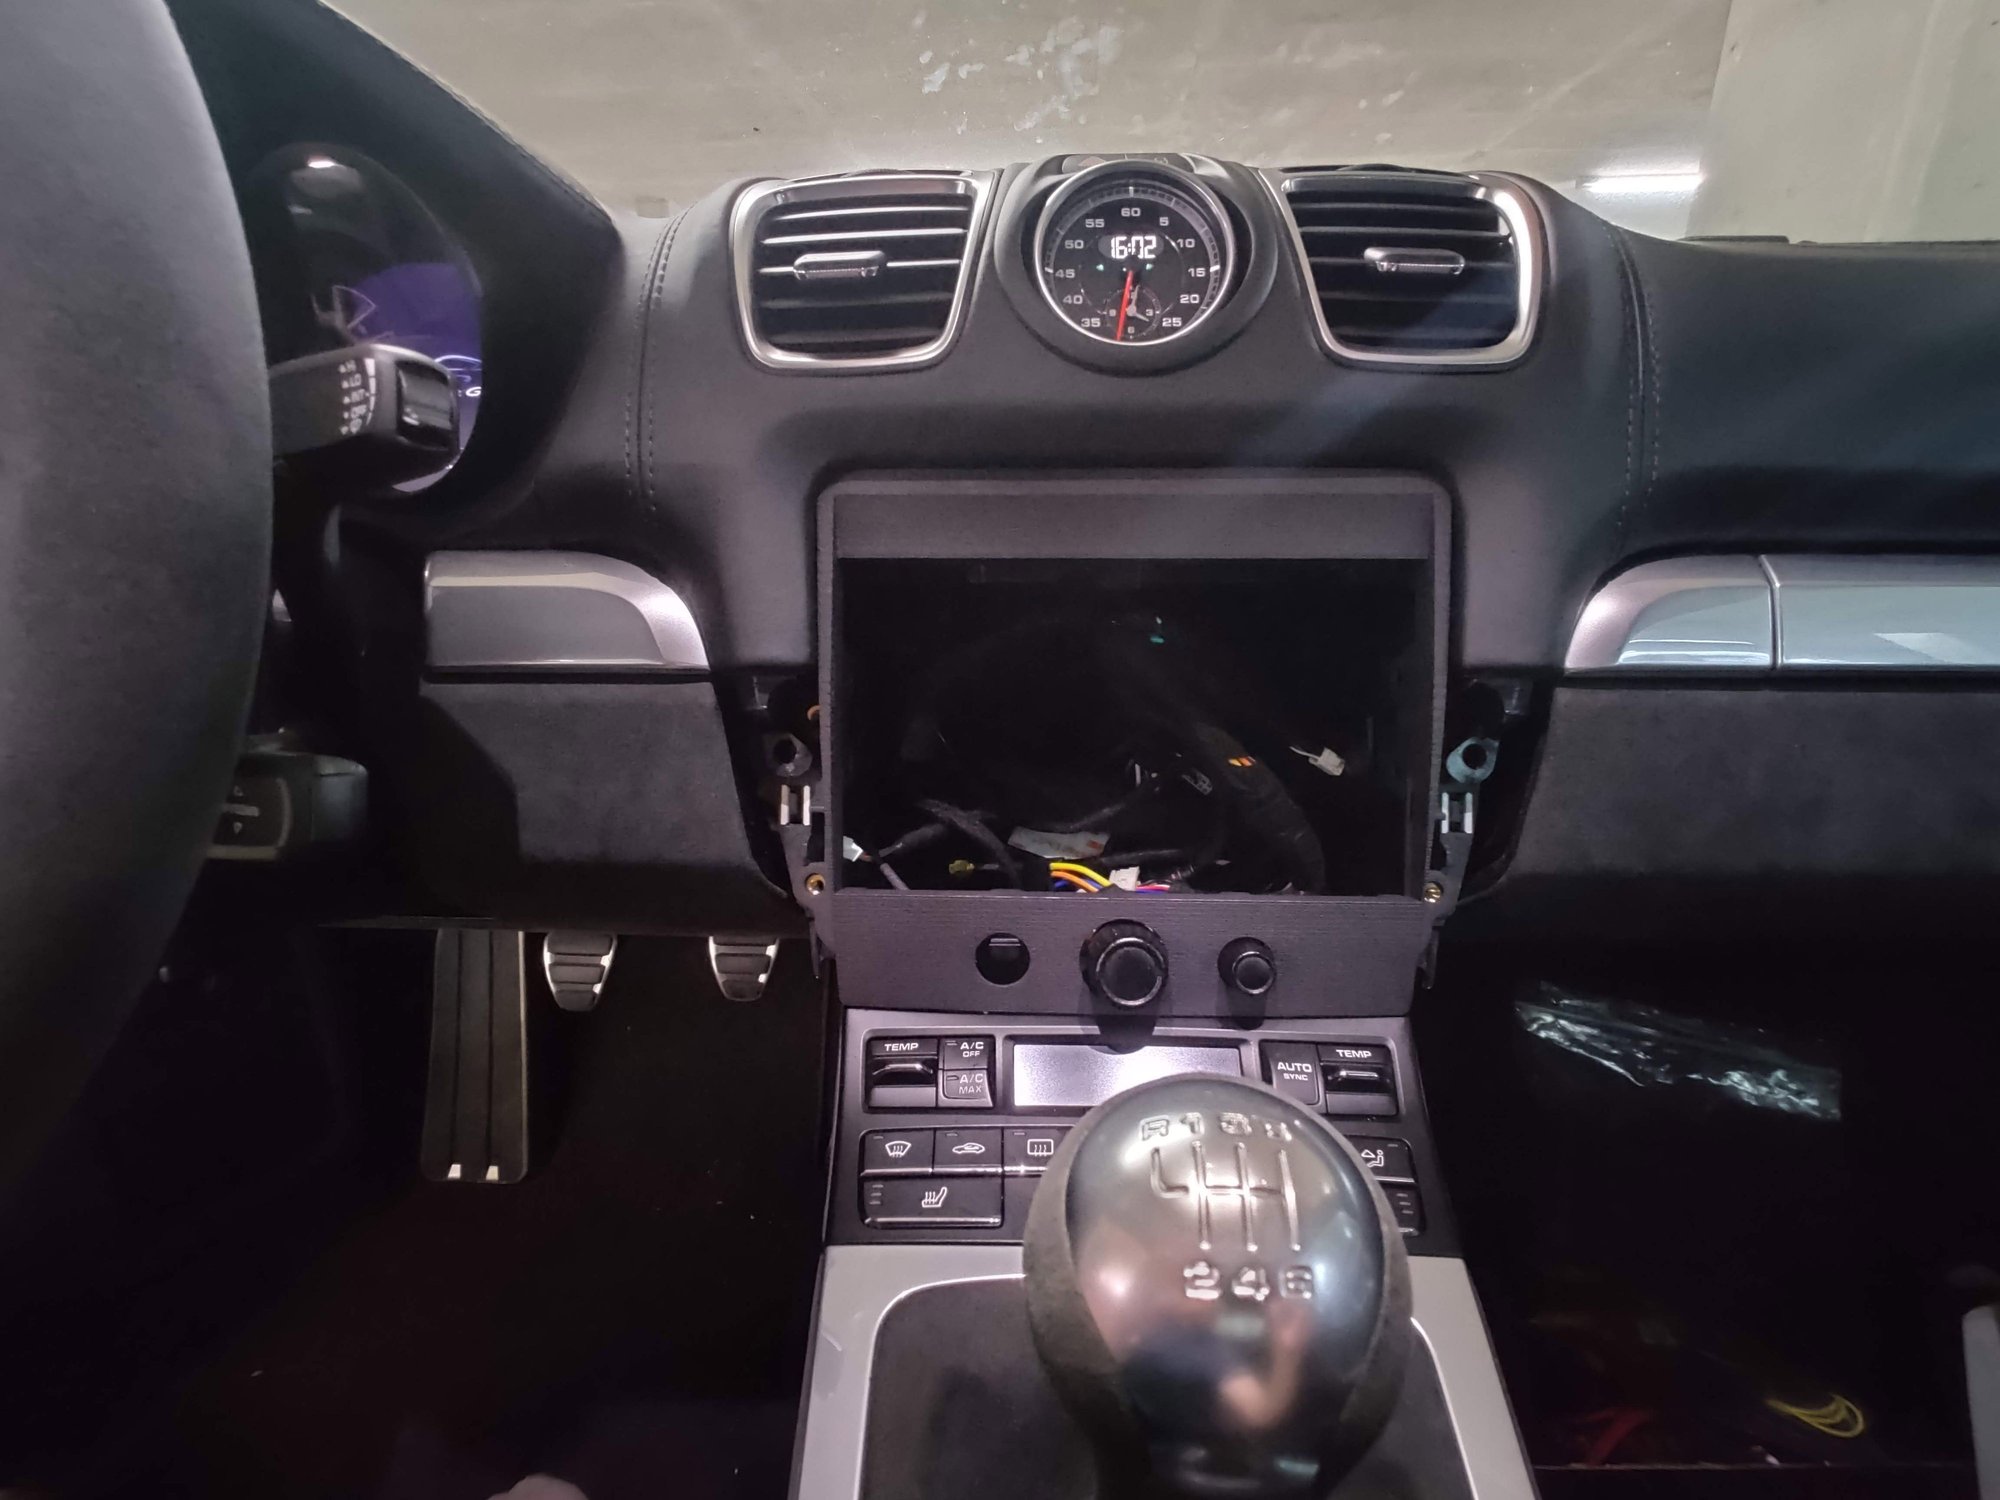
Here are pics of the head unit installed:
Please don't mind my ripped shift boot... I am replacing it soon.
Hey, nice work. I am also running an Android head unit (Teyes CC2 Plus).
My head unit is slightly oversized, so I am 3D printing my kit. I think I will likely need to use some filler and paint to finish it. That SEM paint looks like a pretty good match. Do you have a part number for the one you used?
I used a Connects2 kit, which came with a canbus adapter and doesn't officially support the Cayman. The accessory signal works great. I haven't had my camera installed to test reverse, but I know illumination must be using the wrong canbus signal. Illumination turns on with the running lights and turns off with the headlights. I'm thinking tapping the taillight wires would be the best place to pull an illumination signal.
Props to you! I wish I had a 3d printer too. Then maybe I could've printed the dash kit a little bit better too. The SEM paint is a little darker.. I used 39143 SEM Interior Trim Paint Black. You're also going to want to pick up their prep spray for leather and plastic.. 38353. I have the basic radio and no steering wheel controls so I didn't really need a Canbus module.. I can't wait to see what yours looks like afterwards! I do miss the volume ****
Looking at T'eyes too. How did you measure and draw out the plan for the 3D Printer? Would you still have the STL/other format file that we can bring to the nearest 3D printer?
Cheers
Originally Posted by DriverDaily
Hey, nice work. I am also running an Android head unit (Teyes CC2 Plus).
My head unit is slightly oversized, so I am 3D printing my kit. I think I will likely need to use some filler and paint to finish it. That SEM paint looks like a pretty good match. Do you have a part number for the one you used?
I used a Connects2 kit, which came with a canbus adapter and doesn't officially support the Cayman. The accessory signal works great. I haven't had my camera installed to test reverse, but I know illumination must be using the wrong canbus signal. Illumination turns on with the running lights and turns off with the headlights. I'm thinking tapping the taillight wires would be the best place to pull an illumination signal.
Looking at T'eyes too. How did you measure and draw out the plan for the 3D Printer? Would you still have the STL/other format file that we can bring to the nearest 3D printer?
For the head unit adapter I traced the front and side silhouettes separately. I scanned the tracings into Illustrator, then combined them into a 3D shape using tinkercad. The mounting points were easy enough to pinpoint by measuring the factory head unit with a caliper.
For the head unit adapter I traced the front and side silhouettes separately. I scanned the tracings into Illustrator, then combined them into a 3D shape using tinkercad. The mounting points were easy enough to pinpoint by measuring the factory head unit with a caliper.