When you click on links to various merchants on this site and make a purchase, this can result in this site earning a commission. Affiliate programs and affiliations include, but are not limited to, the eBay Partner Network.
------------
My 1993 968 cab is great except when I get the engine rpms above 5K the vibration in the shifter is excessive and makes a grating sound (the cap on the top of the shifter has a resonance). I had changed the engine mounts (stock) but the vibration persists.
Should I start with the transmission mount (which I've gathered is a very hard job - but the engine mounts were no cake walk themselves), of is there another place to start?
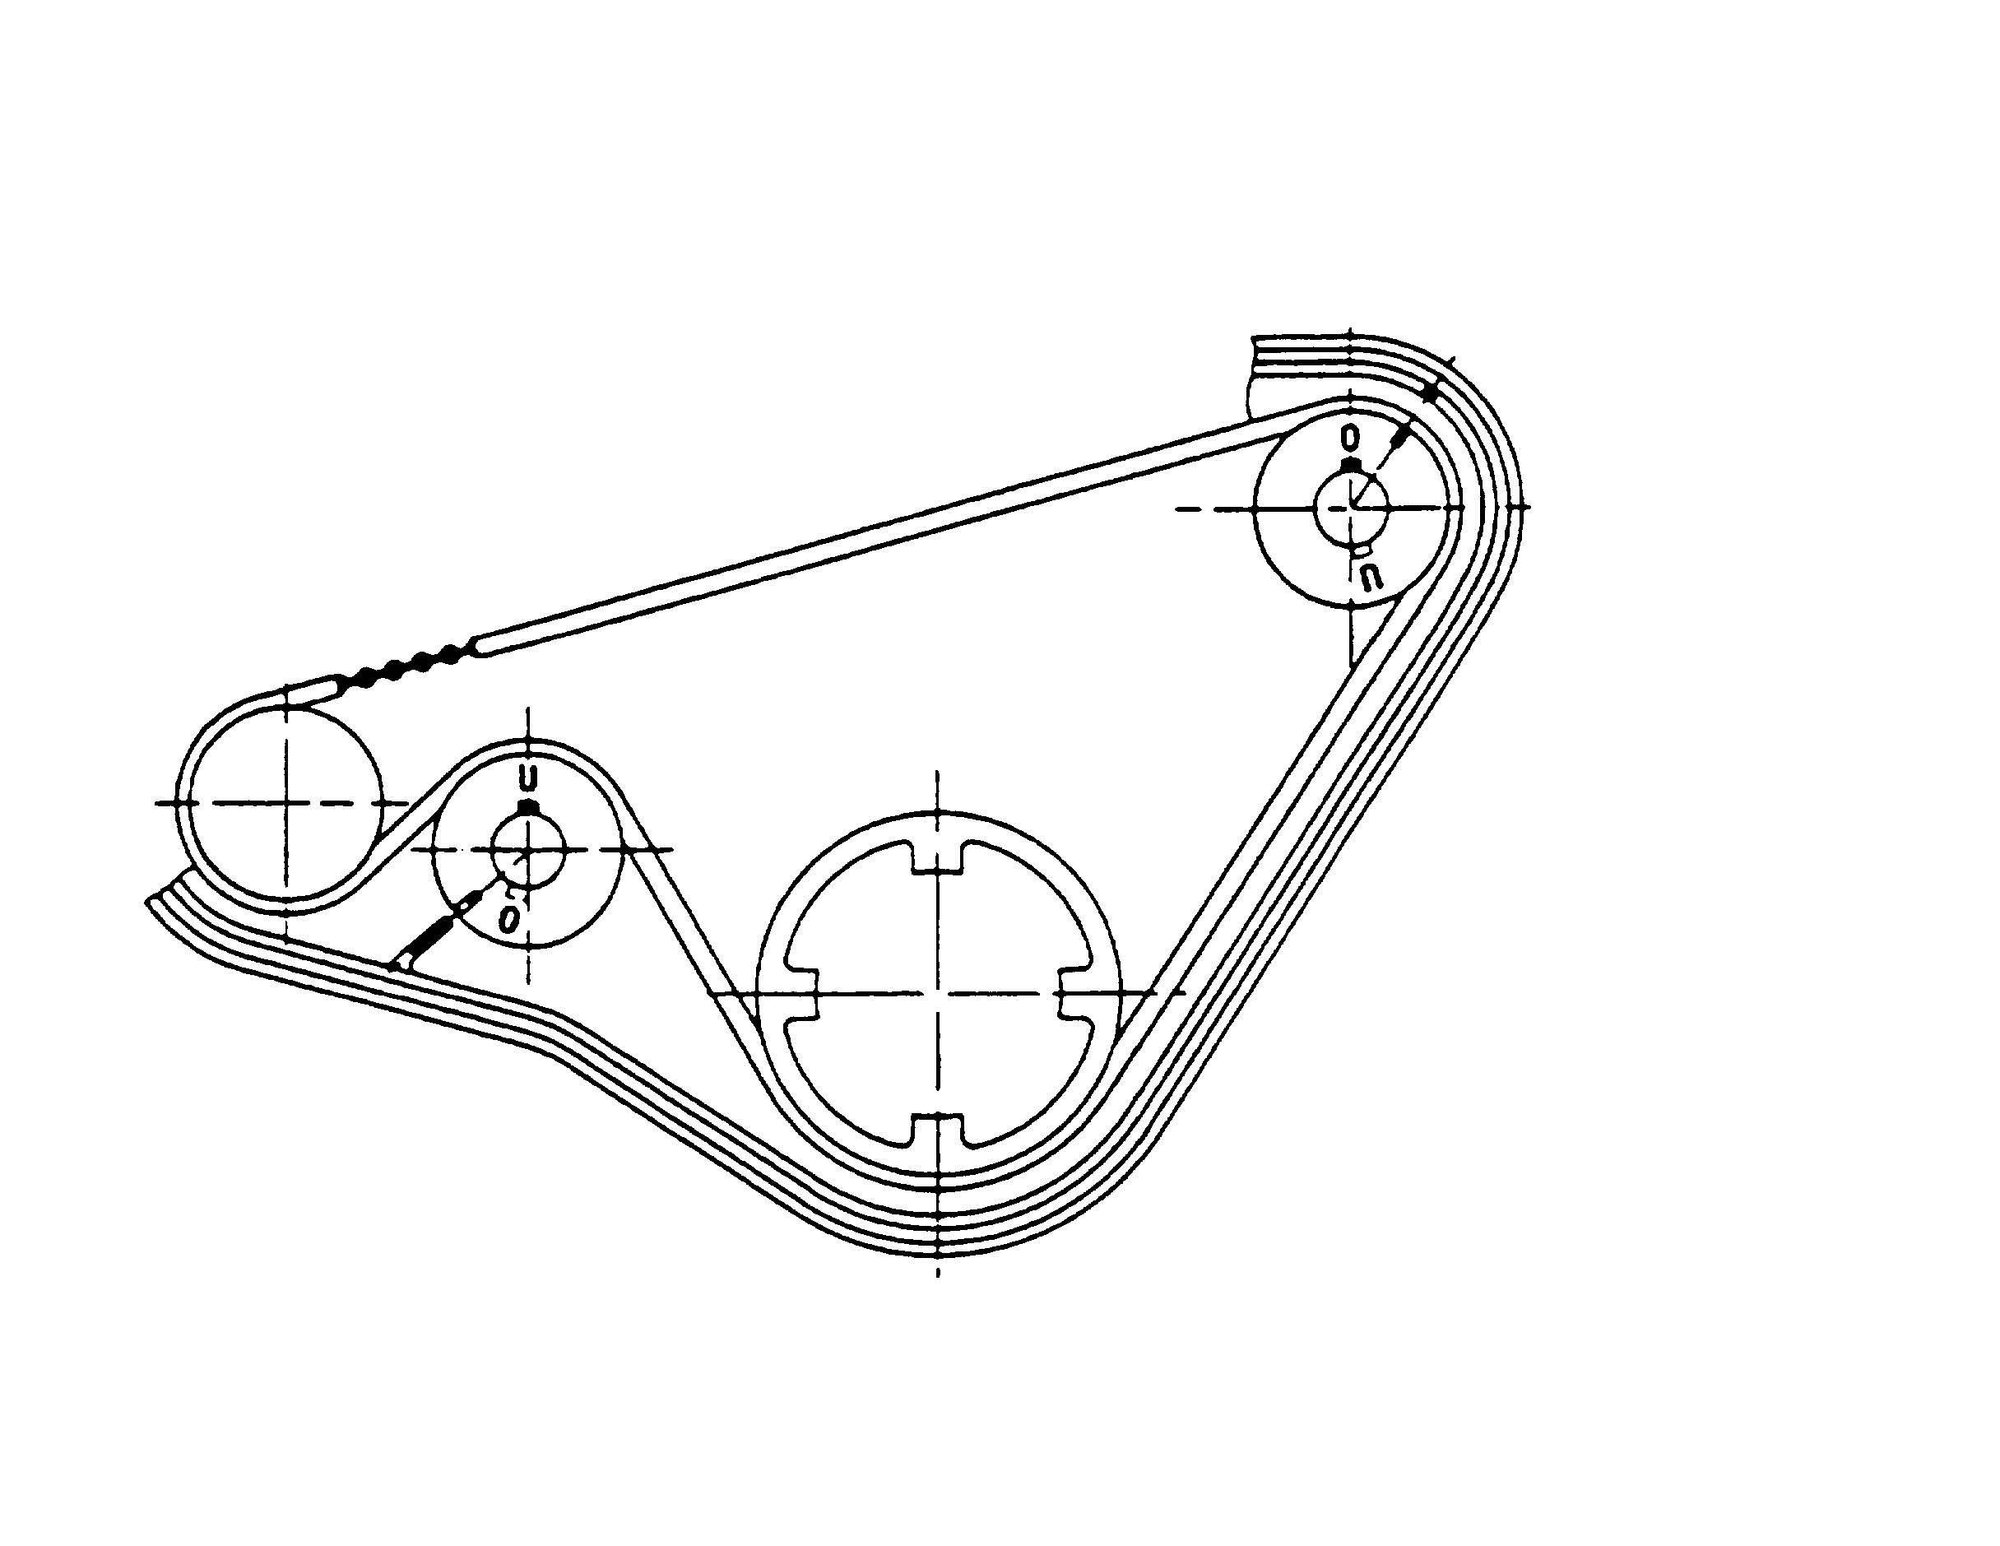
Balance shafts are not timed properly. The balance shaft sprockets might be installed with the keyways in the wrong position(s), since they used the same sprockets for the upper and lower shafts, and need to be installed properly. Here is a diagram of the proper timing. Note the position of the keyways at TDC #1.
Thanks @931guru this is making even more sense now that I realized I had a local shop put a new HVAC compressor on mid-summer, where I presume they may have let one/both slip out of orientation. Presuming the belt would be part of that process.
When you readjust the balance shaft belt, be mindful of which way to turn the lower pulley to get the tension right. I believe (though I haven't done it in quite a while, so hopefully someone will correct me if I am wrong) that you want to turn the pulley counterclockwise to set the tension/gap.
Thanks - I watched nc944er's process on youtube (which was quite good) and while I think I could do it myself - I'm likely just going to farm this out to someone locally (if I can find someone). I'll probably look at selling the car when it's done so I just want to get it done quickly as I've got too many other projects at this point. It's me, not the car!
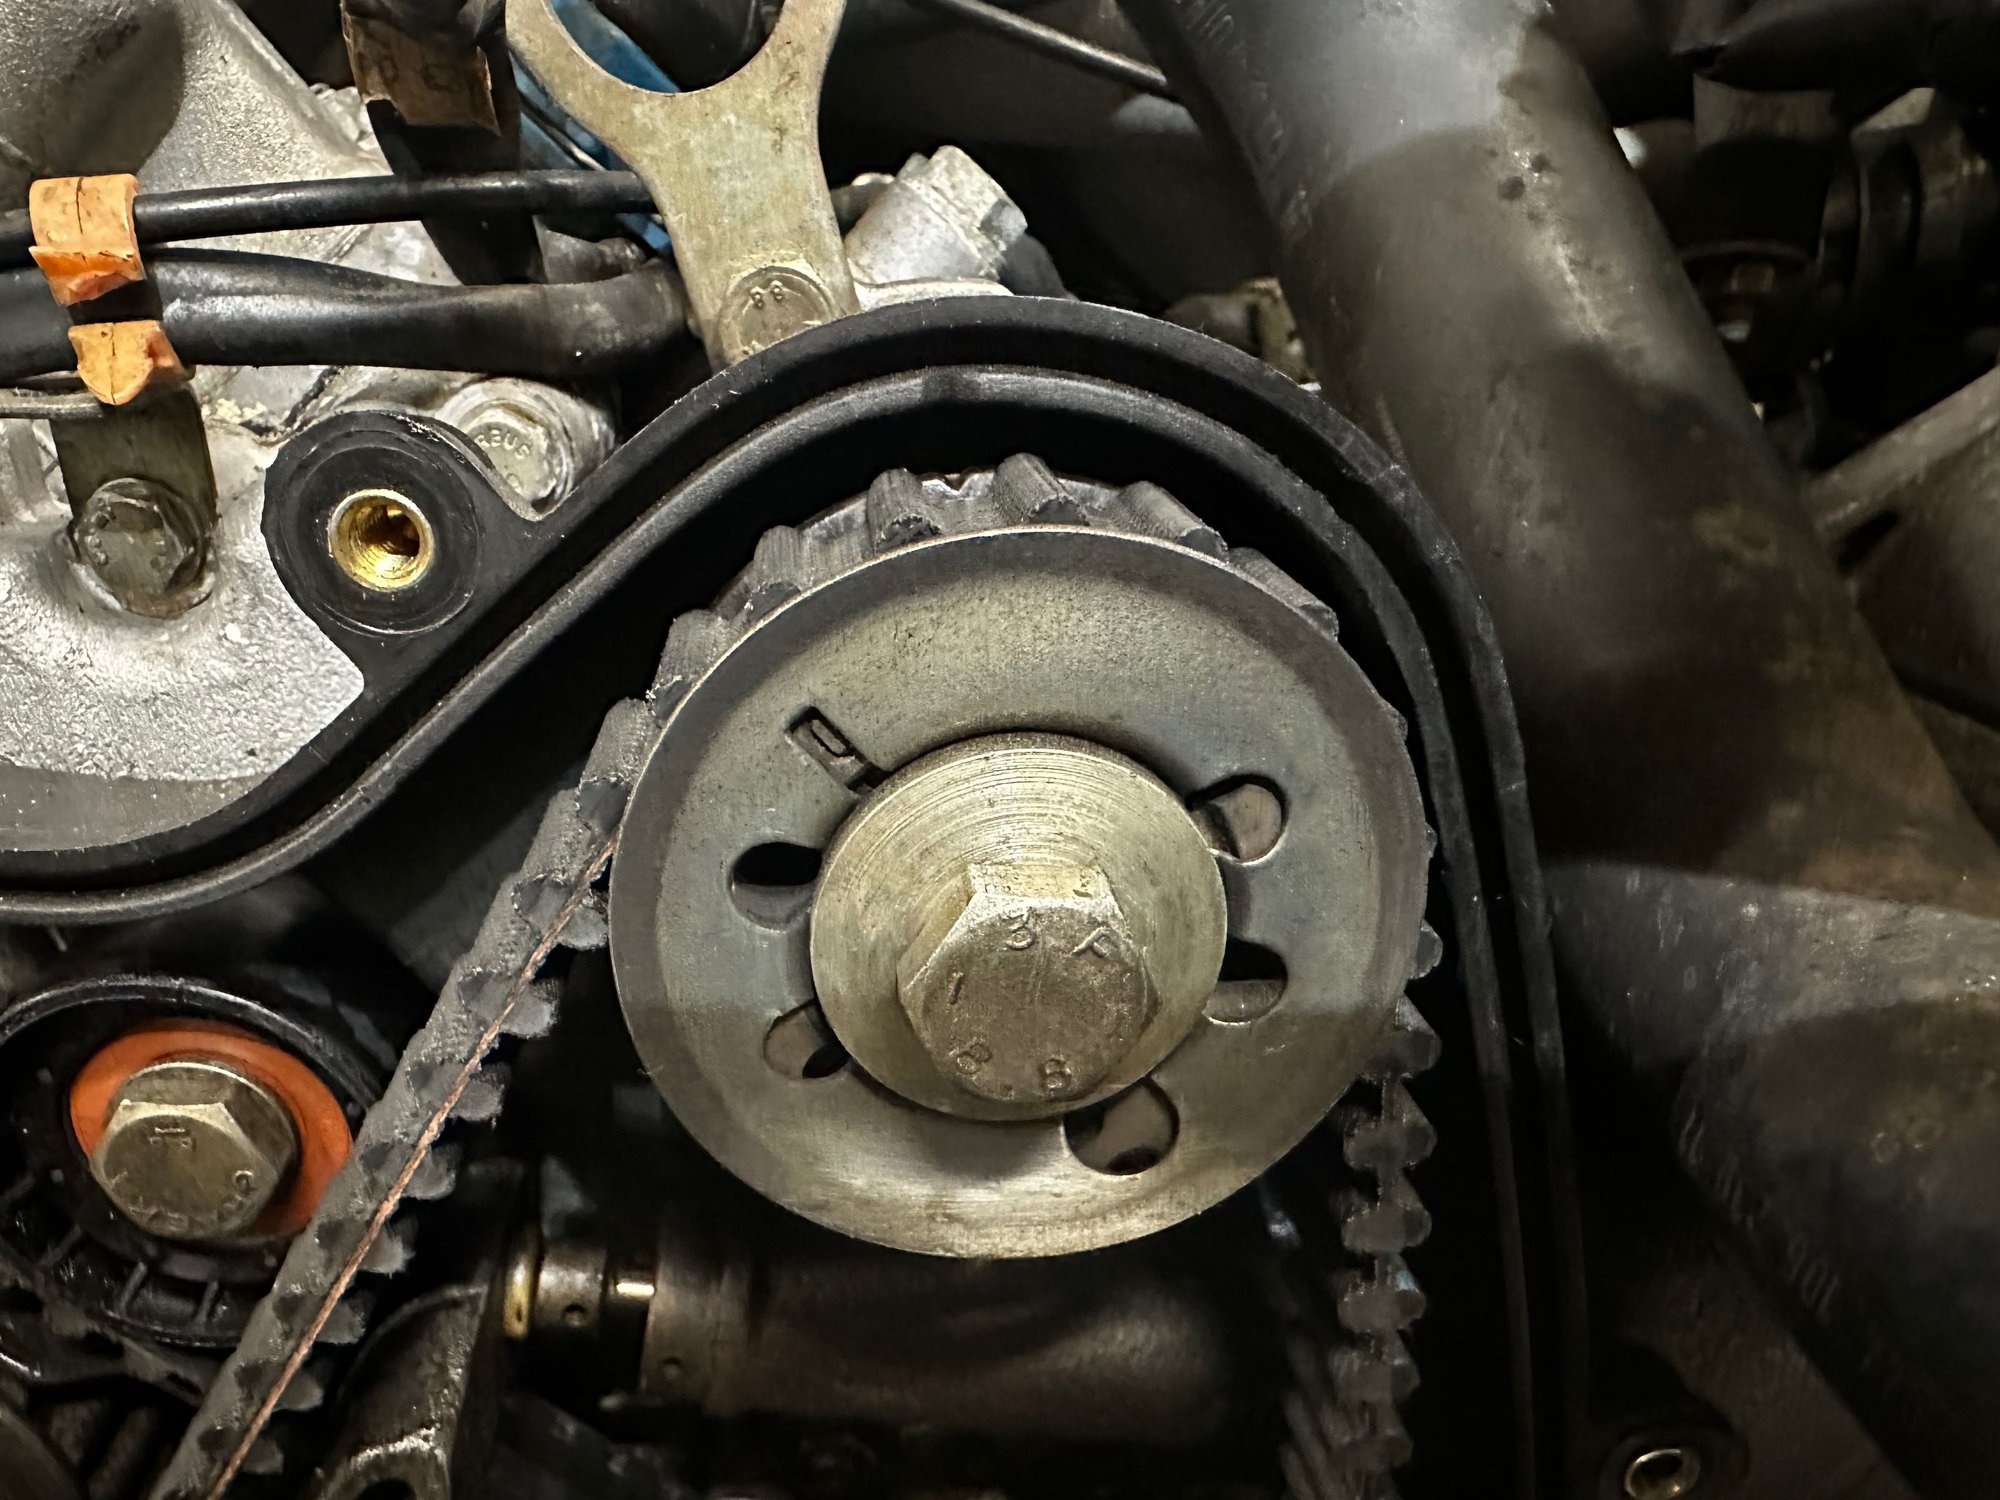
Ok - well - I said I would not work on it - but I spent 2 hours and checked the balance shafts - can someone tell me if this they are correct aligned - I think they are - or maybe off by one tooth?
It's a little hard to see, but it doesn't look to me like you have the lower pulley on right. If you look at the picture above, your "O" is in sort of the right position, but you want the little window over the "U", then align the teeth and pulley correctly. I hope that description makes sense.
ETA: As I compared your second picture more to the technical drawing that was posted above, your lower pulley is pretty far out of position. The "O" should be clockwise/left of the 3 o'clock position on the pulley (as it sits on the engine, not in the picture, sorry for the confusion). My comments about the little window thing hold.
Cheers
Last edited by Zirconocene; 02-23-2024 at 06:50 PM.
ok - I'm confused. I was lining up the "v" cut in the back of the top pulley with the mark "v" on the cover and then noticed the "v" cut in the bottom pulley is close but not lined up with the tab on the bottom cover. - I don't see an "O" or "U" on either pulley. Not sure what I'm looking for.
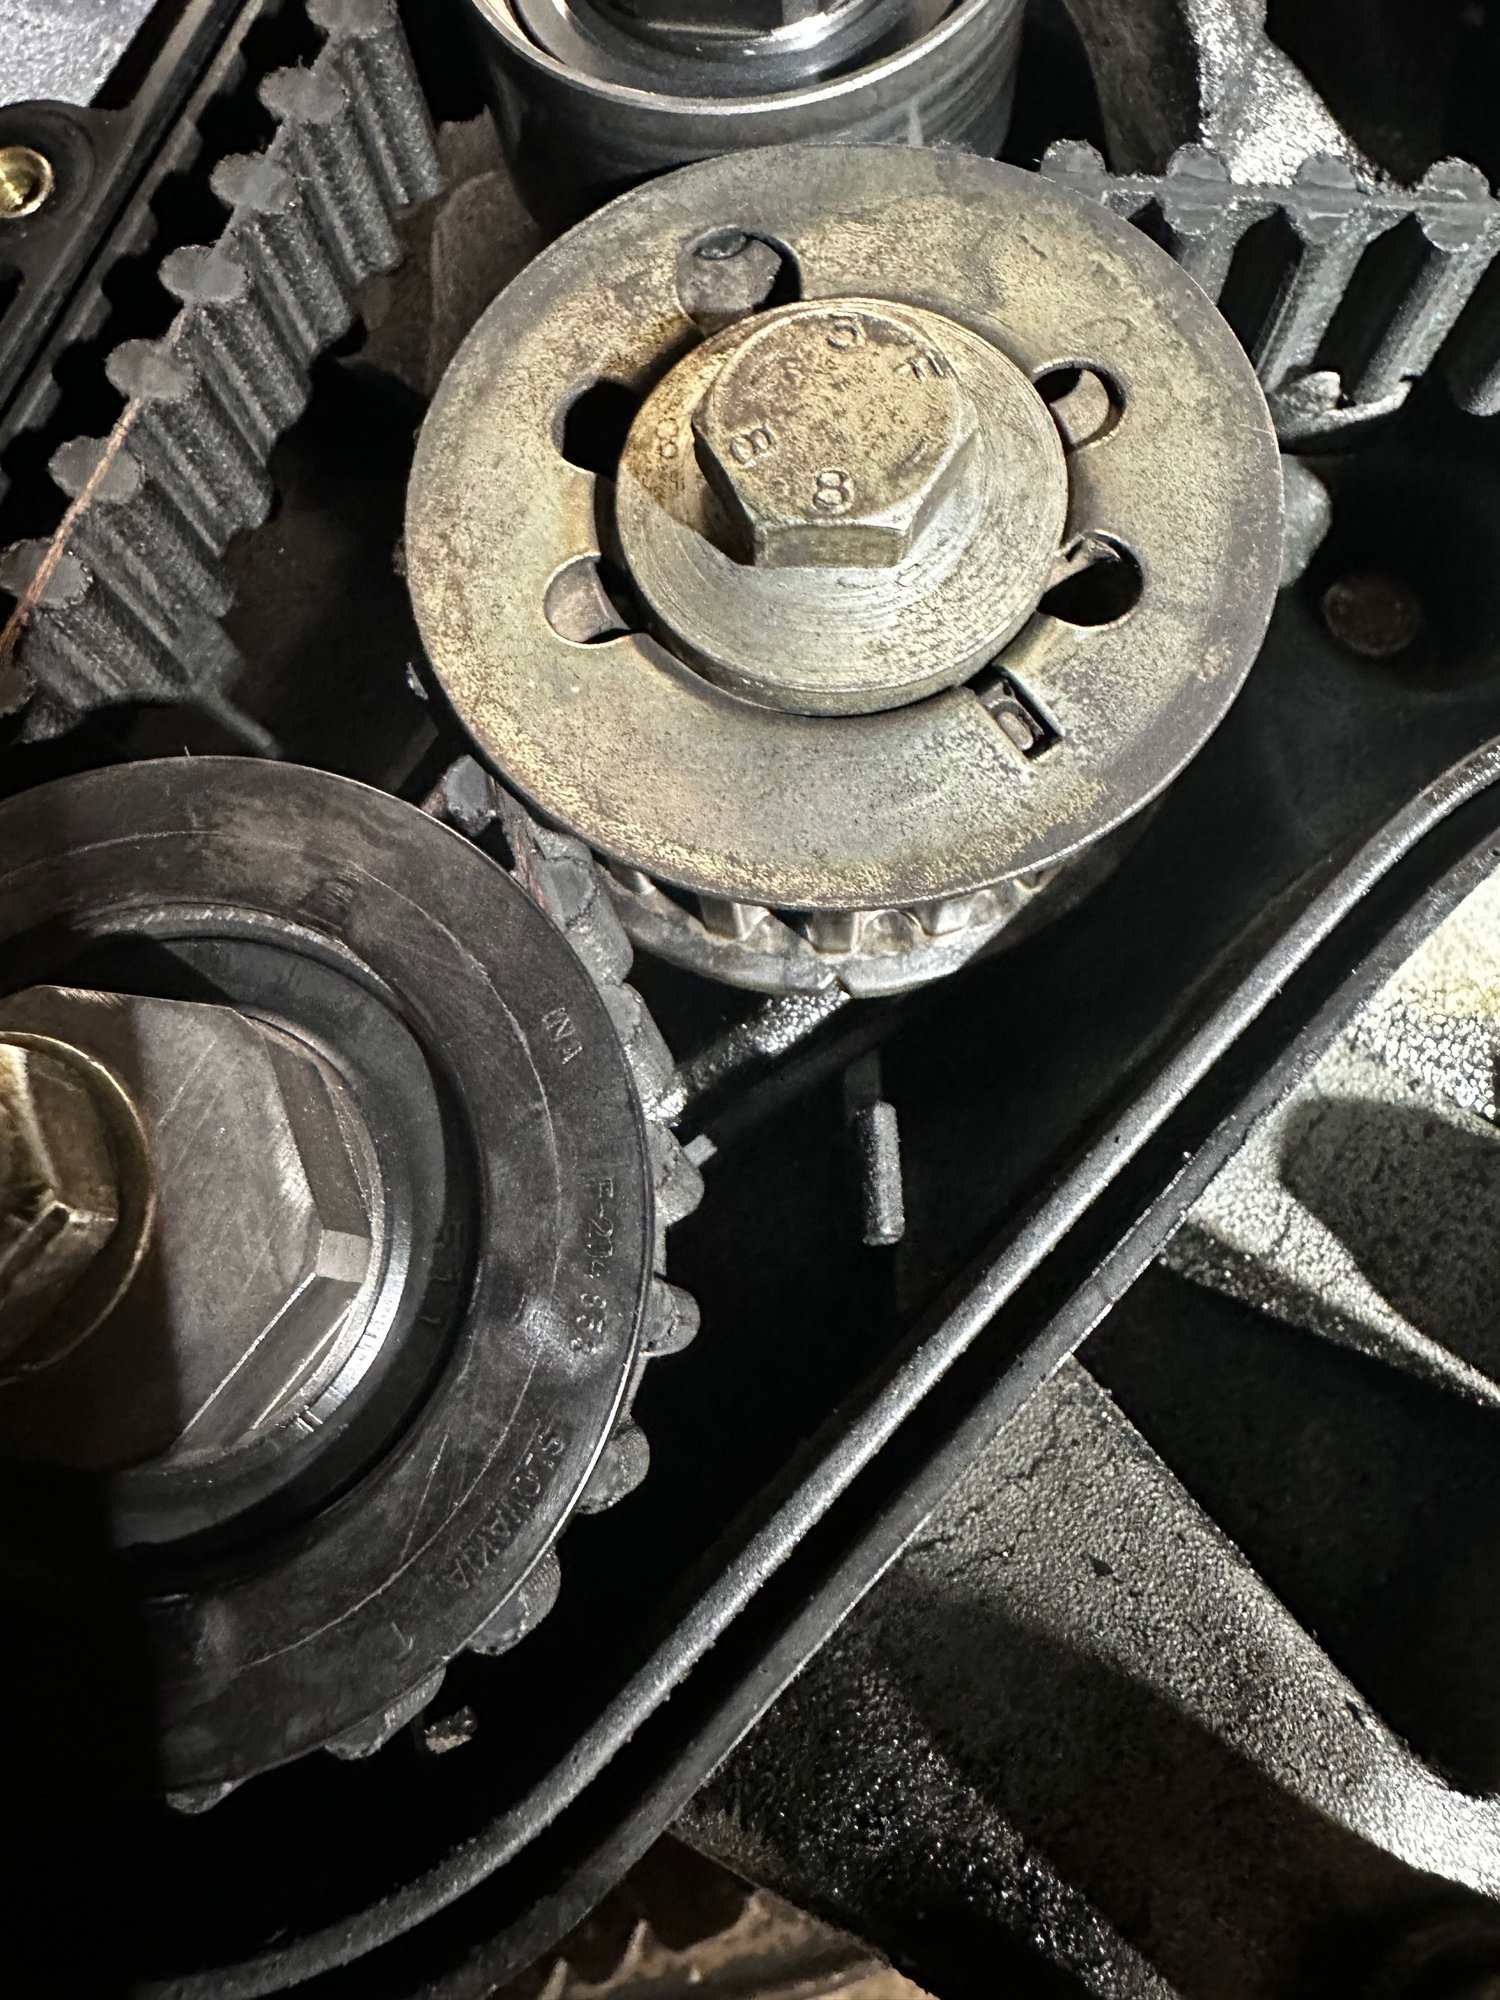
@Zirconocene@931guru ok - I think I'm seeing it now - the "square" window in the pully and what is displayed within it. I just need to see what a "U" looks like and make sure that's rotated to NOT display in the lower pulley window when the "v" is lined up with the plastic tab on the bottom of the cover. Now whether the "v" and the tab line up perfectly when the top is lined up is my next question (mine seems to be off by one cog. But I'd bet that is secondary to having the "U" in the right place on the shaft to time with the upper shaft.
@Gage I agree with you after watching the the video below.
Now - my question is, before I remove the bolt in the center of the sprocket - how to do I hold the shaft while I loosen and tigthten (to 45lbs)?

 02-18-2024, 06:33 PM