When you click on links to various merchants on this site and make a purchase, this can result in this site earning a commission. Affiliate programs and affiliations include, but are not limited to, the eBay Partner Network.
That one band clamp in the center of your picture definitely does not look like a factory-supplied clamp. IIRC, all factory clamps have the smooth inside surface, instead of the worm drive going through the surface of the clamp.
Wow Alex. I think after all this you will get bored, I'll loan you my two 968s so you can have fun doing this to them..lol. I have to warn you, my 197k mile one might take you a few years to tidy up. Great work, keep feeding us your progress please.
I actually enjoy doing this and find it very rewarding.. It also helps that I have a nice and comfy garage to do the work in, and I wouldn't mind doing a bit of restoration work on other 968's, but the distance might be a bit of a deal breaker here..
That one band clamp in the center of your picture definitely does not look like a factory-supplied clamp. IIRC, all factory clamps have the smooth inside surface, instead of the worm drive going through the surface of the clamp.
Excellent spotting there.. A couple of the original hose clamps were in pretty poor condition so I chucked in a few new ones to be zink chromated with the rest of parts so they wouldn't look out of place next to the yellow ones..
Another part that looked like they were still the original ones were the motor mounts.. They weren't leaking but they had definitely sagged somewhat. And since they are a bit of pain in the *** to replace on their own, now that the head, intake and exhaust manifolds were off, they are very easy to replace. Everyone says not to bother with anything but original Porsche mounts which I agree with, but they are not cheap.! In fact those two mounts costs more then the head work I am having done, but hey, if the last the next 25 years I guess its not that bad.. Anyway, new ones going in..
4 bolts to remove the engine support bracket and there is free access to the motor mount.. Same on the drivers side.. Easy peasy..
Difference between old and new mount on the drivers side.. Not to bad considering they are 28 years old actually..
Difference on the passenger side.. A bit more wear and sag then the drivers side, most likely due to being close to the hot exhaust.
Only the original Porsche mount has the part number stamped into the rubber..
So when I had the engine support bracket removed on the passenger side it also provided easy access to another potential trouble maker if not addressed in time.. The bracket that holds the oil filter and oil pressure relief valve, or rather its gasket which can deteriorate over time and causing water and oil to mix.. So that had to come off as well for a check, clean and new gasket..
The gasket looked like it was on its last legs..
So a proper clean, checked for any warpage and a new gasket ready to go back on..
Oil pressure relief valve also received a clean and a new O-ring.. Tool on the left is the alignment tool to ensure the OPRV sits perfectly centered and doesn't bind when installed.. But in this case I actually didn't need it as I could screw the OPRV all the way ind with my fingers..
Oh, and this little connecting tube needs to come out too as it also have an O-ring at the other end that needs replacing. They are often quite stuck and end up getting buggered when removing them, but this one came out with no damage.. So two new O-rings and it was back in again.. Then install the bracket and OPRV as described above as well as the oil cooler lines and another job is done..
Next up was to inspect the bores and give the deck a bit of tidy up in preparation for receiving a new head gasket and the refreshed head.
All the bores were in perfect condition.. No marks or scratches what so ever and all smooth as glass, which was both a relief and very satisfying even though I didn't suspect anything else really.. Porsche Nikasil treatment was really the best quality you could get back when they still hand built their cars, and much better quality then the later Alusil treatment they started to use on the water cooled 911's as part of the money saving process.
New head gasket is on after giving the deck surfaces a thorough clean..
Then its was time to turn my attention to the injectors.. They all looked a bit manky but these older style Bosch injectors with metal body were/are really good quality and long lasting, so I gave them a clean and a rebuild with new O-rings, filter, spacer and pintle caps..
As you can see in these two pics the new pintle caps are taller then the stock ones which concerned me a bit.. The stock green caps sit almost flush with the injector needle where as the new ones sit a couple of millimeters above the injector needle. And I was worried the new caps would interfere with the spray pattern.! Anyway, I didn't have any new green caps and the old ones all got destroyed when I removed them, and I had an appointment with my engine shop to do an ultra sonic clean and flowtest of the injectors when I collected the head. So time would tell if the taller pintle caps would work or not..
As it turned out, the taller pintle caps in the injector rebuild kit I bought worked just fine and doesn't interfere with the spray pattern at all.. In fact my injectors worked perfectly with nice even spray pattern and all 4 of them were within 1% of each other when doing the flow test on the ASNU injector testing machine. So almost better then 4 new injectors.. Proper Bosch quality..
All 4 mounted back on the fuel rail and ready for many more years of service..
Great work Alex!
Just to clarify, 968 blocks/bores are Alusil (exept for 968 Turbo S/RS that had Nikasil) Your bores look perfect👌
Keep up the good work 👍
/Peder
I stand corrected then..! I was just under the impression that all both the air-cooled and 968/928 from that period had Nikasil coated cylinders.. Learned something new today then..
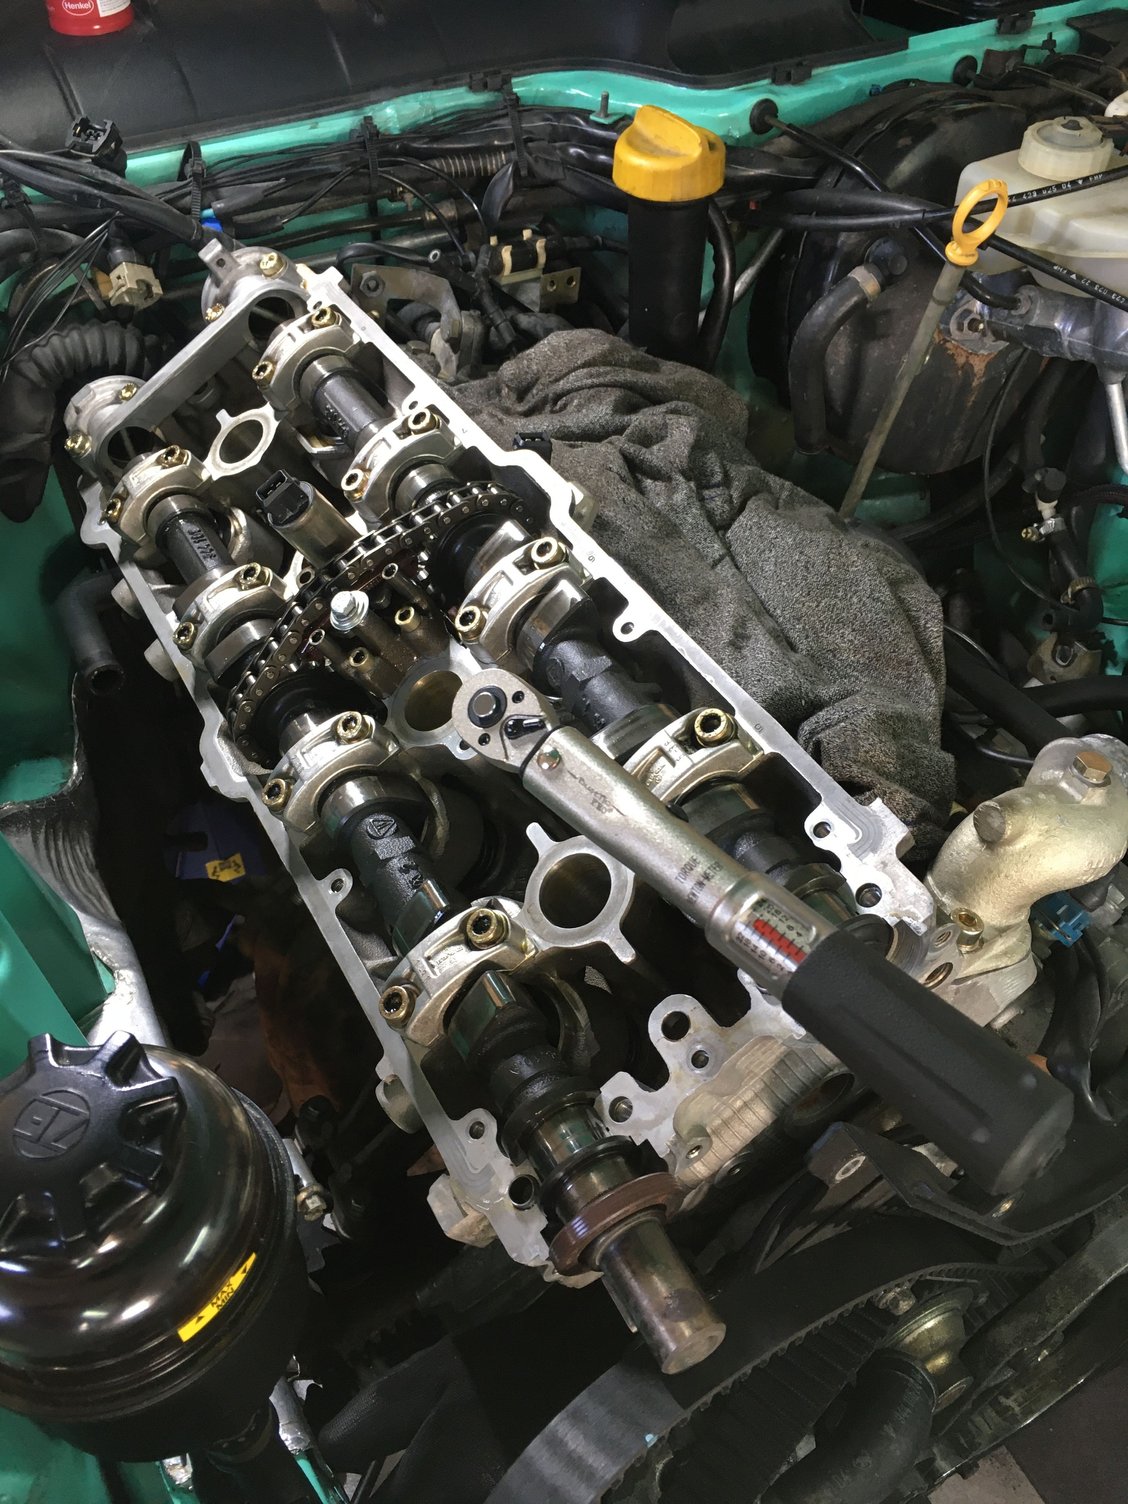
Besides the injectors I also brought back the refreshed head from the engine shop.. It was in pretty good condition and after testing it and giving it a clean, it received new valve stem oil seals, a light skim and all the valve seats lapped. The inlet valves were all pretty tight, where as most of the exhaust valves were leaking slightly. So with a fresh head hopefully the horsepower count will be up to near new..
Head and cams are back on.. Following the WSM and torque values to the letter..
Finally I got to use some of those shiny new yellow plated bolts..
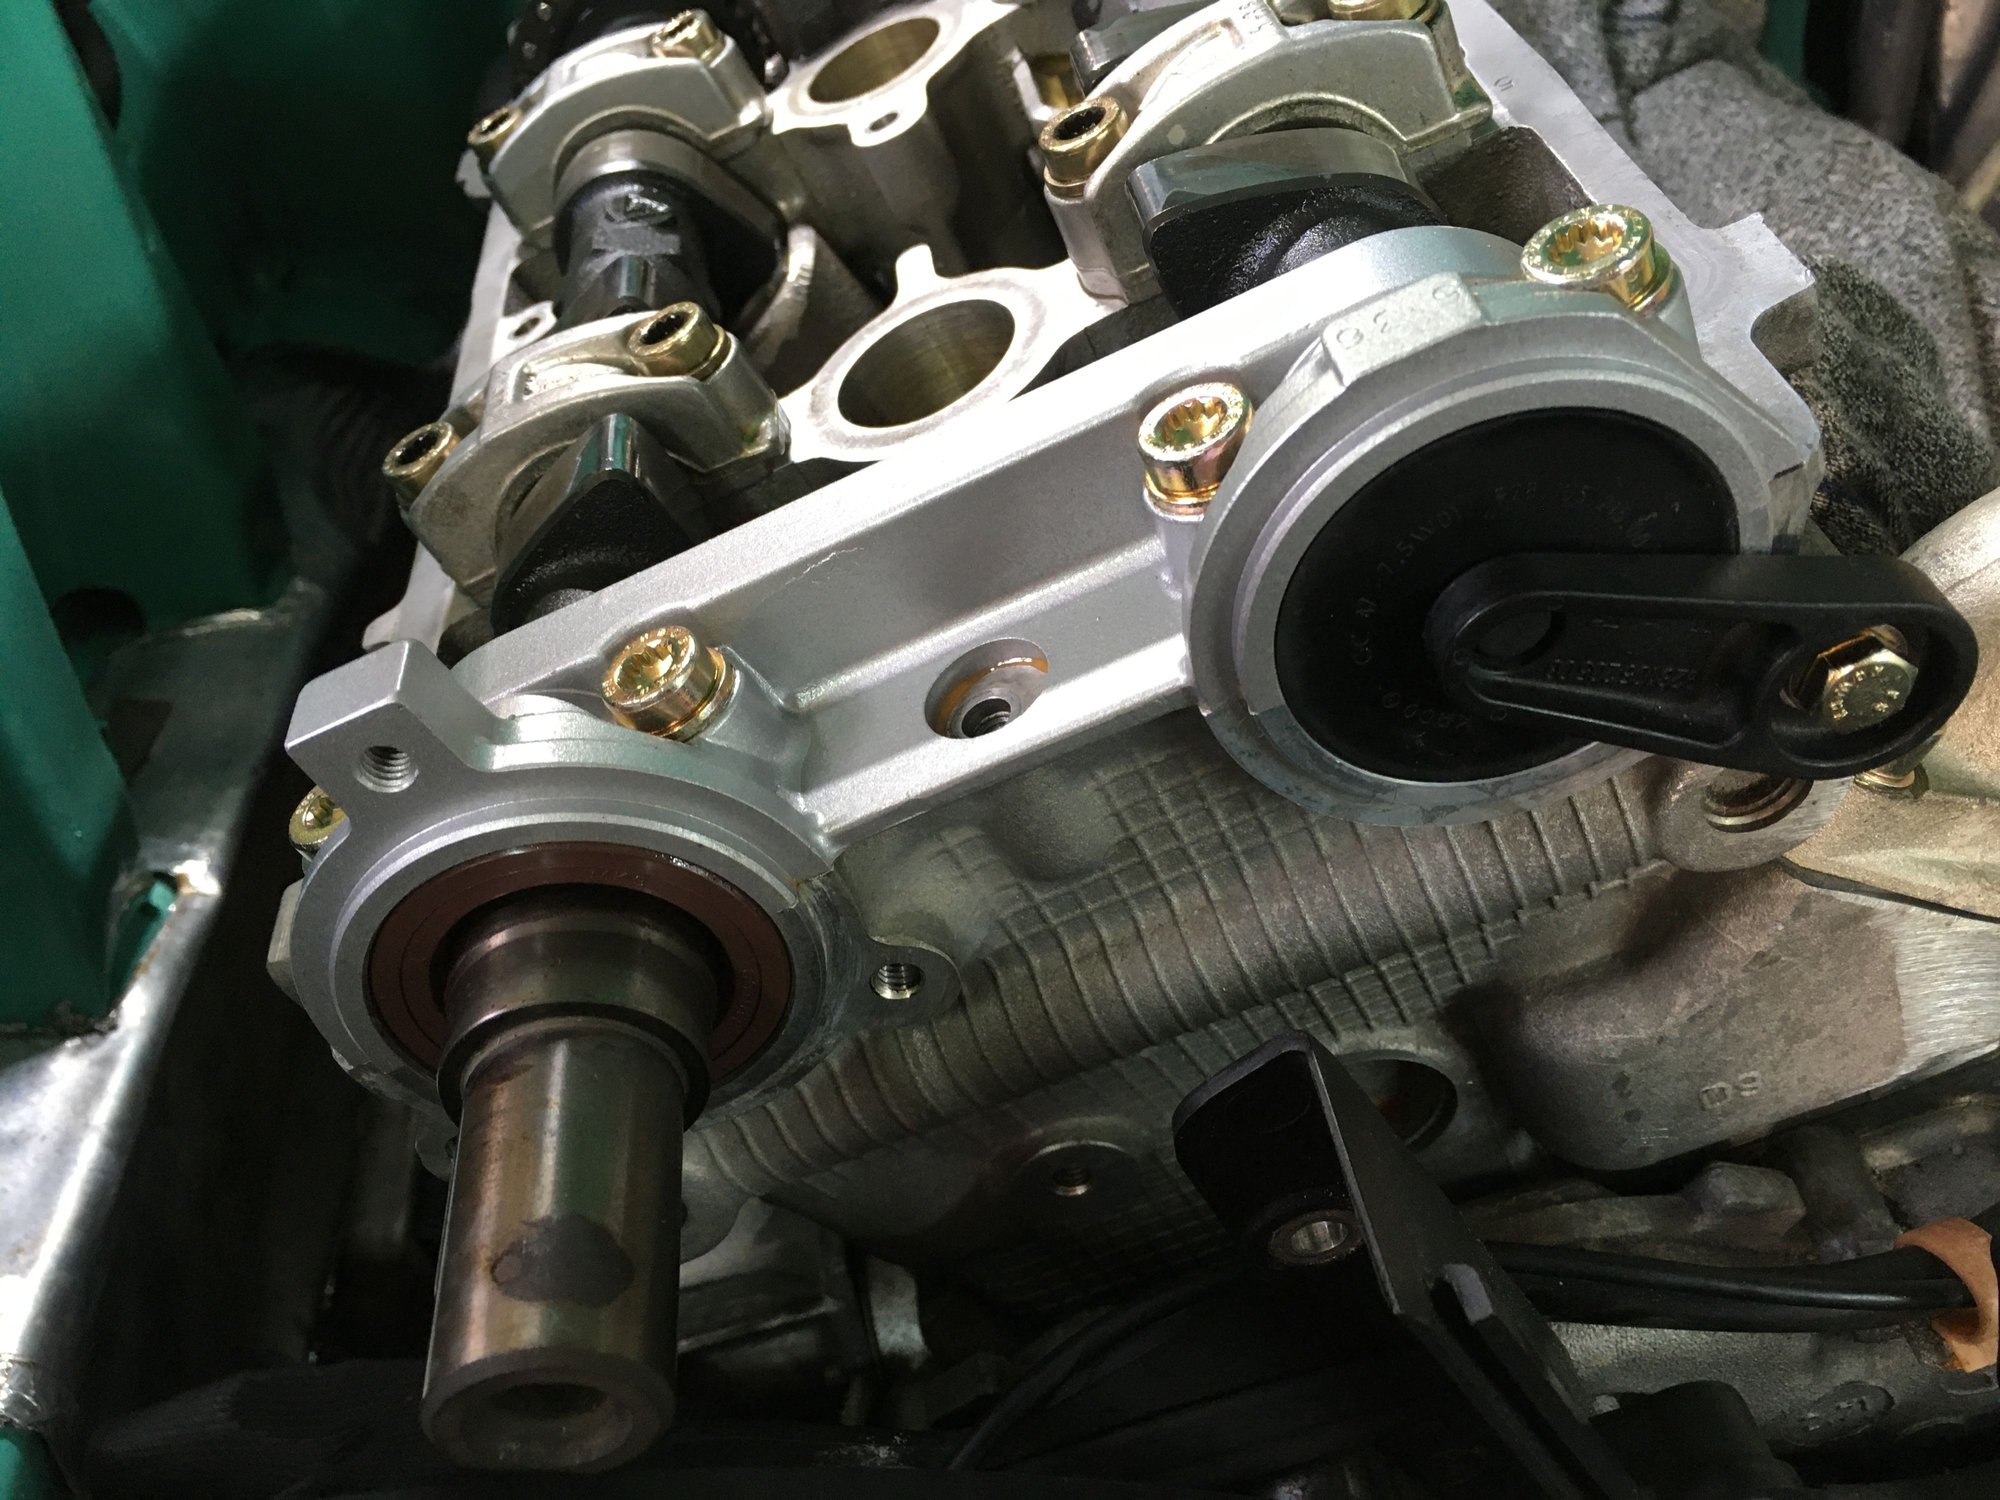
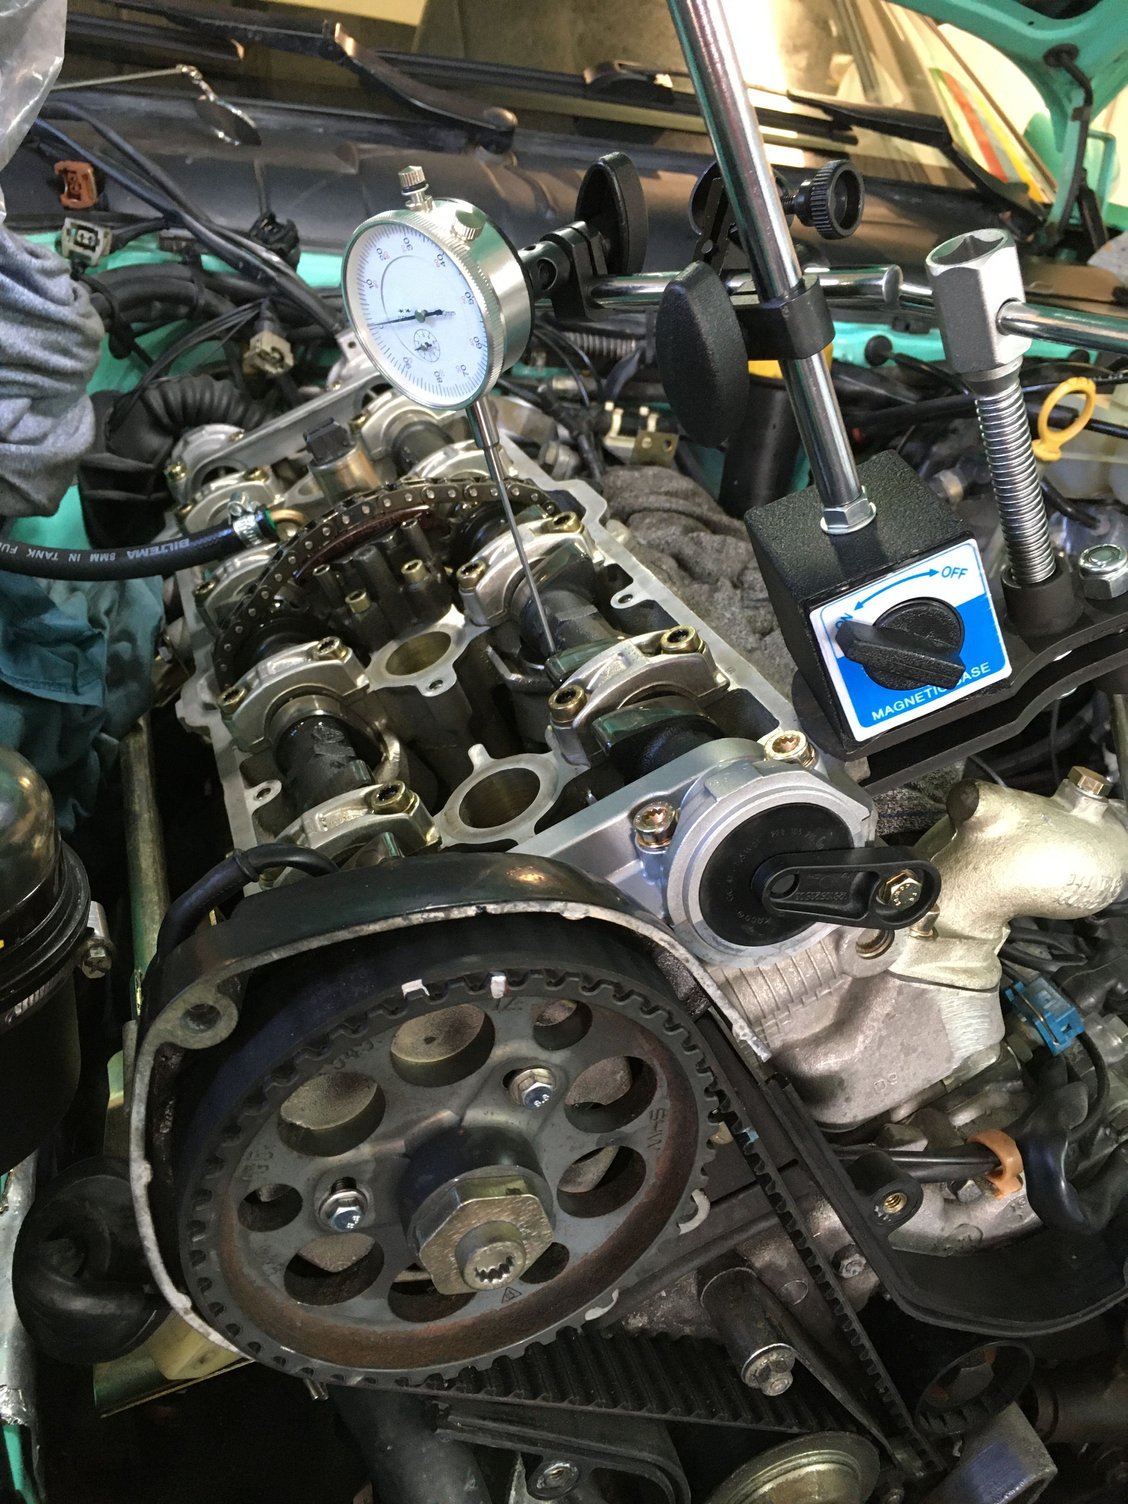
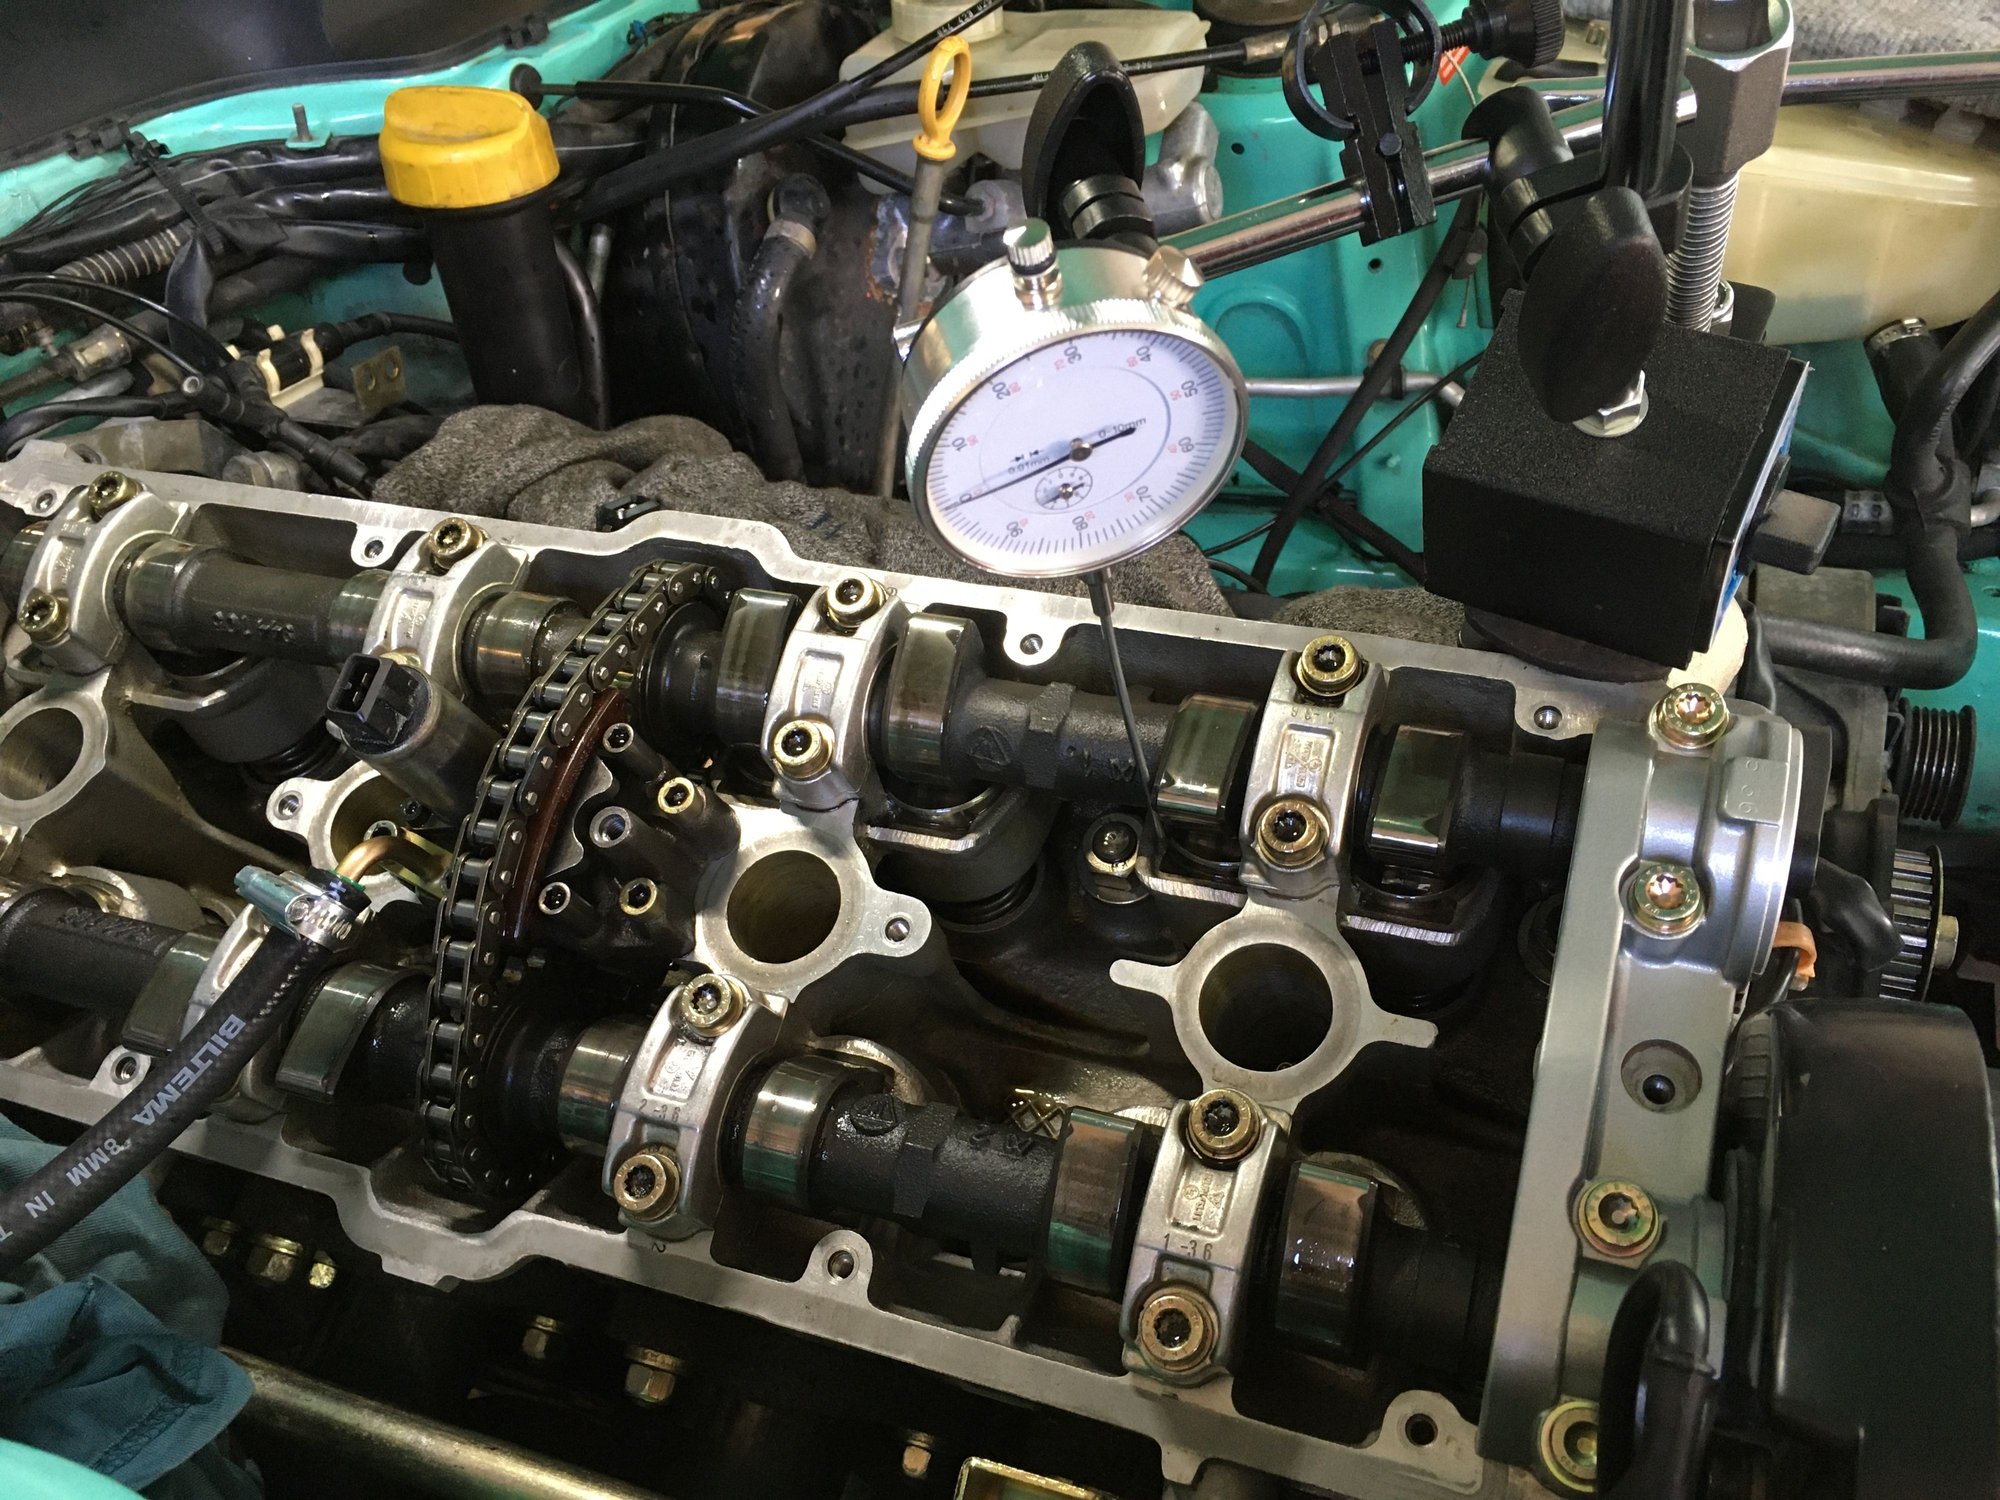
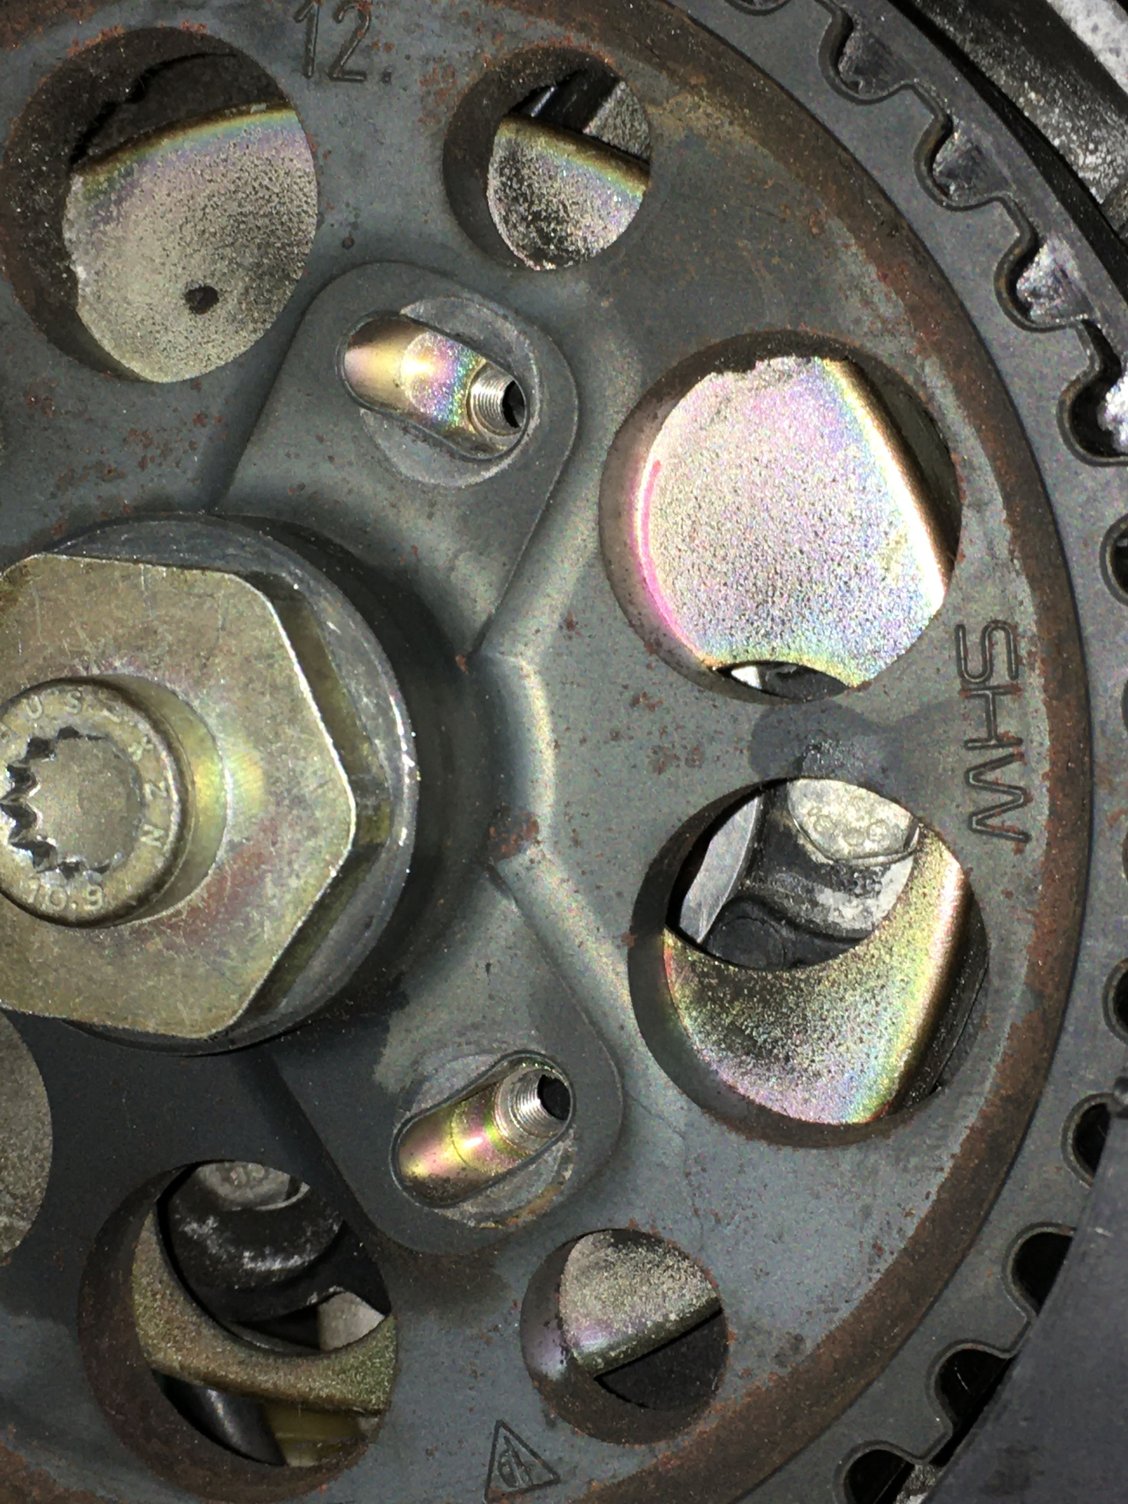
I had saved the cam timing with the locking bolts on the cam sprocket backing plate before disassembly in order to save me the trouble of timing the cams. But then I started wondering when was the last time they were timed.? And with new belts just before I bought the car and possibly new cams and chain not to long ago, who knew where the cam timing would be..?!? So I decided to do it myself just to be sure.. Out came the dial gauge, variocam flange tool, compressor and a few other bits..
Its not difficult as long as one reads the manual a few times and understands the process. So just be slow, meticulous and keep everything steady so not to throw of the dial gauge and it will be fine.
In the end the new cam timing weren't far off what it was before.. As en extra back up I drew a red line along the circle in the cam sprocket when locking it in and the new timing is pretty close.. Oh well, at least I now know its set as per the manual..
Some more shiny bits going back on after reinstalling the headers with anti seize grease and yellow zink coated nuts.. The heat shields also got zink coated, I just forgot to take pics of them.. But a huge improvement..
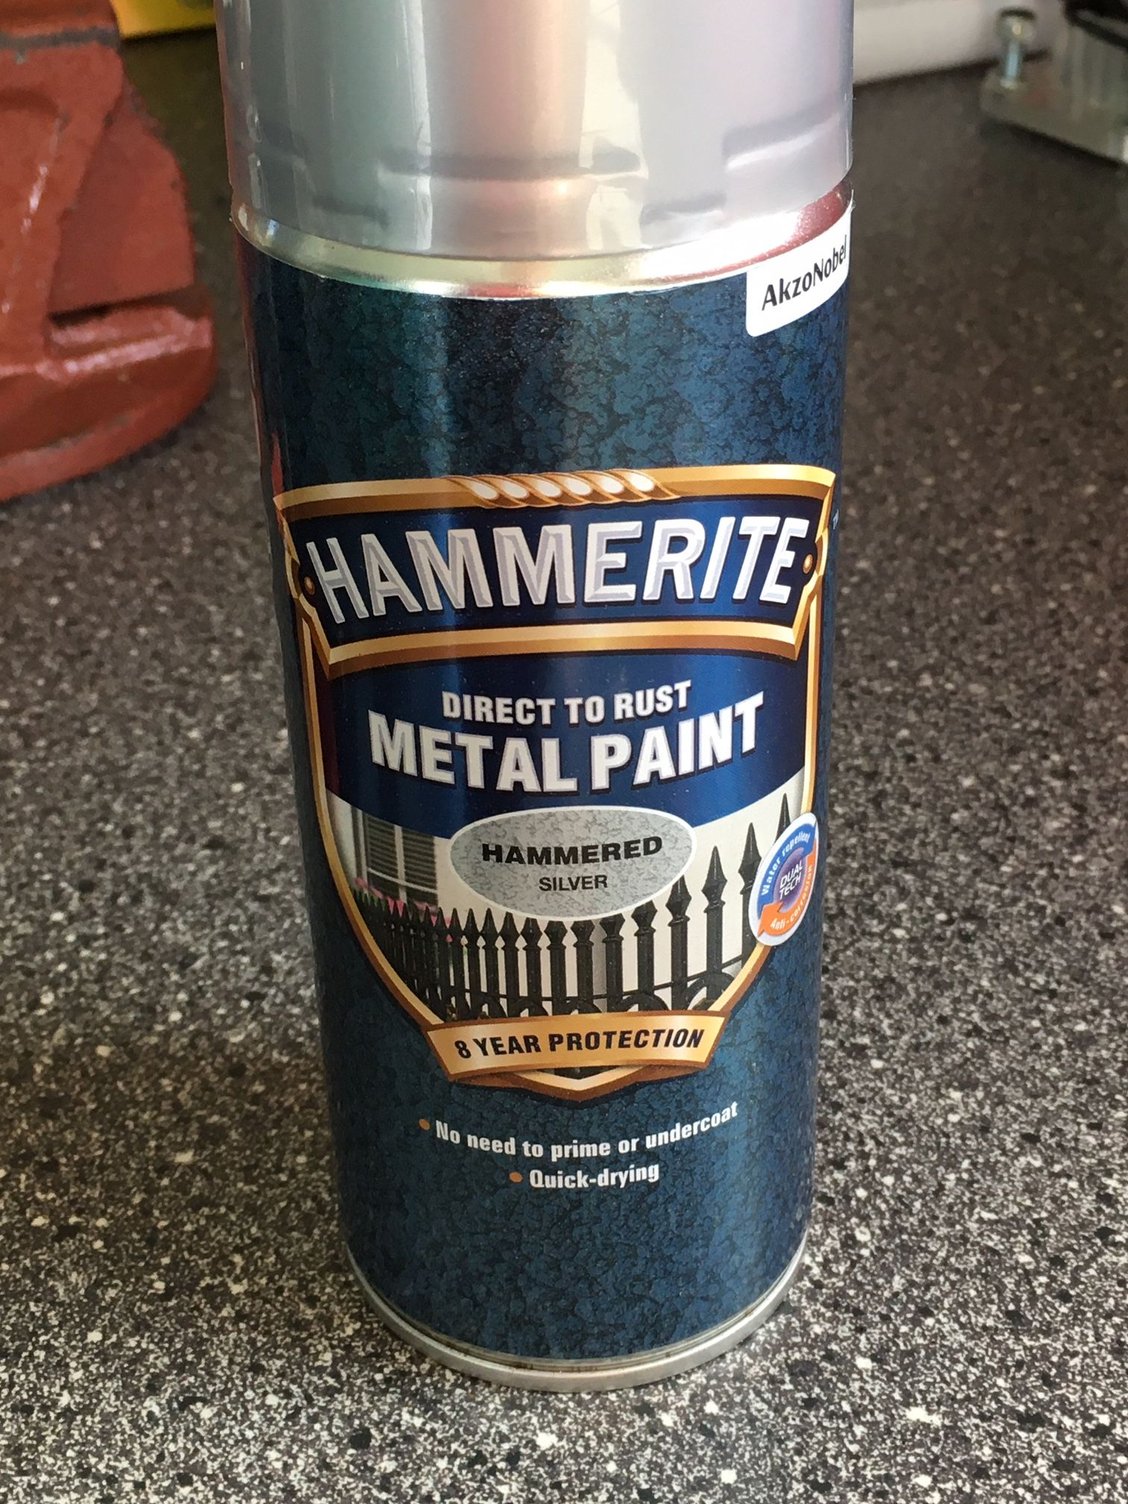
Jeff asked earlier what surface treatment I was planning for the alu parts.. Well, first I had the parts aqua blasted which uses high pressure water to clean the surface. The advantages are that this way is much more gentle to the metal and it also leaves the surface much like when its was new with a more shiny smooth surface then traditional media blasting. Then I painted them with Hammerite hammered silver metal paint, which is pretty much identical in color to original fresh aluminium and also have that slightly textured finish the original valve cover and intake manifold has. I also used Hammerite paint on my coupe when I did the same engine resto to it last year, and it still looks as fresh as new with no fading or yellowing what so ever. Its also much easier to clean the surfaces when they are painted as dirt, oil etc doesn't stick as much.
Hammerite hammered silver metal paint..
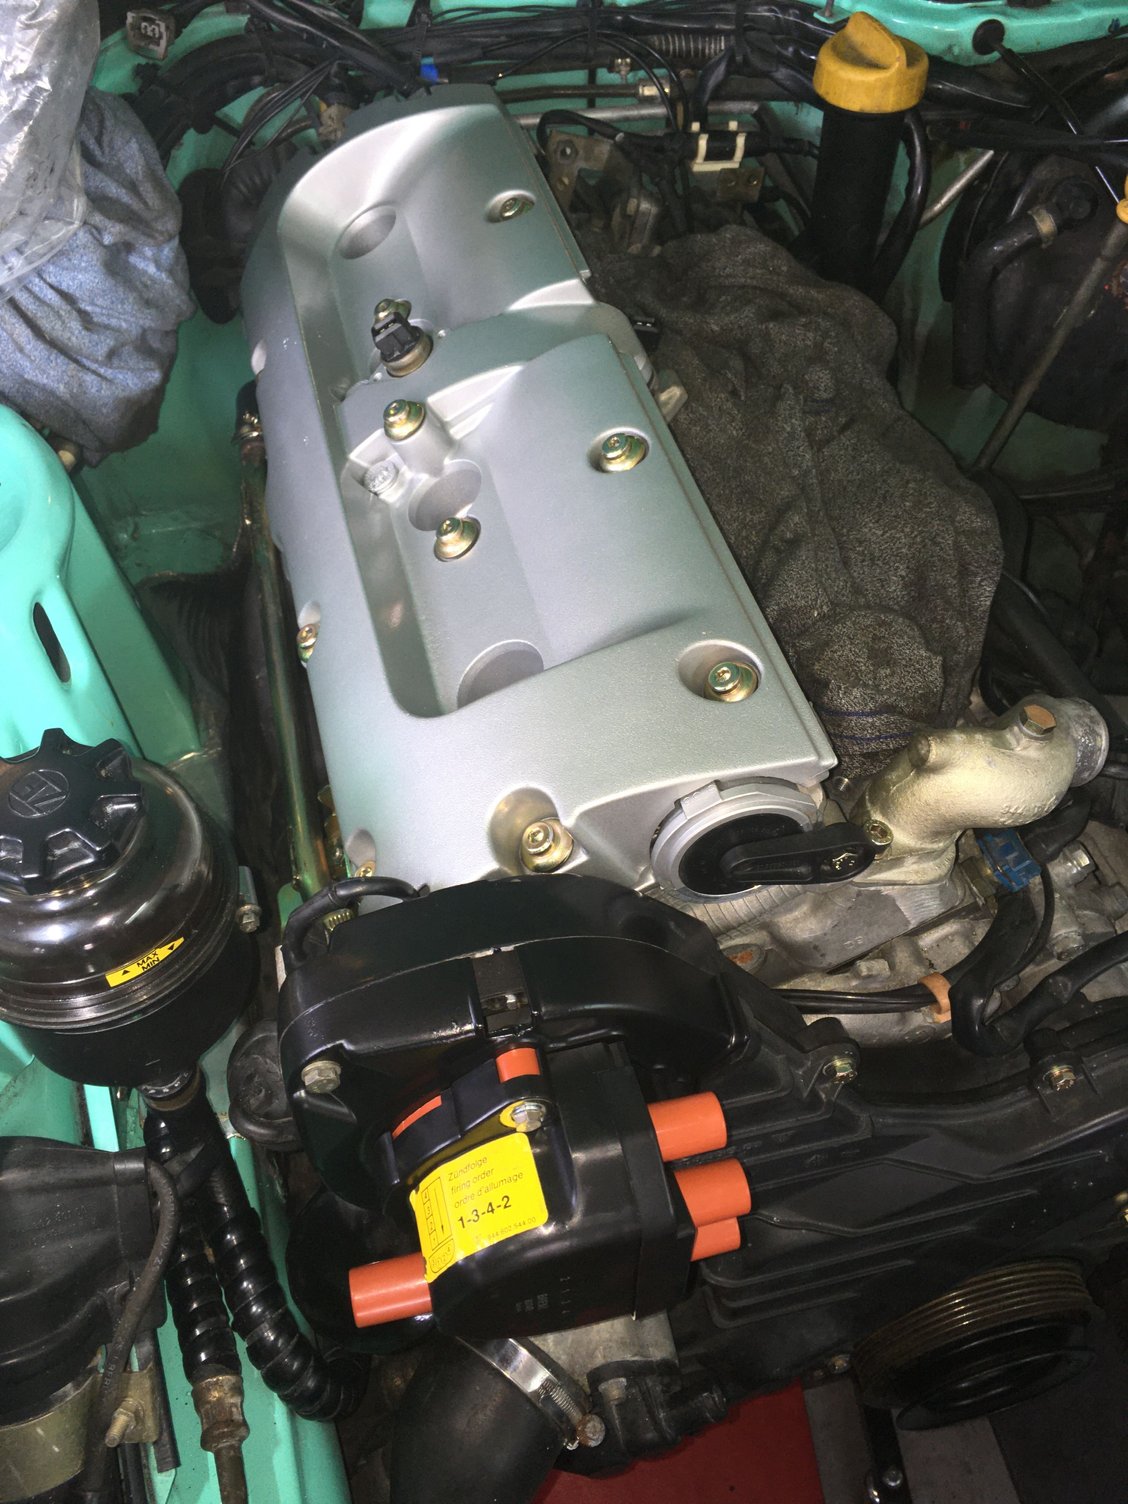
And how it looks on the valve cover.. 3 thin coats of paint is perfect.. The valve cover actually looked pretty much like this when it came back from aqua blasting, and the Hammerite paint just gives it a bit more even and smooth surface along with a bit of protection.
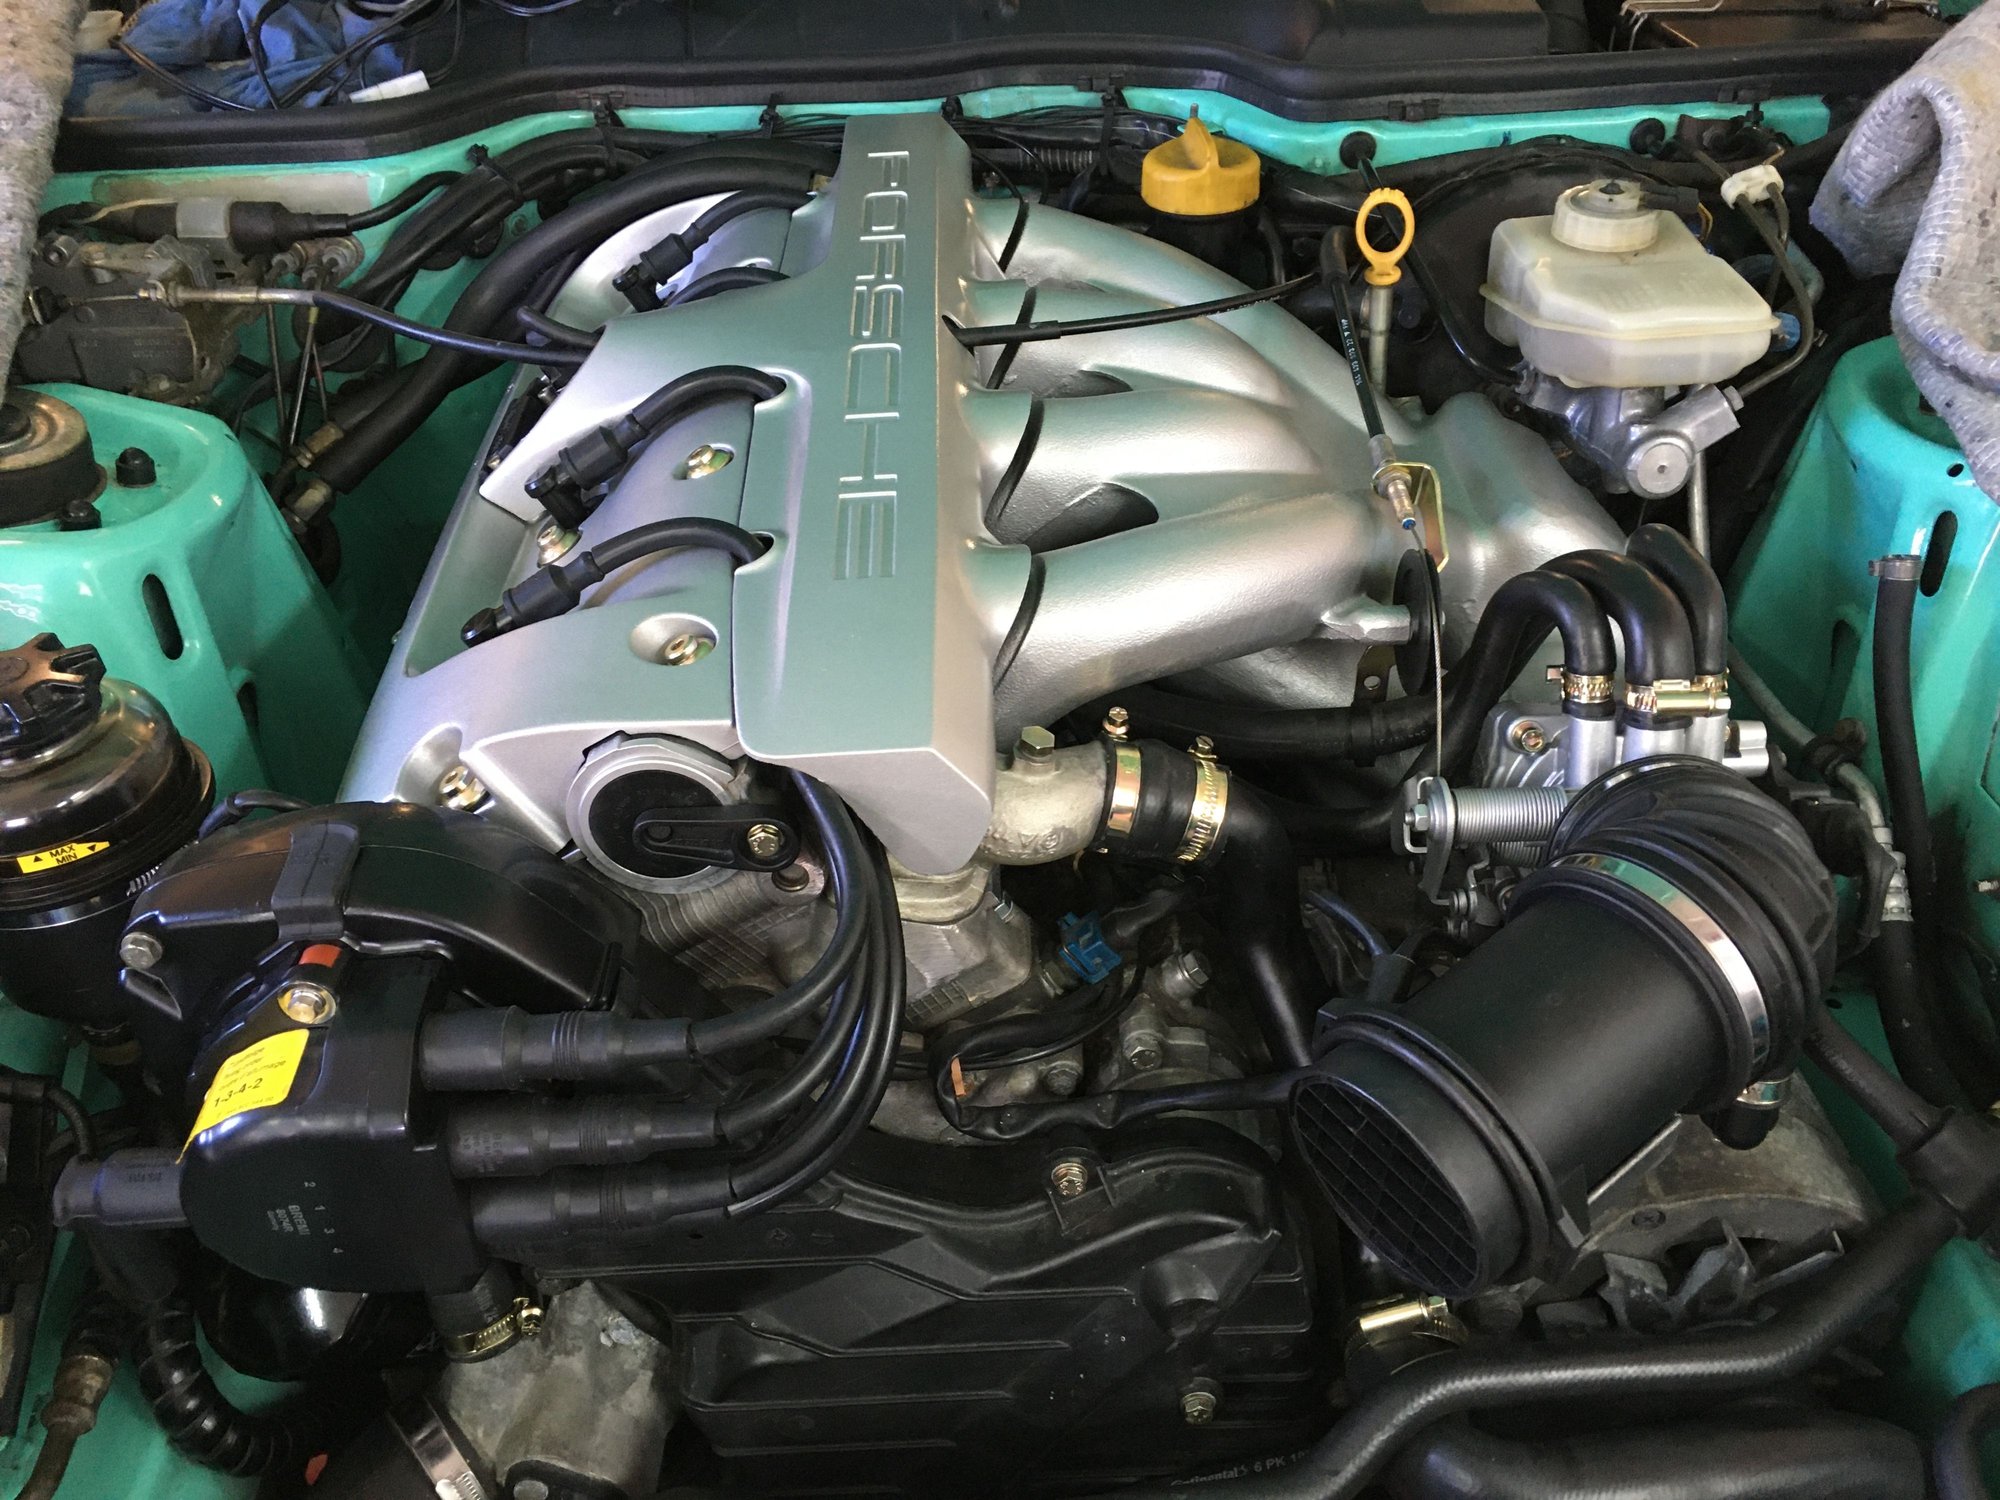
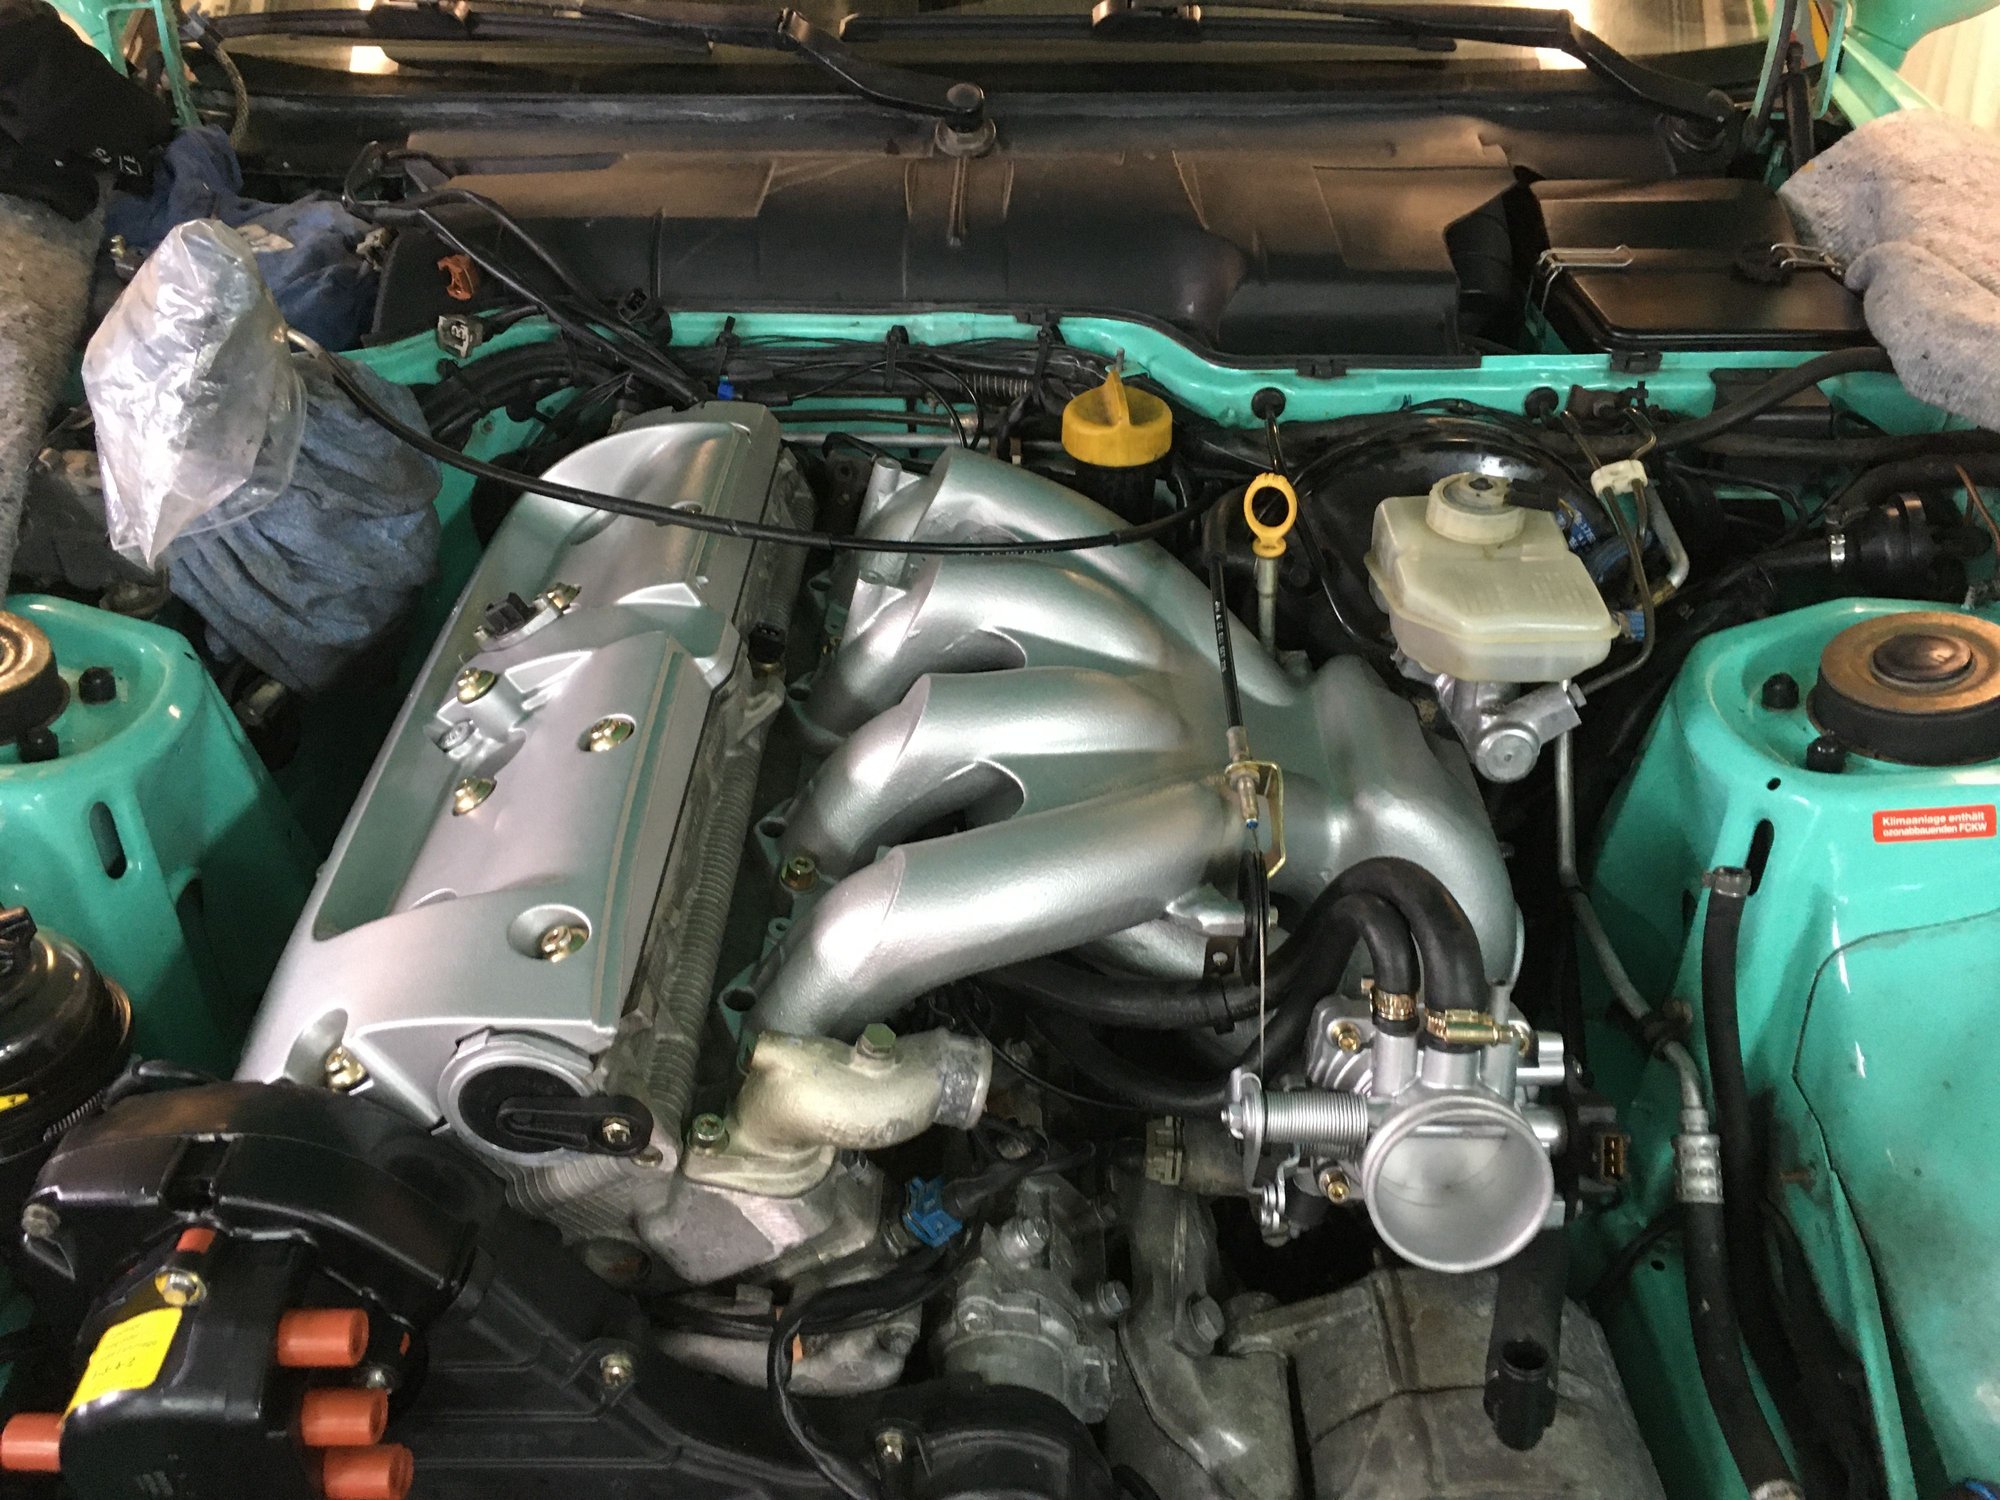
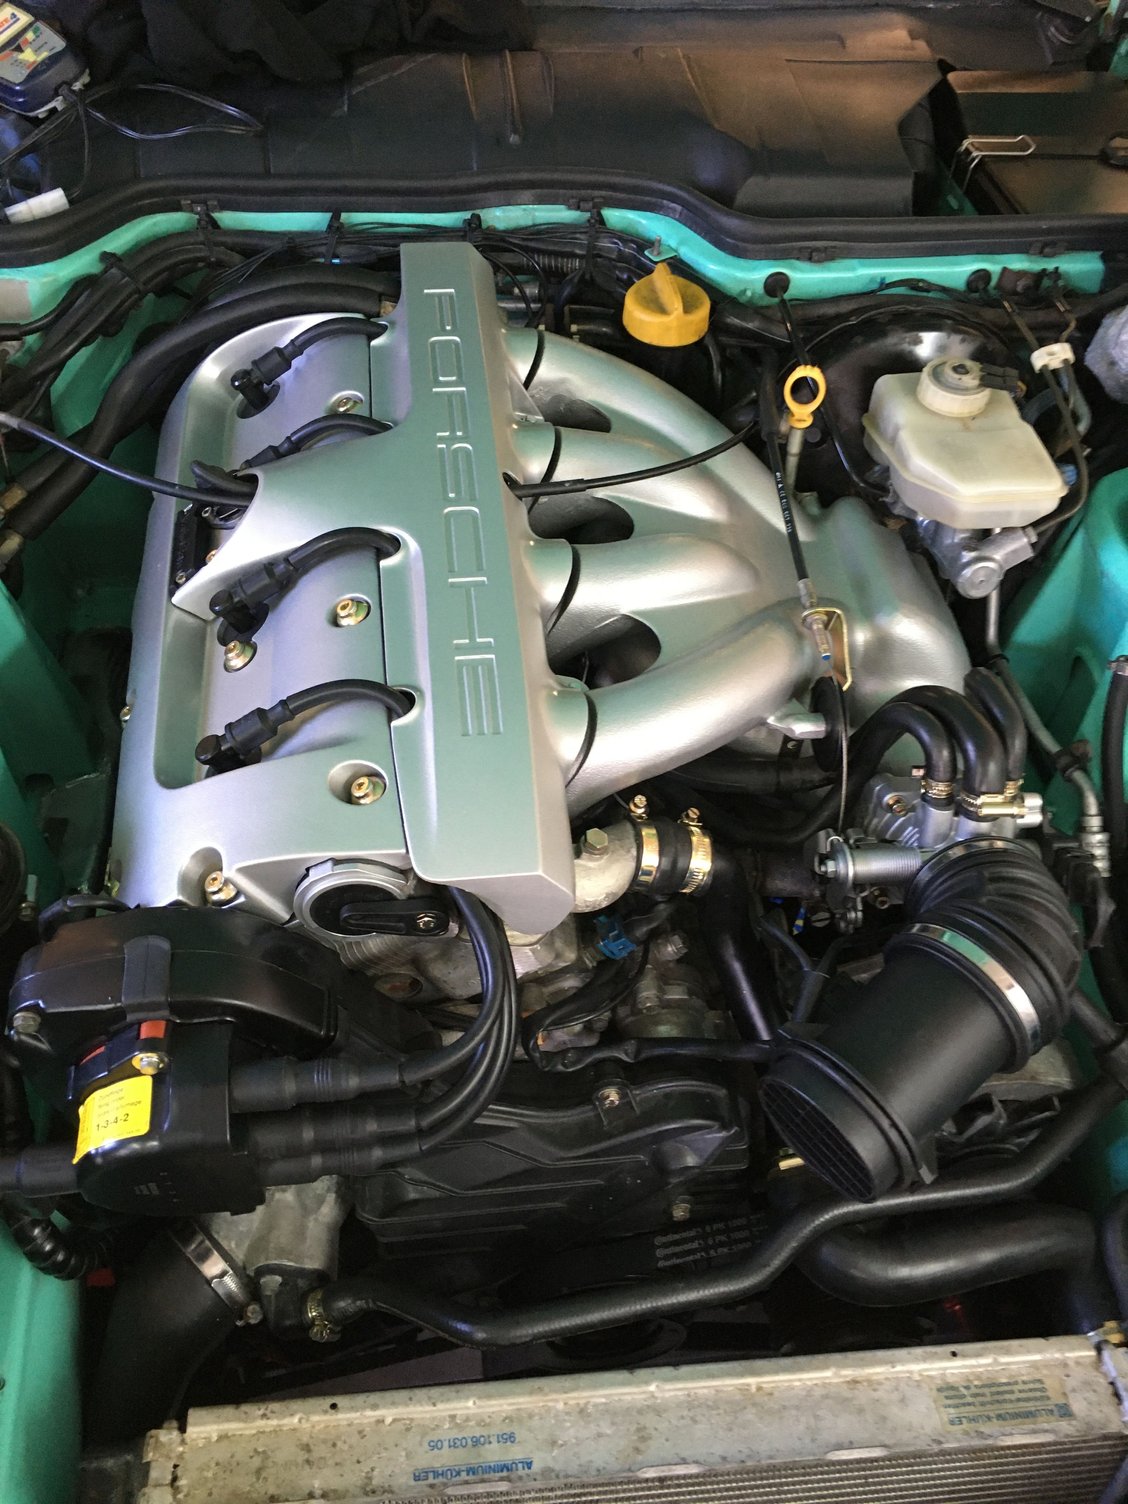
And with the intake manifold installed it gives a better look of the nicely textured surface.. Starting to look like an engine now..
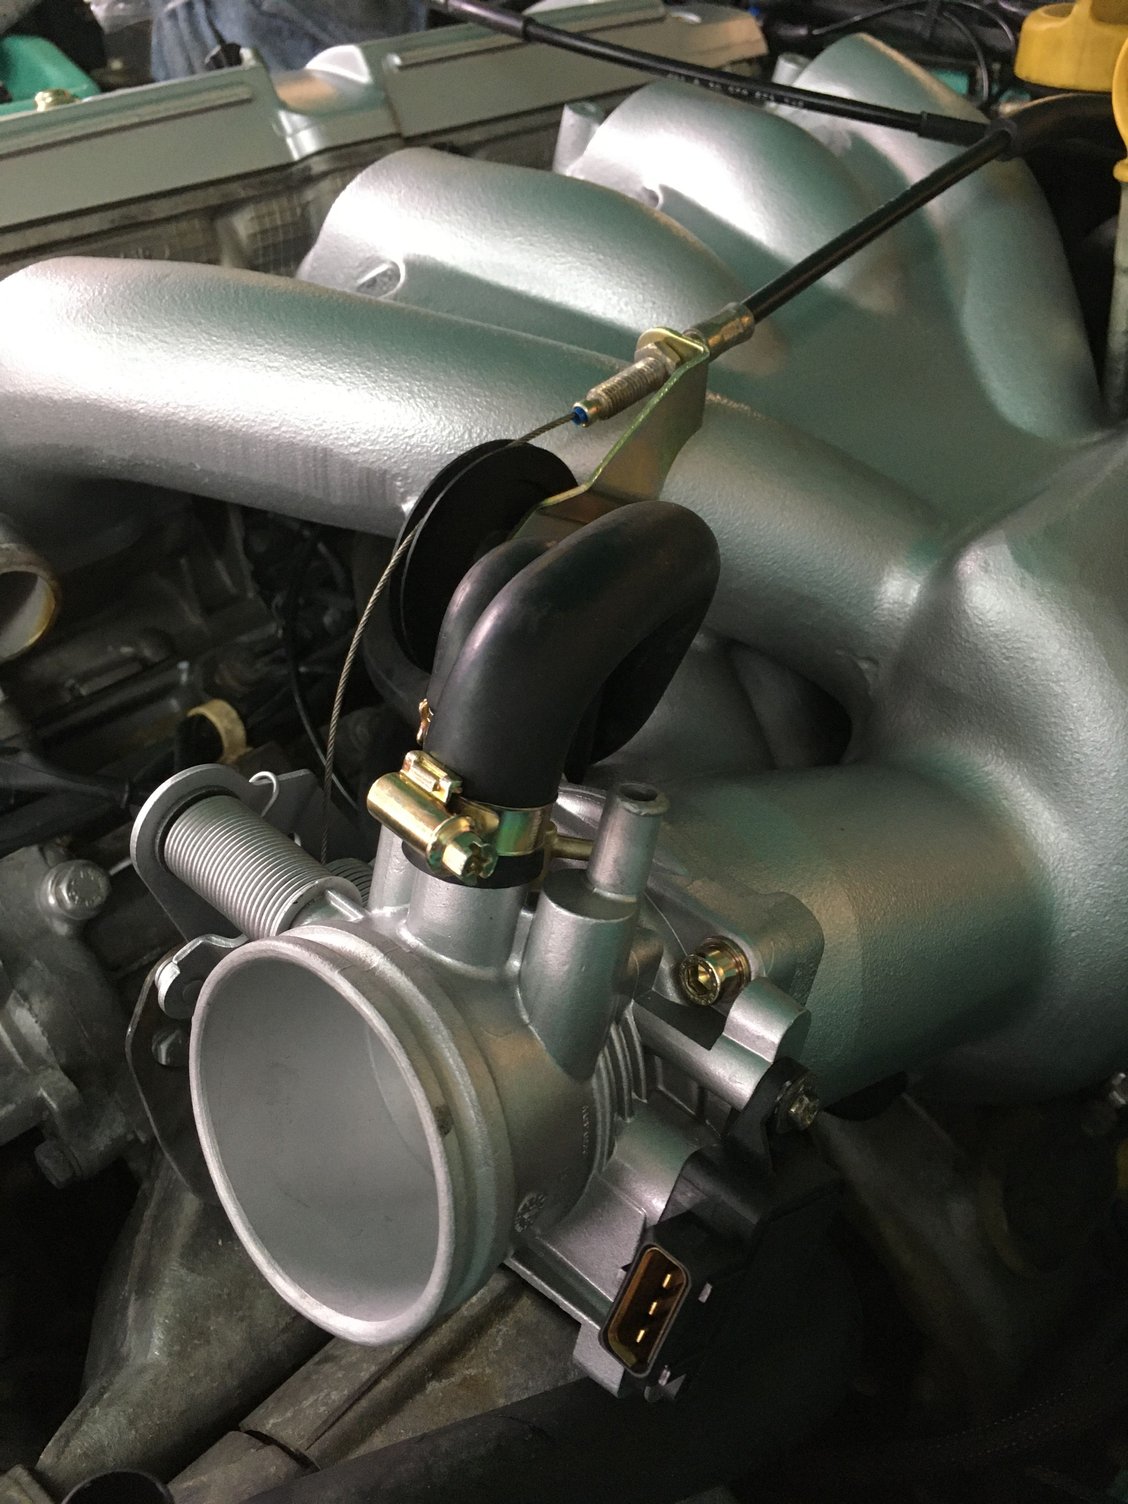
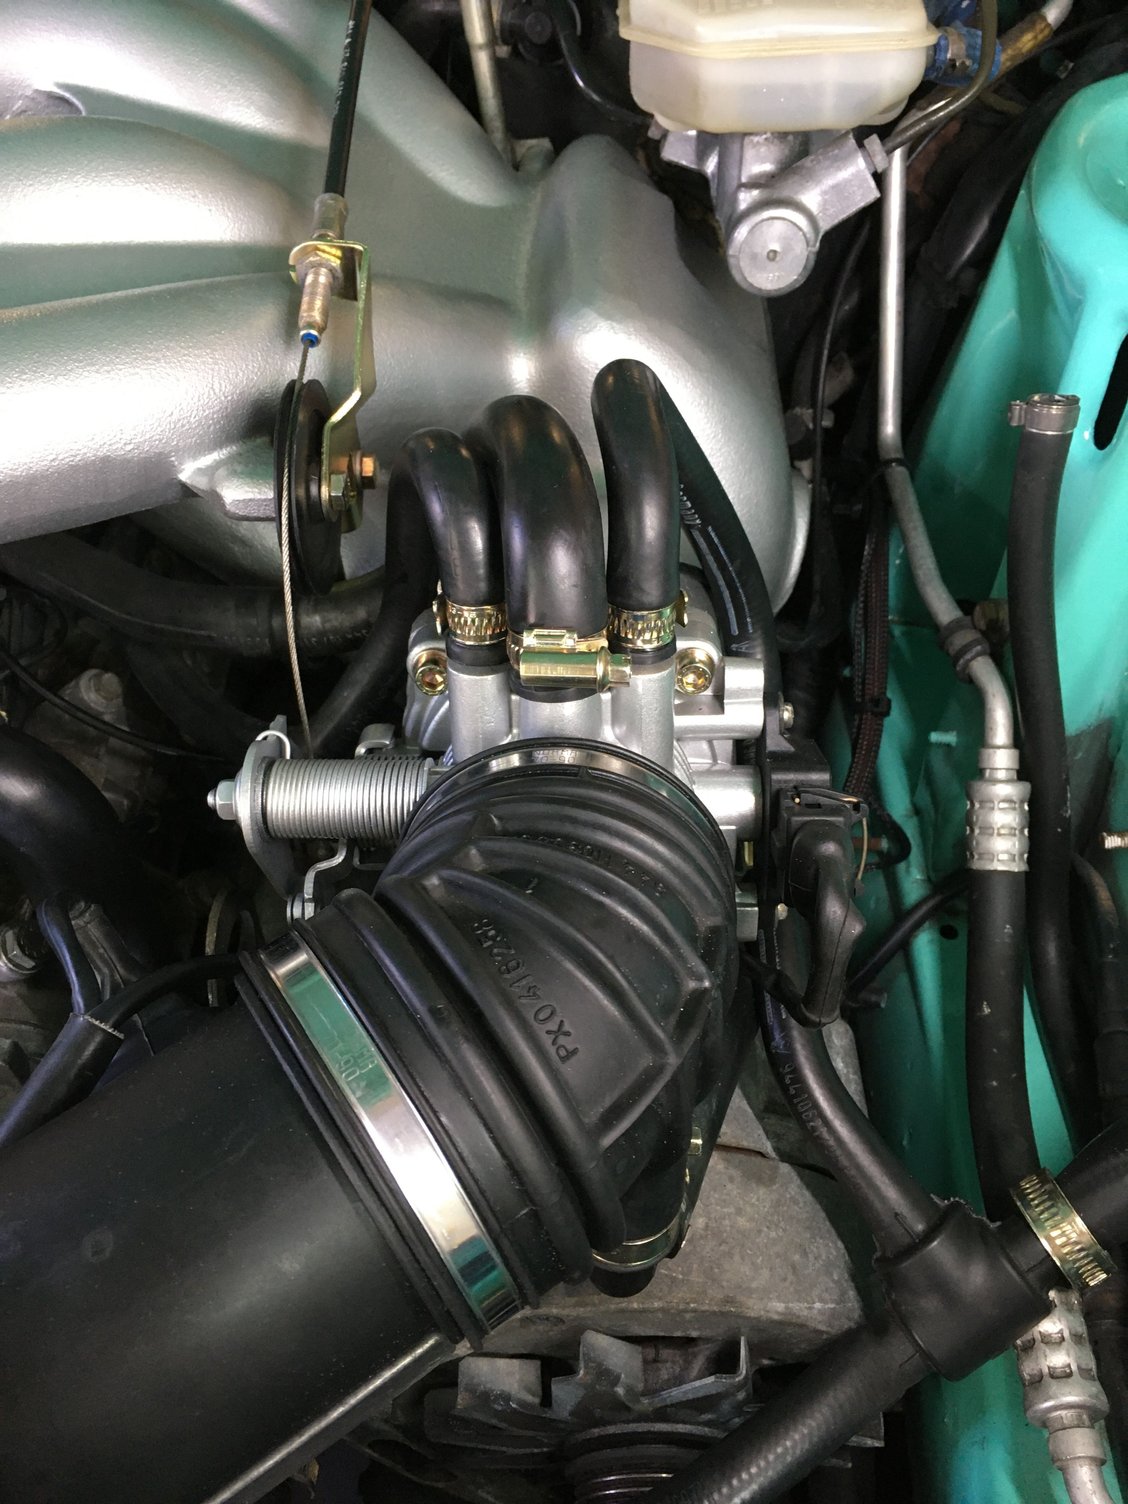
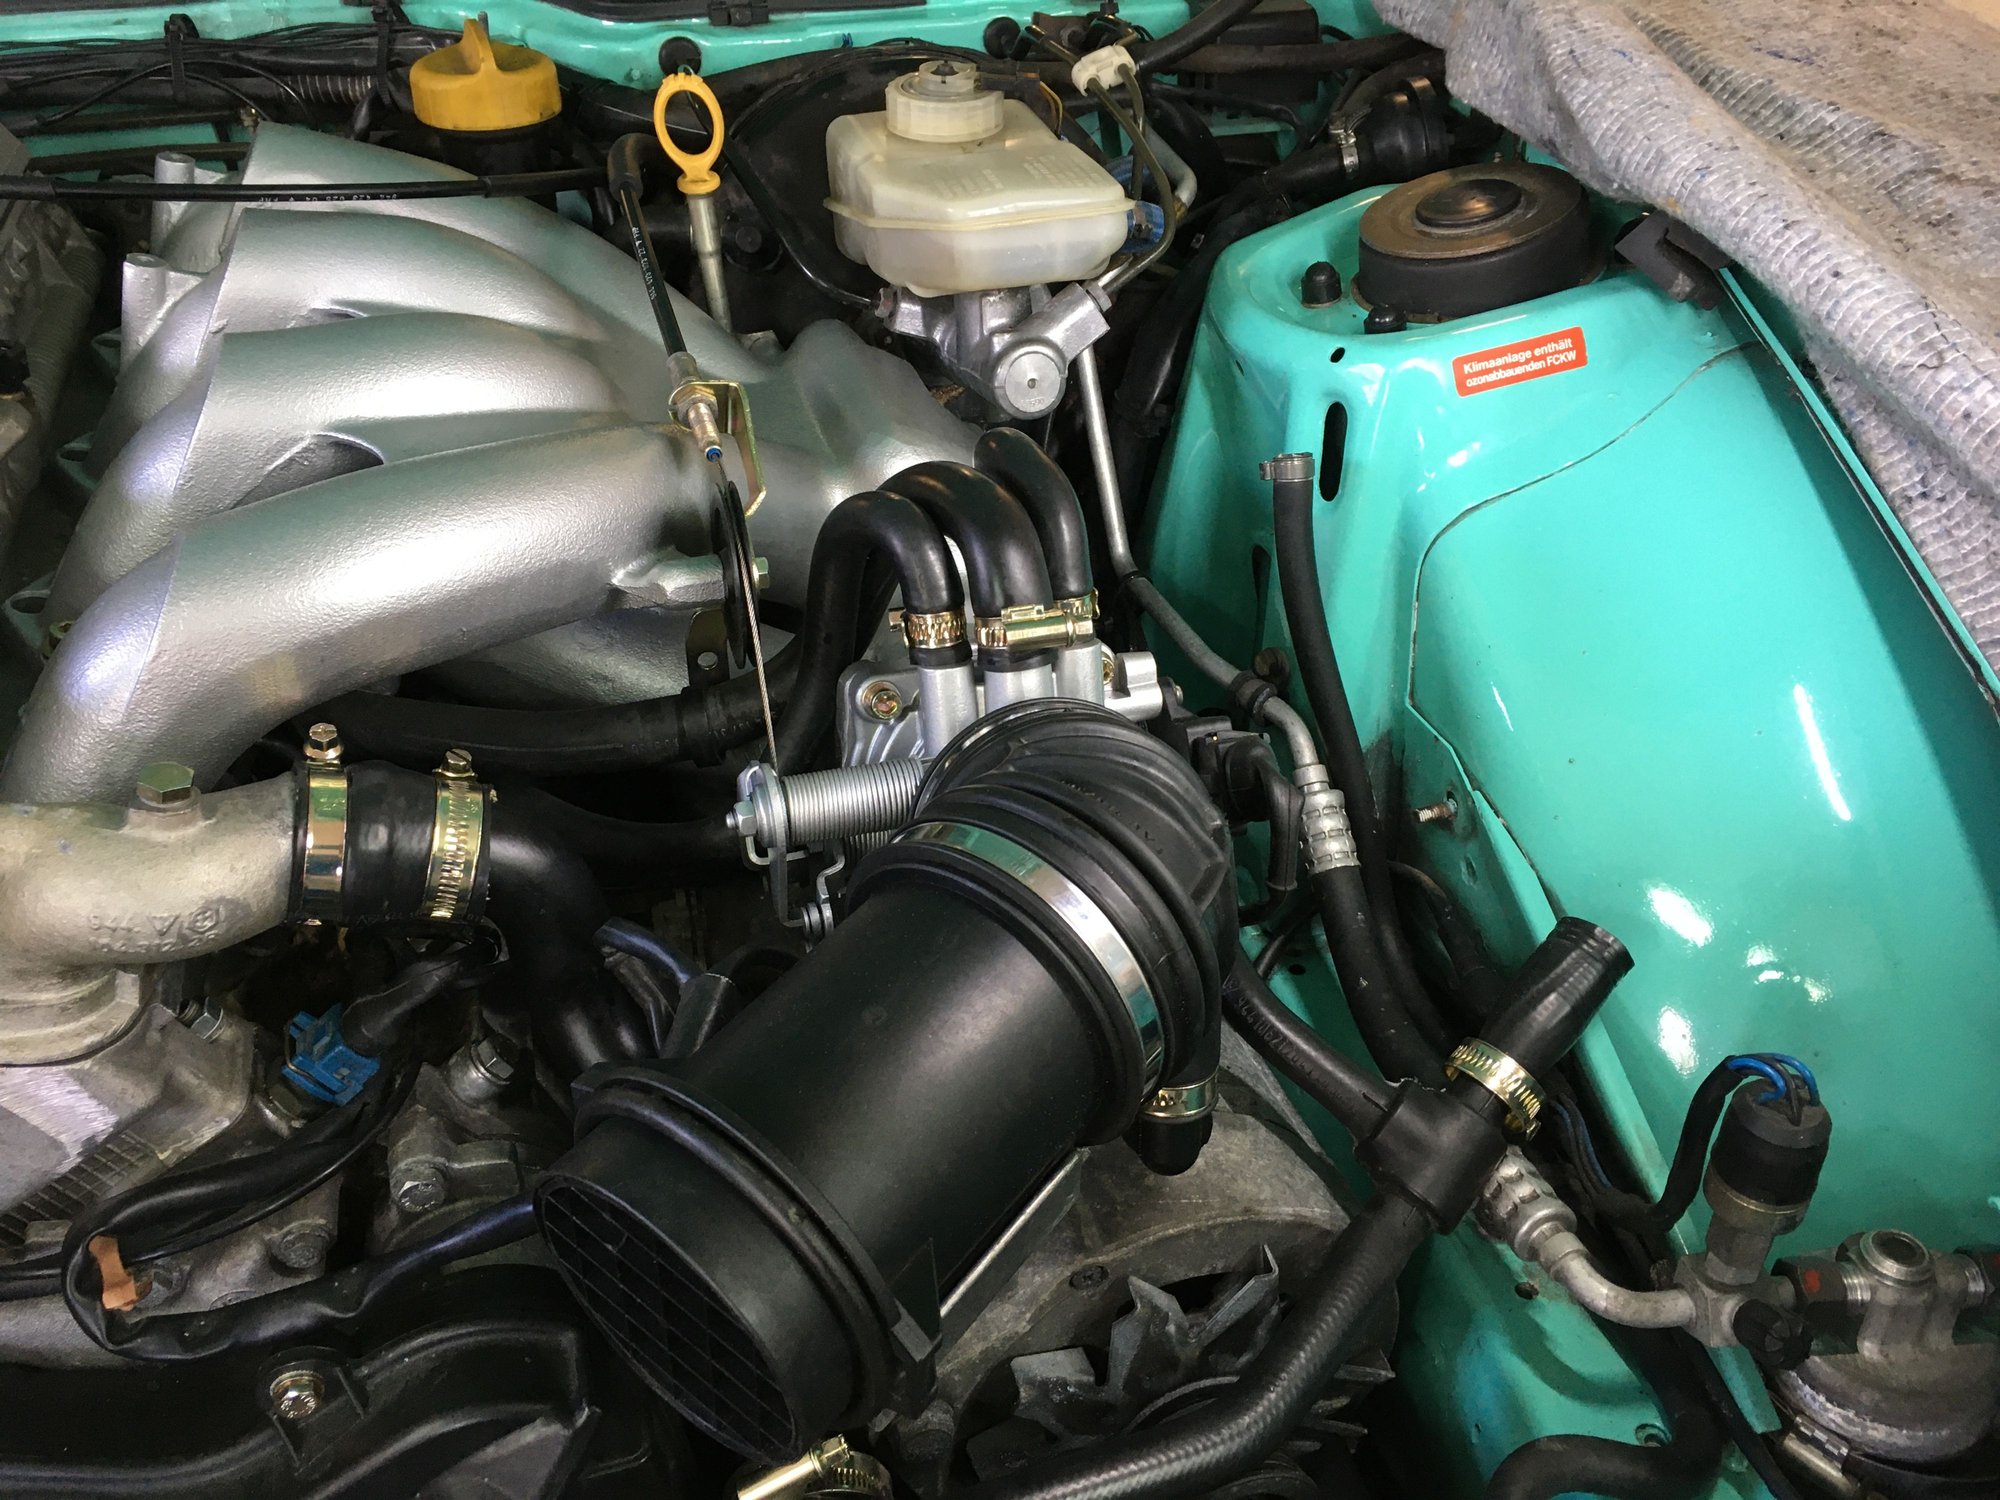
The throttle body looked quite dirty and manky before, but after the same treatment it looks much better and is not an eye sore any longer.. Got some more hoses, cables and vacuum lines installed as well..
I checked and cleaned everything rubber and plastic, before freshening it up with some autoglym rubber and plastic recondition gel.. My pile of shiny yellow bolts, nuts, hose bands and brackets are also getting smaller and smaller..
Gave the paint a bit of clean and polish as well..
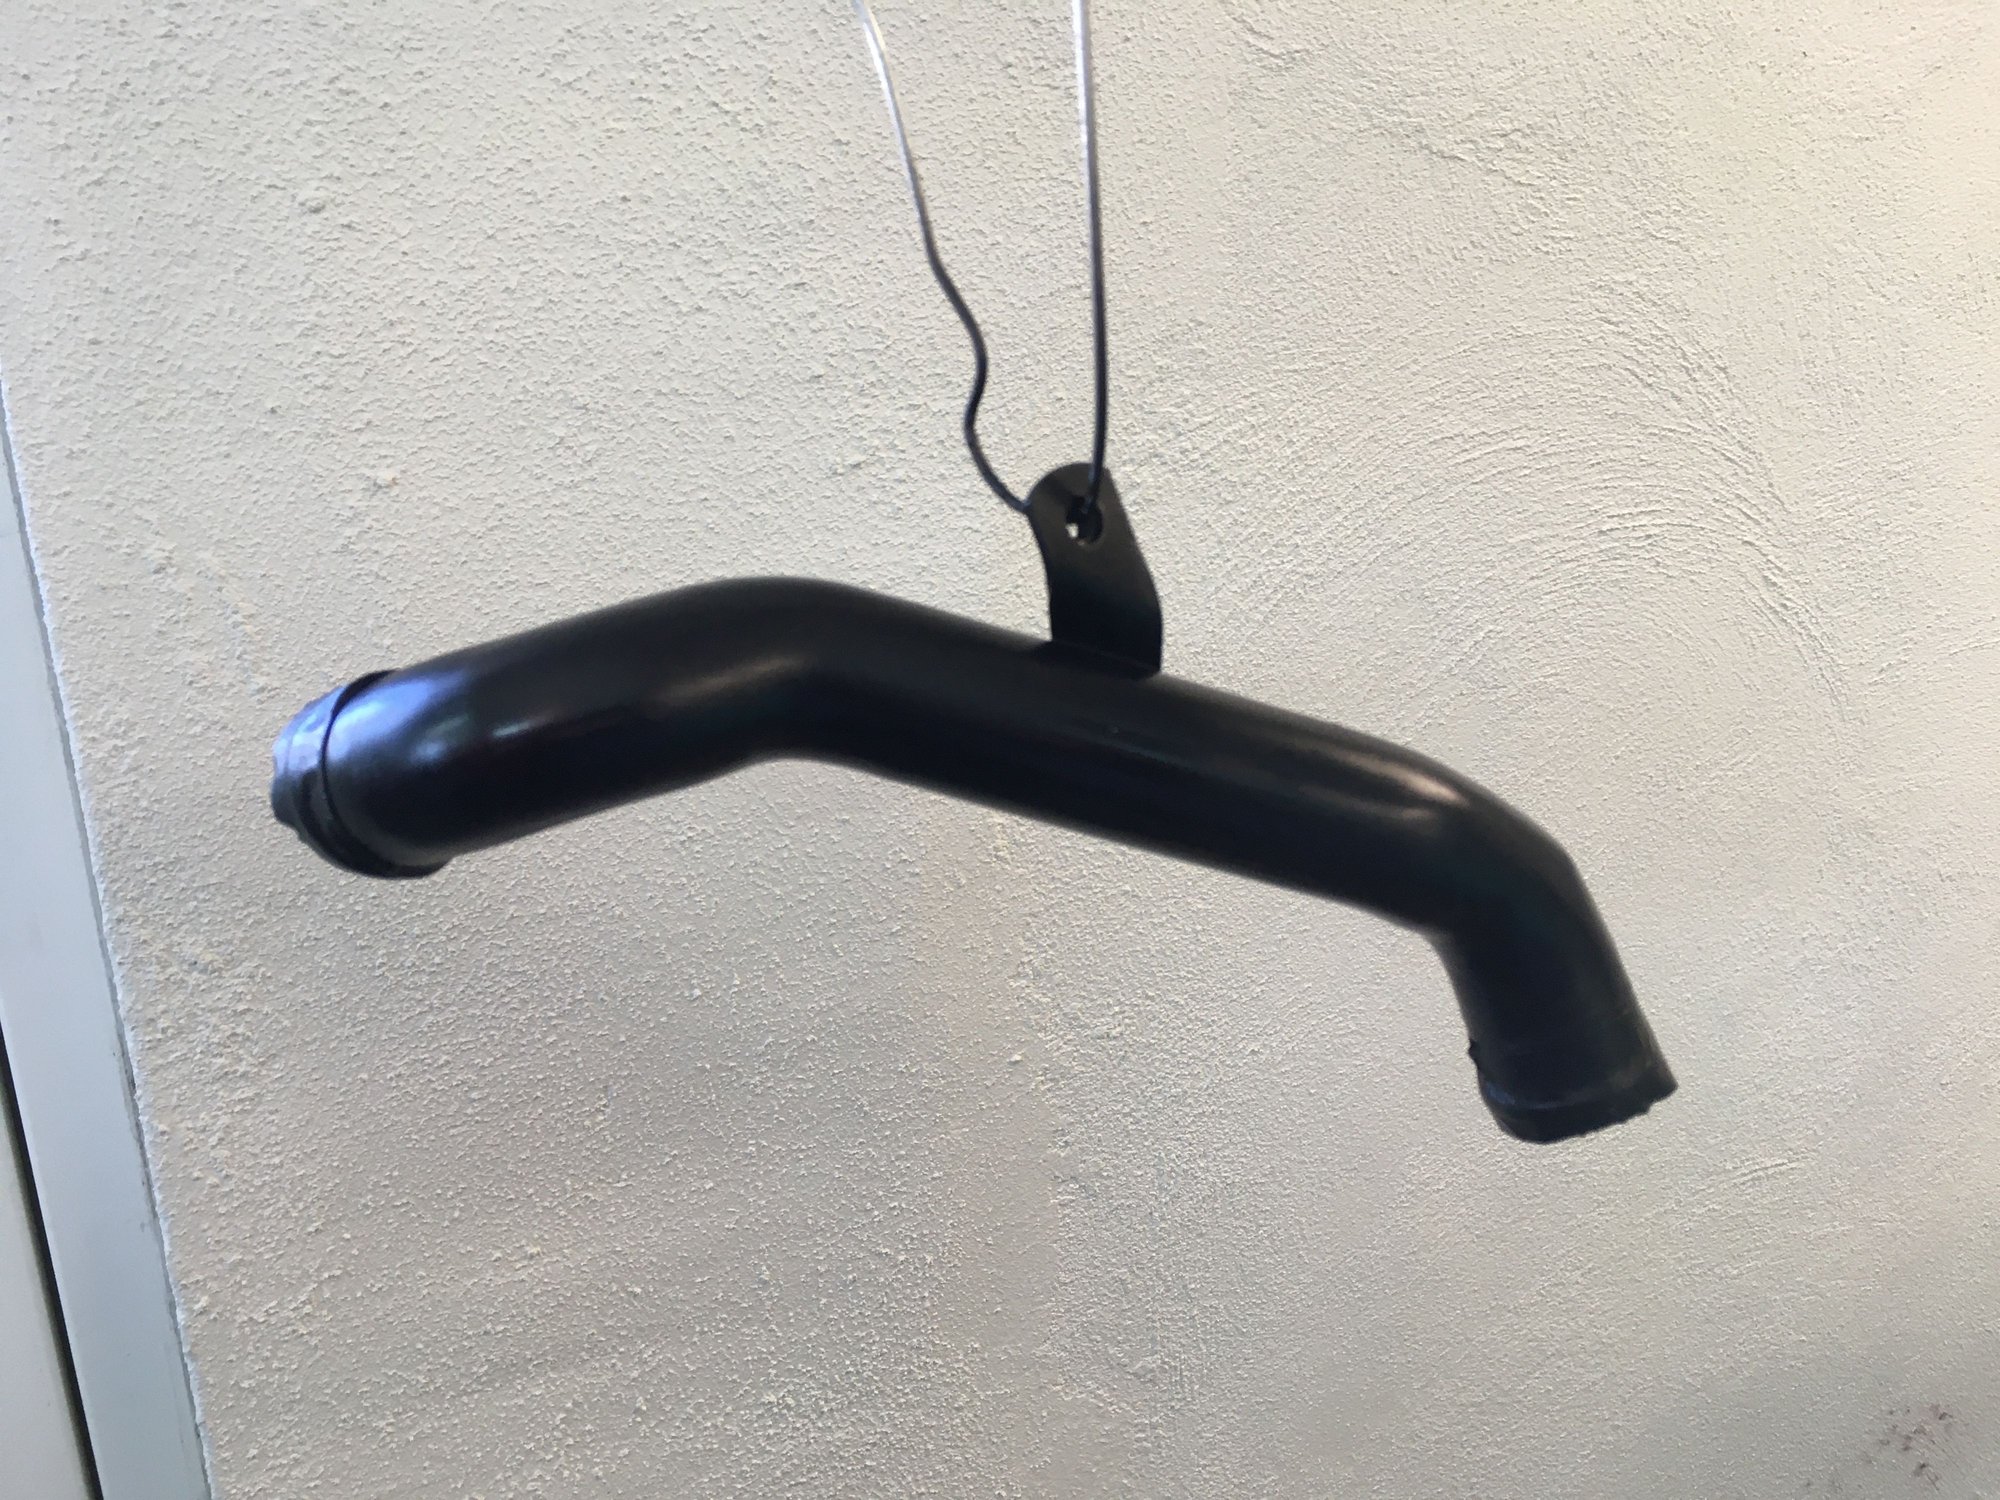
A few other parts also got a lick of paint, in this case the coolant hard pipe from the head.. Hammerite smooth black metallic paint to the rescue..
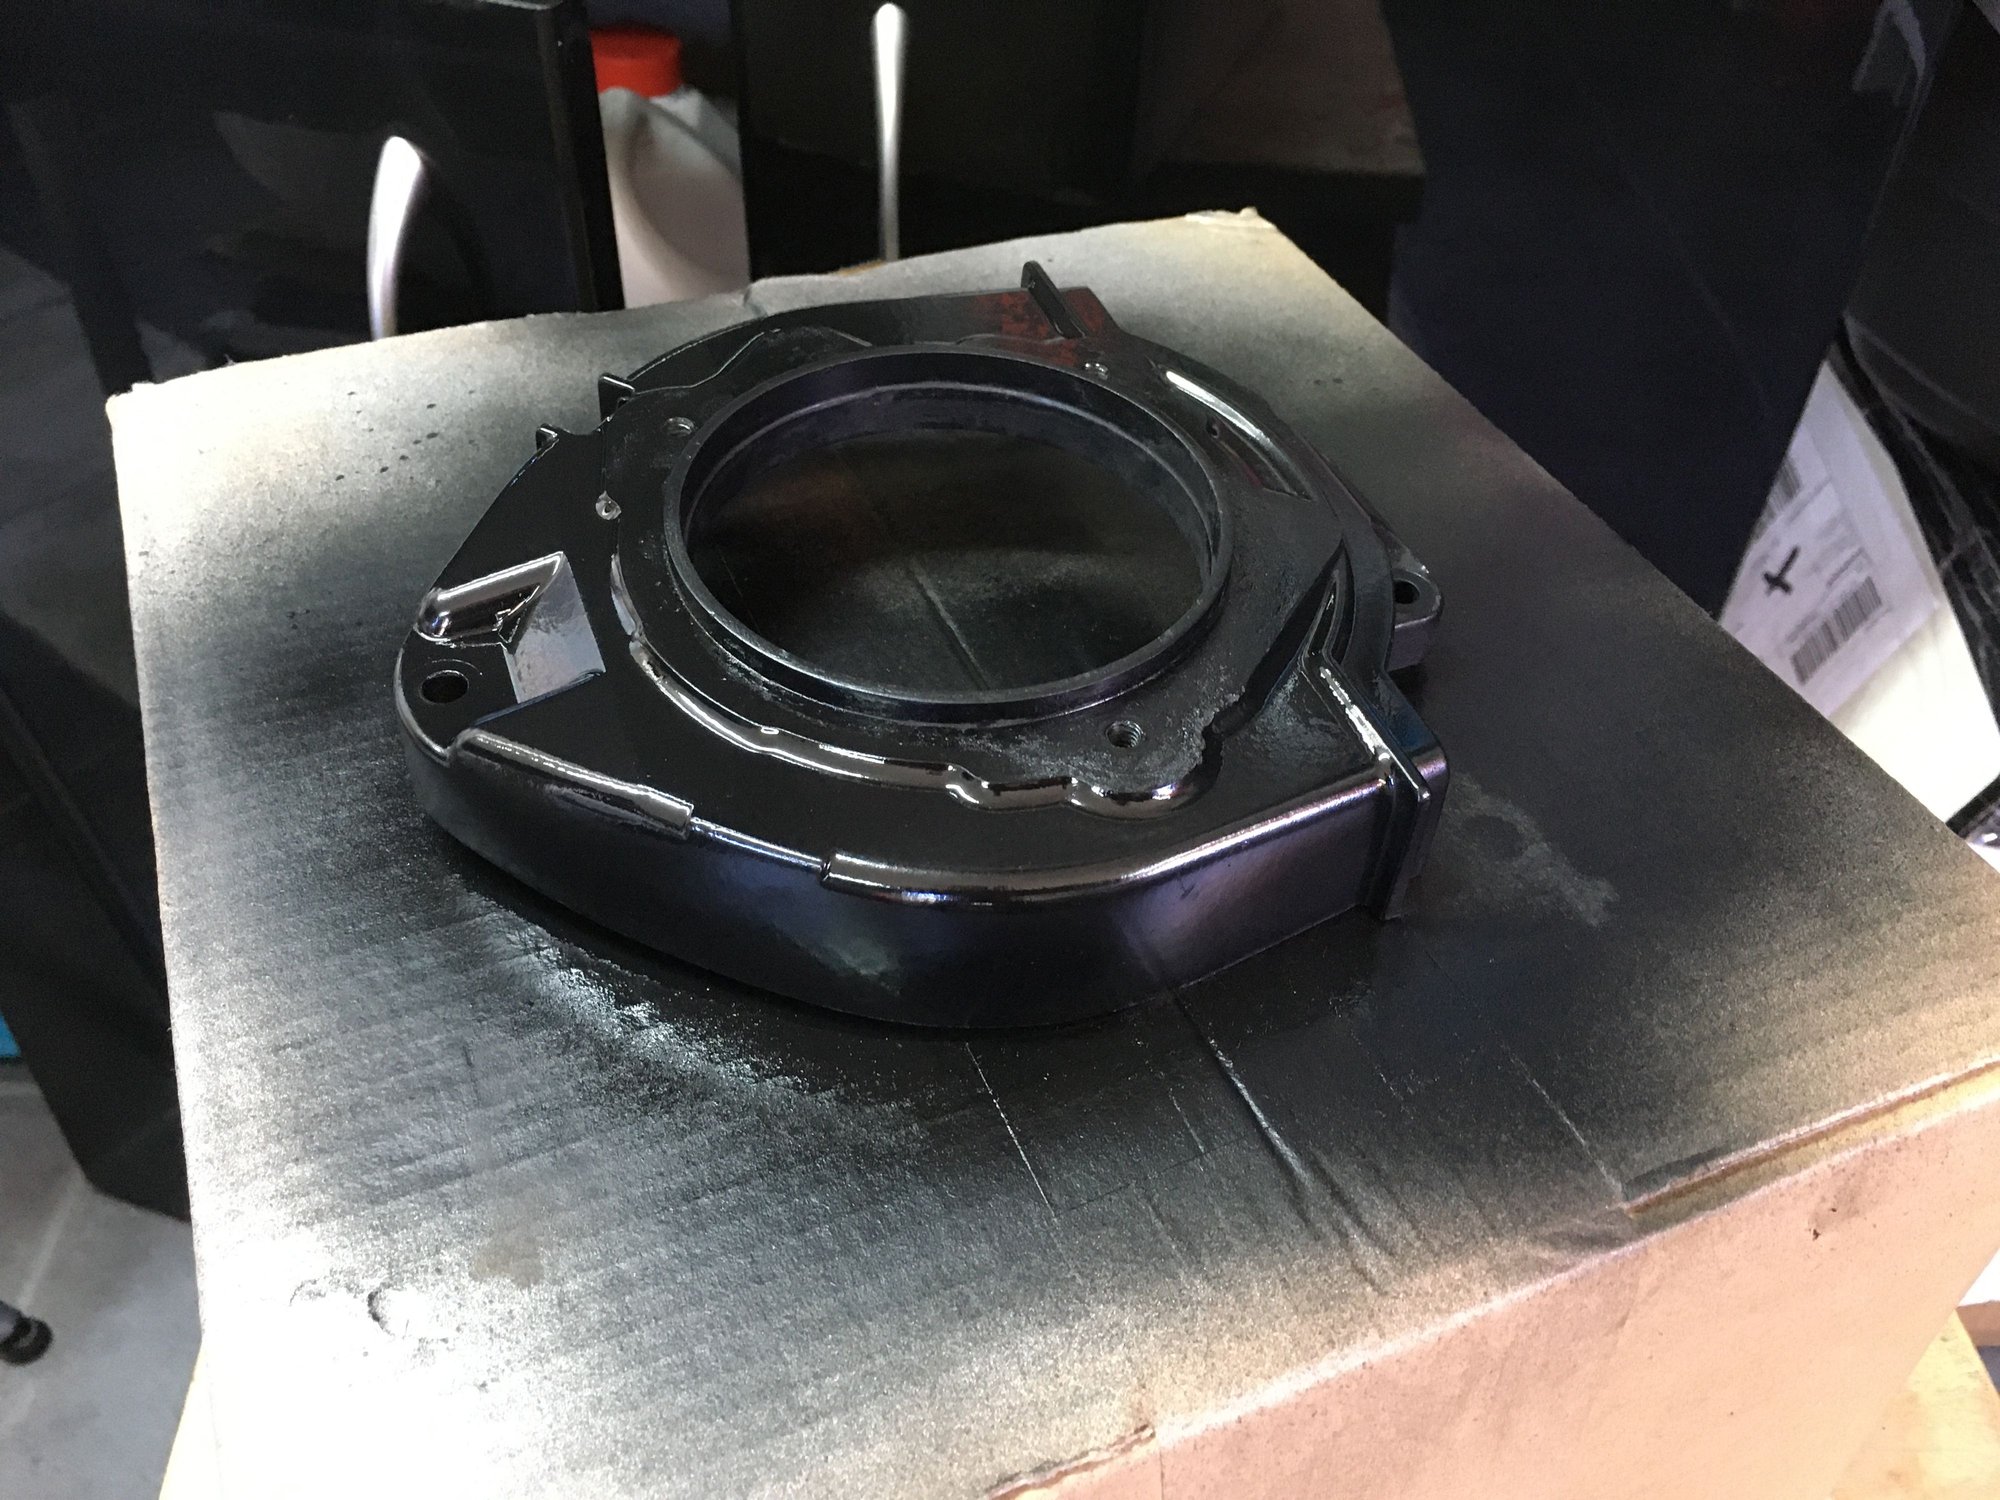
And the ignition cover too..
Also replaced the dizzy cap and rotor as the old ones looked a bit worn.. This one seems to be for a volvo actually, as the cable numbering are different.. So I pried off the yellow sticker from the original Bosch unit and glued it onto the new dizzy cap as you might have noticed in one of the previous pics..
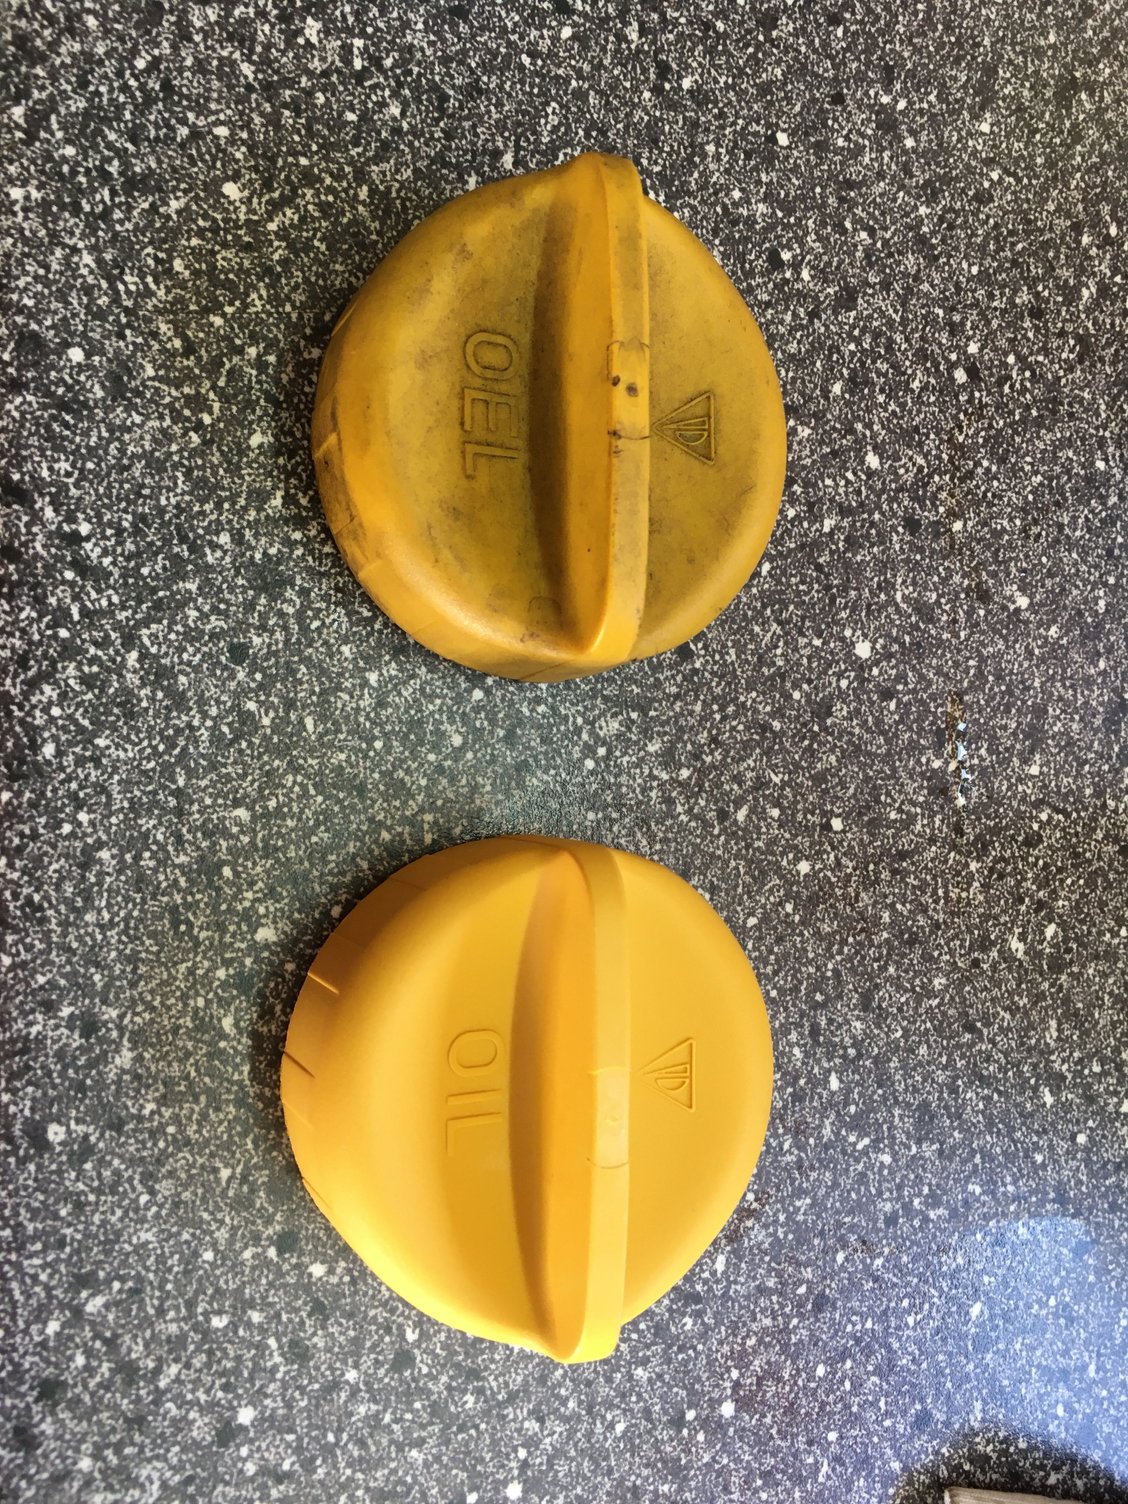
One thing that really stuck out now was the oil filler cap, no matter how much I cleaned it.. So a new one was in order..
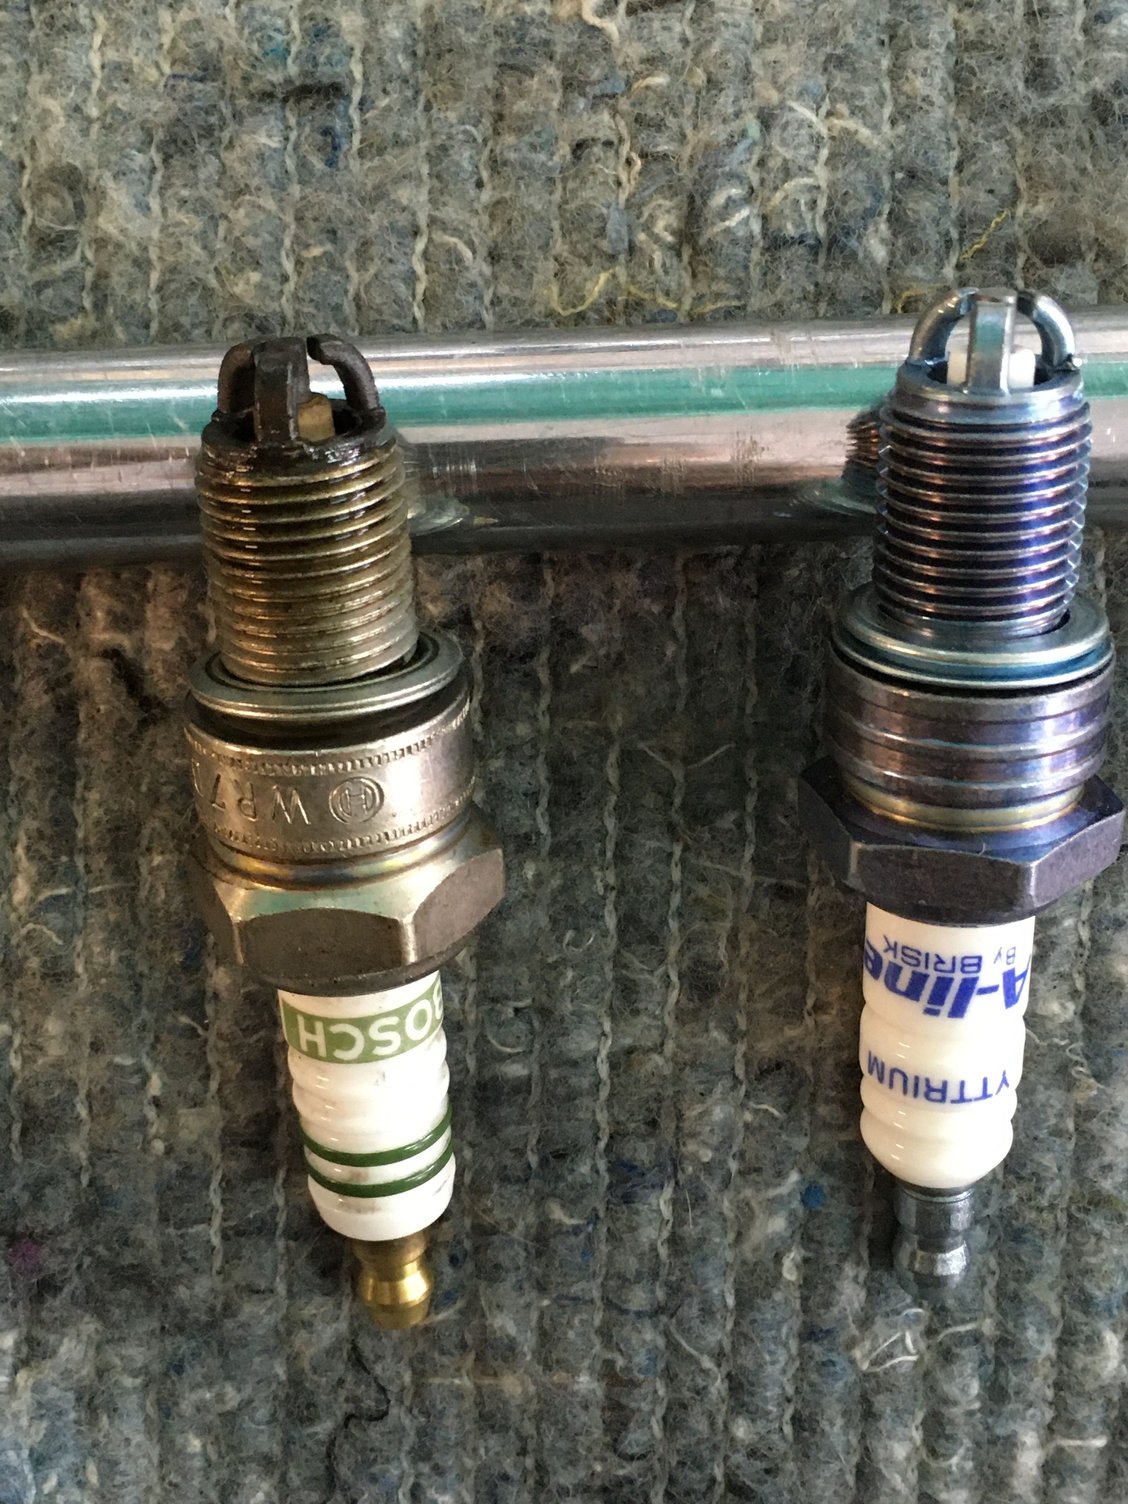
Out with the old spark plugs and in with fresh new ones..
Before I could install the fuel rail, hoses, ignition cables and then as the final touch the vanity cover and vario cam emblem..
Ahh, forgot that to install the new oil filler cap for the photo.. Next time.. I have some black lettering for the vanity cover on order which will go on later.. I also have them on my coupe and they give a nice contrast to all the silver..
Alex, looks fantastic, but I have to disagree with you on the paint choice for the covers. Anything out of a rattle can is not going to hold up. I thought you would go powder coat which is very durable. If that is not an option then you want to use a professional catalyst based urethane which will also harden and last. That said, what you used does look just fine. My 2 cents. Awesome work.
Alex, looks fantastic, but I have to disagree with you on the paint choice for the covers. Anything out of a rattle can is not going to hold up. I thought you would go powder coat which is very durable. If that is not an option then you want to use a professional catalyst based urethane which will also harden and last. That said, what you used does look just fine. My 2 cents. Awesome work.
I am not really a fan of powder coating for this application due to the finish which would likely not be as nicely detailed and textured, and there is really no need for a hard wearing treatment like that, just one that can tolerate heat. And the Hammerite metal paint is very durable, has the right color and perfect texture close to original. I can't tell how its going to look in 10 years time, but on my coupe it still looks perfect after 7000 kms and lots of heat cycles.. So I am quite happy with the outcome and feel comfortable it'll continue to look great for a long time..
Alex, I did notice in one of your pics, it looks like the brake booster has suffered from some leaking fluid at some point in the past, as there was rust under the master cylinder. Plans to fix and paint that? Also, don't the coolant lines on the throttle body affix with Oetiker clamps?
Alex, I did notice in one of your pics, it looks like the brake booster has suffered from some leaking fluid at some point in the past, as there was rust under the master cylinder. Plans to fix and paint that? Also, don't the coolant lines on the throttle body affix with Oetiker clamps?
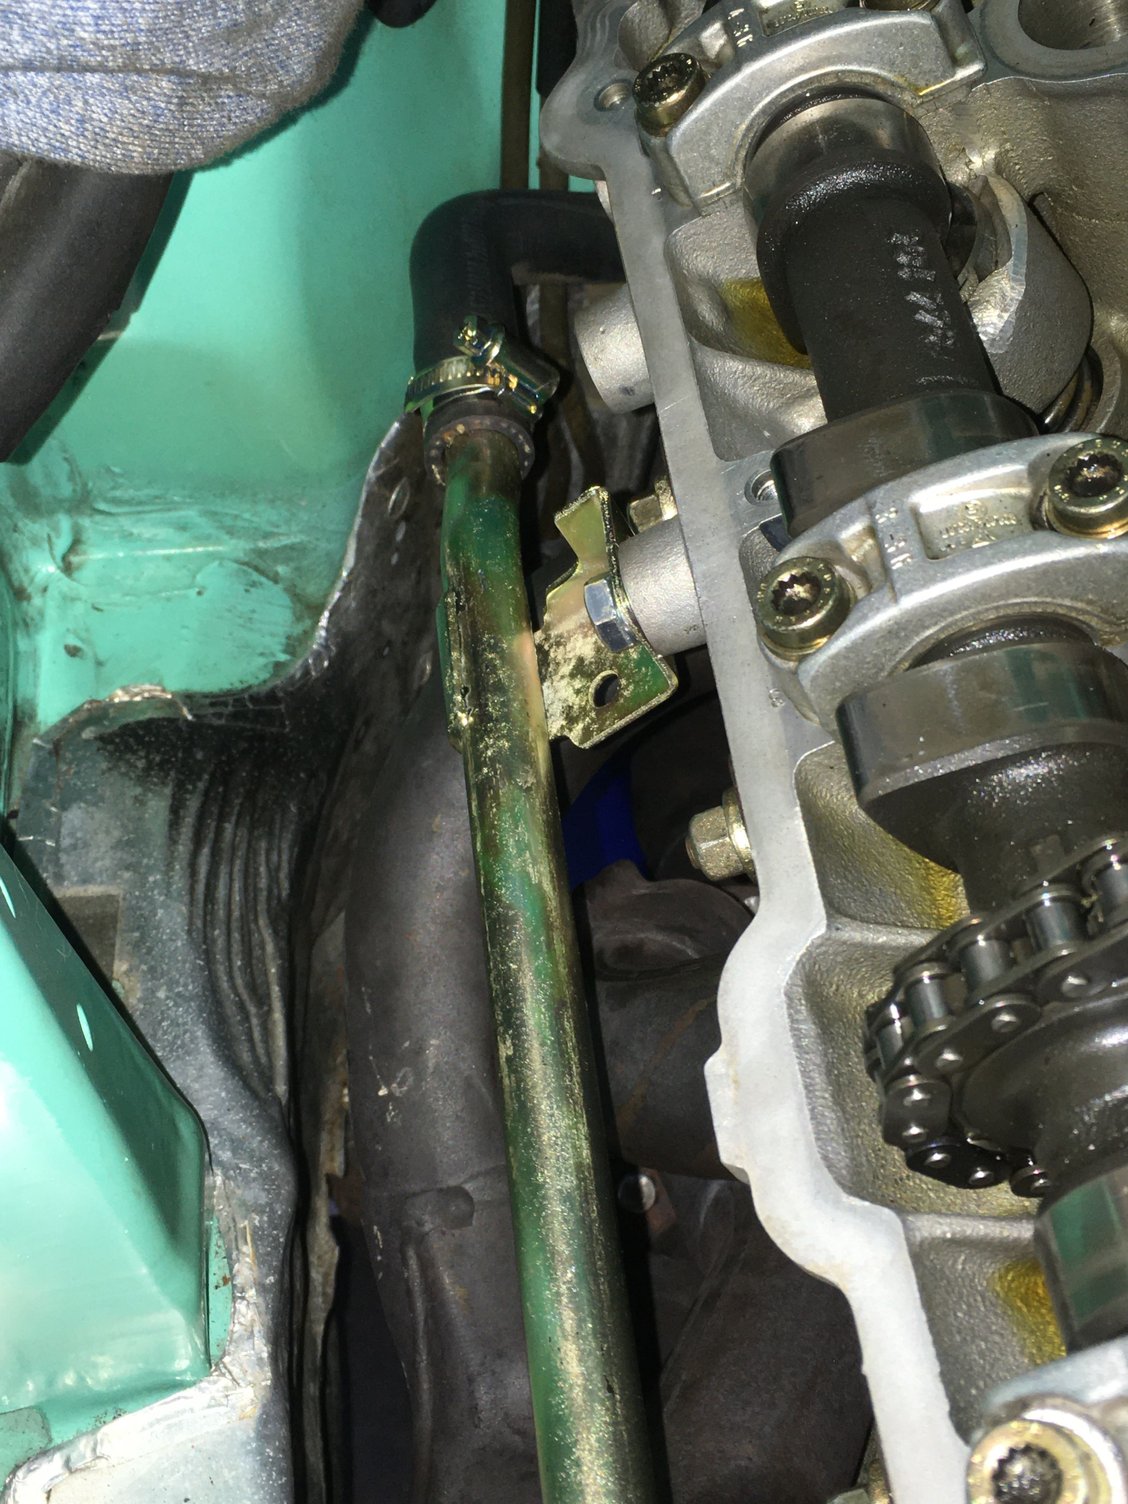
I am planning to tidy up that brake booster, but probably not until later as I am keen to get the car up and running. Its only cosmetic and not really visible when the engine is fully assembled and the covers are on. Good spotting on the clamps.. They original clamps are a bit of pain in the backside to remove and single use only, so I decided to install the hoses with worm clamps instead. Makes it easier if I have to remove the intake at a later point..

 04-24-2020, 06:05 PM


 Next time.. I have some black lettering for the vanity cover on order which will go on later.. I also have them on my coupe and they give a nice contrast to all the silver..