When you click on links to various merchants on this site and make a purchase, this can result in this site earning a commission. Affiliate programs and affiliations include, but are not limited to, the eBay Partner Network.
You order from RM European? Most of their stuff ships from SSF and their warehouse is in SoCal. So we get next day 'free' :-)
Splines, guide tube, fork/release bearing ears. Stuff that slides when clutch moves.
Yes, RM. Thought local warehouse must of been the case. So, this spline grease is okay for splines and all those points other than splines? A dab where fork prongs contact TOB ears?
Originally Posted by John McM
You are powering ahead. I arrived home from a vacation in Japan and started into the disassembly again, albeit hitting a problem straight up. The socket set I use needs thinner walls to access the four bolts holding the chain on.
Yes, I don't like having all those cavities open and valve adjustment all around, replacing distributor needed this done first. My biggest loss of productivity is checking torque specs for everything. Cam timing went well and double checked with several crank rotations, zeroing of gauge, etc. and then checked with tensioners with same result, even though no oil pressure on tensioners. I also used a plastic piston stop and verified that crank TDC from factory matches case seam, it does.
That's funny, I incurred same and had my 30 year old craftsmen socket set and 10mm, 13mm sockets were thin walled, yeah! On the passenger side tc box, One of the chain ramps has to come out as you separate box, (atleast for me it did, as I did not want to be jamming in towards the intermediate shaft to try and get clearance for removal. Just took my time until I found the right position.
Yes, I don't like having all those cavities open and valve adjustment all around, replacing distributor needed this done first. My biggest loss of productivity is checking torque specs for evrything. Cam timing went well and double checked with several crank rotations, zeroing of gauge, etc. and then checked with tensioners with same result, even though no oil pressure on tensioners. I also used a plastic piston stop and verified that crank TDC from factory matches case seam, it does.
That's funny, I incurred same and had my 30 year old craftsmen socket set and 10mm, 13mm sockets were thin walled, yeah! On the passenger side tc box, the bottom rail has to come out as you separate box, (atleast for me it did, as I did not want to be jamming in towards the intermediate shaft to try and get clearance) and I just took my time until I found the right position.
Thanks for the tip. I don't necessarily mind road blocks as they give me time to think. I went and watched the P fix it DVD for the rocker arm and camshaft assembly and noted that they got it out of order with the rocker arm installation shown on DVD 1 and the camshaft on DVD 2 but the camshaft is shown being installed with the rocker arms out. I suppose nothing is perfect. I can see something in the spray bar hole on the cylinder 3 rocker so it's all coming out.
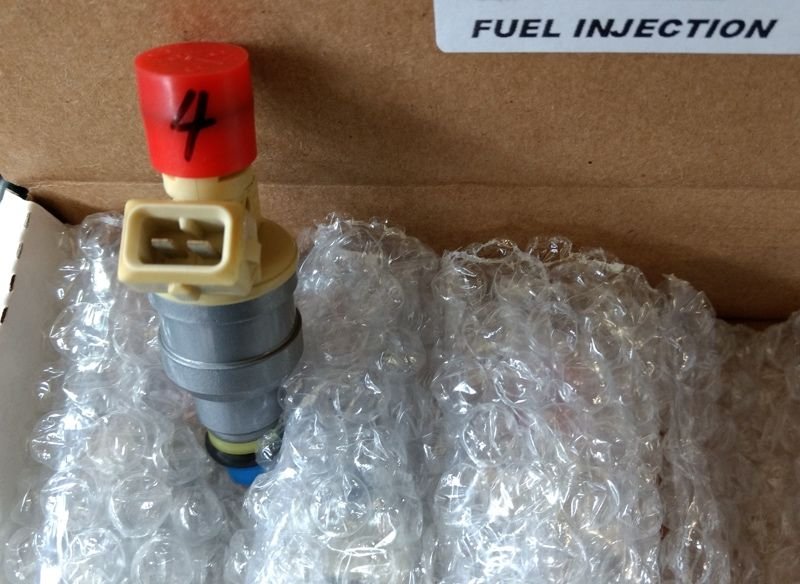
BTW Good work on the shroud. I'm ordering a new set of wires so that area is coming apart anyway. Right now it's sitting in a maze of wires and fuel injection equipment.
Thanks for the references... Ordered the 3 ep ... is the MPO a paste?
Jason, I sense you are well versed in all things Porsche engine!
Nick that list from your rebuild is awesome, thanks!
John,
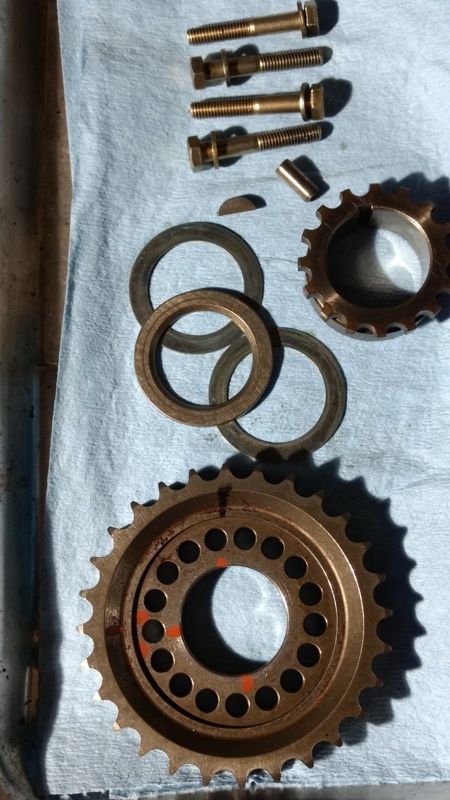
I watch and do check against my DVD all the time... the chap may have replaced thrust washer with bevel backwards on cam sprocket, please watch DVD and note yours when removing, let me know... I think the bevel side faces in ...
John, I watch and do check against my DVD all the time... the chap may have replaced thrust washer with bevel backwards on cam sprocket, please watch DVD and note yours when removing, let me know... I think the bevel side faces in ...
My swivel 13mm socket is coming in handy
Just checked mine on the left side (Driver side in the US).
Working from rocker side out I have two thin shims held in by a thrust washer where the bevel around the hole side faces towards the rockers.
BTW I have seen Jason's posts over the years. If he wasn't a factory engineer he missed his vocation.
Working from rocker side out I have two thin shims held in by a thrust washer where the bevel around the hole side faces towards the rockers.
BTW I have seen Jason's posts over the years. If he wasn't a factory engineer he missed his vocation.
So, I'm not the only one that noticed Jason's replies are quite precise... Pehaps P-car engineer incognito? Jason?
I saw a thread where the heads and cam housing were sitting on a bench for teardown as one unit. Will you be taking that approach or peeling off from the engine stand in order?
So, I'm not the only one that noticed Jason's replies are quite precise... Pehaps P-car engineer incognito? Jason?
I saw a thread where the heads and cam housing were sitting on a bench for teardown as one unit. Will you be taking that approach or peeling off from the engine stand in order?
I will likely disassemble the engine on the stand rather than take off assemblies and do it later. It's easier to work with on the stand.
The thrust washer goes on first with the groove towards the camshaft. The shims go on after.
Yet another OPC fail on my engine as both sides had the shims on first and one thrust washer groove was pointing away from the camshaft.
The manual goes on to say that as a rule three shims are required for the left bank (cylinders 1-3) and four on the right bank. I had two on each. I didn't check the parallelism of the sprockets before dismantling. Have you checked yours?
The sprockets have alternate orientation on each bank. The left hand bank had the flat side facing the camshaft and the other way around for the right bank.
Btw the right bank camshaft has a lot of longitudinal movement with the power steering pump removed. Is yours the same?
Last question. How did you remove the plate with the o ring? I don't want to pry it off and risk damaging the sealing plate.
Mine was thrust and 2 shims only. I did not measure parallelism as cam not removed, would do otherwise. In my pic above, I set those down as a stack to be picked up and placed back on with thrust washer leading the way, bevel in... Yes, sprockets face as you described. I did not notice or test cam front to back movement. I evolved during plate/Oring removal as follows;
I didn't know what tensions or play to expect, therefore, Driver side I used a "park" plastic tool for getting under a rim of bicycle tire and traced the circle plate and did gentle prying, worked, no damage. Passenger side, gently wiggling the box, the box moved away from cam just a little bit and I somehow had access from behind box to pop out from behind, no prying from front, was real easy. I may have removed valve cover on right side? Note, that right box needed just the right orientation to come completely off....
Thanks. Update
Finding: Neither cylinder banks' thrust washers and shims were installed as per the Porsche Workshop Manual. The Manual states that the thrust washer is installed first and with the groove facing the camshaft. Neither was installed first and one is incorrectly oriented.
You are lucky your sound pad did not have much adhesive. Mine had lots of rubbery gunk. I cleaned and cleaned....took forever and still did not get 100%. I figured 98% was good enough since the new one was going in...


 04-19-2017, 12:42 PM