
Anybody else feel guilty taking out original radio?

 02-19-2014, 03:37 PM
#77
Rennlist Member
Got it all hooked up and running, just ran my favourite CD through it, and what a difference in sound from the old set up. Very happy with the outcome.

02-20-2014, 02:45 AM
#79
Burning Brakes
Is that Blutooth and all that jazz?
And yes, it plays jazz.
03-06-2014, 08:05 AM
#81
Instructor
Join Date: Nov 2013
Location: East Northants / Cambs Border
Posts: 157
Likes: 0
Received 0 Likes
on
0 Posts
I just swapped mine out - keeping the old Blaupunkt SQR 46 of course :-)
New one is a VDO CD7316U-OR CD and Radio with USB for MP3s. I think it looks just right :-) and of course the VDO logo matches my clocks!
I'll write a longer post in due course for how i did it all without cutting, splicing, or scotch-locking to a single wire. it is 100% reversible.
New one is a VDO CD7316U-OR CD and Radio with USB for MP3s. I think it looks just right :-) and of course the VDO logo matches my clocks!
I'll write a longer post in due course for how i did it all without cutting, splicing, or scotch-locking to a single wire. it is 100% reversible.
Last edited by Jcx; 03-06-2014 at 08:35 AM.
03-07-2014, 09:06 AM
#82
Instructor
Join Date: Nov 2013
Location: East Northants / Cambs Border
Posts: 157
Likes: 0
Received 0 Likes
on
0 Posts
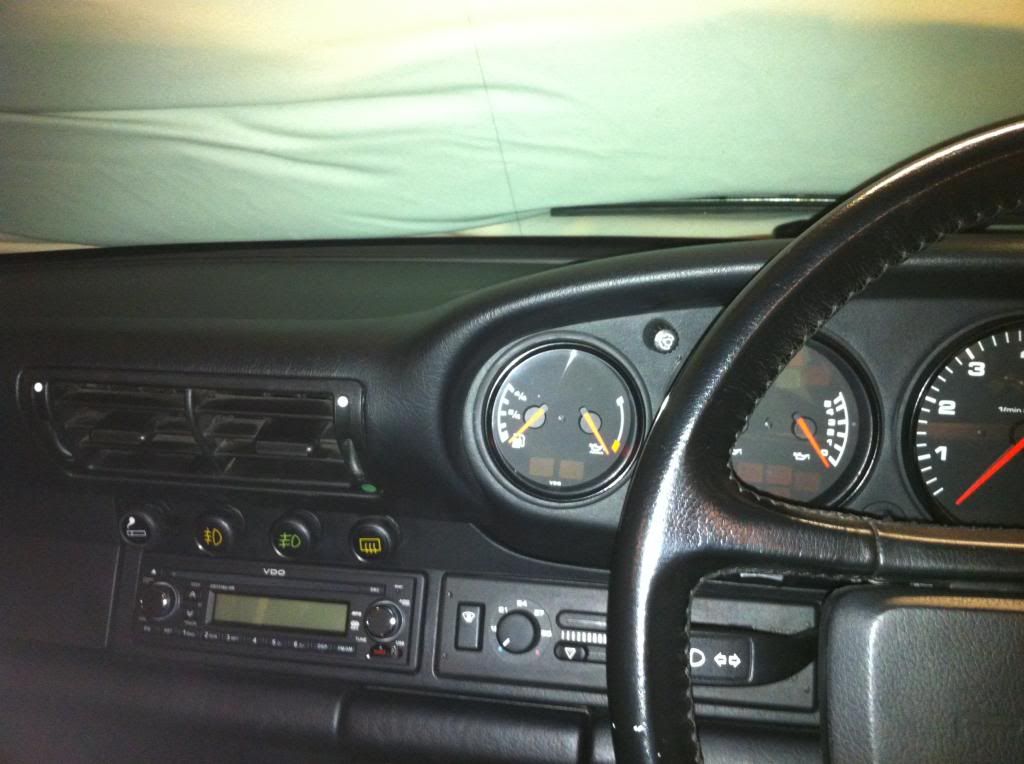
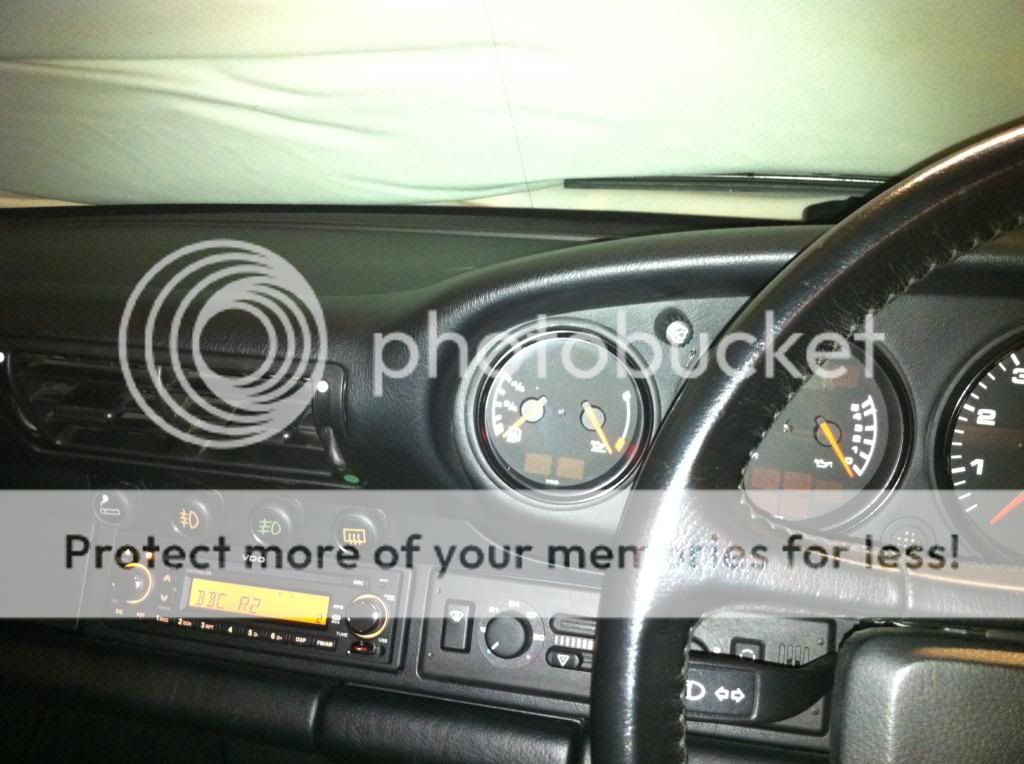
I have now changed my 964 stereo head unit from the original Blaupunkt Toronto SQR 46 to a new VDO CD7316U-OR CD and Radio with USB for MP3s.
I picked the VDO head unit (HU) because it is the closest thing I could find to OEM in terms of style, compositional balance (how the buttons and **** are arranged) and materials with simple matt black plastic, white writing, and amber lighting. I also picked it because it has a USB socket on the front which I could use for permanent MP3 playback without involving cables etc.
For all who don�t know, VDO is a Continental (they make tyres) brand which in turn is a Siemens Brand. Who knew? Not me� VDO is also the manufacturer of our clocks and dials in the 964 so the brand again feels OEM for the 964.
My mission to self was clear but far from simple: there must be no wire cuts or taps so that the original Blaupunkt can be reinstalled at any time without leaving any trace of the VDO. For an amateur like me that was not without its challenges.
First, the Blaupunkt HU uses an old DIN style wiring harness to connect to the car. For all my searching on the web and posts to forums (including this) I could not locate a simple plug-and-play ISO block adapter for connecting the existing harness to the new VDO HU.

Second, the Blaupunkt was connected to an amp located under the driver�s seat via an 8-pin round DIN plug. This type of connection does not exist on the back of the VDO HU so I would need to connect the VDO HU to the amp or the speakers via other means.

Third, the amp in turn connects to the four speaker wires that head off to each corner of the car where the speakers are located. The speaker wires plug into the amp using DIN speaker plugs (DIN features heavily in these 90�s German cars). These plugs are sometimes known as �bar and pin� plugs.

As I was quite unsure how I would manage any of this I resolved to design and implement the wiring connections before I ordered the VDO HU. That way if I failed at any point I wasn�t in for much money. Good Yorkshire strategy!
As I was struggling to find an adaptor for the DIN harness plug I focused first on the speaker connections. Baby steps and all that� I bought some speaker wire from Amazon.

I know there are lots of options for speaker cable and audiophiles will have much to say about speaker wire but here was my logic for picking this wire: 1). I wasn�t changing the speakers are they are fine and I want that stock look so audio quality will always be limited by more than just the cable. 2). I had confidence that my changes would be an improvement over the old system anyway so didn�t need to gain a micro-whatever in the cable stakes. 3). The stuff I bought was delivered via Amazon PRIME (free) and was more than I needed so I had plenty to spare while honing my cabling skills 4). It was quite the bargain to boot.
I then sourced some bullet connectors for the HU end to connect the speaker wires to the ISO block/harness.
Finally, and this took me the longest time, I sourced some �2 pin DIN In-Line Speaker Sockets� so that I could easily unplug the current speaker cables from the amp and plug them into my new speaker wires.

http://www.flashbacksales.co.uk/acat...onnectors.html The supplier shipped them at 6pm on a Friday evening within 15 minutes of my order and they were with me on Monday morning. Brilliant service.
I ran the cables along the driver�s door sill/floor junction under the carpet, up behind the removable panel by the bonnet release lever and then cable tied them to the many cables running underneath the dashboard to the HU location.
Unfortunately, when I unscrewed the cover panel that keeps the bit of carpet in place to hide masses of cables near the pedals the plastic fixings disintegrated (age) so I had to order up a new one of those from my OPC � cheaper than Design911 and with free delivery

While onto the OPC I decided to order up a replacement for my cassette storage so I can update that too. Those pesky cassette storage things just randomly pop up. As you can see below, take out the rubber mat and unscrew the self-tapper and you are able to remove this and replace with the other �tray� like option.

I digress. I then attached my new DIN plugs to the wires on the amp end and attached the bullet connectors to the wires on the HU end. Taking VERY good care to label each wire (FR-FL-RR-RL) for easy connection at each end.


I unplugged the DIN speaker cables from the amp and plugged them into the newly added sockets. Job done.


At the other ends of the speaker wires I attached the bullet connectors.

I was still totally stuck with a plan for the connection to the DIN HU harness. So I did what all good men do, I went to the pub and got chatting to my old mate Bill who loves all things automotive. I explained my issue and shared a photo of my DIN plug and as casually as you like he said, �Put spade connectors on the ISO harness and push them into the DIN plug.� Naturally I bought him a � (did I mention the Yorkshire heritage) and scuttled off home in search of an internet connection for more spending.
Problem is with this DIN plug, the smaller spade connectors are REALLY small. And no amount of �small spade connector� searches on the google and the ebaygum returned any hits. Halfords had none. My other mate Rich who builds cars just for fun had none. Finally I found some here:


I bought an ISO block connector with bare ends and connected my large and small spades and bullet connectors per the photo below.


Sadly I didn�t take a pic of these bits plugged in. I guess I was just too excited.
My unit arrived on Thursday am and I took a few quick pics to share of the front and back as I could find very few on the web when trying to see what it really looked like in real life.


Footnote: all parts will be retained for future use if I ever want/need to return the stereo to its original delivery state.
I picked the VDO head unit (HU) because it is the closest thing I could find to OEM in terms of style, compositional balance (how the buttons and **** are arranged) and materials with simple matt black plastic, white writing, and amber lighting. I also picked it because it has a USB socket on the front which I could use for permanent MP3 playback without involving cables etc.
For all who don�t know, VDO is a Continental (they make tyres) brand which in turn is a Siemens Brand. Who knew? Not me� VDO is also the manufacturer of our clocks and dials in the 964 so the brand again feels OEM for the 964.
My mission to self was clear but far from simple: there must be no wire cuts or taps so that the original Blaupunkt can be reinstalled at any time without leaving any trace of the VDO. For an amateur like me that was not without its challenges.
First, the Blaupunkt HU uses an old DIN style wiring harness to connect to the car. For all my searching on the web and posts to forums (including this) I could not locate a simple plug-and-play ISO block adapter for connecting the existing harness to the new VDO HU.
Second, the Blaupunkt was connected to an amp located under the driver�s seat via an 8-pin round DIN plug. This type of connection does not exist on the back of the VDO HU so I would need to connect the VDO HU to the amp or the speakers via other means.
Third, the amp in turn connects to the four speaker wires that head off to each corner of the car where the speakers are located. The speaker wires plug into the amp using DIN speaker plugs (DIN features heavily in these 90�s German cars). These plugs are sometimes known as �bar and pin� plugs.
As I was quite unsure how I would manage any of this I resolved to design and implement the wiring connections before I ordered the VDO HU. That way if I failed at any point I wasn�t in for much money. Good Yorkshire strategy!
As I was struggling to find an adaptor for the DIN harness plug I focused first on the speaker connections. Baby steps and all that� I bought some speaker wire from Amazon.
I know there are lots of options for speaker cable and audiophiles will have much to say about speaker wire but here was my logic for picking this wire: 1). I wasn�t changing the speakers are they are fine and I want that stock look so audio quality will always be limited by more than just the cable. 2). I had confidence that my changes would be an improvement over the old system anyway so didn�t need to gain a micro-whatever in the cable stakes. 3). The stuff I bought was delivered via Amazon PRIME (free) and was more than I needed so I had plenty to spare while honing my cabling skills 4). It was quite the bargain to boot.
I then sourced some bullet connectors for the HU end to connect the speaker wires to the ISO block/harness.
Finally, and this took me the longest time, I sourced some �2 pin DIN In-Line Speaker Sockets� so that I could easily unplug the current speaker cables from the amp and plug them into my new speaker wires.
http://www.flashbacksales.co.uk/acat...onnectors.html The supplier shipped them at 6pm on a Friday evening within 15 minutes of my order and they were with me on Monday morning. Brilliant service.
I ran the cables along the driver�s door sill/floor junction under the carpet, up behind the removable panel by the bonnet release lever and then cable tied them to the many cables running underneath the dashboard to the HU location.
Unfortunately, when I unscrewed the cover panel that keeps the bit of carpet in place to hide masses of cables near the pedals the plastic fixings disintegrated (age) so I had to order up a new one of those from my OPC � cheaper than Design911 and with free delivery
While onto the OPC I decided to order up a replacement for my cassette storage so I can update that too. Those pesky cassette storage things just randomly pop up. As you can see below, take out the rubber mat and unscrew the self-tapper and you are able to remove this and replace with the other �tray� like option.
I digress. I then attached my new DIN plugs to the wires on the amp end and attached the bullet connectors to the wires on the HU end. Taking VERY good care to label each wire (FR-FL-RR-RL) for easy connection at each end.
I unplugged the DIN speaker cables from the amp and plugged them into the newly added sockets. Job done.
At the other ends of the speaker wires I attached the bullet connectors.
I was still totally stuck with a plan for the connection to the DIN HU harness. So I did what all good men do, I went to the pub and got chatting to my old mate Bill who loves all things automotive. I explained my issue and shared a photo of my DIN plug and as casually as you like he said, �Put spade connectors on the ISO harness and push them into the DIN plug.� Naturally I bought him a � (did I mention the Yorkshire heritage) and scuttled off home in search of an internet connection for more spending.
Problem is with this DIN plug, the smaller spade connectors are REALLY small. And no amount of �small spade connector� searches on the google and the ebaygum returned any hits. Halfords had none. My other mate Rich who builds cars just for fun had none. Finally I found some here:
I bought an ISO block connector with bare ends and connected my large and small spades and bullet connectors per the photo below.
Sadly I didn�t take a pic of these bits plugged in. I guess I was just too excited.
My unit arrived on Thursday am and I took a few quick pics to share of the front and back as I could find very few on the web when trying to see what it really looked like in real life.
Footnote: all parts will be retained for future use if I ever want/need to return the stereo to its original delivery state.
 03-07-2014, 09:26 AM
#84
Instructor
Join Date: Nov 2013
Location: East Northants / Cambs Border
Posts: 157
Likes: 0
Received 0 Likes
on
0 Posts
Thanks! I really struggled with this project as I am not a sparky, I can follow directions but I could find very few directions or pointers anywhere. So this is for all the folks that want some guidance in the future.
Last edited by Jcx; 03-07-2014 at 10:30 AM.
03-07-2014, 09:46 AM
#85
Addict
Rennlist Member
Rennlist Member
Nice write up!
Out on interest, do you know if the USB connection has enough power to charge a phone or at least stop it from loosing power whilst being used as an MP3 player?
Thanks
Out on interest, do you know if the USB connection has enough power to charge a phone or at least stop it from loosing power whilst being used as an MP3 player?
Thanks
03-07-2014, 09:55 AM
#86
Addict
Rennlist Member
Rennlist Member
Since this thread is on-going about radio upgrades, a couple of weeks ago I fitted some new front speakers - Pioneer TS E130 CI"s - http://www.amazon.it/dp/B0028QHLBK/r...291_TE_3p_dp_1
I managed to fit the speakers and crossovers (although not fitted the tweeters yet) and I was able to re-use the stock speaker grills. All I had to do was to use a dremmel to enlarge the factory fitting ring that the speaker slots into a little and it looks stock and sounds a whole lot better than it used to!
This weekend I'm planning to fit some new rear speakers too to complete the upgrade.
I also have a small active sub fitted behind the passenger seat and that really makes a big difference to the bass.
Andy
03-07-2014, 10:28 AM
#87
Instructor
Join Date: Nov 2013
Location: East Northants / Cambs Border
Posts: 157
Likes: 0
Received 0 Likes
on
0 Posts
Hi Andy, Thanks! You are not the first to ask this so i just checked and No! The iPhone does not charge and it does not play music.
03-07-2014, 10:30 AM
#88
Instructor
Join Date: Nov 2013
Location: East Northants / Cambs Border
Posts: 157
Likes: 0
Received 0 Likes
on
0 Posts
Since this thread is on-going about radio upgrades, a couple of weeks ago I fitted some new front speakers - Pioneer TS E130 CI"s - http://www.amazon.it/dp/B0028QHLBK/r...291_TE_3p_dp_1
I managed to fit the speakers and crossovers (although not fitted the tweeters yet) and I was able to re-use the stock speaker grills. All I had to do was to use a dremmel to enlarge the factory fitting ring that the speaker slots into a little and it looks stock and sounds a whole lot better than it used to!
This weekend I'm planning to fit some new rear speakers too to complete the upgrade.
I also have a small active sub fitted behind the passenger seat and that really makes a big difference to the bass.
Andy
I managed to fit the speakers and crossovers (although not fitted the tweeters yet) and I was able to re-use the stock speaker grills. All I had to do was to use a dremmel to enlarge the factory fitting ring that the speaker slots into a little and it looks stock and sounds a whole lot better than it used to!
This weekend I'm planning to fit some new rear speakers too to complete the upgrade.
I also have a small active sub fitted behind the passenger seat and that really makes a big difference to the bass.
Andy