Notices
964 Forum 1989-1994
Sponsored by:
Sponsored by:

DIY fender/cowl scuttle panel seal replacement

Thread Tools
 
Search this Thread
 
Old 01-08-2014, 08:09 PM
  #1  
John McM
Rennlist Member
Thread Starter
 
John McM's Avatar
 
Join Date: May 2001
Location: Auckland, New Zealand.
Posts: 13,206
Received 567 Likes on 339 Posts
Default DIY fender/cowl scuttle panel seal replacement

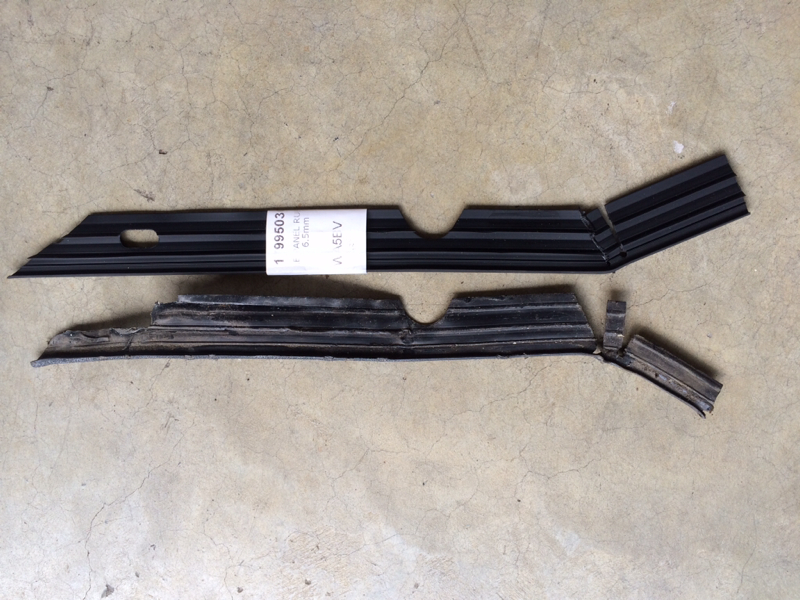
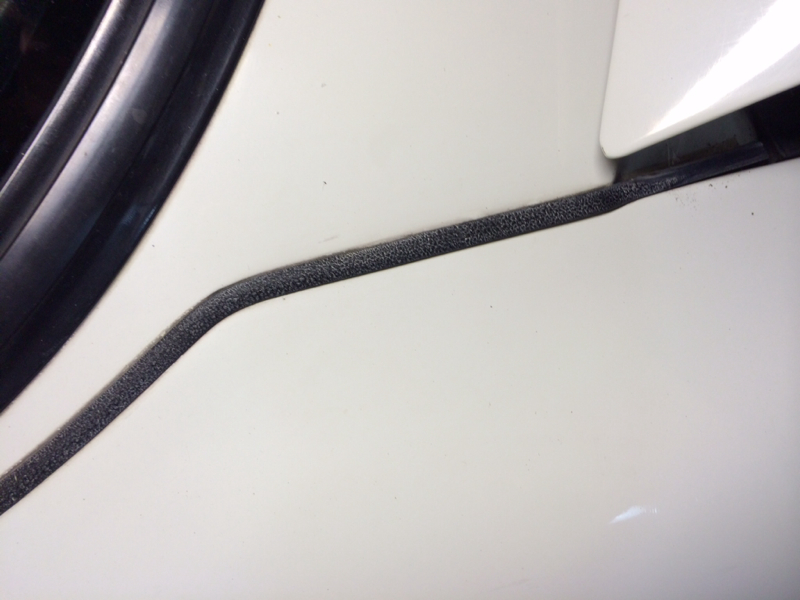
My scuttle panel seals were very tired so I bought 6.5mm replacements from Design 911 for GBP 4.31 each

This is how I fitted them.

First assemble tools

Name:  image-2201370574.jpg
Views: 4031
Size:  500.6 KB

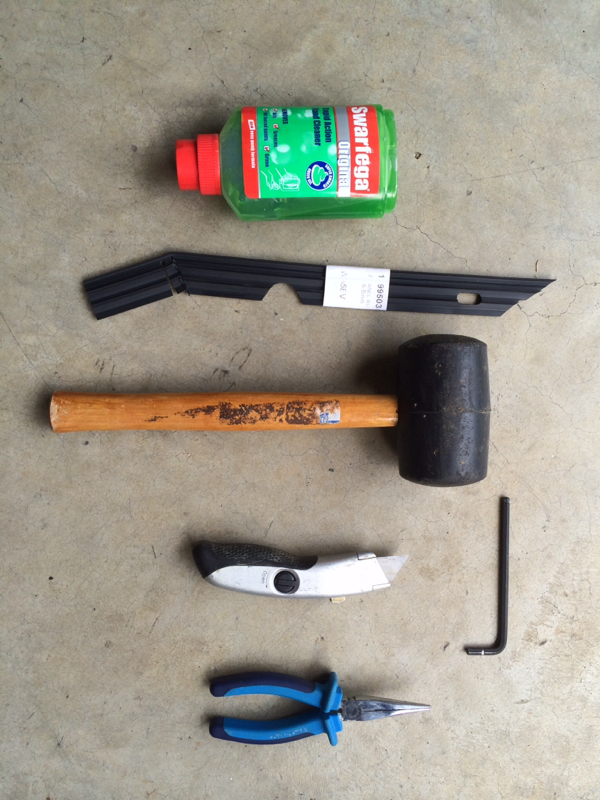
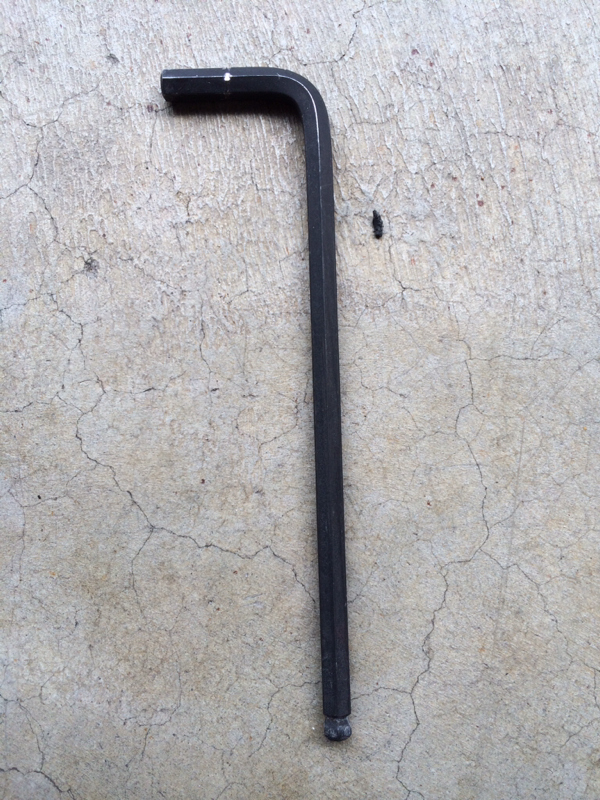
It is far easier if the hex tool has a ball end

Name:  image-303740291.jpg
Views: 3909
Size:  622.3 KB

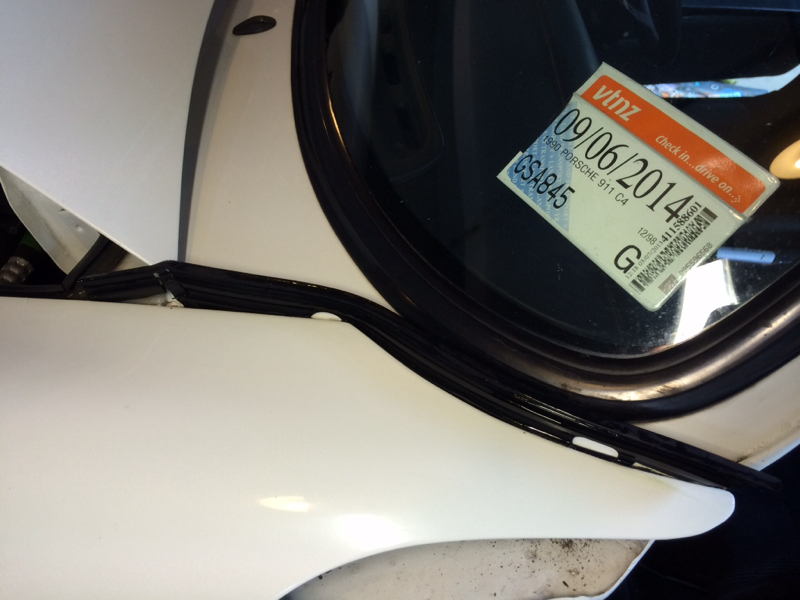
Open the door and locate the two bolts in the scuttle cavity

Name:  image-2619203649.jpg
Views: 4177
Size:  368.3 KB

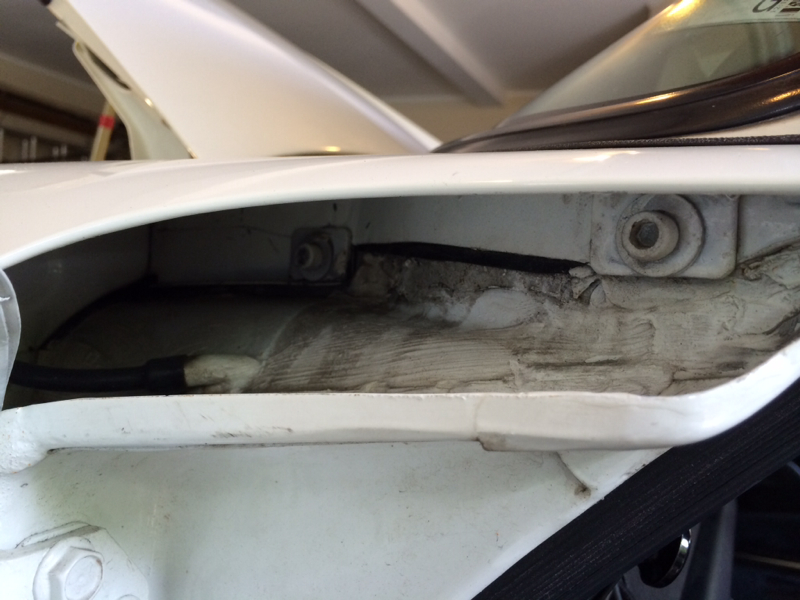
Loosen the forward one and remove the rear one. I think mine had been done before so they were easy to undo

Name:  image-294716128.jpg
Views: 3820
Size:  365.2 KB

Using fingers or pliers if necessary, start removing the existing seal from the front end.

Name:  image-1419351387.jpg
Views: 4075
Size:  301.9 KB

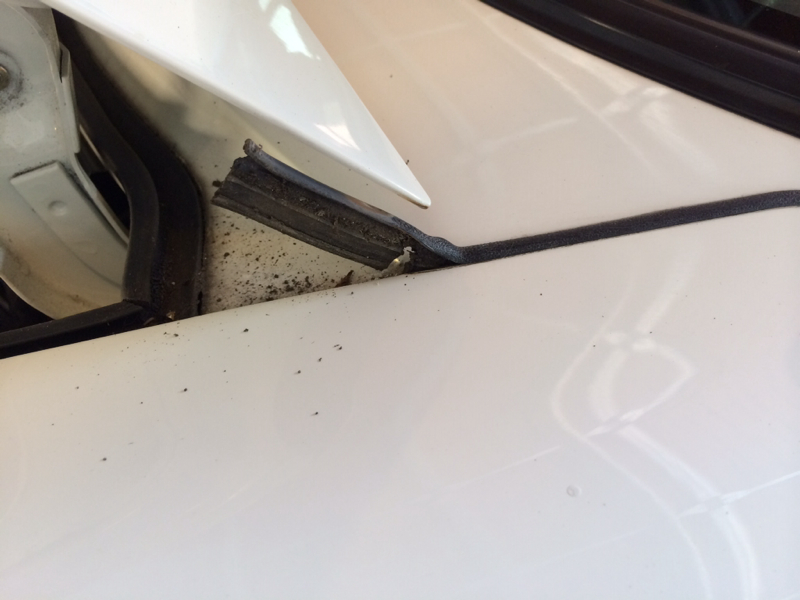
In my case, the seal was becoming difficult to remove so I moved to the other end

Name:  image-2518032425.jpg
Views: 4202
Size:  415.4 KB

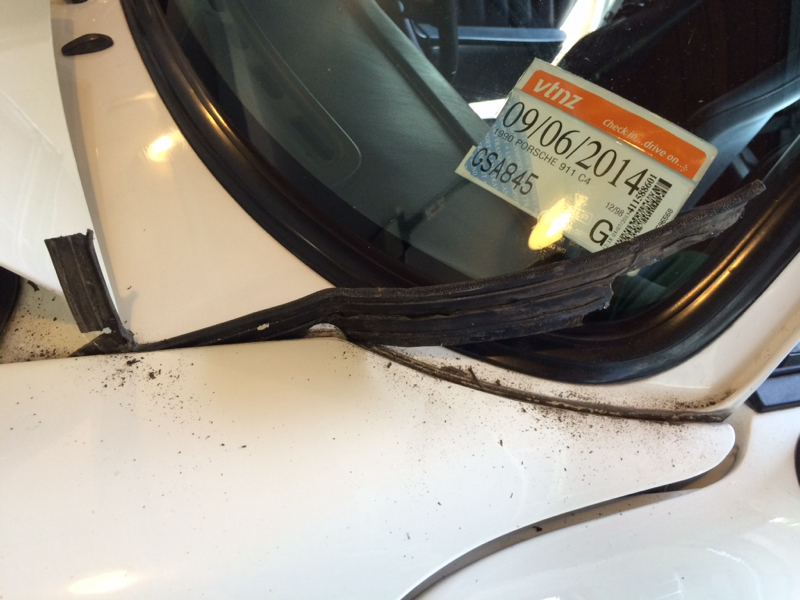
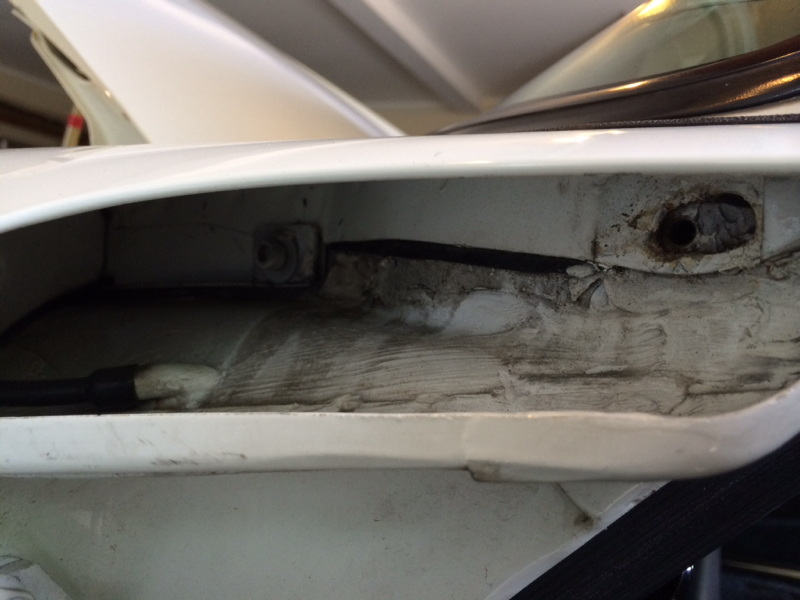
The seal came out in one piece, and liberated a lot of dirt

Name:  image-2724590306.jpg
Views: 4004
Size:  401.4 KB

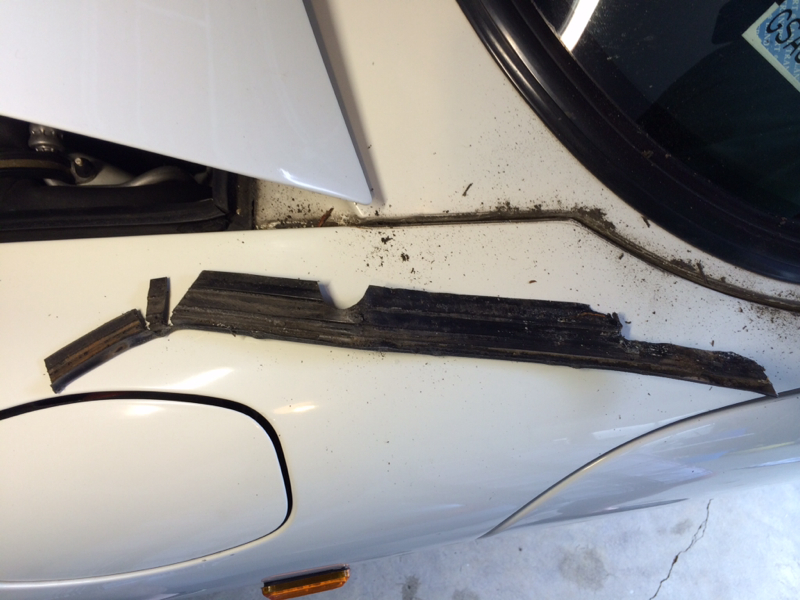
Clean up the gap with whatever is needed. I used wax remover and some polish

Name:  image-2287471236.jpg
Views: 3857
Size:  329.4 KB

Using the old seal as a template, trim the new one

Name:  image-4275735022.jpg
Views: 3819
Size:  492.5 KB

Smear the new seal with a suitable lubricant. I used swarfega. Then position the seal in the gap

Name:  image-640855471.jpg
Views: 3769
Size:  362.3 KB

Push directly on the seal trying to keep it as level as possible. When it becomes tight use a rubber mallet

Name:  image-473175021.jpg
Views: 3793
Size:  386.7 KB

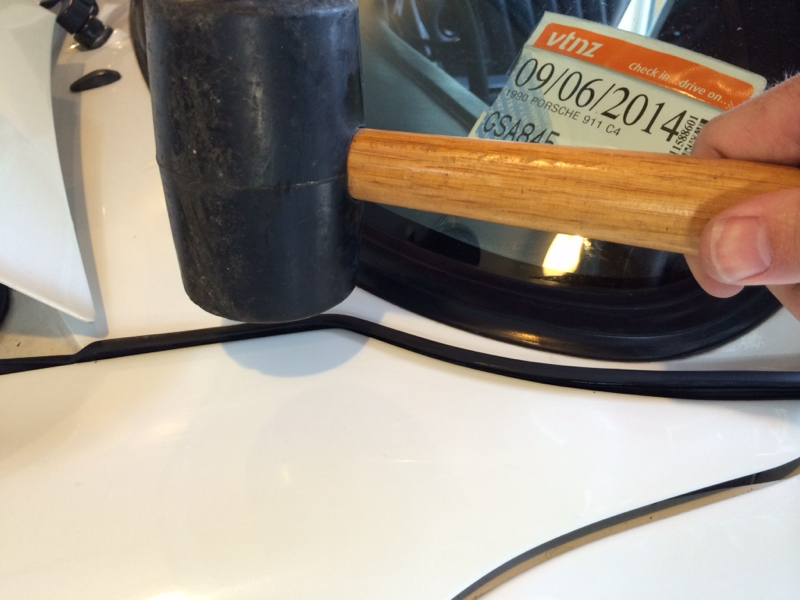
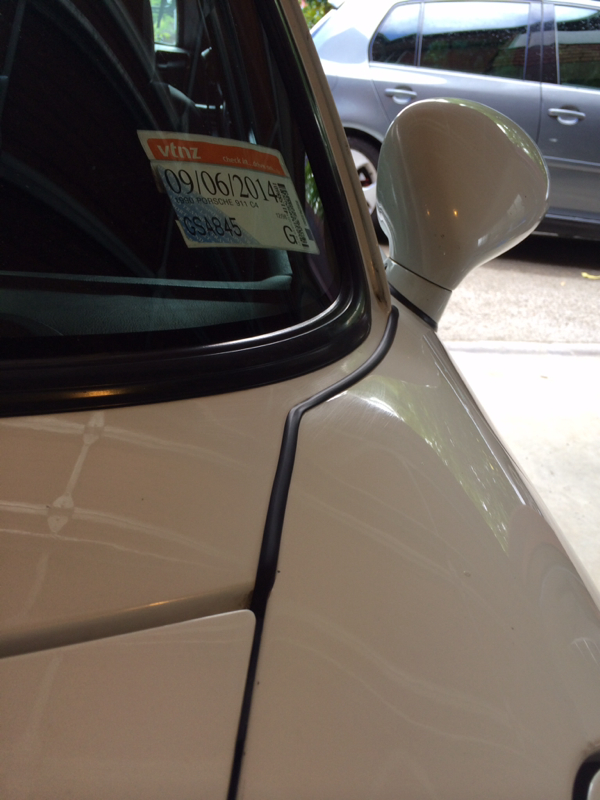
You should be able to fully insert the seal using the above method. When installed trim the ends if necessary.

Refit the rear bolt and tighten both bolts. Finished.

Name:  image-611044845.jpg
Views: 3814
Size:  385.2 KB
Old 01-08-2014, 08:13 PM
  #2  
mf_rsr
Pro
 
mf_rsr's Avatar
 
Join Date: Oct 2009
Posts: 680
Received 0 Likes on 0 Posts
Default

Nice job!
Old 01-08-2014, 08:17 PM
  #3  
Cosmos99
Pro
 
Cosmos99's Avatar
 
Join Date: Aug 2009
Location: Baltimore
Posts: 554
Likes: 0
Received 0 Likes on 0 Posts
Default

Good one! Are those Strosek mirrors?
Old 01-08-2014, 08:21 PM
  #4  
John McM
Rennlist Member
Thread Starter
 
John McM's Avatar
 
Join Date: May 2001
Location: Auckland, New Zealand.
Posts: 13,206
Received 567 Likes on 339 Posts
Default

Originally Posted by Cosmos99
Good one! Are those Strosek mirrors?
Don't think so. They look like normal aftermarket aero mirrors to me.
Attached Images  
Old 01-08-2014, 08:26 PM
  #5  
Cosmos99
Pro
 
Cosmos99's Avatar
 
Join Date: Aug 2009
Location: Baltimore
Posts: 554
Likes: 0
Received 0 Likes on 0 Posts
Default

Yep normal aero mirrors! The first pic had a foreshortening effect and made them look like the strosek ones. Looks great.
Old 01-08-2014, 08:38 PM
  #6  
Vandit
Nordschleife Master
 
Vandit's Avatar
 
Join Date: Jul 2007
Location: DFW, TX
Posts: 5,614
Likes: 0
Received 47 Likes on 36 Posts
Default

Looks simple enough, but i'm still scared to attempt it.

Thanks for the DIY.
Old 01-08-2014, 08:43 PM
  #7  
John McM
Rennlist Member
Thread Starter
 
John McM's Avatar
 
Join Date: May 2001
Location: Auckland, New Zealand.
Posts: 13,206
Received 567 Likes on 339 Posts
Default

Originally Posted by Vandit
Looks simple enough, but i'm still scared to attempt it. Thanks for the DIY.
I couldn't live with the perished old ones.

Name:  image-3812318842.jpg
Views: 3540
Size:  333.6 KB

It became the first thing I saw each time I cleaned the car.
Old 01-09-2014, 05:13 AM
  #8  
Runtothehills
Racer
 
Runtothehills's Avatar
 
Join Date: Dec 2012
Location: Auckland, New Zealand
Posts: 281
Likes: 0
Received 1 Like on 1 Post
Default

Good one john, exactly what I need to do too, must be the summer sun that's finally made mine so brittle and they've popped up over the last few weeks.
Old 01-09-2014, 05:29 AM
  #9  
John McM
Rennlist Member
Thread Starter
 
John McM's Avatar
 
Join Date: May 2001
Location: Auckland, New Zealand.
Posts: 13,206
Received 567 Likes on 339 Posts
Default

Originally Posted by Runtothehills
Good one john, exactly what I need to do too, must be the summer sun that's finally made mine so brittle and they've popped up over the last few weeks.
Sam, we could easily do them in between sessions at HD....

If you haven't seen my other post, Tore B's remote door lock kit is another good upgrade, especially for the money.
Old 01-09-2014, 12:14 PM
  #10  
FeralComprehension
Rennlist Member
 
FeralComprehension's Avatar
 
Join Date: Jun 2010
Location: Detroit (Rock City); 1990 C4
Posts: 1,710
Likes: 0
Received 4 Likes on 4 Posts
Default

Wow, nice- had no idea that was so simple. Mine look like total ****e, being (I'm sure) the ones Hans and Udo installed in March, 1990.

Thanks for taking the time. Can you expand on the qualities of your lubricant? Living in the oosa I've never heard of it.
Old 01-09-2014, 01:40 PM
  #11  
John McM
Rennlist Member
Thread Starter
 
John McM's Avatar
 
Join Date: May 2001
Location: Auckland, New Zealand.
Posts: 13,206
Received 567 Likes on 339 Posts
Default

Originally Posted by FeralComprehension
Wow, nice- had no idea that was so simple. Mine look like total ****e, being (I'm sure) the ones Hans and Udo installed in March, 1990. Thanks for taking the time. Can you expand on the qualities of your lubricant? Living in the oosa I've never heard of it.
The 'lubricant' is a jelly like hand cleaner. It just happened to be what I had to hand.
Old 01-09-2014, 01:50 PM
  #12  
jimq
Burgled
Rennlist Member
 
jimq's Avatar
 
Join Date: Aug 2003
Location: Altamonte Springs, Fl/Gwynns Island, Va.
Posts: 22,385
Received 14 Likes on 11 Posts
Default

I thought there were a couple spot welds also holding the fenders??
Old 01-09-2014, 01:53 PM
  #13  
John McM
Rennlist Member
Thread Starter
 
John McM's Avatar
 
Join Date: May 2001
Location: Auckland, New Zealand.
Posts: 13,206
Received 567 Likes on 339 Posts
Default

Originally Posted by jimq
I thought there were a couple spot welds also holding the fenders??
I read that as well, but couldn't see them on my car. Given the ease that the bolts unfastened and the state of the seal trim, I'd wager that mine had been changed before.
Old 01-09-2014, 01:58 PM
  #14  
John McM
Rennlist Member
Thread Starter
 
John McM's Avatar
 
Join Date: May 2001
Location: Auckland, New Zealand.
Posts: 13,206
Received 567 Likes on 339 Posts
Default

To those still concerned about the difficulty of this job, remember what these seals are doing. Basically they just stop water getting into the join between the scuttle and fender. As long as you get the whole seal out, you can trim the new one aggressively to fit and still have it do its job.
Old 01-09-2014, 02:32 PM
  #15  
JasonAndreas
Technical Guru
Rennlist Member

 
JasonAndreas's Avatar
 
Join Date: May 2002
Location: USVI
Posts: 8,138
Received 112 Likes on 90 Posts
Default

Originally Posted by jimq
I thought there were a couple spot welds also holding the fenders??
The front fenders are tack welded.


Quick Reply: DIY fender/cowl scuttle panel seal replacement


All times are GMT -3. The time now is 10:16 AM.