
Another interior strip and RS style carpet install thread
 02-03-2013, 06:39 PM
#31
Nordschleife Master
Thread Starter
Carried on with removing the sound proofing today. First removed it from the sides of the tunnel but left the top layer on for the time being - others' experiences have been that some padding is needed there to allow the centre console to fit properly:
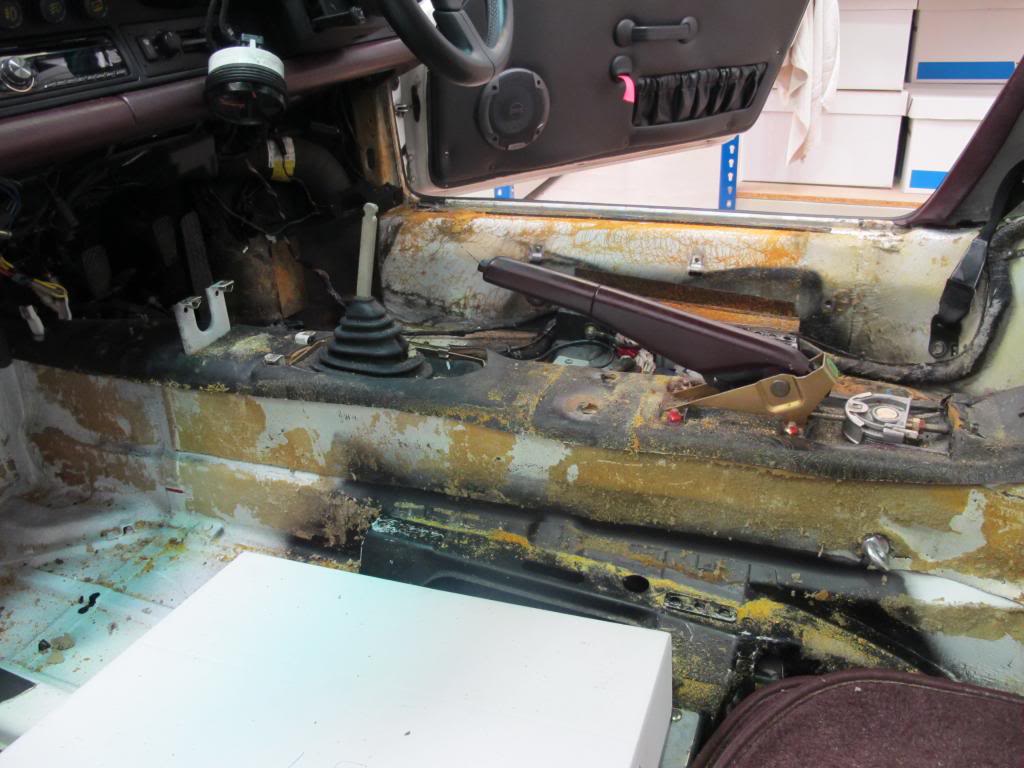
Then cleaned off as much of remaining foam as I could by hand by using a plastic ruler:

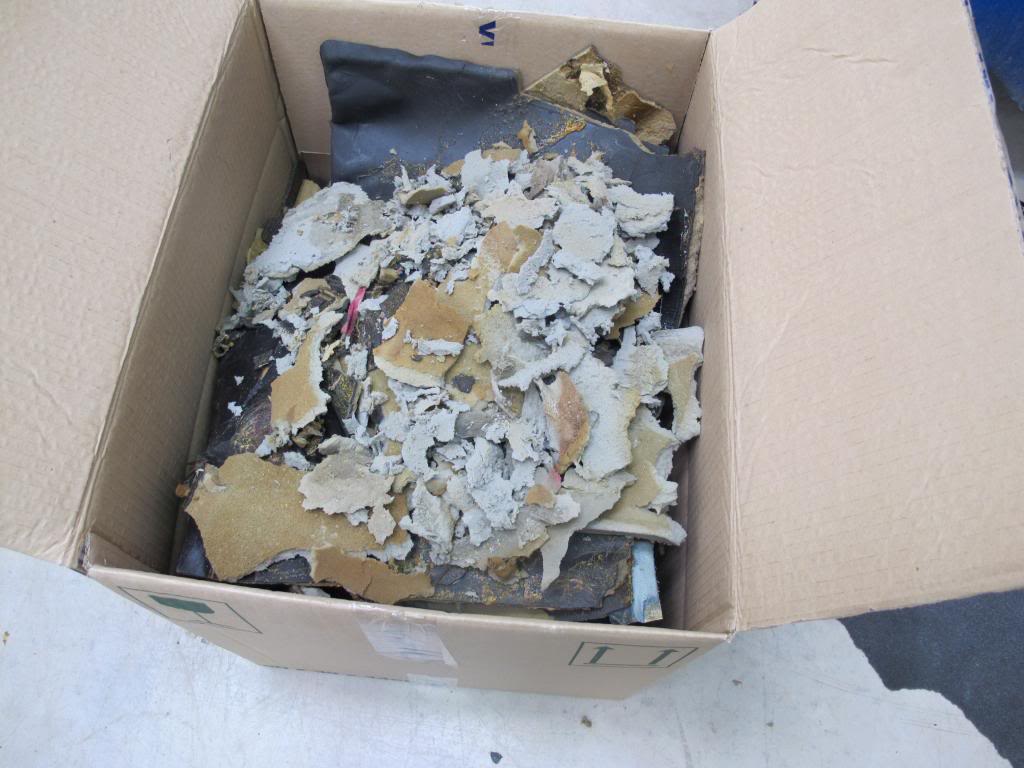
All the sound proofing has gone in to a box to weigh later:
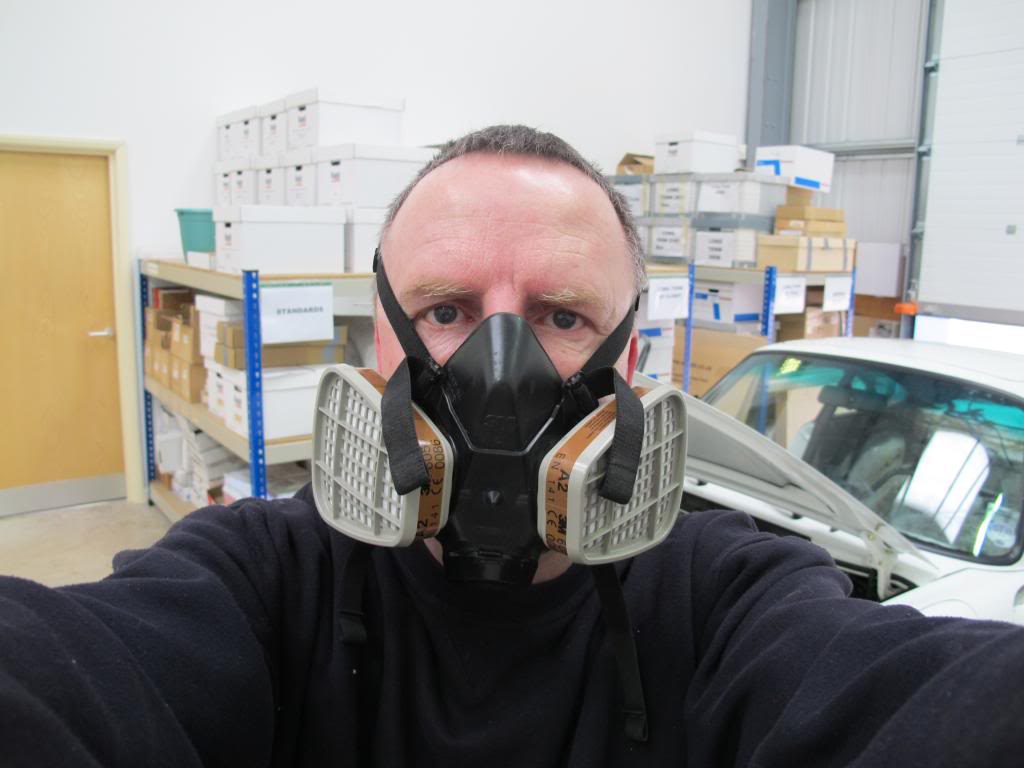
Time to break out the solvent and take precautions:
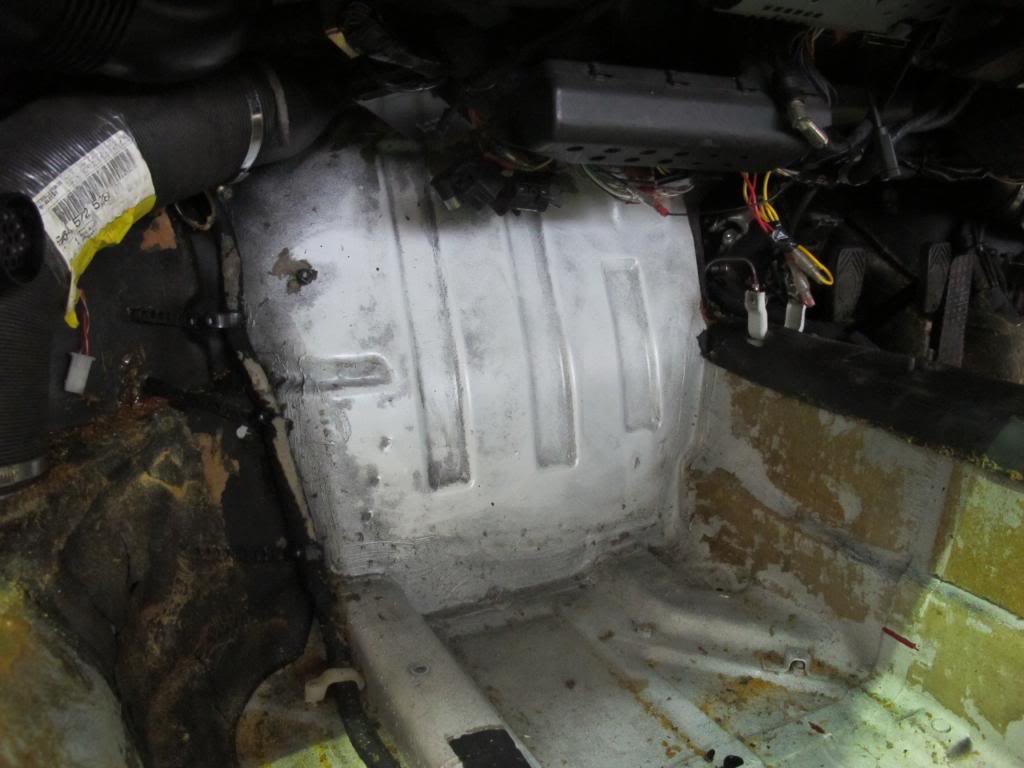
Top of the parcel shelf came out OK:
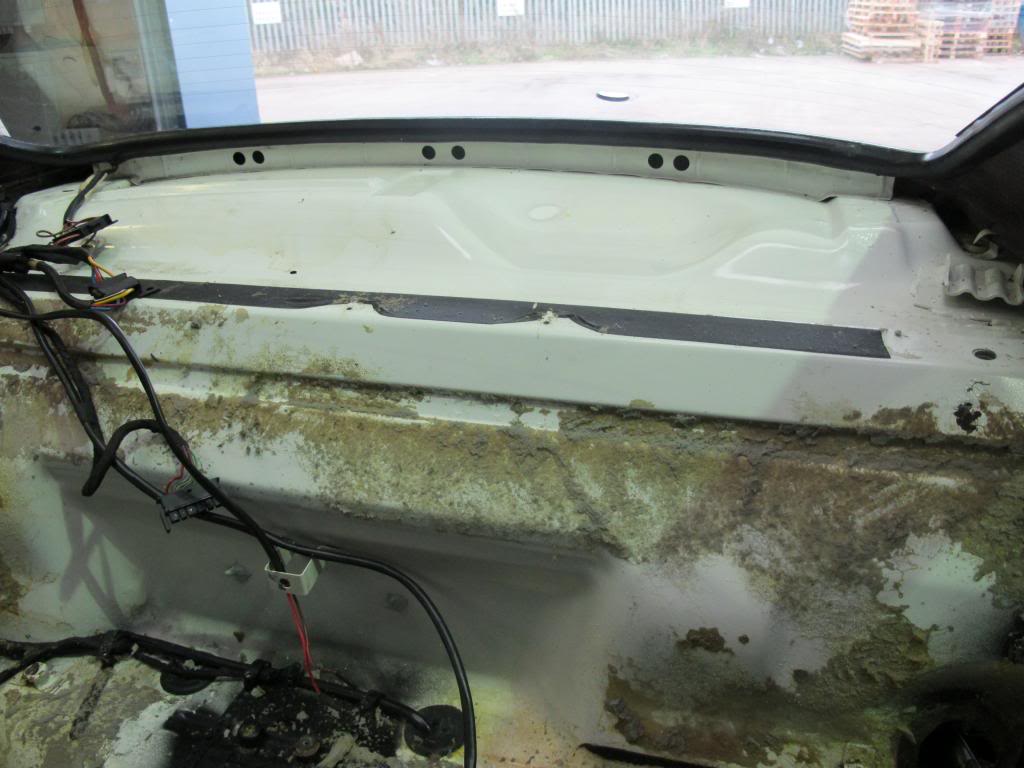
As did the passenger bulk head:
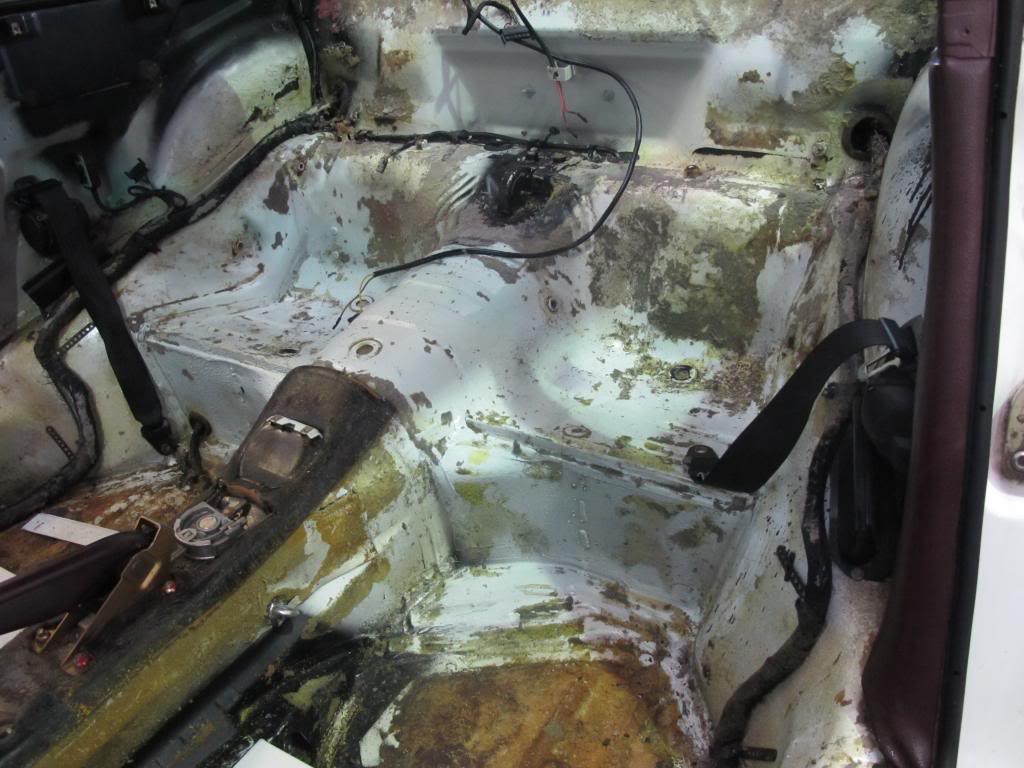
And made some decent progress on the rear seats:
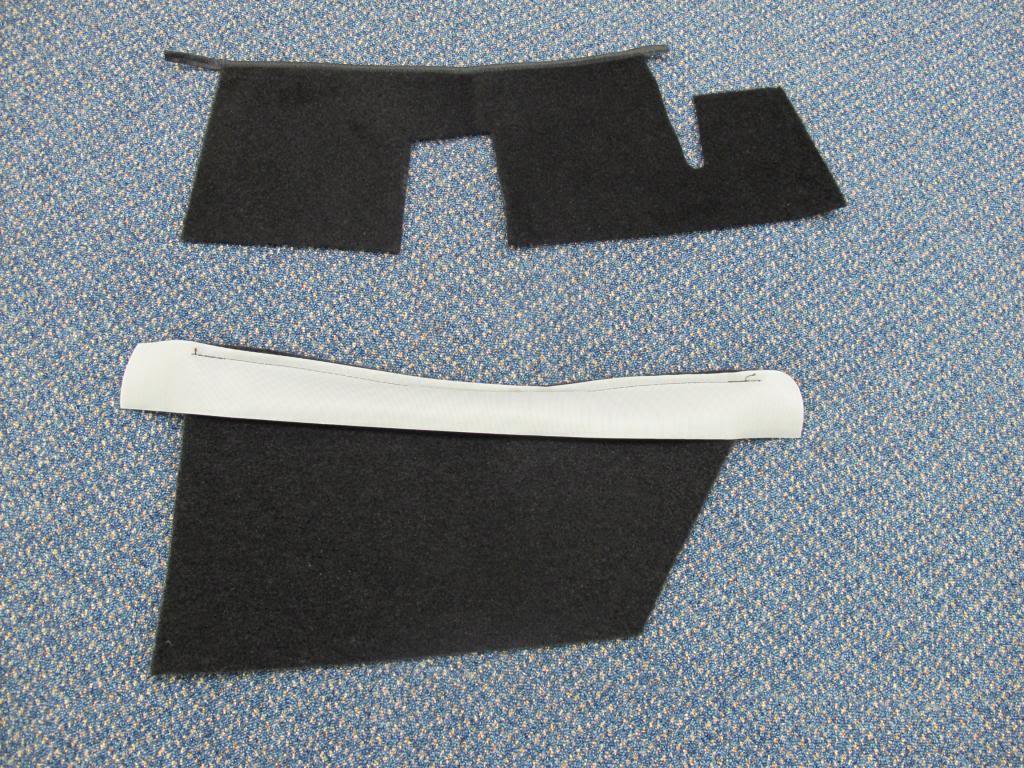
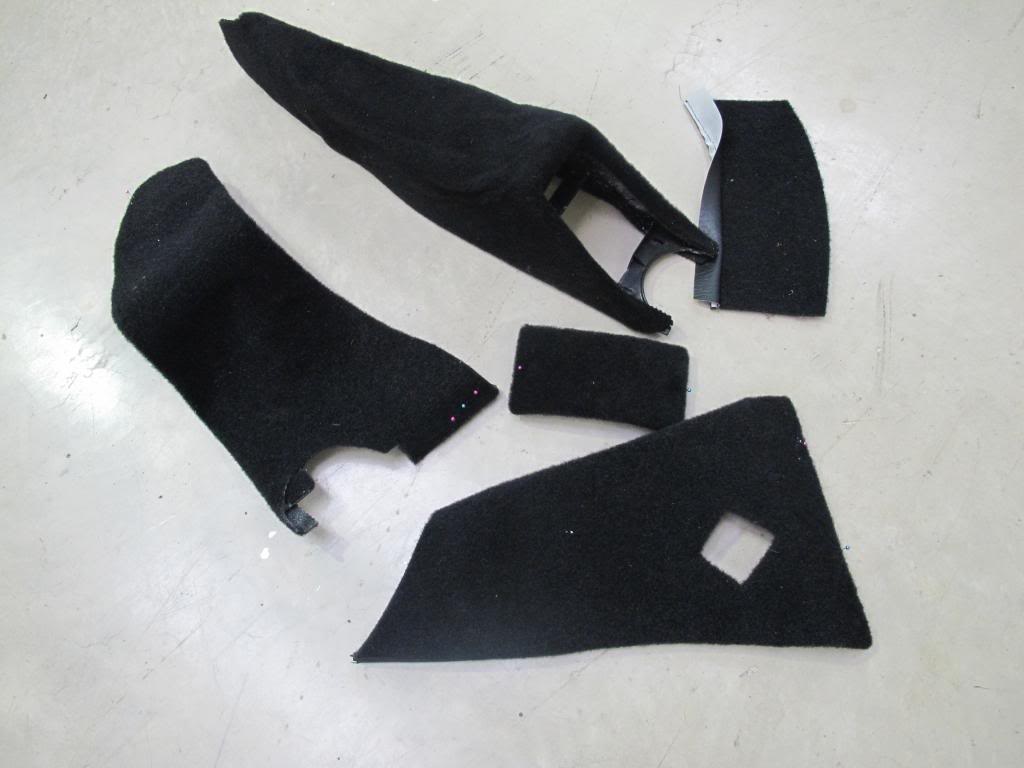
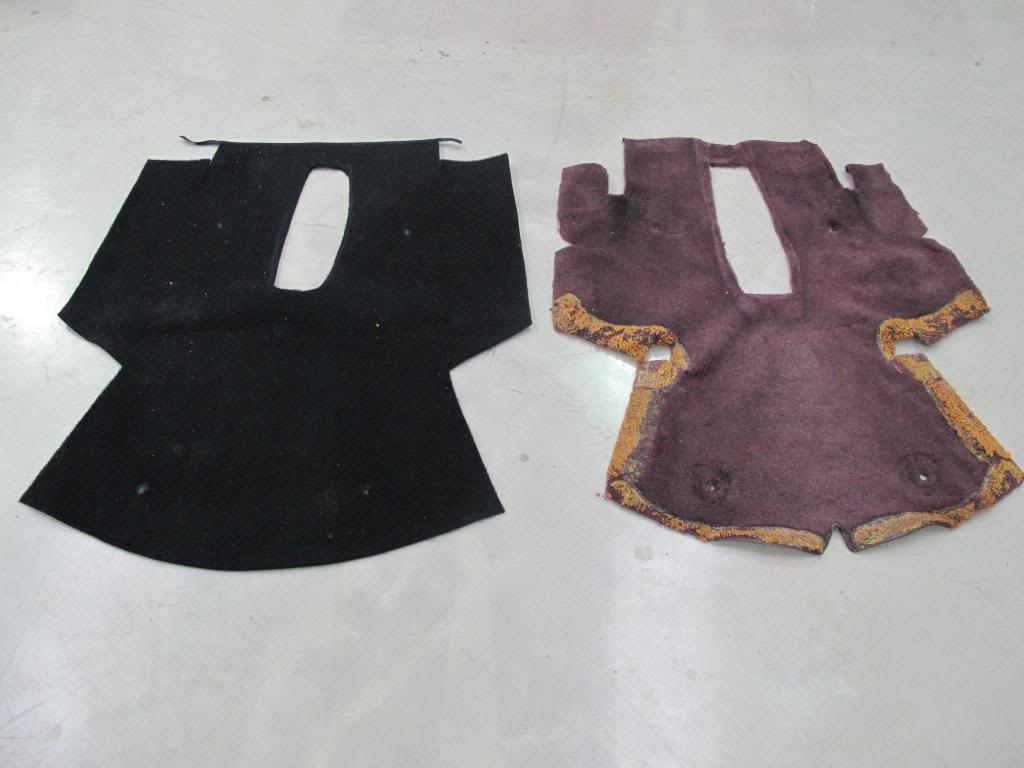
I've checked off most of the new pieces of carpet with those that I've taken out. However, these two don't appear to correspond to anything I've removed. So, do any of you that have done this job know where they go?
Then cleaned off as much of remaining foam as I could by hand by using a plastic ruler:
All the sound proofing has gone in to a box to weigh later:
Time to break out the solvent and take precautions:
Top of the parcel shelf came out OK:
As did the passenger bulk head:
And made some decent progress on the rear seats:
I've checked off most of the new pieces of carpet with those that I've taken out. However, these two don't appear to correspond to anything I've removed. So, do any of you that have done this job know where they go?
 02-03-2013, 07:09 PM
#33
Instructor
Join Date: Jan 2010
Location: Sydney, Australia
Posts: 118
Likes: 0
Received 0 Likes
on
0 Posts
Hey Boxsey, good luck with the carpets, did mine 12 months ago and was glad to get the job finished. It was a job that was well over due and made more urgent by the fact some weeping hoses in the driver's foot well made the sound proofing turn to mush. I wasn't so diligent with the old glue removal though.....I left some history in the car!
Regarding the extra pieces, the bottom one looks like the pieces I used to cover the door pockets on the standard doors - the vinyl at the top looks like the piece that wraps over the top edge of ther pocket (if it's black on the other side), however it does look a little small. Good Luck, Matt
Regarding the extra pieces, the bottom one looks like the pieces I used to cover the door pockets on the standard doors - the vinyl at the top looks like the piece that wraps over the top edge of ther pocket (if it's black on the other side), however it does look a little small. Good Luck, Matt
Last edited by ozmatt964; 02-03-2013 at 07:09 PM. Reason: spelling
02-03-2013, 07:16 PM
#34
Nordschleife Master
Thread Starter
 02-03-2013, 07:19 PM
#35
Nordschleife Master

How much engine noise do you pick up from deleting the speaker shelf and insulation on the back wall?
I've got a rear shelf carpet I want to install in place of the hard speaker shelf, and I'll probably pull all the insulation too.
I've got a rear shelf carpet I want to install in place of the hard speaker shelf, and I'll probably pull all the insulation too.
 02-04-2013, 03:24 AM
#38
Not unpleasant though, especially when rev-matching during "spirited" braking. (With an Appbiz RS carpet, no soundroofing except for a couple of closed cell foam pieces to make carpet fit better, Heigo cage, PSS10 coilovers, monoballs (f&r), RS bushes, RS OEM tranny mount, engine sound pad delete etc, you get the picture ... No regrets, the sound is intoxicating
 02-04-2013, 05:52 AM
#39
Three Wheelin'
Hey boxey,
In your initial post, picture No7, in the bottom left corner of the image, on the edge of the inner wheel arch I see you have a corrosion spot that looks exactly like mine! This is where the oil tank upper mount is spot welded to the shell. (see my thread 'Oil tank refurb')
Do you plan on addressing it before carpeting?
I recognized the rust spot as I've just pulled out the rear interior of in this area in my car so that I can cut it out and reweld. I've now decided to stip out all the deadening as well :-)
02-04-2013, 06:20 AM
#40
Nordschleife Master
Thread Starter
Hey boxey,
In your initial post, picture No7, in the bottom left corner of the image, on the edge of the inner wheel arch I see you have a corrosion spot that looks exactly like mine! This is where the oil tank upper mount is spot welded to the shell. (see my thread 'Oil tank refurb')
Do you plan on addressing it before carpeting?
I recognized the rust spot as I've just pulled out the rear interior of in this area in my car so that I can cut it out and reweld. I've now decided to stip out all the deadening as well :-)
In your initial post, picture No7, in the bottom left corner of the image, on the edge of the inner wheel arch I see you have a corrosion spot that looks exactly like mine! This is where the oil tank upper mount is spot welded to the shell. (see my thread 'Oil tank refurb')
Do you plan on addressing it before carpeting?
I recognized the rust spot as I've just pulled out the rear interior of in this area in my car so that I can cut it out and reweld. I've now decided to stip out all the deadening as well :-)
 02-09-2013, 06:31 PM
#42
Racer

Join Date: Jul 2007
Posts: 275
Likes: 0
Received 0 Likes
on
0 Posts
How well does the closed cell work in sound proofing? I want to strip all of the old foam out, since it's falling apart anyways from me removing the carpet. However, I want to keep the cabin sound as quiet or close to how it was before as possible.
-Don
-Don
02-10-2013, 07:29 PM
#43
Nordschleife Master
Thread Starter
Owing to other stuff that cropped up I didn't get as much time as I'd hoped to work on the car this weekend. However, some progress was made and here's the update.
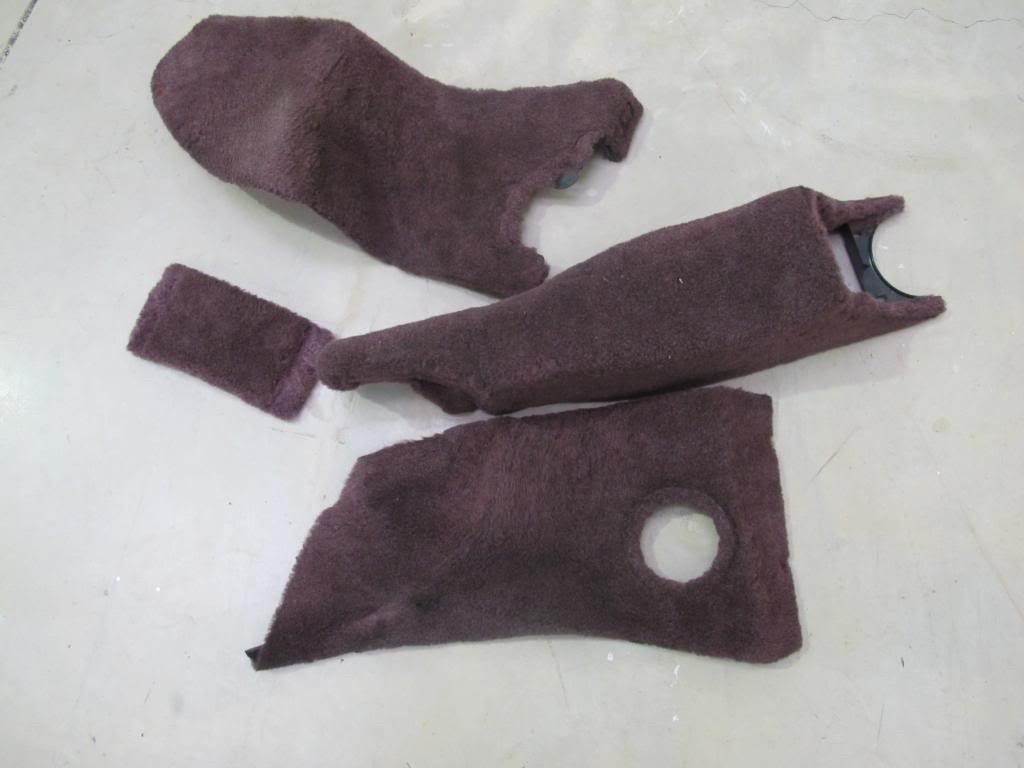
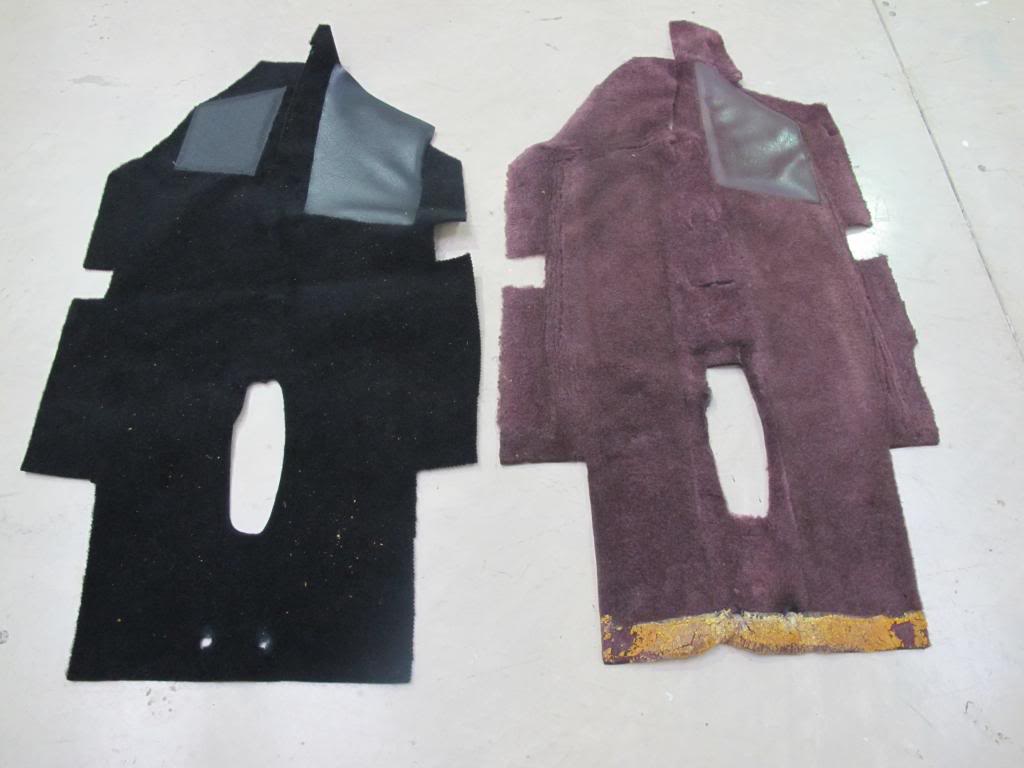
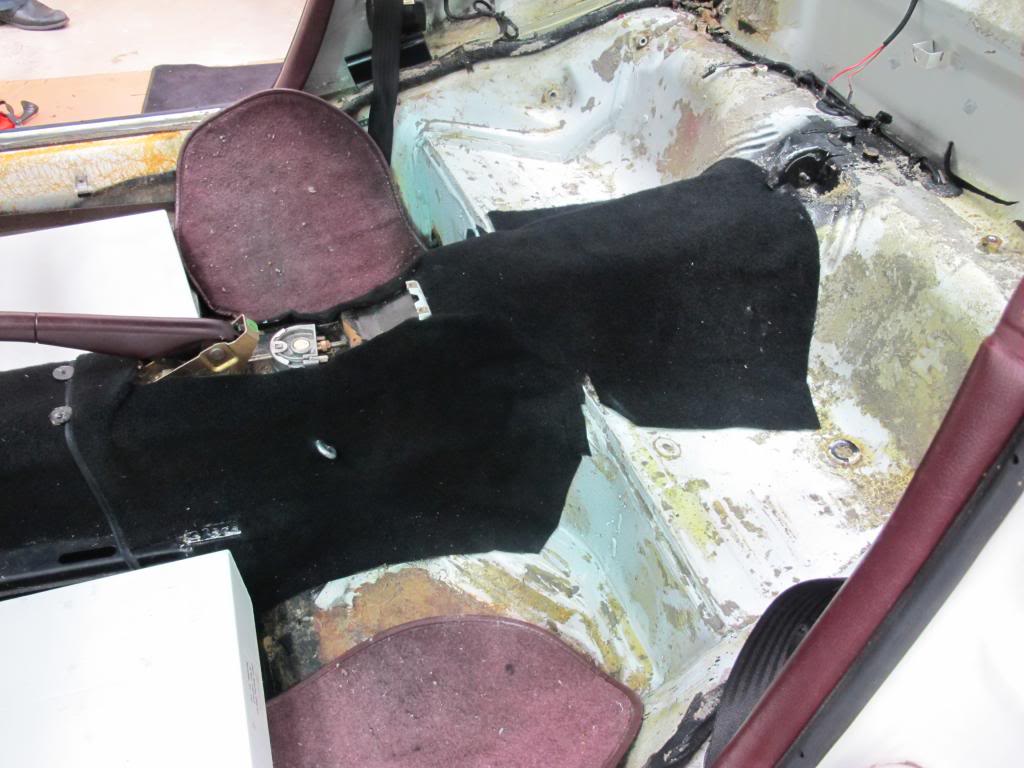
All the removable carpeted panels had been taken out of the car and were duly passed to Mrs Boxsey to strip them down and re-carpet them (luckily she loves the car as much as me). Before:
After:
She also sanded down my cup style floor boards and stained them black:

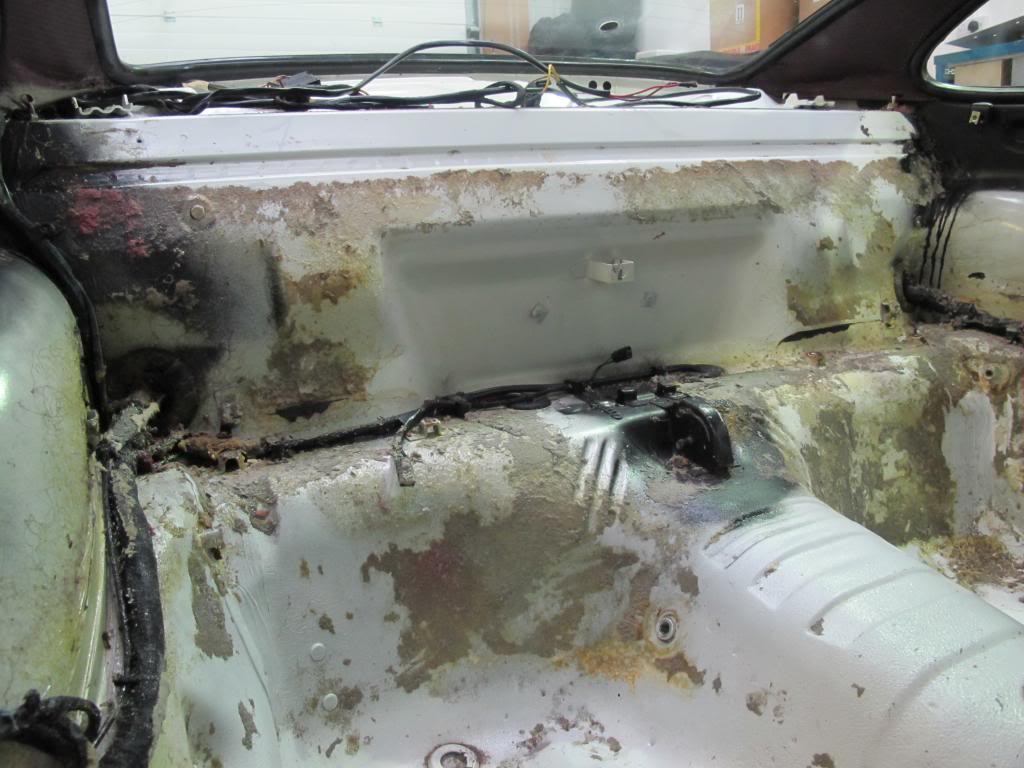
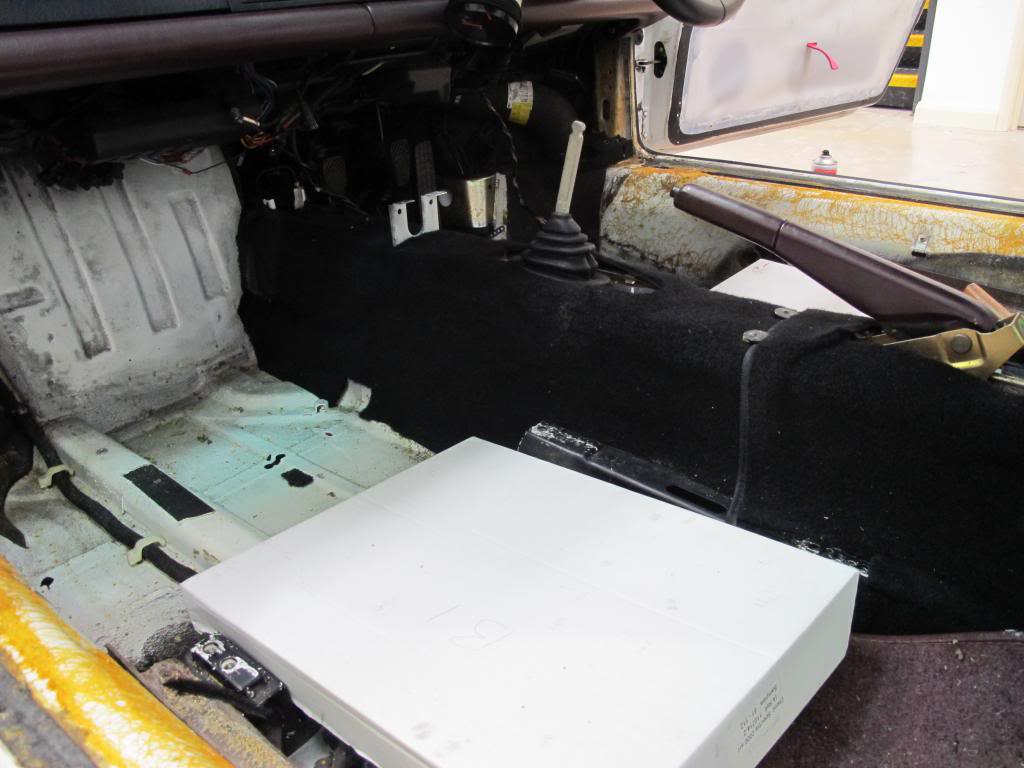
I finally called a halt to the glue removal. I decided that I'd got it to a state where I was happy that the carpets would fit nicely. Glue removal can go on for ever if you want it to! For me the end point was to have no chunks of foam and a nice clean top line on the parcel shelf:
Then it was time to start fitting carpets. As others had advised, we started with the forward tunnel section. I used the old carpet as a template to cut out the hole for the gear shift and the slits for the protruding brackets. Even though I had bought a RHD carpet set, it was soon clear that this piece provided is still LHD (I may notify Bob at Appbiz about this). Note the vinyl patch on the left for LHD. So, Mrs B sewed on a vinyl patch for the right side and did a fair bit of trimming to mimic the original template:
This was then fitted to the car, trimmed a bit more and then glued in to place:
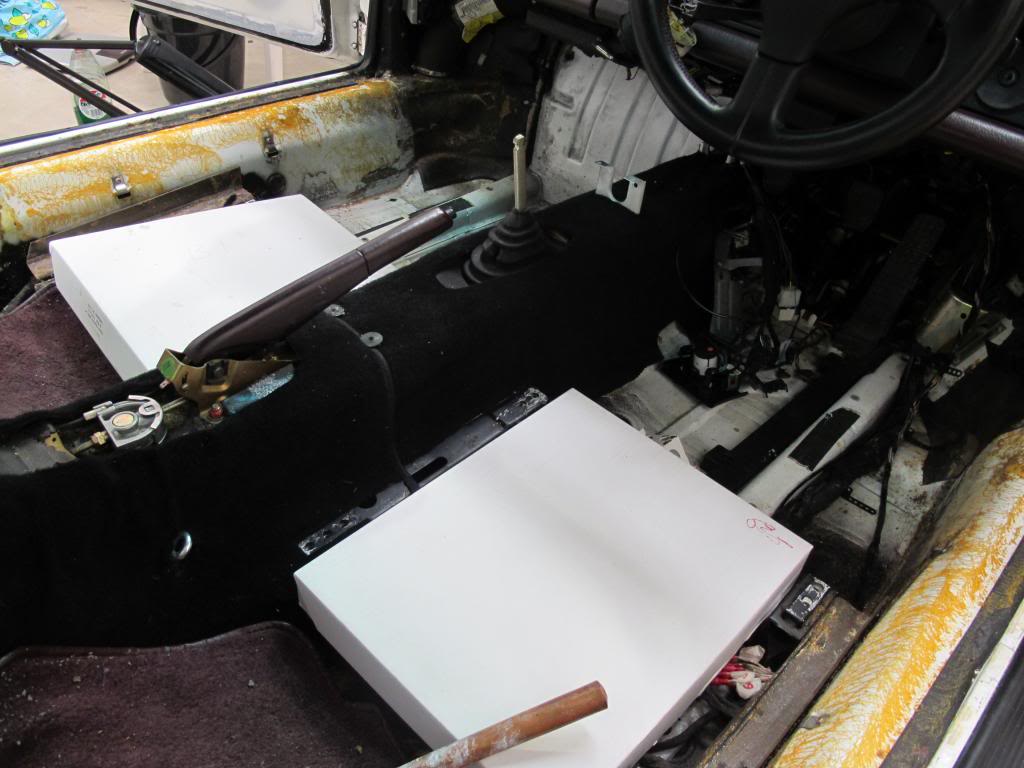
Similarly, the rear tunnel original carpet was used as a template to cut the hole for the handbrake:
And then fitted in the car (again there was a fair bit of trimming to do):
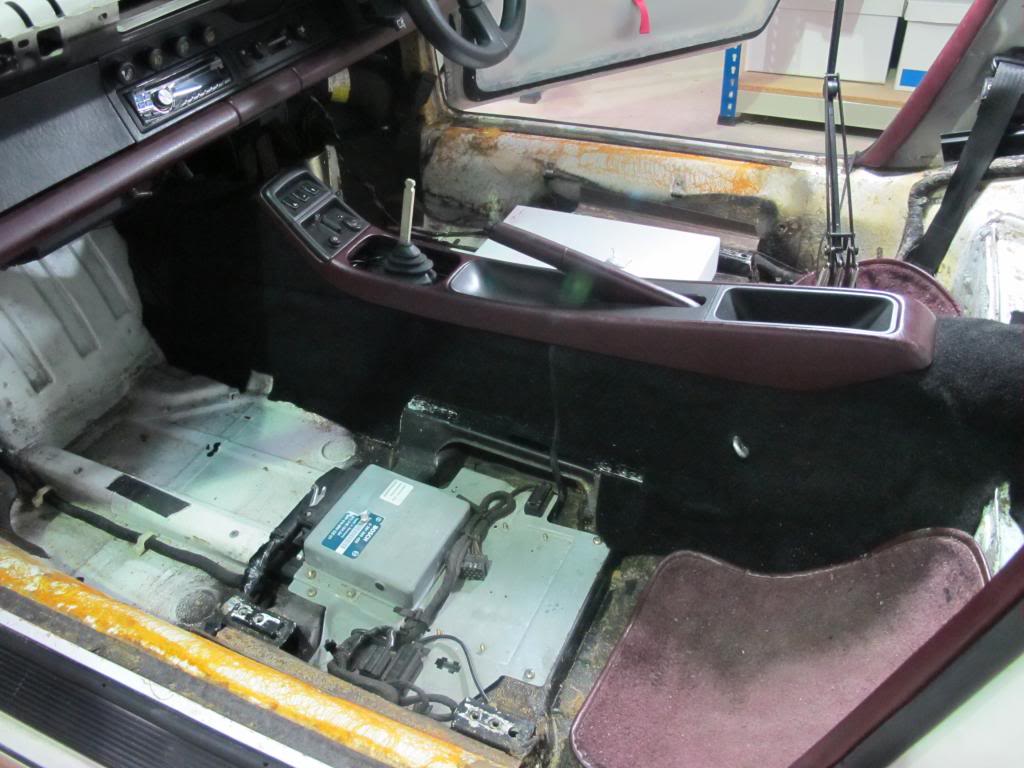
I then re-connected the battery and spent some time checking over the car's electrics to make sure I hadn't upset anything during the strip down. Happy that all was OK, I then fitted the forward upper tunnel and centre console. Leaving the top layer of sound proofing on the tunnel (see earlier in thread) appears to have worked a treat:
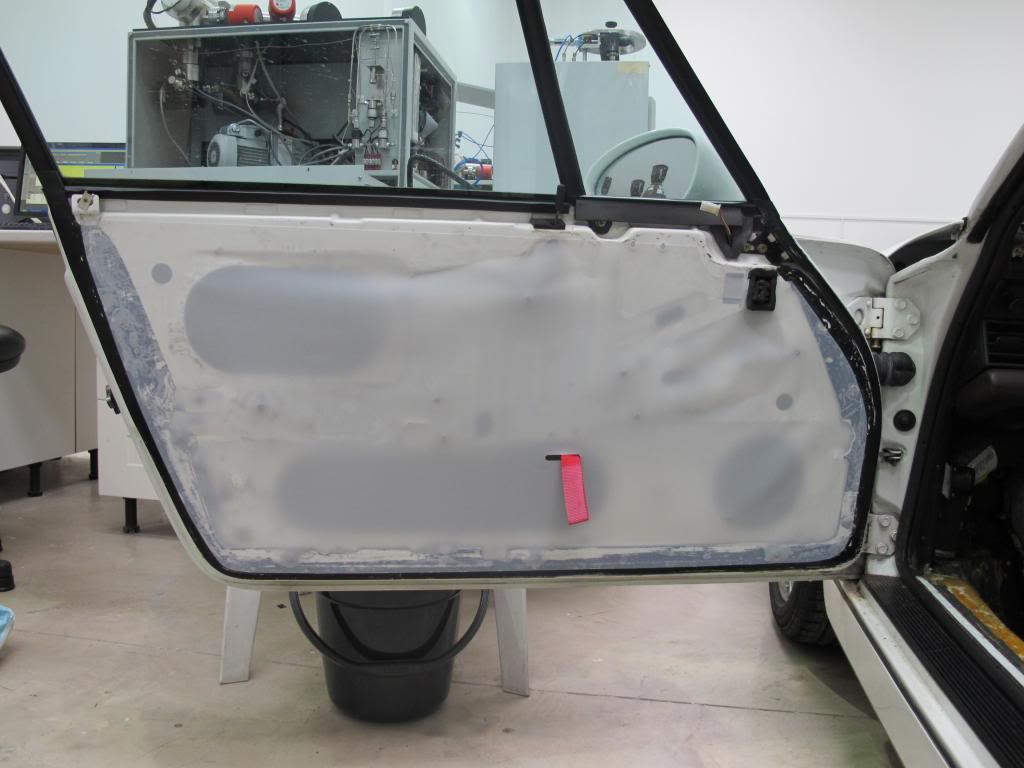
Seeing as one of the reasons for doing this job was to get rid of all the absorbed water that had been caused by leaks, I thought it would be prudent to whip off the LWT door panels and replace the membranes:
Hopefully the end is now in sight and barring interruption, I should get it all finished next weekend
All the removable carpeted panels had been taken out of the car and were duly passed to Mrs Boxsey to strip them down and re-carpet them (luckily she loves the car as much as me). Before:
After:
She also sanded down my cup style floor boards and stained them black:
I finally called a halt to the glue removal. I decided that I'd got it to a state where I was happy that the carpets would fit nicely. Glue removal can go on for ever if you want it to! For me the end point was to have no chunks of foam and a nice clean top line on the parcel shelf:
Then it was time to start fitting carpets. As others had advised, we started with the forward tunnel section. I used the old carpet as a template to cut out the hole for the gear shift and the slits for the protruding brackets. Even though I had bought a RHD carpet set, it was soon clear that this piece provided is still LHD (I may notify Bob at Appbiz about this). Note the vinyl patch on the left for LHD. So, Mrs B sewed on a vinyl patch for the right side and did a fair bit of trimming to mimic the original template:
This was then fitted to the car, trimmed a bit more and then glued in to place:
Similarly, the rear tunnel original carpet was used as a template to cut the hole for the handbrake:
And then fitted in the car (again there was a fair bit of trimming to do):
I then re-connected the battery and spent some time checking over the car's electrics to make sure I hadn't upset anything during the strip down. Happy that all was OK, I then fitted the forward upper tunnel and centre console. Leaving the top layer of sound proofing on the tunnel (see earlier in thread) appears to have worked a treat:
Seeing as one of the reasons for doing this job was to get rid of all the absorbed water that had been caused by leaks, I thought it would be prudent to whip off the LWT door panels and replace the membranes:
Hopefully the end is now in sight and barring interruption, I should get it all finished next weekend
02-10-2013, 11:28 PM
#44
Instructor
Join Date: Jan 2010
Location: Sydney, Australia
Posts: 118
Likes: 0
Received 0 Likes
on
0 Posts
Can you let me know about the membranes for the doors, are they your creation or a purchased part? I need to replace mine after I attack a central locking issue.
02-10-2013, 11:47 PM
#45
Racer
Join Date: Jul 2007
Posts: 275
Likes: 0
Received 0 Likes
on
0 Posts