

Aussie 964C2 Maintenance Diary (pic heavy!)
 09-09-2011, 10:33 AM
#31
Burning Brakes
Thread Starter

When I bought the car, one of the comments on the pre purchase inspection was that the sunroof operation was noisy. And so it was. When you opened or closed it, it was to the accompaniment of lots of oldschool-sounding mechanical whirring noises. But it worked just fine. For a few months 
Then one day it seized. Thankfully it seized in the closed position, and when you tried to open it, you could see that the left side would try to open by about half an inch, but the right hand side was resolutely stuck. This seemed a clear case of the cable on the right side having snapped, so I ordered a new set of cables and a few other bits and pieces so that we could do a proper overhaul
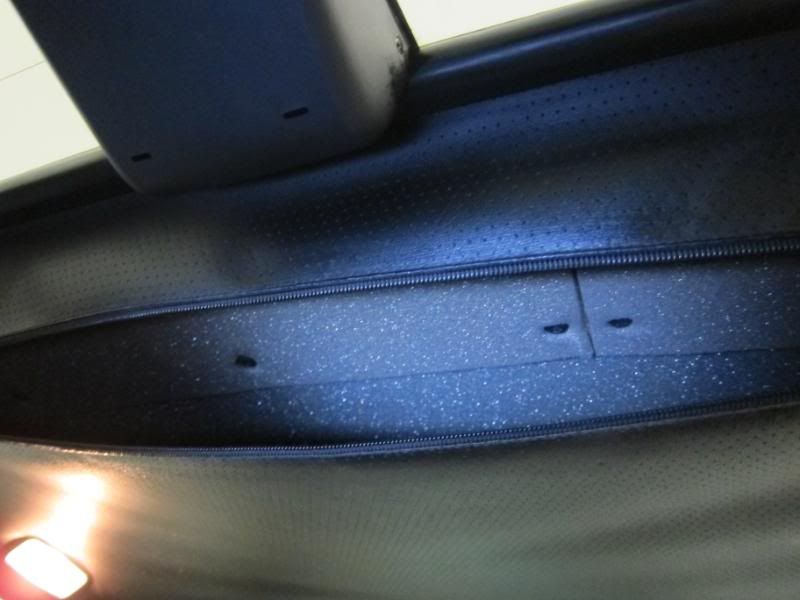
The first step is to unzip that mysterious zipper at the back of the headlining. First I sprayed some interior-detailer cleaning fluid onto the 20yr old zipper to lubricate it. And when it's opened, you see the foam pad that insulates the cabin from the whirrings of the sunroof motor.
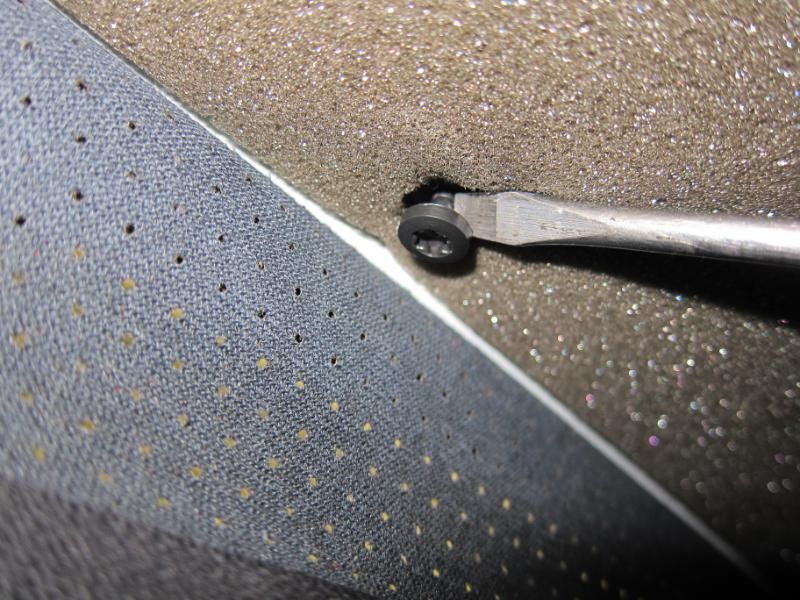
The pads are held in by a series of those pesky little plastic scrivets. They look like they can be unscrewed with a torx driver, but in reality the threads are stripped most of the time and unscrewing them just makes them spin around and they don't actually come out. So I usually just eliminate the middleman and prise the little plastic screws out with a screwdriver, or just extracting them with a needlenose pliers works too. Don't worry, they pop back in later no problems.
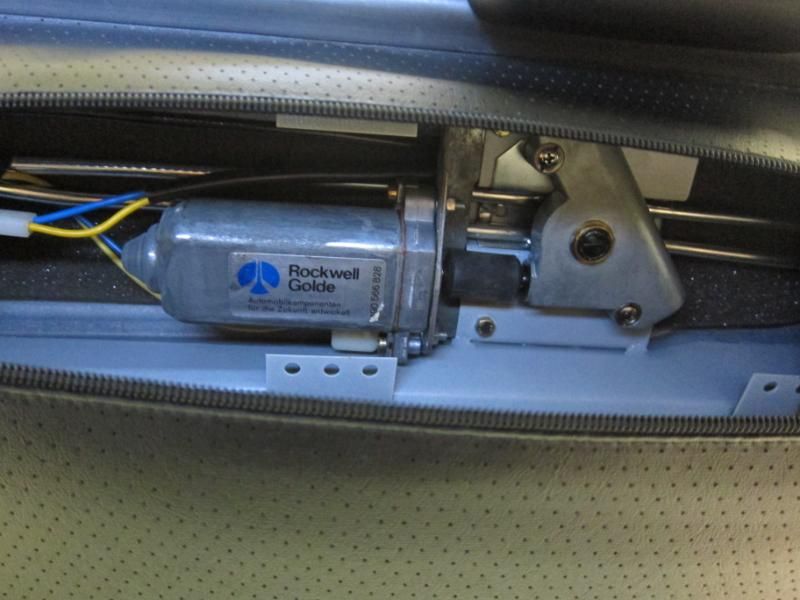
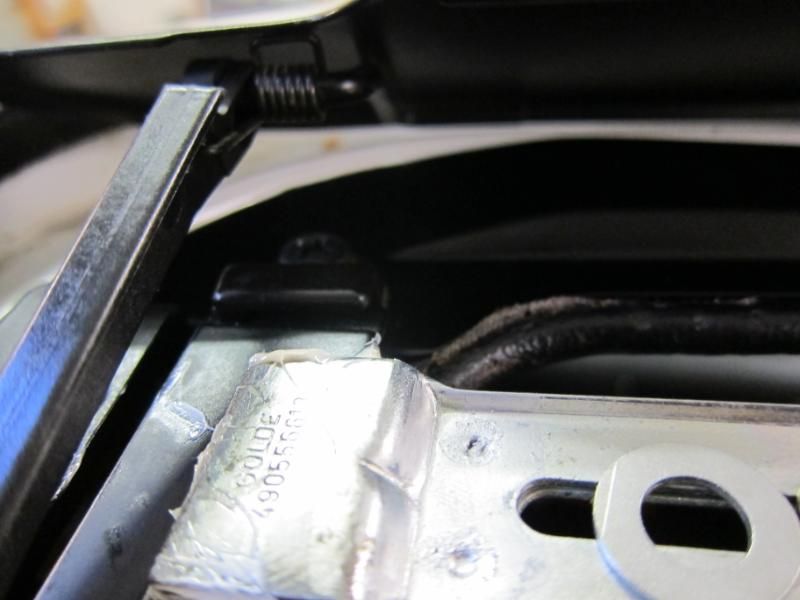
And when the foam pad is out of the way, it reveals the sunroof motor (that "Rockwell Golde" thing on the left) which goes into like a rubber universal joint, and then into a gearbox which drives the sunroof cables.
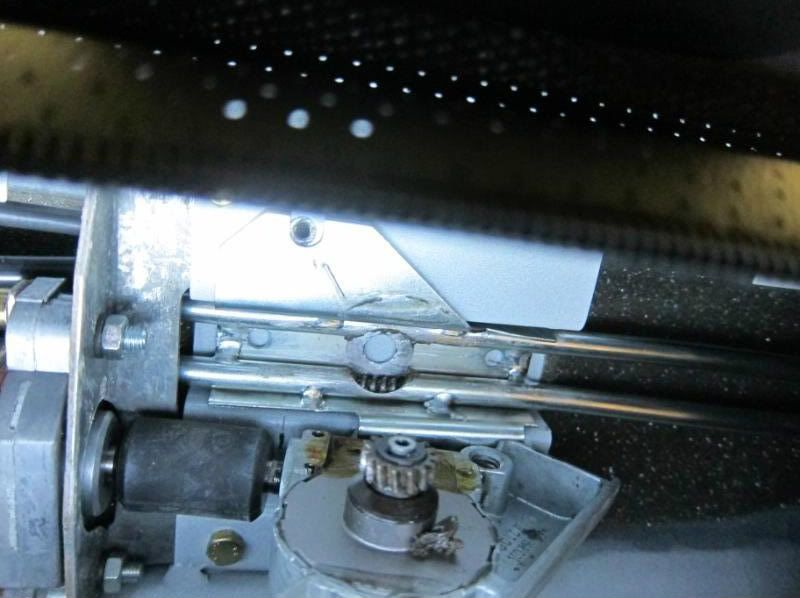
Unscrewing the gearbox and flipping it down reveals the cables, which look to be in good shape. So no stripped teeth here, which was a possible cause of the sunroof getting stuck.
But with the drive gear out of the way, you can now push the sunroof back by hand. Now, this ain't easy, for reasons I'll explain in a moment. It takes a fair bit of effort to push the rear edge of the sunroof down, so that it can slide back a little.
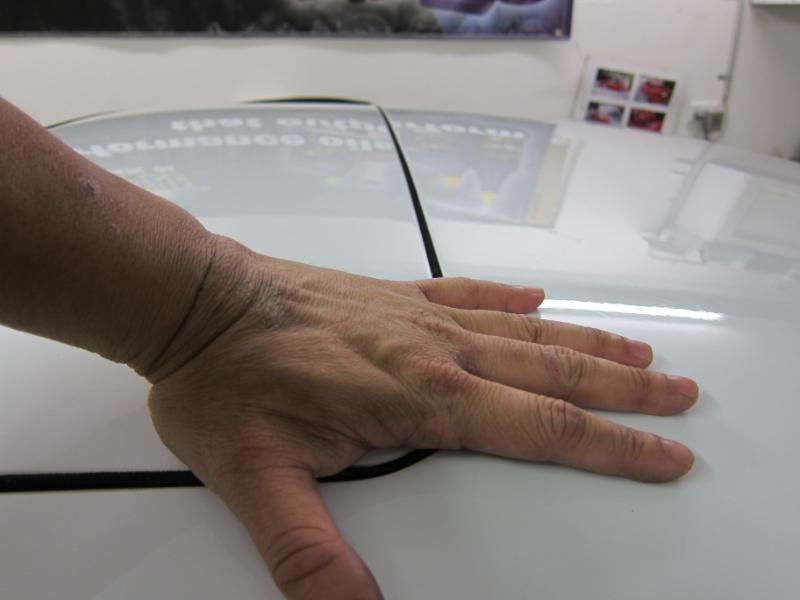
You'll notice that it's really, really tight, but thankfully you only have to move it back a tad.
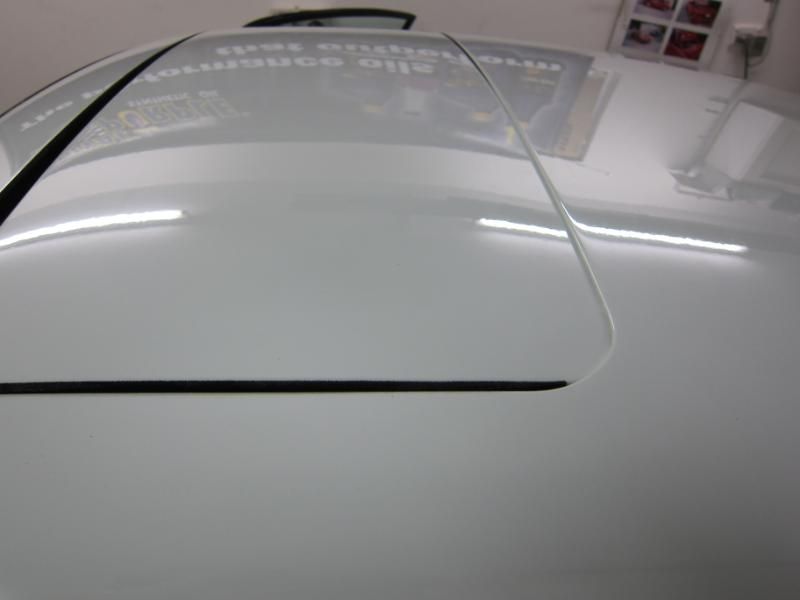
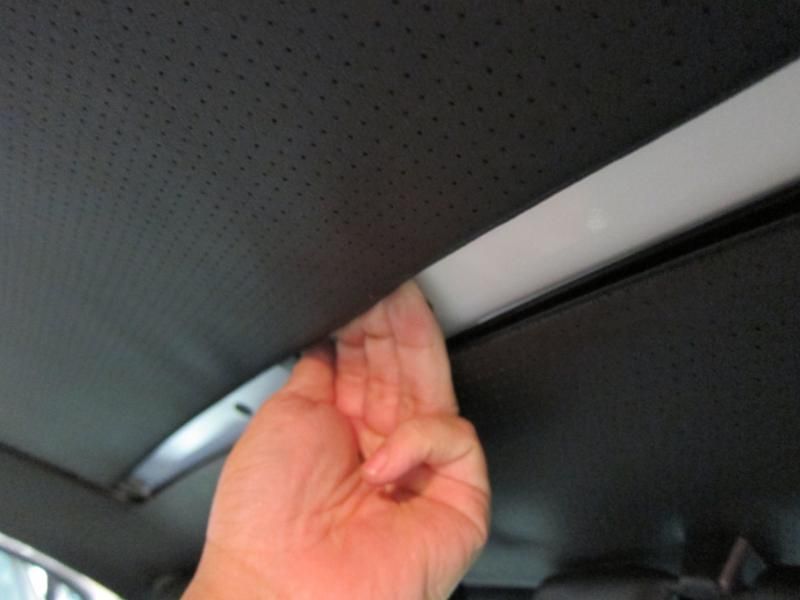
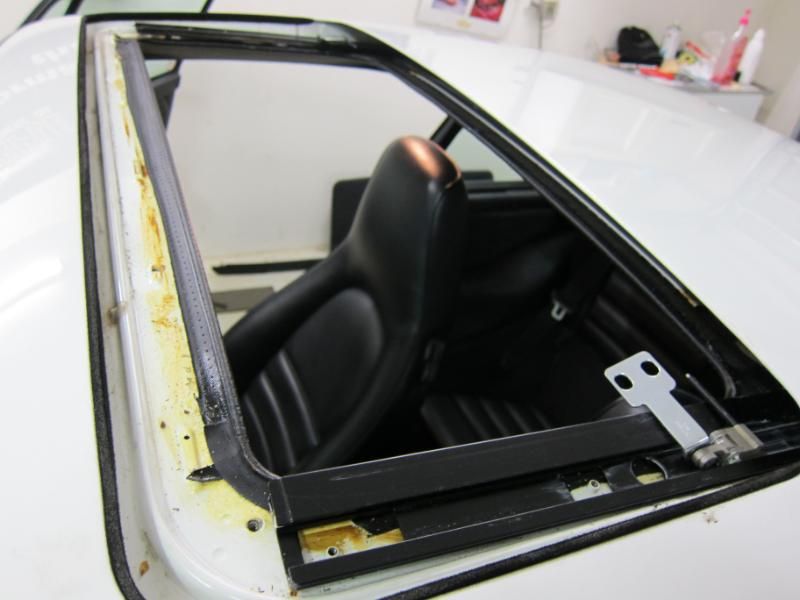
...just about enough for you to expose the front edge of the sunroof liner, and there is enough of a gap for you to get your fingers in there and unpop the liner from the sunroof panel. It's held in by some metal spring loaded clips.
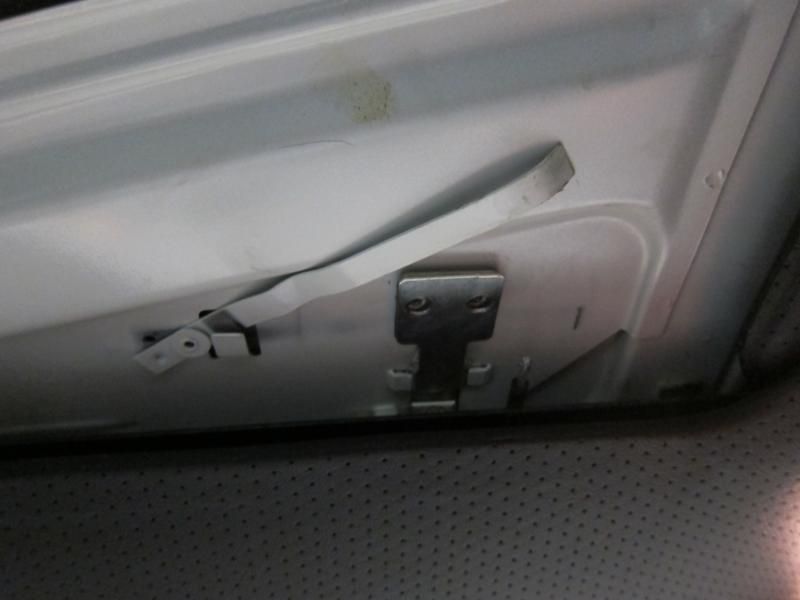
Once the front edge of the liner is loose, you can slide it back into the roof cavity, to expose the underside of the sunroof. The panel is bolted to the mechanism by 4 bolts that you can see, plus that funny leaf spring looking thing.
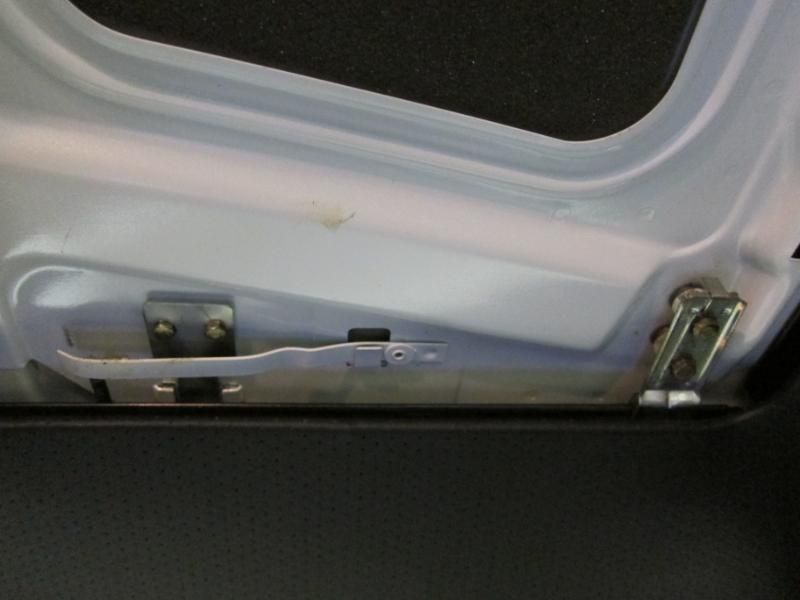
First thing you do, is push the sunroof closed again. Doing this might elicit a loud "snap!" sound and then the back of the sunroof goes all floppy, and I'll explain what this is later For now, unclip that little leaf spring looking doohickey from the cable bracket.
Unbolt the rear cable bracket, and slide out the locating shim.
Unbolt the front bracket, and when you're done on both sides, the sunroof panel itself can be lifted out. Careful, it's surprisingly heavy.
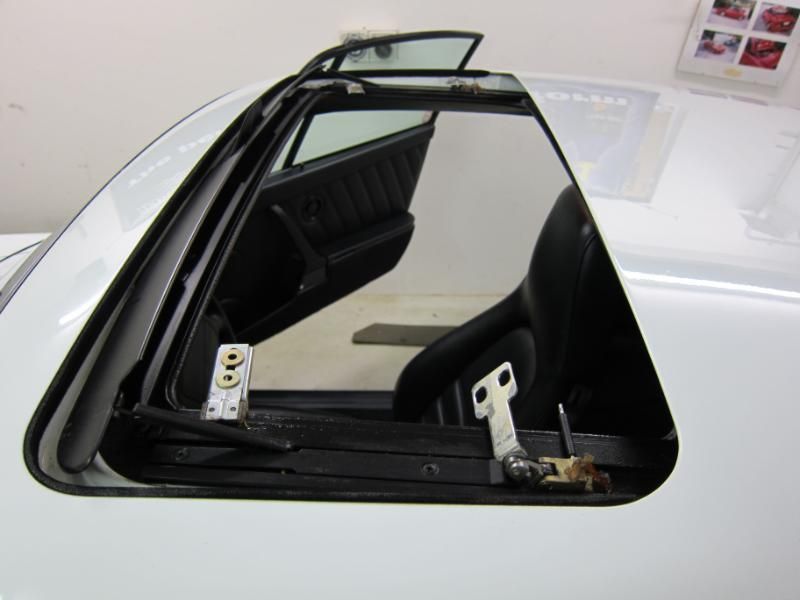
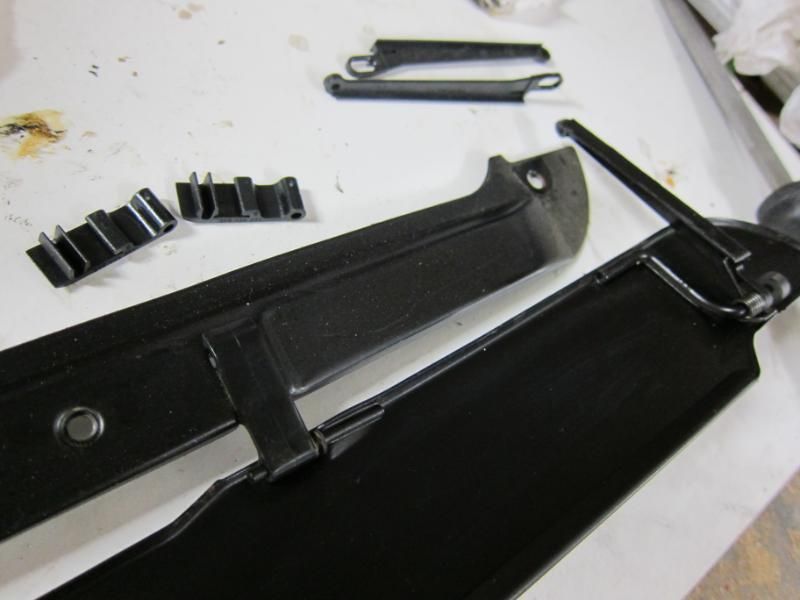
Then you unscrew this spacer bar that sits inside the cable tracks. It's necessary to release the air deflector arms.
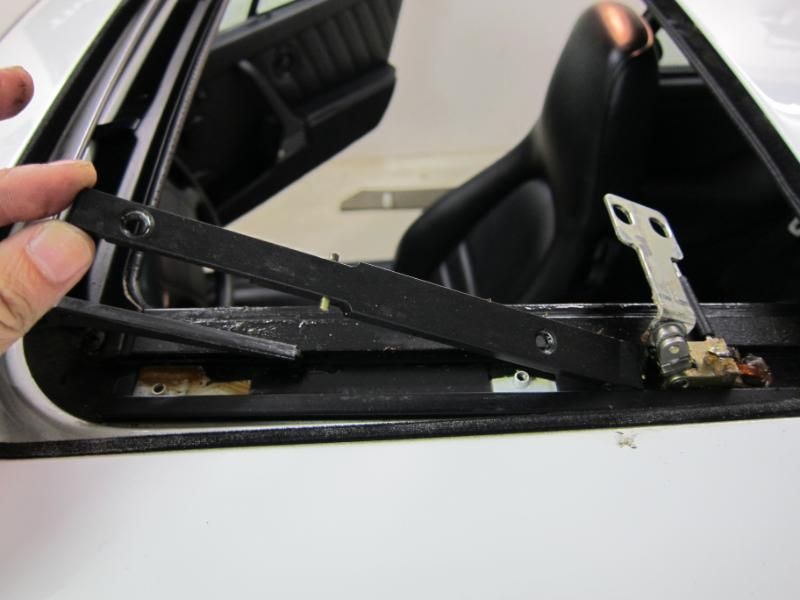
Then unscrew the air deflector, which just lifts off in one big piece.
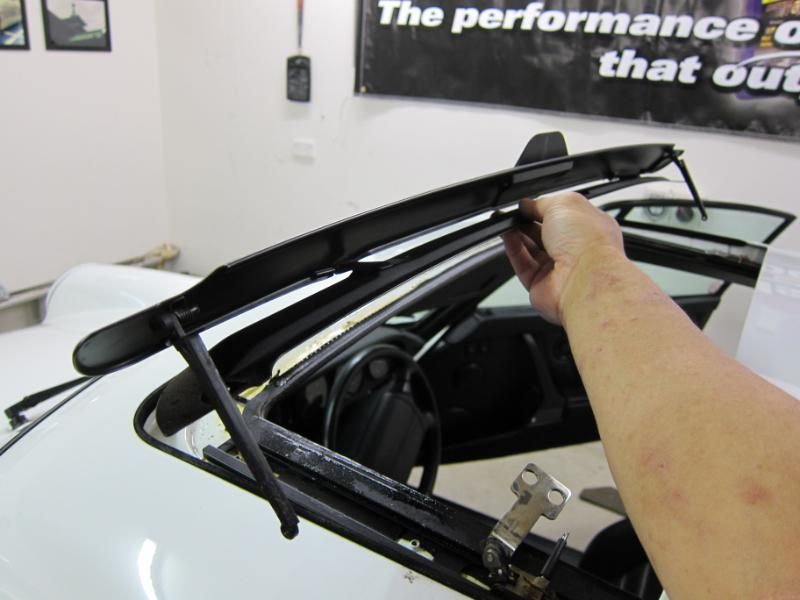
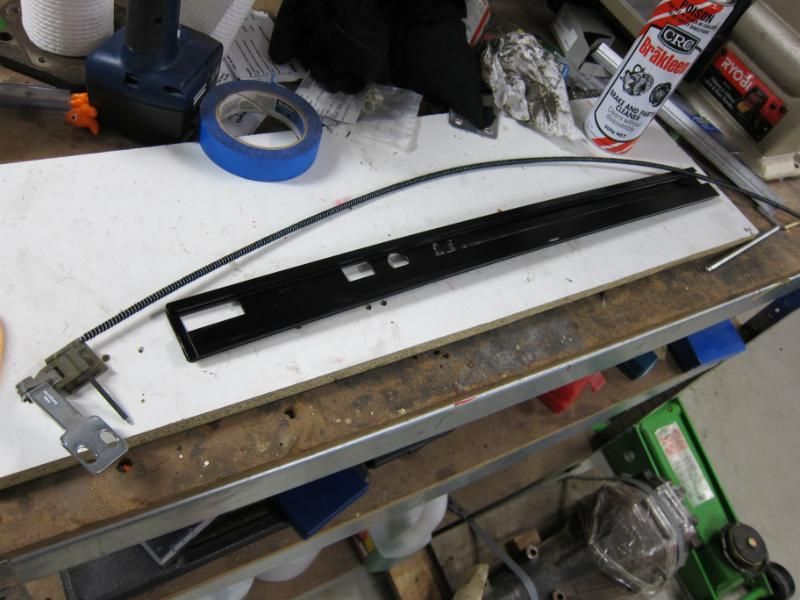
Then you undo the cable tracks themselves, and gently wiggle them out. Don't use too much force, the track locate into the back of the roof via these plastic pins, and you don't want to break them.
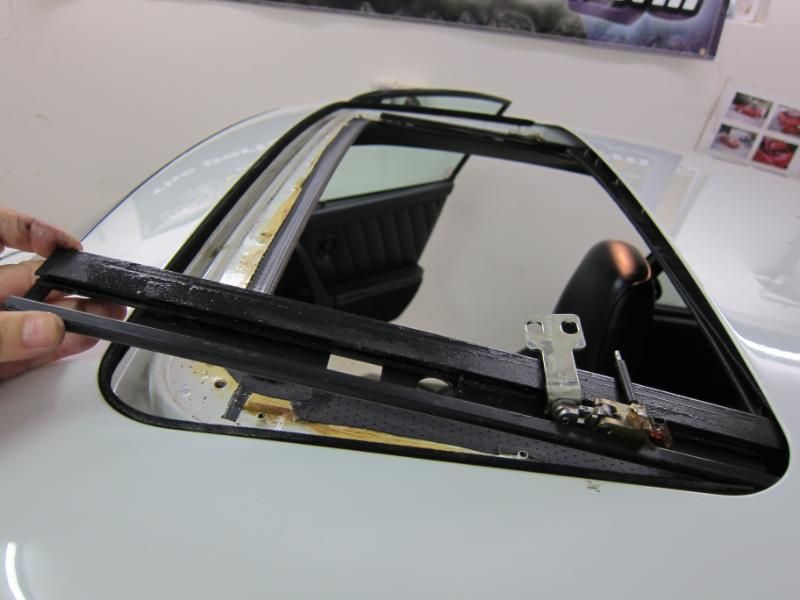
Once the tracks are out, it reveals the cable and bracket which lives inside. Left side looks just fine and dandy.
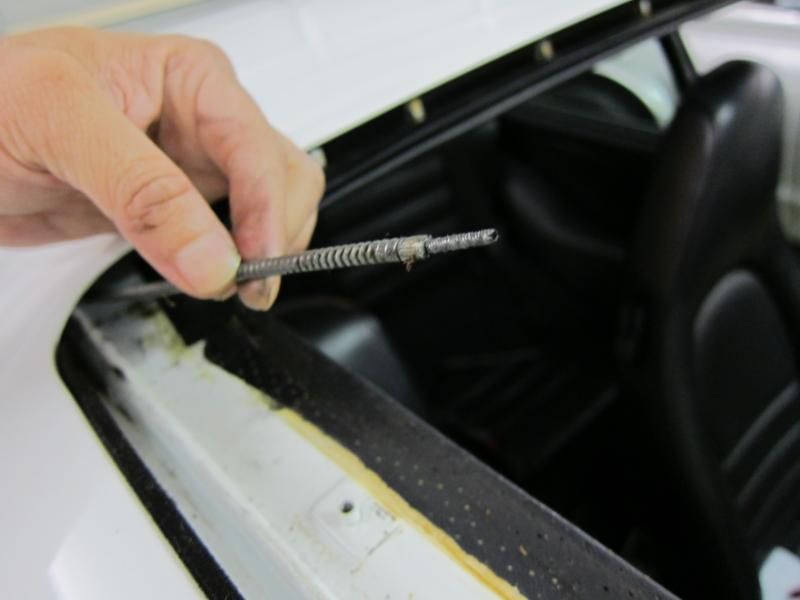
Right side, as suspected is snapped!
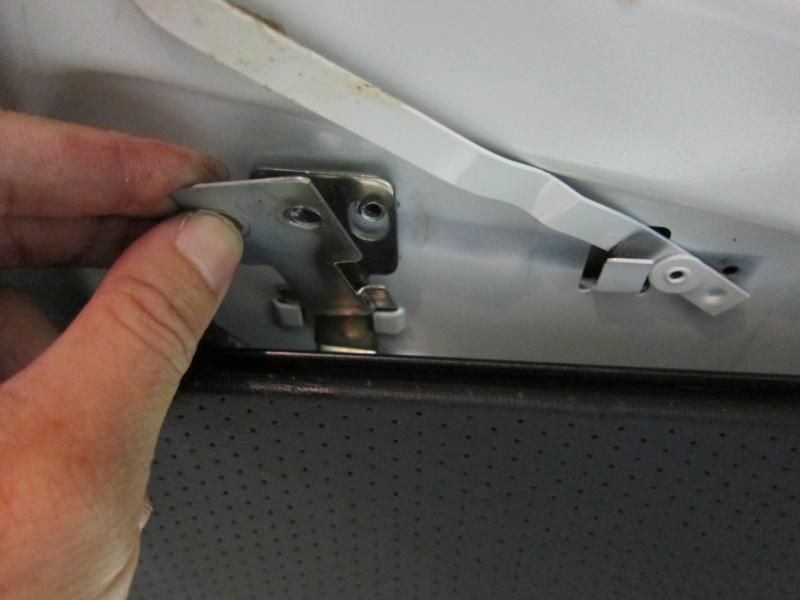
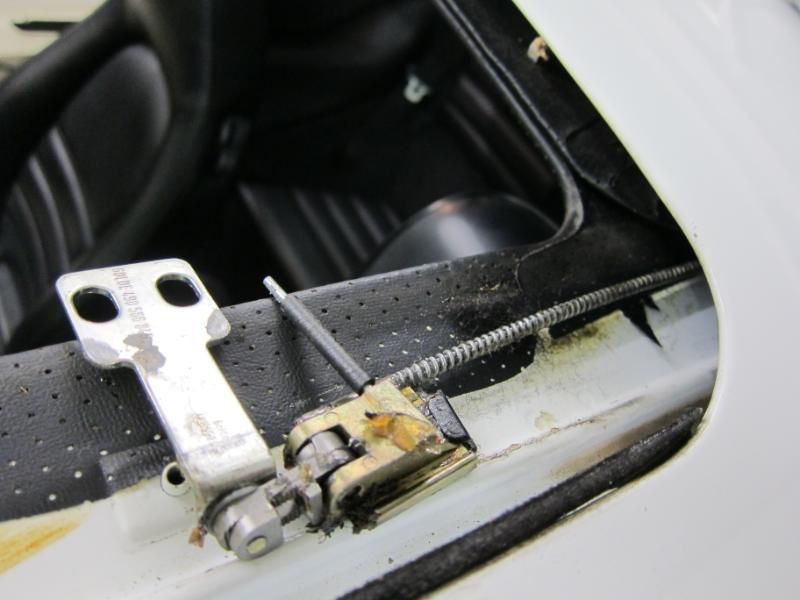
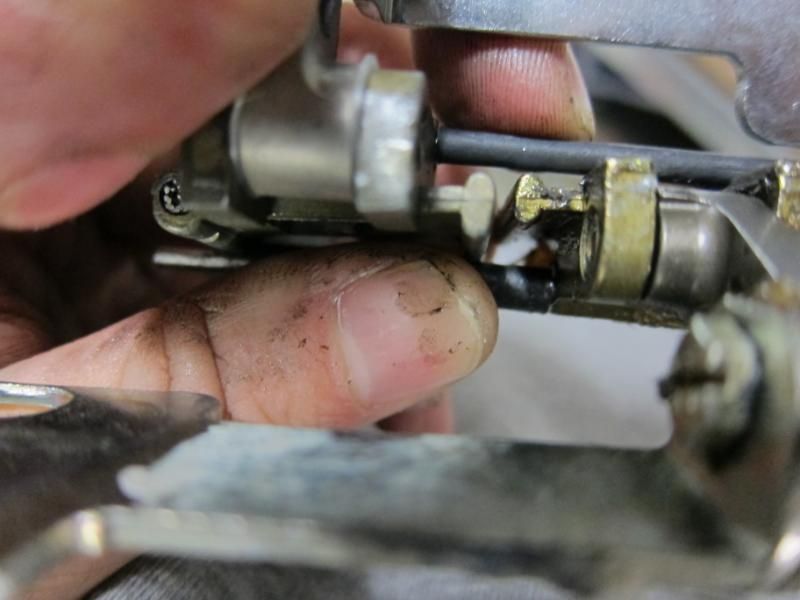
First, let's take a look at the cable mechanism, which is pretty clever. When you open the sunroof, the cable pulls to the left, and it pulls the bracket on the right down. This allows the rear edge of the sunroof to dip down, and slide back into the roof cavity.
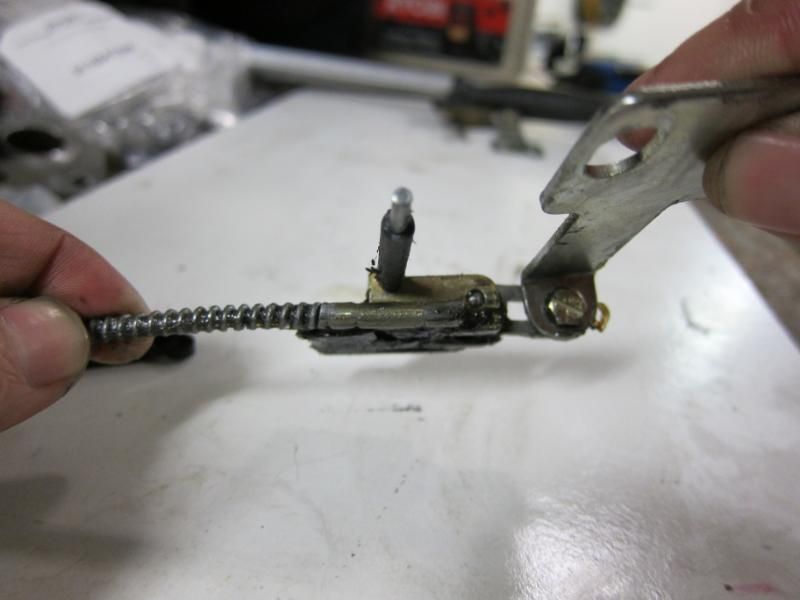
But when you close it...the cable pushes the sunroof closed, and then pops that linkage upwards, which makes the rear edge of the sunroof go up and lock in a position that's flush with the roof. This is why the sunroof is so hard to push back by hand...you are actually fighting this linkage in the bracket, which is essentially locking the sunroof in a closed position.
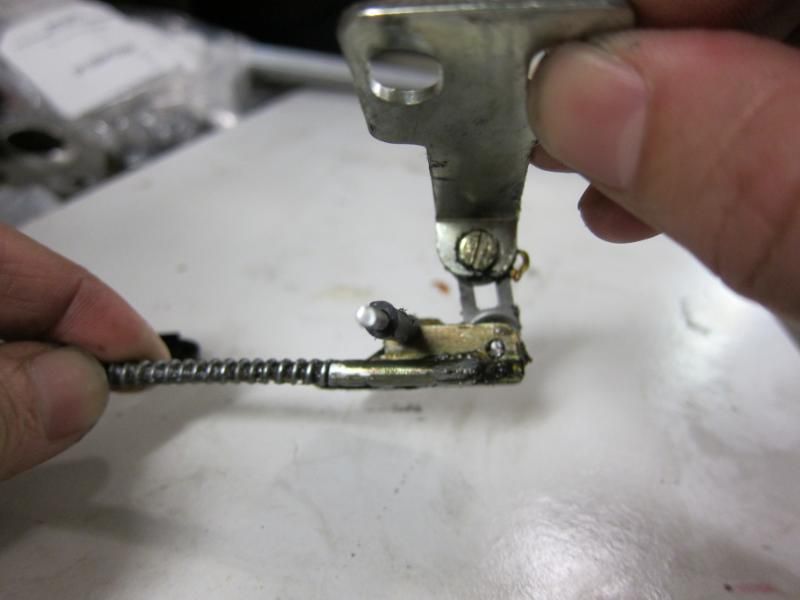
This is also why it might make a loud popping noise when you close the rood by hand, it's the tension on these linkages popping 90 degrees from upright to flat. But now we can put the new cable into the tracks (and you clean the living daylights out of it first of course)
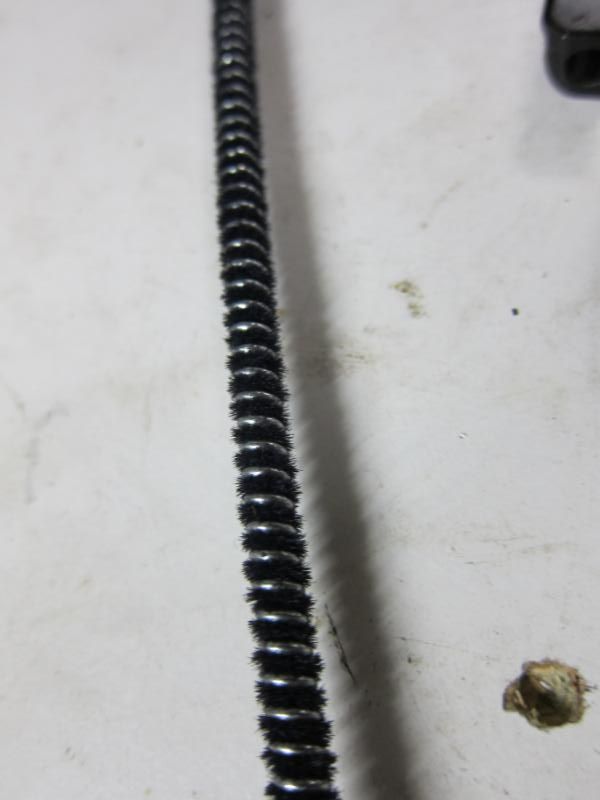
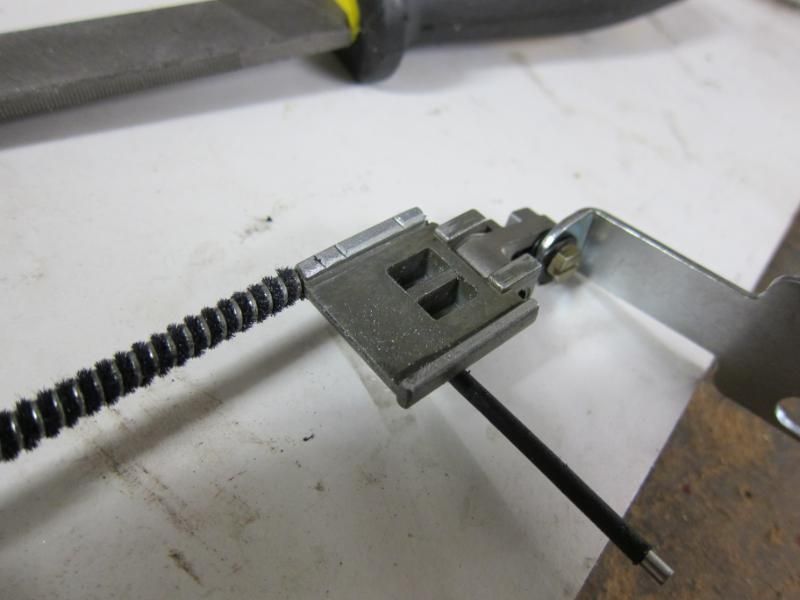
Interestingly, the new cable has a fuzzy felt layer intertwined in it, which wasn't in the original cable. It does make the new cable more of a tight fit in the mechanism tubes, but I figure this might be so that any old gunk or dead bits of old cable in the tubes are pushed out when you install the new cables for the first time. And this, is a good thing
But the problem with the new cable as many threads have noted, is that the bracket is much bigger than the original one. Too big in fact to fit into the channel in the tracks.
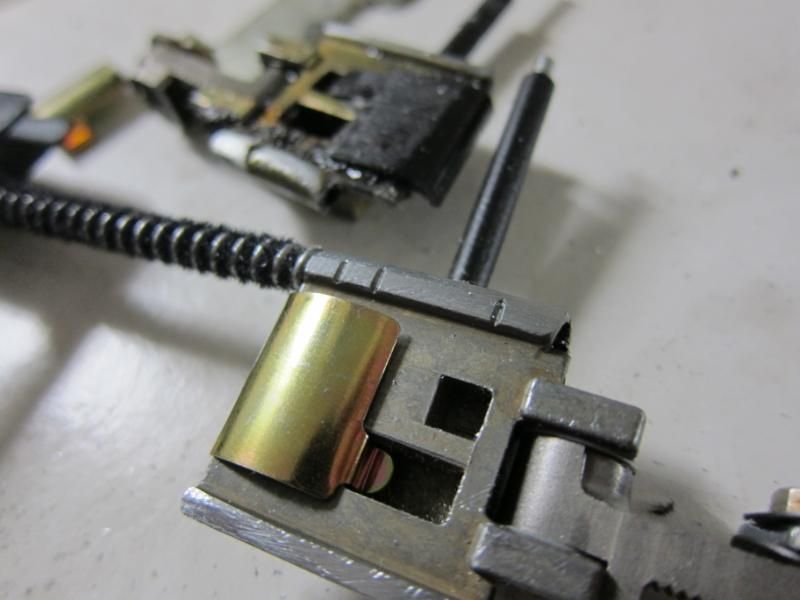
So you file them down by hand until they can slide smoothly in the tracks. There's quite a big size difference between the new and old ones, so you end up taking off quite a bit of metal.
The original cable bracket has a plastic skid on the bottom (you can see in the background that it's pretty trashed) but with the new cable parts, you have to order the skid separately, and the latest ones are a metal piece which clips into place.
Insert the cables into the tracks with plenty of grease and then installation as they say is the reverse of you-know-what. I know that there is some recommendations not to use grease, but to be honest the parts are such a tight fit (and those fuzzy cables especially) that it seemed to be way too much friction in the system without grease. Oh by the way, don't be freaked out if both sides are different. On the left side, the cable runs in the inner channel, and on the right side it runs in the outer channel
Part of the overhaul was to replace the little hinges and arms that operate the air deflector. They're quite delicate but not expensive, so I thought it was a good idea to renew them while I was at it. If one of these things snap, it can cause the air deflector to jam the sunroof.
Oh, and a little tip for refitting...make sure that the brackets holding down the tracks aren't fouling the air deflector. There's a bit of latitude in how they screw on, so that can snag the little plastic arm when it tries to close.
...ready for the sunroof panel to go back on...Oh BTW, make sure you don't slide on the front brackets upside down like I have in this pic It will mean that you won't be able to slide the liner back into place, and the sunroof will be at a weird sunken position.

I put a nice dab of grease on the gear mechanism before screwing that on, and then refitting the foam pads. I had the sunroof partially open when I refitted the geardrive, so I just measured the distance from the front edge to the edge of the roof, just to make sure the panel isn't crooked before fitting the geardrive again.

And ta-da!
Now I'm not going to say that it glides back and forth as silently as a Lexus sunroof, but it is better than it was before, and the more I use it, the smoother it seems to get, so here's hoping that I don't have to do this again for a long while I would recommend that this is a much easier job to do when your sunroof is still working, because you can motor it back and undo the liner, motor it forward and then unbolt the panel. Much easier than trying to manhandle it with snapped cables. So if your sunroof is very noisy or jerky, I reckon do this while it's still working, and save some time and aggravation when you inevitably have to replace these cables
Then one day it seized. Thankfully it seized in the closed position, and when you tried to open it, you could see that the left side would try to open by about half an inch, but the right hand side was resolutely stuck. This seemed a clear case of the cable on the right side having snapped, so I ordered a new set of cables and a few other bits and pieces so that we could do a proper overhaul
The first step is to unzip that mysterious zipper at the back of the headlining. First I sprayed some interior-detailer cleaning fluid onto the 20yr old zipper to lubricate it. And when it's opened, you see the foam pad that insulates the cabin from the whirrings of the sunroof motor.
The pads are held in by a series of those pesky little plastic scrivets. They look like they can be unscrewed with a torx driver, but in reality the threads are stripped most of the time and unscrewing them just makes them spin around and they don't actually come out. So I usually just eliminate the middleman and prise the little plastic screws out with a screwdriver, or just extracting them with a needlenose pliers works too. Don't worry, they pop back in later no problems.
And when the foam pad is out of the way, it reveals the sunroof motor (that "Rockwell Golde" thing on the left) which goes into like a rubber universal joint, and then into a gearbox which drives the sunroof cables.
Unscrewing the gearbox and flipping it down reveals the cables, which look to be in good shape. So no stripped teeth here, which was a possible cause of the sunroof getting stuck.
But with the drive gear out of the way, you can now push the sunroof back by hand. Now, this ain't easy, for reasons I'll explain in a moment. It takes a fair bit of effort to push the rear edge of the sunroof down, so that it can slide back a little.
You'll notice that it's really, really tight, but thankfully you only have to move it back a tad.
...just about enough for you to expose the front edge of the sunroof liner, and there is enough of a gap for you to get your fingers in there and unpop the liner from the sunroof panel. It's held in by some metal spring loaded clips.
Once the front edge of the liner is loose, you can slide it back into the roof cavity, to expose the underside of the sunroof. The panel is bolted to the mechanism by 4 bolts that you can see, plus that funny leaf spring looking thing.
First thing you do, is push the sunroof closed again. Doing this might elicit a loud "snap!" sound and then the back of the sunroof goes all floppy, and I'll explain what this is later
For now, unclip that little leaf spring looking doohickey from the cable bracket.Unbolt the rear cable bracket, and slide out the locating shim.
Unbolt the front bracket, and when you're done on both sides, the sunroof panel itself can be lifted out. Careful, it's surprisingly heavy.
Then you unscrew this spacer bar that sits inside the cable tracks. It's necessary to release the air deflector arms.
Then unscrew the air deflector, which just lifts off in one big piece.
Then you undo the cable tracks themselves, and gently wiggle them out. Don't use too much force, the track locate into the back of the roof via these plastic pins, and you don't want to break them.
Once the tracks are out, it reveals the cable and bracket which lives inside. Left side looks just fine and dandy.
Right side, as suspected is snapped!
First, let's take a look at the cable mechanism, which is pretty clever. When you open the sunroof, the cable pulls to the left, and it pulls the bracket on the right down. This allows the rear edge of the sunroof to dip down, and slide back into the roof cavity.
But when you close it...the cable pushes the sunroof closed, and then pops that linkage upwards, which makes the rear edge of the sunroof go up and lock in a position that's flush with the roof. This is why the sunroof is so hard to push back by hand...you are actually fighting this linkage in the bracket, which is essentially locking the sunroof in a closed position.
This is also why it might make a loud popping noise when you close the rood by hand, it's the tension on these linkages popping 90 degrees from upright to flat. But now we can put the new cable into the tracks (and you clean the living daylights out of it first of course)
Interestingly, the new cable has a fuzzy felt layer intertwined in it, which wasn't in the original cable. It does make the new cable more of a tight fit in the mechanism tubes, but I figure this might be so that any old gunk or dead bits of old cable in the tubes are pushed out when you install the new cables for the first time. And this, is a good thing
But the problem with the new cable as many threads have noted, is that the bracket is much bigger than the original one. Too big in fact to fit into the channel in the tracks.
So you file them down by hand until they can slide smoothly in the tracks. There's quite a big size difference between the new and old ones, so you end up taking off quite a bit of metal.
The original cable bracket has a plastic skid on the bottom (you can see in the background that it's pretty trashed) but with the new cable parts, you have to order the skid separately, and the latest ones are a metal piece which clips into place.
Insert the cables into the tracks with plenty of grease and then installation as they say is the reverse of you-know-what. I know that there is some recommendations not to use grease, but to be honest the parts are such a tight fit (and those fuzzy cables especially) that it seemed to be way too much friction in the system without grease. Oh by the way, don't be freaked out if both sides are different. On the left side, the cable runs in the inner channel, and on the right side it runs in the outer channel
Part of the overhaul was to replace the little hinges and arms that operate the air deflector. They're quite delicate but not expensive, so I thought it was a good idea to renew them while I was at it. If one of these things snap, it can cause the air deflector to jam the sunroof.
Oh, and a little tip for refitting...make sure that the brackets holding down the tracks aren't fouling the air deflector. There's a bit of latitude in how they screw on, so that can snag the little plastic arm when it tries to close.
...ready for the sunroof panel to go back on...Oh BTW, make sure you don't slide on the front brackets upside down like I have in this pic
It will mean that you won't be able to slide the liner back into place, and the sunroof will be at a weird sunken position.I put a nice dab of grease on the gear mechanism before screwing that on, and then refitting the foam pads. I had the sunroof partially open when I refitted the geardrive, so I just measured the distance from the front edge to the edge of the roof, just to make sure the panel isn't crooked before fitting the geardrive again.
And ta-da!
Now I'm not going to say that it glides back and forth as silently as a Lexus sunroof, but it is better than it was before, and the more I use it, the smoother it seems to get, so here's hoping that I don't have to do this again for a long while
I would recommend that this is a much easier job to do when your sunroof is still working, because you can motor it back and undo the liner, motor it forward and then unbolt the panel. Much easier than trying to manhandle it with snapped cables. So if your sunroof is very noisy or jerky, I reckon do this while it's still working, and save some time and aggravation when you inevitably have to replace these cables
Last edited by Babalouie; 11-05-2011 at 04:19 AM.
 09-09-2011, 12:09 PM
#32
Rennlist Member

...But the problem with the new cable as many threads have noted, is that the bracket is much bigger than the original one. Too big in fact to fit into the channel in the tracks.
So you file them down by hand until they can slide smoothly in the tracks. There's quite a big size difference between the new and old ones, so you end up taking off quite a bit of metal.
So you file them down by hand until they can slide smoothly in the tracks. There's quite a big size difference between the new and old ones, so you end up taking off quite a bit of metal.
To save myself $150 and the hassle of having to file the cable bracket to fit in the channel in the tracks, I re-tapped the cable holder with a nail, inserted the cable, added glue (I'm sure it's the wrong type of glue for this application), and crimped the cable...it's held up really well.
More sun roof pictures here if anyone needs it. (link)
09-09-2011, 12:29 PM
#33
Rennlist Member
Wow.... Nice writeup man. Being that you're a first time p-car owner, how the hell do you know how to do all these projects? Granted I'm not handy so any DIY's impress me but it blows me away that people that have never owned a 911 before seem to be able to figure out all the little tricks to be able to fix/upgrade these machines. I wish my brain worked like that!! Congrats!!!
09-09-2011, 01:11 PM
#34
Rennlist Member
Kick ***, no I know exactly how to remove my sunroof liner and start to work on the drooping headliner attached to it. Awesome write-up, you need to separate these out into the DIY section and link to it.
09-09-2011, 08:41 PM
#35
Burning Brakes
Thread Starter
The knowledge is already on the forum, my contribution is just adding more pictures of the process The liner slides back and forth in a groove in the cable tracks. I'm not so sure if you can get it out without going to the trouble of removing the sunroof metal panel and then unbolting the tracks ....but once you're at that stage the liner comes out easy.
09-09-2011, 10:08 PM
#36
Rennlist Member
Got the liner out of the car, I only had to loosen up one of the tracks for it to pop out easily. Anybody have recommendations for headliner fabric glue? it released on one side
09-10-2011, 01:33 AM
#38
Burning Brakes
Thread Starter
Yeah the 3M stuff is cool, but if you're just limited to hardware store stuff this weekend, regular spray contact glue is fine. I made a set of kickpanels for another car this way.
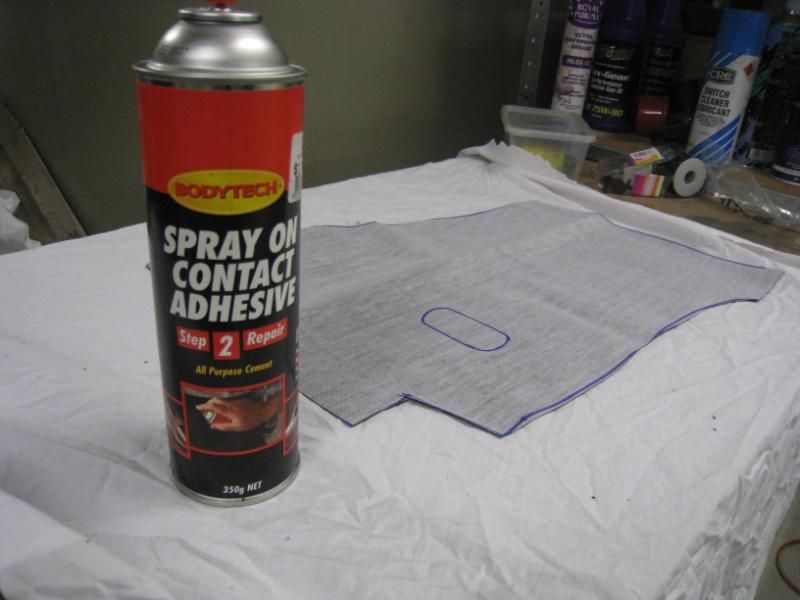
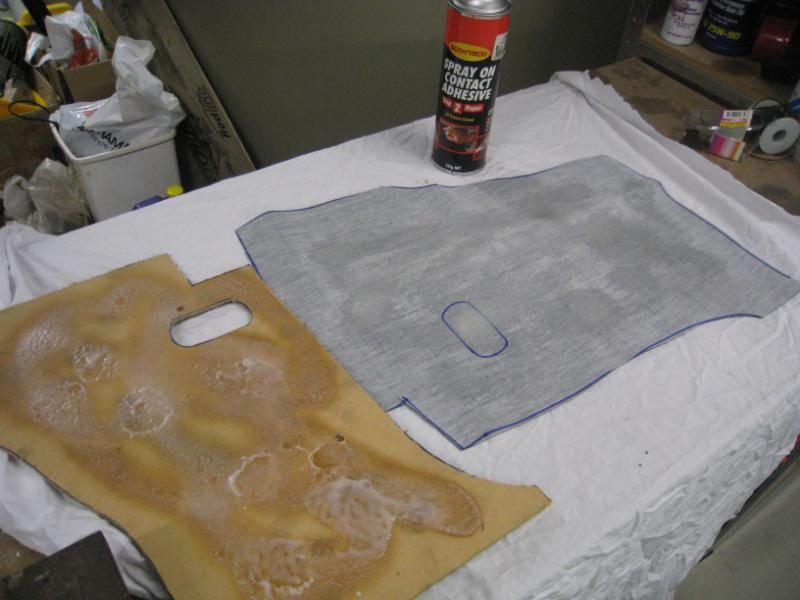
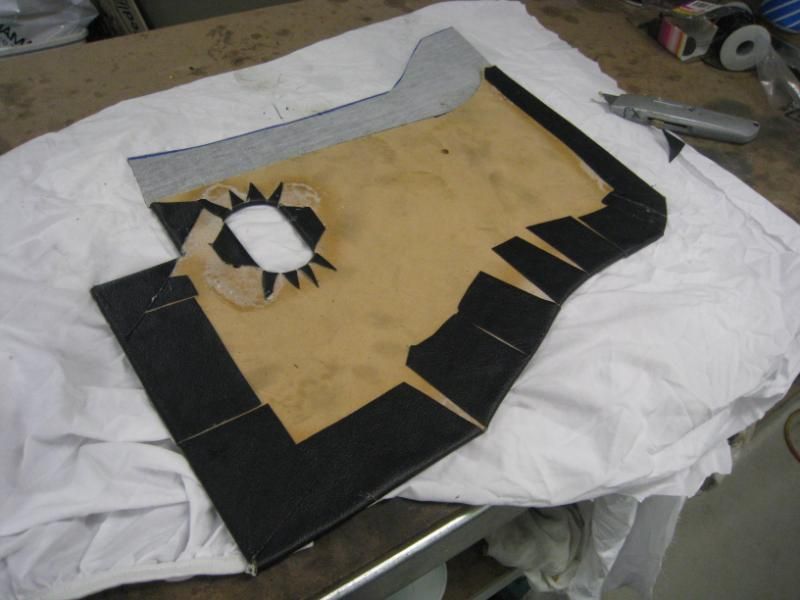
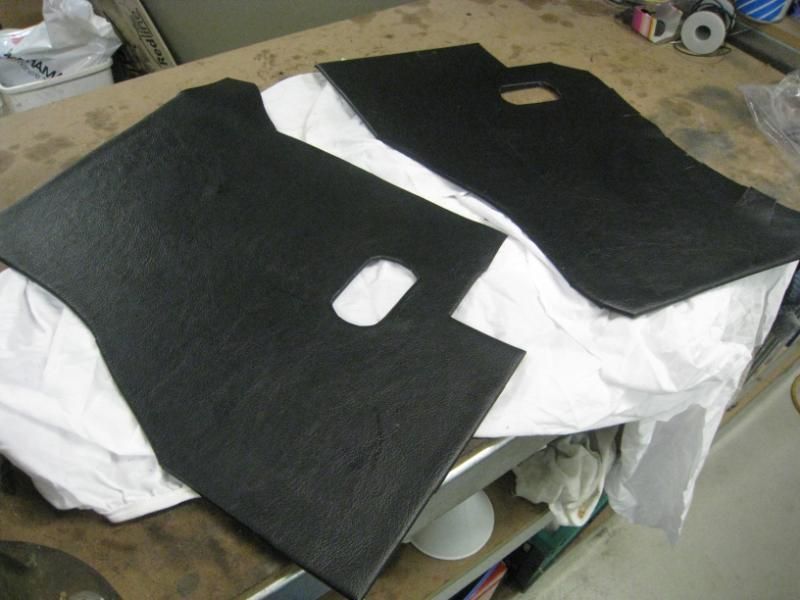
Little bit goes a long way tho, esp with the liner fabric which has holes in it
Little bit goes a long way tho, esp with the liner fabric which has holes in it
09-10-2011, 02:34 AM
#39
Rennlist Member
Found the 3M stuff, headliner is now re-attached to the the panel, I redid all 4 side as it was super easy to peel each side. I should close it back up tomorrow. I've been meaning to do this for 4 years, never even open my sunroof until today for fear of ripping headliner!
09-14-2011, 09:48 PM
#41
Burning Brakes
Thread Starter
Well it seems that I have to add another item to the to-do list....the heater-blower relay has melted again  I'm now thinking that altarchsa was spot-on in diagnosing a dying heater blower fan. Anyway I've decided I've had enough of this, and an RS heater delete tube is on order
But now that the aussie spring weather has kicked in, it sure is nice to drive around with a working sunroof again
I'm now thinking that altarchsa was spot-on in diagnosing a dying heater blower fan. Anyway I've decided I've had enough of this, and an RS heater delete tube is on order But now that the aussie spring weather has kicked in, it sure is nice to drive around with a working sunroof again

 09-23-2011, 01:49 PM
#43
Burning Brakes
Thread Starter
The latest thing I have to do, is to sort out this:

Those of you following the thread might remember that this was the very first DIY I had to do on the car (and not by choice, either). The relay for the engine bay heater blower has melted! At the time I didn't really know what caused it, but as I said a couple of posts ago, I reckon that fellow RLer Altarchsa was right when he said that maybe the heater blower motor might be causing the issue. If it's on its last legs, the windings could be shorting, and this would increase the current draw and melt something.
What happened, was that I was driving along, with the heater on and enjoying the toasty confines of the 964 cabin Then all of a sudden I notice this really strong puff of burnt smell coming through the vents. I pulled over, and found the relay had melted as you see above. So I think that a sporadically seizing heater blower is now a rather obvious cause
But I thought it would be more fun to eliminate the heater blower altogether and install one of these, the Cup heater bypass pipe.

Carrera Cup race cars didn't have the heater blower, and had this pipe instead, that routed air from the top of the fan housing, down into the heat exchangers. So you lose the big, ugly (and in my case..not working) heater blower and instead you open up all this free space inside the engine bay...what's not to like? The first step is to remove the down tube.

Then unplug everything from the heater blower and downtube, not forgetting this tricky little plug on the side of the blower.

The blower is just held in with two 10mm bolts, one which you can see, and the other one is underneath. So it's not long before you have it out and on the floor.

There should be three stray wires now: the blower power wire, the temp sender wire and the ballast resistor wires (which were connected to the side of the downtube). Without the blower, they aren't needed anymore, and with the way I'm going to wire things up, no more current will flow through them, so you can just tape them up and secure them out of the way (and remove the ballast resistor too).

The next step involves cutting a 21mm hole in my nice, new Cup pipe

The cup pipe only comes with one fitting for a vent tube, and so I pulled one of the detachable fittings off the old downtube and plugged it in.

The distributor vent pipe is just the right length, but I had to cut the tail light vent hose in half to get it looking neat.

And here it is...ta-da ....but we're not yet done.

This is very well documented on RL, but the problem is, that the system has a failsafe built into it. If the climate control unit senses that the heater blower is no longer working, it will shut everything down. So what happens is that you will dial up the heater ****, and immediately feel a little trickle of warm air coming through the vents (which is fed by the engine fan) but the moment you try to turn on the dash fans to get more air flowing, they won't work. Set the temp to full-cold, and the fans will work fine, but the moment you dial up some heat, they'll stop.
So a fudge is needed to "fool" the CCU that the old heater blower is still hale and hearty in the engine bay
But first, here's how it's all wired up as stock:

The heater blower that we've removed is on the left, and interestingly the wiring diagram says that RS M001 (which is the Cup Car) doesn't have it. The way it works is that the 30A fuse in the engine bay fusebox sends power to the relay along those blue lines. When a signal is sent from the CCU via those yellow lines, the relay will engage some internal switches and send power to the heater fan via the green lines.
Notice that there are two internal switches inside the relay. This is so that the blower can be a 2-speed fan. On the low speed, some of the current is simply bled away by going through the Resistor Blower (the ballast resistor) and when the fast-setting is needed, the CCU simply kicks in the second circuit. I believe that when this happens, the slow-circuit doesn't turn off, the fast-circuit simply switches on in addition.
Now you see that red line? That's the feedback wire that goes back to the CCU to confirm that the blower fan is all working. Since the blower is removed, it's really all going to be about how we deal with this red wire (which isn't really red in real life!).
Now there is an excellent thread here where RollingJack suggests that two wires can be added to the relay plug to hotwire it.

What this does, is permanently connect 87c to 30c and 87 to 30 in the wiring diagram above: this is a great idea, basically mimmicking the situation where both Hi and Lo circuits are turned on. This will of course successfully send some juice up the red line, which does the trick for fooling the CCU. Some guys have said that this means that current is always flowing through that circuit, even with the engine off, and this drains the battery. So that needs to be dealt with too...it's worth noting from that thread that this hotwire method only seems to work for post 91 964s.
Now since I have melted components to replace anyway, I thought I'd start from scratch, with an aftermarket generic 4 pin relay and a relay plug to suit.

As before, first I have to cut open the old melted relay plug, to release the female pins inside. And replace the spade terminal that's all melted of course.

Once they're all cleaned up, this is what we got:

The thick yellow wires are the ones that power the heater blower, so they are no longer needed. The thin yellow wire is the feedback wire back to the CCU (the red one in my diagram) . The various red wires are the power-in wires (30 and 30c in the diagram) and we need one of these to power my new relay. The thin white wires are the original signal wires from the CCU and these are no longer needed.
Here's how we wire up the new relay:

Pin 30 will be one of the original thick red "30" power wires. 85 will just be a new wire I add to earth to the chassis. 87 will be the thin yellow feedback wire to the CCU, but what should we use for 86? We want the relay to only be on when the engine is on, and when you shut down the engine, you want 86 to shut down the relay and stop sending current to the CCU (which will drain the battery).
Rather handily, the coils are right next to the fusebox, and so I can hook up 86 to the positive low tension terminal. This is perfect because the coils are powered down when the engine is off, so that means that our CCU-fooling relay will be off too if we tap into the same power source. The wire I've added is the green one, which just bolts on top of the coil power wire. In the background you might also see the black earth wire that I've bolted to the body earth point. Both wires are fed into the fusebox under the rubber boot.

Again, these are the 4 wires that we will use to drive the new relay. The green and black ones you know about and that leaves the red power wire and yellow CCU wire, which are from the old relay. Everything else is taped up.

The new relay bolts in place of the original one...oh yes one last thing. It is no longer necessary for the heater blower circuit to be fused at 30A (which we now know is plenty enough to melt things). So I replaced the 30A fuse with a 7.5A fuse, which is more than enough for the little trickle of current that goes from the new relay back to the CCU.

And the finished product!

And it works! With the heat dialled up, the dashfans work just fine. And in terms of current drain, when the engine is turned off, there is none
And how is the heat? Well, I think that the old heater blower must have been on its last legs, because if anything I seem to have MORE heat without it now. I'd say that with just the engine fan (mind you...it is a 250hp powered fan) and the cabin fans, the volume of air is about the same whether it's hot or cold. So you can dial up fanspeed 2 when the dial is on cold, and when you turn up the heat, there doesn't seem to be any loss of volume. The air does seem to now be rpm-dependent though, and there is a noticeable amount more hot air at 4000rpm compared to 2000rpm. And when you stop and the rpms return to idle, I'd say there is maybe a tiny little loss of volume, but not as much as one click on the fanspeed dial.
I'm not sure how relavent this is to anyone since my situation is a little unusual that I had to replace the melted old bits, so it made sense to rig up something totally new. But it could be reverted to stock if needed later, once we overhaul that pesky old blower fan of course
And it's nice to know that we have a little Cup Car in our road car now.
Those of you following the thread might remember that this was the very first DIY I had to do on the car (and not by choice, either
). The relay for the engine bay heater blower has melted! At the time I didn't really know what caused it, but as I said a couple of posts ago, I reckon that fellow RLer Altarchsa was right when he said that maybe the heater blower motor might be causing the issue. If it's on its last legs, the windings could be shorting, and this would increase the current draw and melt something.What happened, was that I was driving along, with the heater on and enjoying the toasty confines of the 964 cabin
Then all of a sudden I notice this really strong puff of burnt smell coming through the vents. I pulled over, and found the relay had melted as you see above. So I think that a sporadically seizing heater blower is now a rather obvious cause But I thought it would be more fun to eliminate the heater blower altogether and install one of these, the Cup heater bypass pipe.
Carrera Cup race cars didn't have the heater blower, and had this pipe instead, that routed air from the top of the fan housing, down into the heat exchangers. So you lose the big, ugly (and in my case..not working) heater blower and instead you open up all this free space inside the engine bay...what's not to like?
The first step is to remove the down tube.Then unplug everything from the heater blower and downtube, not forgetting this tricky little plug on the side of the blower.
The blower is just held in with two 10mm bolts, one which you can see, and the other one is underneath. So it's not long before you have it out and on the floor.
There should be three stray wires now: the blower power wire, the temp sender wire and the ballast resistor wires (which were connected to the side of the downtube). Without the blower, they aren't needed anymore, and with the way I'm going to wire things up, no more current will flow through them, so you can just tape them up and secure them out of the way (and remove the ballast resistor too).
The next step involves cutting a 21mm hole in my nice, new Cup pipe
The cup pipe only comes with one fitting for a vent tube, and so I pulled one of the detachable fittings off the old downtube and plugged it in.
The distributor vent pipe is just the right length, but I had to cut the tail light vent hose in half to get it looking neat.
And here it is...ta-da
....but we're not yet done.This is very well documented on RL, but the problem is, that the system has a failsafe built into it. If the climate control unit senses that the heater blower is no longer working, it will shut everything down. So what happens is that you will dial up the heater ****, and immediately feel a little trickle of warm air coming through the vents (which is fed by the engine fan) but the moment you try to turn on the dash fans to get more air flowing, they won't work. Set the temp to full-cold, and the fans will work fine, but the moment you dial up some heat, they'll stop.
So a fudge is needed to "fool" the CCU that the old heater blower is still hale and hearty in the engine bay
But first, here's how it's all wired up as stock:
The heater blower that we've removed is on the left, and interestingly the wiring diagram says that RS M001 (which is the Cup Car) doesn't have it. The way it works is that the 30A fuse in the engine bay fusebox sends power to the relay along those blue lines. When a signal is sent from the CCU via those yellow lines, the relay will engage some internal switches and send power to the heater fan via the green lines.
Notice that there are two internal switches inside the relay. This is so that the blower can be a 2-speed fan. On the low speed, some of the current is simply bled away by going through the Resistor Blower (the ballast resistor) and when the fast-setting is needed, the CCU simply kicks in the second circuit. I believe that when this happens, the slow-circuit doesn't turn off, the fast-circuit simply switches on in addition.
Now you see that red line? That's the feedback wire that goes back to the CCU to confirm that the blower fan is all working. Since the blower is removed, it's really all going to be about how we deal with this red wire (which isn't really red in real life!).
Now there is an excellent thread here where RollingJack suggests that two wires can be added to the relay plug to hotwire it.
What this does, is permanently connect 87c to 30c and 87 to 30 in the wiring diagram above: this is a great idea, basically mimmicking the situation where both Hi and Lo circuits are turned on. This will of course successfully send some juice up the red line, which does the trick for fooling the CCU. Some guys have said that this means that current is always flowing through that circuit, even with the engine off, and this drains the battery. So that needs to be dealt with too...it's worth noting from that thread that this hotwire method only seems to work for post 91 964s.
Now since I have melted components to replace anyway, I thought I'd start from scratch, with an aftermarket generic 4 pin relay and a relay plug to suit.
As before, first I have to cut open the old melted relay plug, to release the female pins inside. And replace the spade terminal that's all melted of course.
Once they're all cleaned up, this is what we got:
The thick yellow wires are the ones that power the heater blower, so they are no longer needed. The thin yellow wire is the feedback wire back to the CCU (the red one in my diagram) . The various red wires are the power-in wires (30 and 30c in the diagram) and we need one of these to power my new relay. The thin white wires are the original signal wires from the CCU and these are no longer needed.
Here's how we wire up the new relay:
Pin 30 will be one of the original thick red "30" power wires. 85 will just be a new wire I add to earth to the chassis. 87 will be the thin yellow feedback wire to the CCU, but what should we use for 86? We want the relay to only be on when the engine is on, and when you shut down the engine, you want 86 to shut down the relay and stop sending current to the CCU (which will drain the battery).
Rather handily, the coils are right next to the fusebox, and so I can hook up 86 to the positive low tension terminal. This is perfect because the coils are powered down when the engine is off, so that means that our CCU-fooling relay will be off too if we tap into the same power source. The wire I've added is the green one, which just bolts on top of the coil power wire. In the background you might also see the black earth wire that I've bolted to the body earth point. Both wires are fed into the fusebox under the rubber boot.
Again, these are the 4 wires that we will use to drive the new relay. The green and black ones you know about
and that leaves the red power wire and yellow CCU wire, which are from the old relay. Everything else is taped up.The new relay bolts in place of the original one...oh yes one last thing. It is no longer necessary for the heater blower circuit to be fused at 30A (which we now know is plenty enough to melt things). So I replaced the 30A fuse with a 7.5A fuse, which is more than enough for the little trickle of current that goes from the new relay back to the CCU.
And the finished product!
And it works! With the heat dialled up, the dashfans work just fine. And in terms of current drain, when the engine is turned off, there is none
And how is the heat? Well, I think that the old heater blower must have been on its last legs, because if anything I seem to have MORE heat without it now. I'd say that with just the engine fan (mind you...it is a 250hp powered fan
) and the cabin fans, the volume of air is about the same whether it's hot or cold. So you can dial up fanspeed 2 when the dial is on cold, and when you turn up the heat, there doesn't seem to be any loss of volume. The air does seem to now be rpm-dependent though, and there is a noticeable amount more hot air at 4000rpm compared to 2000rpm. And when you stop and the rpms return to idle, I'd say there is maybe a tiny little loss of volume, but not as much as one click on the fanspeed dial.I'm not sure how relavent this is to anyone
since my situation is a little unusual that I had to replace the melted old bits, so it made sense to rig up something totally new. But it could be reverted to stock if needed later, once we overhaul that pesky old blower fan of course And it's nice to know that we have a little Cup Car in our road car now.

