front hood struts the easier way
#19
I don't think it can be the light. Even when it's disconnected there's still a drain. Just have to start working backward from the battery and trying to find the short/gremlin.
#20
So I have an update...turns out that the short was nothing more than coincidence to my strut replacement. Apparently the starter wire was rubbing the heat exchanger coiling and causing a 15amp draw. Repositioned the wire and wrapped it up. No further problems. Thanks again to all for the ideas and advice.
#21
Banned
So to get back to the strut replacement - am I essentially using the top of the strut to leverage against the Dowel (which I can't fit between the hose and the strut anyway) and prying it lose at the bottom?
I have to believe there is something holding it in place at the bottom...
I have to believe there is something holding it in place at the bottom...
#22
You may already know this, but just in case: There is a retainer clip that slides into the lower ball that stops the ball from popping off the post.
Check the pics in this thread
https://rennlist.com/forums/964-1989...od-shocks.html
After the clip was out it didn't take too much force with a long screwdriver to get the ball to pop off the post.
Check the pics in this thread
https://rennlist.com/forums/964-1989...od-shocks.html
After the clip was out it didn't take too much force with a long screwdriver to get the ball to pop off the post.
#23
AutoX
Join Date: Aug 2009
Location: South Central Idaho
Posts: 14
Likes: 0
Received 0 Likes
on
0 Posts
Thanks again for walking me through another repair. So tired of carrying around an adjustable ski pole to hold hood open. I used a sturdy wooden spoon handle to pop off and pop on the lower strut end. To loosen the clip for easier popping on, I slipped in the end of a length of steel wire that I then pulled out from above after popping it on with spoon handle. I will admit it took me longer than 15 minutes, but most of it was finding "tools."
#25
Worth removing half the airbox and the heater blower when replacing the rears. Also invest in a pair of extra length needle no pliers. Alternatively, use a Turbo struts and just do one side. The left hand side is much easier. The Turbo strut is more powerful as it needs to support the spolier
The following 2 users liked this post by Fwdc2:
9SIX4-C4 (01-21-2021),
mark lintott (05-31-2022)
#28
Advanced
Worth removing half the airbox and the heater blower when replacing the rears. Also invest in a pair of extra length needle no pliers. Alternatively, use a Turbo struts and just do one side. The left hand side is much easier. The Turbo strut is more powerful as it needs to support the spolier


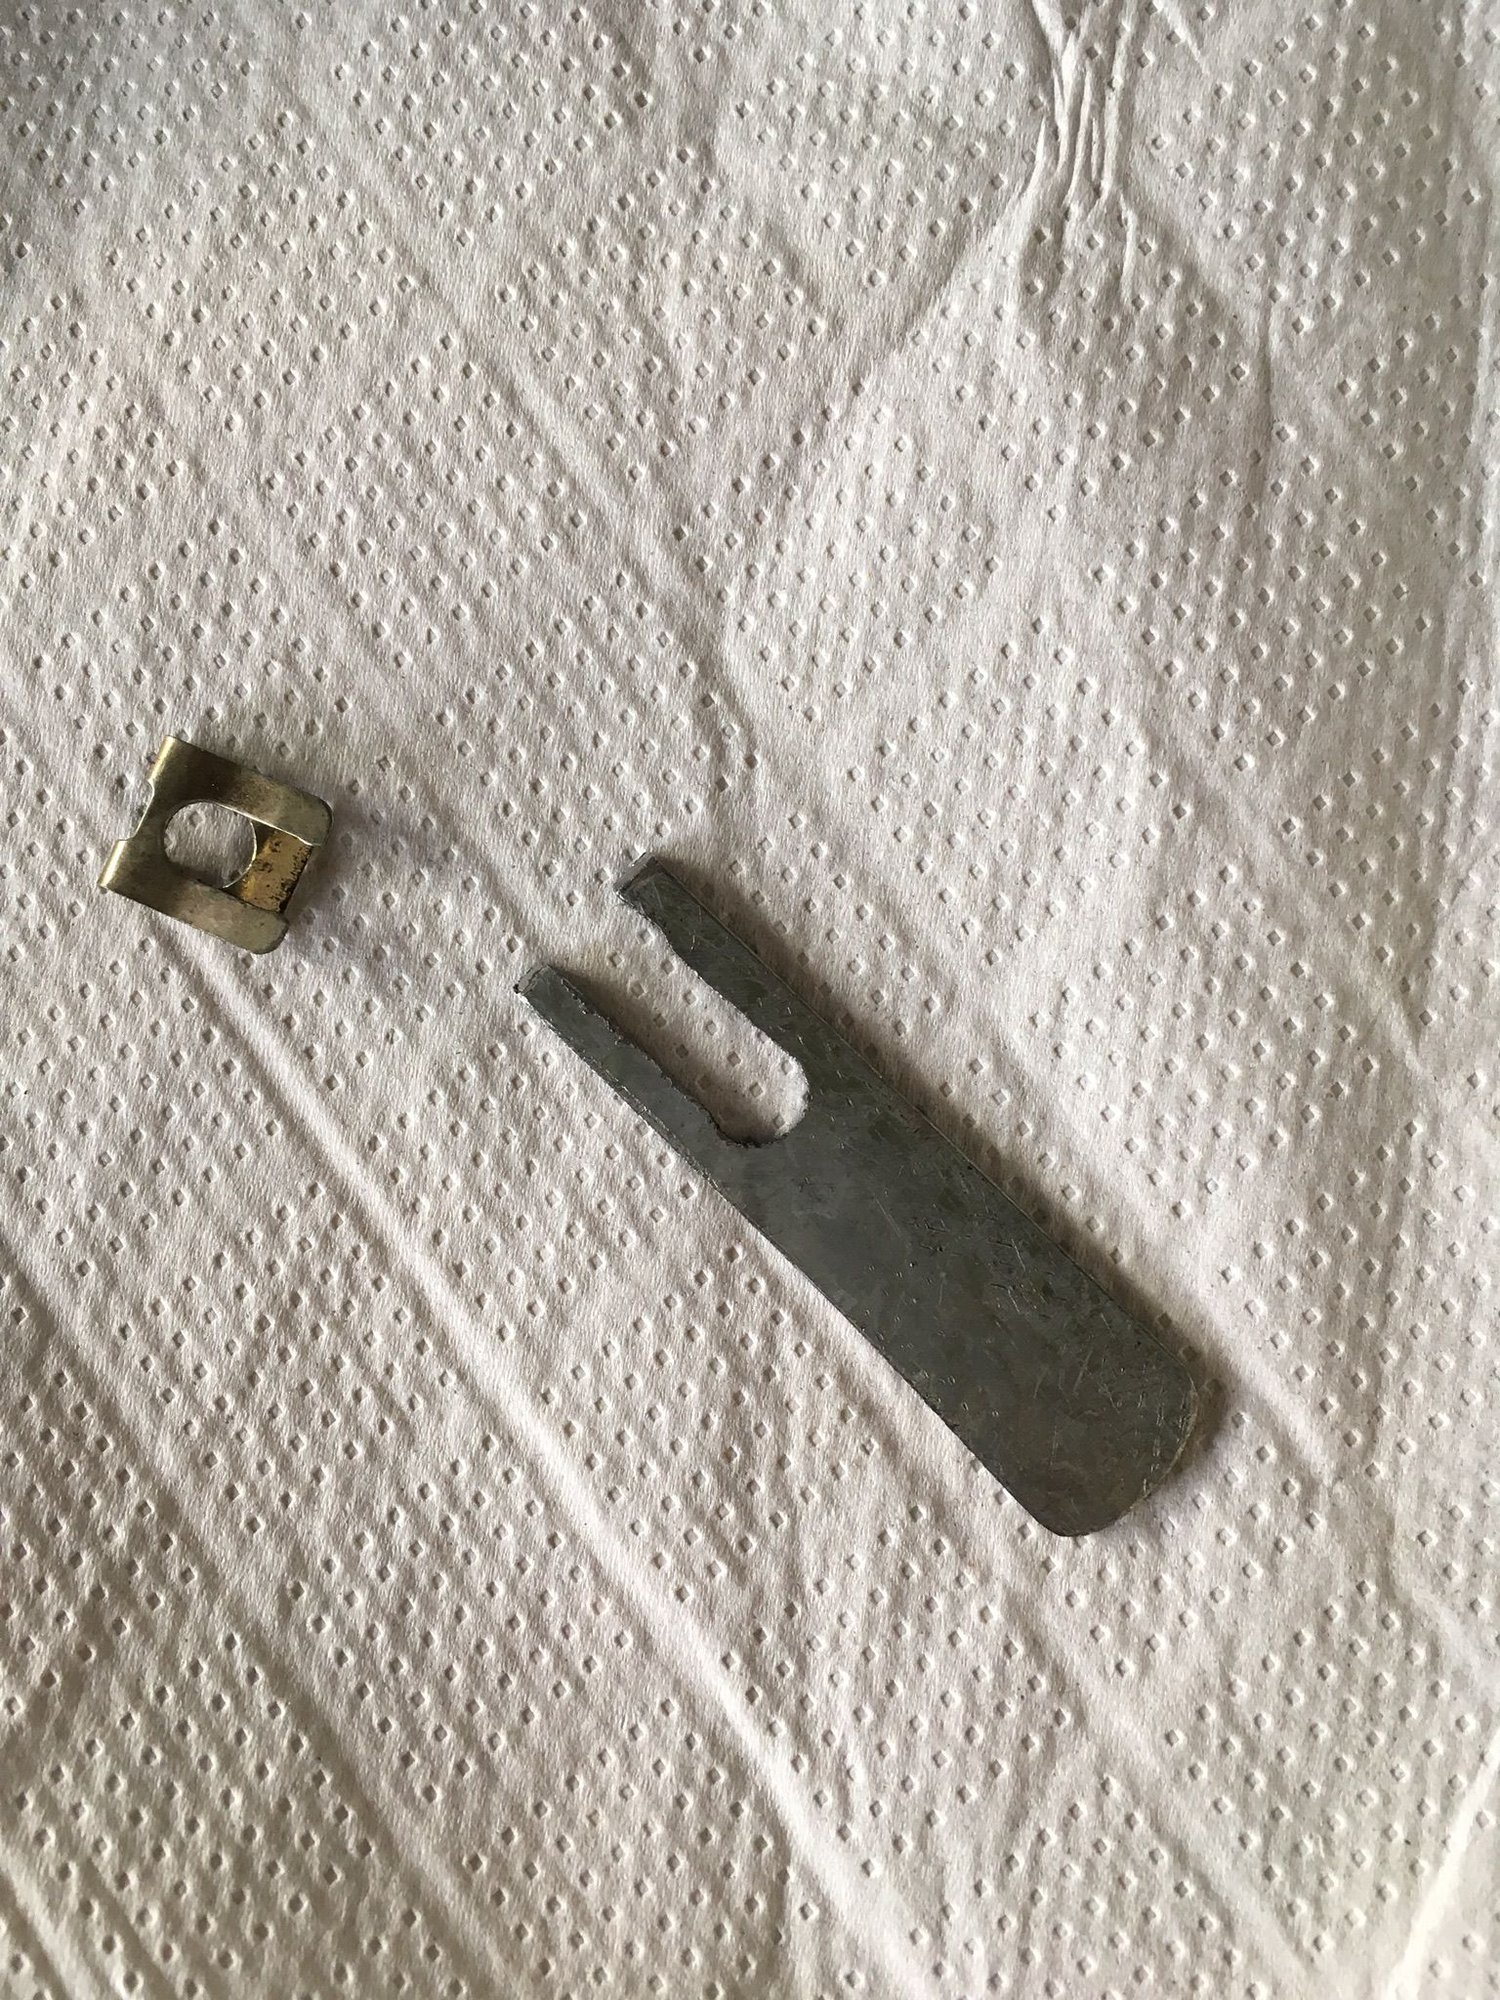
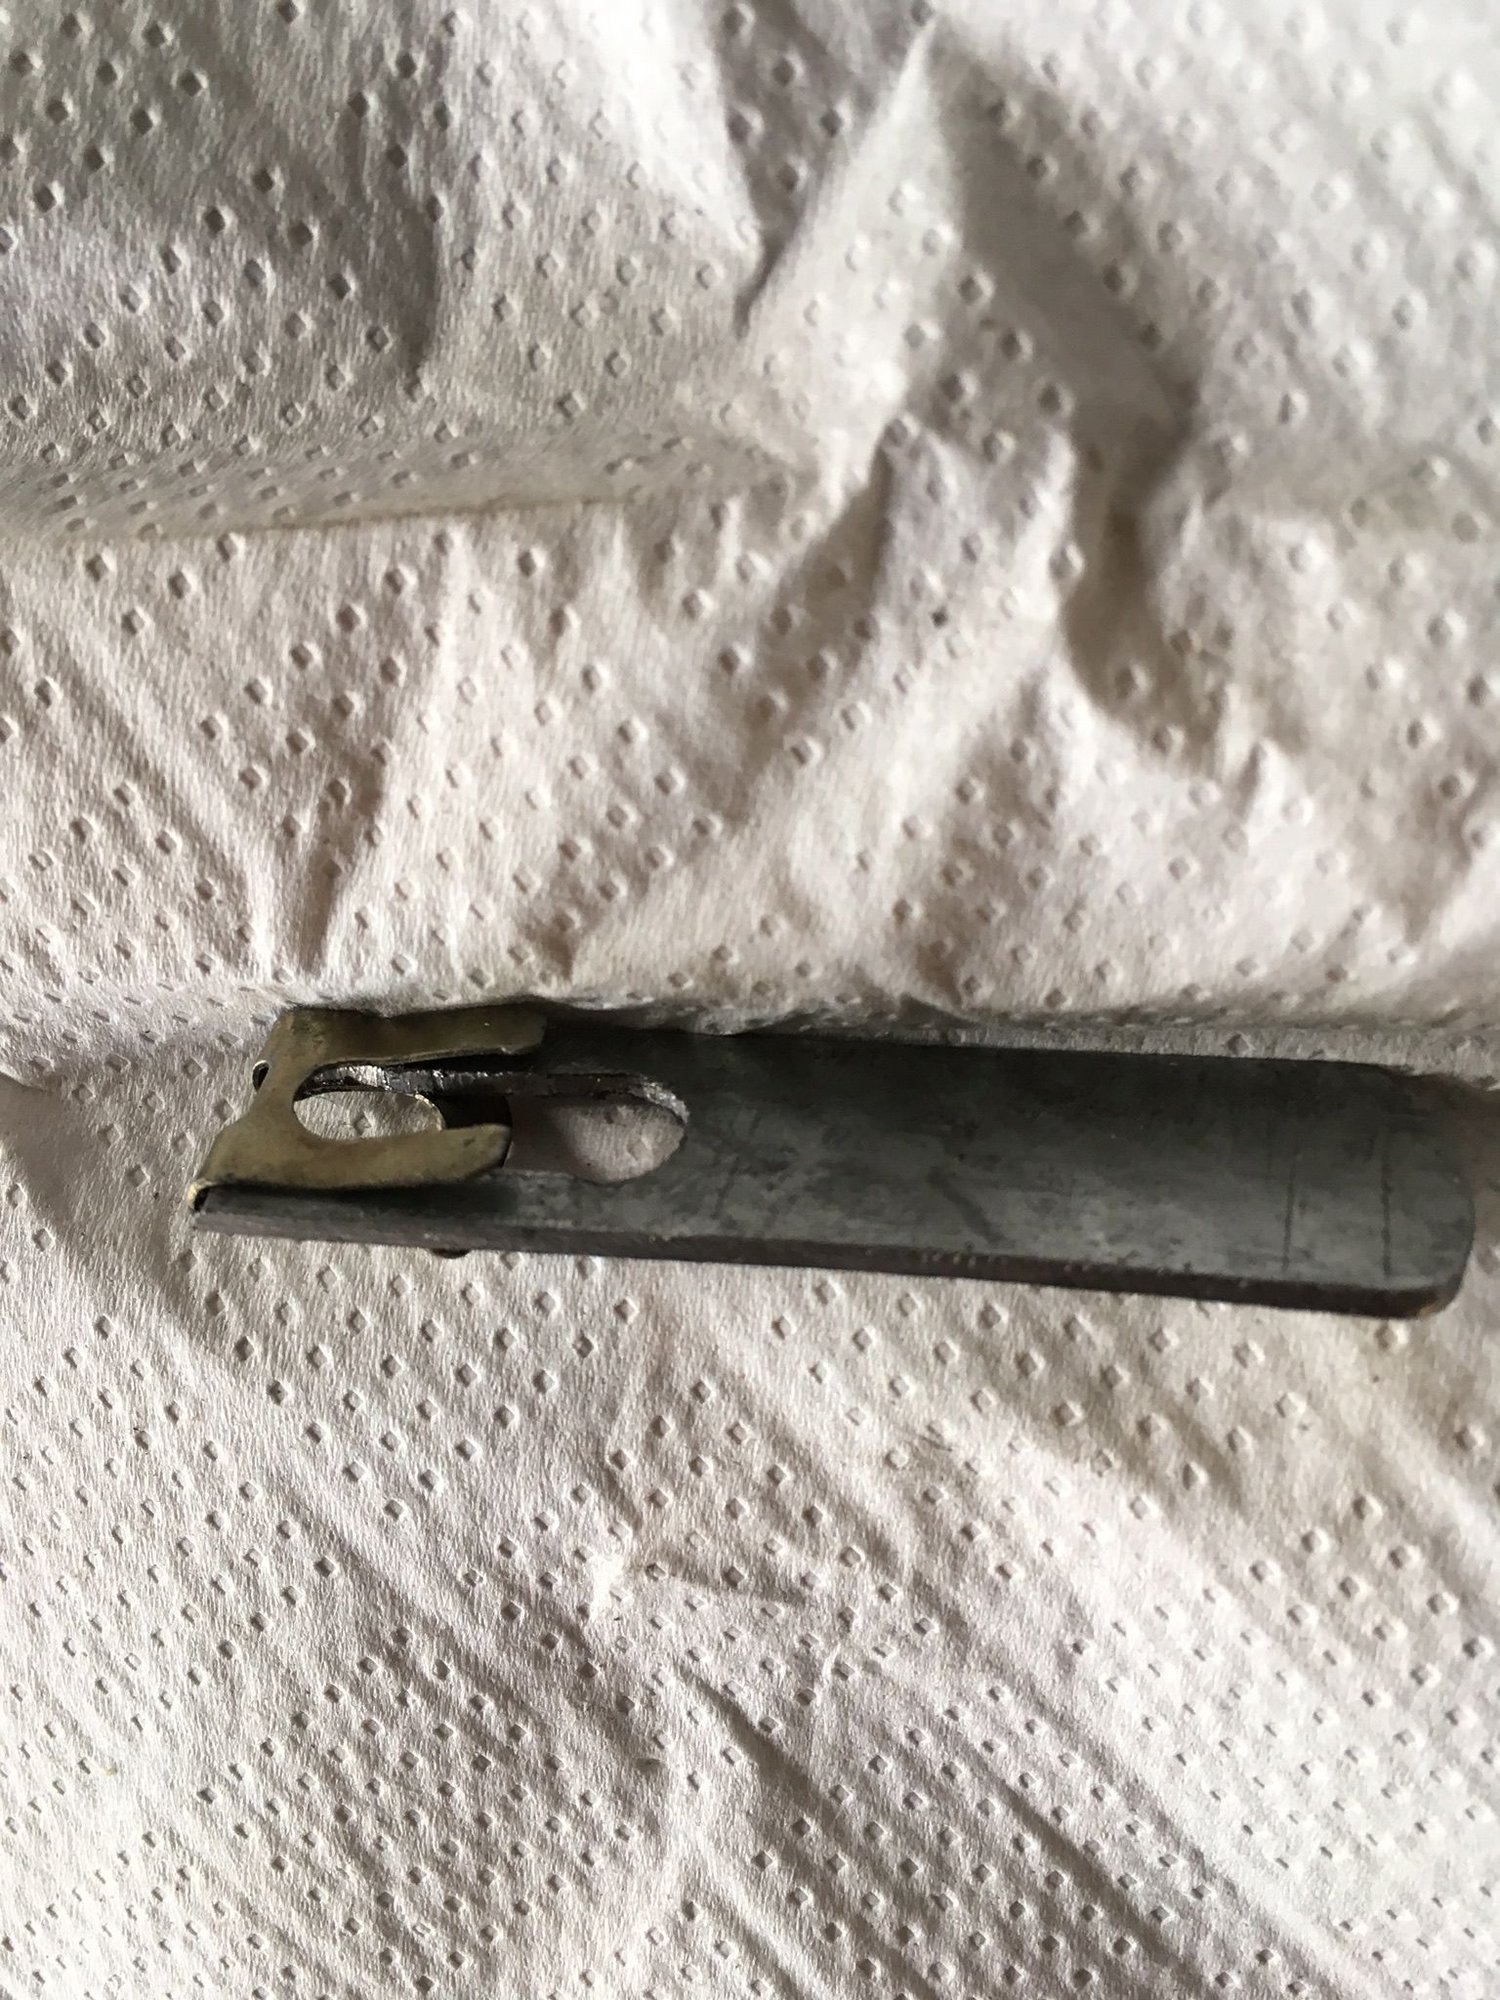
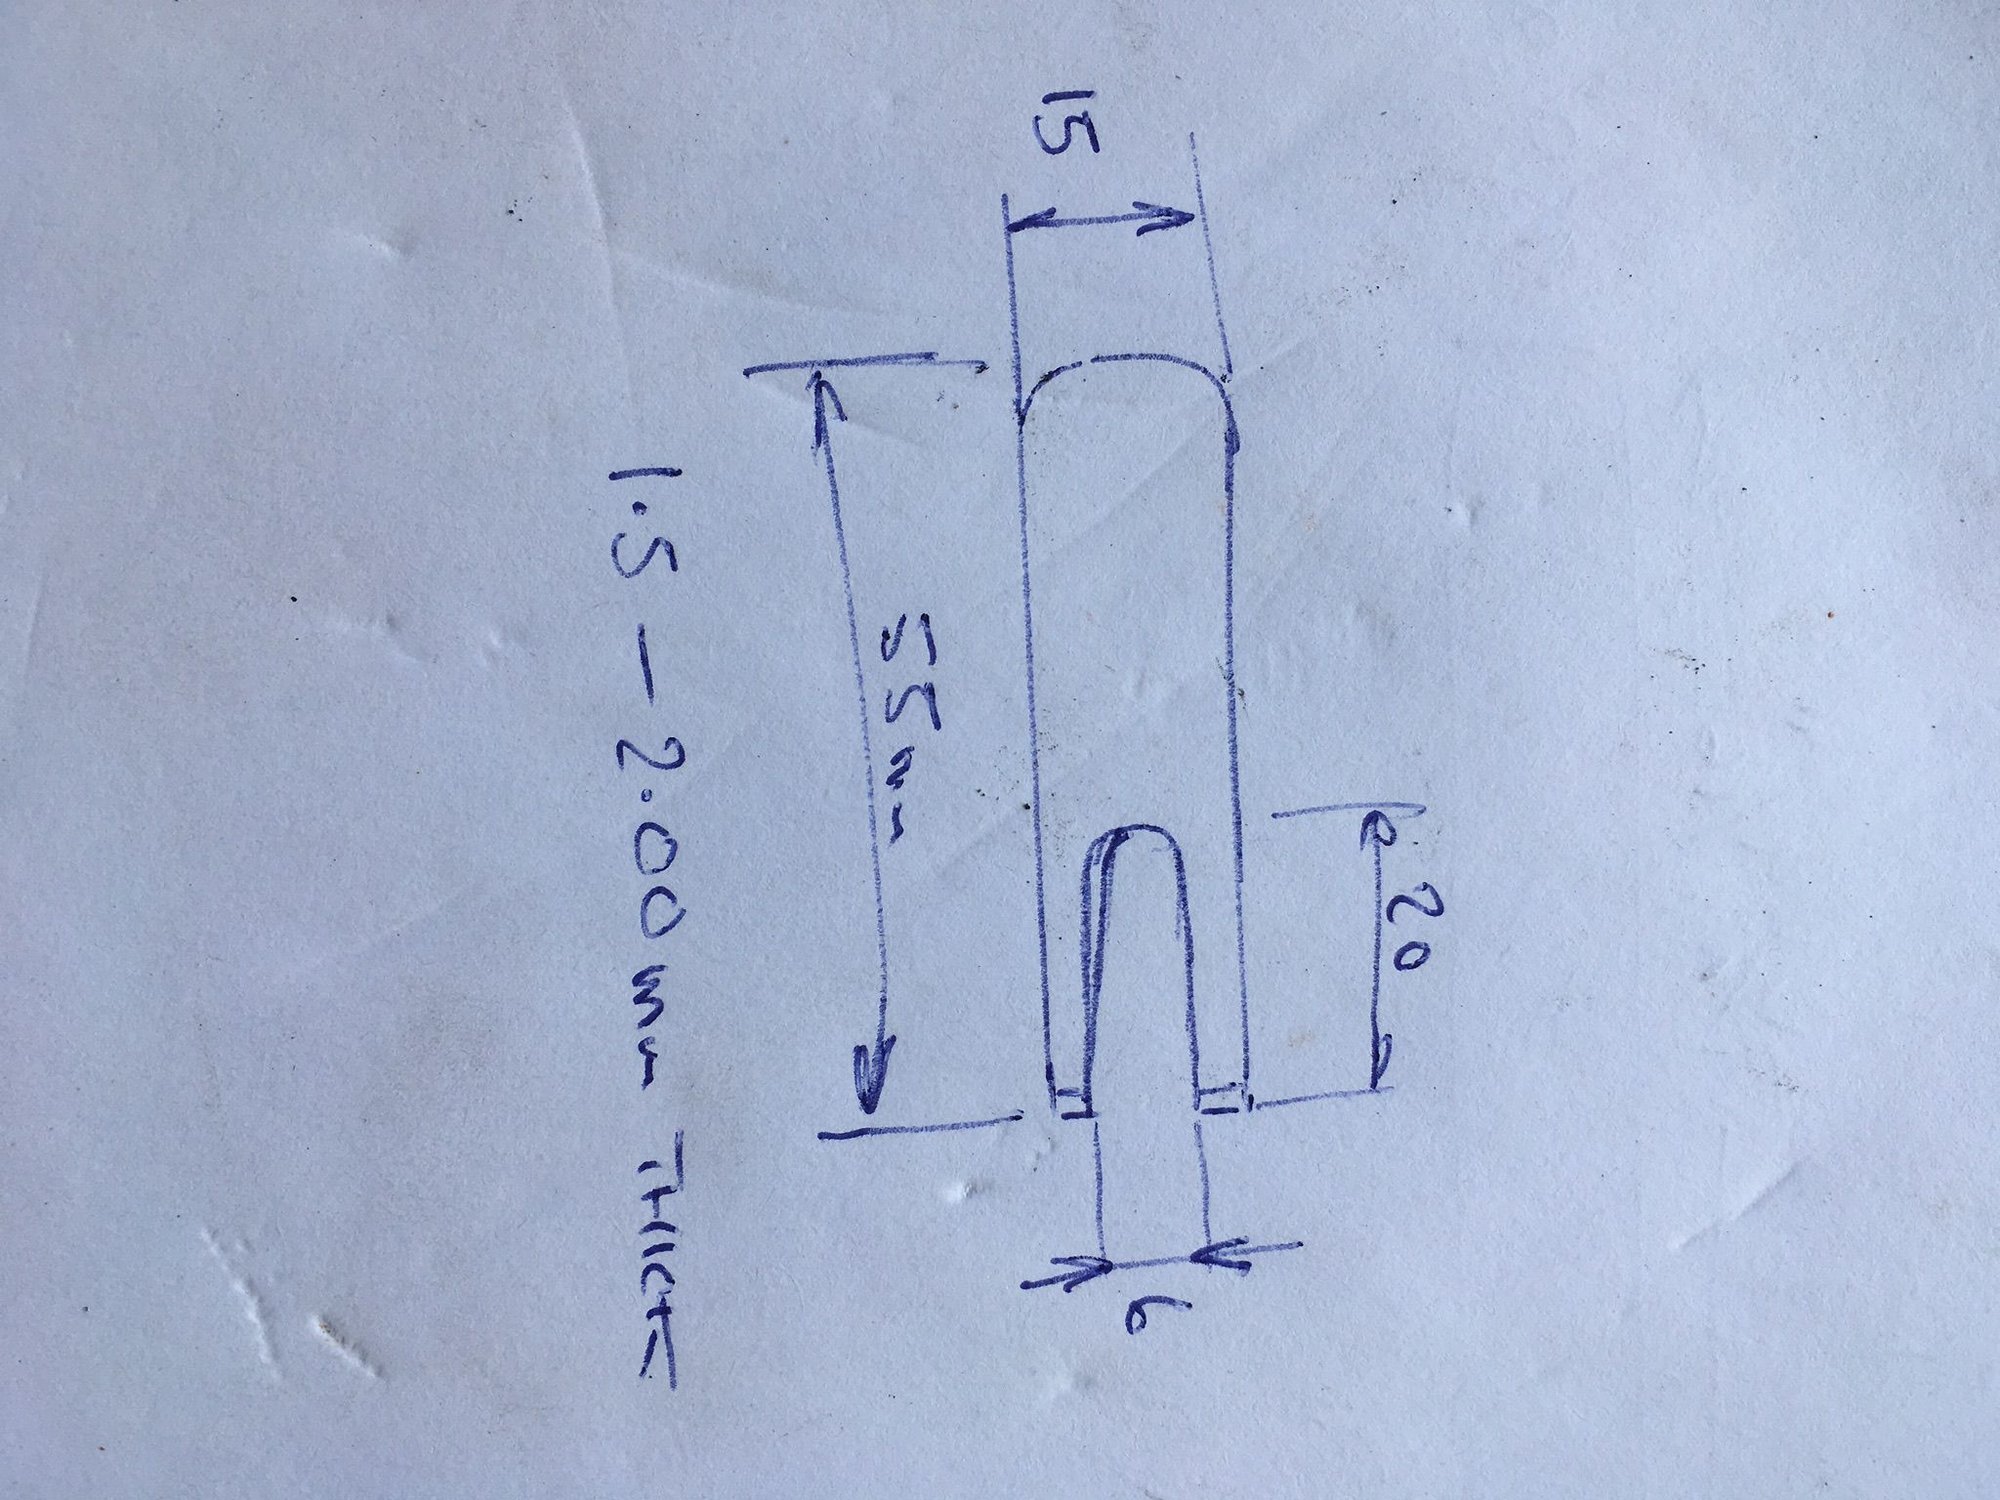
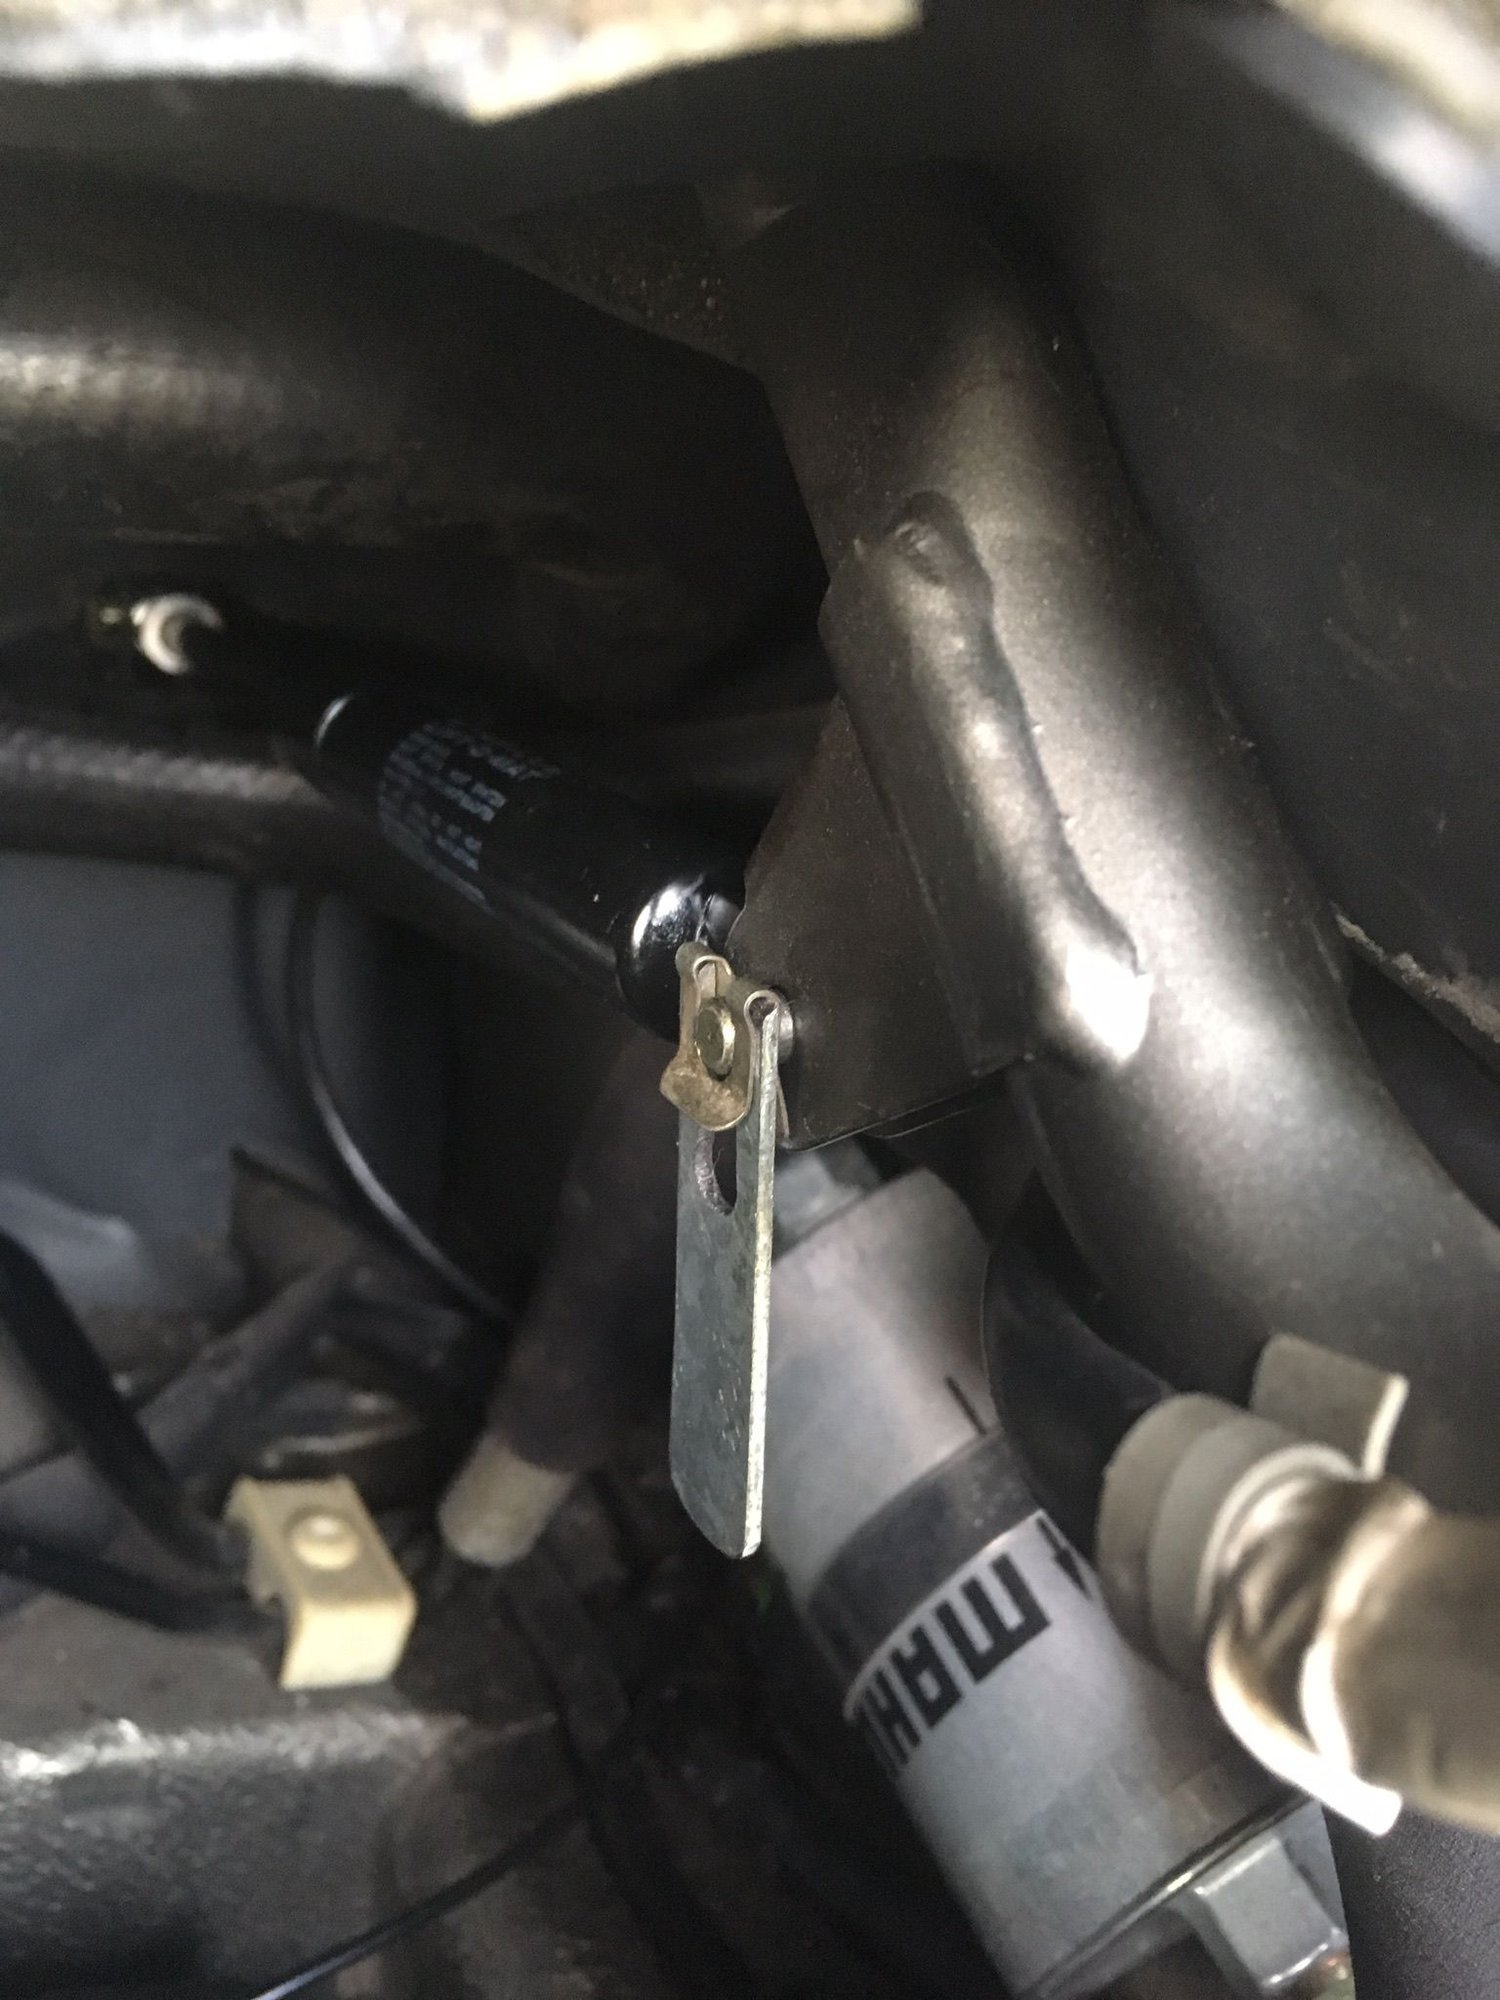
For removing and refitting the rear struts I made up this little tool it takes a moment to slide into the clip follow through and the clip comes off the pin and stays on the tool.
The following users liked this post:
Rocket Rob (06-04-2022)


