

Broken Head Studs

Three Wheelin'
Joined: Jul 2007
Posts: 1,307
Likes: 0
From: Helotes, TX
Re: head temp sensor, buy a throw away 14mm box end wrench and cut a slot in it with a hacksaw wide enough to allow it slip past the wire and down onto the sensor. If the wrench starts to flex too much, use a little heat at the threads.
Re: cam nut size, I think you're looking at a book for older cars, which had a large cam nut. This one is 19mm bolt IIRC. I think my mid 70's cars had the large cam nut.
If you remove the cam bolts before removing the flywheel, you can remove the bolts by holding the flywheel with the special tool flywheel holder, which is just a few teeth that match the ring gear, on the edge of a steel block with a hole in it that can be slipped over a trans bolt. ORRRR you can even use a LARGE screwdriver or flat chisel wedged into the ring gear teeth and leveraged against one of the trans bolts. (If you break a ring gear tooth, I didn't tell you to do that!) However, I've done 4 rebuilds and it works fine if you're careful to get the screwdriver/chisel down into the groove and have someone hold it at an angle that doesn't put pressure on the tip of the tooth.
As you can tell, I'm cheap (or not rich, depending on your point of view) and don't buy a lot of special tools. Seems I can always make something on hand work by simply evaluating the design of the special tool, i.e.:
Pully/harmonic balancer can be removed with the correct size bolt (which is not easily sourced, by the way) and a series of 1/4" drive sockets strategically placed in the hole first to push against the back of the hole. You may have to remove the bolt and add another socket as it comes off the shaft if it's tight all the way off.
Timing chains can be held tight by a 3/4" bolt, 2 nuts and 2 washers, instead of the special tool. Simply insert the bolt through the tensioner hole, place a washer on the end of the bolt inside of the case, then a nut, another nut, and a washer. Adjust the washer and nut on the chain ramp end to fit the hole in the ramp, and adjust the other nut and washer out against the inside face of the case until you get enough tension on the chain.
So this would be a good time to evaluate and really decide whether you want to listen to me suggest "poor boy" homemade tool alternatives, or spend the big bucks for the real things and then throw/give them away when you're finished.
The only thing you can't get around, so far as I know, is a good dial gauge. And I wasted a lot of time making the attachment accessories that came with mine work on the 964. It may be worth buying the Z shaped special attachment for the dial gauge before you buy a gauge (assuming you don't already have one and you're not going to buy the Porsche gauge) so that you can make sure the one you get easily attaches to the accessory in a such a way that it properly positions the gauge's pin on the valve spring retainer.
Have fun. Wish I were there!
Three Wheelin'
Joined: Jul 2007
Posts: 1,307
Likes: 0
From: Helotes, TX
Oh, forgot one other one:
A realy good aluminum I beam type 2' carpenter's level can be used to measure the end float on the cams. Simply position the level perpendicular to the motor with one end over the cam gear and the other over the intermediate shaft cover and locate, then drill two holes through the flanges of the I beam so that the level can fit down onto the two bolts. Install the nuts and tighten them and you've got yourself a good, firmly positioned straightedge to measure to. If you drill the holes just right, you can use the same holes when it's flipped to measure to the other cam. Another tool that doesn't just sit in your tool box waiting for another Porsche rebuild. It's still a carpenter's level.
Did someone just say "redneck"?
Racer
Joined: Oct 2010
Posts: 378
Likes: 2
From: eastern north carolina
Here is where I stopped off this afternoon before dinner. Got the pulley off the front it actually just slipped off. I couldnt manually take it off with a socket and breaker bar as the flywheel kept trying to turn so this may have been terrible but will find out later but I put the impact on it patiently. Then it just slipped right off. Here is where I am with the pully off.
Attachment 493086
Attachment 493086
Last edited by cobias1; Feb 11, 2013 at 11:45 AM.
Racer
Joined: Oct 2010
Posts: 378
Likes: 2
From: eastern north carolina
Alta,
This is where I stopped with the cams as it was getting late and dinner was ready. I think im gonna have to order the cam holder tool for this one so I can finish getting the power steering gear off the back of the motor. May take another look in the morning before I order anything though. Thanks by the way for the advice on the tools as anything I can utilize without buying new stuff is always great.
Attachment 493087
Three Wheelin'
Joined: Jul 2007
Posts: 1,307
Likes: 0
From: Helotes, TX
Don't pry against the outside of the rubber centered pully!!!!!!!!!!!! You can damage the pulley. Removal is by special bolt which has a reduced diameter on the end. It threads into the larger diameter threads nearer the outside of the hole while pushing against the back of the hole to push the pulley off the crank.
Looks like you just removed the ouside portion by removing the small bolts around the interior?
PM me if you don't have access to Porsche workshop manuals.
Looks like you just removed the ouside portion by removing the small bolts around the interior?
PM me if you don't have access to Porsche workshop manuals.
Racer
Joined: Oct 2010
Posts: 378
Likes: 2
From: eastern north carolina
actually not planning on taking that last pully off as I was just trying to get the ac bracket off. So this would be the actual harmonic balancer then ? And yes I just removed the small bolts but also the center bolt via my impact gun.
Three Wheelin'
Joined: Jul 2007
Posts: 1,307
Likes: 0
From: Helotes, TX
Harmonic balancer, although not normally called that on Pcars, is the outer portion with the rubber insert. That's the part that can be damaged. Be sure you get the pully back on in the same orientation. Should check the run-out (alignment) with the dial gauge after reinstalling.
Good progress!
Good progress!
Addict
Rennlist
Site Sponsor
Rennlist
Site Sponsor

Joined: Oct 2002
Posts: 4,449
Likes: 203
From: Cheshire, England
The 964 crank pulley is balanced as an assembly at the factory, so I hope you marked the relative positions of all three parts?
Here is where I stopped off this afternoon before dinner. Got the pulley off the front it actually just slipped off. I couldnt manually take it off with a socket and breaker bar as the flywheel kept trying to turn so this may have been terrible but will find out later but I put the impact on it patiently. Then it just slipped right off. Here is where I am with the pully off.
Attachment 493086
Attachment 493086
Racer
Joined: Oct 2010
Posts: 378
Likes: 2
From: eastern north carolina
Hi Ninemeister, actually I didnt think of doing so but thats the least of worries right now. hoping that the multiple headstuds were still at a point where I could get hold of them with some vice grips or something, I just pulled out one really long one yesterday evening...thinking really not good. back to the pulley though...did notice that at least one of the pieces is marked for TDC so with that in mind if need be ive just got one of the pieces to figure out how to align. Thanks for the intel though as it will be helpful when I put things back together later. ( did take a quick glance at the center pulley but hadnt noticed anything on it). Thanks again for the info and feel free to post any more info on this ( can use all the help i can get ).
Three Wheelin'
Joined: Jul 2007
Posts: 1,307
Likes: 0
From: Helotes, TX
I'm trying to recall, but I can't. I know there's a pin that aligns the crank with the pulley, but isn't there also something that aligns the two pieces of the pulley with each other so that they can't be rotated independently?
Addict
Rennlist
Site Sponsor
Rennlist
Site Sponsor
Joined: Oct 2002
Posts: 4,449
Likes: 203
From: Cheshire, England
The pin on the crank locates the hub to TDC, so when you assemble it you put #1 piston to TDC & align the Z1 mark on the inner pulley. The outer pulley (damper) does not have a mark. Technically it should go together anywhere and still be balanced, but I'd rather not leave it to chance & usually put a Z1 centre-pop at the top of the balancer.
As the OP said though, his problems are greater than worrying about the relative alignment of the crank damper.
As the OP said though, his problems are greater than worrying about the relative alignment of the crank damper.
Three Wheelin'
Joined: Jul 2007
Posts: 1,307
Likes: 0
From: Helotes, TX
The pin on the crank locates the hub to TDC, so when you assemble it you put #1 piston to TDC & align the Z1 mark on the inner pulley. The outer pulley (damper) does not have a mark. Technically it should go together anywhere and still be balanced, but I'd rather not leave it to chance & usually put a Z1 centre-pop at the top of the balancer.
As the OP said though, his problems are greater than worrying about the relative alignment of the crank damper.
As the OP said though, his problems are greater than worrying about the relative alignment of the crank damper.
I know that when I bought a replacement pulley for my car, the pin was in a different position relative to Z1, so I had to disassemble ans rotate one side of the pulley. I think the must be balanced independently though because it is the smoothest running 911 I have ever owned. Even at 4k rev; can't feel a thing with fingertips on top of the fan housing. I did rebalance all the pistons, rods and wrist pins in sets before reassembly though.
Racer
Joined: Oct 2010
Posts: 378
Likes: 2
From: eastern north carolina
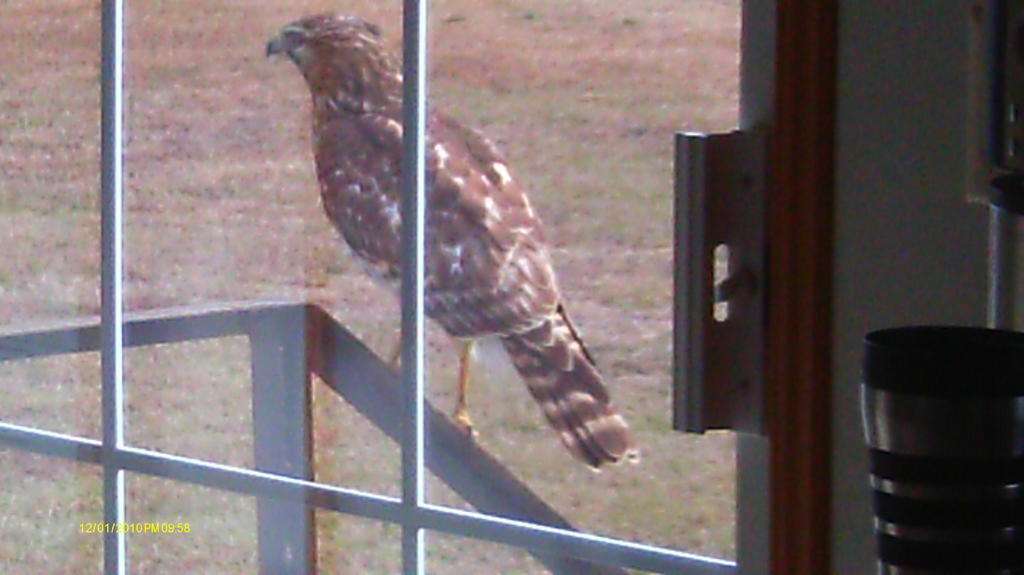
Hey guys, concerning the pulley..I can tell you this, there are marks ( possibly alignment ) on the balancer. These I can check out later. progress to date..I am down to 3 tough head studs on one side of the block. Borrowed a collett from a friend/my bike mechanic today and this side is almost ready for new studs. the shortest one came out the easiest actually as I was able to use a better collett in the set for it. remaining 3 are 1 broken and 2 unbroken that are longer and more flexible. stopped for the night because honestly after 2 hrs straight..im done. will get some pics on maybe tomorrow but will add one special one now as I had a special visitor this AM just before coffee at my back door. thanks again for the help guys and will keep ya posted.
IMAG0002.jpg
IMAG0002.jpg
Racer
Joined: Oct 2010
Posts: 378
Likes: 2
From: eastern north carolina
Hey guys...thinking of ordering the new studs for the block. Im thinkiing of going with the cheaper ones on pelican that are the same as what was in it. Not sure of the lifespan of them though. either those or the fully threaded dilivar. Looking for your E-pinions on this as I will probably be ordering soon. Thanks in advance.
Pro
Joined: May 2009
Posts: 510
Likes: 0
From: Raeford, North Carolina
Sorry I have not hopped onto this thread yet, alterchsa has been doing a fantastic job of walking you though it.
I have rebuilt my engine recently.....where are you in North Carolina?? Perhaps I can help if you are not too far away, as the signature says, I am in Raeford, just south of Ft. Bragg.
Cheers
I have rebuilt my engine recently.....where are you in North Carolina?? Perhaps I can help if you are not too far away, as the signature says, I am in Raeford, just south of Ft. Bragg.
Cheers