When you click on links to various merchants on this site and make a purchase, this can result in this site earning a commission. Affiliate programs and affiliations include, but are not limited to, the eBay Partner Network.
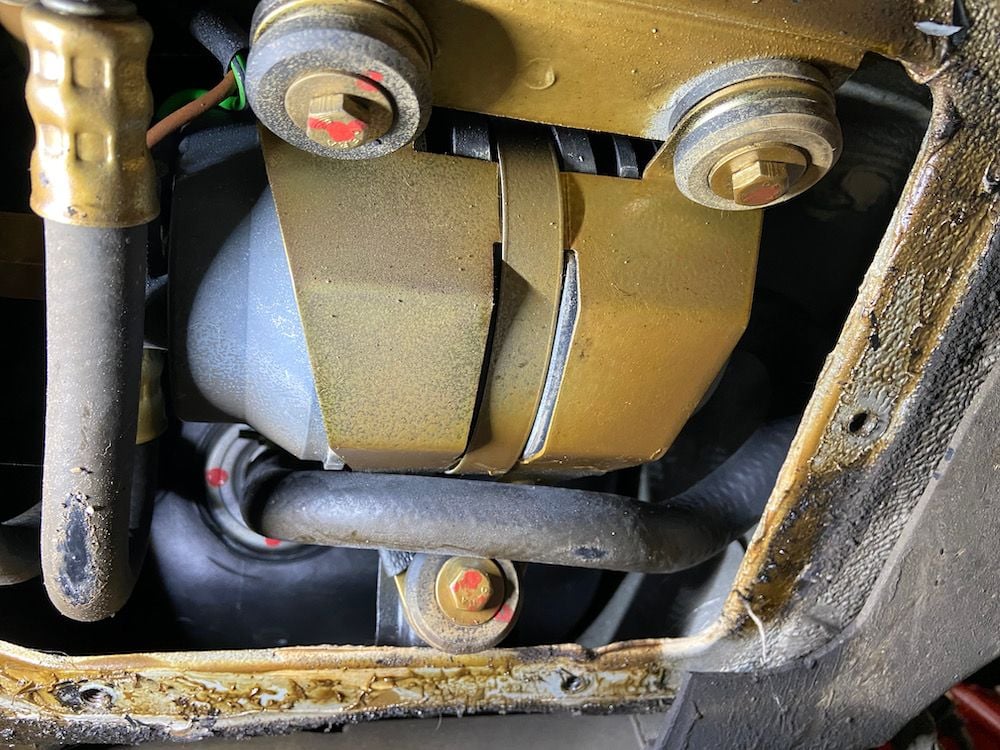
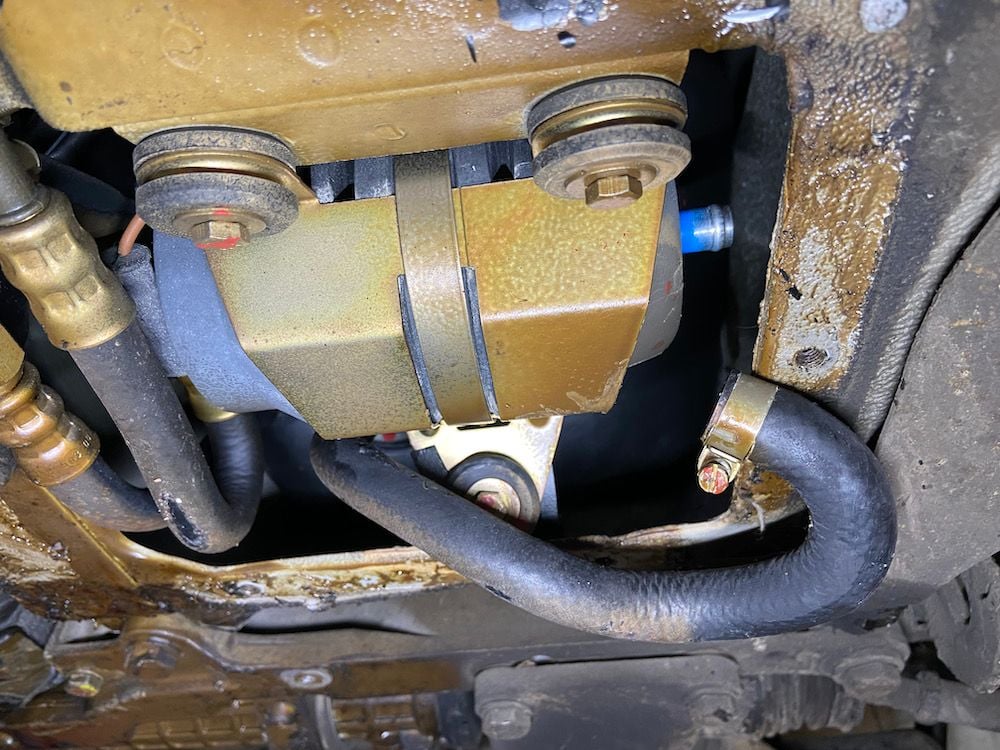
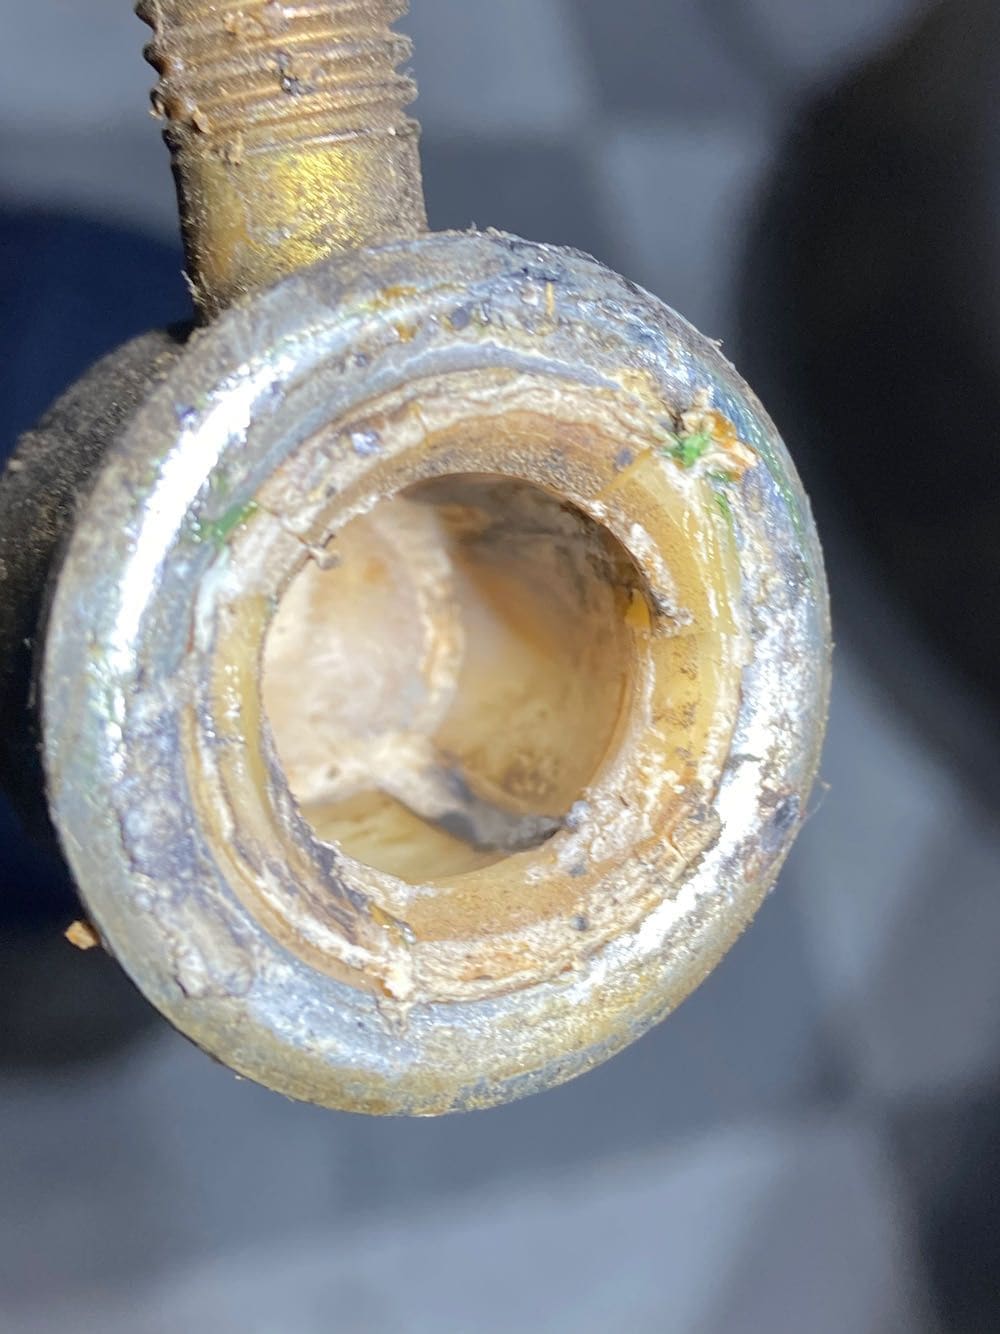
Tonight was the in-tank fuel filter which was my last step to ensure all the old gasoline is completely out of the car. I was able to change this out with a stubby screw driver for the fuel line clamp on the filter and my TINY hands without removing the fuel pump! Probalby should have simply removed those three bolts holding onto the fuel pump to make more room but I was stubborn and never had to touch those.
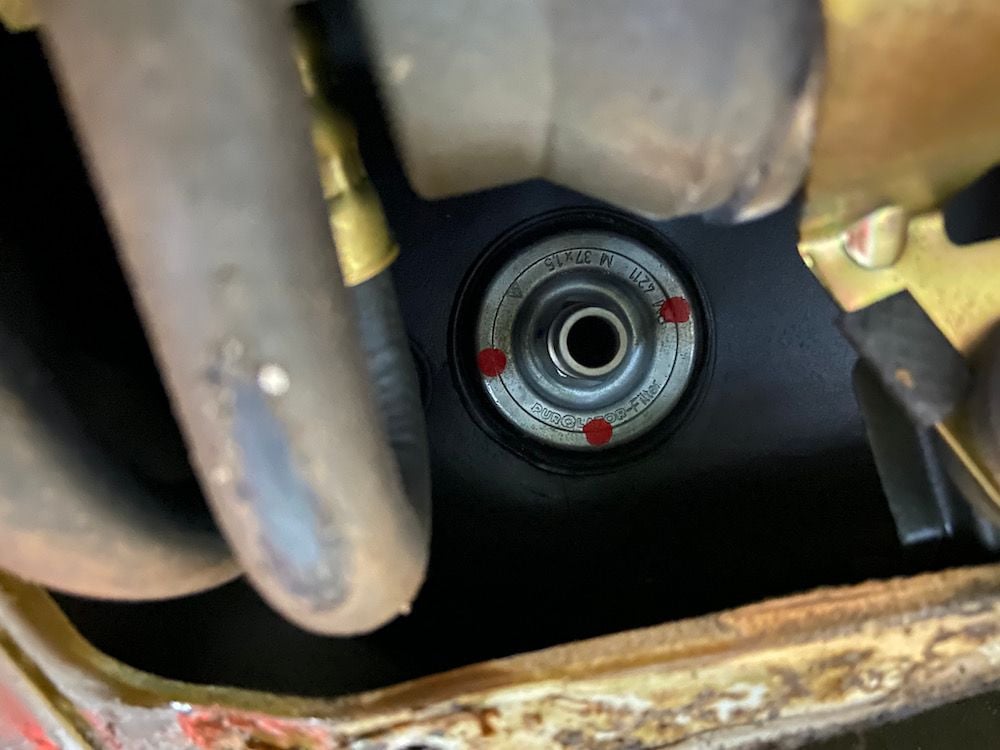
17mm deep socket to remove the filter.
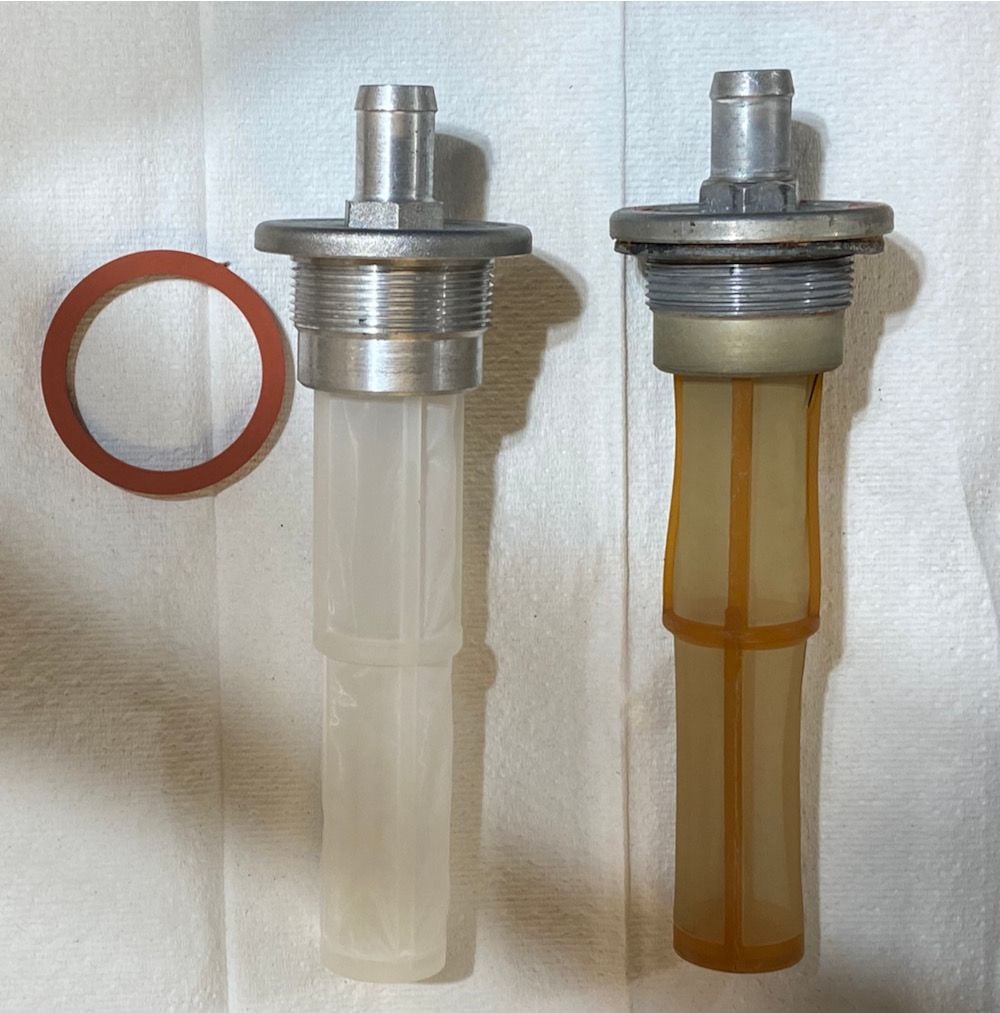
Here is my old filter and new filter and O-ring side by side. The O-ring comes with the new fuel tank filter. My west coast car with ~65k miles is in great shape.
Apply Otimoly to the threads, and I used Dow 111 on the gasket, and then re-install to 25Nm of torque.
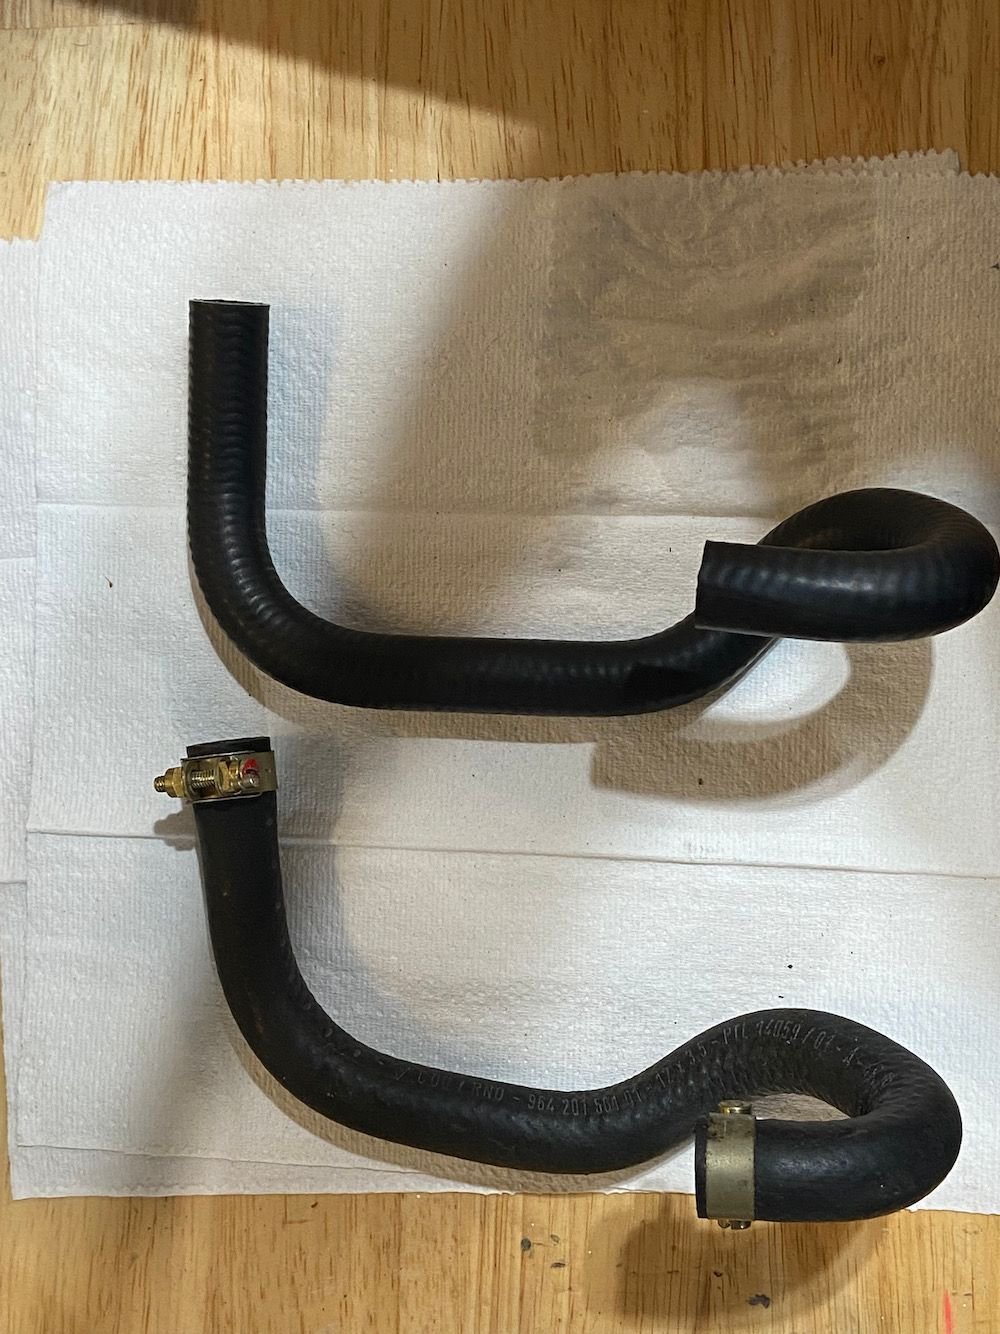
Here is the old hose with clamps still on and my new fuel hose from tank to inlet of the fuel pump. Carefully transfer the clamps in the correct orientation to the new hose. Enough time has gone by where I have forgotten how ridiculously expensive this hose was.
Ricardo, I have a new front Diff rubber mount and want to get it installed. Would you mind quickly outlining how that is done? Looking at it want to make sure I don't undo something that drops out LOL! Many thanks,
You went with the 17" d90 front augment? What offsets and sizes did you go with?
Dan Pye is great to work with. Though i think i might not be...i drove him nuts w the back and forth last time over the campy sport wheels. But he was a trooper and got me pretty much spot on where i needed to be. Those centers are tough with our brake calipers...fitment-wise
You went with the 17" d90 front augment? What offsets and sizes did you go with?
I just emailed Dan and told him to set me up so my car looks like the picture from his website below. I have no idea what the offsets are. I think I am his favorite customer next to you Rob. Based upon the work he did with you and your recommendation I just went with the trust model.
All I have from Dan is "17x8 and 17x9. This will allow us to run a 225/255 tire which is what is needed for your C4" I haven't even opened the boxes that are in my garage! Should the offsets should be marked on the wheels?
Ricardo, I have a new front Diff rubber mount and want to get it installed. Would you mind quickly outlining how that is done? Looking at it want to make sure I don't undo something that drops out LOL! Many thanks,
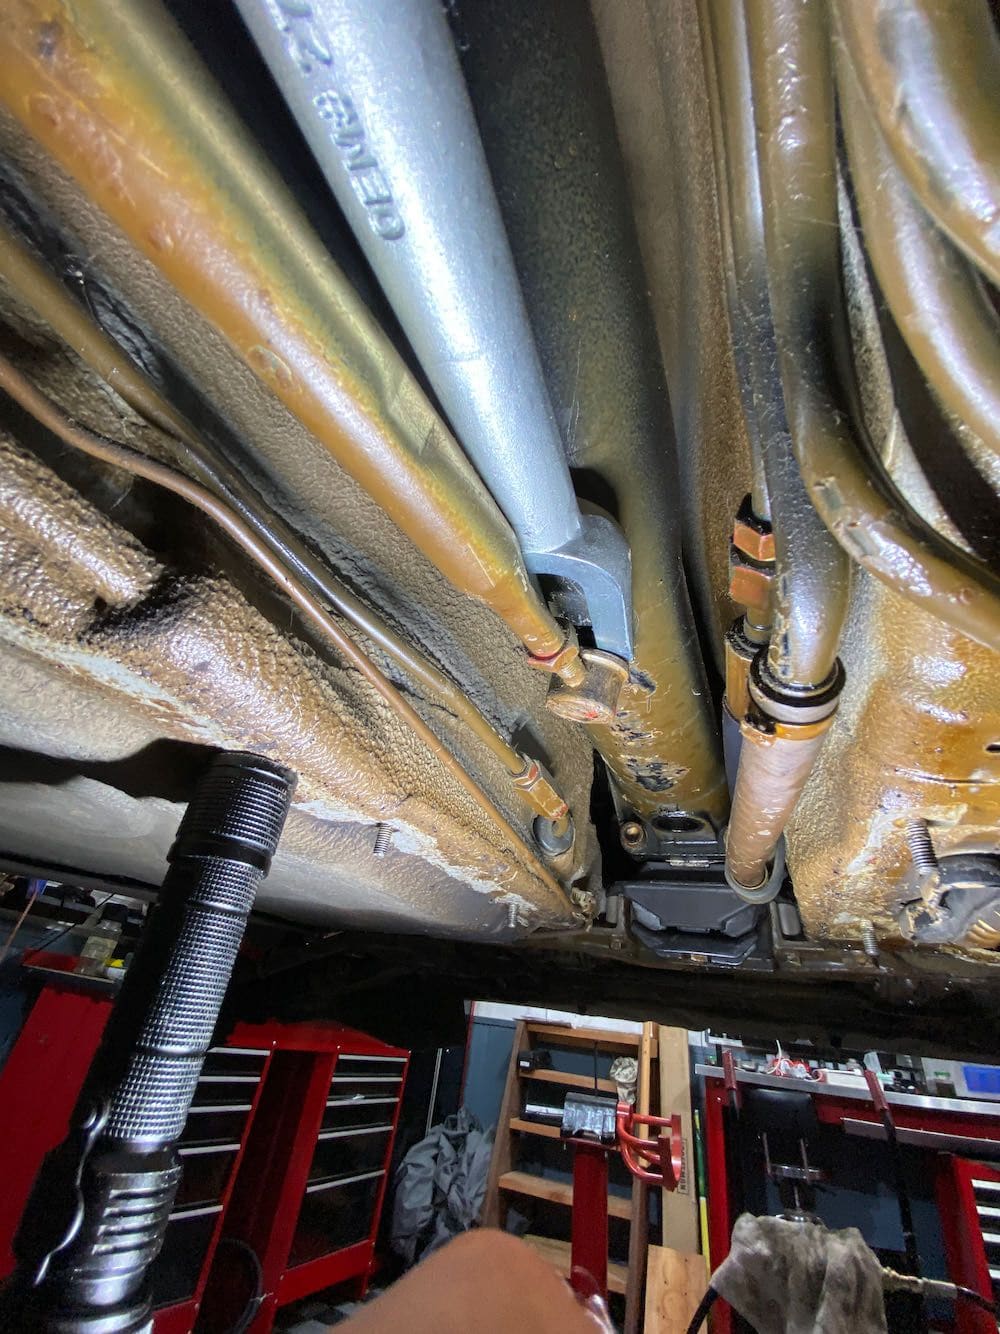
The key is you have to lift up the center tube / diff to be able to remove the mount even after you undo all the screws. This will create some clearance for the mount to slide out by hand. The new rubber mount will be "thicker" so I had to lift up the diff/drive tube even more to get that to slide in. Keep in mind that my engine was out of the car so my center drive tube was already hanging by a simple rear support in the rear and not by the transmission that is normally there. The dynamics may be different with your engine / trans still in the car. I still think you will have to lift the entire diff assembly a bit to get the clearance you need. Below is a picture of my shade tree mechanic setup with a couple of jacks. In your case with your trans still in the car I think one jack pushing up on the diff may work.
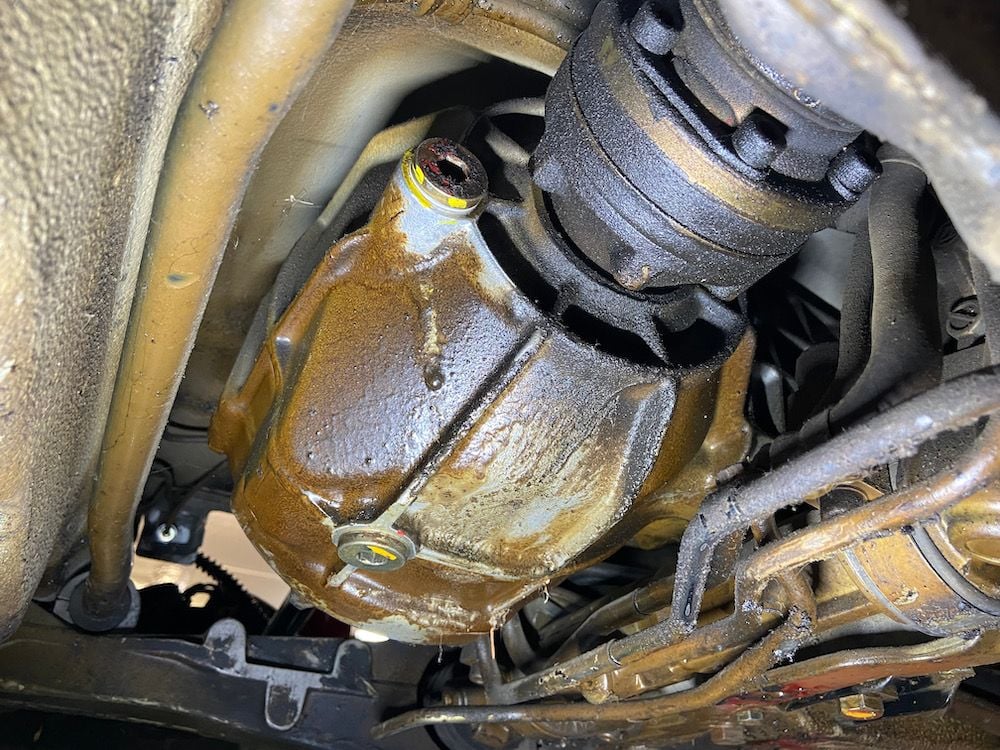
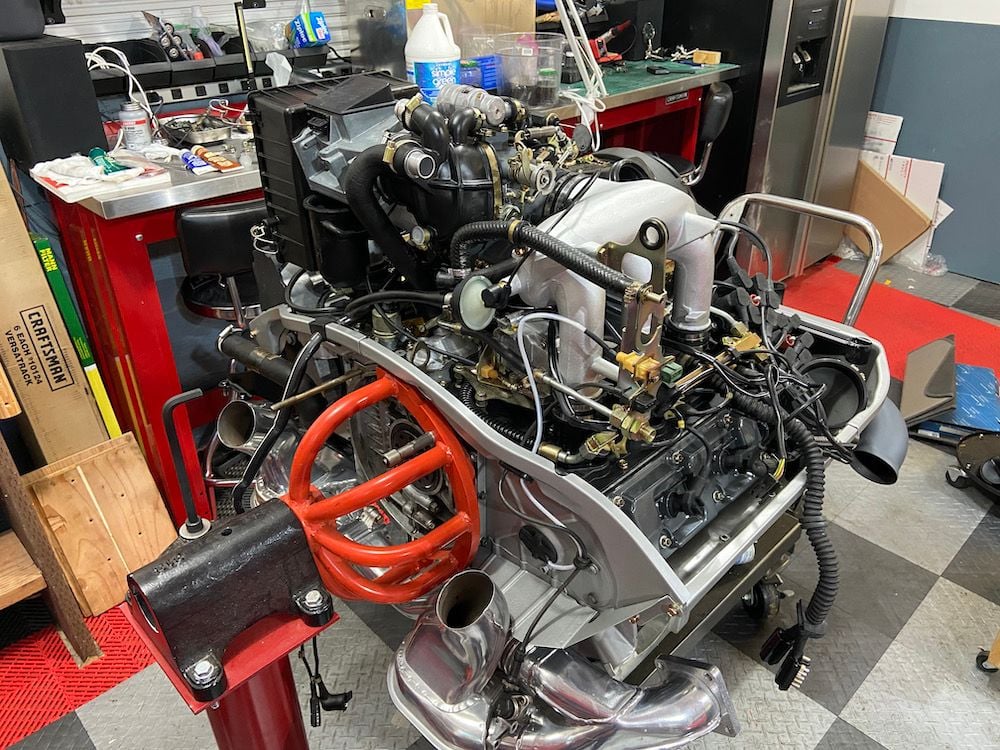
Changed C4 front differential fluid and had a strong sense of Deja Vu. Fluid came out honey colored so there must be a post somewhere of me doing this before prior to me tearing out the engine. I think I am just making **** up now to avoid taking the engine off the stand and finally getting it stuffed back into the car.
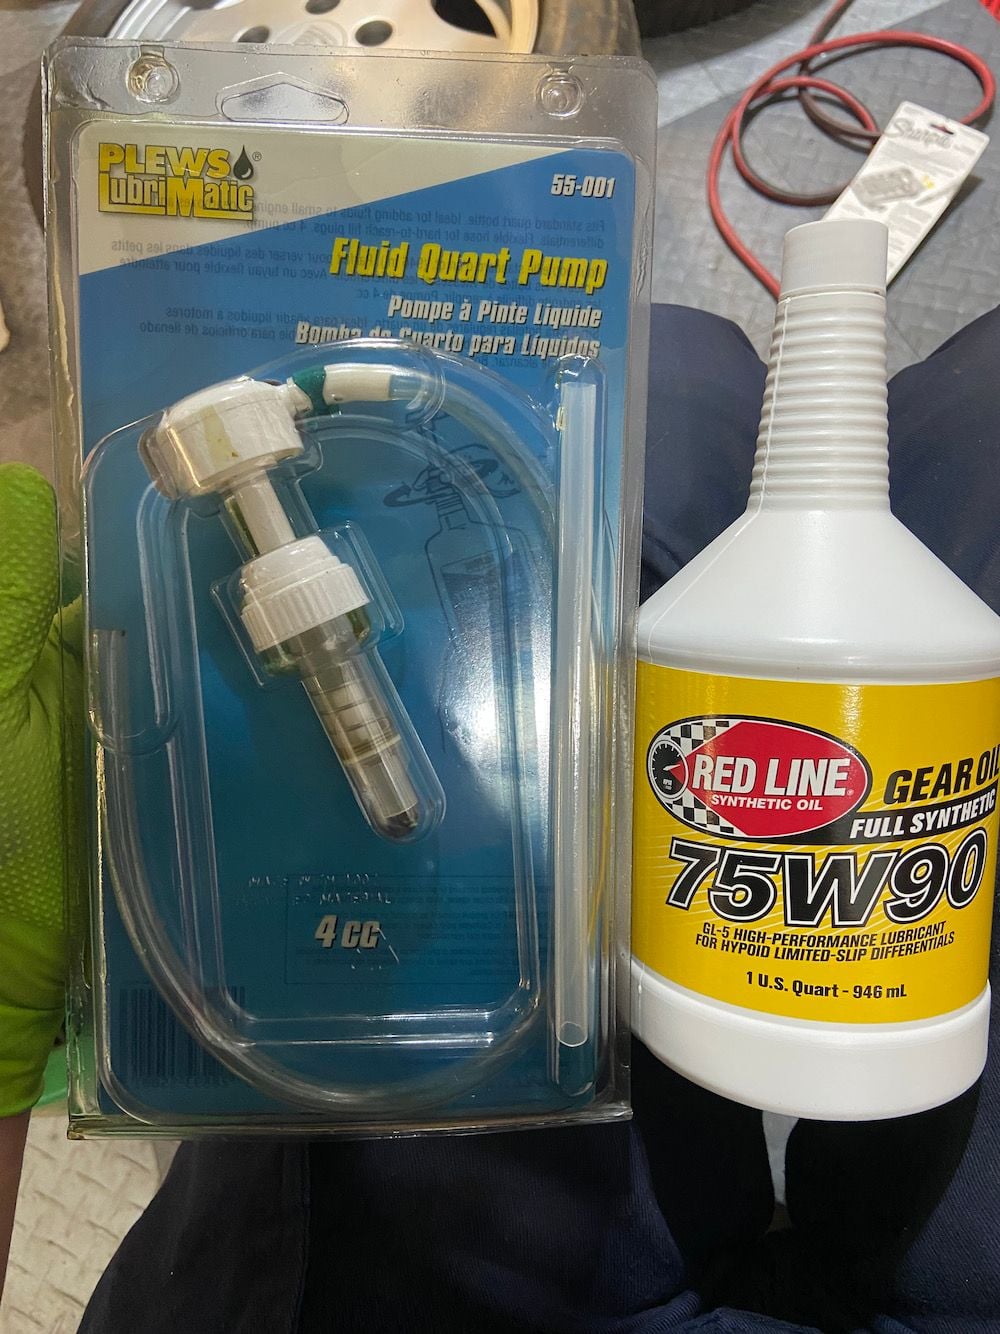
Always open the fill plug first because if you find that is problem later you then have a diff with no fluid in it. Drain plug needs new crush washers and 30Nm of torque. 10mm allen head plugs. Use one of those fluid pumpers to refill via the top fill port until gear fluid overflows. Easy access and simple. Take about 1.2L (more than 1 quart of fluid, you need two 1 quart bottles).
Please ignore the wet looking CV joint, I will deal with that later, yes I know there are several seals on the diff but need to get engine back into the car first!! I never had major leaks in that area before.
The engine isn't in the way for those. The biggest PITA is getting at the evaporator. The job I feared most was removing the petrol tank because of the risk while draining it but it turned out to be relatively easy. The most difficult bits were removing the "suitcase" physically and then refitting the dashboard vent tubes to the suitcase when it was reinstalled.
I used a combination of threads as a guide and they were a fantastic help.
I couldn't wait for Goughary's "Aircon madness" thread to appear. :-)
The oil lines are next on my list.
Just took it all a part, restoring the whole suitcase at the moment and waiting for Jonny�s news from Retrofitclassic about his electric heat corps and set up.
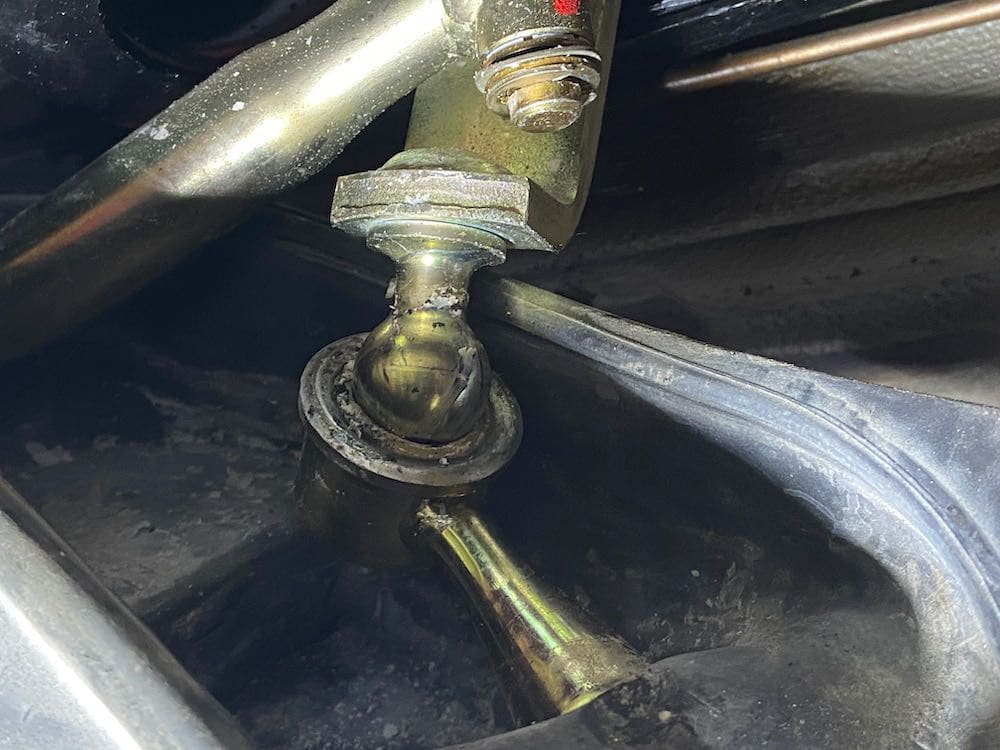
Ok, one more side project. I wanted to make sure my shifter linkages were in good shape and found out via fellow Rennlisters that the bushings for a couple of the shifter ball joint connections on my C4 are easily replaced. About $50 for the pair shipped to my door.
The bushing to use is from the 928: Part Number: 92811614503 you need 2
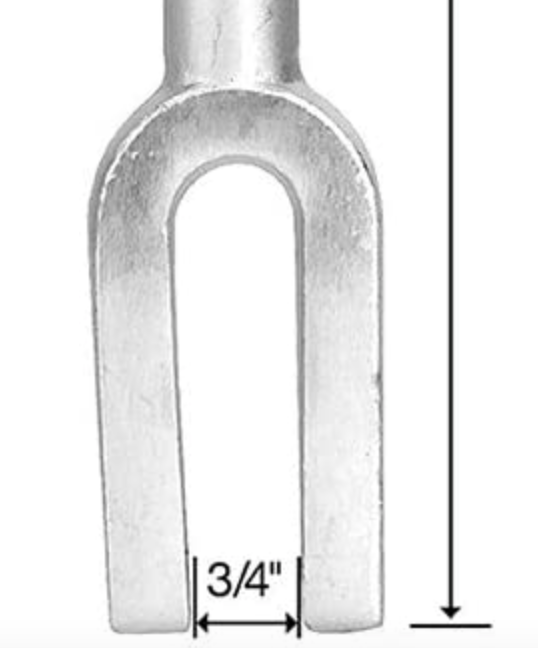
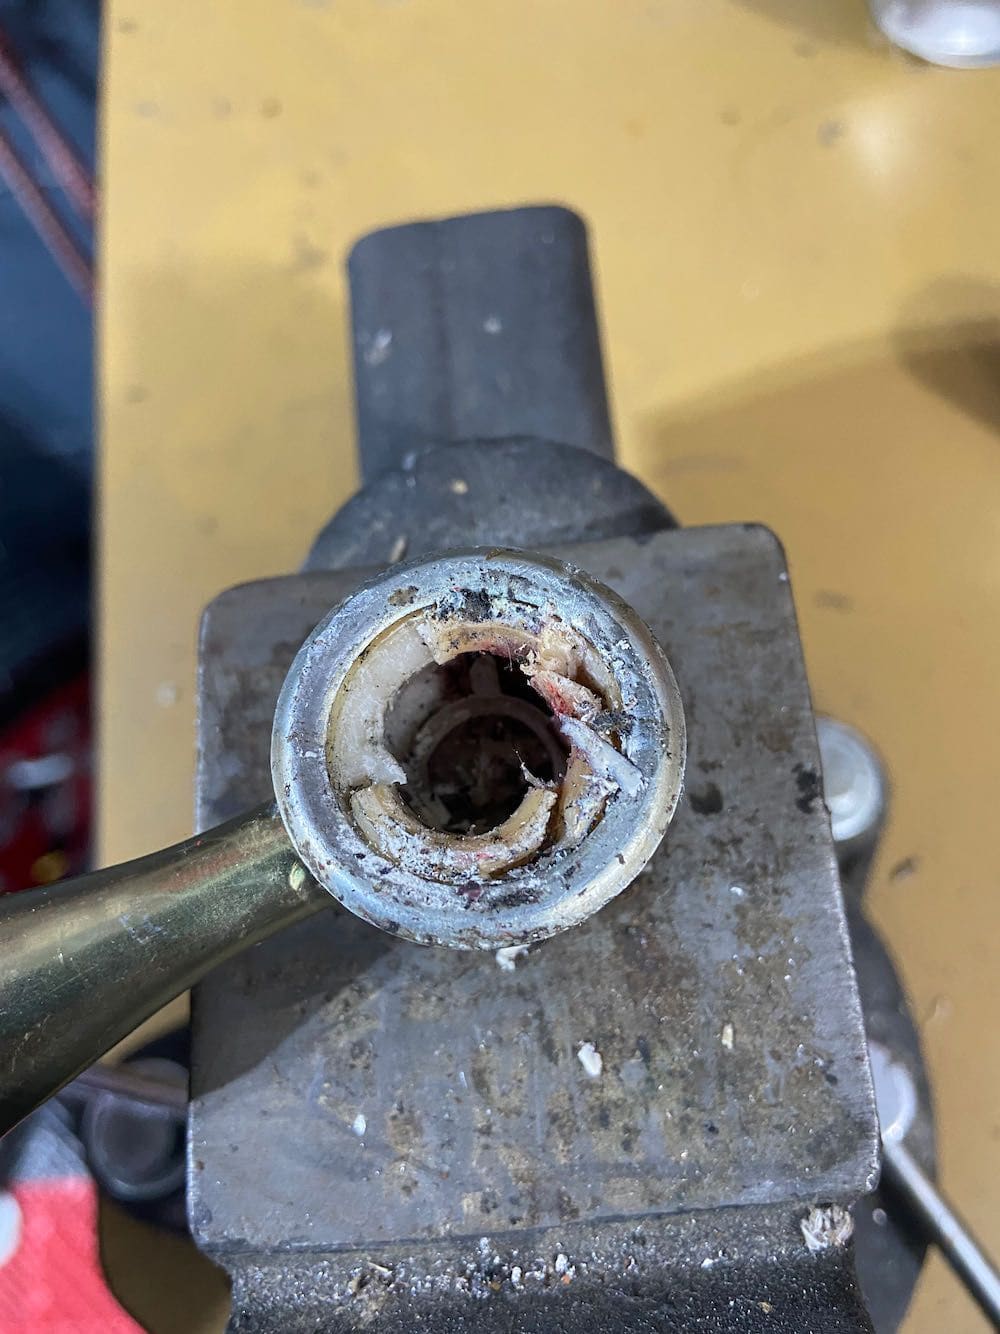
Goughary let me know you are supposed to disconnect the front joint first with a screwdriver and then gently pop out the other rear one using the rod. I must have weak screwdriver skills because I had no luck with this (may original bushings where still in decent shape). Instead I bought a Tie Rod separator / ball joint pickle fork for about $16 on Amazon to add to my tool kit.
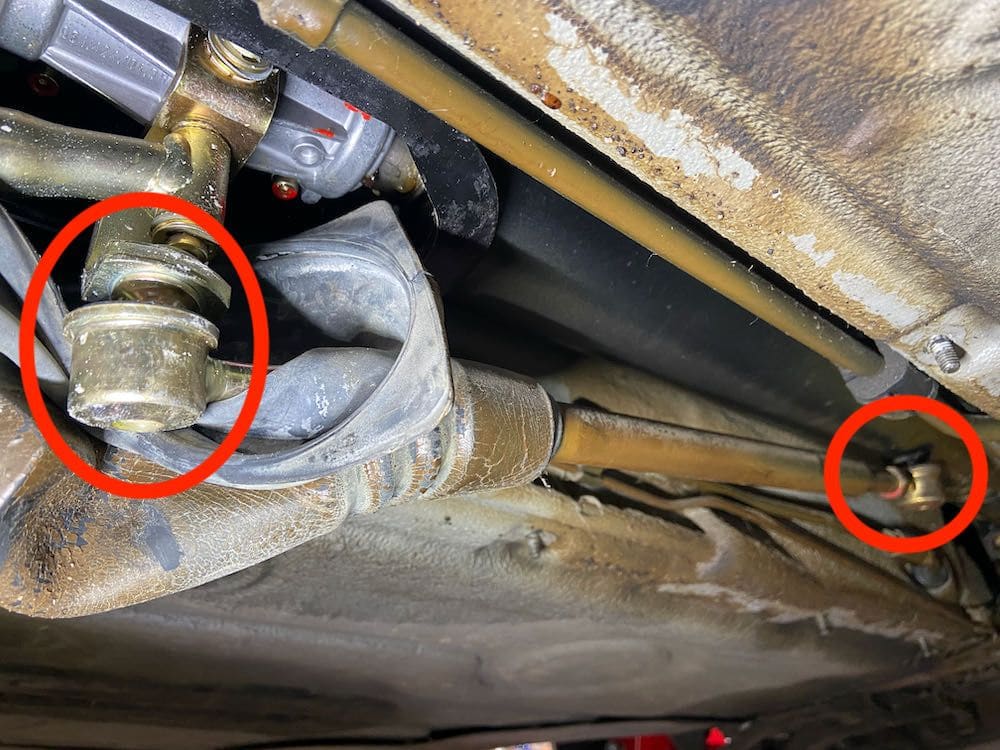
This made quick work to separate the the front ball joint connection. I greased it up and a couple of light taps and the rod popped out.
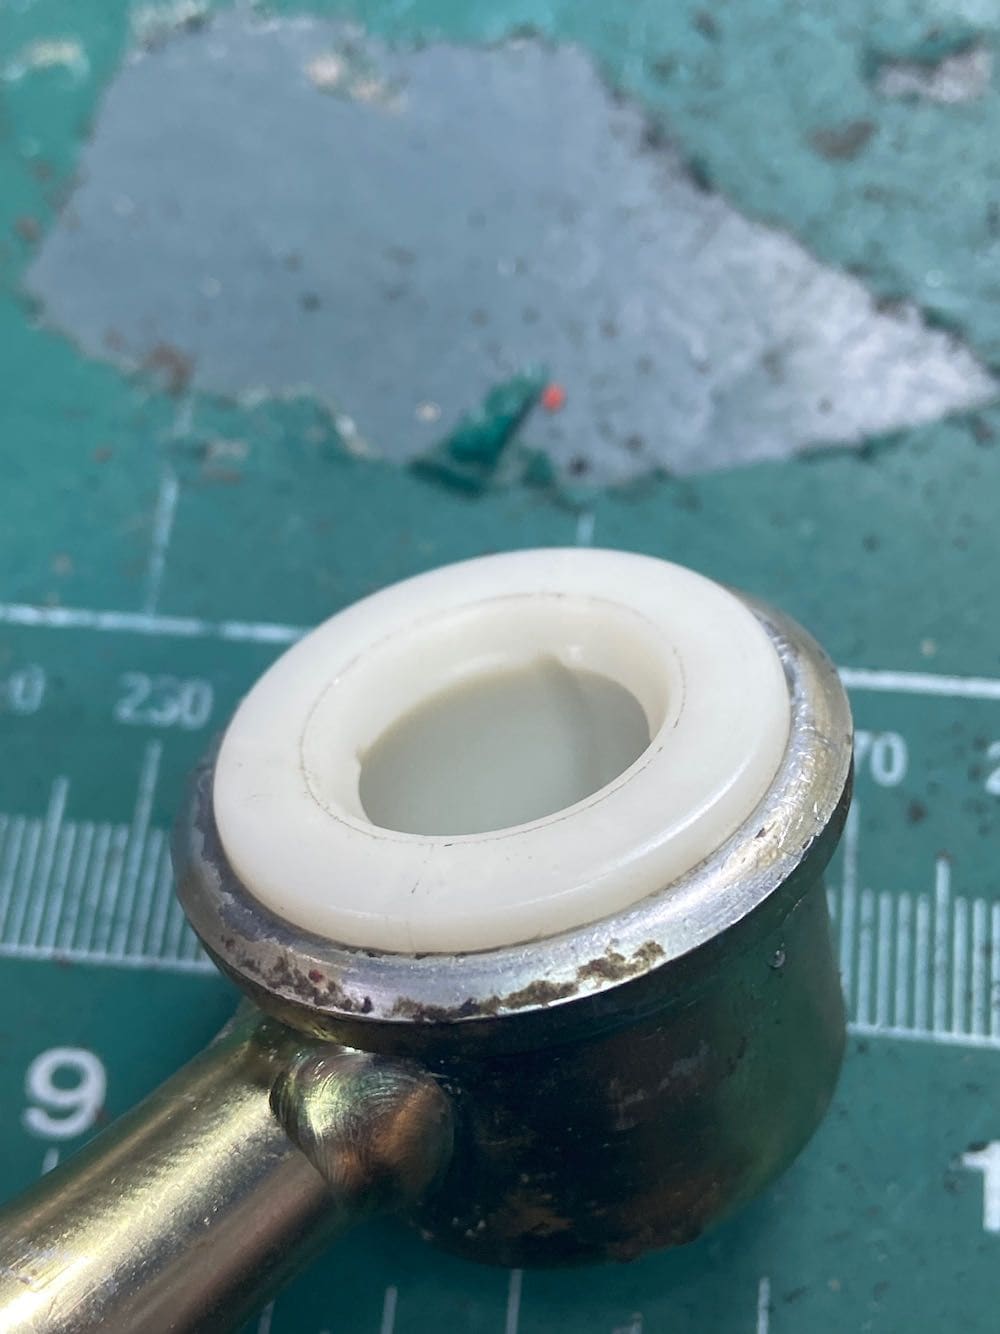
My old bushing are still in pretty good shape.
The rear you can just leverage out carefully. It released easily.
I just used a screwdriver and some needle nose pliers to pry out and pull out the old bushings.
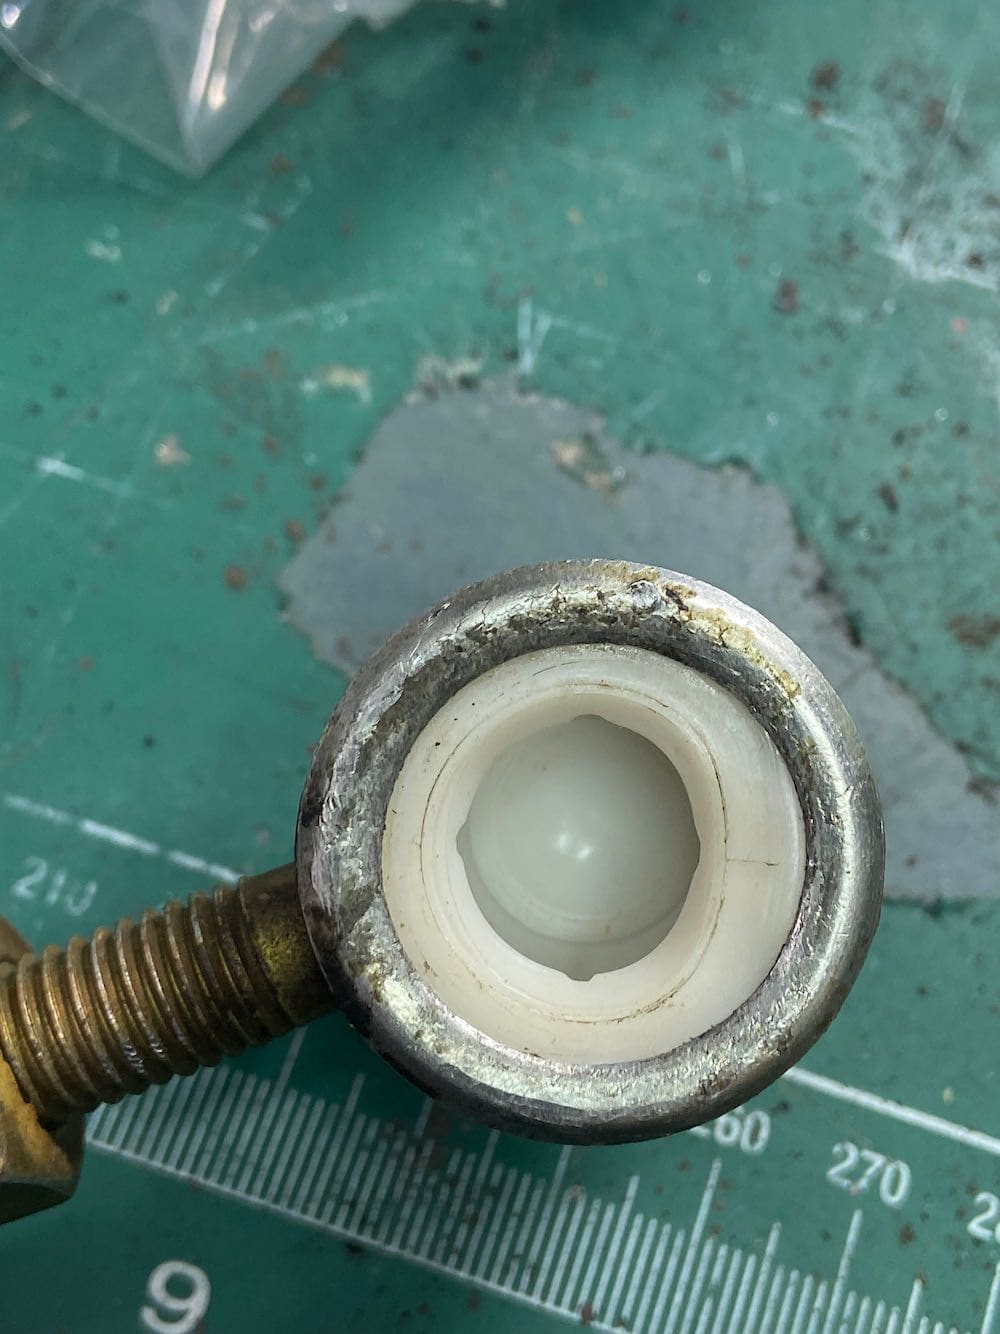
You can pop in the new ones very lightly at first with a bench vice and then push them all the way down. However, you then need to push it all the way so the bushing cup lip seats under the rod end bushing holder.
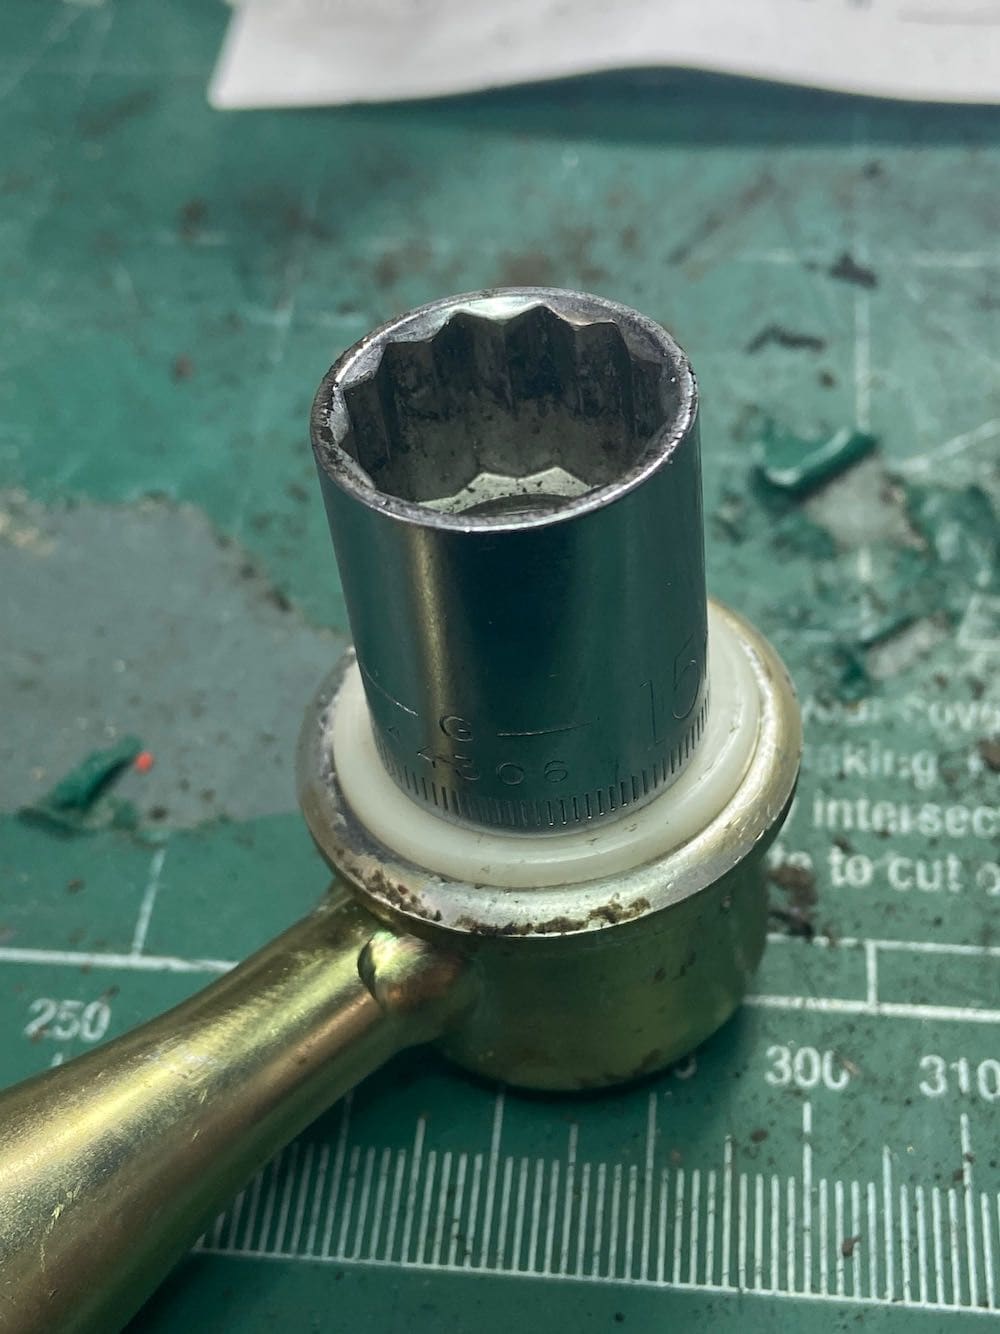
Thanks to Goughary for this tip. A 15mm socket worked best for me. You may have to play around with different sockets. Then you compress this gently in a bench vise.
Here it is after install, almost all the way in, I used another smaller socket to work the bushing in properly to get in centered. Once the ball joint is in there it will be fine.
I popped in the rear joint with the help of a large pair of pliers.
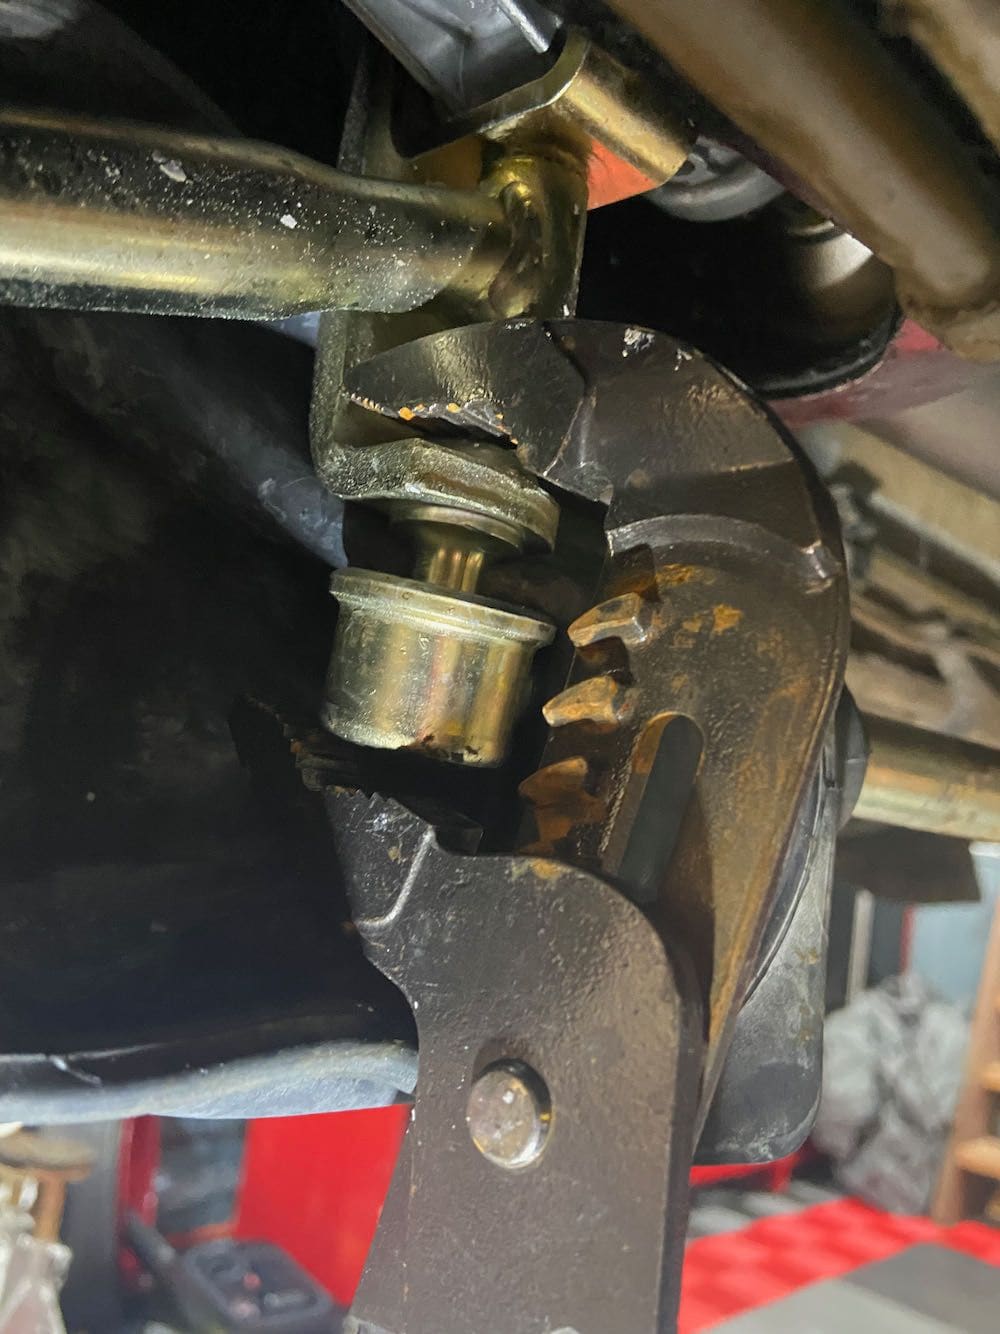
And my shade tree mechanic solution for the front joint was to just push up on the rod end using my floor jack and some wood.
Linkage should feel good as new now. I have the Sleepers C4 short shift kit but need to get the engine in the car and do that as a separate project or sell it later.
Always be mindful - just so that it's been said - that jacking anything from under a car on a lift, can unseat the car from the lift...so if you need a little pressure- ok, but if there is any chance one would be using the jack to "lift"....that can get dangerous very quickly.
How do i know this??? I had put some grease once in one of those shift cups- and using the jack for the exact same cup as in the photo above- doing it EXACTLY the same way, with a floor jack and 2x4, the grease didn't allow the air to escape and the jack actually lifted the car precariously on the lift....so i delicately set it down and counted myself lucky that someone never got rich off what would have been the "epic Porsche lift fail" video that year on YouTube.
Rob Dyrdek would have had a laugh at the car falling on me...at my expense...
Anyway- glad you got that done! Can't wait to see the car...waiting patiently out here for a good first start/drive video!

 08-27-2021, 01:47 AM