When you click on links to various merchants on this site and make a purchase, this can result in this site earning a commission. Affiliate programs and affiliations include, but are not limited to, the eBay Partner Network.
I have been quietly following this forum since before I purchased my car and it's helped enormously - the posts and images have allowed me to sort out a number of issues over the years. So, in the hope it may help some other members, I thought I'd tell the story that lead to a recent engine rebuild on my '92 C2 Coupe..
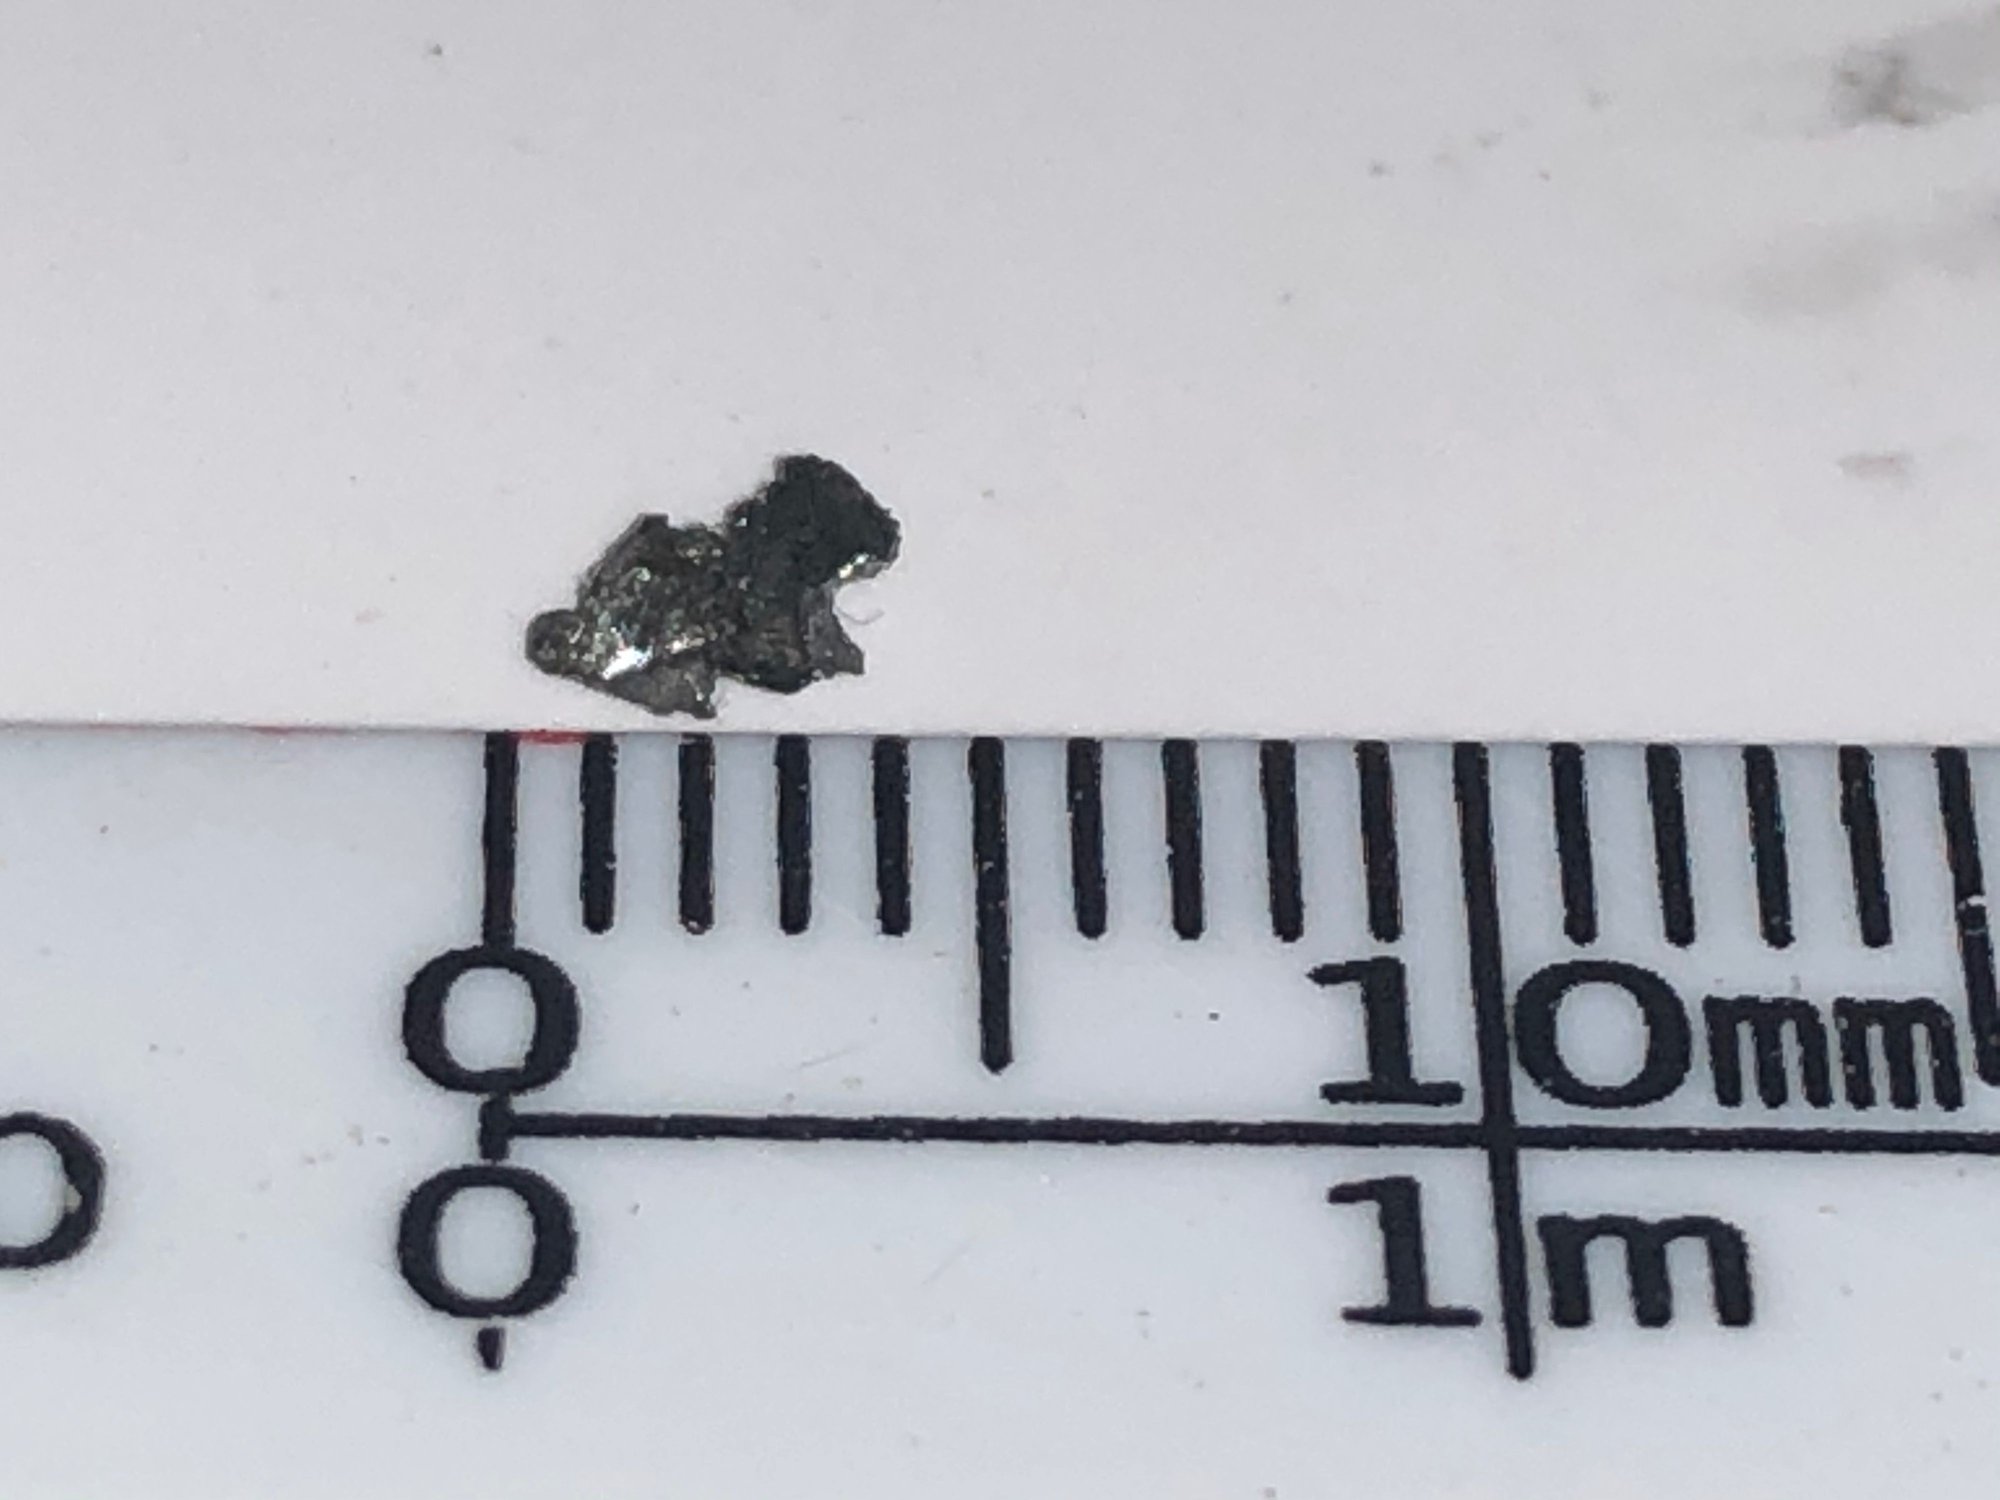
The car was in great shape and still pulled really well however I began to notice some light pinging under load back in November. I initially thought it might be the distributer belt of some other ignition issue but all checked out fine. I did a complete service and all seemed fine except for when I did the oil change. Stuck to the magnetic sump plug were 2 beaten up metal slivers both about the same size.
I decided to do a leak down test and found that cylinder 3 and 4 were 25% off the other cylinders. Cylinder 3 could be heard leaking from the exhaust and 4 from the intake.
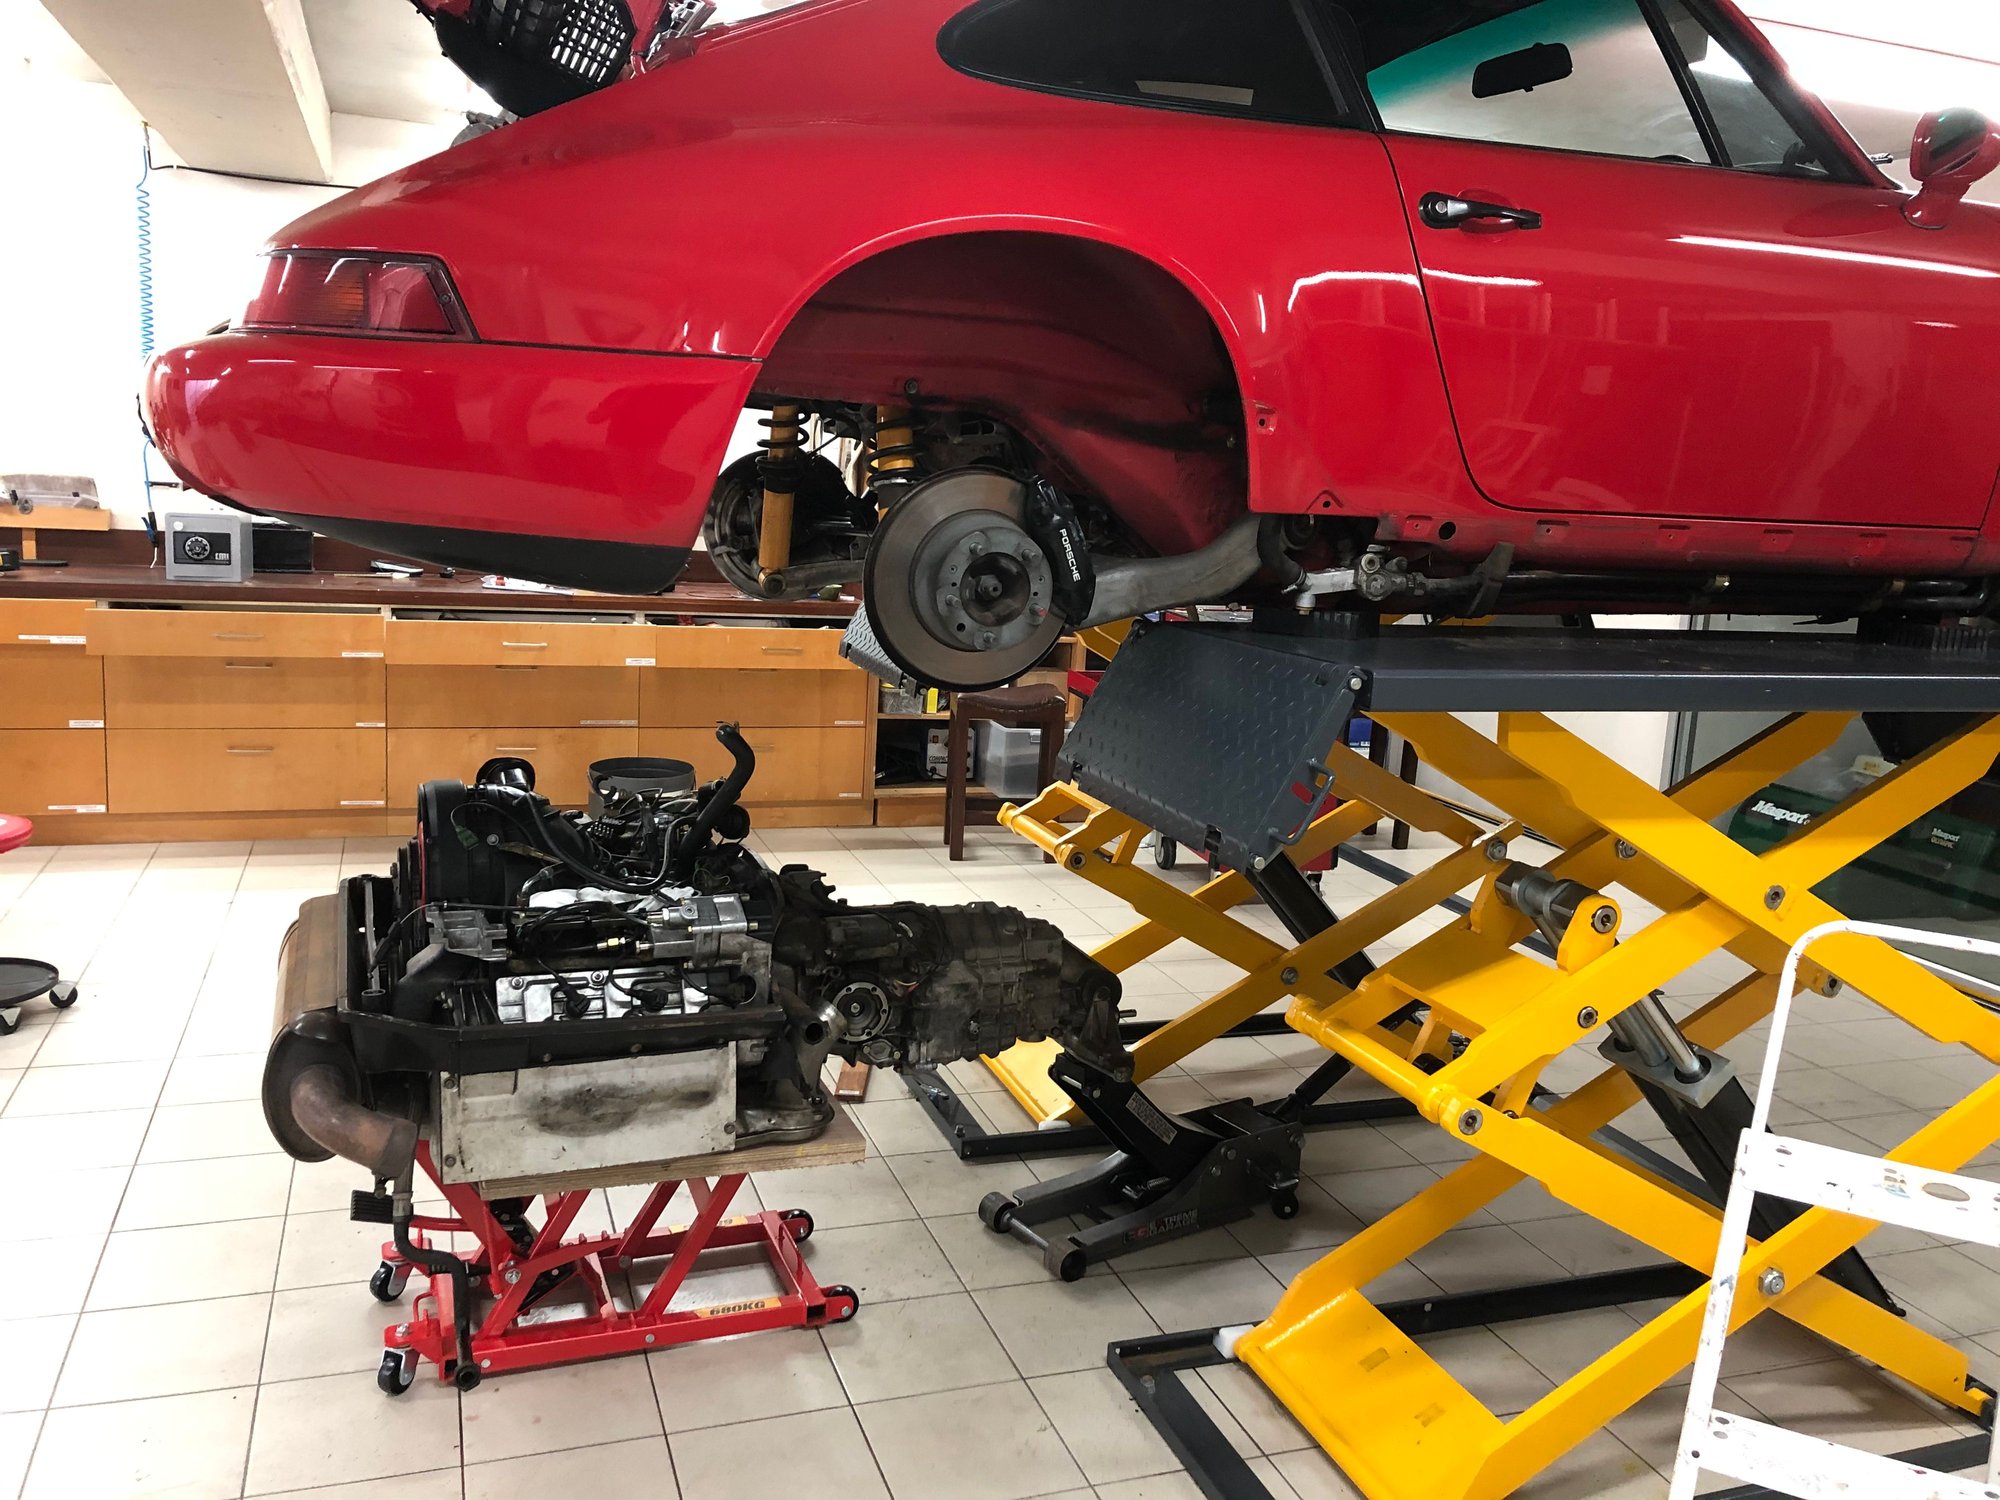
The car had 145,000kms on it and some minor oil leaks from a couple of cylinder based and between the chain housings and case. This and the fact that the metal fragments had obviously been ground through the engine made me elect to take an a full rebuild. It was my first time rebuilding and my only previous experience had been pulling apart some VW beetle engines in my teens, so armed with the Wayne Dempsey's and Andrian Streather's books and this forum I started work last December.
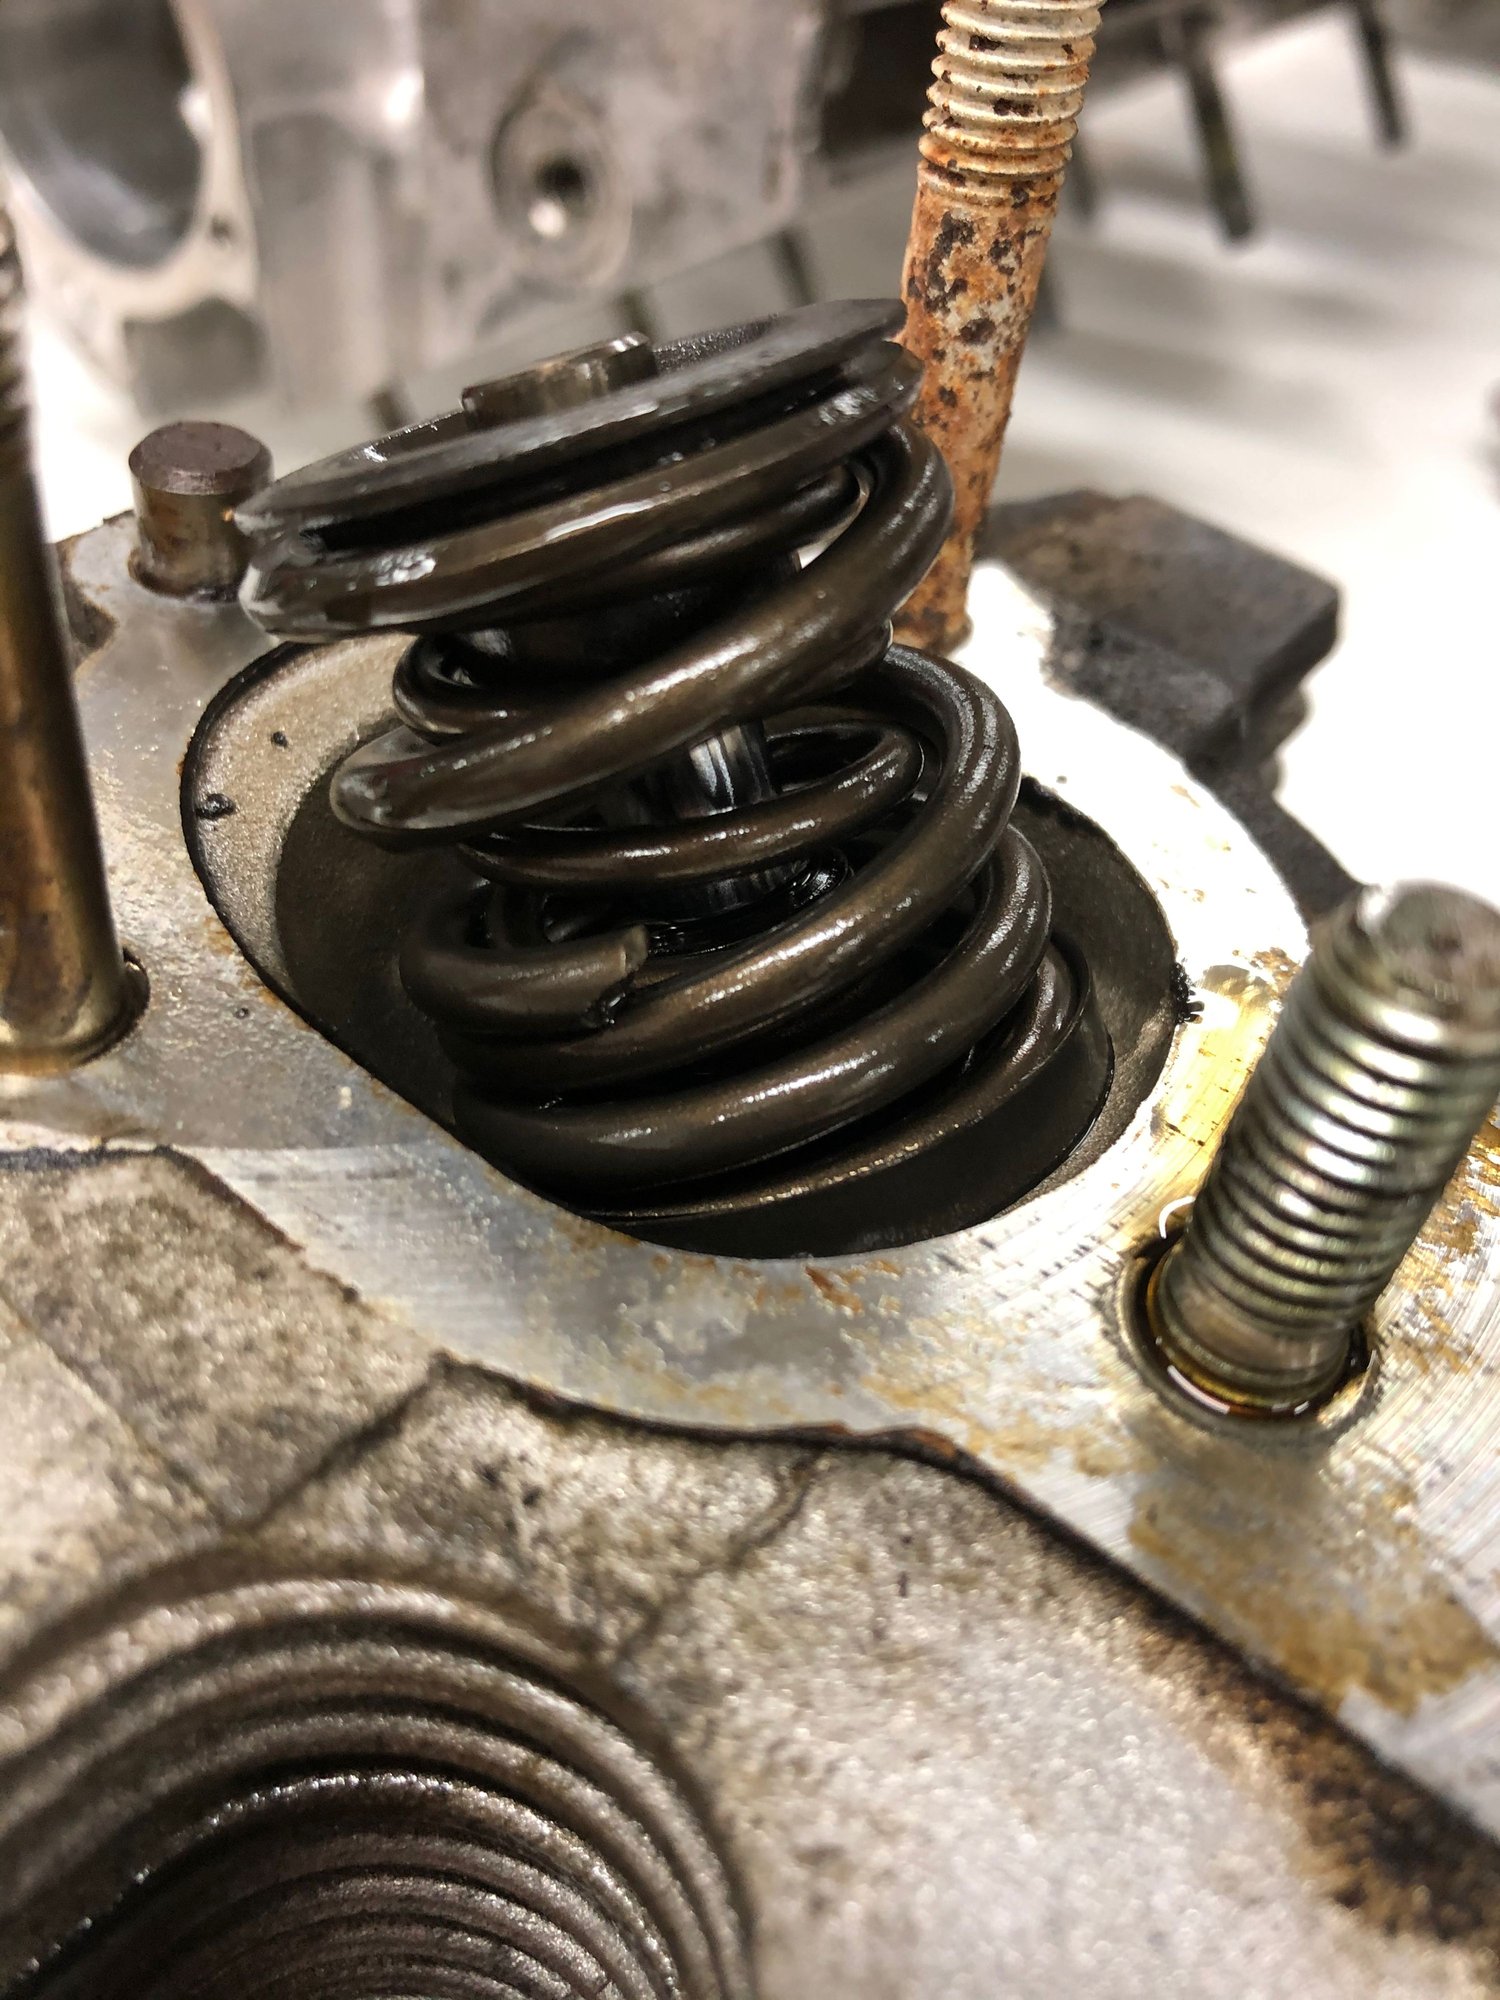
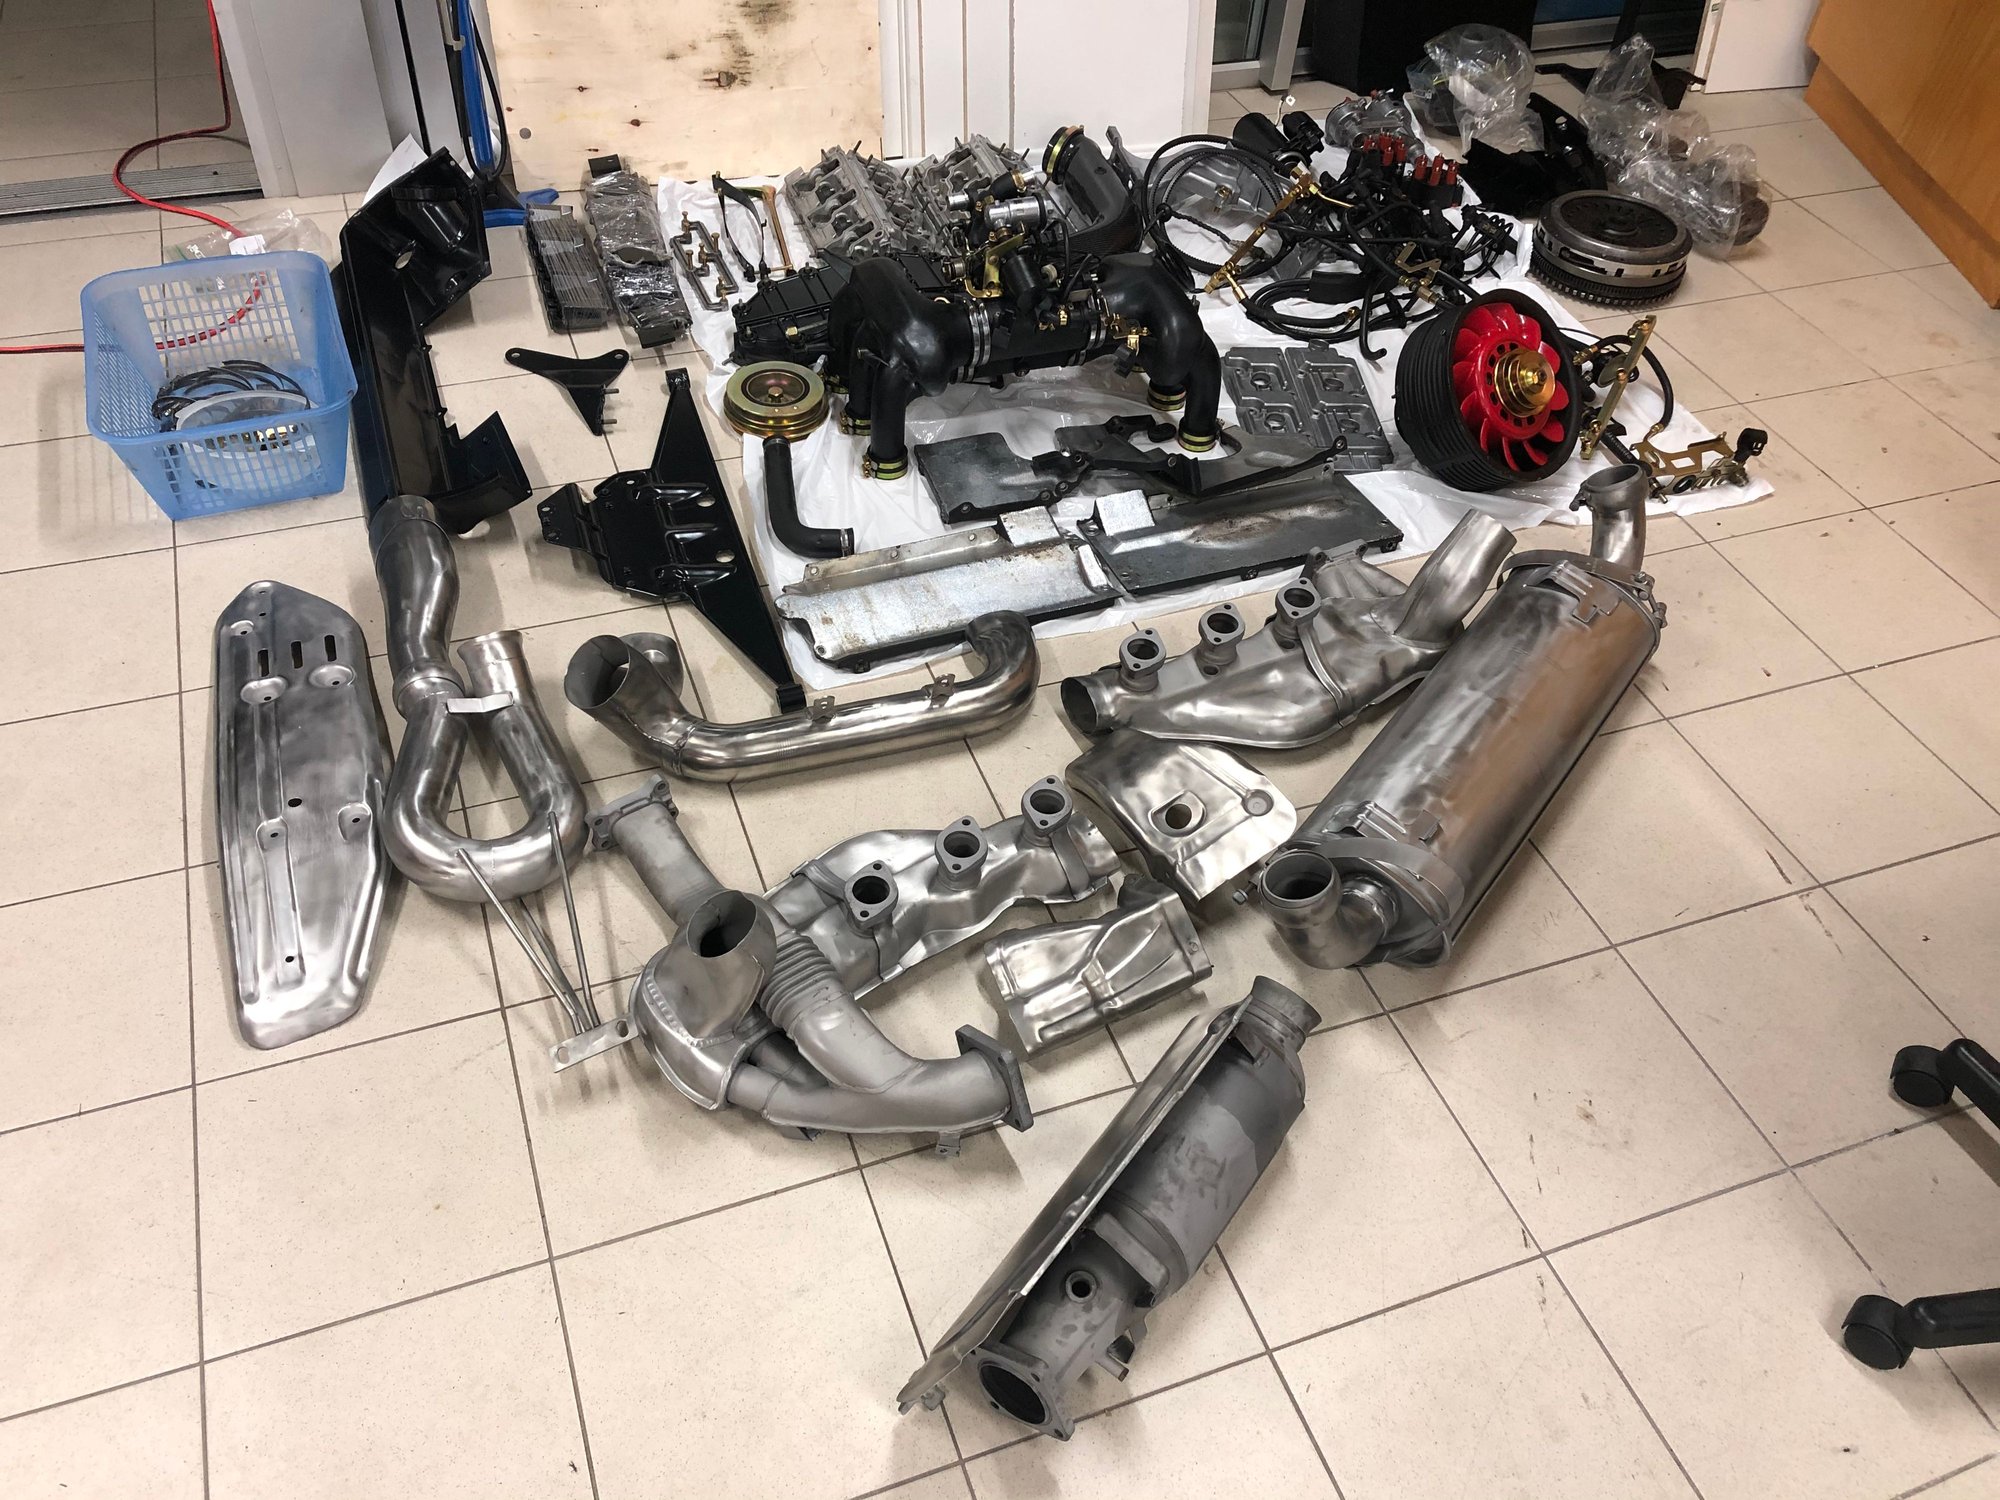
I won't give you a running commentary of the teardown and rebuild (other members have already well documented this) but I have included a number of pictured that I took along the way that may be useful to members. What I found on teardown were 2 cleanly broken outer valve springs that corresponded to the leak down results.
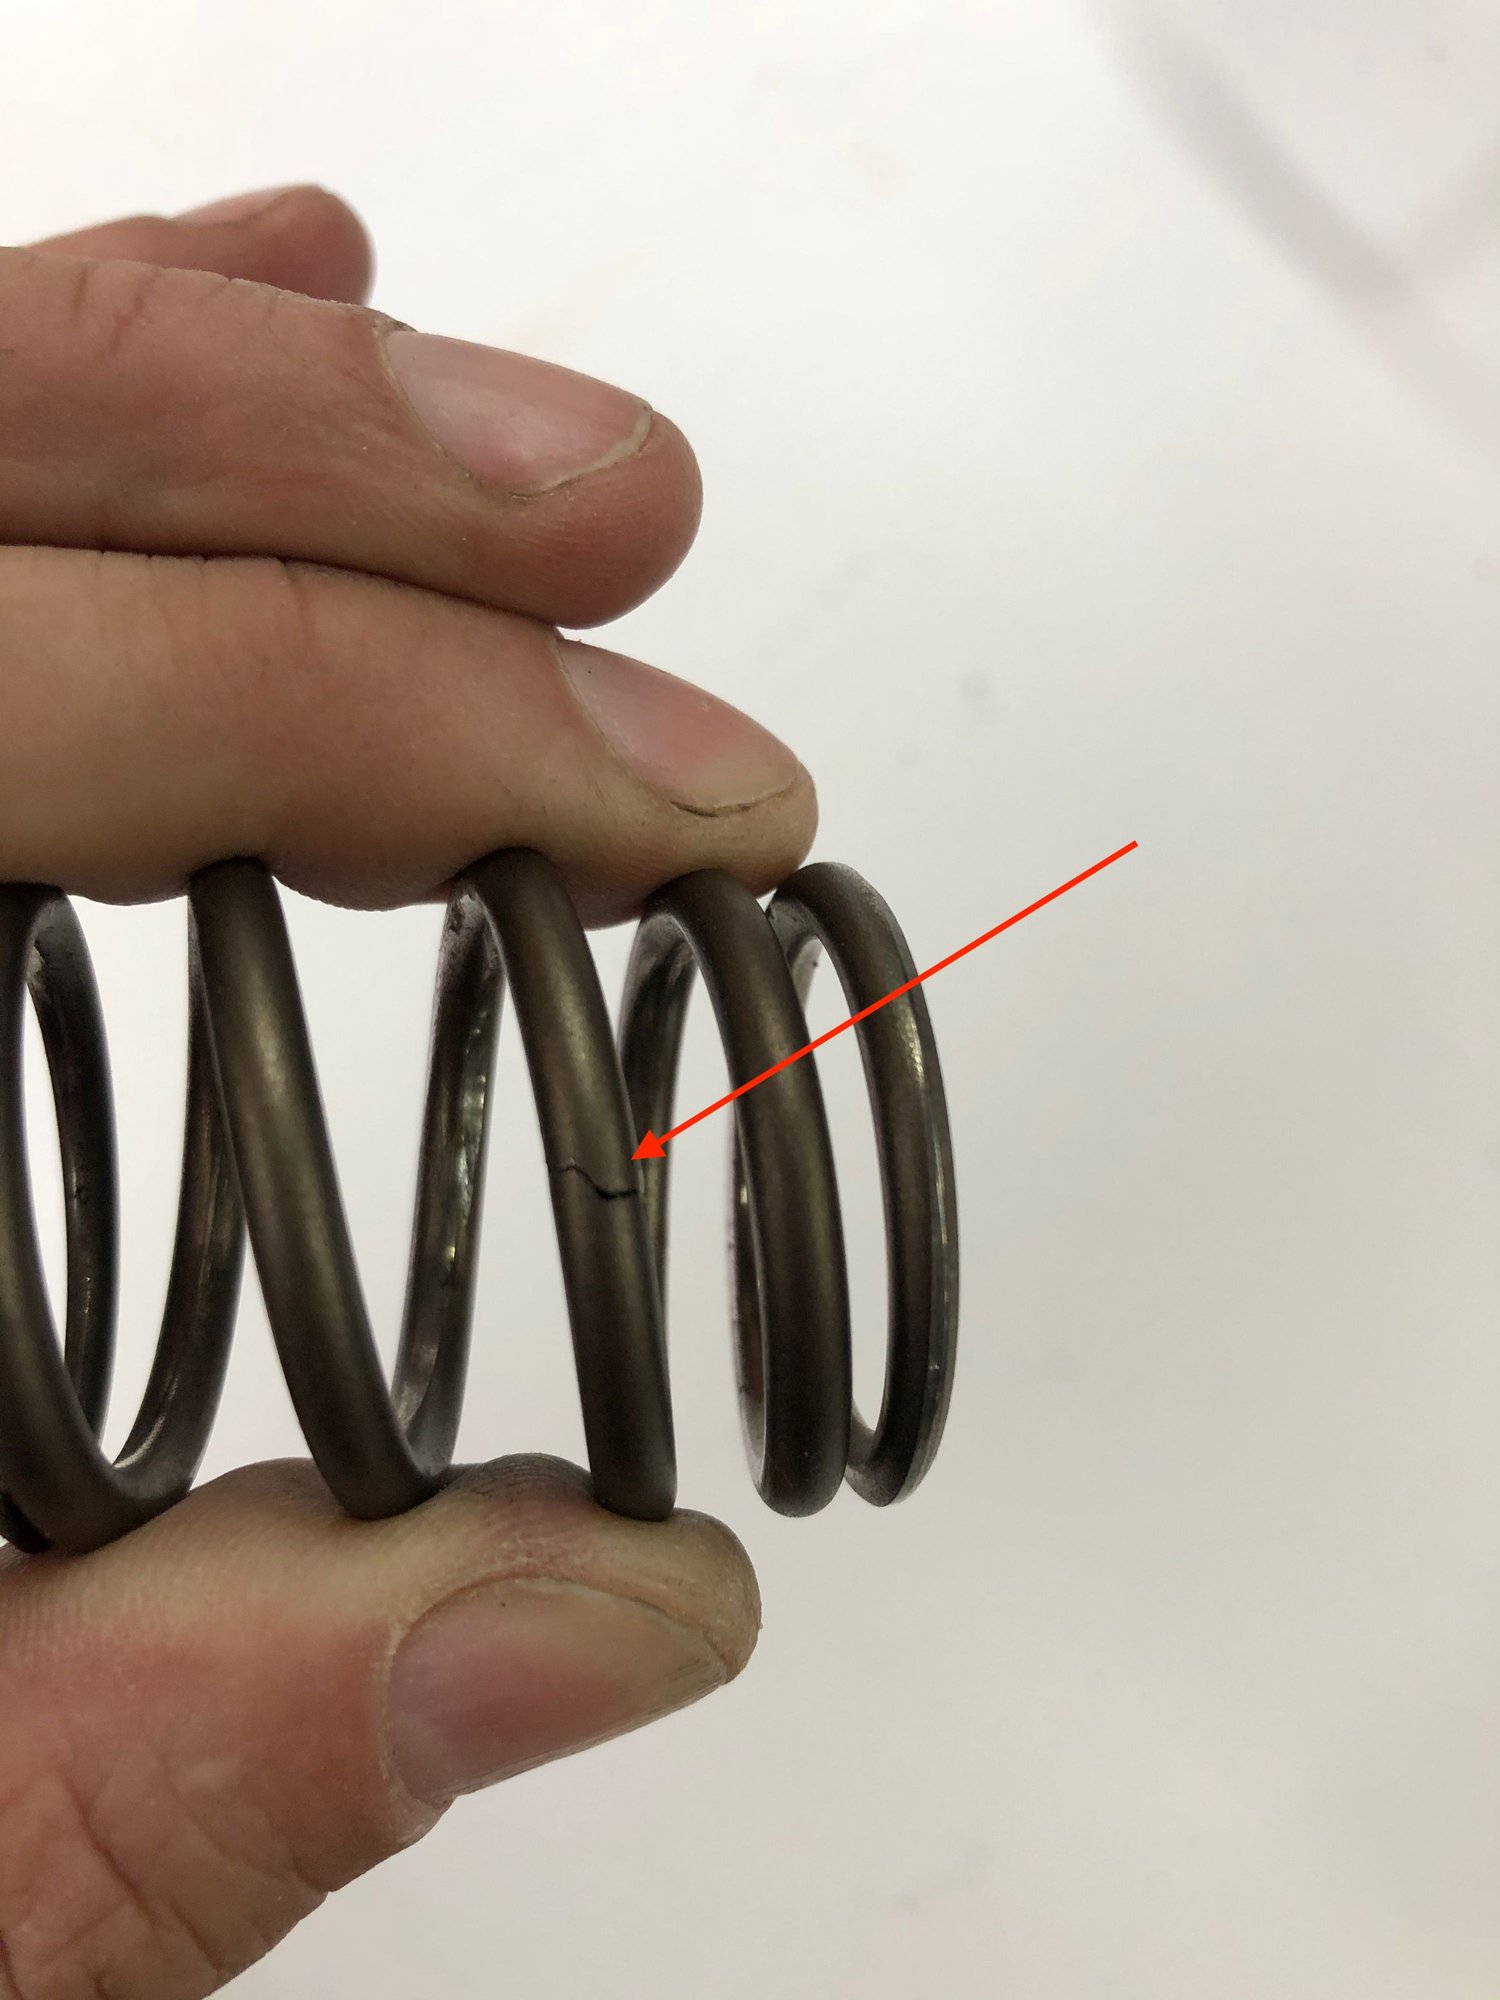
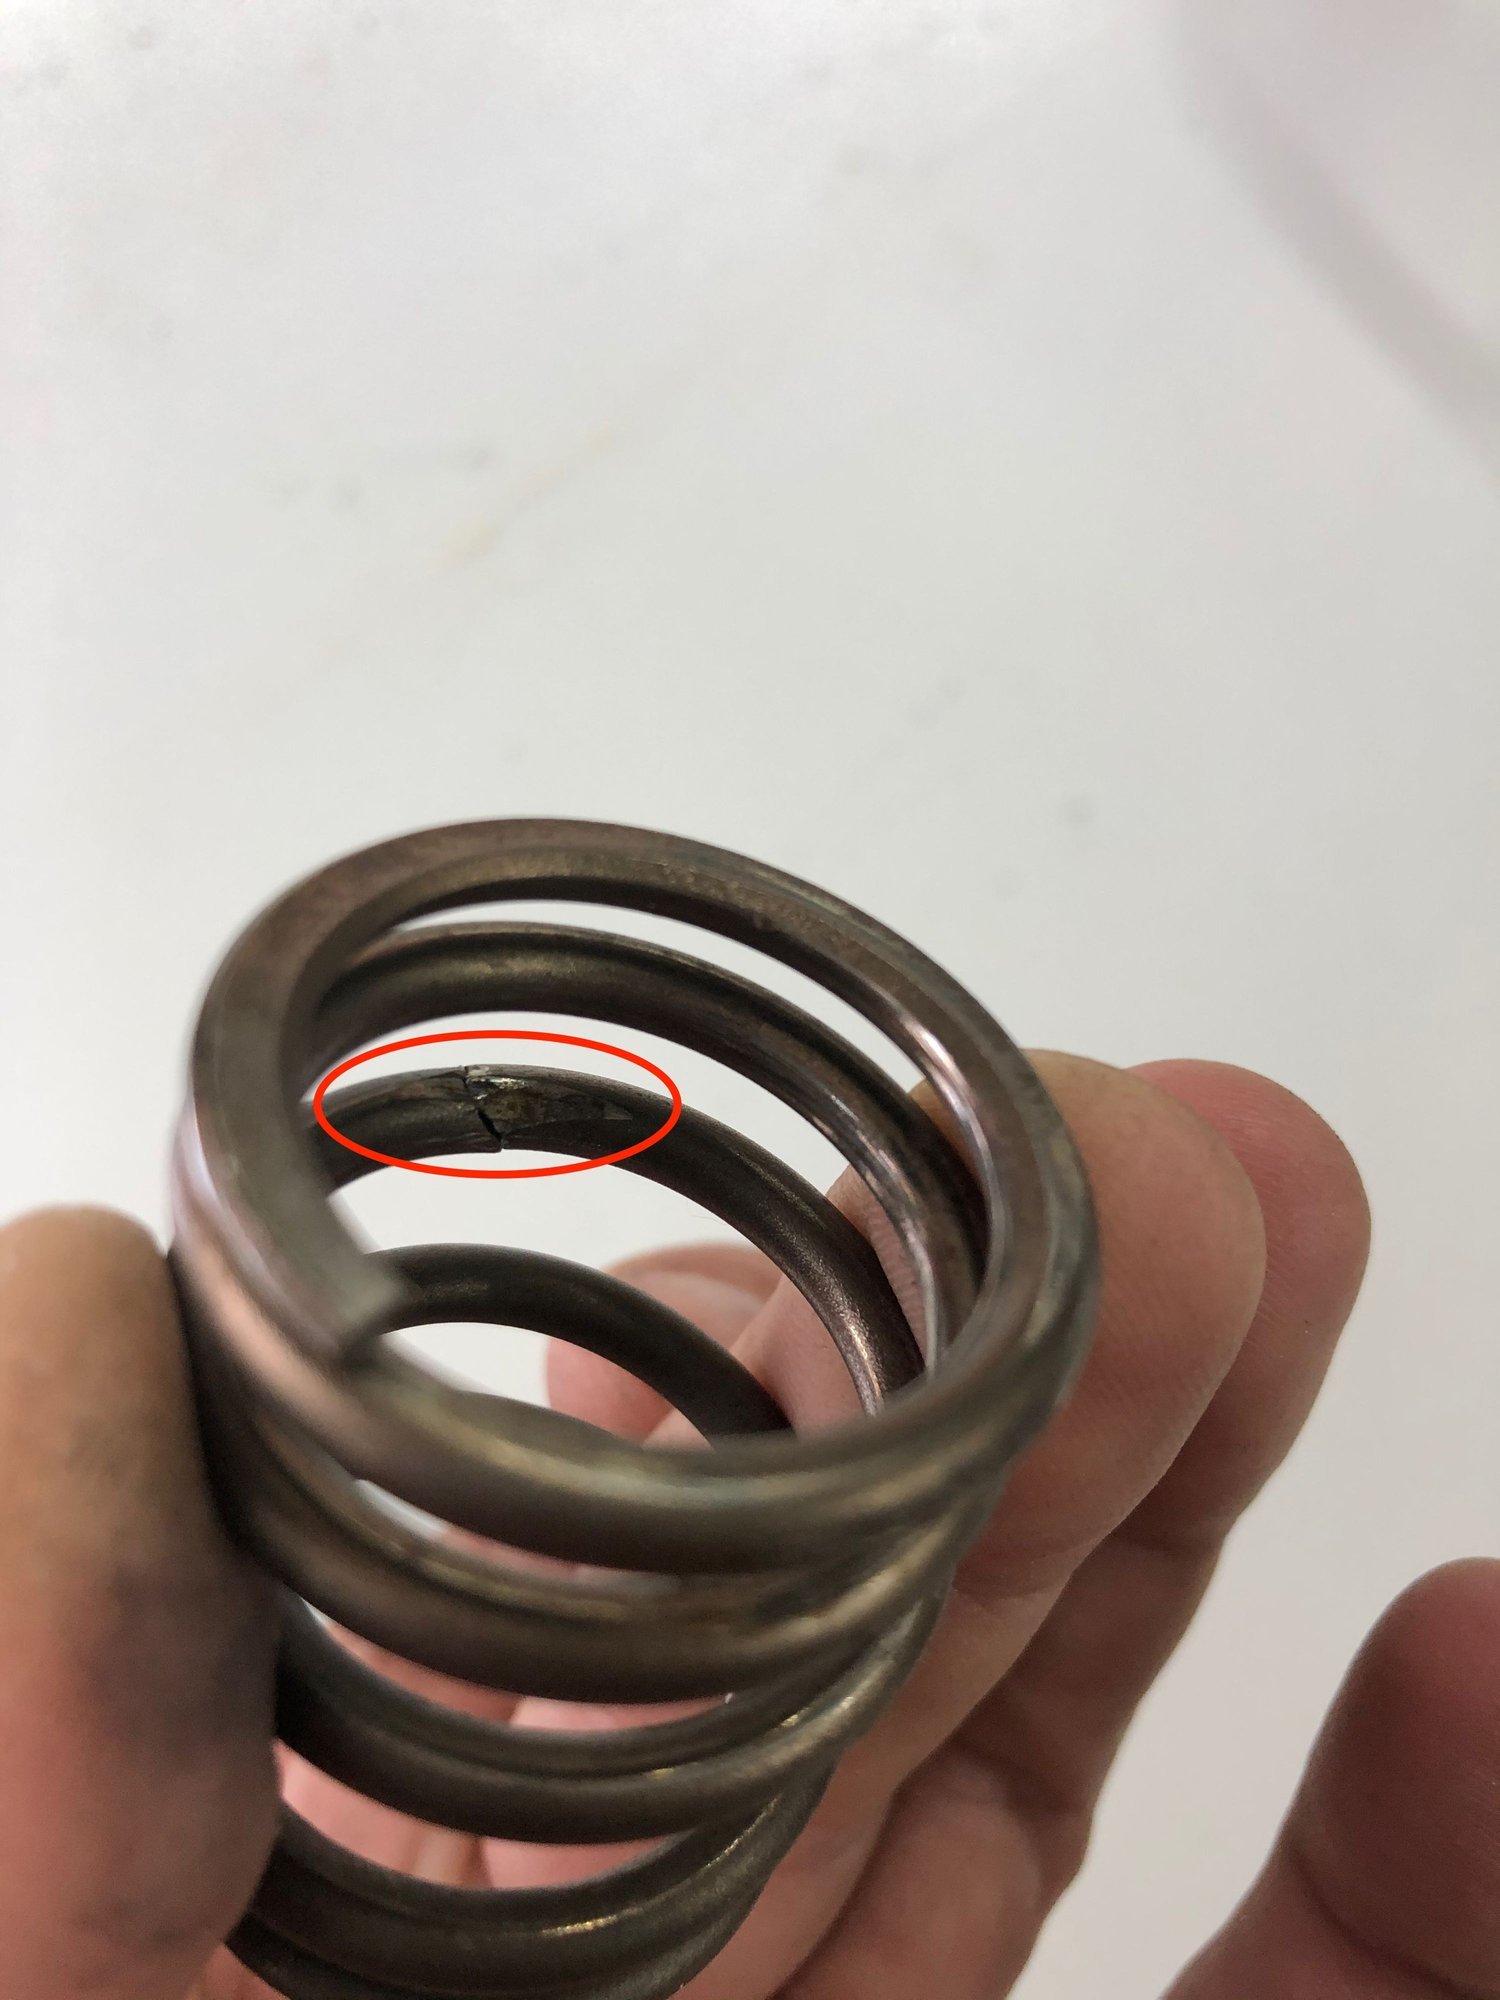
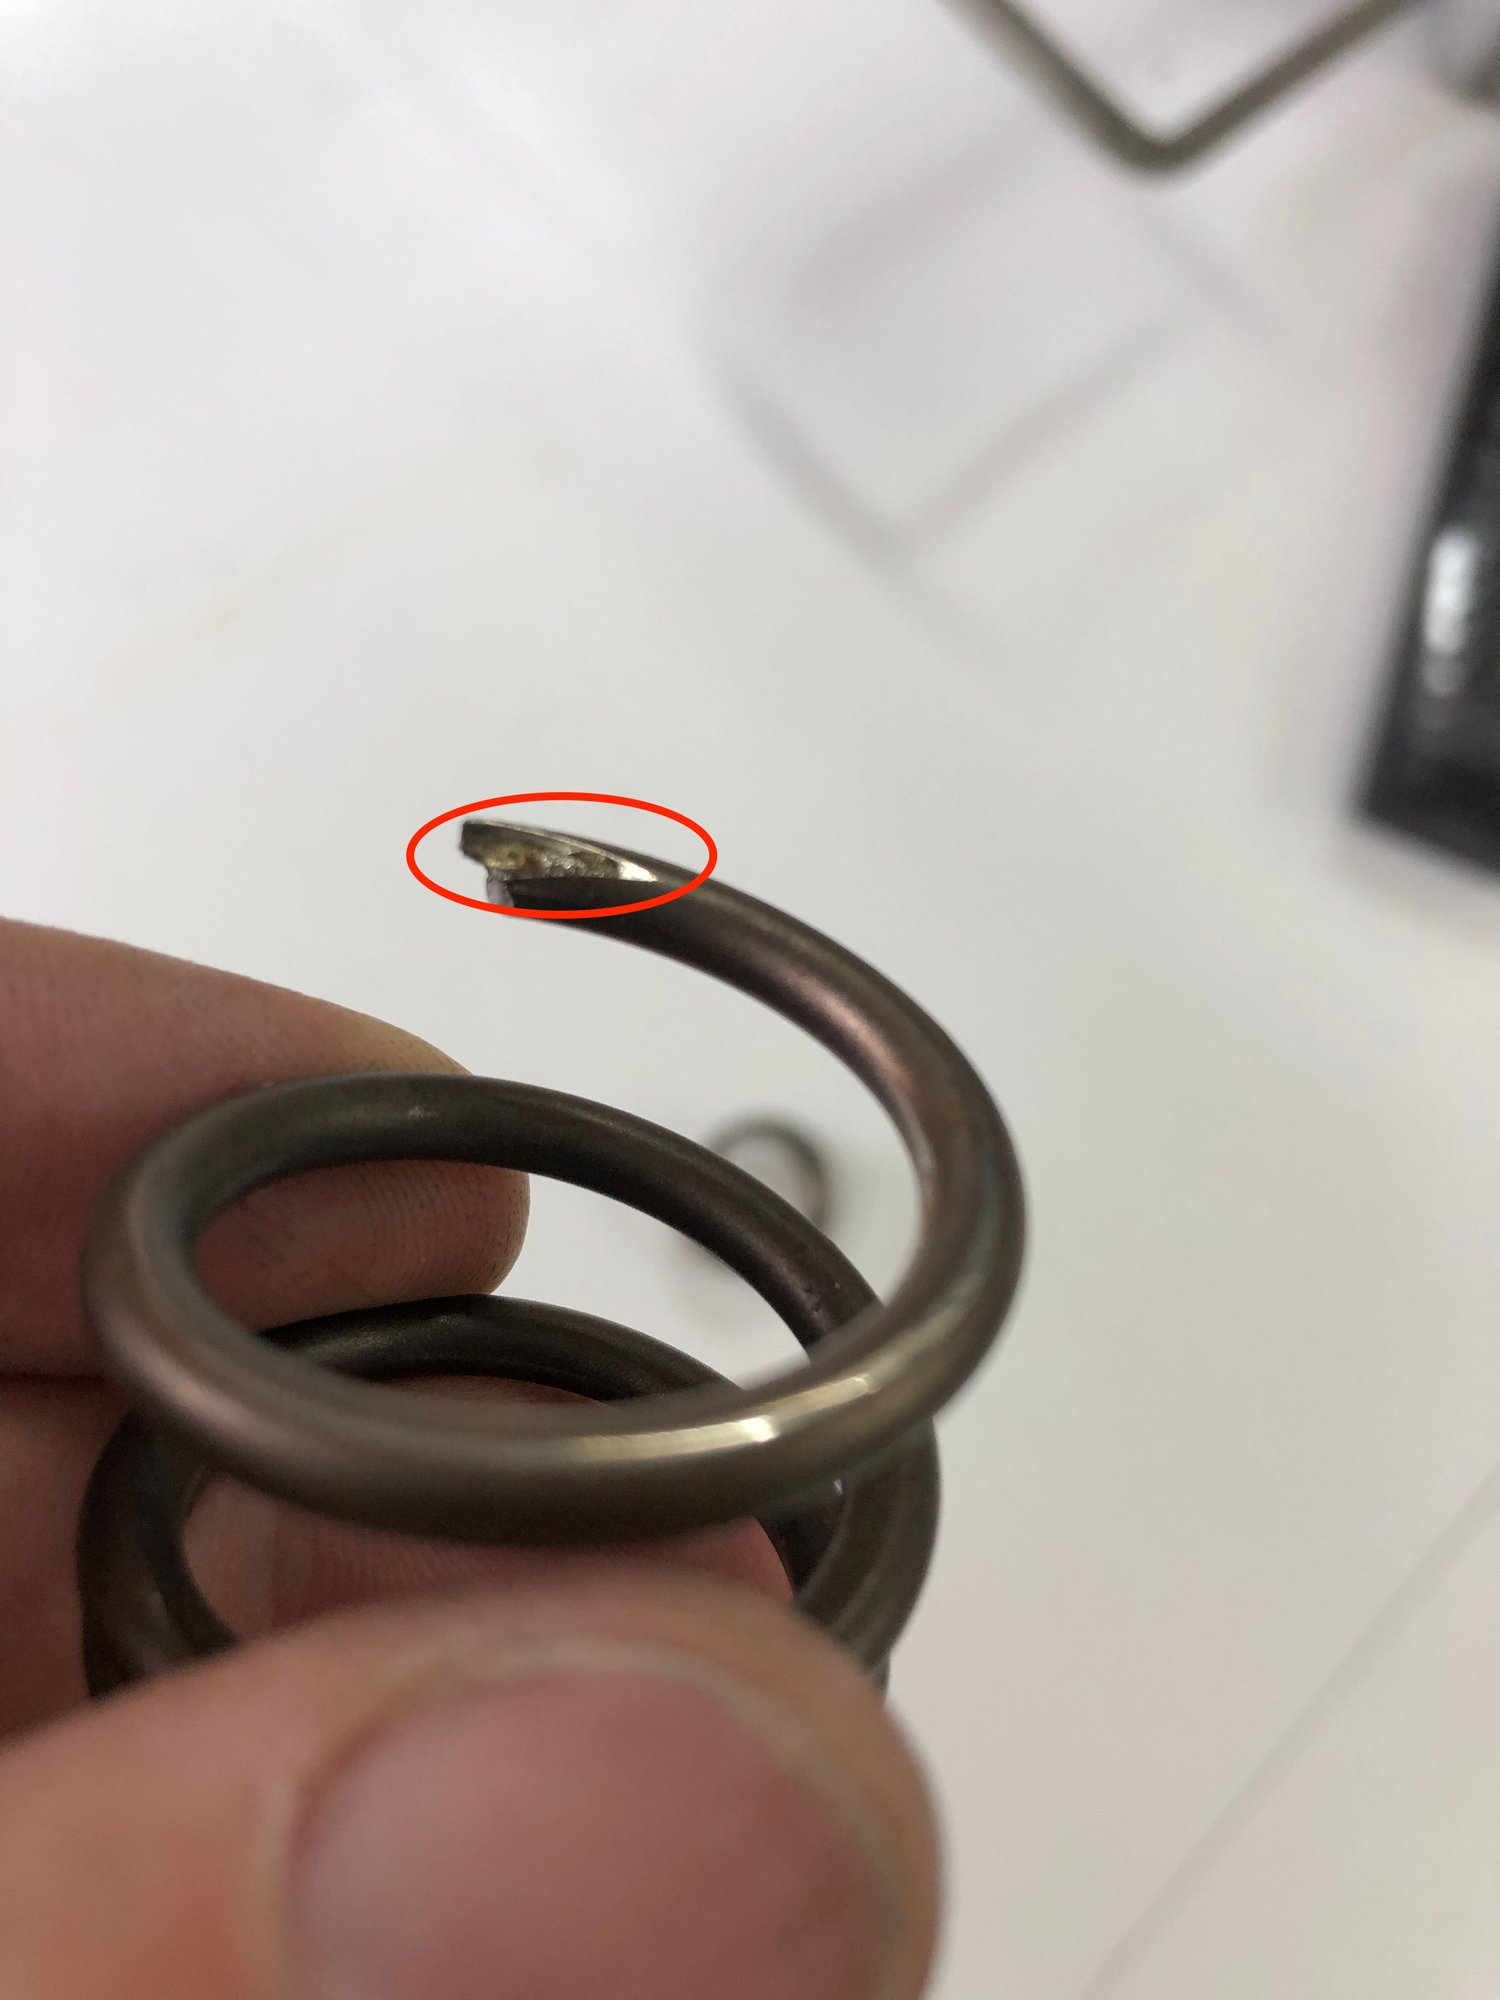
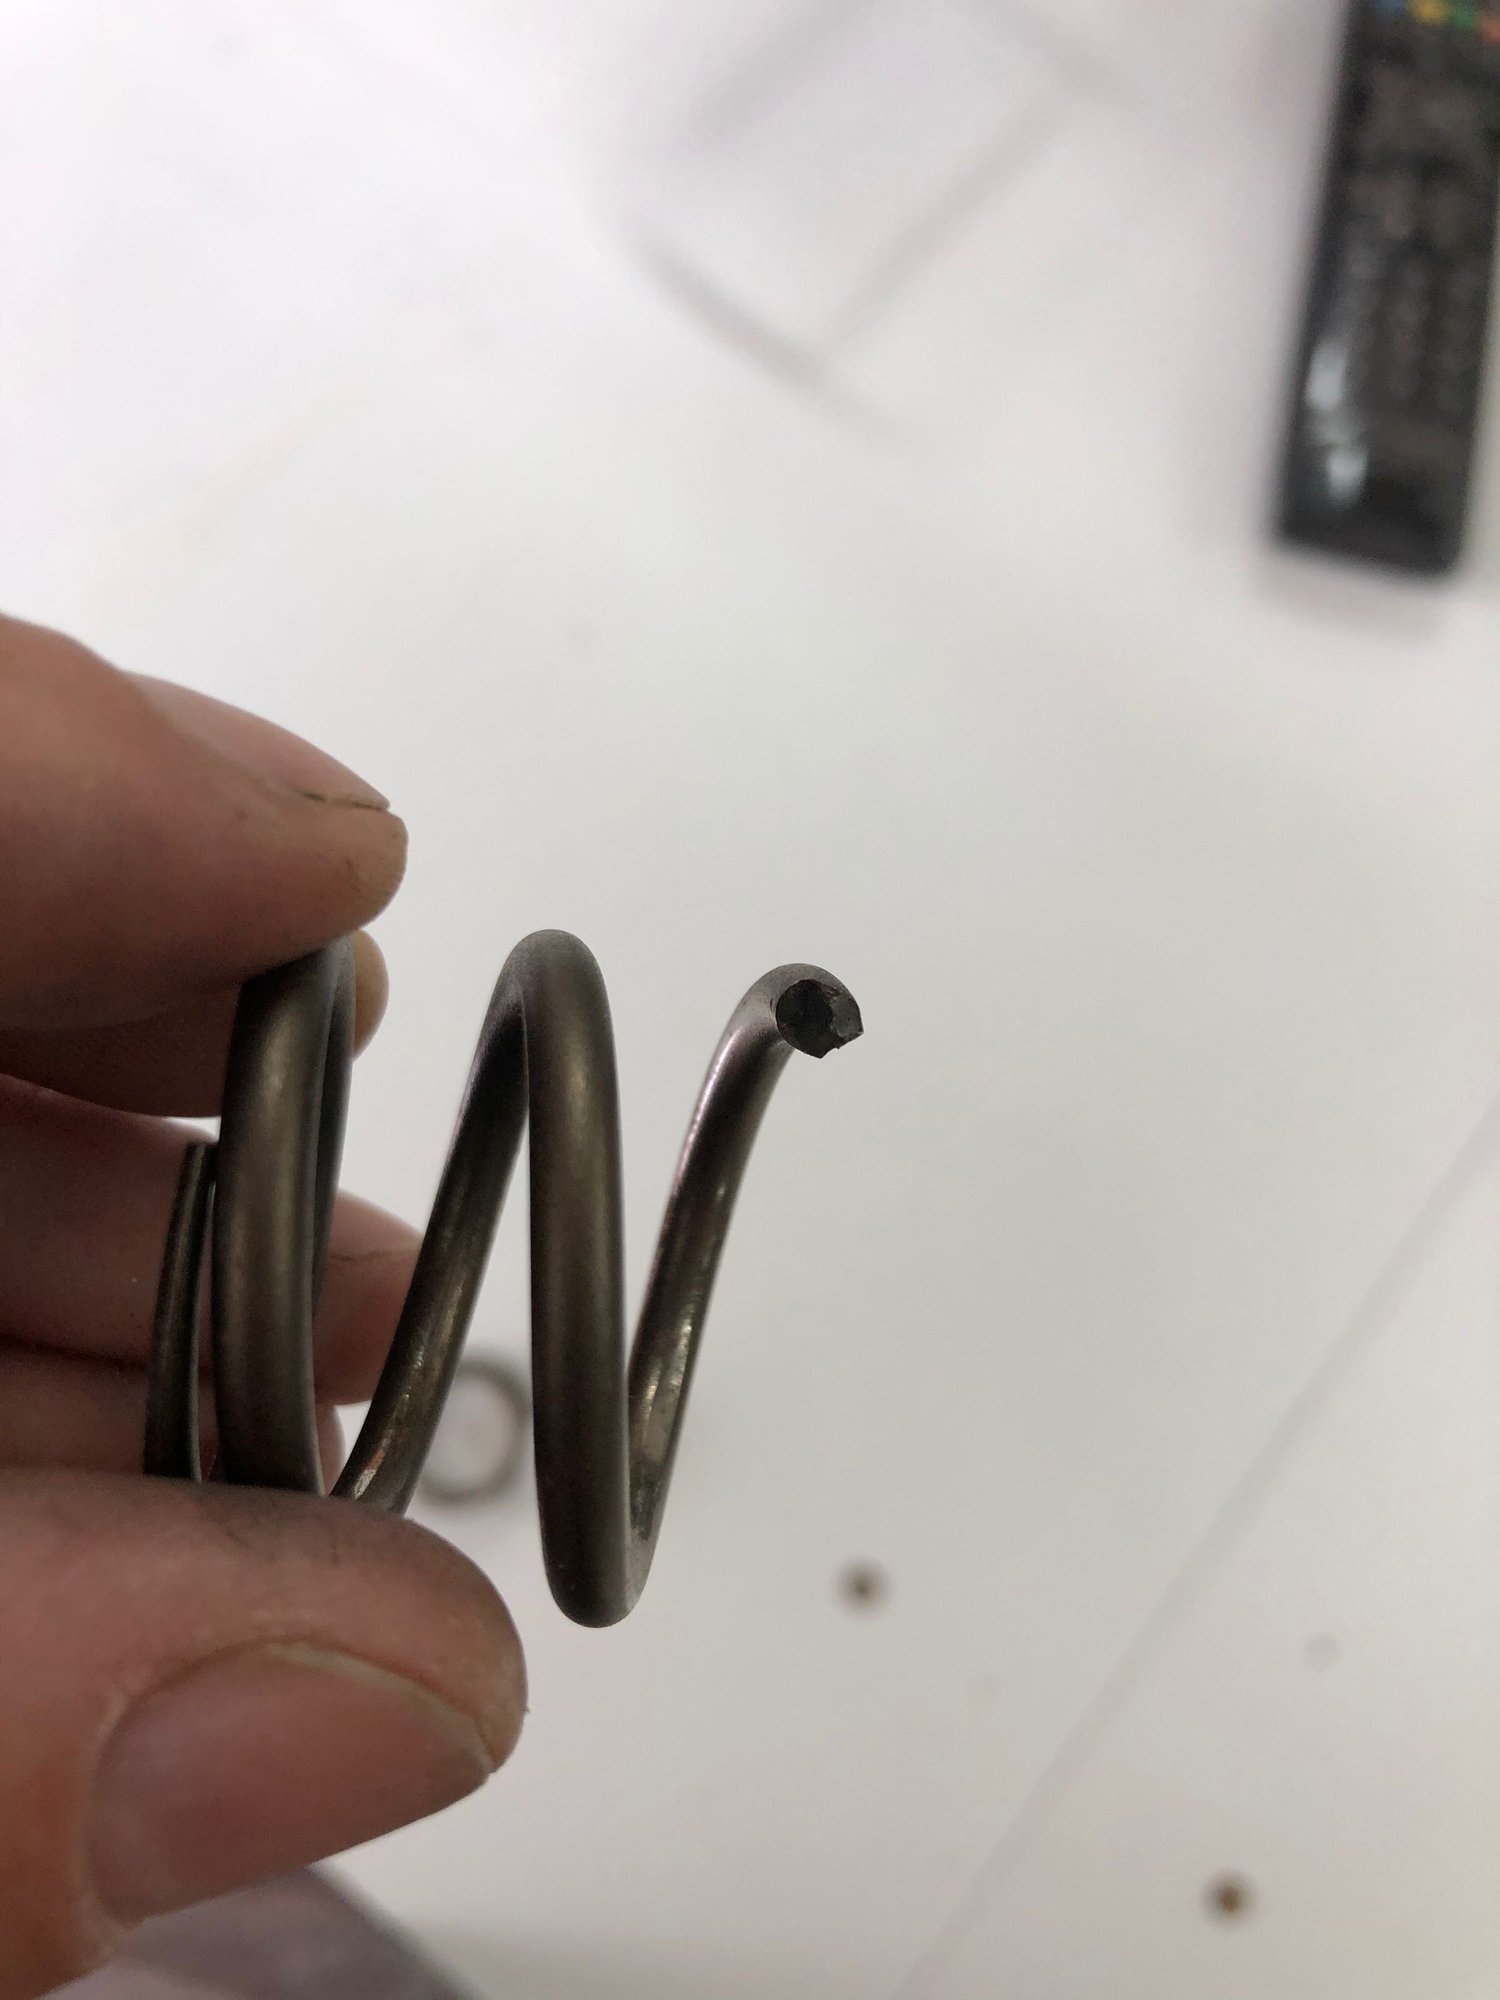
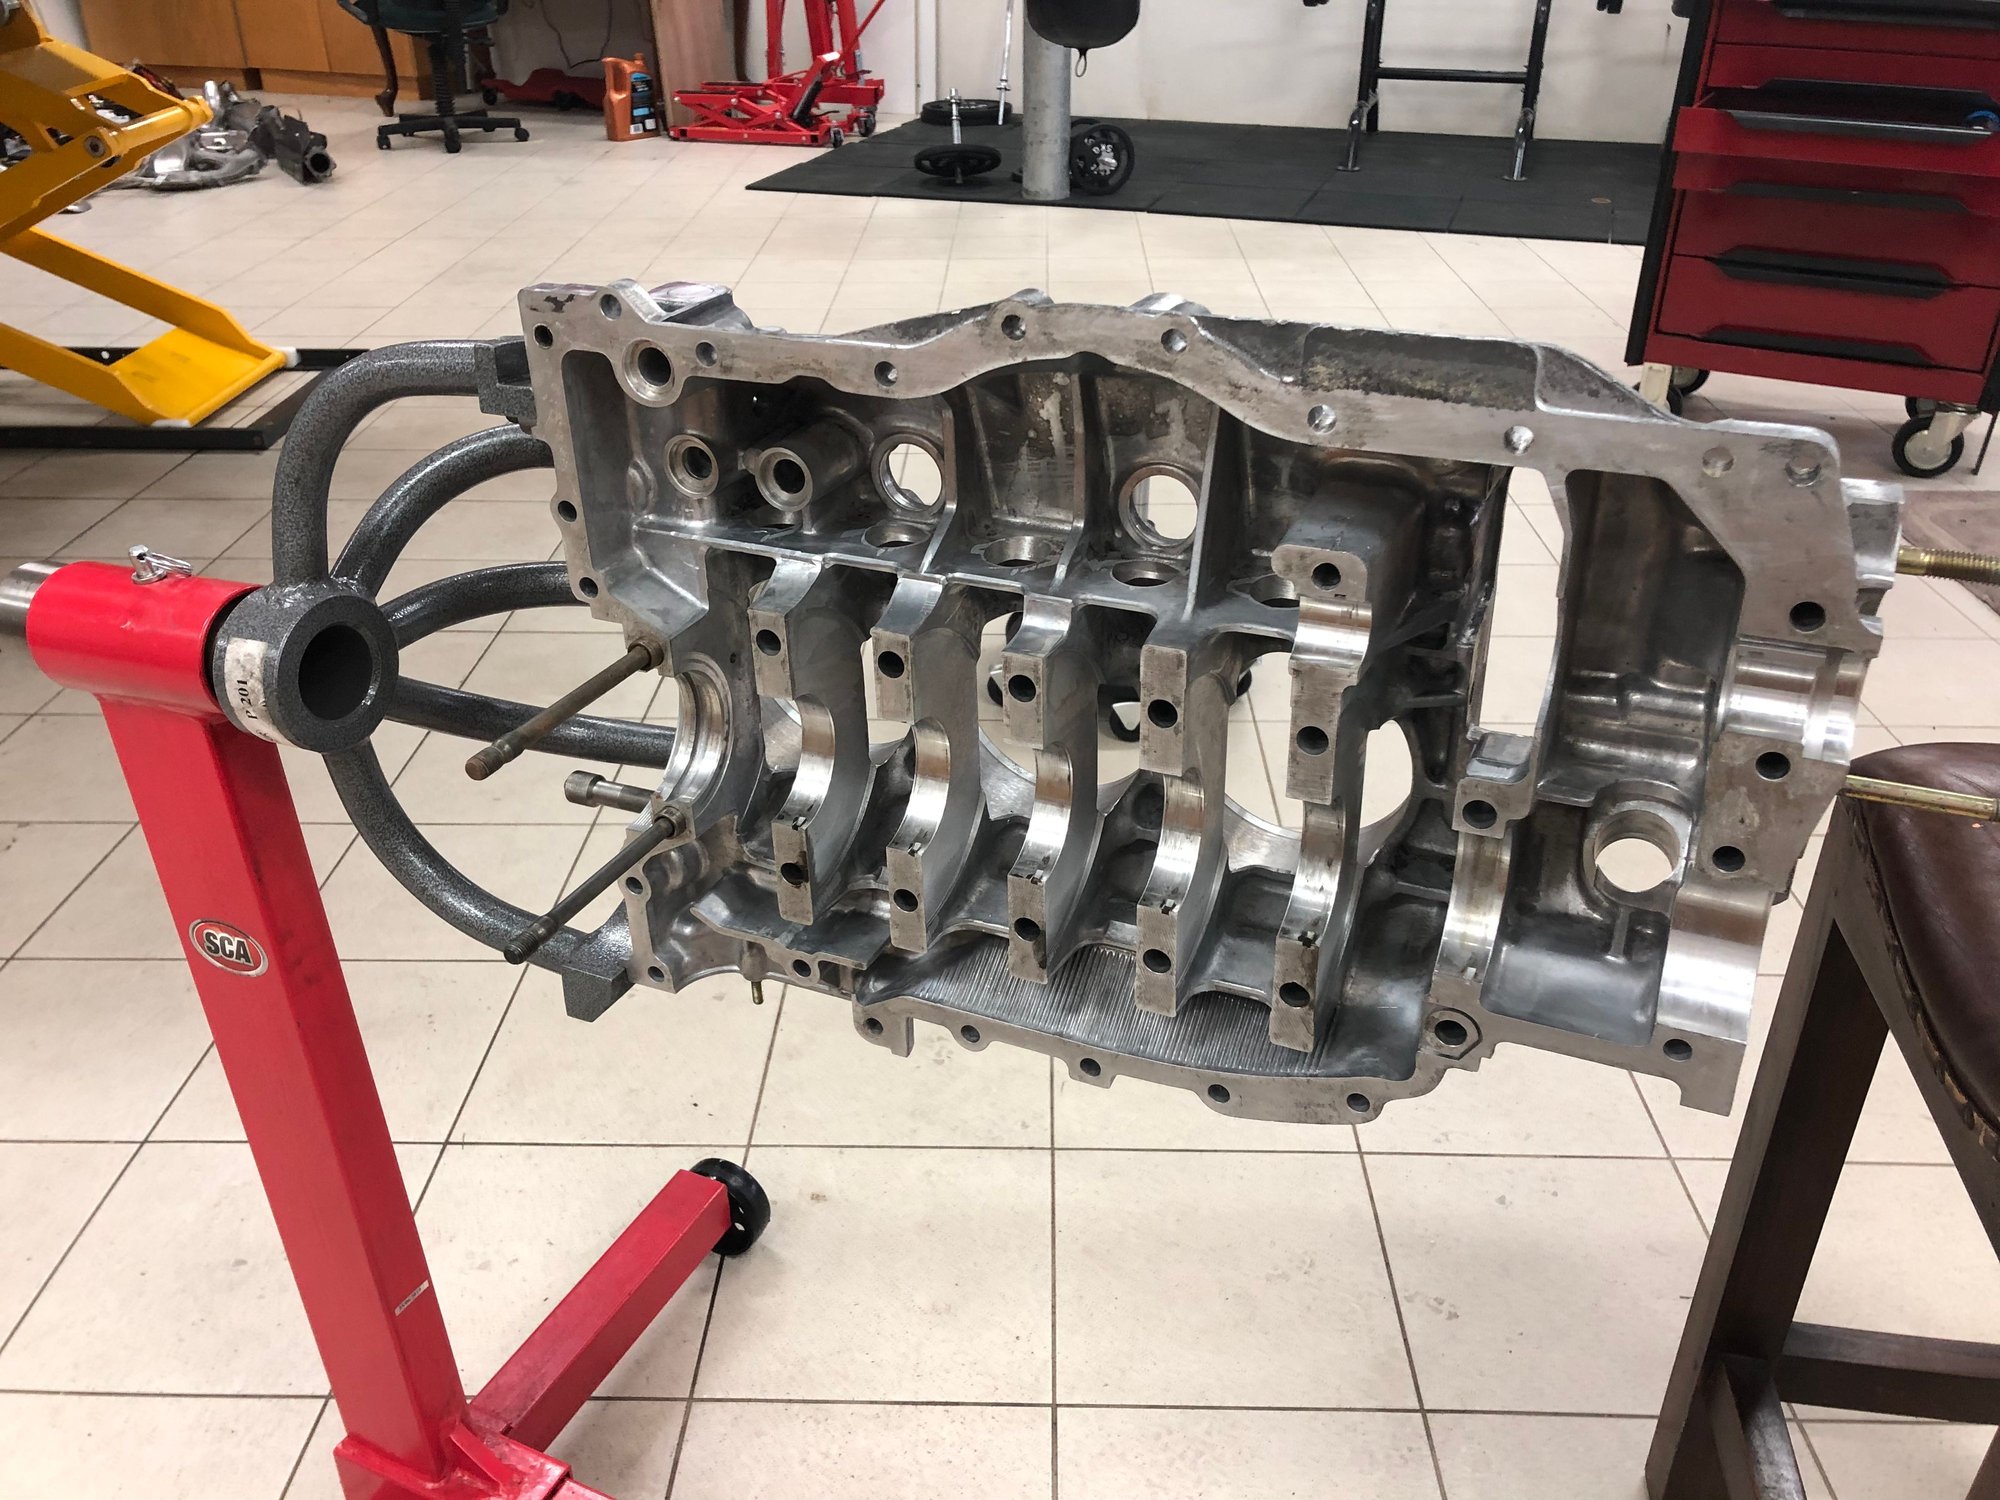
All components looked to be in remarkably good shape. The cranks and cams were assessed and the specialist shop just recommenced a polish. The rod and crank bearing also looked to be in good condition however the intermediate shaft bearing were down to copper. The cylinder rings were all in tact and frustratingly I couldn't find the source of the metal fragments....until I took a real close look at the broken springs. There was a small area that came off both springs when they broke and these were about the same size as the fragments I found on the sump plug.
Not very easy to see here This one shows it best. As you can see here, it's a fairly thin sliver that came off...and this was almost identical on the other spring.
With the rebuild I decided to make sure I did it for the long haul - I really have no intentions of going into that crank case ever again. Parts replaced include:
Valves, springs, retainers etc.
Pistons, cylinders, rings.
Rod bolts
Head studs (removing these was a PITA)
All seals
All bearings
All consumable nuts/bolts
Chains, ramps
Oil pressure, temp and other sensors
Distributer rebuild
Power steering pump rebuild
All oil + breather pipes
Engine bay sound pad
Rear (and front) coil overs
Clutch fork and pin/bearings (the clutch was in good condition having been replace about 5,000km ago)
I also had the engine tin powder coated and re-plated all the bits that were originally plated.
Here are some pics along the way....
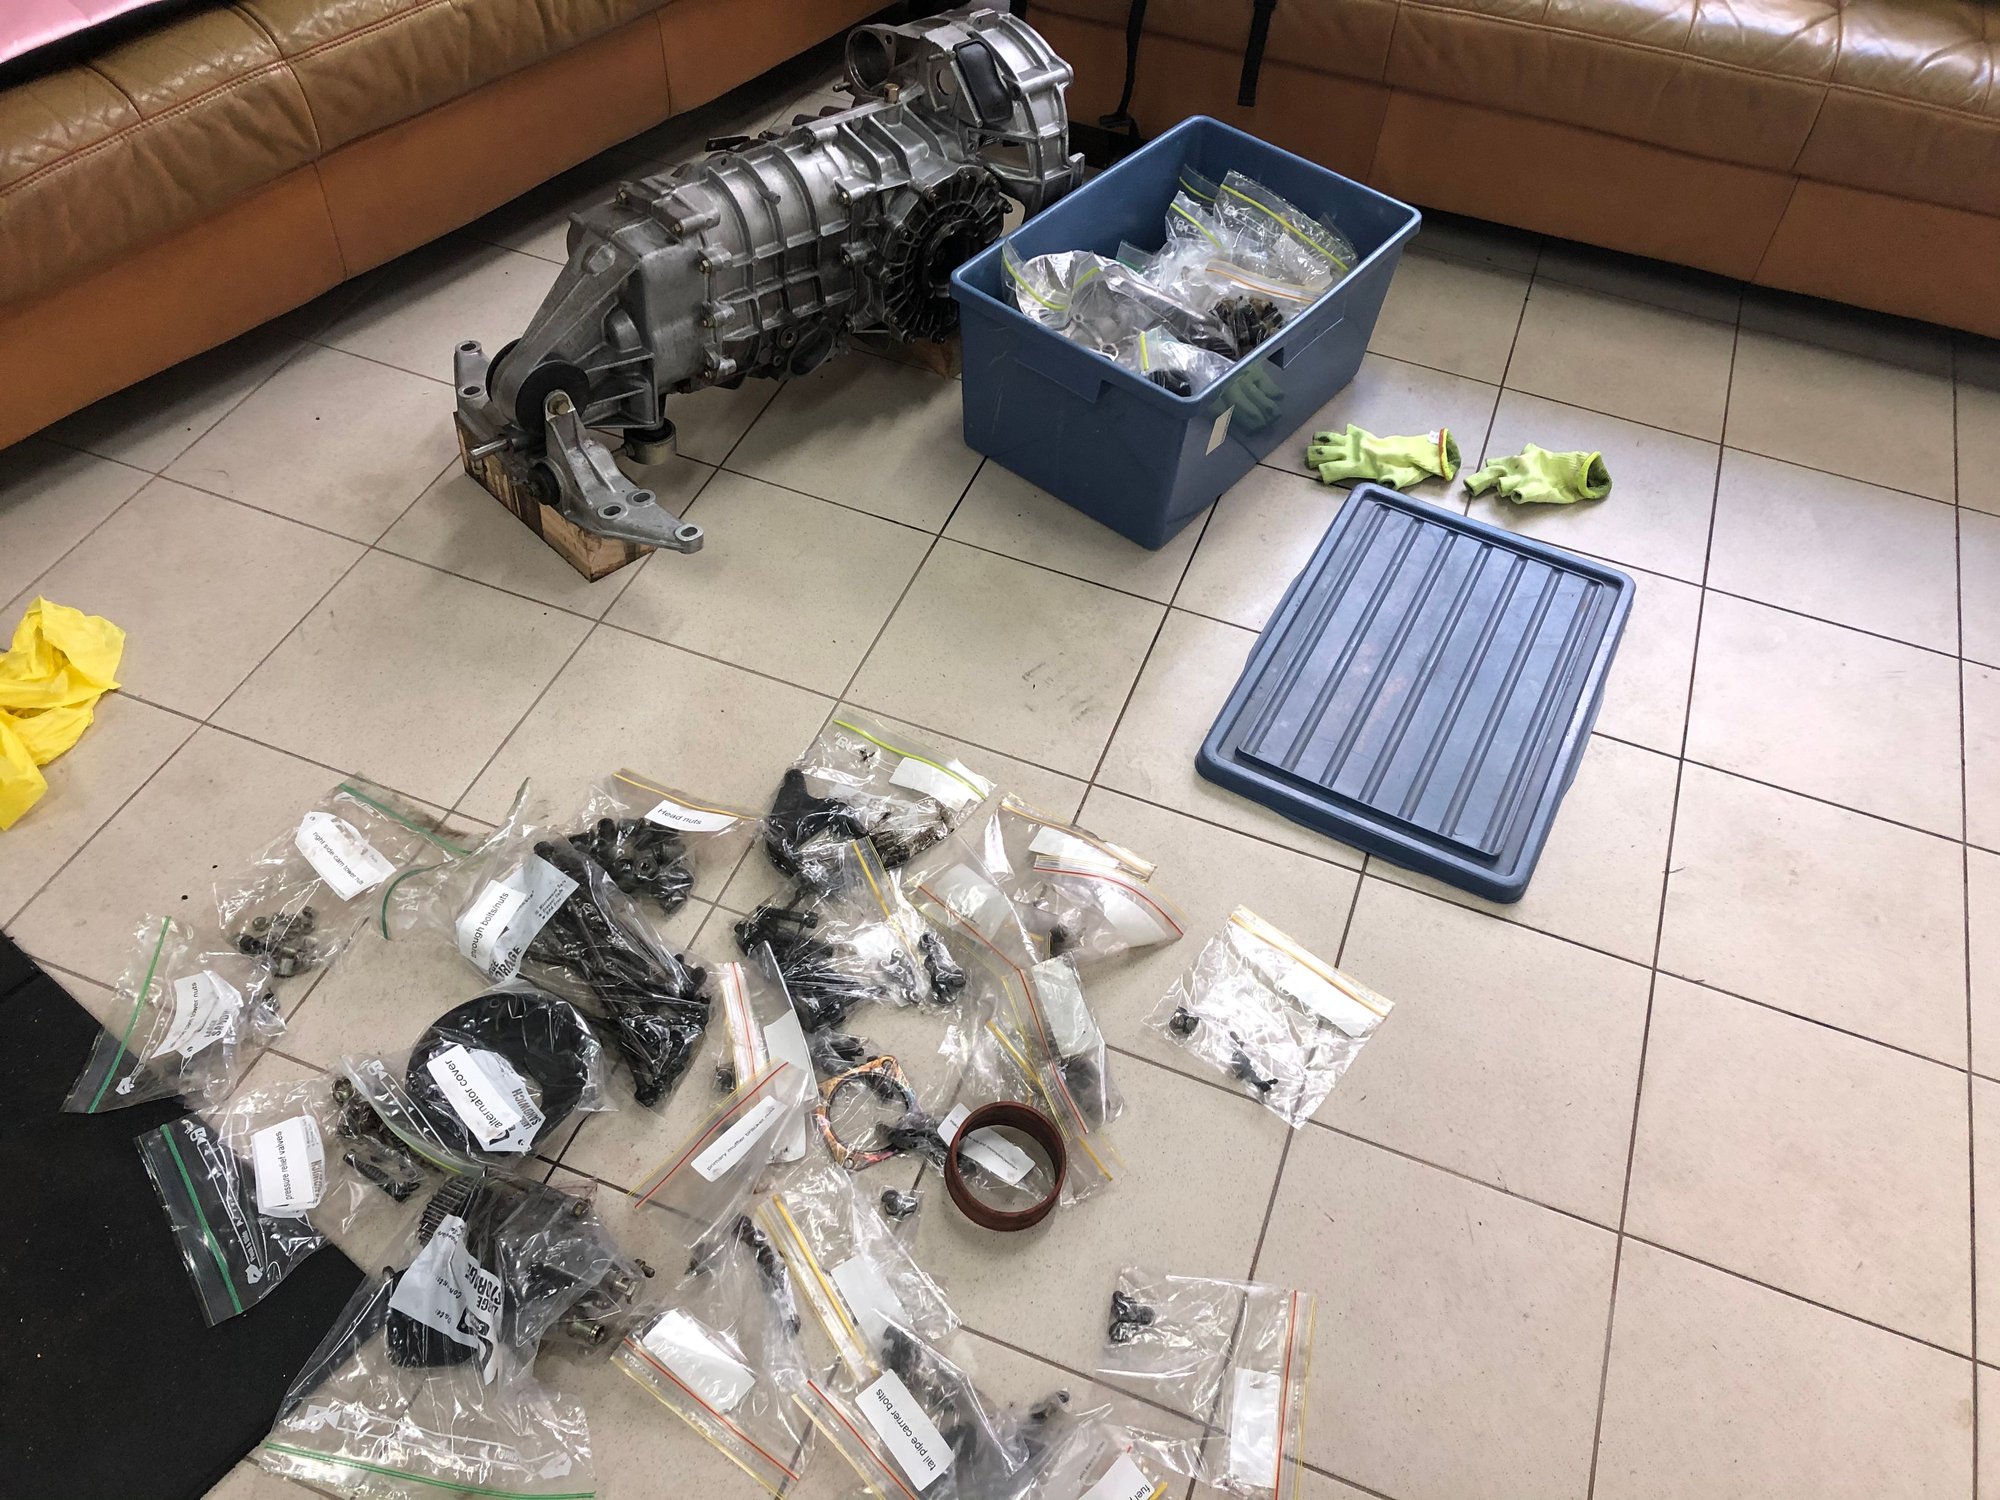
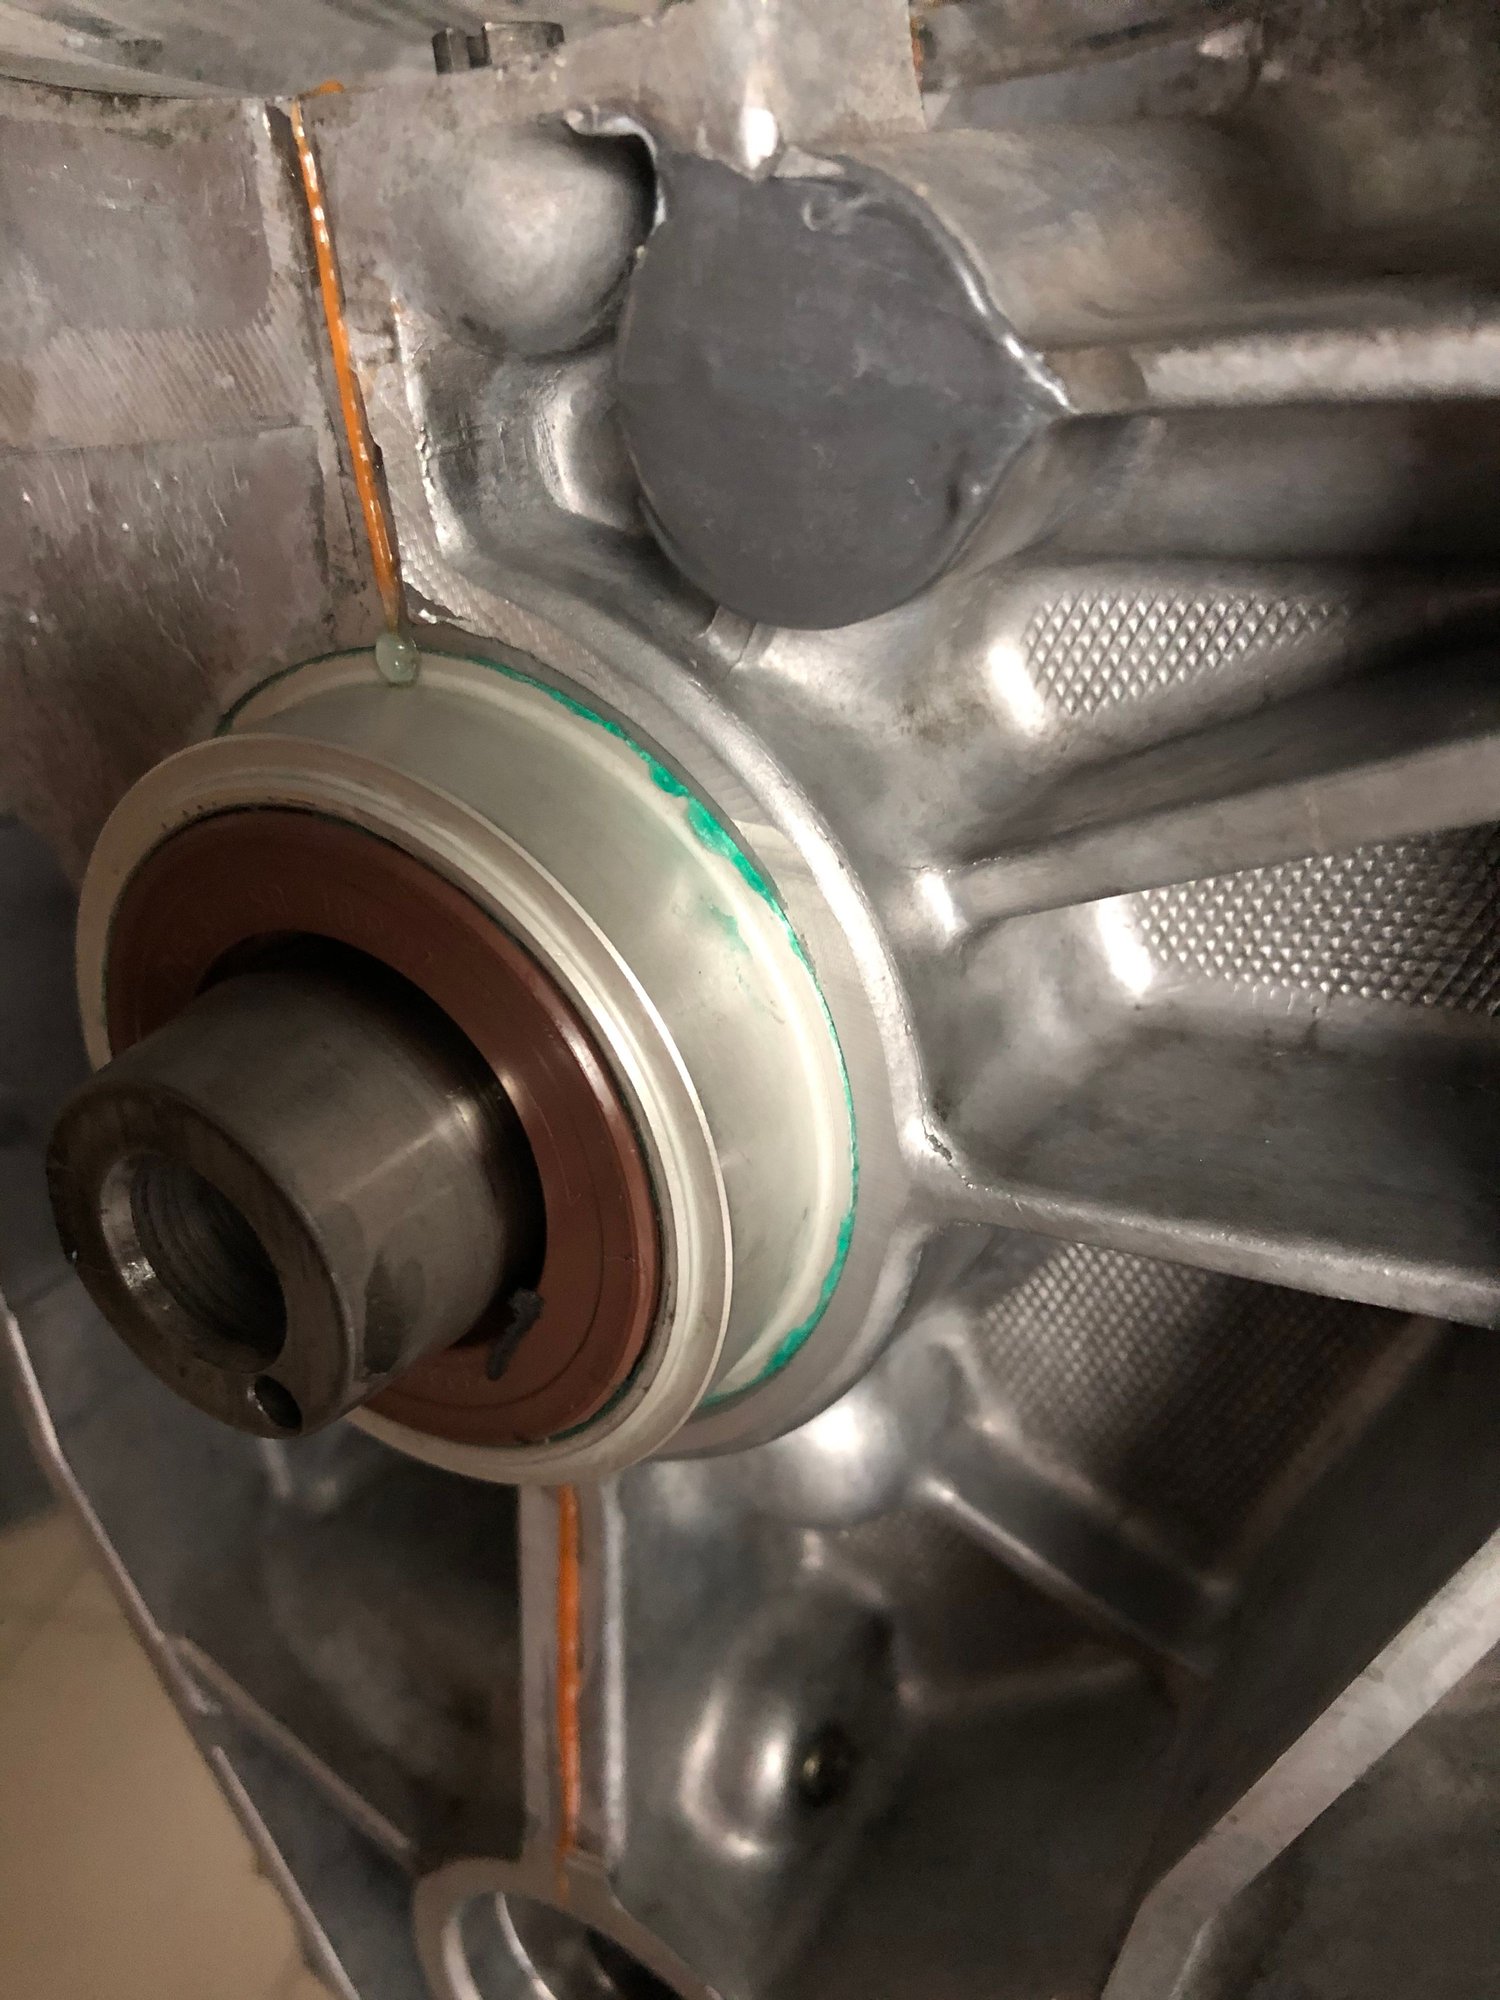
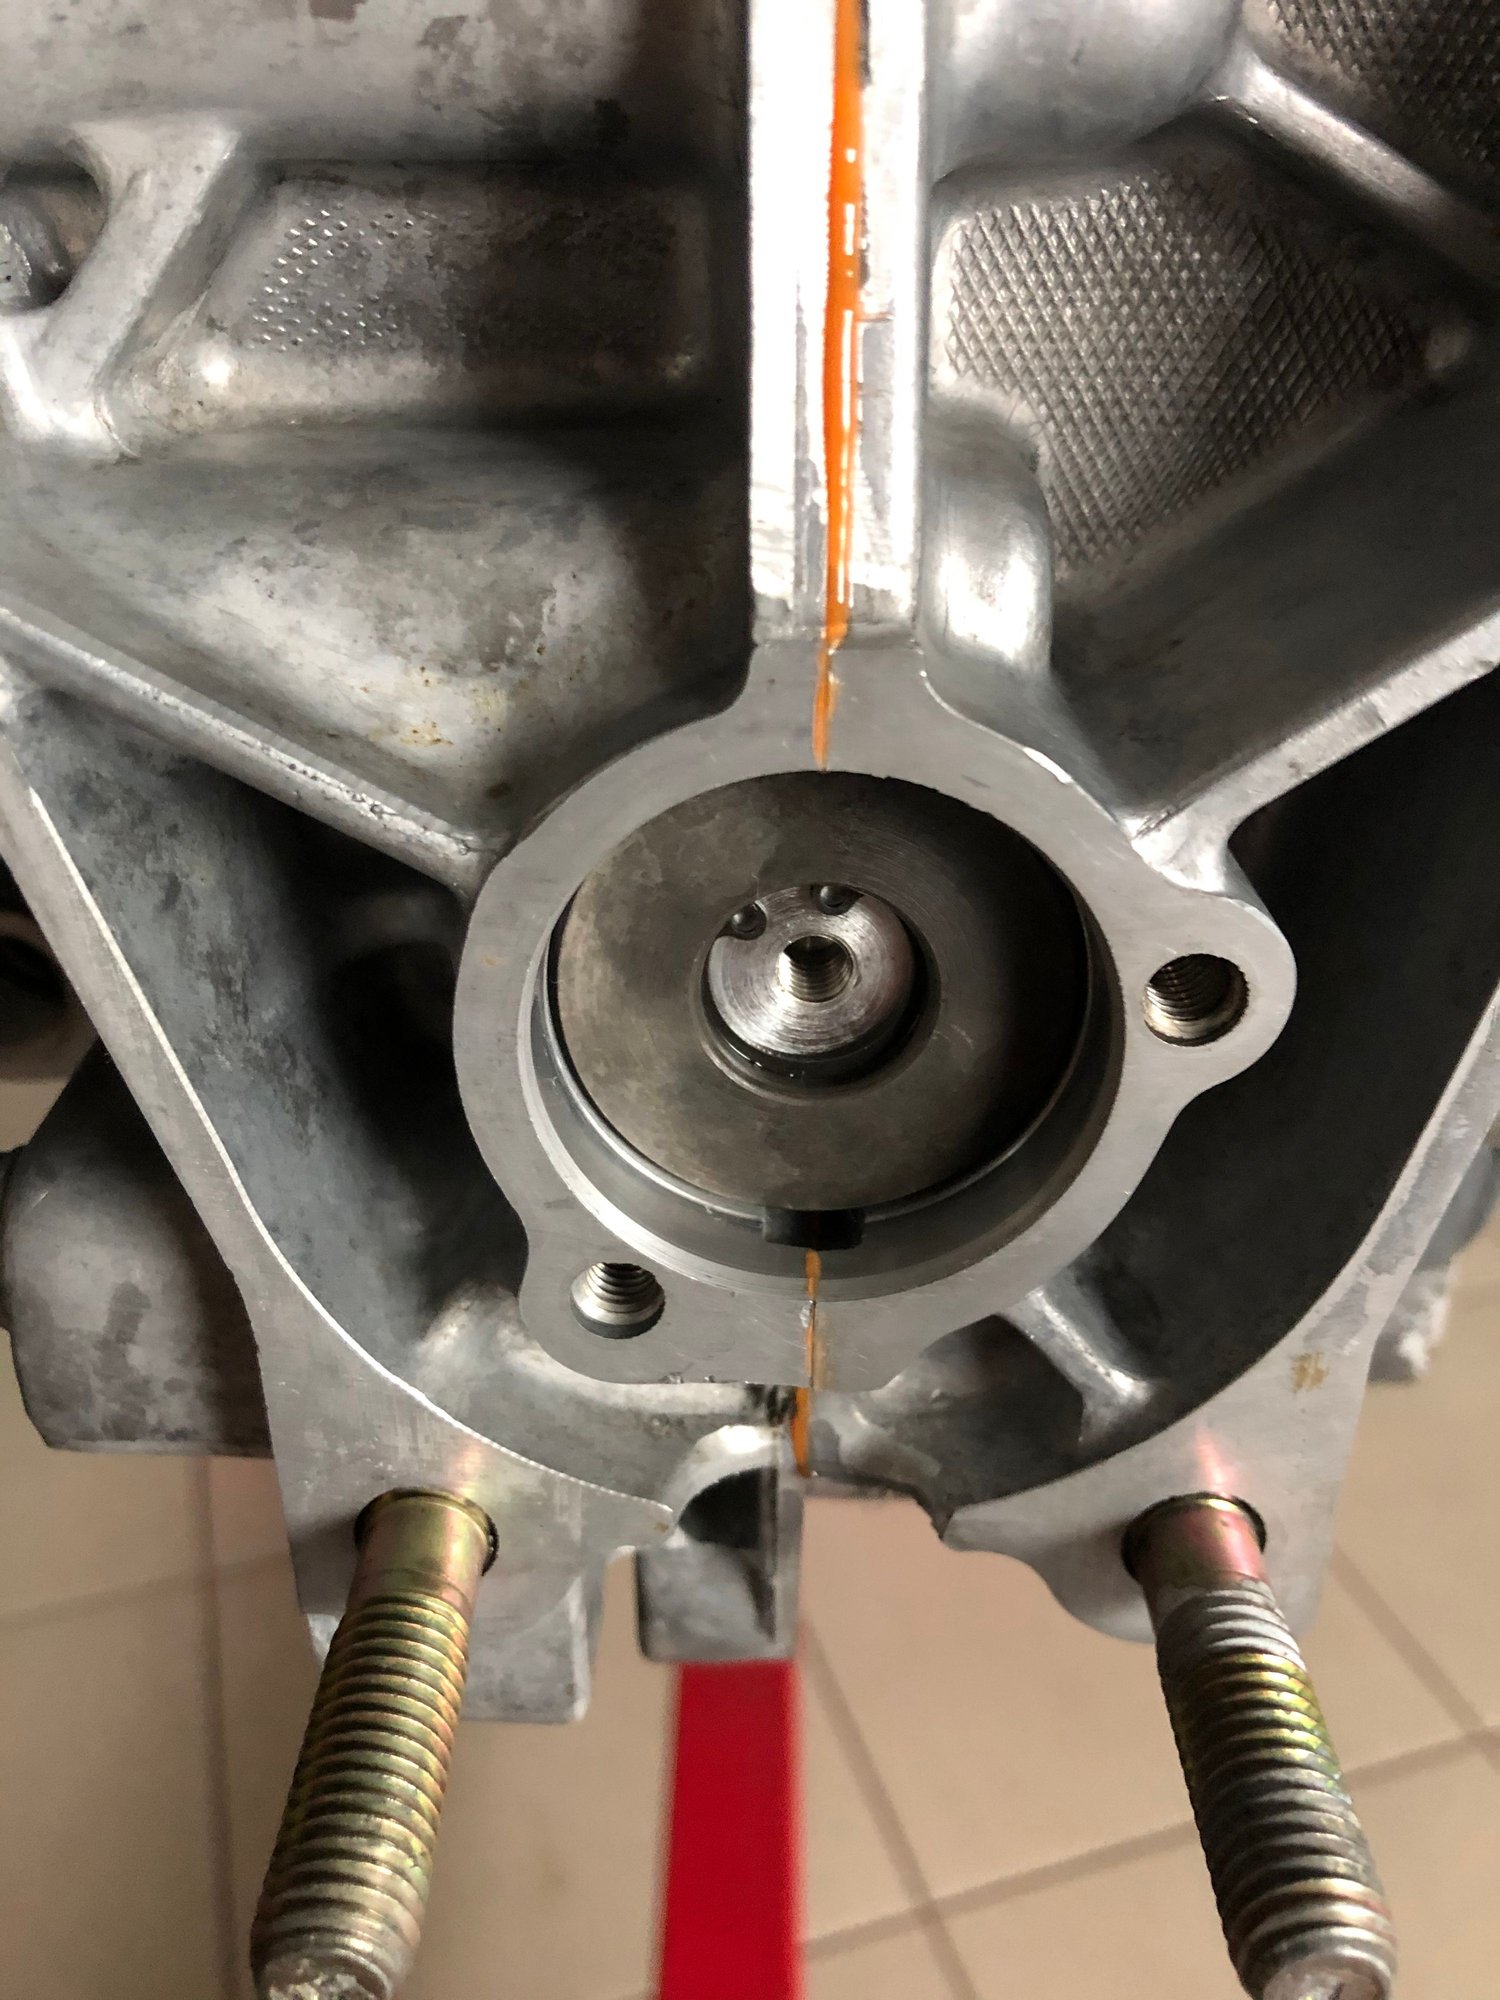
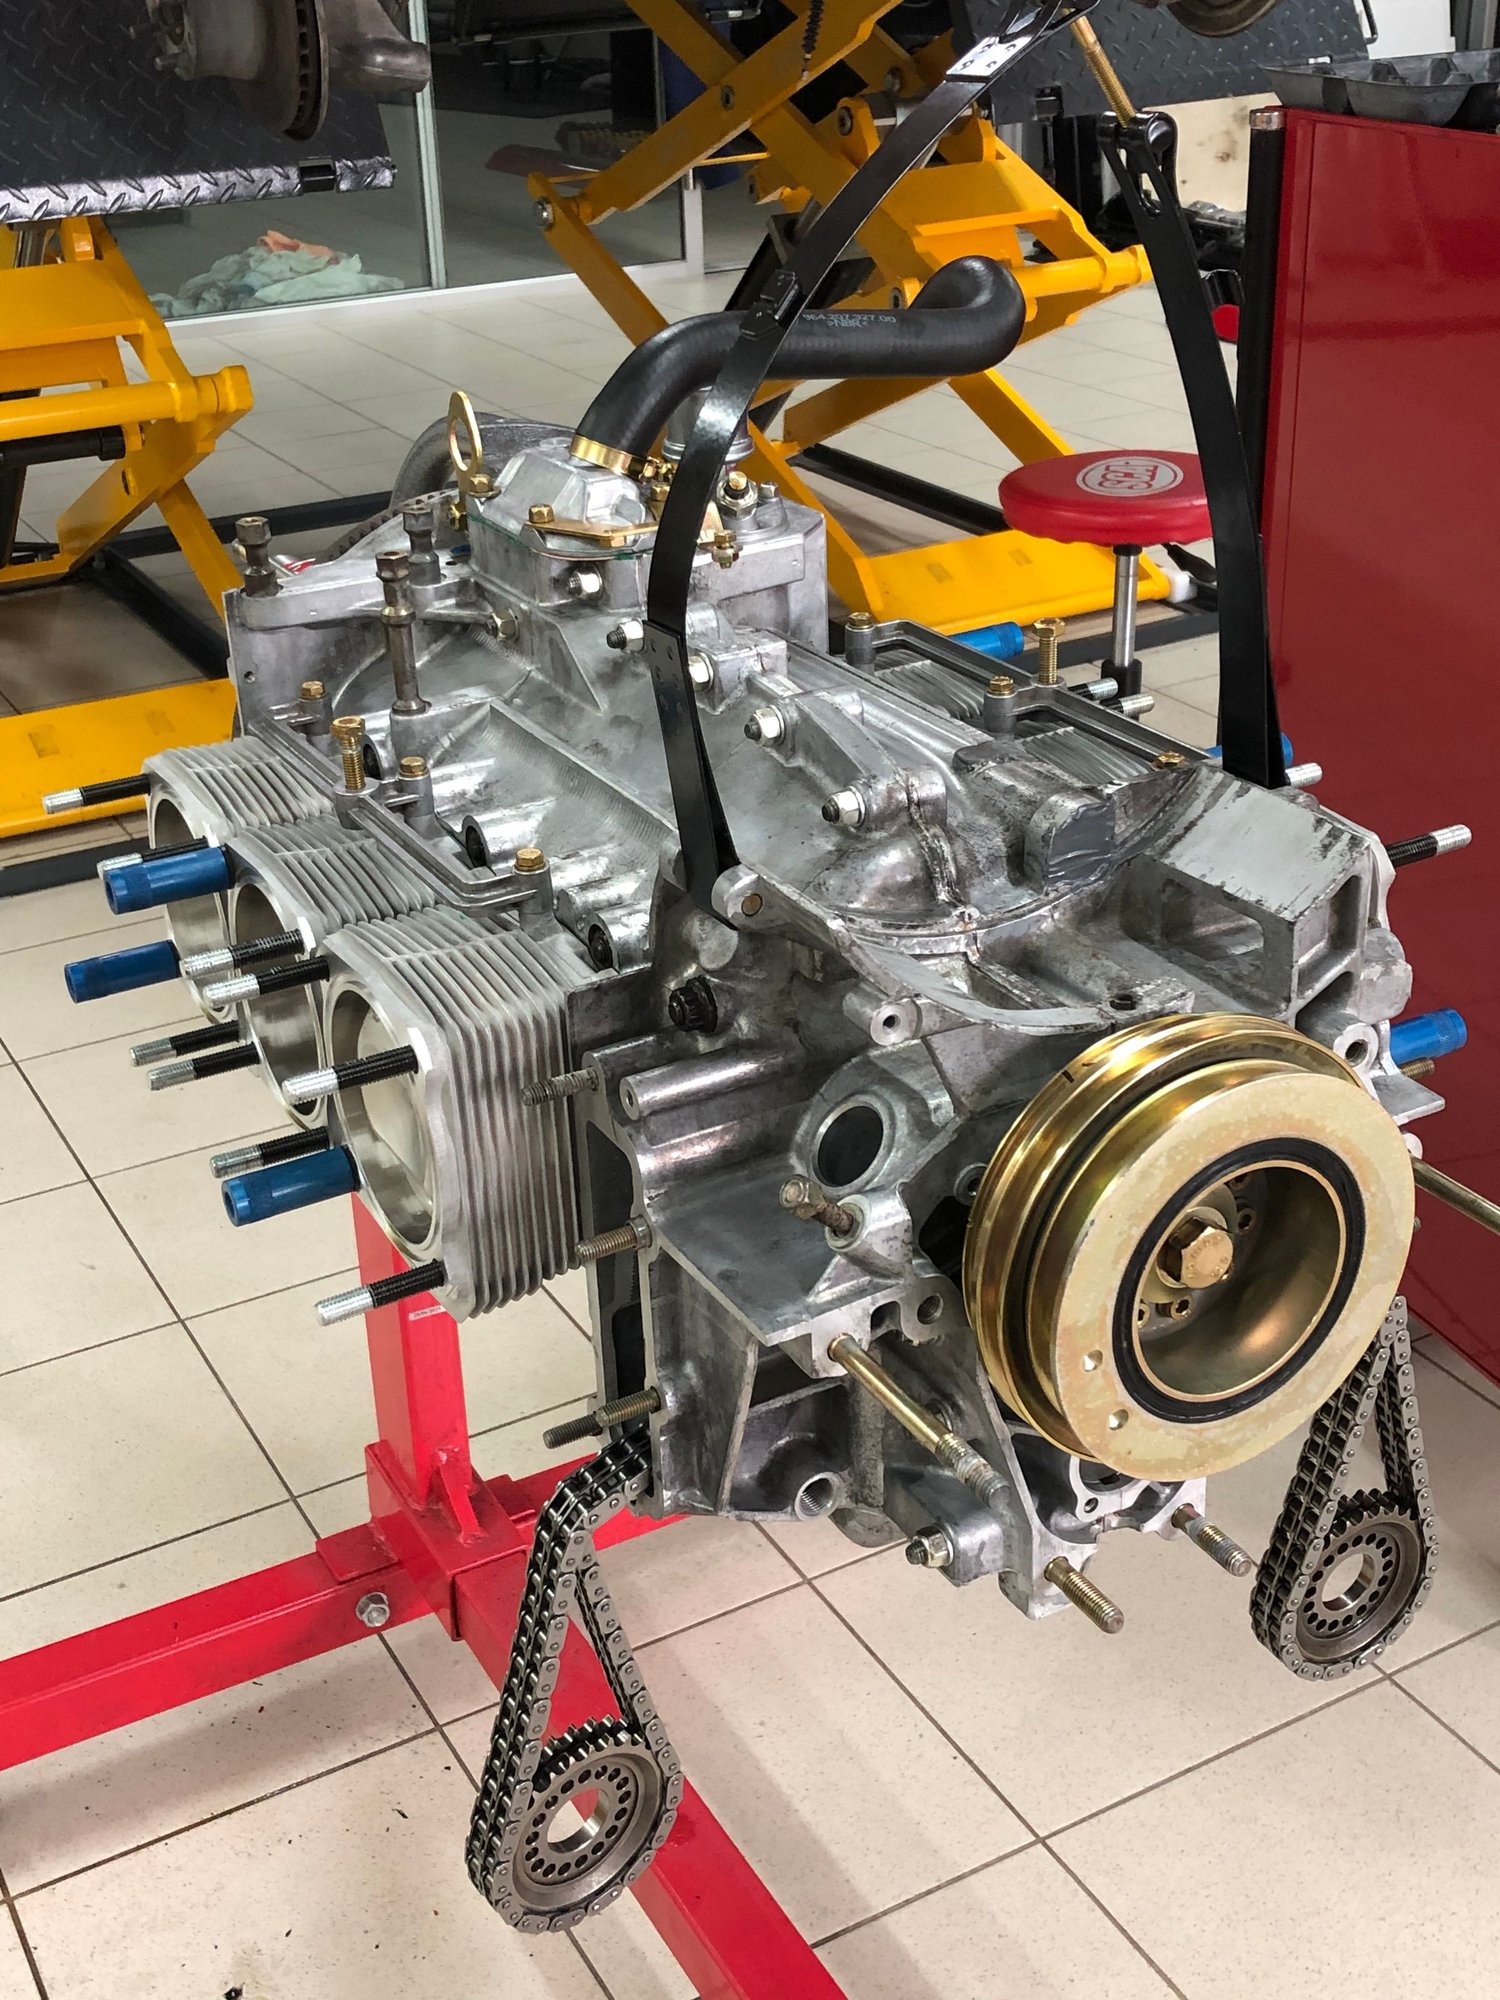
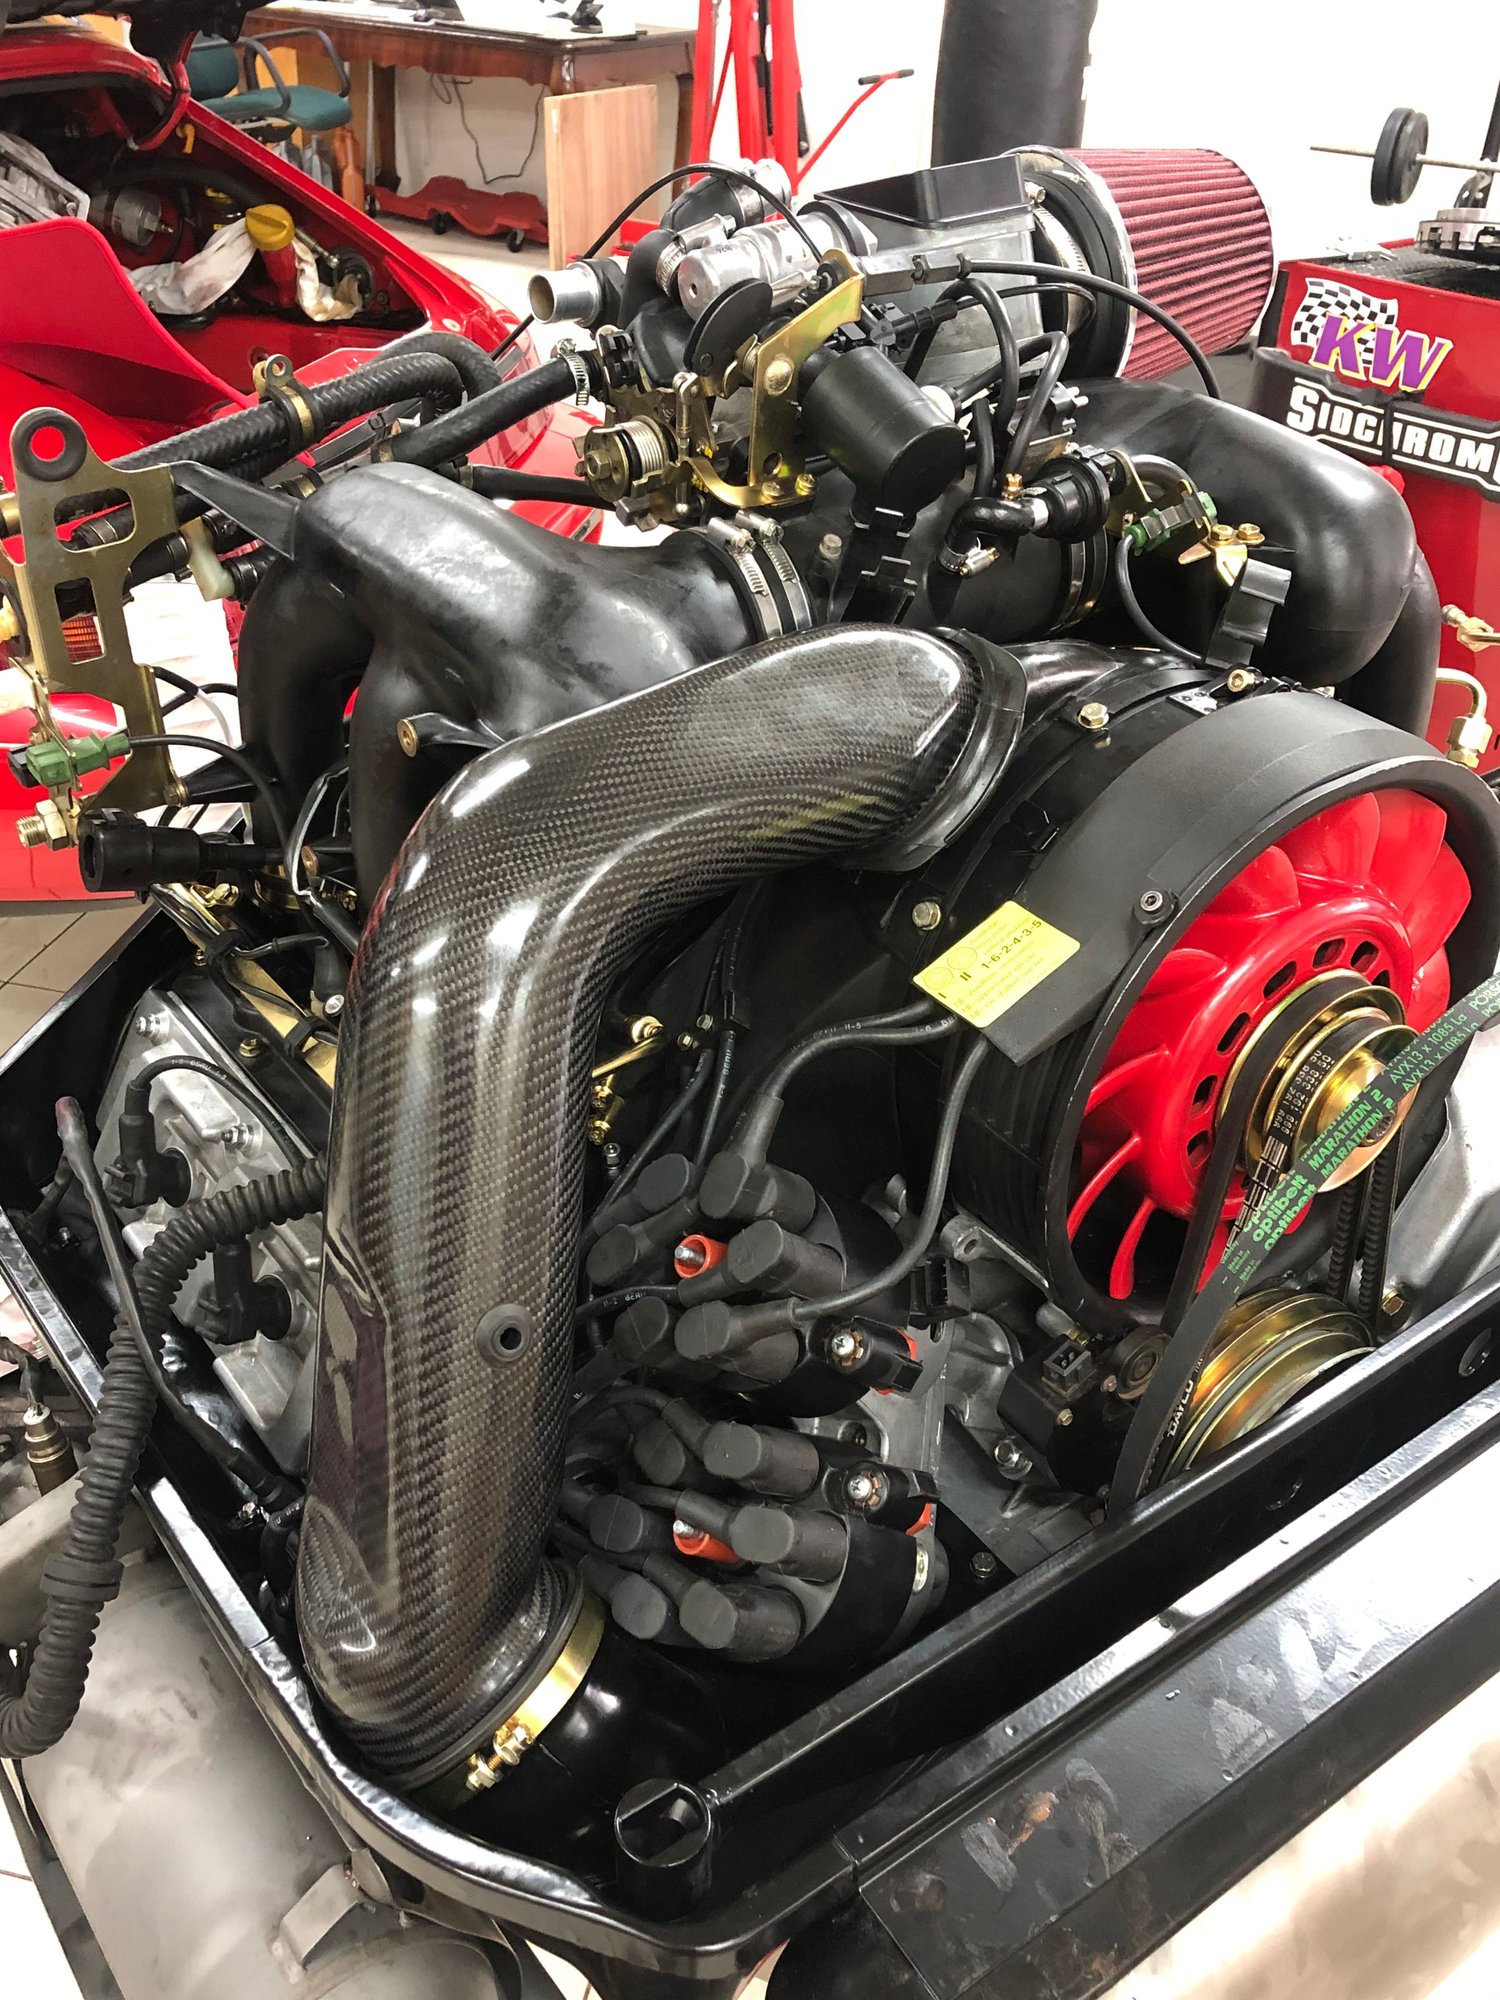
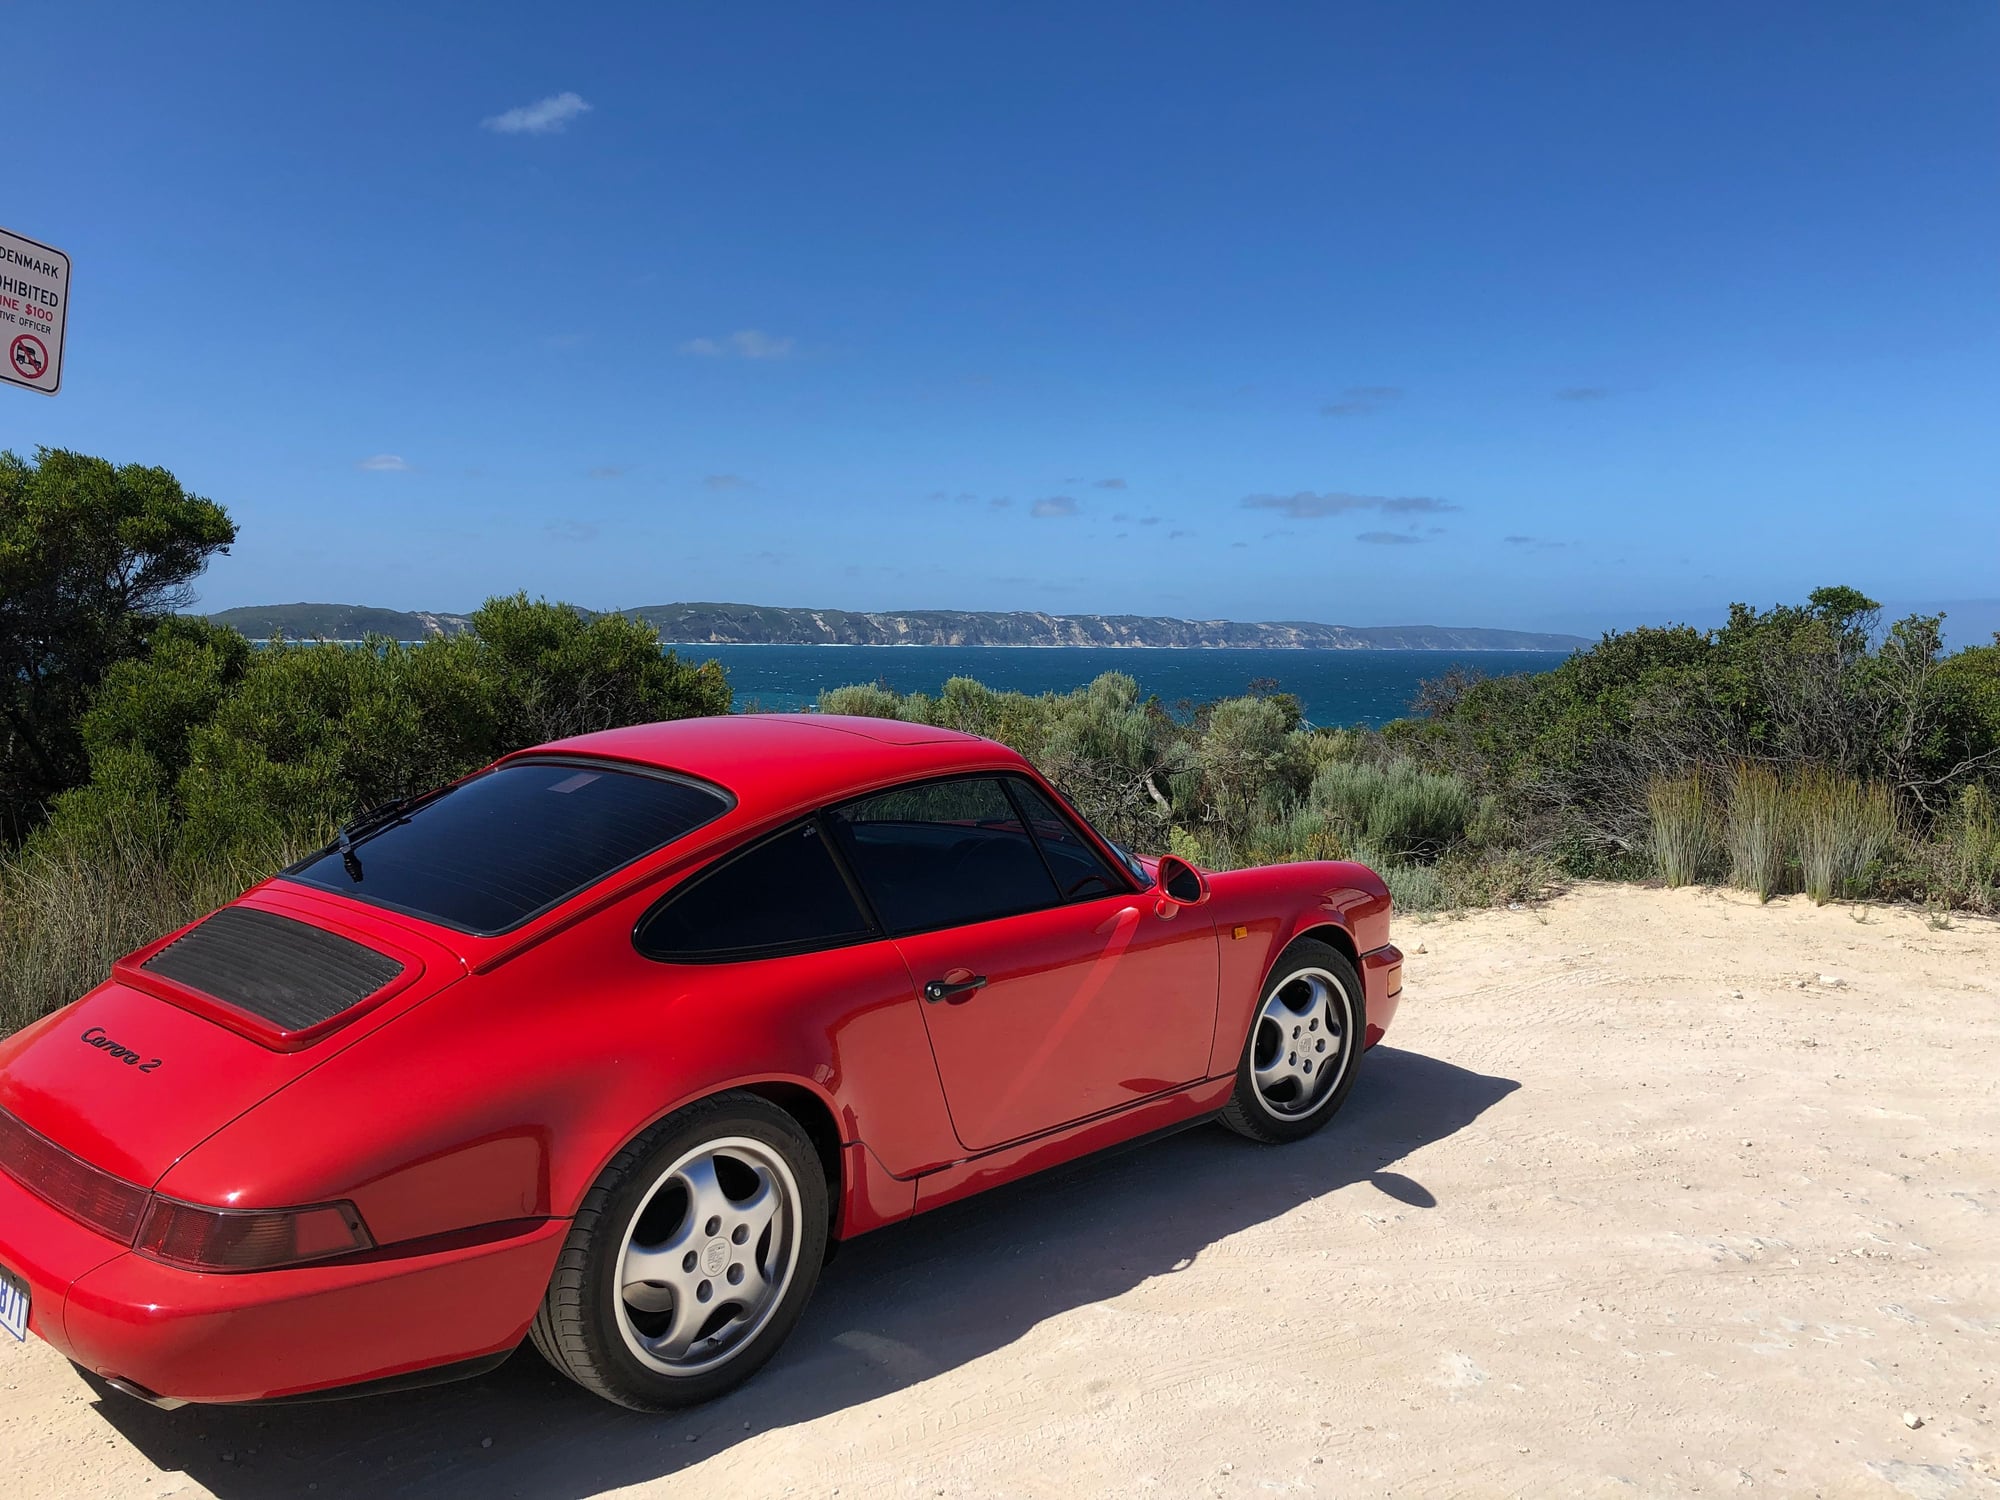
Engine dropped. Lots of bits carefully bagged, labelled and photographed Some parts after quite a lot of cleaning Half a case after several hours of meticulous cleaning All the bits back in their place before closing the case. Sealed up with hopefully just the right amount of Locktite 574, Curil T and Dow 111 Heads with new valves back from the machinist Finally back together Back on the road again, pulling better than ever ....and no oil leaks.
If you have any questions or are after more pictures (I took lots!) just let me know.
Congratulations, aint it great when it starts. Nice clean job, really helps appreciate the porsche air cooled design, and understand how they make all them awsome noises.
Who did the machine work, where did you get parts?
Congratulations, aint it great when it starts. Nice clean job, really helps appreciate the porsche air cooled design, and understand how they make all them awsome noises.
Who did the machine work, where did you get parts?
The whole first start process was a bit nerve wracking. Despite checking and double checking everything, I was worried that I had maybe missed something but after priming the oil and inserting the DME it came to life straight away. I have almost 1,000kms on it now and it�s idling well and still getting better by the day.
I got 80% of the parts from Pelican and the rest from Design911.
I�m in Perth, Australia and there is a local company that was recommended to me called HeadTorque who did the heads and the cam and crank shafts and cleaned the case. They were great and are experienced with these air cooled engines.
Not sure about skill. It was more the slow and steady approach and making sure everything was clean and organised.....and lots of walking away from the garage when I got frustrated! The books and threads on this forum, plus tools and time is all you need.

 05-04-2020, 10:48 AM