When you click on links to various merchants on this site and make a purchase, this can result in this site earning a commission. Affiliate programs and affiliations include, but are not limited to, the eBay Partner Network.
Looking at the old stuff it's easy to doubt the durability of the factory insulation - but it is 30 years old. I contemplated a foil faced option but wasn't sure I'd like the look.
So I've been reading treads here about changing the oil lines. It appears I have leaks in the couplings for the 2 solid lines that run to the front oil cooler. Before I crack open Pandora's box - does anyone have any suggestions about fixing these leaky fittings? Is there an O ring or other serviceable part inside or do you have to replace the entire pipe? Thanks in advance. Looks like they take a couple monster size line wrenches.
The oil/gravel mix inside the rocker panel cover weighed a couple pounds. Looks like there will be some minor repair/replacement work to do on the clearly "one time use" clips.
So I've been reading treads here about changing the oil lines. It appears I have leaks in the couplings for the 2 solid lines that run to the front oil cooler. Before I crack open Pandora's box - does anyone have any suggestions about fixing these leaky fittings? Is there an O ring or other serviceable part inside or do you have to replace the entire pipe? Thanks in advance. Looks like they take a couple monster size line wrenches.
just did this a few months ago. No O-rings on the inside, metal to metal fitting unf. I replaced both lines w new ones along with the fittings and crush washers. One way would be to replace just those latter 2 and see if that fixes the issue.
be warned tho. Once I was done w those lines the front oil cooler opened up and started leaking which I just replaced. Now I�m seeing a slow leak from the thermostat to filter console line at the thermostat I�m going to replace. It�s like when you fix one leak it adds pressure to another part of the system and makes it fail! Good thing I like working on this stuff!
Great work, The factory pad was smart, I did that and I also added the 911 pad keeper, Look for pic's online, it just adds a finished look to the edge that you see. and keeps your pad from falling apart. 911 Pad keeper !
just did this a few months ago. No O-rings on the inside, metal to metal fitting unf. I replaced both lines w new ones along with the fittings and crush washers. One way would be to replace just those latter 2 and see if that fixes the issue.
be warned tho. Once I was done w those lines the front oil cooler opened up and started leaking which I just replaced. Now I’m seeing a slow leak from the thermostat to filter console line at the thermostat I’m going to replace. It’s like when you fix one leak it adds pressure to another part of the system and makes it fail! Good thing I like working on this stuff!
Ouch! This sounds like one of those "while we're in here" jobs. I read somewhere on Rennlist that you need a 38mm and 32mm line wrench to get those fittings apart. The closest I have to that right now are a couple 38mm crescent wrenches. ;~) So if I understand - you replaced the entire solid lines going up to the front? Where is the crush washer located?
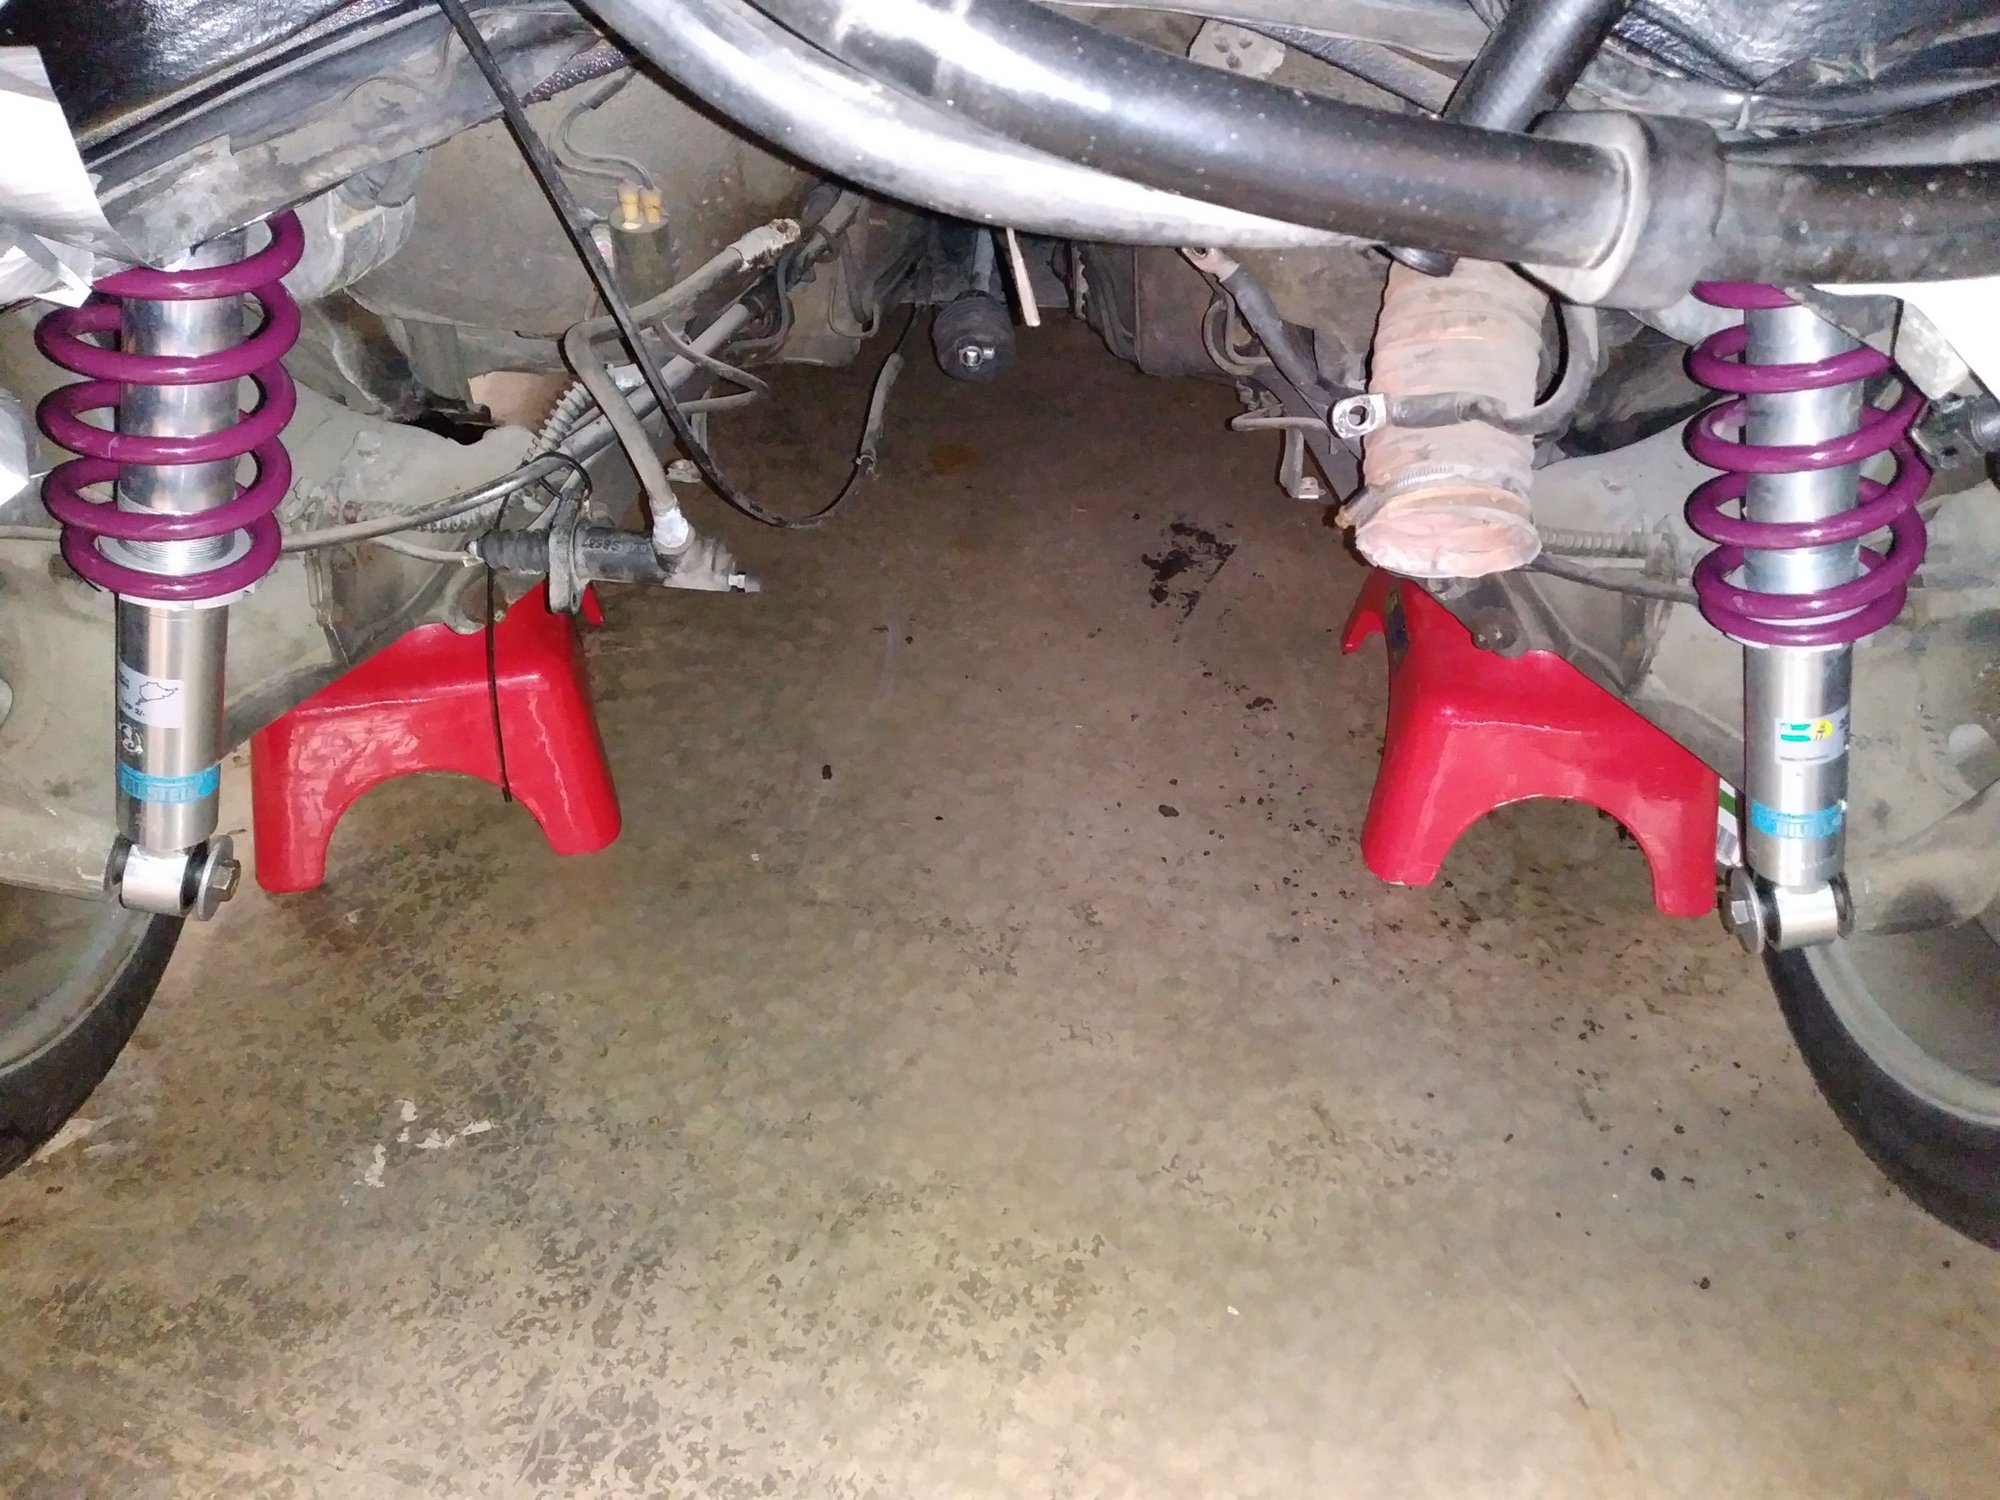
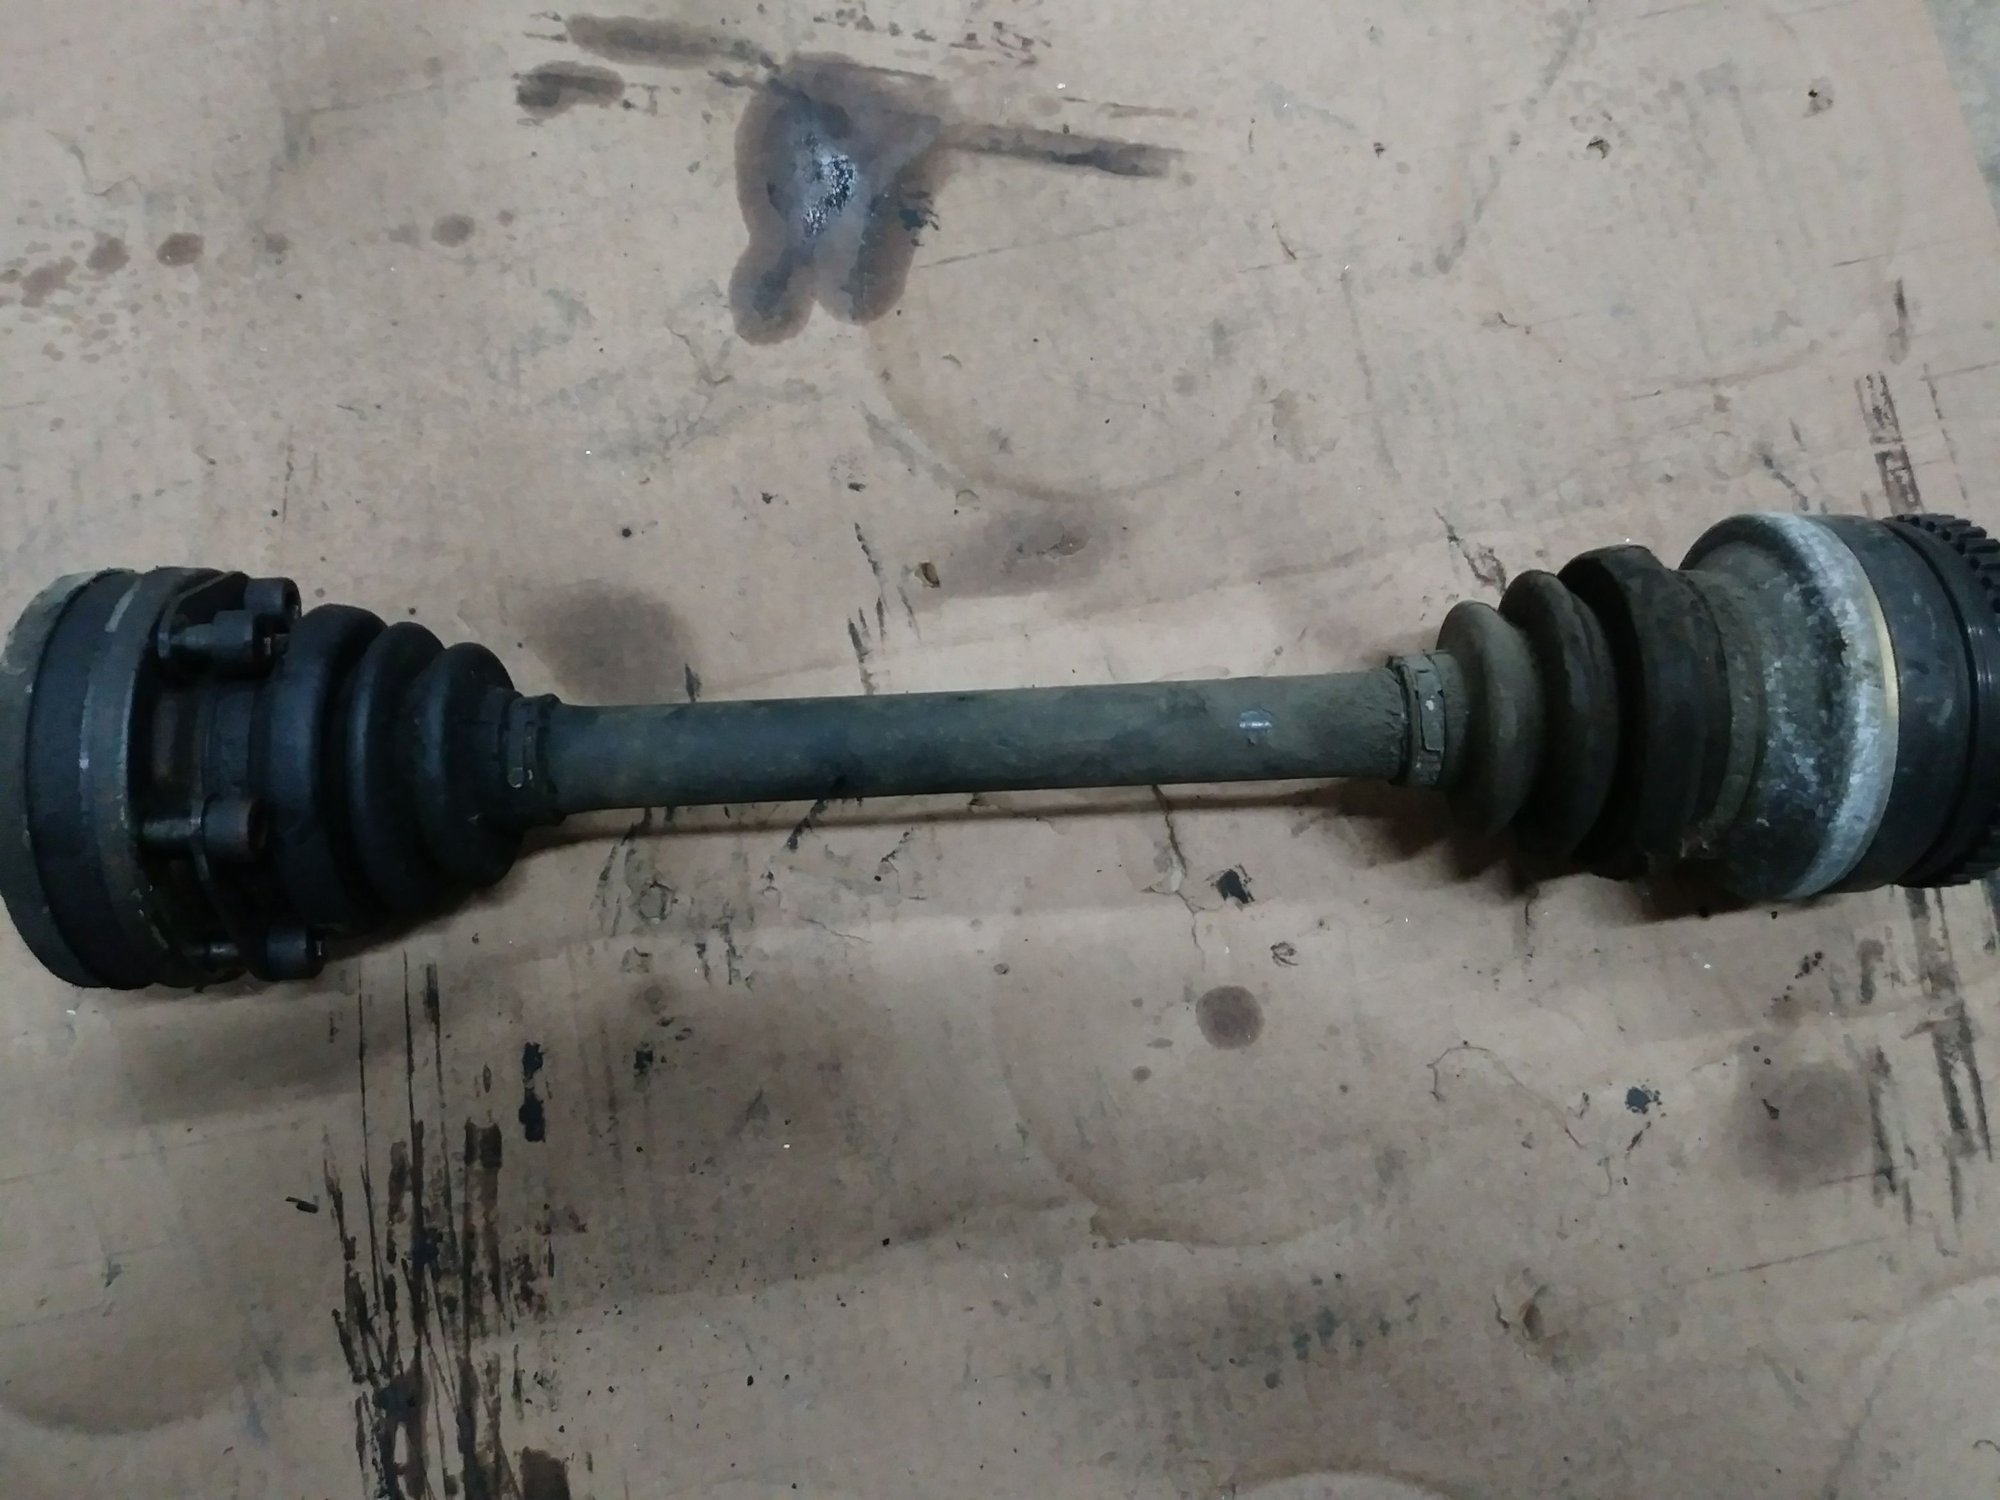
Sometimes a project like this needs an easy job to encourage one to tackle a messy one. The rear shocks were the easy job - at least with the engine out. Messy jobs on the table are the oil lines and the axles. I see there are 2 options for one of the oil lines. They refer to an "early" version and an updated one. I'll need to dig a bit deeper into the sludge to determine which I need.
Ouch! This sounds like one of those "while we're in here" jobs. I read somewhere on Rennlist that you need a 38mm and 32mm line wrench to get those fittings apart. The closest I have to that right now are a couple 38mm crescent wrenches. ;~) So if I understand - you replaced the entire solid lines going up to the front? Where is the crush washer located?
Crush washers are in PET but are on both ends of the line between the fitting and the oil thermostat and the fitting and the oil cooler. Wrenches are 32mm and 36mm and crow's feet style are the ones I used and worked for me. Ideally both on a long breaker bar but I used a large ratchet with the 32mm and got it done.
Fresh from the machine shop are the pistons, cylinders, and heads. Here's what we started with.
The heads are now machined to work with the updated cylinders. Really nice work!
I wish I had a before picture of the inside of the head. This is an amazing difference.
The used injectors I got from Mike at Autobahn parts came back from checking. They cleaned up and flow tested great. My originals were almost completely blocked and would not clean. $120 for a full set of used ones saved me a bunch. That's less than the price of one new injector. We'll change the O rings and they should be "better than used".
Original fuel lines, fuel rails, and pressure regulator.
I'm trying to decide what to do about the fuel line/rails. Mike has some rails that will get replated - just for the cosmetics. I'm considering rebuilding the existing fuel lines with new rubber or maybe going to braided stainless. The factory replacements would be more money than the stainless but less work. The "while we're in here" factor on old cars is enormous. Every piece of rubber is 30 years old unless it's obviously been replaced. There are some parts that were "updated" early in production. Most differences seem to come after 1991 but I'm finding parts that list as "fitting" a '90 car but then have minor differences in the part. Since the car hasn't really been run before the rebuild I can't assume the little parts like oil temp or pressure sensors work even though they look fine.
The old foam insulation had to go and came out easy. There are several options for replacing or deleting it. Oddly I'm leaning toward the factory look original.


 04-24-2020, 01:08 PM