

My UK 964 C2 diary
 10-24-2019, 09:46 AM
#1
Instructor
Thread Starter
Hi Guys!
Another thread, originally started in March 25th 2015, I am just wanting to carry on my progress diary here. Hope that is ok and I hope you enjoy my journey so far.
The story.
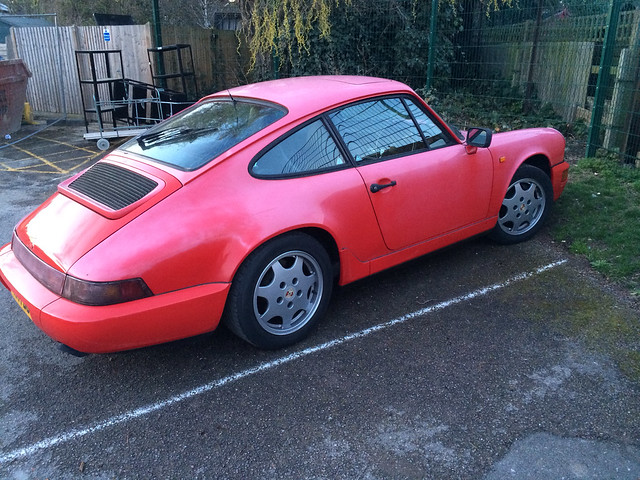
I have taken a bit of a turn from the usual direction I go with my choice of car and ended up buying something that kind of scares me. Normally I know a car in and out before I buy it, having spent months doing research etc etc. Well, I have to admit, I know literally nothing about the workings of a 964, it is the oldest car I have owned, (A 1994 was previously the oldest and that is my current MX5 Turbo and an old Volvo T5, don't ask..), it is my first experience with an air cooled car and just a car I never thought I would own, always liked them but always been scared.
So, I was about to buy a 996 which was an impulse decision, no need or want for it, just a convenient local purchase. Before I bit that bullet, I happened to think of an old friend I knew through work, I remember doing some work at his place of work which was a weekly thing and one day, him telling me with glee that he has just bought a Porsche, outside stood this Guards Red 964.. Iconic car and paid a measly �13k for it (7 years ago)... Fast forward and I decided to text him, simply asking, "do you still have the Porsche. A reply comes in, "YES WHY?", I get straight to the point, "Do you want to sell it", he replied with, "Come down and let's talk".
5:30 rolls round and straight from the office, I shoot to his place, I see the 964 looking a tad sorry for itself. Out comes Dave and a tour begins. Car starts on the button and is used at least once a week, sounding healthy, I get taken for a spin in it and wow, this thing feels better than my 997, so solid after so many years.
Cutting a long story short, after being told that he needs to sell as he feels he's had it too long, being shown the hoard of new OEM spare parts, complete spare rear light set, complete tailgate, various seals and other random lucky dip boxes, I didn't really care for what was in them, I just knew I had to buy this car. A deal was done and this Friday/Saturday, I will be collecting it. It is currently at an alarm place having a new alarm fitted
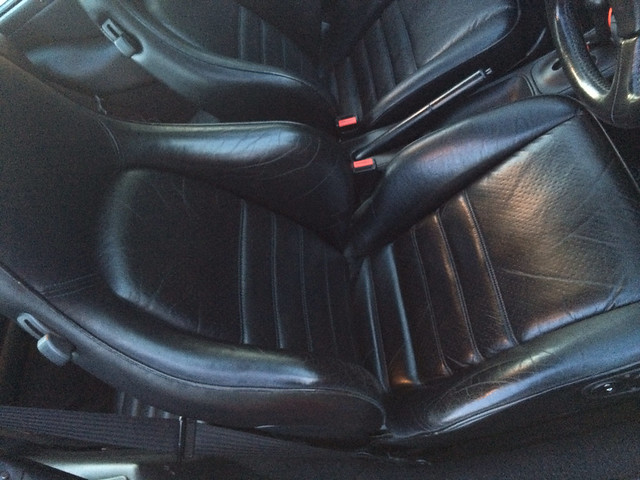
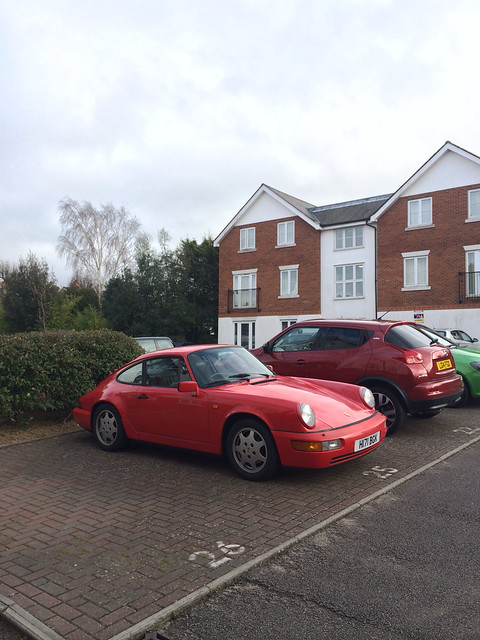
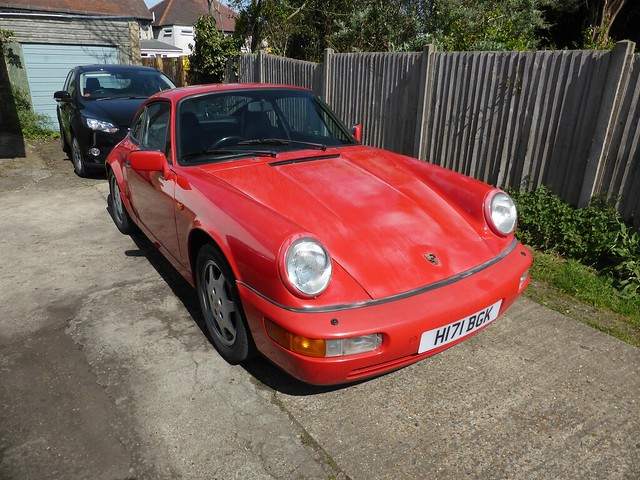
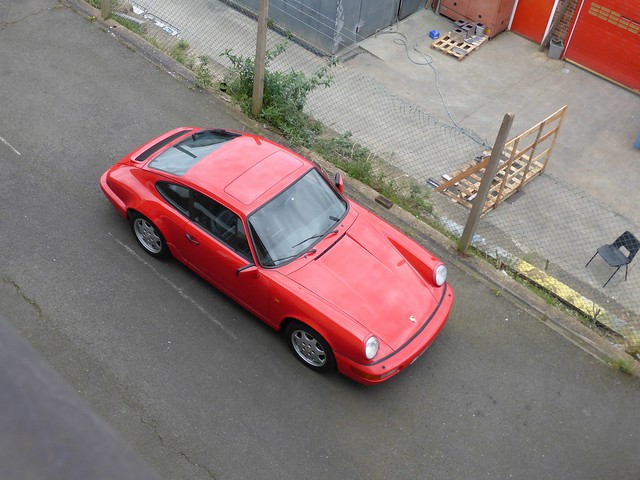
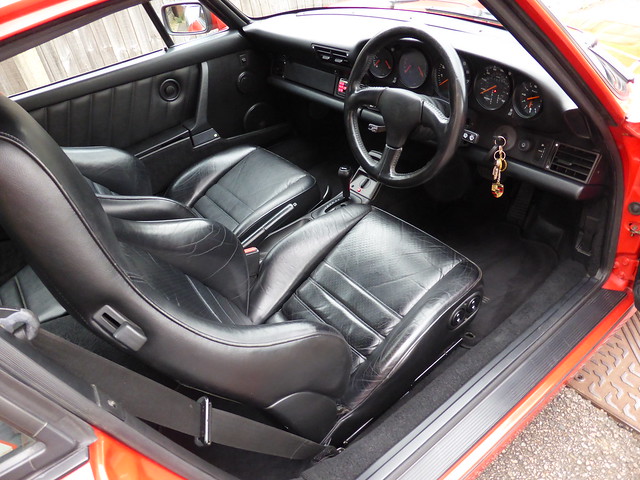
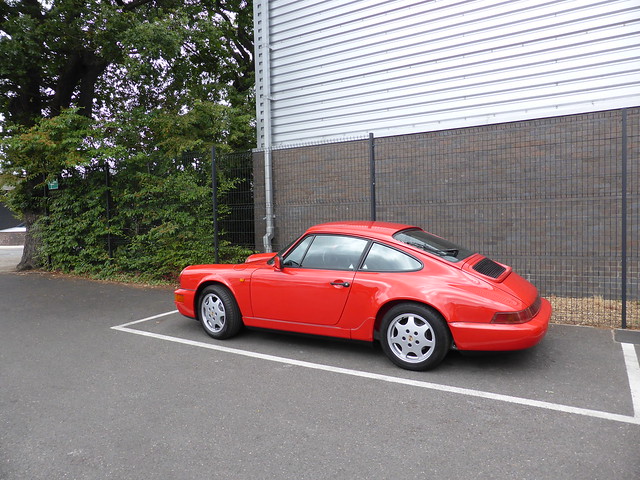
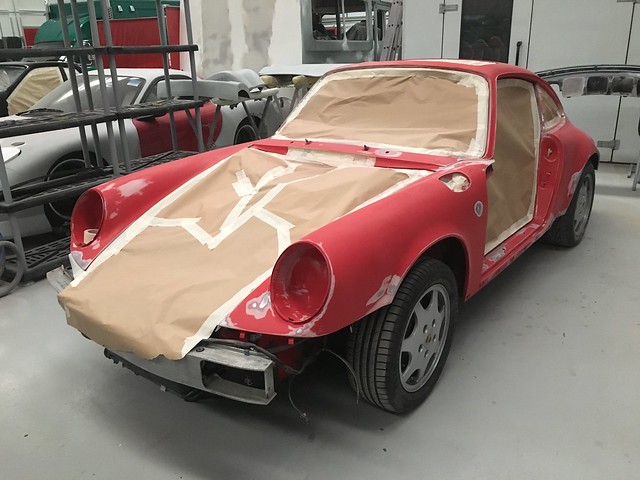
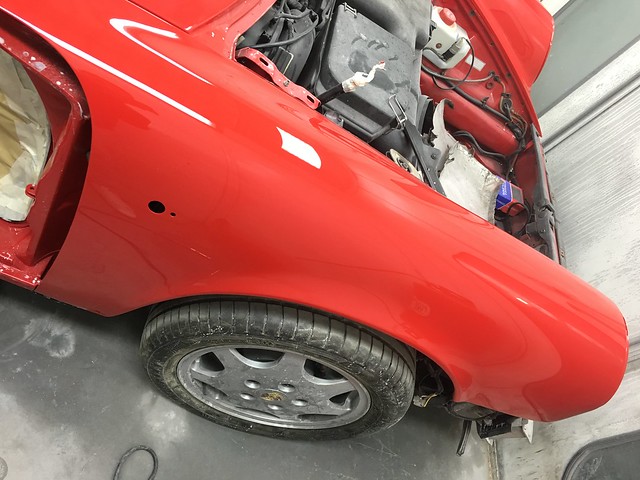
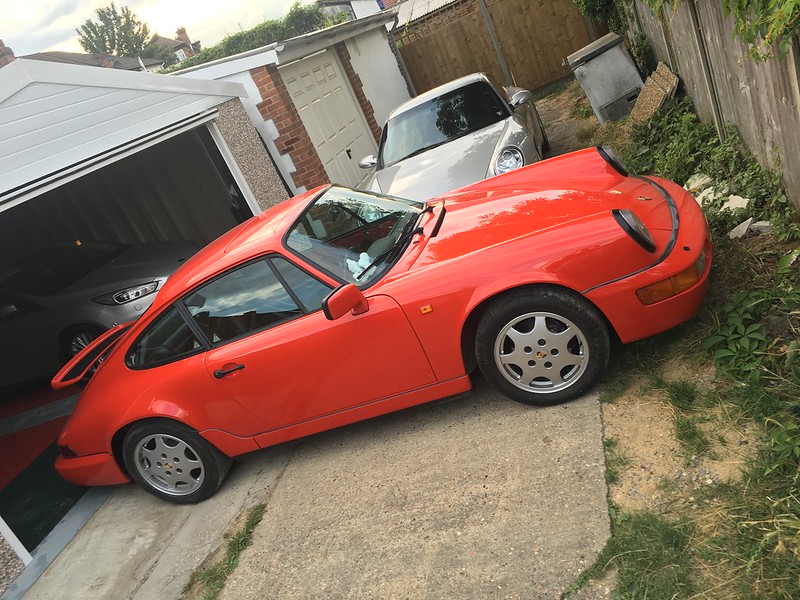
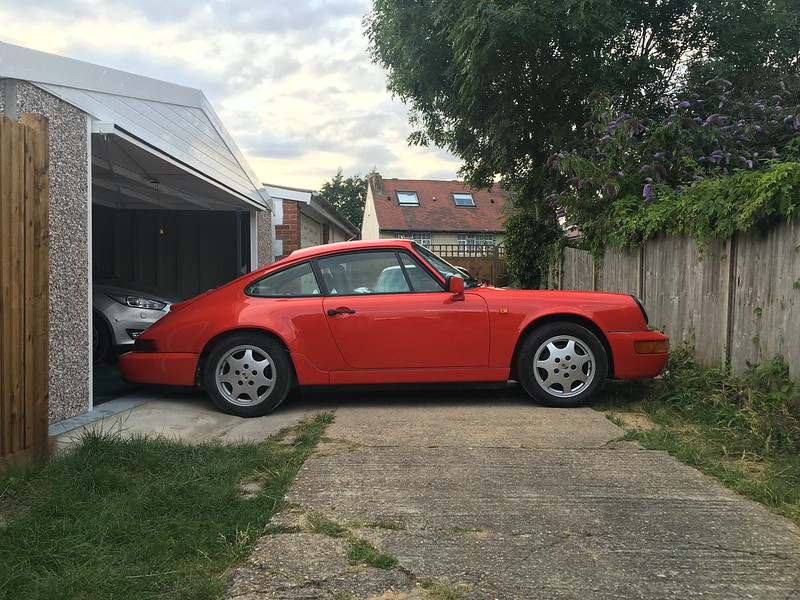
She is a tiptronic (Not my choice but couldn't say no) with 79k miles, loads of paperwork, loads of recent work performed, looked after heavily (mechanically), the interior is 100%, exterior just needs a polish although there are 2/3 very light rust bubbles on the wing edges and the spare boot lid is white so I can see myself booking this in for a full repaint.
I could go on, but I'll let the pics do the talking!

I cannot wait!
I really want to learn what options it has and how to do a few things..
Things that are wrong, tyres are old, heater does not blow hot air and rear wiper seems to be jammed, otherwise it's just minor bits, mechanically its solid, regular oil changes, new tiptronic fluid along with some replaced pipes, healthy brakes.. Cant wait to get stuck in.
Cheers
Mark
March 28th 2015
It's now in my hands!
With the 964 only being 10 minutes from my home and my parents being in between, I went along with my Dad as the taxi, we arrived to collect it dead on time and was welcomed by a view of the 964 in its same pink state with a pile of spares next to it.
When I initially viewed the car, I was so excited at the opportunity, I pretty much forgot to check anything!! So even though I had already paid for the car, I thought I'd have a proper look underneath, see the service book and receipts. All were as initially described and ok anyway.
The excitement was then all dampened by a phone call from my mum who had just been in a car accident with her friend whom was driving... So, everything loaded up into my Dads car and off we shot through the Friday escape traffic, I then got another call to say not to worry about coming as the police were dropping her home and apart from pains caused by the seat belt, she's ok.
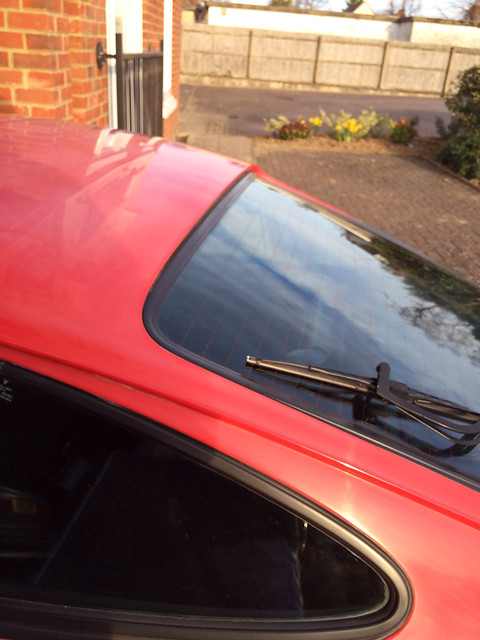
That all aside and everything settled, I went about unloading the cars and taking a close look around the car. Nothing I hadn't seen before apart from some bubbling to the lower rear wings. No major oil leaks, just appears to be one from a rocker cover, interior is in perfect order, needs new tyres as they're low and cracking, I fixed the rear wiper by yanking it into position, this seemed to free it up and now works! :wink:
initial thoughts on the car,
Wipers in my view are annoying
Brake pedal feels odd compared to other cars
Auto works very well
Radio is far away
Annoying intermittent squeal from under dash (fan?)
Picks up speed fast!
I got a 964 :worship:
Chuffed with the rear wiper now working, I didn't bother checking why it doesn't blow hot air, i wanted to see if I could make it red ( SORRY, I just couldn't resist)
So out came my paint depth gauge, my machine and pads, Polish etc etc and I went straight for it.. After a very short while, I could see the guards red gleaming away. As it was now very dark, I had to call it a night and leave the car looking like a 50/50 demonstration car. I set off to get home (I do most work at parents place) and stopped in a petrol station for pictures.
The side I only went over with a quick detailer with..
The side I did quickly with the polisher, farrrrr from refined
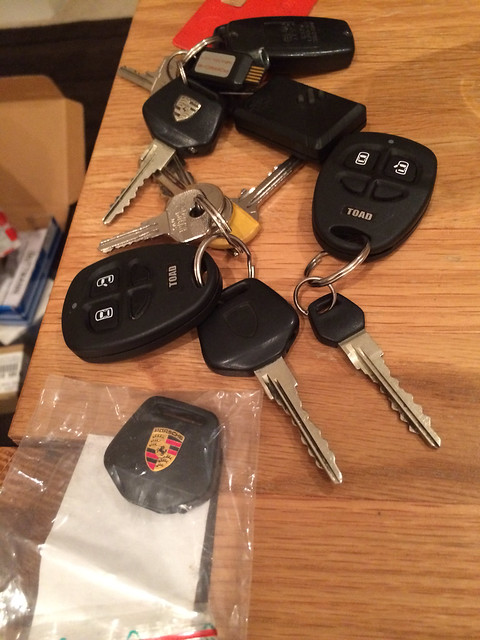
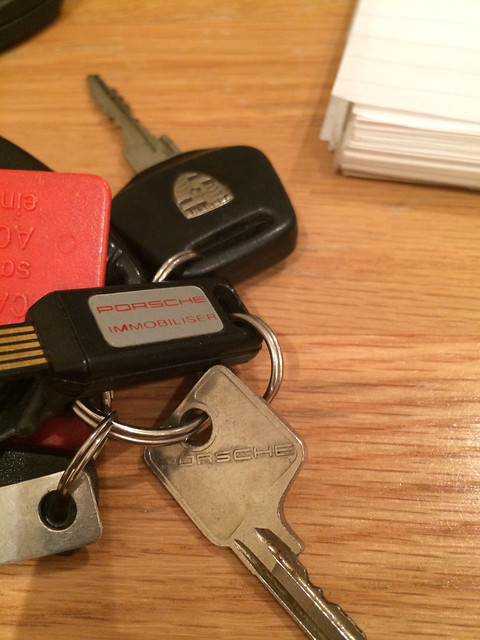
Once home, I brought all of the paperwork and smaller spares in to have a good look through. This was pretty fun, just seeing where the car has been, names of previous owners, work performed etc. all of the original Porsche supplied books, key sets, original alarm documentation and fobs, spare belts, gearbox filter etc all very exciting.
The car has a full recorded service history upto 2007/71500 miles. I know the previous owner did all the work himself in terms of servicing and he's told me that he did an oil change in Jan and did at least 1 a year.. The car now has 79700 miles. Regardless of what has been done, I plan on giving the car a thorough going over, if that means booking it into somewhere or doing it myself, I am not sure right now..
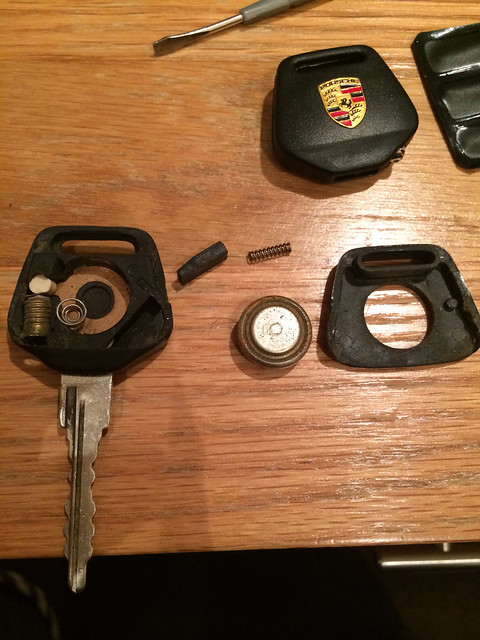
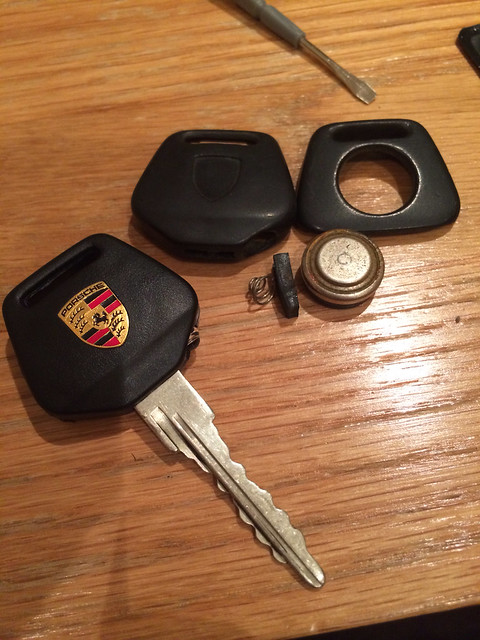
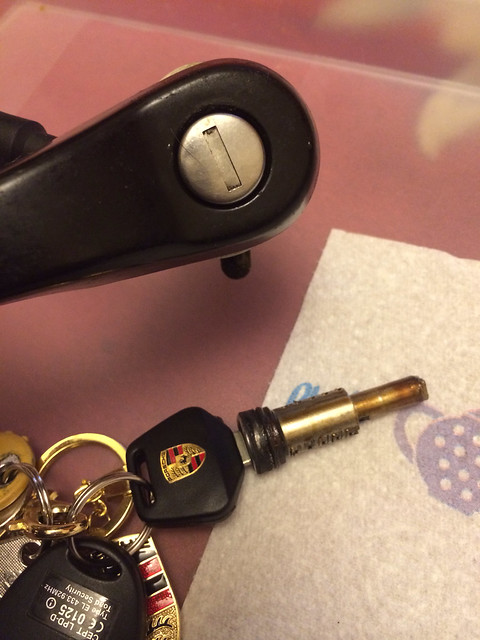
With some of the new spares, a new key head was included so I got to work with swapping this on the main key. Happy with my new key and now approx 12:30pm, I decided to go out for a drive.
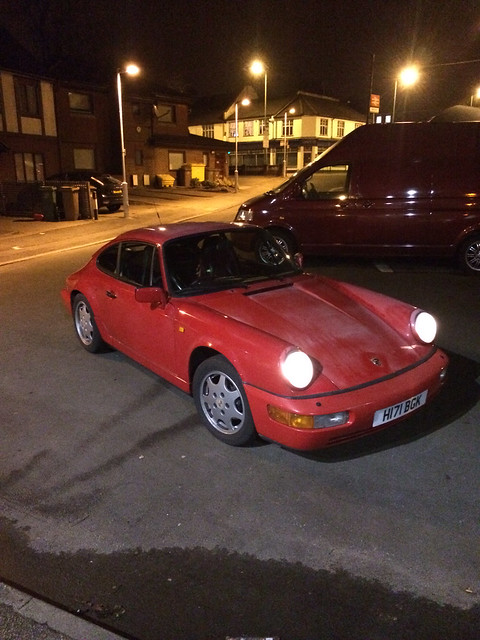
With roads being empty, I got to have a fairly spirited drive which has left me feeling very smug and impressed, for something so old (in my books), it drives so perfectly, it is no slouch and I love the weight of the steering, the brakes work tremendously well and the interior of the car does rattle one bit! Wow.
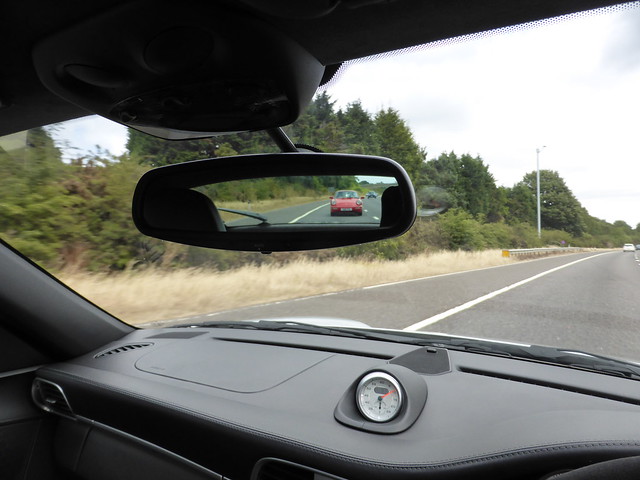
[img]https://farm8.staticflickr.com/7633/16953511671_85d356357a_z.jpg[/img]
30th March 2015
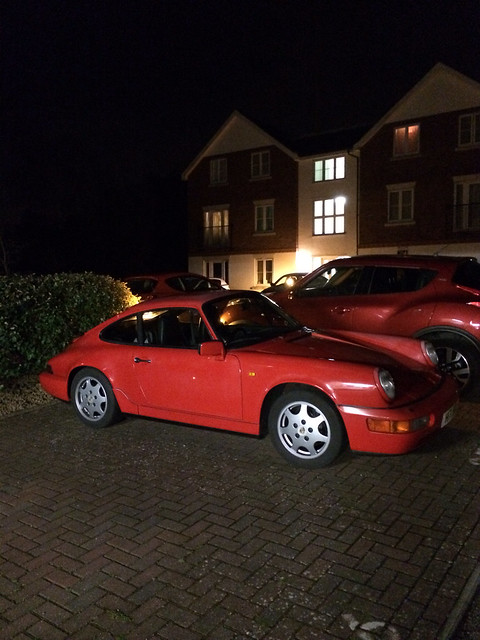
I must say, this car has come as a surprise to drive. I thought my girlfriend would hate it but she loves it and I'll let her take it to work once I've given it a once over. I used it to do a bit of shopping in yesterday and parked in a multi story, popped off to a country pub for a drive and Sunday roast and let the girlfriend drive it home.
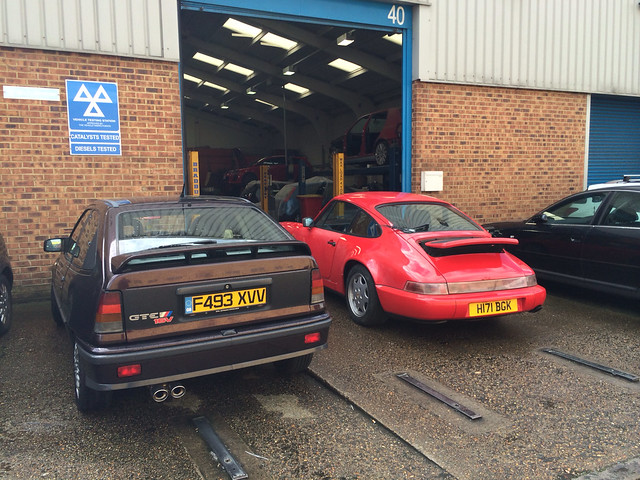
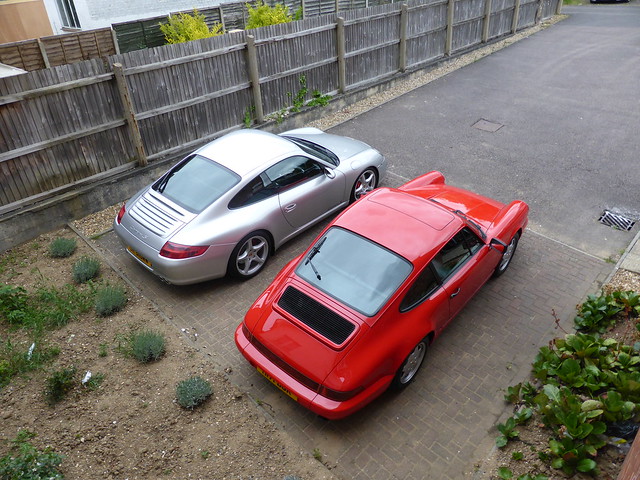
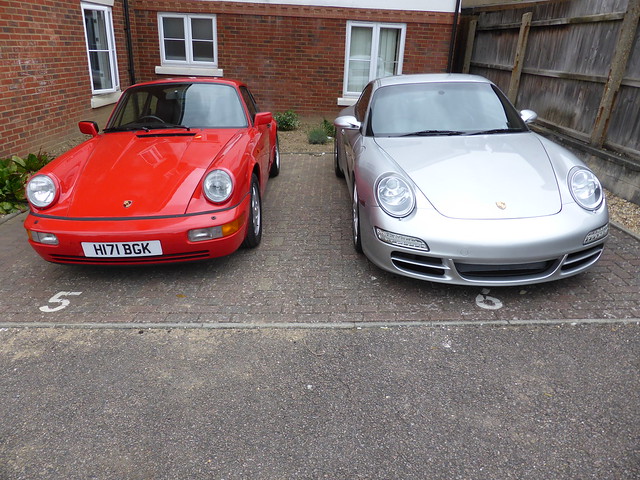
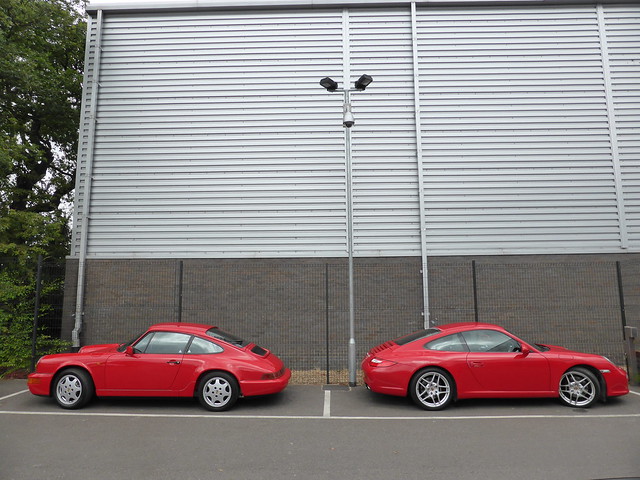
Parked it's younger, bigger brother next to it
I got to spend a bit of time on the car, I removed the 90's edition mobile phone aerial and wire, found out that my mixer servo's are completely jammed so these have been removed but not opened up for investigation as yet, did a button refurb on my air recirculation button and tried to make the buttons the correct way up but this doesn't seem possible..
Also, as the undertrays are not currently fitted, it's been good to see no evidence of an oil leak on the ground
Much driving with no radio on has shown there to be no horrible noises, rattles or creaks. A real credit to Porsche and it's build quality.
Aerial gone!
Fan controller coming out, notice the upside down buttons!

25 years of scum?

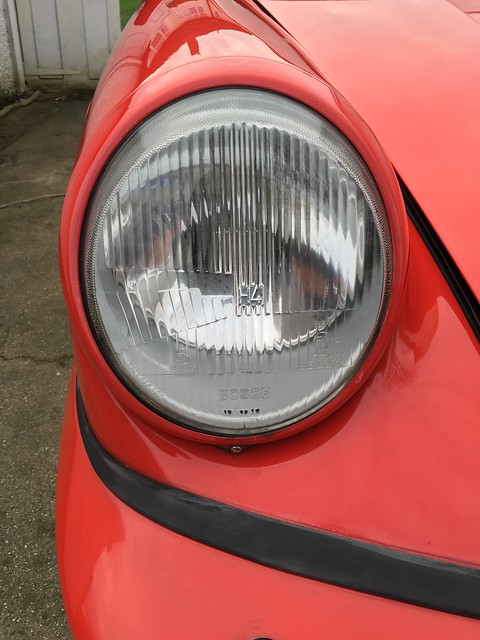
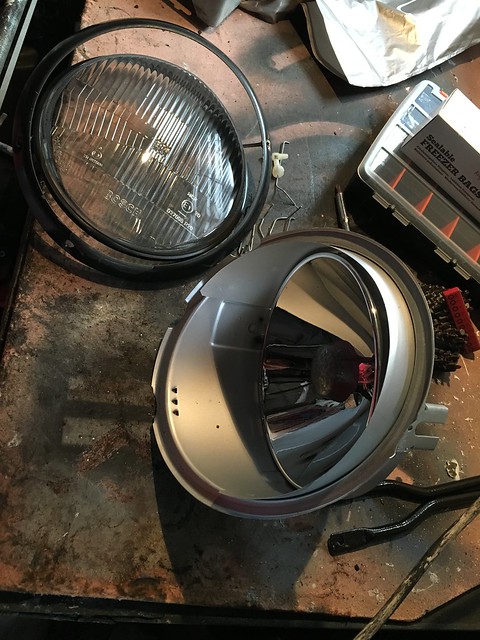
Discovered that my reverse and fog lights were working, turns out that all of the terminals needed a good clean, once they were clean, bulbs actually worked!

The b�s&ard fan control, fully apart, springs shooting out from the buttons countless times and no way of sprinning of shuffling anything around to make the button appear the correct way! Baffled!! :?:

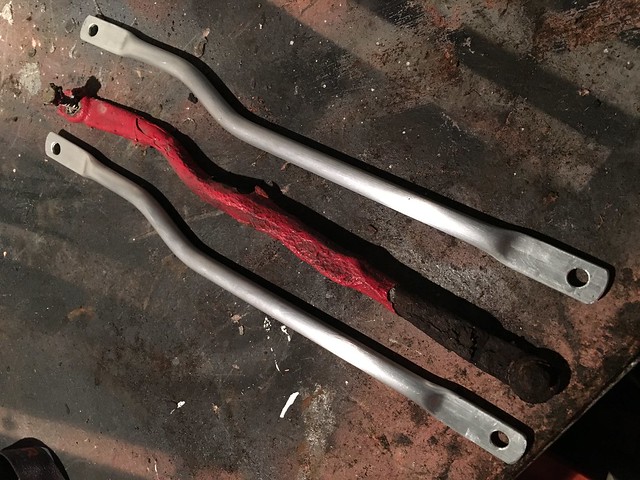
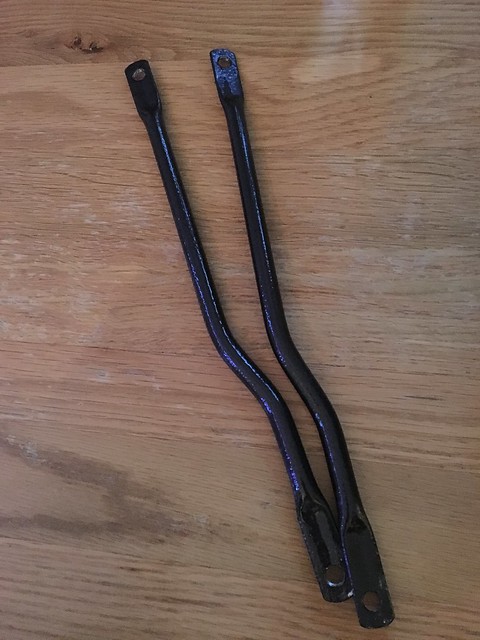
Thanks to Gaz, I have ordered one of these bars which hide the leading edge of the fraying sound proofing
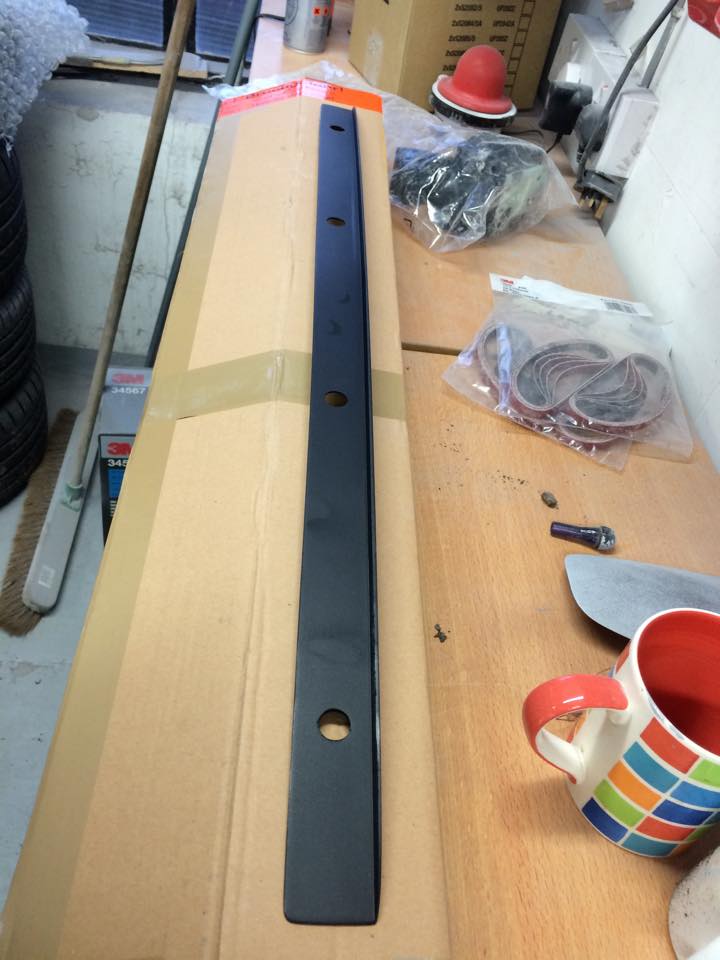
Currently working out at �46 INC post thanks to the exchange rate
http://www.world964owners.com/#!TIDY...f23137e856d35d
March 31st 2015
I had to order the bar to hide the edge of the sound proofing, things like that keep me up at night!
Ohh, well I have spent some time looking at buttons online and even those look like they would fit into my car upside down. The buttons are keyed and only fit 1 way.. Total mystery!
Look great don't they, at least the refurbed button looks good now.
[img]https://farm9.staticflickr.com/8711/16982177782_b343978349_z.jpg[/img]
I spent some time trying to get to the bottom of the non working mixer servo's. Both servos were very stiff/jammed when I first had a look, it took great force to move them but now that they have been free, I can move them with not so much force..
With a power probe and earthing pin 5, I put 12v to pin 4 on the servo's and they both move nicely! Reverse the polarity and they go the other way, great! I plugged everything back in and hoped something would happen but nothing did
My temperature **** activated the rear blower so I am assuming that works fine. I tried to test for voltage on pins 4/5 of the plug which goes onto the server but nothing registered even when getting someone to turn the temperature ****..
Totally stuck on this for the moment. My only options now are, remove the servo's, open up and clean. If that fails, try another CCU..
While I was under there, I oiled up the shaft on the passenger side blower as it was squeaking, now it's silent, so I did something productive!
[ame=https://flic.kr/p/rSLZsH][img]https://farm8.staticflickr.com/7606/16983522225_2ec273a614_z.jpg%5b/img%5d%5b/url]
April 1st 2015
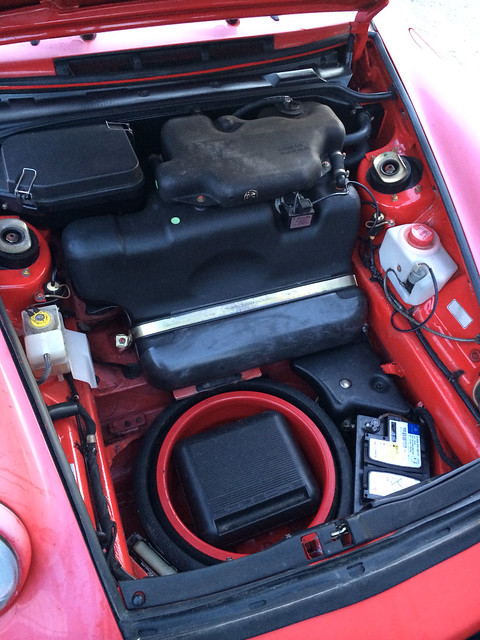
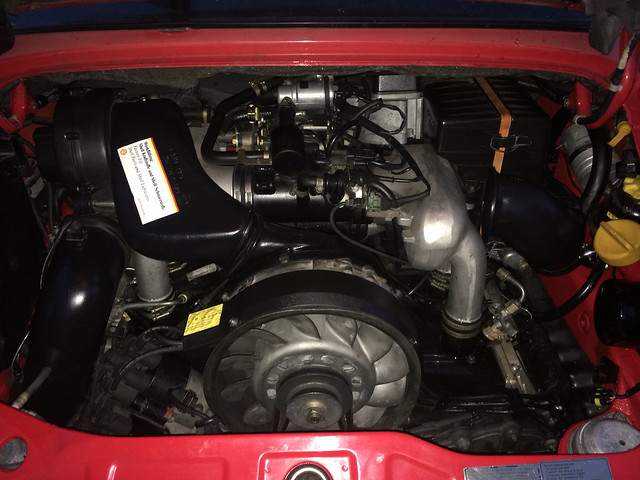
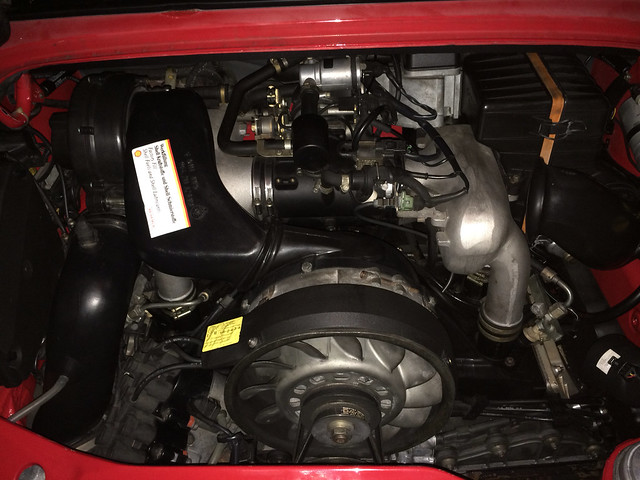
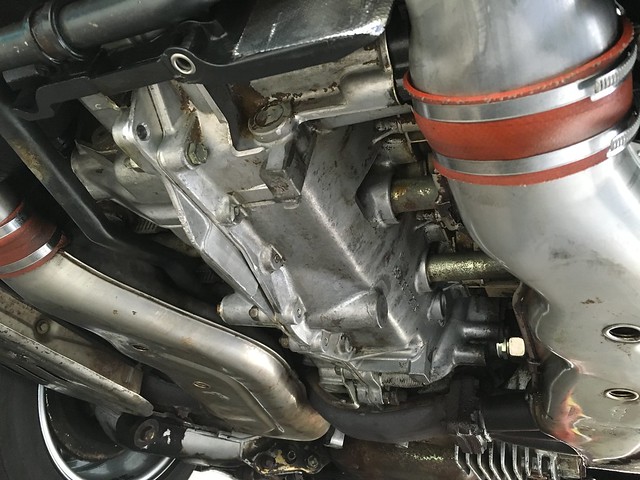
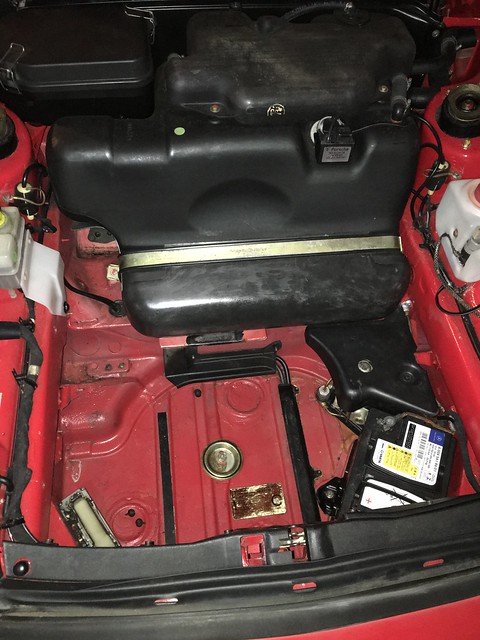
I decided to finish up at the gym early and go and give the engine bay some attention. I had given some surfaces a wipe as I noticed a minor oil leak, it turned out to be from the oil filler cap, so I wiped this off, flipped the seal and did the cap up.
It didn't look like the bay had ever been cleaned, so I set about applying Autosmart G101 to all of the oily and grimey areas, followed by a scrub.
Delicate areas wrapped in foil and with the engine still warm, I gave the dirty areas a quick blast with my trusty jet wash. After some poking around, scrubbing and soaking, the bay had come up looking good. I will probably remove the blower and do it again with that out of the way.
Needs more work but certainly better.
Looking forward to getting the fan powder coated in some sort of colour to spice up the bay, probably the usual red or I may go silver.
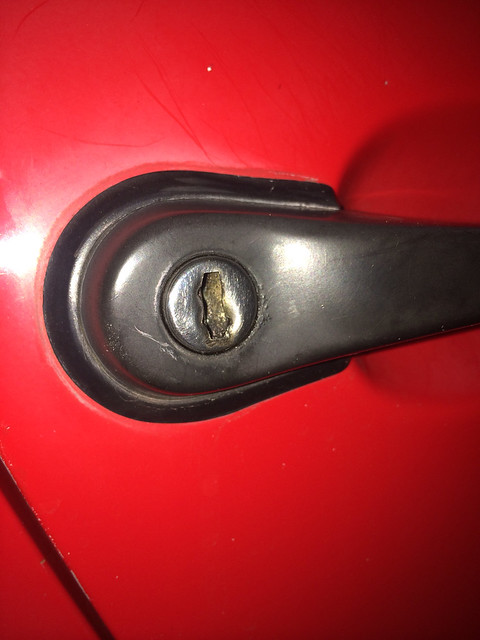
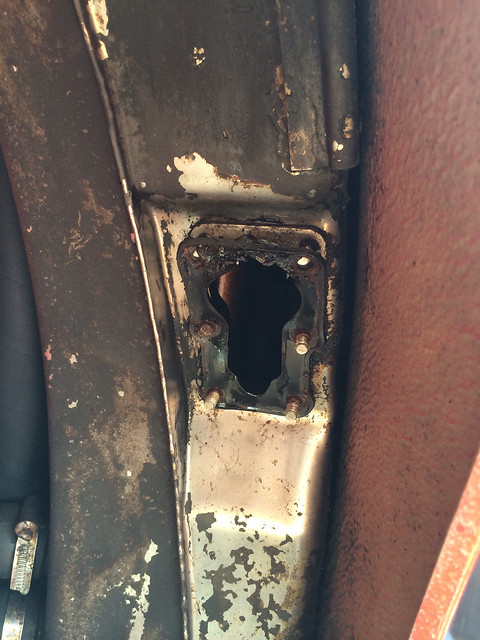
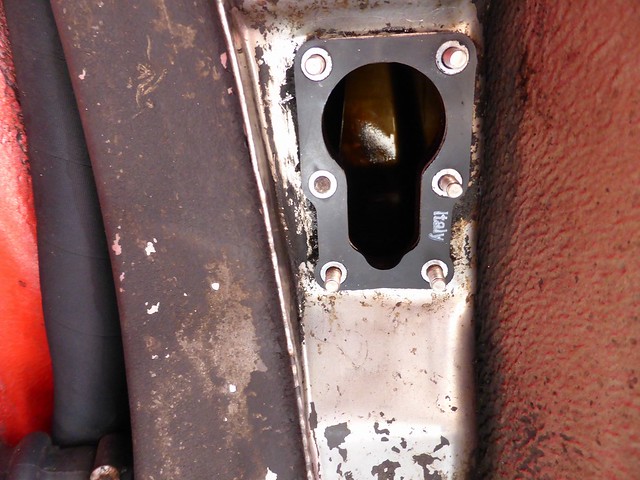
After it got too dark to continue in there, I set about sorting out the drivers door lock where someone had clearly tried to gain entry. This was pretty easy, a simple job of removing the door card, getting inside the door and undoing the handle and then undoing a screw on the back of the barrel which then let's you pull the barrel out. As I had a spare unmarked handle, I decided to swap the internals of the barrels over so I could keep using the original key if my remote central locking were to fail etc. As very simple job and the total barrel swap took no more than 10 mins. Removing and reattaching the door card took the longest amount of time, especially in the freezing wind with my iPhone hanging out of my mouth for light!
All done!

I think that will be it until my single car day allowance over the bank holiday, girlfriend has out her foot down now!
I pretty much just plan to clean out the inner arches and machine polish it.
April 2nd 2015
I only had an hour on the car last night so I thought I would tackle a nice quick yet satisfying job. When I first got the, only 1 bulb was working in the centre console, now none work. I had ordered some replacement bulbs thanks to Zingari.
I set about changing the 3 bulbs which cover the Hazard, central locking and warning lamp. A 10 minute job which has really made a nice difference.

When refitting this panel, I noticed that there was a similar PCB with a bulb fitted for the rear spoiler. This also didn't work, so I quickly swapped this out.
The results, a fully lit switch panel
If anyone knows where I can get hold of a trim panel for the rear spoiler unit, please let me know! I don't want to buy a whole new switch, I literally want the casing so that I can swap with mine due to someone drilling a random hole in it!
Thanks
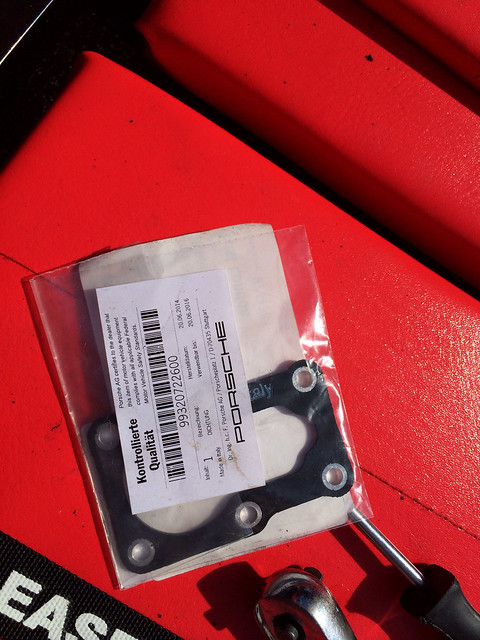
The start of the parts for the repaint were ordered today. Side skirt seals, wing/scuttle panel seals, front bumper smile seal, cabin light switch covers etc etc. All from Design911
Some new front tyres too, spent ages trying to decide what would be good for the car. Something for all round road use, the normal choice for me are Michelin PS2's but they do not offer a 16" tyre so I was a bit lost, harking back to my first days of buying tyres for small wheels, wondering if Toyo T1S's were still good... I ended up reading a fair few reviews and went for Goodyear Efficient Grip Performance's in the end. They had great reviews all round. Probably a waste of time as I will only end up fitting some bigger wheels in the end. :frustrated: :grin:
April 16 2015
So, I have been keeping busy and totally distracted from everything else recently. My main goal has been to get the 964 as clean as possible, MOT'd and everything working (Minus the heating, for now)
This will be pretty picture heavy, I'll let them do the talking.
I had a cap which fits in the lock, it helps disguise it and stop it standing out so much on the black handle, I'll be getting another for the other side.
The carpet was a complete state, spent a fair while cleaning oil and various crap from it. 3 of the fasteners have been pulled off and are missing so I need to sort this out. I've seen that I need 15mm female button things.
The car is very dry underneath, infact, there doesn't appear to be any leaks apart from above the passenger side rear trailing arm. When previously looking through the invoices I have, I could see that the gearbox pipes to the oil cooler were noted as being "Heavily corroded". I worked out that these pipes looked new and obviously replaced the corroded lines.. Evidence of the leak was coming from the coupling, so I tightened the suspect line up and 1 week later, still no leak, so job done!
While poking around, I discovered the car has some height adjustment!! Not much I know
Are these standard fitment?
Some before shots, not as bad as I expected...
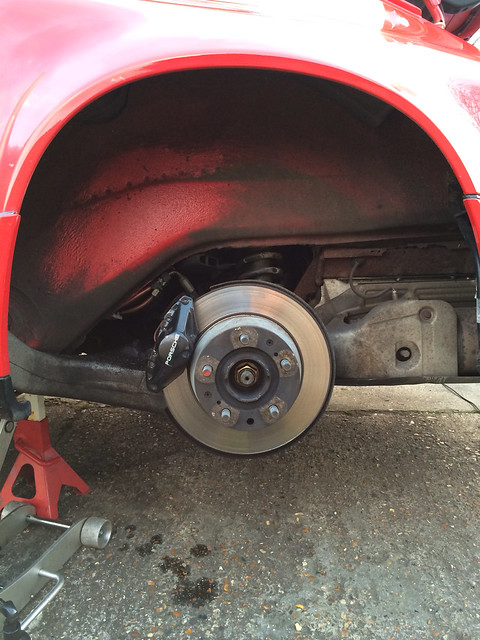

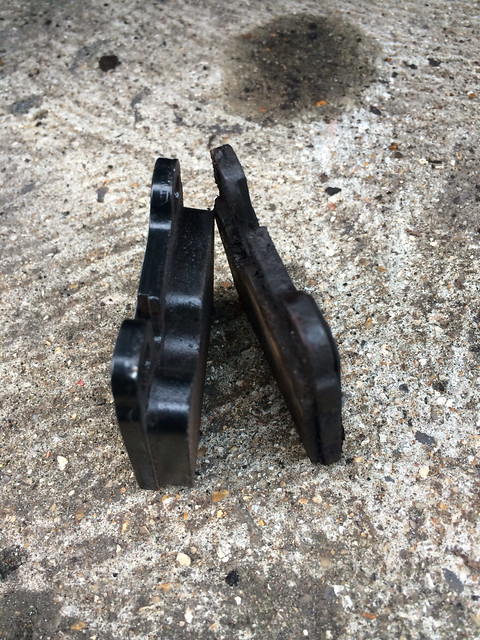
Some new brake pads, much required!
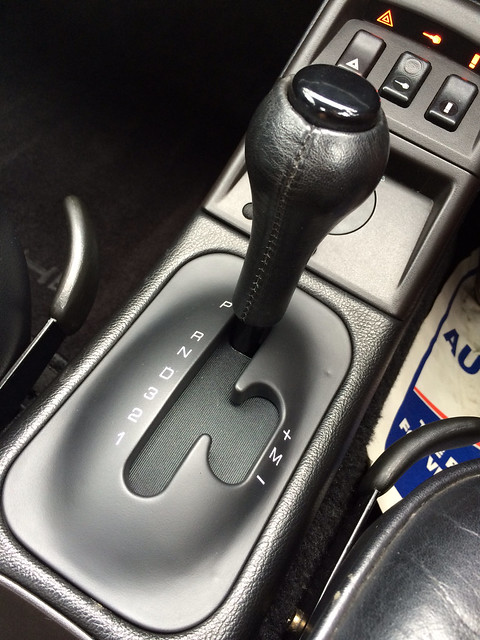
The tiptronic surround had some wear to some of the lettering, so I swapped this with the new one I had.
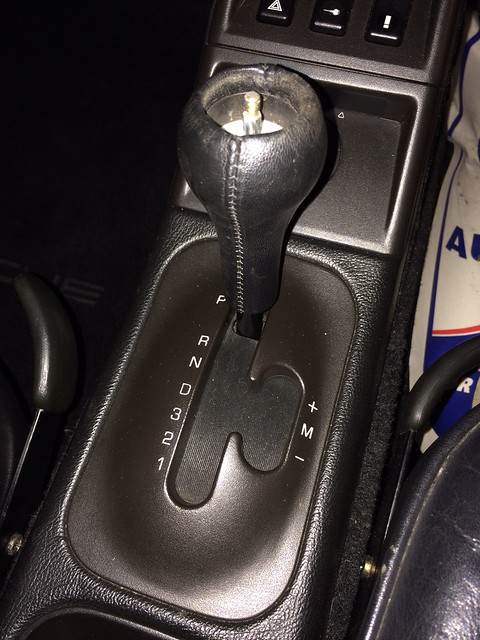
What a tiptronic shifter looks like.
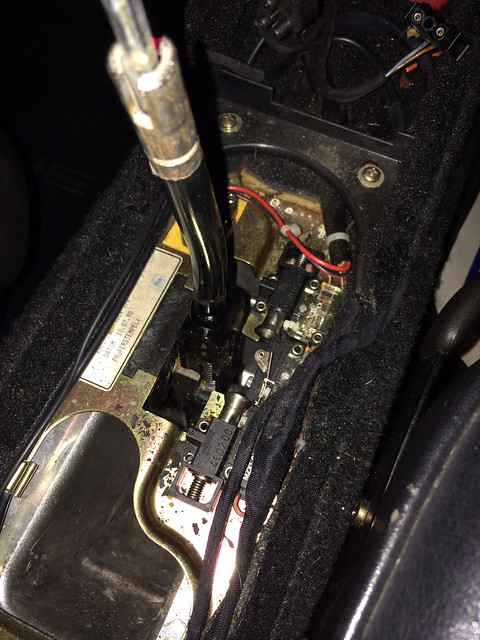
While at it, all of these were jammed, so a good clean and grease and it works like new!

Old Vs New

My first aftermarket part for the car arrived.
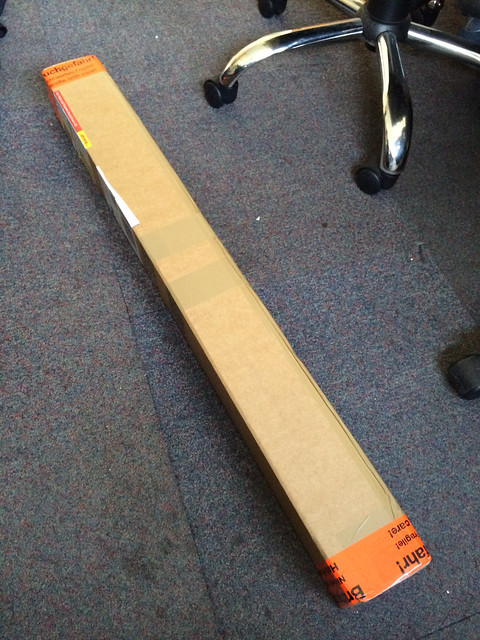
A nice sound proofing tidy bar from Germany, thanks to a link seen on world 964 owners.
A bunch of other bits turned up from Design911..
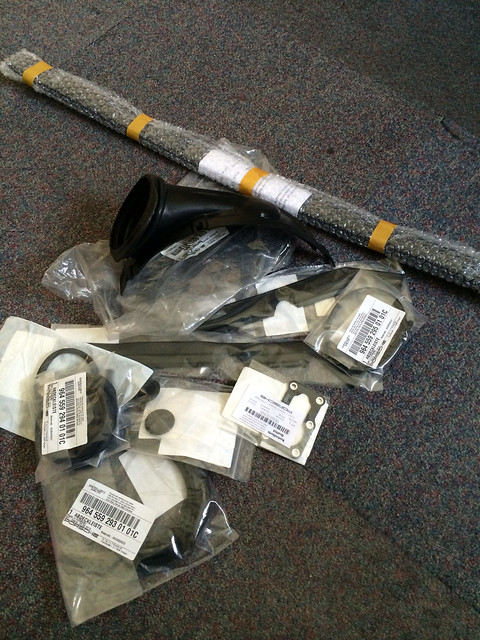
Before the bar..
After
This should have been a 2minute job, but I dropped one of the clips and had to remove the heater blower to find the thing!!
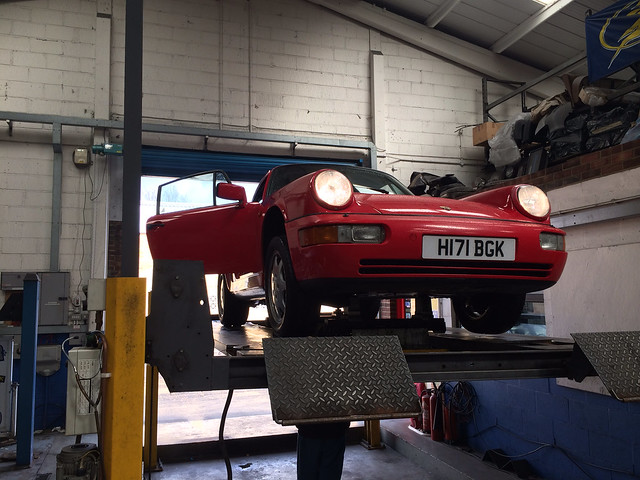
Off for an MOT, passed without a single advisory!
Met an old school friend while there
New tyres being fitted
Sunday just gone, it was time to really put some time into it, jobs like painting up bolts and small details, listing out what new parts I need to buy etc.

Thorough cleaning

While under the arches, I wanted to investigate my oil level sender not working.. Pulled the sender out and gave it a clean, it still didn't work.. I had heard that these can suffer from bad earth, after running a earth from the sender itself to the chassis, I discovered that it worked!! So, I need to work out how you earth the oil tank, or how it should be earth, as earthing the sender to the oil tank did nothing. If the oil tank is earth or is the sender has it's own earth, I don't know... Any advice?

Old seal
New Seal
It now works (This was a shot after the car had been in heavy traffic)
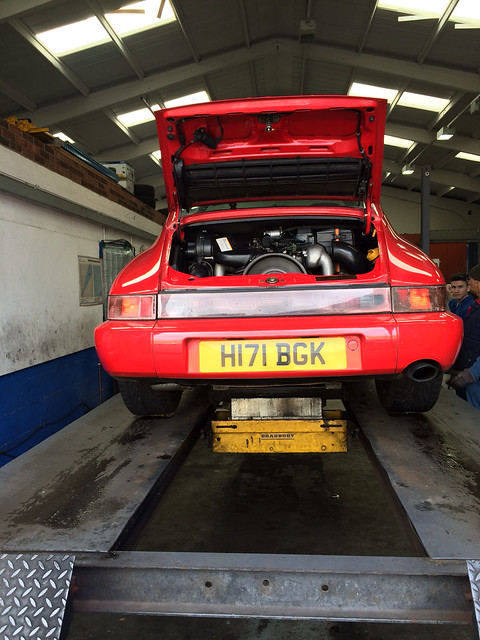
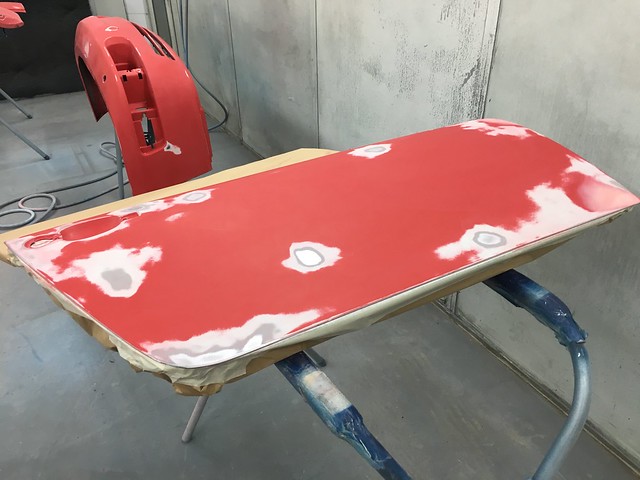
On to the body work. I had already spent some time, mainly by hand, seeing how much work it would need... Alot and by machine was the answer.. I had taken some of the oxidation off by hand but not much and in the dark, it looked better than it did in the below pic..
Time for the body
Ready for a cutting session

And after, I am still yet to tackle the bumpers and some panels need another session but for now, it's looking presentable.
A high shot from my office, the clouds aren't helping the now non faded look


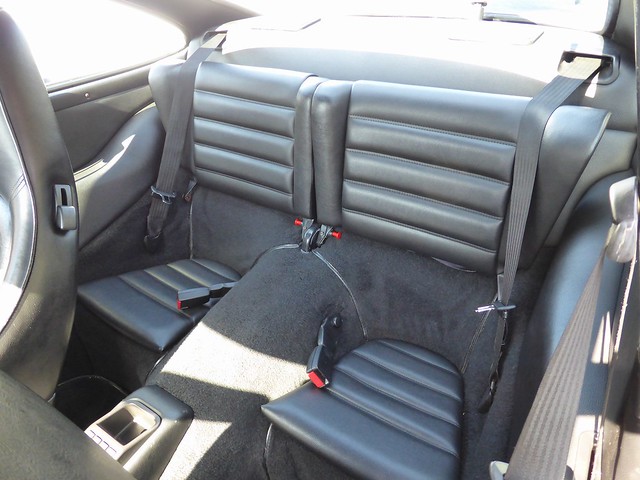
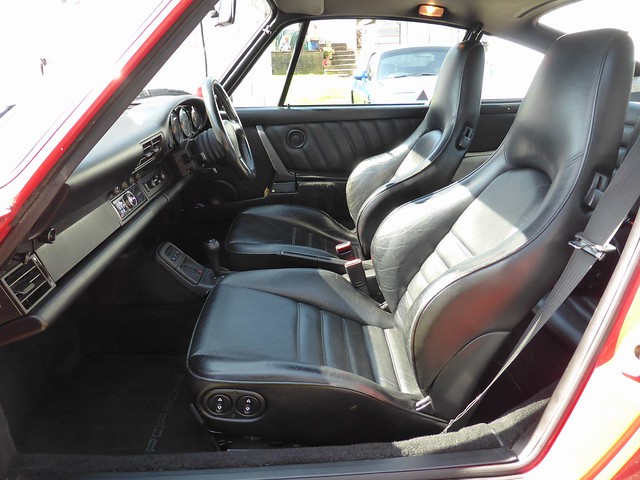
Some random interior shots, only given this a quick hoover and treated the seats to some conditioning.

No way near where I want it to be yet, still need to polish the bumpers.
Xquisite Automotive should be taking the car in for a full repainting in June but I am hoping they can do it sooner.
I have been using the car and put around 260 miles on it so far, I am really enjoying it, there is a sense of occasion every time. I had a run on a local test track against my old E46 M3 and was totally shocked at how it didn't fall too far behind it, really impressed us both.
I love the soft, hugging seats, the chunky steering wheel and the tiptronic isn't that bad. Still not my choice but for driving in town, it's quite nice. My girlfriend loves it.
The car does feel heavy, even without a full tank of fuel, perhaps I'm used to the light steering on my MX5 and 997. It wouldn't be my choice for a track car out of the box but I'm sure some low profile tyres, suspension and manual box, it would be a different car. This car is going to stay a cruise, it's nice to pop it into D, windows down and sunroof open and listen to the sound of the engine just rumbling away, some extra noise would be nice though.
Overall, after 260 miles, I am loving this car and cannot wait to see it restored, it's been a fun experience so far and thankfully, it's a perfect solid base car. The garage I took it too for an MOT couldn't believe how good of a condition it is in, they see and even own a 964, amongst other porsche and air cooled cars, they really commended it. :worship:
As she stands as of 15 mins ago
Front end high as anything! I did notice a difference in my driving position after going from an empty tank to a full one though

I changed the clear silicon piping to black and I can't for the life of me, get that bloody heater pipe into the new rubber arm above the fan!!

Thanks,
Mark
April 29th 2015
Nothing too much has been happening, I had yet more seals and bits and pieces arrive ready for when the car has been painted, otherwise, just a couple of small jobs which needed ticking off of the list.
Calipers before
Calipers after
I had always planned to have the calipers refurbished in red when the car goes in for paint but now they are glossy, I am not so sure..
A night time drive

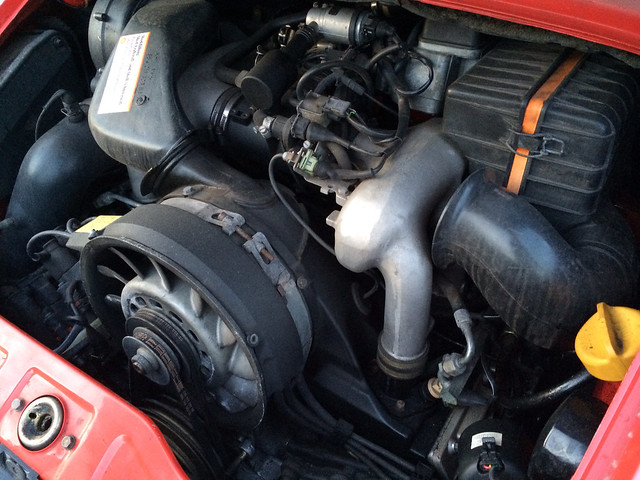
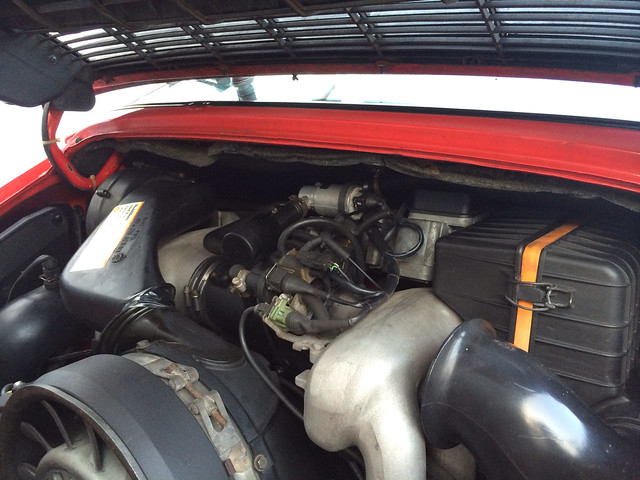
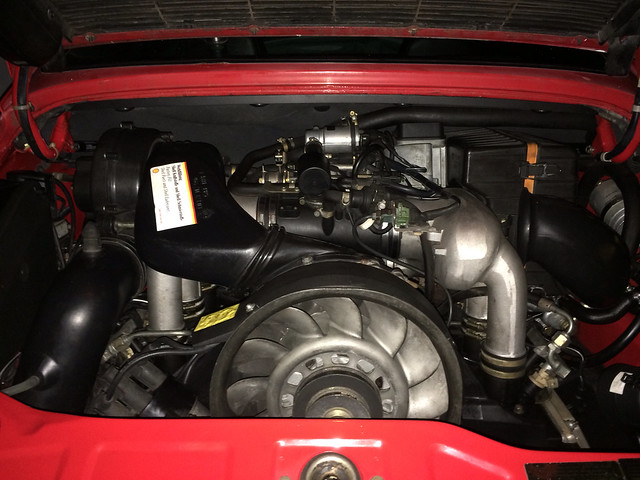
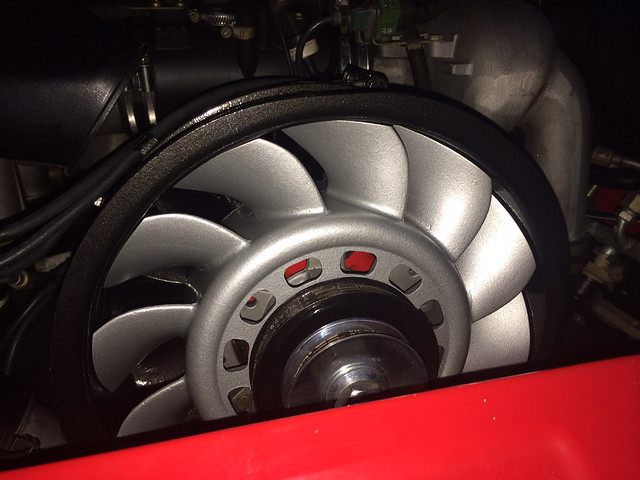
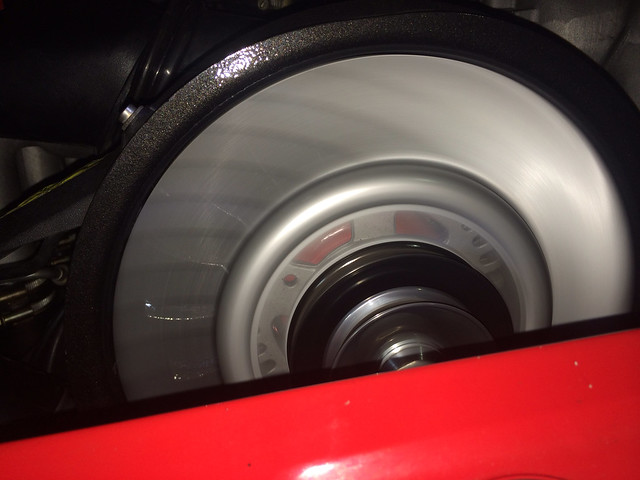
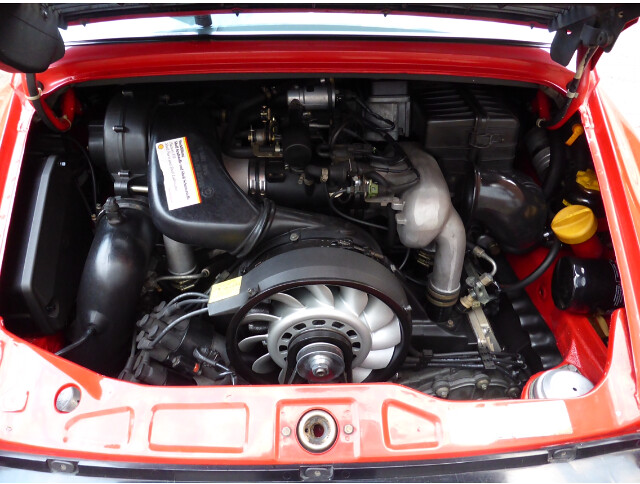
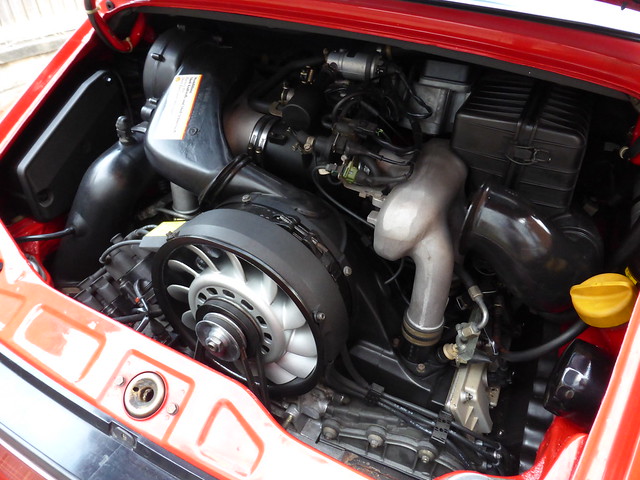
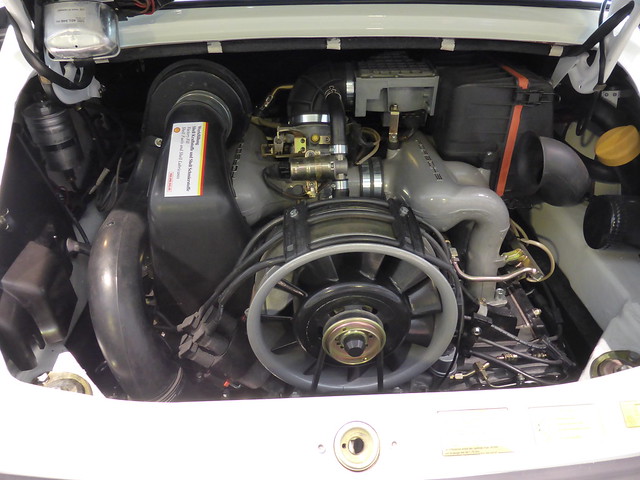
I was itching to get the fan out, I had always loved the idea of changing the colour of the engine fan as it gives such a big change to the appearance of the engine bay with such little effort.
Fan/Alternator removed from the car
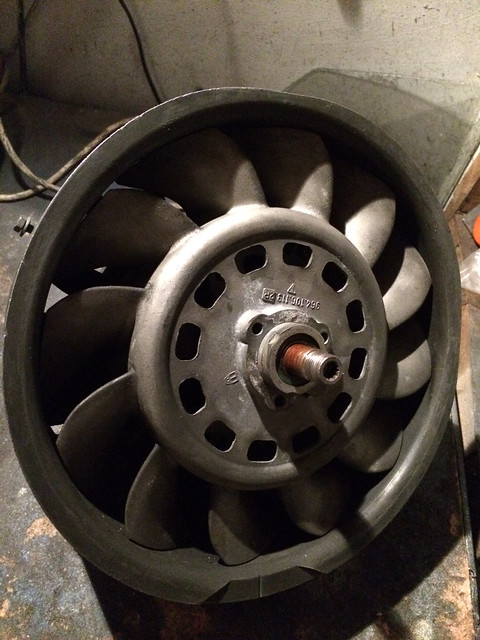
After discovering that I needed a bearing puller, �18 and a Mcdonalds later, I was able to pull the fan off..
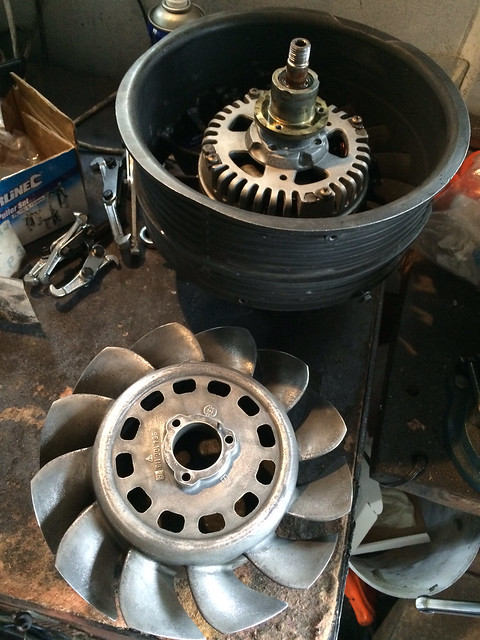
After a lot of prep and a minor bead blasting, I was ready..
I was going to paint the fan red but I decided that it has been done and it would detract from the original look of the car which I want to go for.
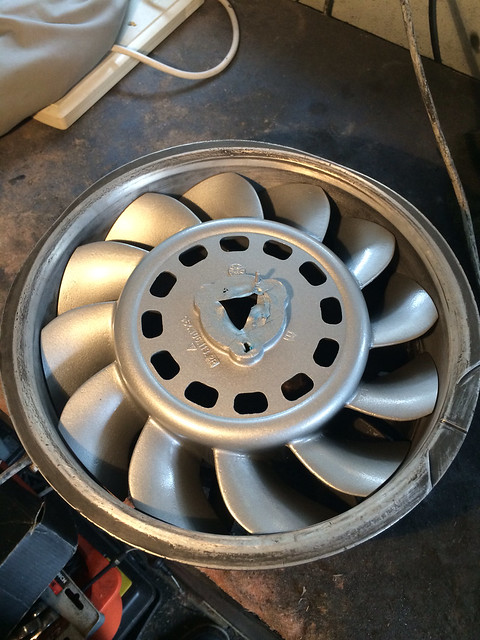
I went for a texture effect paint which I use on most rocker covers, it's durable and retains that tough look. Once baked, it forms to a nice factory looking textured finish. Brilliant stuff.
I also polished the belt things


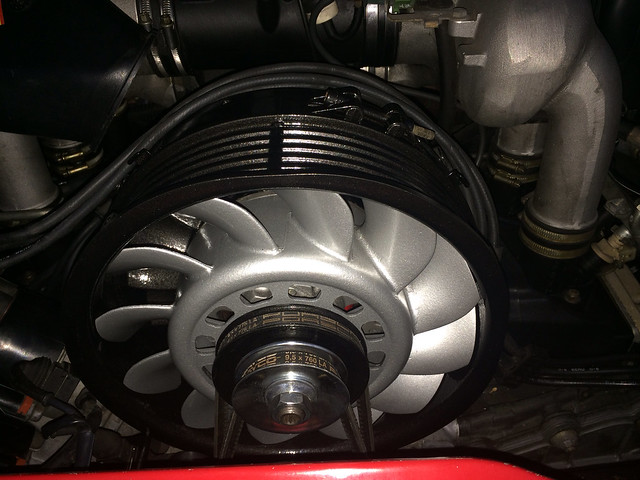
As I refrained from going red on the fan, I thought I'd add some detail to the alternator internals...
It was dark so no decent full on pictures as yet! Need to paint the manifold now!
Last update was a change to the peeling gauge face...
New face from Germany and an easy swap!
All done

Not sure what's next :dont know:
July 6th 2015
I am in limbo with it at the moment, ultimately I WILL be selling it once painted, the tiptronic is nice for just cruising along and the odd sprint but for me, I need a manual, so I plan on selling this once repainted and tip top and hunting out a manual project to make my long term serious project.
I am only awaiting the bodywork to be performed which will feature a new boot lid to replace the current rusty one and new seals and rubbers throughout. I am fighting the temptation to do some smoothing of side repeaters and headlight washers while it is being painted. Even fighting changing the colour to the latest Porsche "Crimson red" as seen on the GTS's and complete a GTS theme with black wheels and alcantara pieces inside.... No good if I plan to sell it on though.
I also need to get to the bottom of the lack of movement in the servos, I recently spent some time investigating them and having exchanged some emails with Tore, got a bit closer to the potential problem. I opened 2 of the servo's and they appeared fine, I also opened the CCU and that appeared fine. Checking the outputs on the CCU, I was seeing no change in voltages, even after resets, putting a current to the servos made them move, so I believe the CCU will need repair/replacement, so once I get back around to it, I will be sending that to Tore for inspection.. Before this I would love to get hold of a spare from someone, just to be sure that it is the CCU. I don't want to waste time and money sending it over to Tore should it actually be OK.
No update unfortunately, it has been tucked under a cover avoiding the sun from fading it's remaining red paintwork anymore.
Oh, one thing, when playing with the CCU, I found a rubber bulb holder hanging down with no bulb, turns out this was for the ashtray, new bulb and jod done. That's as good as this gets :grin: :sad:
A picture of it in the parking area of the bodyshops new premises.
Oh that's another thing, I bought a Pipercross filter for the sake of it being black, rather than some odd orange thing! I haven't noticed any increase in performance or noise if anyone considers one..
Some random pictures after I cleaned the pair.

Does anyone have a Carrera badge they wish to sell? Looks naked without one.
[img]https://c2.staticflickr.com/4/3937/18845374544_339ed4bfe8_z.jpg[/img]
August 28th 2015
Nothing overly exciting to add to this as yet, the car had an outing to Brands Hatch to watch a mate race, it seemed to draw a crowd when parked in the paddock, was quite surprised.
A few weeks prior, I took the car along with my 997 down OPC Brooklands for their service clinic. Was a really good event and met some good people, the guys at Brooklands were all very welcoming and certainly won my business for the future servicing of my Porsches.
I was surprised how dry it was underneath, some weaps from the rear chain covers but that was all!
Got talking to a nice guy, James who owned this beautiful RS
Some great cars turned up and were on display


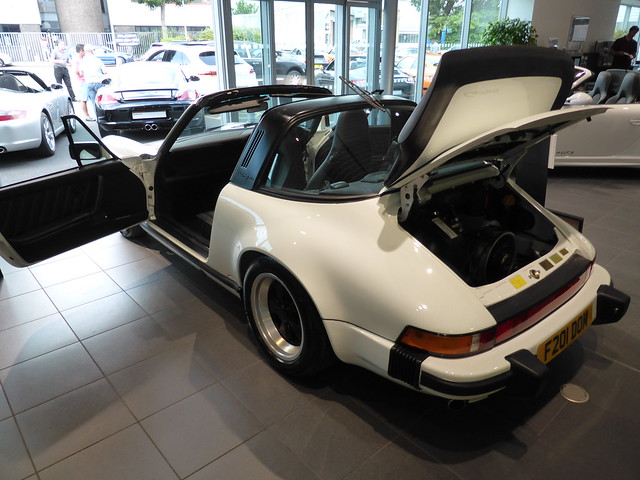
The restored Targa which is now for sale. It was immaculate!
If anyone wants to swap a 993, let me know
The historic Brooklands track.. and on the left, Tesco

Was really good to get talking to the techs about both cars, both had great things to say. I was surprised at how thorough the inspections were, thankfully no surprises and everything pointed out is due to be sorted and I have replacement parts for. My girlfriend drive the 964 which she has now claimed as hers and changed her mind from trying to push me to sell it to now keeping it.
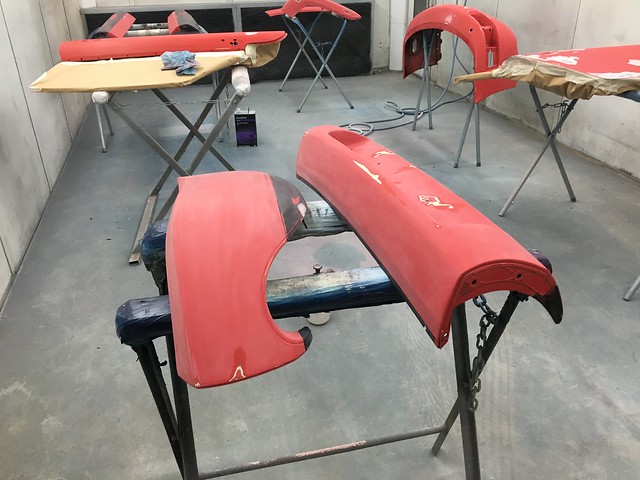
I have a huge collection of parts now, all in prep for the respray.
A small job I could do now and not wait for the respray, new fuel pump cover and some new stainless bolts to replace some rusty looking originals on the underside. All noticed when cleaning the underside :roll:
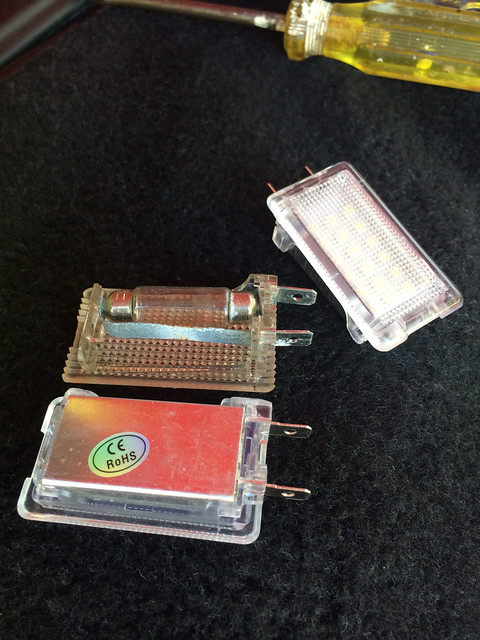
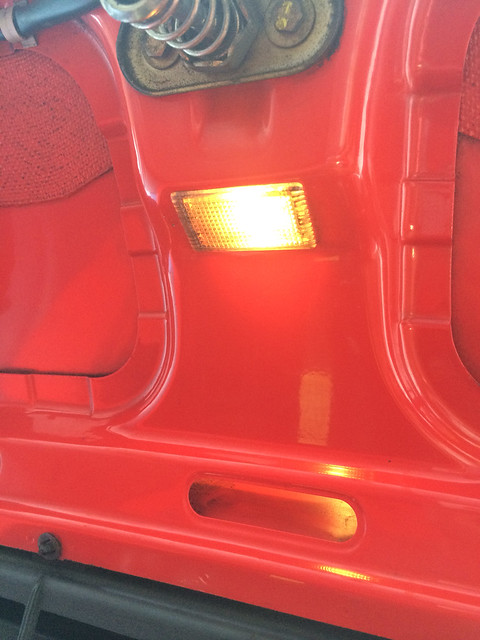
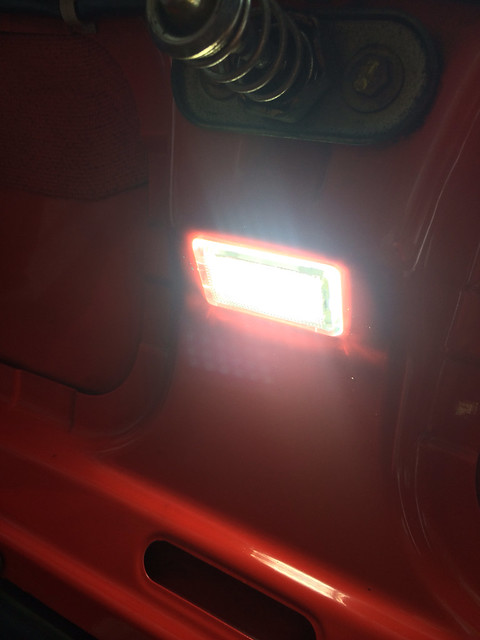
New LED compartment lights, I'm always leaving the boot/bonnet open so less draw and more light can only be a benefit!
Managed to give the car a good clean and finished with Zaino, it then rained!
Home time now, will add some more to this over the weekend.
Feb 17th 2016
A bit of an update, after a little while of just remaining stored away, I got some time to crack on and progress with getting some bits and pieces done. All minor bits, ordering a fair few new parts from Porsche and finally getting her in to the bodyshop!! Wooo
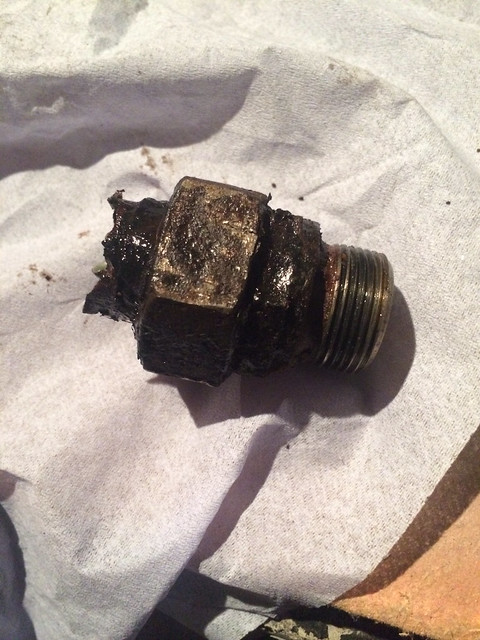
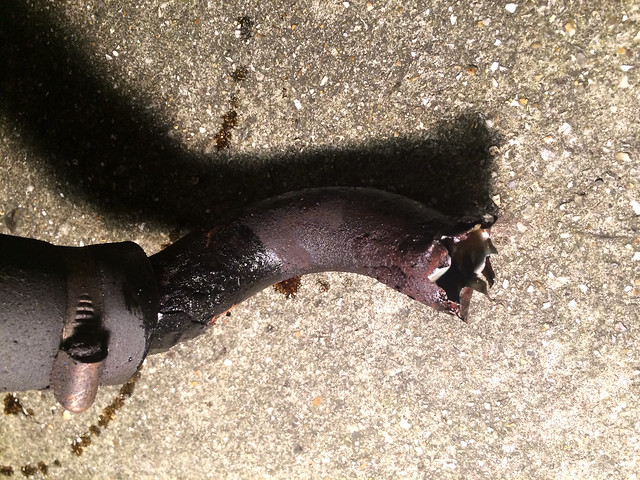
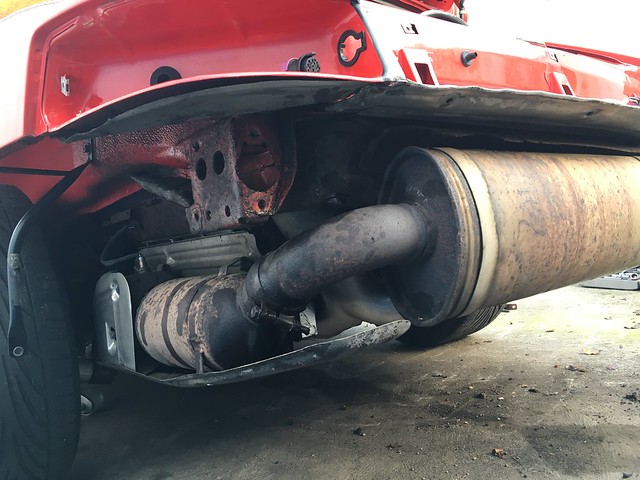
So wheeled out into my "work bay", I started work, back in November I think, on replacing the rusty oil return pipe that had managed to develop a small hole which was weeping oil, this was a job I was not looking forward to as I thought I would have to remove the heat exchangers, luckily, after some advice on here, I was able to replace it quite easily.
Said pipe, after some pokery, now gone from a weep to a pour.. I had drained the oil prior to this.

I did have a little fight with it and ended up just tearing the end part away from the rest of the pipe
Old Vs New
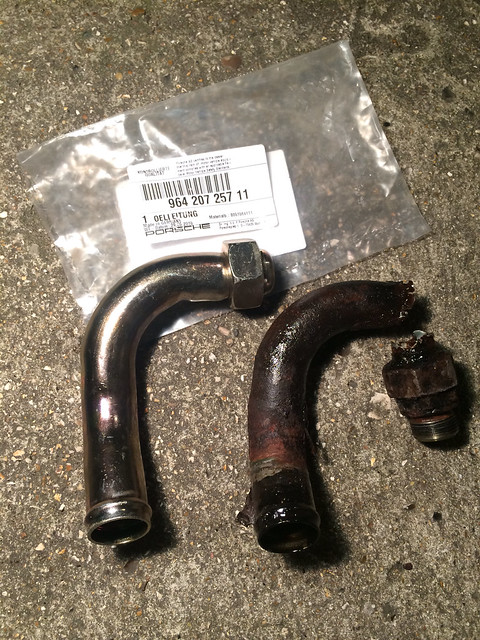
New pipe in place with new stainless jubilee clips. I am hoping to get around and replace all OEM jubliees with these nice stainless ones to future proof!
Always impressed with how dry and clean it remains under here, I like to clean all gunk off as it makes it easier to locate oil weepage at times like this.
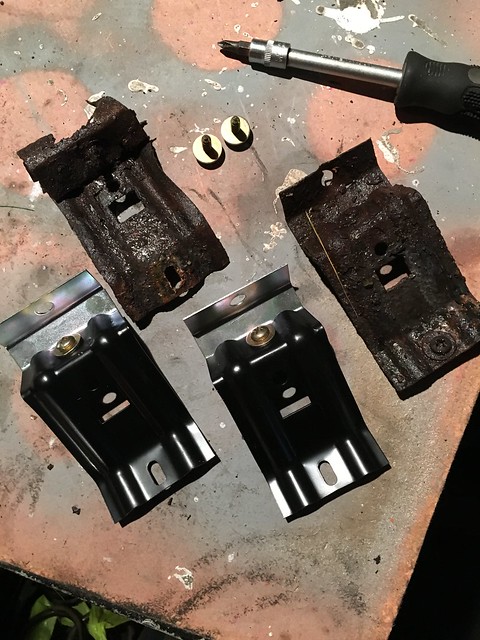
While under it, I wanted to remove the bumpers to replace some of the rusty support brackets and check the car for any rusty as I have seen that rust can sometimes hit the areas where the bumper reinforcement brackets attached to, thankfully, this car has remained in great condition with no rust to anything other than some minor replaceable parts and the tiny bits on the body.
In it's original 25+ years worth of dirt and grime.
I did spend an age cleaning everything but strangely, didn't take a picture of the finished article, it was probably dark!
This was a bit odd, BMW and Porsche?
Horrible rusty bumper brackets
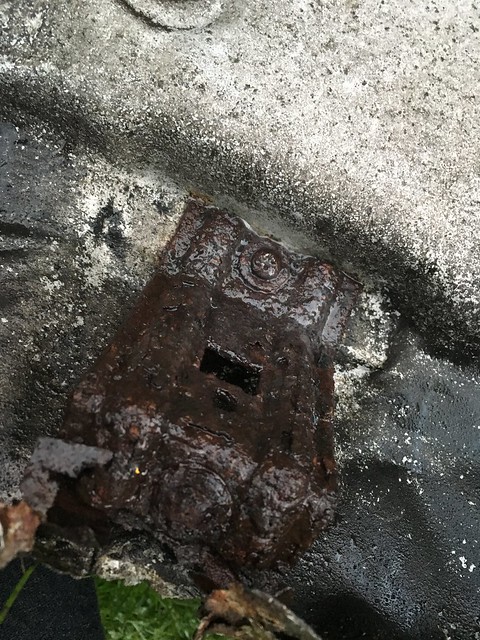
Old Vs New
The remains of the central rear bump reinforcment bar and new one

Exhaust clamp bolts were all shot, so replaced these with staineless items
Bumper brackets refitted with stainless bolts
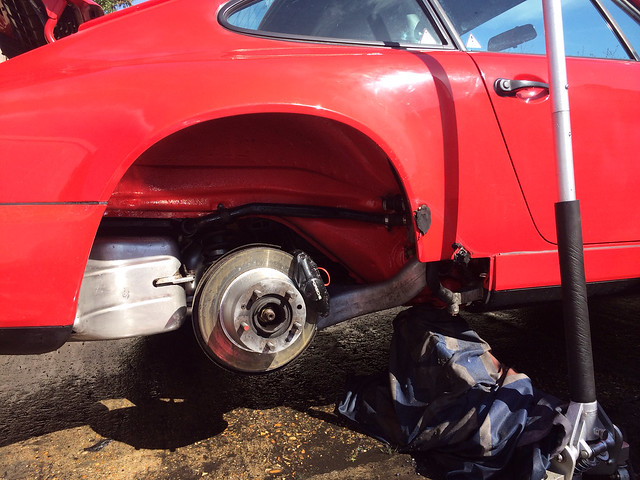
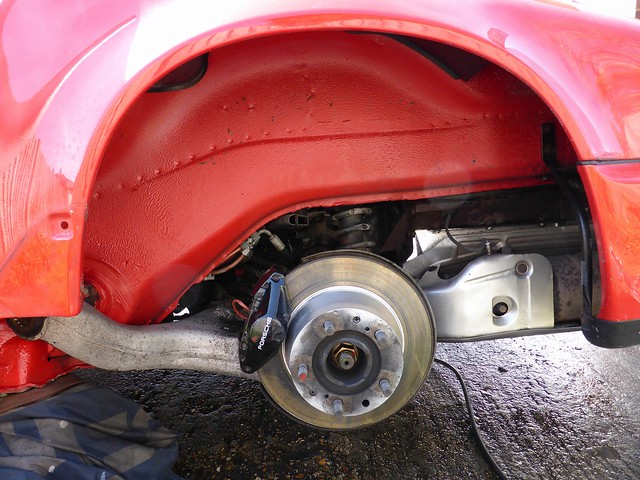
Next, I wanted to look at the conditon of the PAS rack and brakes, see if anything untoward was going on, but all factory fresh with a little patina.
Next was removing the front bumper and looking under here.
The first thing I wanted to do with get the area that sits just behind the lower grille back to black and protected, this has some wear from stone chips I guess, so I thought I'd waxoyl this area and do the same on the underside.
Waxoyl'd

Enlisted the girlfriend to help as she wanted to "do more stuff together"... Not what she had in mind..
The old undertray had seen some action, so I replaced with a new one. I assume the new one is for a C4 but no issue, will cool the steering rack :floor:
Bracketry given a coat of paint
Fog insert replaced with proper one
Wing supports replaced for some really nice and light, yet still impossible to flex ally items. Cheap and perfectly made, can't fault them.
Painted
After all of this, I took it for a drive, the first since the oil pipe change... I think the remains of oil which had leaked and mainly WD40 were taking a while to burn off and causing some stares at the lights..

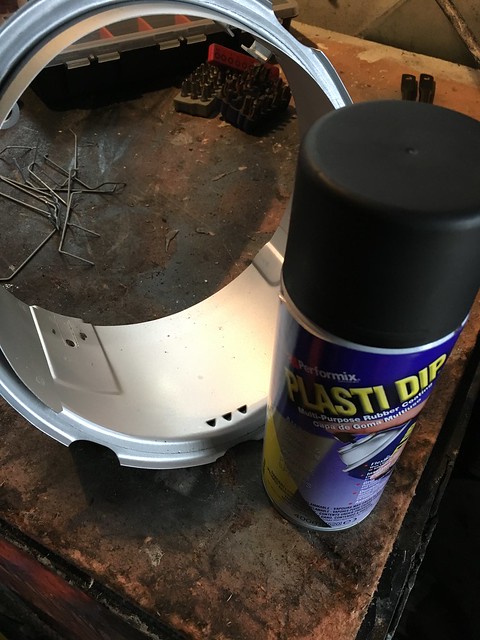
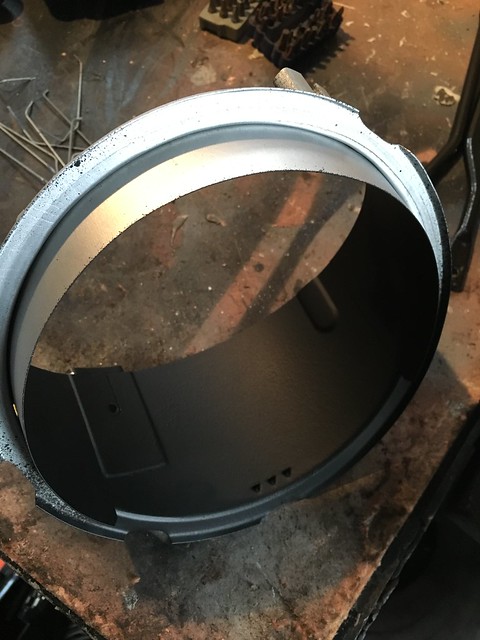
I decided I wanted to smoke the lights, just the silver trim thing at the bottom, I used plastidip as this can be peeled off if I didn't like it. I am still undecided but I will wait until the car is back from the bodyshop.
Before
Apart
Plastidip for your reference.
TO BE CONTINUED!!
More to come but I have spent 45 minutes typing all of this so computer time is over for today.
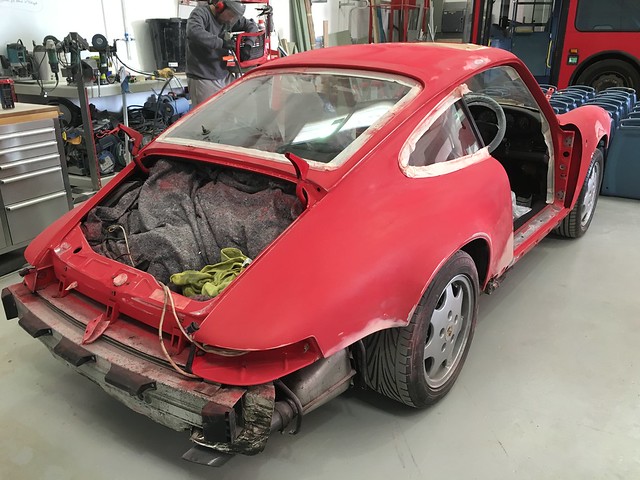
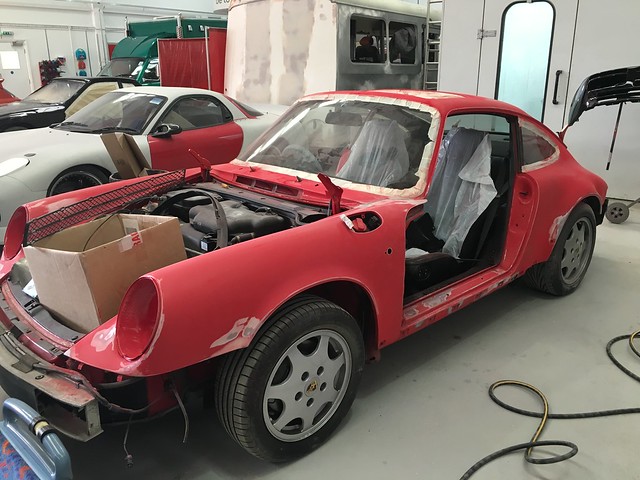
Next is the stripping of the car, mainly in the dark freezing December temperatures, for the bodyshop!
:bandit:
Cheers
Feb 18th 2016
I was initially very scared of working on this car but it turns out to be quite a simple beast, very well put together and I have really grown fond of it, especially after seeing how solid it is underneath.
The next bits, on a slightly warmer day, fixing some small jobs and then strip down 8)
The sunroof wind deflector was a bit loose on one side, I narrowed this down to 2 clips being broken, a nice easy 5 minute fix, love jobs like that.
Broken!
Old vs new parts
All done
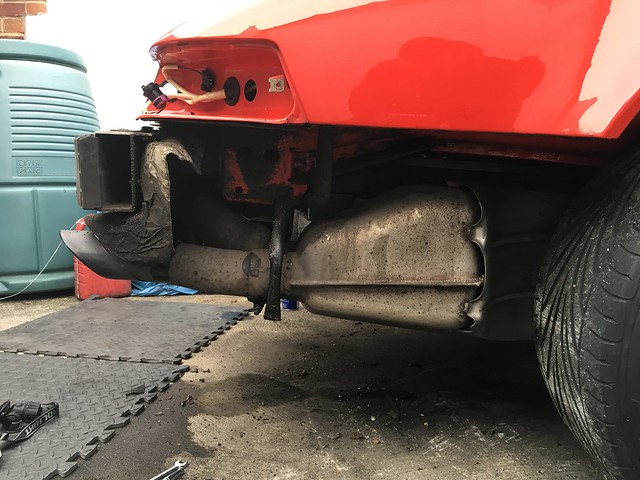
Next was the exhaust tip, this was looking a bit tired so I gave it toa friend who was going down to the local powder coaters, it came back and is lovely and fresh but sadly, didn't get a picture!!! This is what happens when I'm working in the dark.
As it was before, very tired!
I thought I would remove the scuttle panel seals, I thought it would take me a few mintues but they turned out to be right b&st$rds!! Much swearing was done removing these, probably the hardest job on the car so far!!
It is a case of removing the first allen bolt you can see when you open the door and then loosening the further one, then just pull up, so I was told. It took a lot of levering and pulling with pinchers!
The result, this was the good one, the other side was in 5 or 6 pieces, I didnt take any pictures as I was probably pissed off :lol:
Even though they would be coming off, I thought I would try my new scraper seals, mine had shrunk, so new ones went on and fill the big gaps left by the old seals. An easy 5 min job, drop the window, lever the trim up and off, slide old seal out, new one in, push trim back.
Hopefully you can see the difference in size
Trim removed

New on, old short enough to let alot of water down
On an inspection at Porsche, they noted that my front bump stops had seen better days, I had some spares and this looked like an easy swap so I spent a couple of hours dropping the fronts down and popping the replacements in... This is an area I am going to revisit, I have some shocks from a low miler car which I think I will fit as these shocks seem a bit weak on rebound.
This gave me access to that dirty area just behind too :roll:
Replacement on - Its ok, I was sure not to strain the brake lines
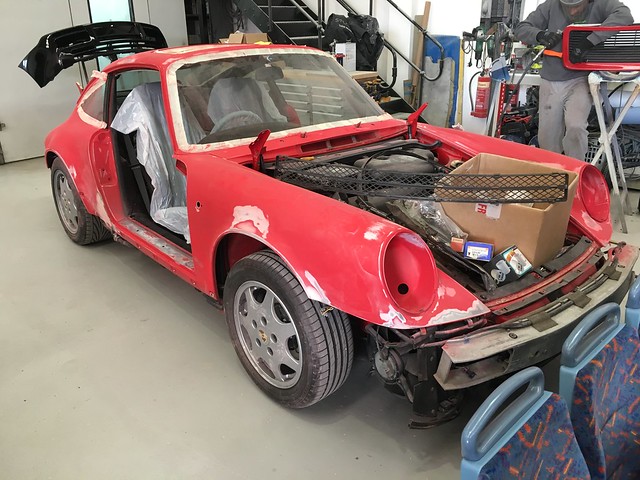
I then got on to removing the side skirts, I was always a bit worried about this as I had seen some horror stories here on other cars, thankfully, I felt nothing but relief, my underskirts are totally rust free, phew!!
Front area stripping of loose items
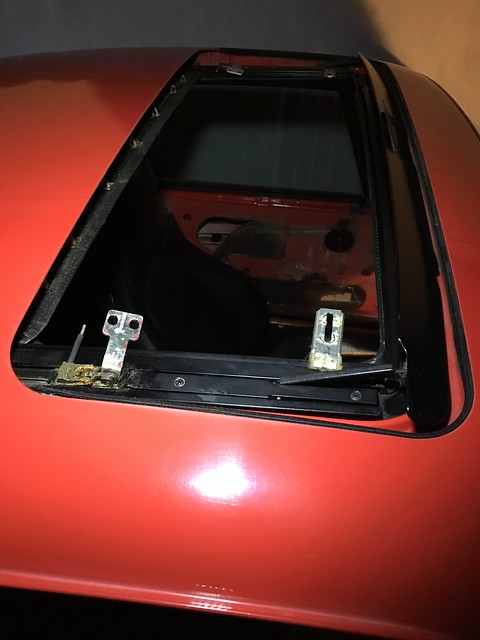
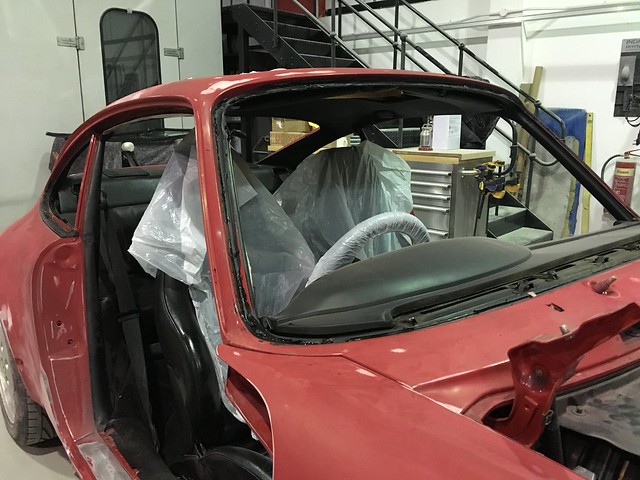
Sunroof and interior door cards removed
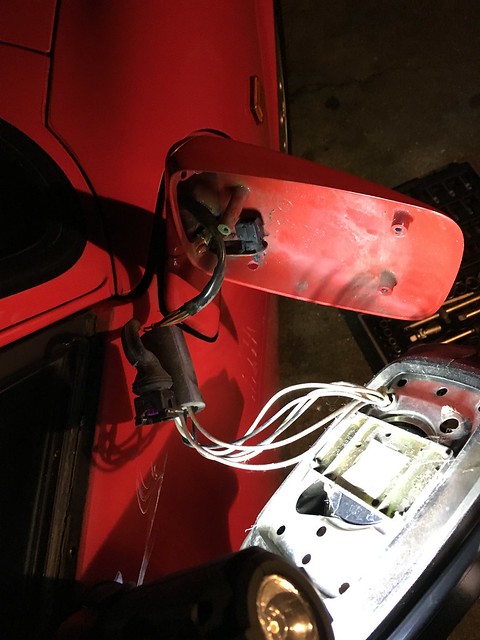
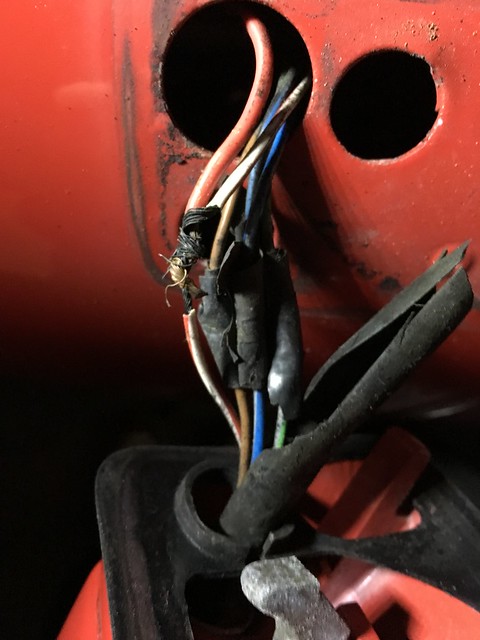
Mirrors were next, I found that the drivers one had never been removed as wires were intact, I had the sad job of cutting them but thankfully, in a nice place where I plan to use a waterproof connector to join them back up once it's all painted.
All was going well with the passenger side..
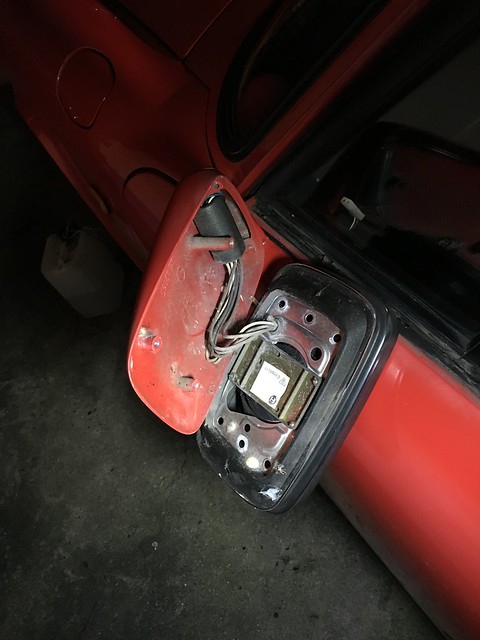
Then I came across a wiring job done by an 8 year old!! Wires twisted together!! Who does this on a Porsche?!! I guess this is what happens when cars drop to a low value, they get low value treatment. Grrr
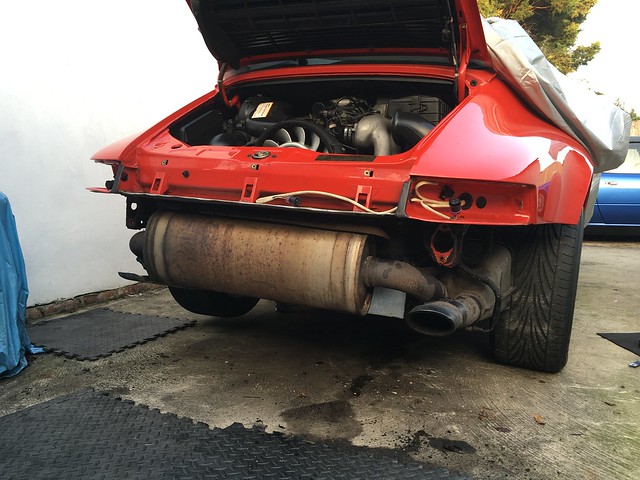
Tea tray off

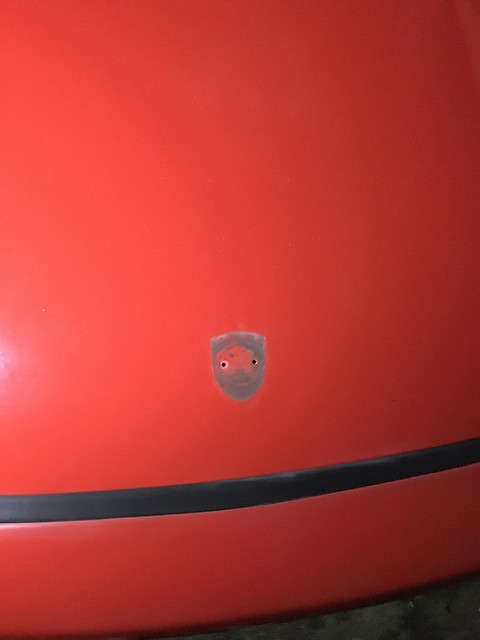
Bye badge!
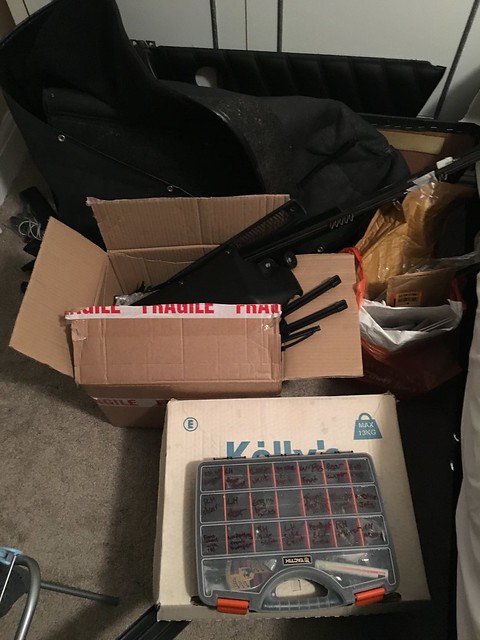
Every nut, bolt and clip I remove goes into here in labelled sections
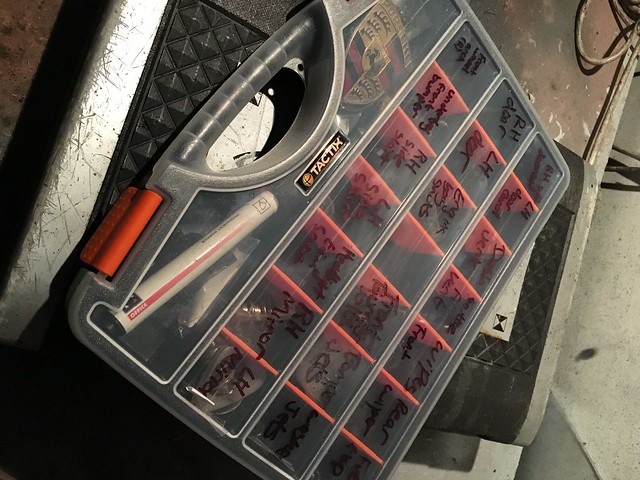
STUFF in the spare room
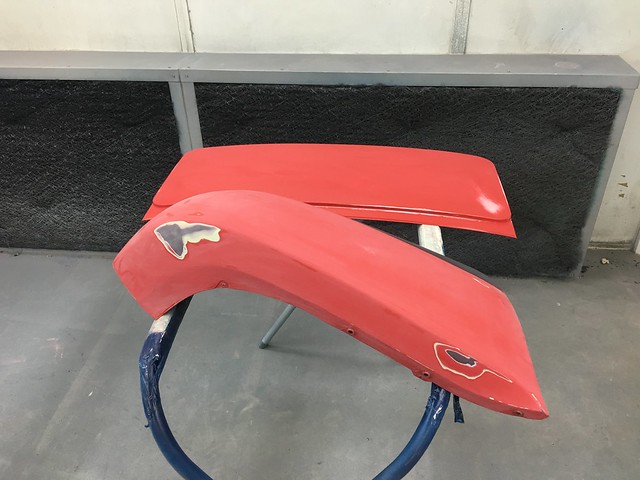
Spare engine lid
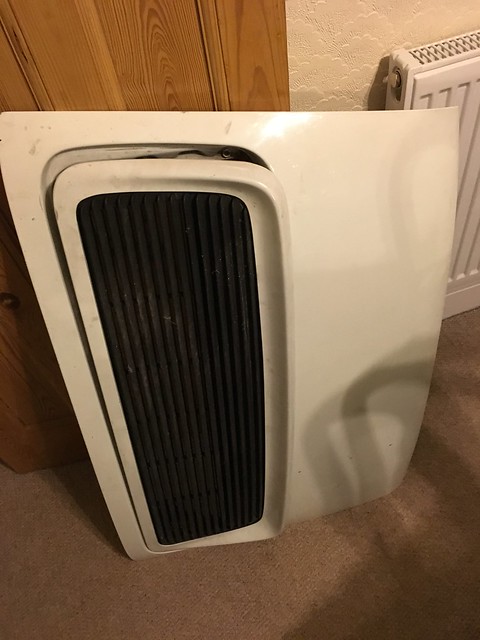
Casing off and split so that they can be painted properly.

Lacking pictures again, sorryyyy
The morning I was due to take the car to the bodyshop came, I ended up refitting the drivers mirror housing so that I could be legal, although I didn't refit the wipers and it rained a bit, lucky the windscreen had Gtechniq on, so it just beaded straight off..
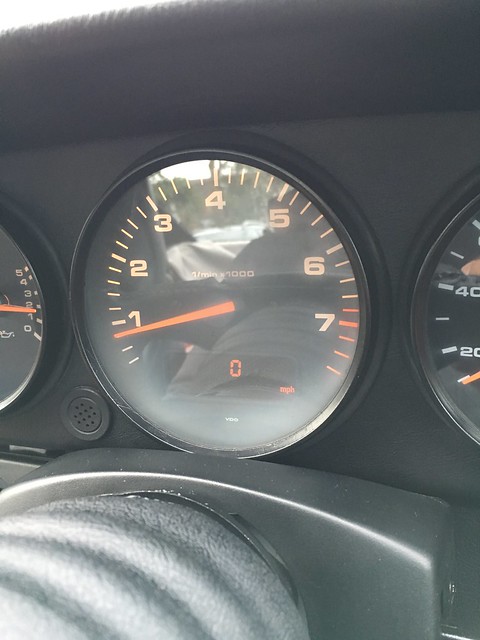
Weirdly, the rev gauge fogged up, never had this happen before!!
Outside Xquisite
Tea tray was cable tied in place
Lights were all removed and here she is inside, nice and warm
Not only warm and dry, in good company too
That’s it, next jobs are just cleaning up light lenses and working out what other stainless bolts I need.
I'll hopefully have some progress shots of the windows out, doors off repaint soon, planning on making a few visits
Cheers
21st Feb 2016
It's been a bit slower than planned due to having to wait in line for the bodyshop after it's move but that has given me time to put some miles on the car to makes sure it's spot on, which it is thankfully A total pleasure to drive. I didn't see the fuss but I totally get it now, even with the tiptronic which suits it as a road car imo (I normally HATE autos)
Cheers chief, I wish it was your build! The bodyshop is great, the work has always been perfect with them working on show cars - secret super car projects etc, now they've got a premises which reflect their work, I wish them all the best on their new move. Truly deserved having used them from day 1.
Just a couple progress shots.
Windows are due to come out on Monday and then it will be full steam ahead to have her rubbed down. I would rather them take their time as it's one less stress to worry about while I haven't got it, also saves me from rebuilding it in the cold :thumb:
I took a trip to a local dealer yesterday and got my 964
fix while there, just a taste of what was on display.. What a treat!

[img]https://farm2.staticflickr.com/1612/24549362783_363deca988_z.jpg[/img]
Latest from Xquisite Automotive, they certainly are flying through this, I literally cannot wait to see the finished article.
No surprises around the Windows
That's the latest as of an hour ago, eager to get her back together, hopefully in time for Goodwood 74th members meeting.
Really happy, yet again with how the team at Xquisite are coming on with the car, the updates, speed and detail, can't wait!!! :thumb:
Feb 28th 2016
Another update
The car is soon to be ready for paint :worship:
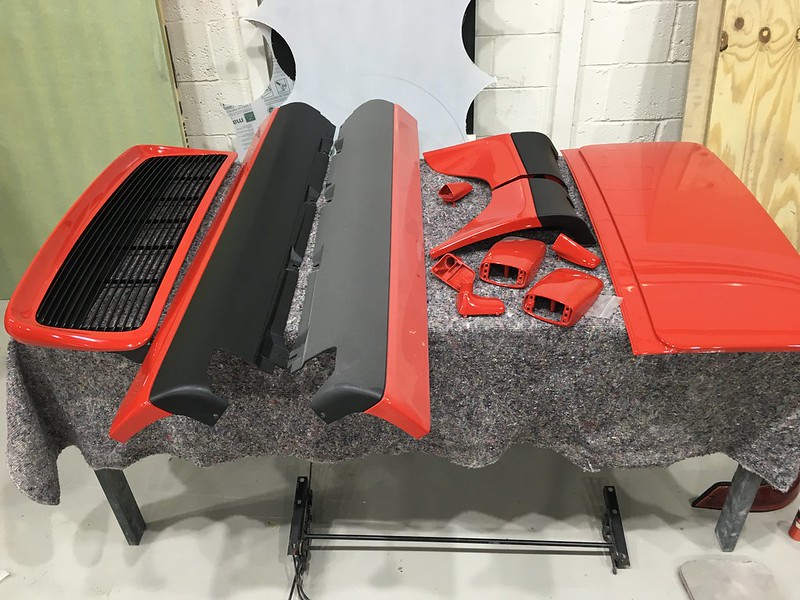
I'll be sticking with the original guards red but this time, it will be a clear coated finish to help extend its life. The body will be going into white primer, as some other parts already are on Monday and may get its first coat of red


23RD May 2016
It’s been a few months but finally we have a nice little update.
There was a slight delay which I was made aware of from the start, I wasn’t at all fussed as it meant that the car would be kept in the workshop rather than outside through the rest of the cold season, plus, I’m having a double garage built so the delay could have been an extra blessing.
This was the cause of the delay. A last minute rush job to build this for the gumball rally.
[img]https://pbs.twimg.com/media/C3r4ymYW8AA3JW4.jpg[/img]
Anyway, back to the real star
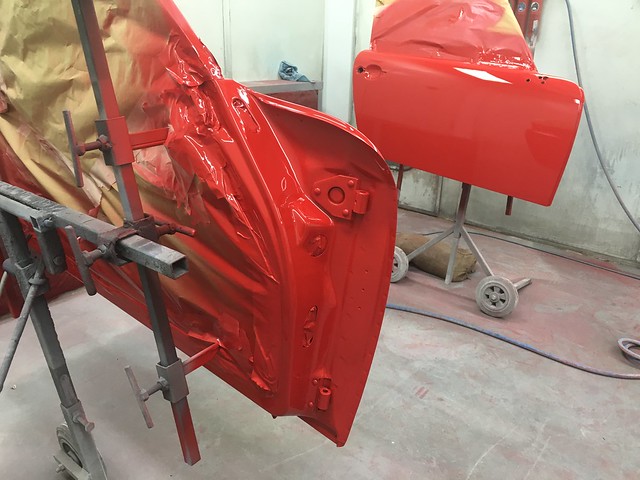
Once that was out of the way, attention turned back to my 964 and in it went for paint.
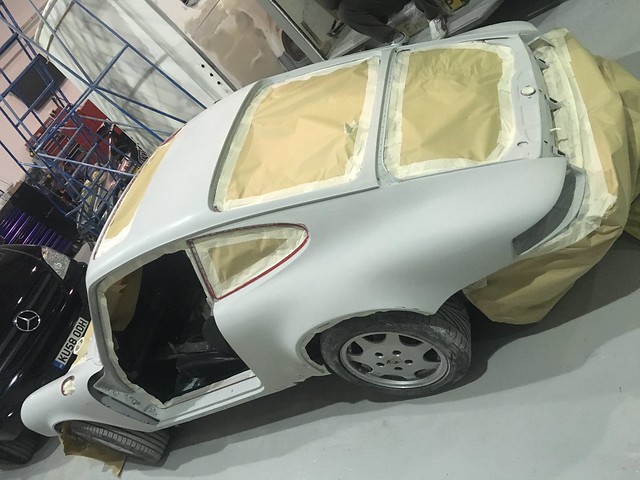
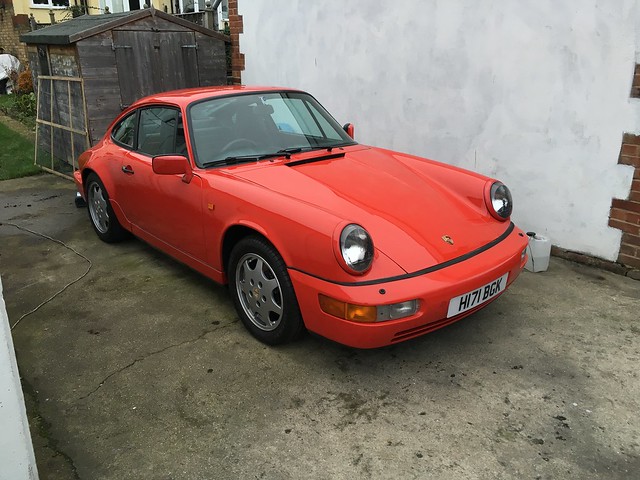
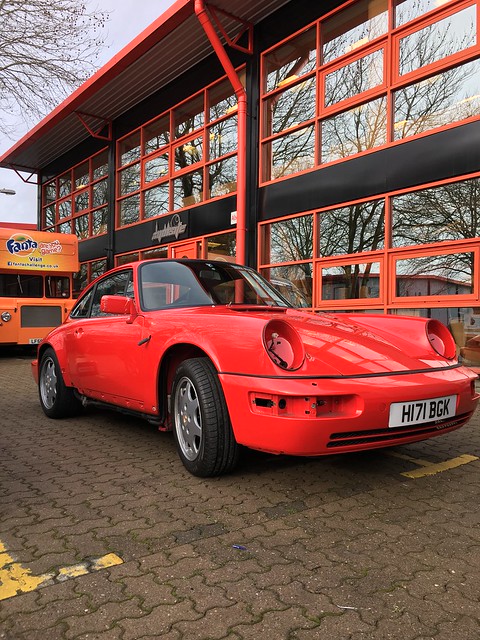
Now done, original Guards Red but with a lacquered finish for durability, it has been put in a clean room to sit for a few days before being polished, once polished, I can bring her home and start the refit, fit some H&R coilovers and start to enjoy her all over again!
It’s been a complete pleasure popping down to see the guys at Xquisite, the enthusiasm and shared excitement over seeing the 964 complete is really reassuring and pleasing, knowing that it is in good hands, part of why I have always used these guys, it just results in perfect jobs.
Think the next updates will be of the car once I bring it home, shouldn't be long
June 14th 2016
Update;
Not much, I went down to see the new Top gear being filmed, got to meet Chris Harris :worship: , was a good day out and on the way back, I thought I would pop in with a few friend and the missus to see the guys along with the 964 at Xquisite.
Before I got to the car, I got to see some interesting cars.
Someone very very high up at Mclaren's own personal toy, in for a complete restoration.
And a recently returned, AMG GT which the guys at Xquisite had custom built a GT3 replica bodykit for. It has now been returned to them for it to all be recreated in carbon fibre panels, not overlays but actual 100% carbon panels! Crazy.
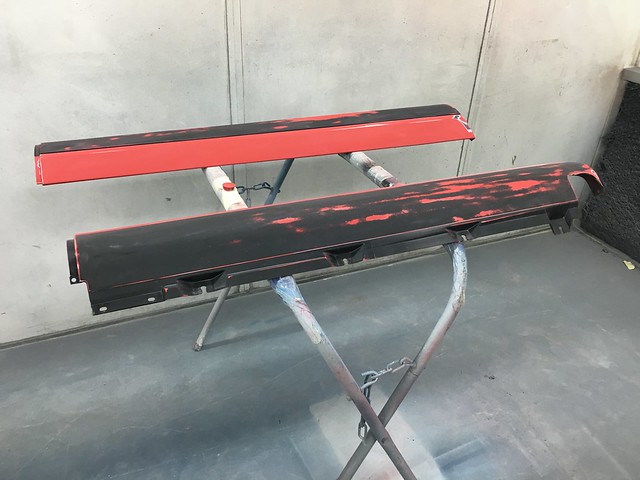
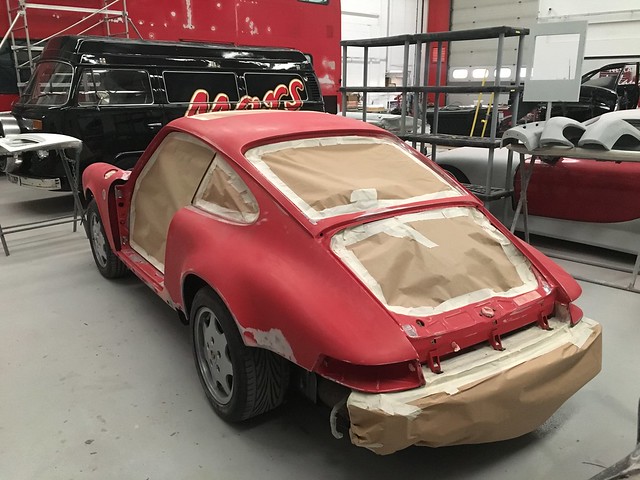
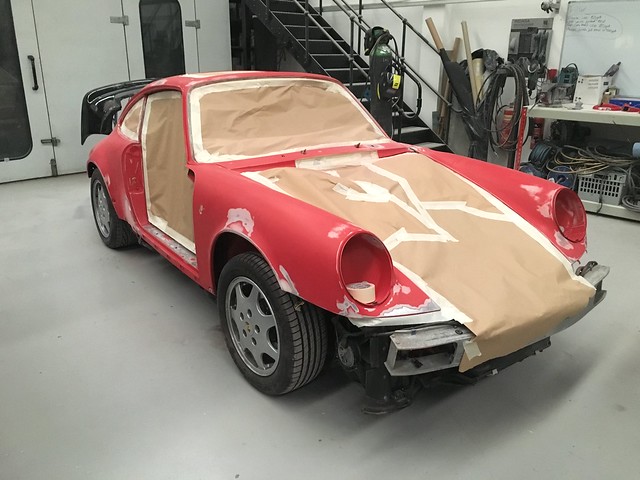
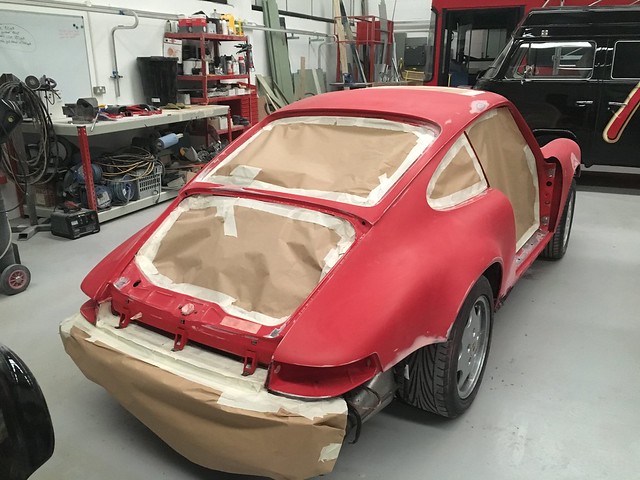
Enough about those, the 964 had been brought back in for sitting alone for a couple of weeks and it was now being wet sanded and its first polish. Pictures do the paint work no justice, it is SO SO SO red and SO flat, yet they have another stage of polishing to do on the panels that have been polished already! Amazing job.
These were in the other booth, not sanded as yet.
So that was last Thursday.
Apparently the car now has the doors back on and is shaping back up so I may need to shoot down later this week :thumb:
Not long now...
August 16th 2016
The car is back but frustratingly, I just haven't had the time I would like to get it back together and to a standard that I want to show it off (It's filthy). I have only been able to spend the odd few hours on it fitting the new bits and pieces, things are taking much longer than planned (Sunroof seal!!!), I now have to be really careful when doing anything in fear of causing any damage and I keep coming across new nuts/bolts/things that I have to order which I didn't anticipate which slow progress.
But, here'a pic after I fitted the front H&R coilovers. I can't fit the rears as yet as upon doing so, I discovered that the kit I've bought is for a late 964! I am after the adapters and late top mounts in order to complete the job.
Few bits missing and things not buttoned up, but you get some idea I hope to lower the rear of the car, just a touch once I manage to get the rear coilovers on.
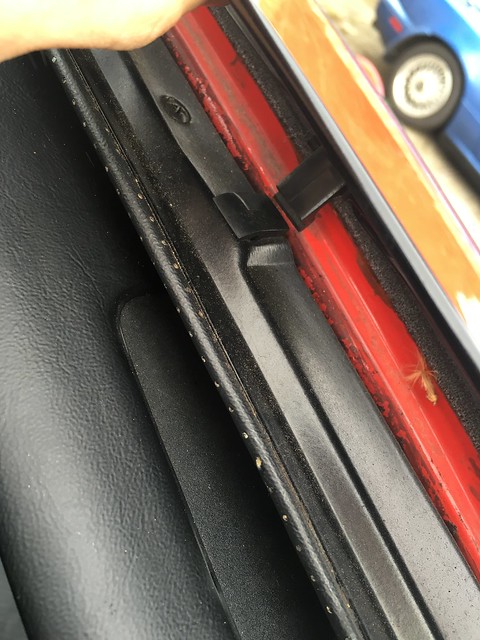
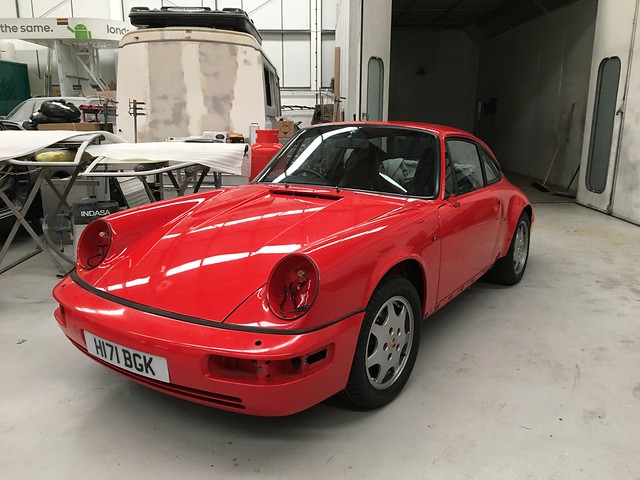
The paint is pure perfection!! I have not come across one single fault, it truly has been an amazing job by the guys, it was a shame to hide areas like the door shuts as even these areas are perfect. I am really happy with the work and it is every bit of the show quality job I wanted, perfectly flat. I will have to see if I can share some videos which one of the guys took which shows how flat the job is. The painter strives for perfection out of the gun.
Will be sure to update properly very soon.
Another thread, originally started in March 25th 2015, I am just wanting to carry on my progress diary here. Hope that is ok and I hope you enjoy my journey so far.
The story.
I have taken a bit of a turn from the usual direction I go with my choice of car and ended up buying something that kind of scares me. Normally I know a car in and out before I buy it, having spent months doing research etc etc. Well, I have to admit, I know literally nothing about the workings of a 964, it is the oldest car I have owned, (A 1994 was previously the oldest and that is my current MX5 Turbo and an old Volvo T5, don't ask..), it is my first experience with an air cooled car and just a car I never thought I would own, always liked them but always been scared.
So, I was about to buy a 996 which was an impulse decision, no need or want for it, just a convenient local purchase. Before I bit that bullet, I happened to think of an old friend I knew through work, I remember doing some work at his place of work which was a weekly thing and one day, him telling me with glee that he has just bought a Porsche, outside stood this Guards Red 964.. Iconic car and paid a measly �13k for it (7 years ago)... Fast forward and I decided to text him, simply asking, "do you still have the Porsche. A reply comes in, "YES WHY?", I get straight to the point, "Do you want to sell it", he replied with, "Come down and let's talk".
5:30 rolls round and straight from the office, I shoot to his place, I see the 964 looking a tad sorry for itself. Out comes Dave and a tour begins. Car starts on the button and is used at least once a week, sounding healthy, I get taken for a spin in it and wow, this thing feels better than my 997, so solid after so many years.
Cutting a long story short, after being told that he needs to sell as he feels he's had it too long, being shown the hoard of new OEM spare parts, complete spare rear light set, complete tailgate, various seals and other random lucky dip boxes, I didn't really care for what was in them, I just knew I had to buy this car. A deal was done and this Friday/Saturday, I will be collecting it. It is currently at an alarm place having a new alarm fitted
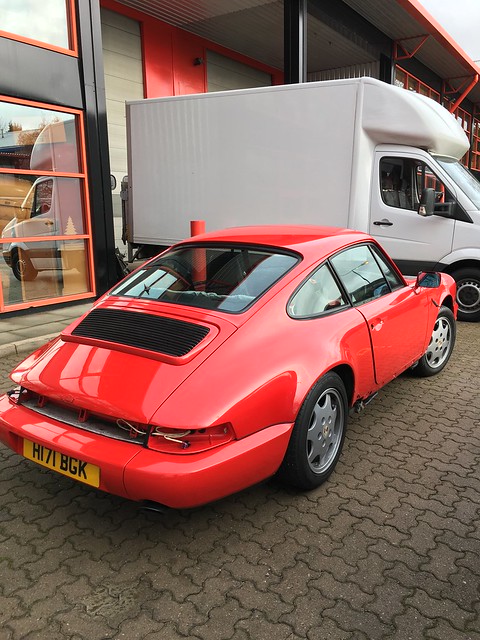
She is a tiptronic (Not my choice but couldn't say no) with 79k miles, loads of paperwork, loads of recent work performed, looked after heavily (mechanically), the interior is 100%, exterior just needs a polish although there are 2/3 very light rust bubbles on the wing edges and the spare boot lid is white so I can see myself booking this in for a full repaint.
I could go on, but I'll let the pics do the talking!
I cannot wait!
I really want to learn what options it has and how to do a few things..
Things that are wrong, tyres are old, heater does not blow hot air and rear wiper seems to be jammed, otherwise it's just minor bits, mechanically its solid, regular oil changes, new tiptronic fluid along with some replaced pipes, healthy brakes.. Cant wait to get stuck in.
Cheers
Mark
March 28th 2015
It's now in my hands!
With the 964 only being 10 minutes from my home and my parents being in between, I went along with my Dad as the taxi, we arrived to collect it dead on time and was welcomed by a view of the 964 in its same pink state with a pile of spares next to it.
When I initially viewed the car, I was so excited at the opportunity, I pretty much forgot to check anything!! So even though I had already paid for the car, I thought I'd have a proper look underneath, see the service book and receipts. All were as initially described and ok anyway.
The excitement was then all dampened by a phone call from my mum who had just been in a car accident with her friend whom was driving... So, everything loaded up into my Dads car and off we shot through the Friday escape traffic, I then got another call to say not to worry about coming as the police were dropping her home and apart from pains caused by the seat belt, she's ok.
That all aside and everything settled, I went about unloading the cars and taking a close look around the car. Nothing I hadn't seen before apart from some bubbling to the lower rear wings. No major oil leaks, just appears to be one from a rocker cover, interior is in perfect order, needs new tyres as they're low and cracking, I fixed the rear wiper by yanking it into position, this seemed to free it up and now works! :wink:
initial thoughts on the car,
Wipers in my view are annoying
Brake pedal feels odd compared to other cars
Auto works very well
Radio is far away
Annoying intermittent squeal from under dash (fan?)
Picks up speed fast!
I got a 964 :worship:
Chuffed with the rear wiper now working, I didn't bother checking why it doesn't blow hot air, i wanted to see if I could make it red ( SORRY, I just couldn't resist)
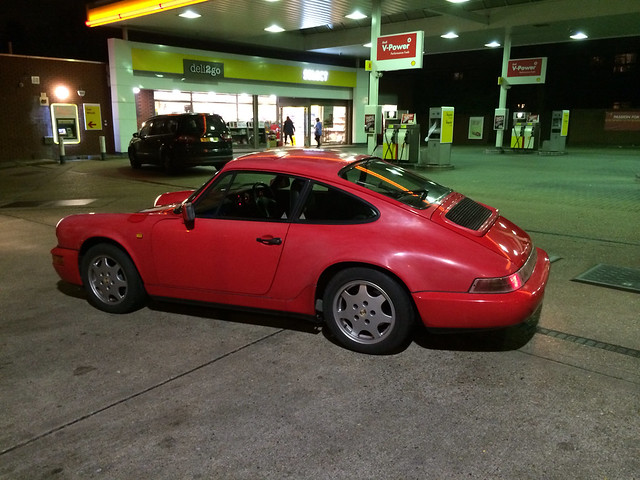
So out came my paint depth gauge, my machine and pads, Polish etc etc and I went straight for it.. After a very short while, I could see the guards red gleaming away. As it was now very dark, I had to call it a night and leave the car looking like a 50/50 demonstration car. I set off to get home (I do most work at parents place) and stopped in a petrol station for pictures.
The side I only went over with a quick detailer with..
The side I did quickly with the polisher, farrrrr from refined
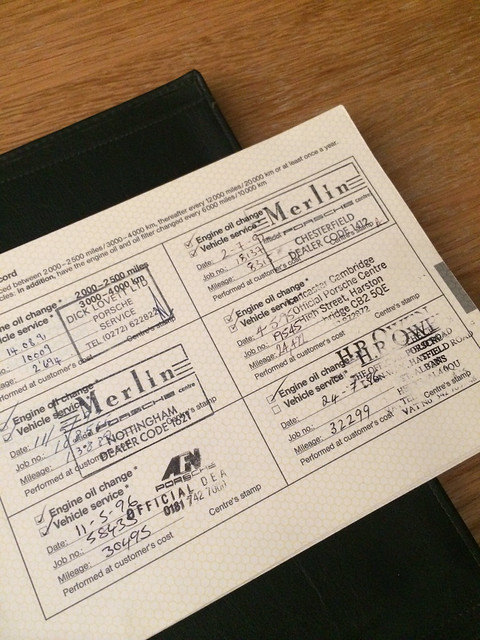
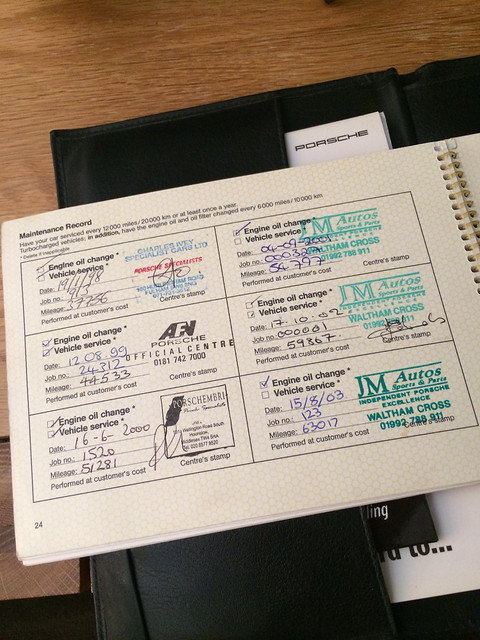
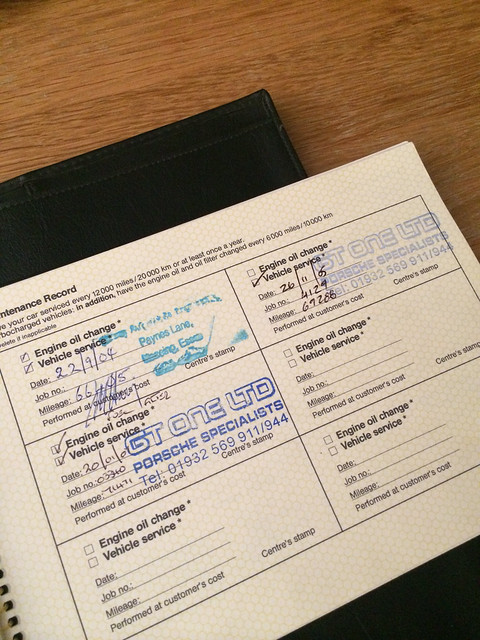
Once home, I brought all of the paperwork and smaller spares in to have a good look through. This was pretty fun, just seeing where the car has been, names of previous owners, work performed etc. all of the original Porsche supplied books, key sets, original alarm documentation and fobs, spare belts, gearbox filter etc all very exciting.
The car has a full recorded service history upto 2007/71500 miles. I know the previous owner did all the work himself in terms of servicing and he's told me that he did an oil change in Jan and did at least 1 a year.. The car now has 79700 miles. Regardless of what has been done, I plan on giving the car a thorough going over, if that means booking it into somewhere or doing it myself, I am not sure right now..
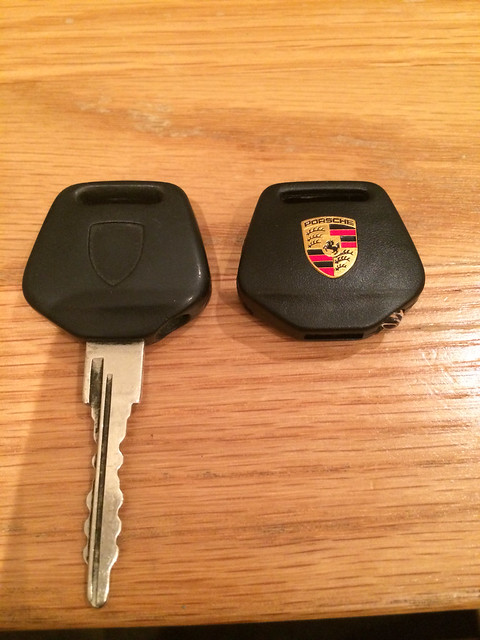
With some of the new spares, a new key head was included so I got to work with swapping this on the main key. Happy with my new key and now approx 12:30pm, I decided to go out for a drive.
With roads being empty, I got to have a fairly spirited drive which has left me feeling very smug and impressed, for something so old (in my books), it drives so perfectly, it is no slouch and I love the weight of the steering, the brakes work tremendously well and the interior of the car does rattle one bit! Wow.
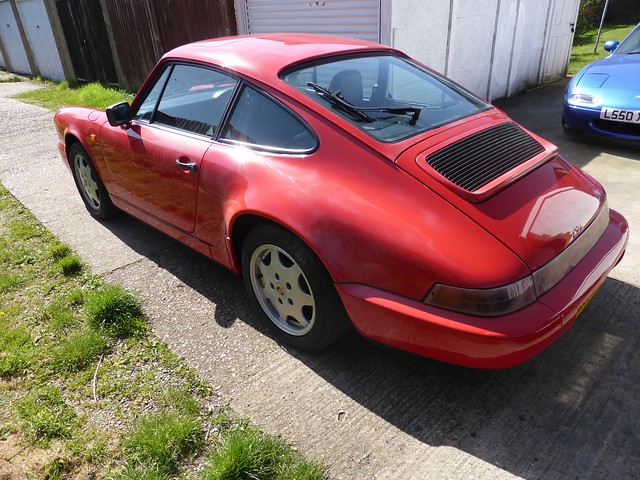
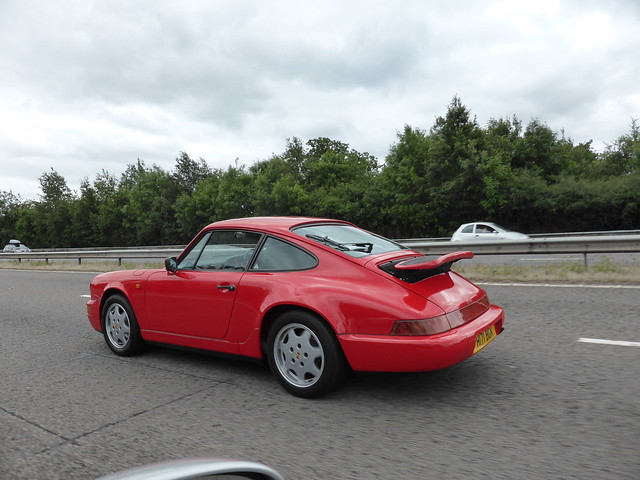
[img]https://farm8.staticflickr.com/7633/16953511671_85d356357a_z.jpg[/img]
30th March 2015
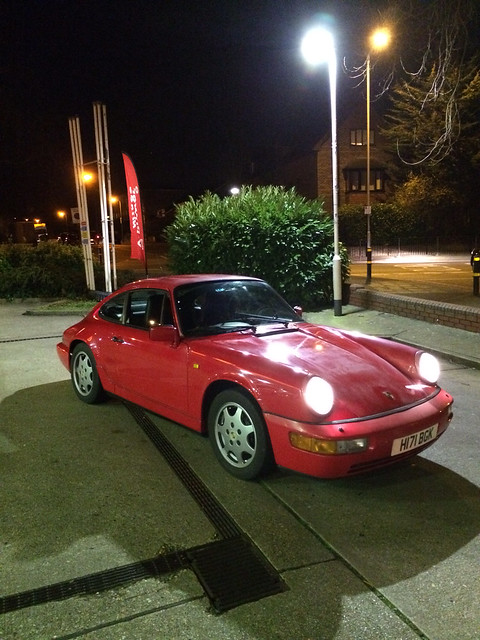
I must say, this car has come as a surprise to drive. I thought my girlfriend would hate it but she loves it and I'll let her take it to work once I've given it a once over. I used it to do a bit of shopping in yesterday and parked in a multi story, popped off to a country pub for a drive and Sunday roast and let the girlfriend drive it home.
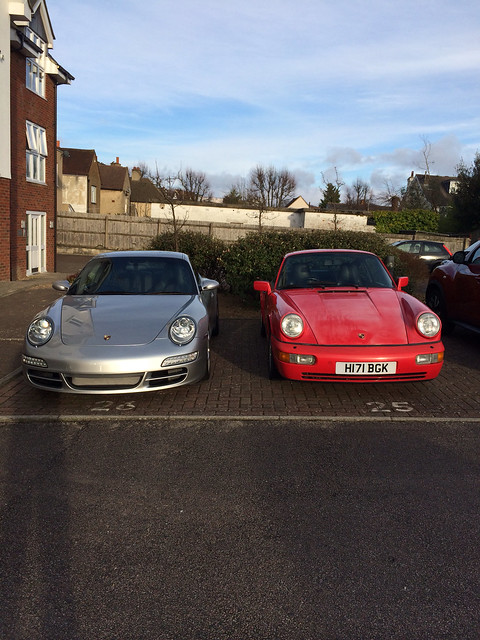
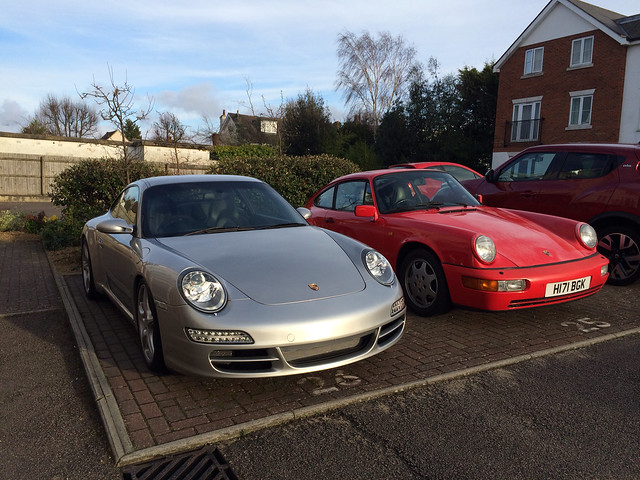
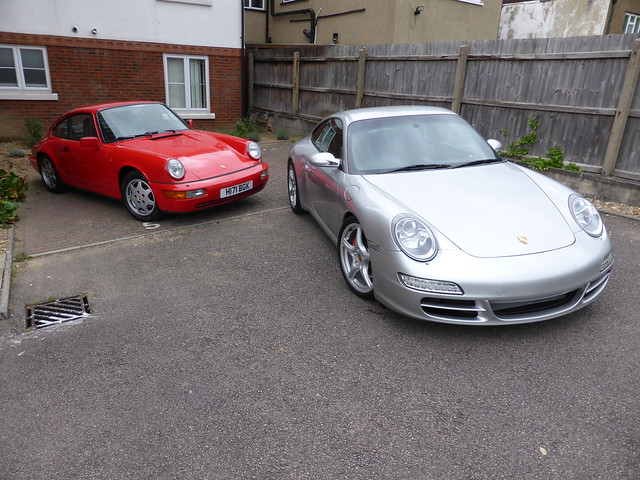
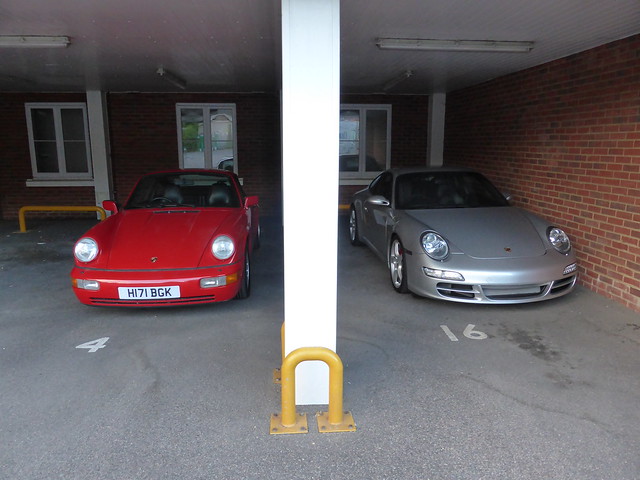
Parked it's younger, bigger brother next to it
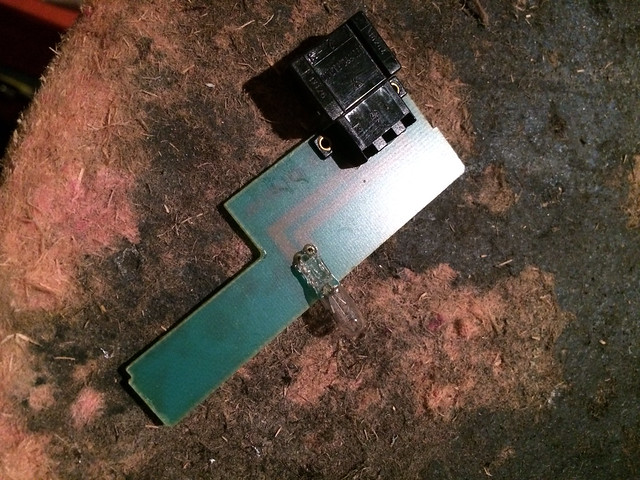
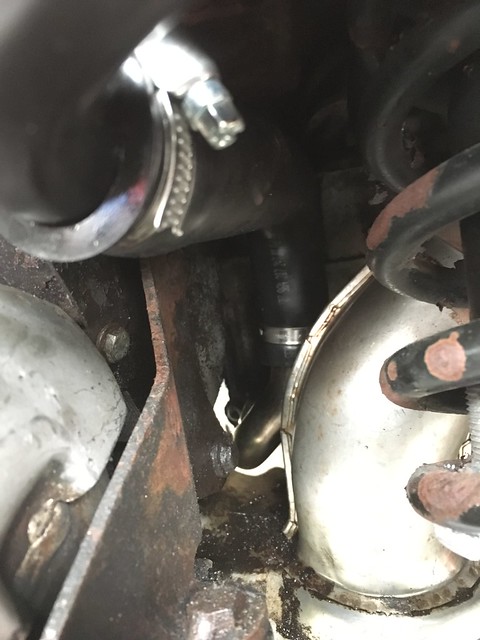
I got to spend a bit of time on the car, I removed the 90's edition mobile phone aerial and wire, found out that my mixer servo's are completely jammed so these have been removed but not opened up for investigation as yet, did a button refurb on my air recirculation button and tried to make the buttons the correct way up but this doesn't seem possible..
Also, as the undertrays are not currently fitted, it's been good to see no evidence of an oil leak on the ground
Much driving with no radio on has shown there to be no horrible noises, rattles or creaks. A real credit to Porsche and it's build quality.
Aerial gone!
Fan controller coming out, notice the upside down buttons!
25 years of scum?
Discovered that my reverse and fog lights were working, turns out that all of the terminals needed a good clean, once they were clean, bulbs actually worked!
The b�s&ard fan control, fully apart, springs shooting out from the buttons countless times and no way of sprinning of shuffling anything around to make the button appear the correct way! Baffled!! :?:
Thanks to Gaz, I have ordered one of these bars which hide the leading edge of the fraying sound proofing
Currently working out at �46 INC post thanks to the exchange rate
http://www.world964owners.com/#!TIDY...f23137e856d35d
March 31st 2015
I had to order the bar to hide the edge of the sound proofing, things like that keep me up at night!
Ohh, well I have spent some time looking at buttons online and even those look like they would fit into my car upside down. The buttons are keyed and only fit 1 way.. Total mystery!
Look great don't they, at least the refurbed button looks good now.
[img]https://farm9.staticflickr.com/8711/16982177782_b343978349_z.jpg[/img]
I spent some time trying to get to the bottom of the non working mixer servo's. Both servos were very stiff/jammed when I first had a look, it took great force to move them but now that they have been free, I can move them with not so much force..
With a power probe and earthing pin 5, I put 12v to pin 4 on the servo's and they both move nicely! Reverse the polarity and they go the other way, great! I plugged everything back in and hoped something would happen but nothing did
My temperature **** activated the rear blower so I am assuming that works fine. I tried to test for voltage on pins 4/5 of the plug which goes onto the server but nothing registered even when getting someone to turn the temperature ****..
Totally stuck on this for the moment. My only options now are, remove the servo's, open up and clean. If that fails, try another CCU..
While I was under there, I oiled up the shaft on the passenger side blower as it was squeaking, now it's silent, so I did something productive!
[ame=https://flic.kr/p/rSLZsH][img]https://farm8.staticflickr.com/7606/16983522225_2ec273a614_z.jpg%5b/img%5d%5b/url]
April 1st 2015
I decided to finish up at the gym early and go and give the engine bay some attention. I had given some surfaces a wipe as I noticed a minor oil leak, it turned out to be from the oil filler cap, so I wiped this off, flipped the seal and did the cap up.
It didn't look like the bay had ever been cleaned, so I set about applying Autosmart G101 to all of the oily and grimey areas, followed by a scrub.
Delicate areas wrapped in foil and with the engine still warm, I gave the dirty areas a quick blast with my trusty jet wash. After some poking around, scrubbing and soaking, the bay had come up looking good. I will probably remove the blower and do it again with that out of the way.
Needs more work but certainly better.
Looking forward to getting the fan powder coated in some sort of colour to spice up the bay, probably the usual red or I may go silver.
After it got too dark to continue in there, I set about sorting out the drivers door lock where someone had clearly tried to gain entry. This was pretty easy, a simple job of removing the door card, getting inside the door and undoing the handle and then undoing a screw on the back of the barrel which then let's you pull the barrel out. As I had a spare unmarked handle, I decided to swap the internals of the barrels over so I could keep using the original key if my remote central locking were to fail etc. As very simple job and the total barrel swap took no more than 10 mins. Removing and reattaching the door card took the longest amount of time, especially in the freezing wind with my iPhone hanging out of my mouth for light!
All done!
I think that will be it until my single car day allowance over the bank holiday, girlfriend has out her foot down now!
I pretty much just plan to clean out the inner arches and machine polish it.
April 2nd 2015
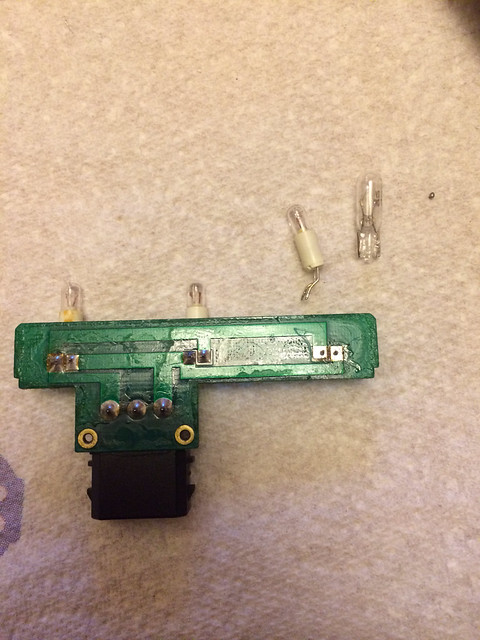
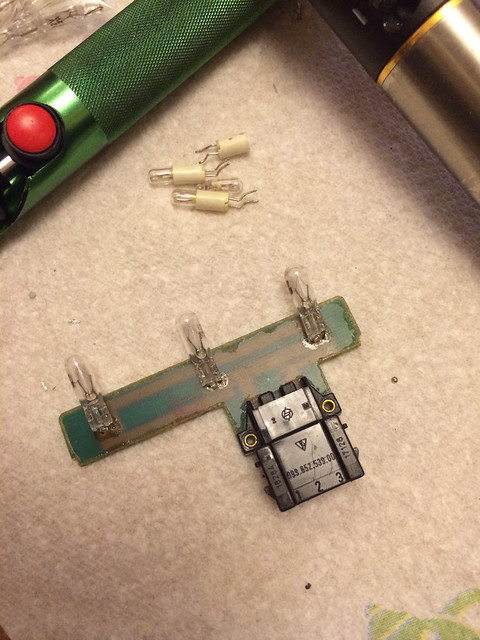
I only had an hour on the car last night so I thought I would tackle a nice quick yet satisfying job. When I first got the, only 1 bulb was working in the centre console, now none work. I had ordered some replacement bulbs thanks to Zingari.
I set about changing the 3 bulbs which cover the Hazard, central locking and warning lamp. A 10 minute job which has really made a nice difference.
When refitting this panel, I noticed that there was a similar PCB with a bulb fitted for the rear spoiler. This also didn't work, so I quickly swapped this out.
The results, a fully lit switch panel
If anyone knows where I can get hold of a trim panel for the rear spoiler unit, please let me know! I don't want to buy a whole new switch, I literally want the casing so that I can swap with mine due to someone drilling a random hole in it!
Thanks
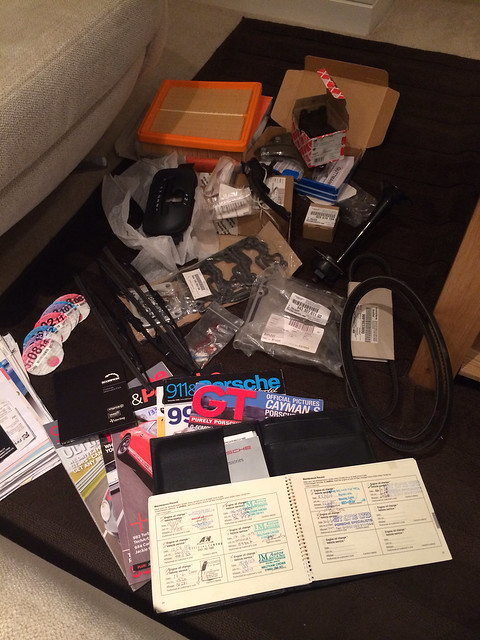
The start of the parts for the repaint were ordered today. Side skirt seals, wing/scuttle panel seals, front bumper smile seal, cabin light switch covers etc etc. All from Design911
Some new front tyres too, spent ages trying to decide what would be good for the car. Something for all round road use, the normal choice for me are Michelin PS2's but they do not offer a 16" tyre so I was a bit lost, harking back to my first days of buying tyres for small wheels, wondering if Toyo T1S's were still good... I ended up reading a fair few reviews and went for Goodyear Efficient Grip Performance's in the end. They had great reviews all round. Probably a waste of time as I will only end up fitting some bigger wheels in the end. :frustrated: :grin:
April 16 2015
So, I have been keeping busy and totally distracted from everything else recently. My main goal has been to get the 964 as clean as possible, MOT'd and everything working (Minus the heating, for now)
This will be pretty picture heavy, I'll let them do the talking.
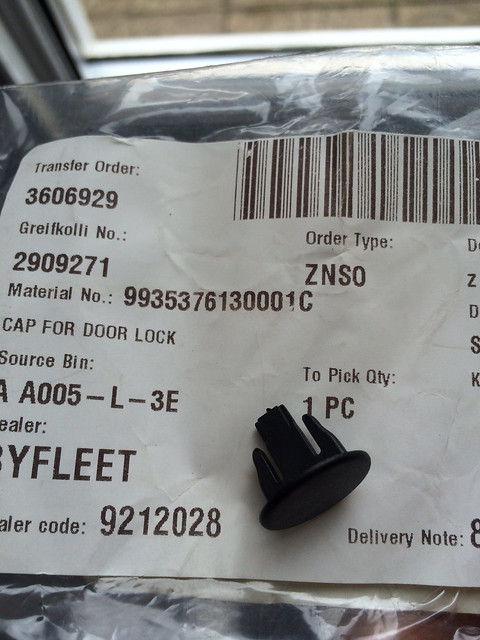
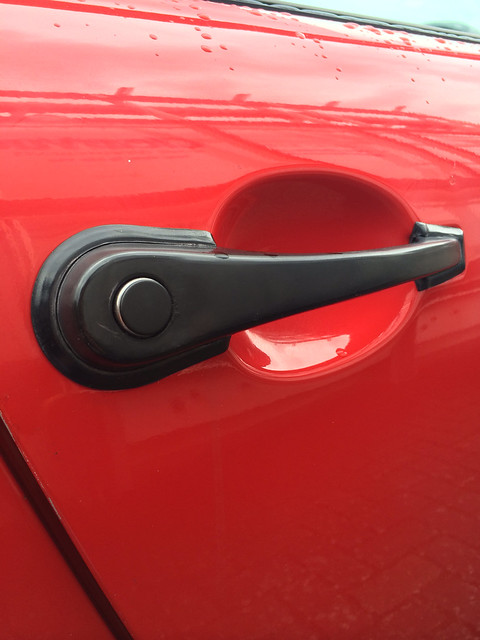
I had a cap which fits in the lock, it helps disguise it and stop it standing out so much on the black handle, I'll be getting another for the other side.
The carpet was a complete state, spent a fair while cleaning oil and various crap from it. 3 of the fasteners have been pulled off and are missing so I need to sort this out. I've seen that I need 15mm female button things.
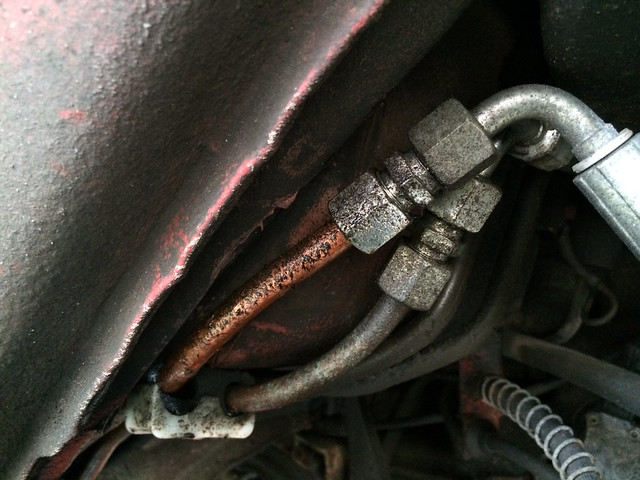
The car is very dry underneath, infact, there doesn't appear to be any leaks apart from above the passenger side rear trailing arm. When previously looking through the invoices I have, I could see that the gearbox pipes to the oil cooler were noted as being "Heavily corroded". I worked out that these pipes looked new and obviously replaced the corroded lines.. Evidence of the leak was coming from the coupling, so I tightened the suspect line up and 1 week later, still no leak, so job done!
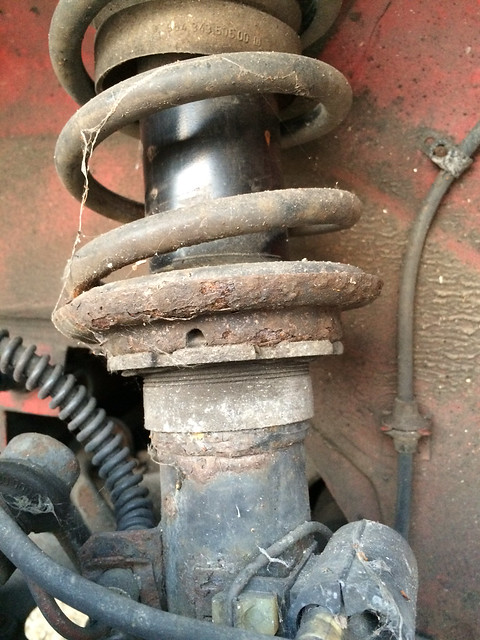
While poking around, I discovered the car has some height adjustment!! Not much I know
Are these standard fitment?
Some before shots, not as bad as I expected...
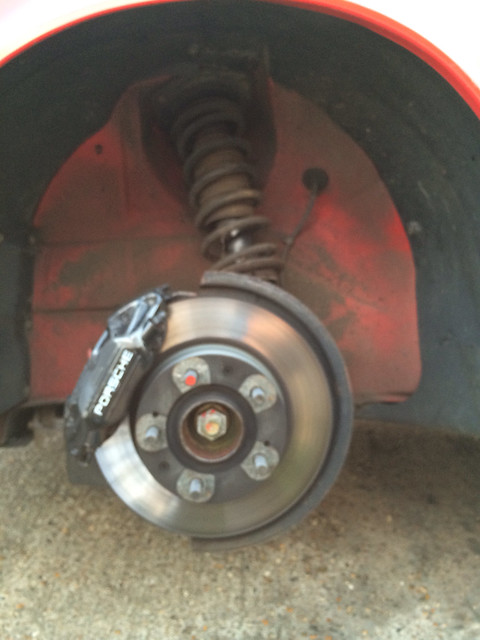
Some new brake pads, much required!
The tiptronic surround had some wear to some of the lettering, so I swapped this with the new one I had.
What a tiptronic shifter looks like.
While at it, all of these were jammed, so a good clean and grease and it works like new!
Old Vs New
My first aftermarket part for the car arrived.
A nice sound proofing tidy bar from Germany, thanks to a link seen on world 964 owners.
A bunch of other bits turned up from Design911..
Before the bar..
After
This should have been a 2minute job, but I dropped one of the clips and had to remove the heater blower to find the thing!!
Off for an MOT, passed without a single advisory!
Met an old school friend while there
New tyres being fitted
Sunday just gone, it was time to really put some time into it, jobs like painting up bolts and small details, listing out what new parts I need to buy etc.
Thorough cleaning
While under the arches, I wanted to investigate my oil level sender not working.. Pulled the sender out and gave it a clean, it still didn't work.. I had heard that these can suffer from bad earth, after running a earth from the sender itself to the chassis, I discovered that it worked!! So, I need to work out how you earth the oil tank, or how it should be earth, as earthing the sender to the oil tank did nothing. If the oil tank is earth or is the sender has it's own earth, I don't know... Any advice?
Old seal
New Seal
It now works (This was a shot after the car had been in heavy traffic)
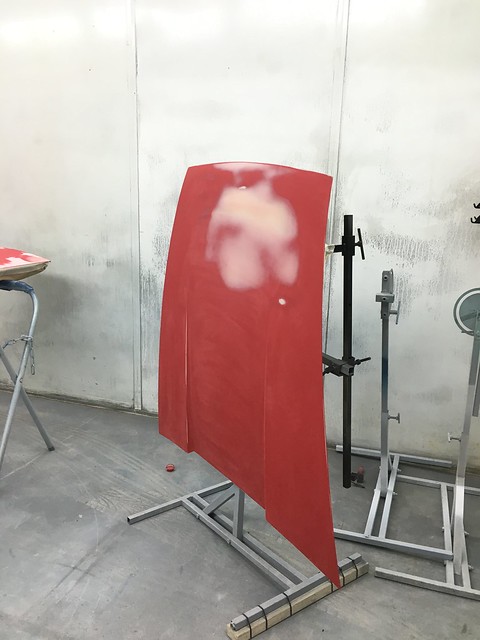
On to the body work. I had already spent some time, mainly by hand, seeing how much work it would need... Alot and by machine was the answer.. I had taken some of the oxidation off by hand but not much and in the dark, it looked better than it did in the below pic..
Time for the body
Ready for a cutting session
And after, I am still yet to tackle the bumpers and some panels need another session but for now, it's looking presentable.
A high shot from my office, the clouds aren't helping the now non faded look
Some random interior shots, only given this a quick hoover and treated the seats to some conditioning.
No way near where I want it to be yet, still need to polish the bumpers.
Xquisite Automotive should be taking the car in for a full repainting in June but I am hoping they can do it sooner.
I have been using the car and put around 260 miles on it so far, I am really enjoying it, there is a sense of occasion every time. I had a run on a local test track against my old E46 M3 and was totally shocked at how it didn't fall too far behind it, really impressed us both.
I love the soft, hugging seats, the chunky steering wheel and the tiptronic isn't that bad. Still not my choice but for driving in town, it's quite nice. My girlfriend loves it.
The car does feel heavy, even without a full tank of fuel, perhaps I'm used to the light steering on my MX5 and 997. It wouldn't be my choice for a track car out of the box but I'm sure some low profile tyres, suspension and manual box, it would be a different car. This car is going to stay a cruise, it's nice to pop it into D, windows down and sunroof open and listen to the sound of the engine just rumbling away, some extra noise would be nice though.
Overall, after 260 miles, I am loving this car and cannot wait to see it restored, it's been a fun experience so far and thankfully, it's a perfect solid base car. The garage I took it too for an MOT couldn't believe how good of a condition it is in, they see and even own a 964, amongst other porsche and air cooled cars, they really commended it. :worship:
As she stands as of 15 mins ago
Front end high as anything! I did notice a difference in my driving position after going from an empty tank to a full one though
I changed the clear silicon piping to black and I can't for the life of me, get that bloody heater pipe into the new rubber arm above the fan!!
Thanks,
Mark
April 29th 2015
Nothing too much has been happening, I had yet more seals and bits and pieces arrive ready for when the car has been painted, otherwise, just a couple of small jobs which needed ticking off of the list.
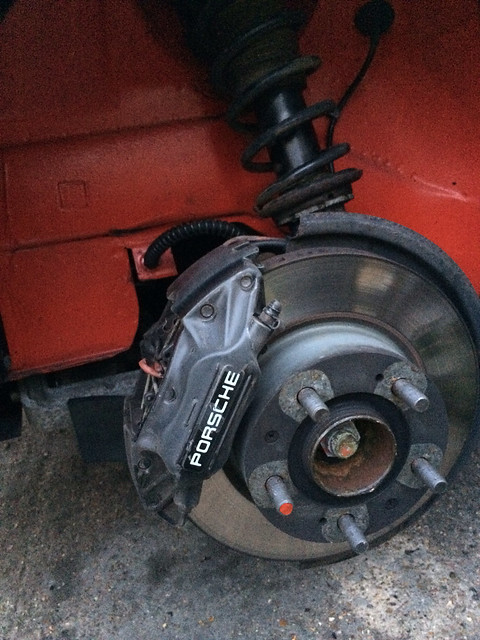
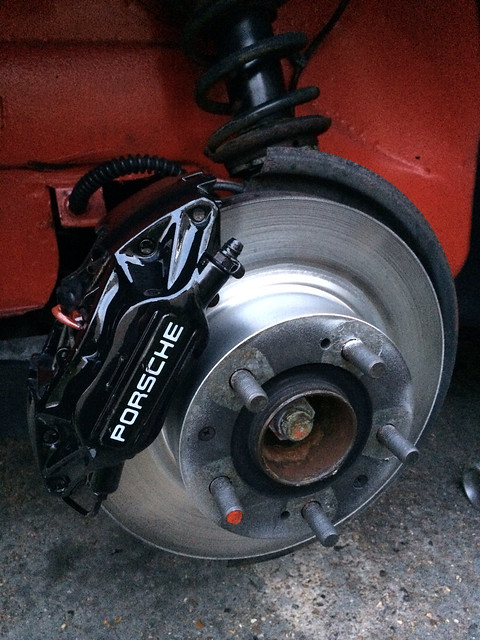
Calipers before
Calipers after
I had always planned to have the calipers refurbished in red when the car goes in for paint but now they are glossy, I am not so sure..
A night time drive
I was itching to get the fan out, I had always loved the idea of changing the colour of the engine fan as it gives such a big change to the appearance of the engine bay with such little effort.
Fan/Alternator removed from the car
After discovering that I needed a bearing puller, �18 and a Mcdonalds later, I was able to pull the fan off..
After a lot of prep and a minor bead blasting, I was ready..
I was going to paint the fan red but I decided that it has been done and it would detract from the original look of the car which I want to go for.
I went for a texture effect paint which I use on most rocker covers, it's durable and retains that tough look. Once baked, it forms to a nice factory looking textured finish. Brilliant stuff.
I also polished the belt things
As I refrained from going red on the fan, I thought I'd add some detail to the alternator internals...
It was dark so no decent full on pictures as yet! Need to paint the manifold now!
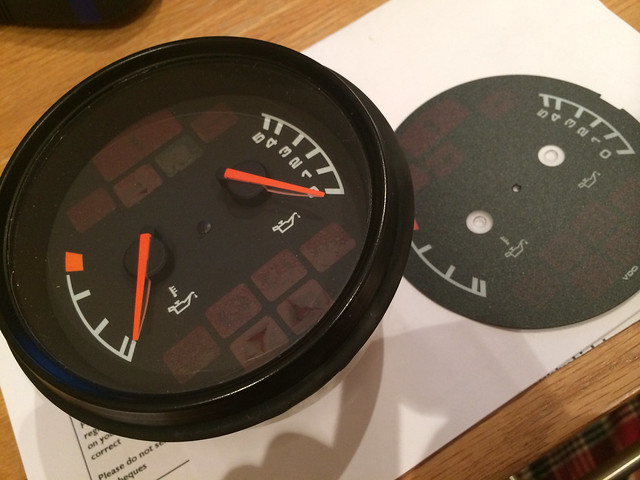
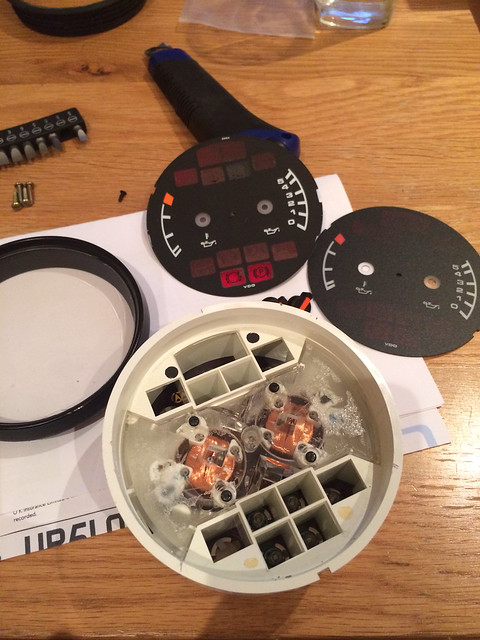
Last update was a change to the peeling gauge face...
New face from Germany and an easy swap!
All done
Not sure what's next :dont know:
July 6th 2015
I am in limbo with it at the moment, ultimately I WILL be selling it once painted, the tiptronic is nice for just cruising along and the odd sprint but for me, I need a manual, so I plan on selling this once repainted and tip top and hunting out a manual project to make my long term serious project.
I am only awaiting the bodywork to be performed which will feature a new boot lid to replace the current rusty one and new seals and rubbers throughout. I am fighting the temptation to do some smoothing of side repeaters and headlight washers while it is being painted. Even fighting changing the colour to the latest Porsche "Crimson red" as seen on the GTS's and complete a GTS theme with black wheels and alcantara pieces inside.... No good if I plan to sell it on though.
I also need to get to the bottom of the lack of movement in the servos, I recently spent some time investigating them and having exchanged some emails with Tore, got a bit closer to the potential problem. I opened 2 of the servo's and they appeared fine, I also opened the CCU and that appeared fine. Checking the outputs on the CCU, I was seeing no change in voltages, even after resets, putting a current to the servos made them move, so I believe the CCU will need repair/replacement, so once I get back around to it, I will be sending that to Tore for inspection.. Before this I would love to get hold of a spare from someone, just to be sure that it is the CCU. I don't want to waste time and money sending it over to Tore should it actually be OK.
No update unfortunately, it has been tucked under a cover avoiding the sun from fading it's remaining red paintwork anymore.
Oh, one thing, when playing with the CCU, I found a rubber bulb holder hanging down with no bulb, turns out this was for the ashtray, new bulb and jod done. That's as good as this gets :grin: :sad:
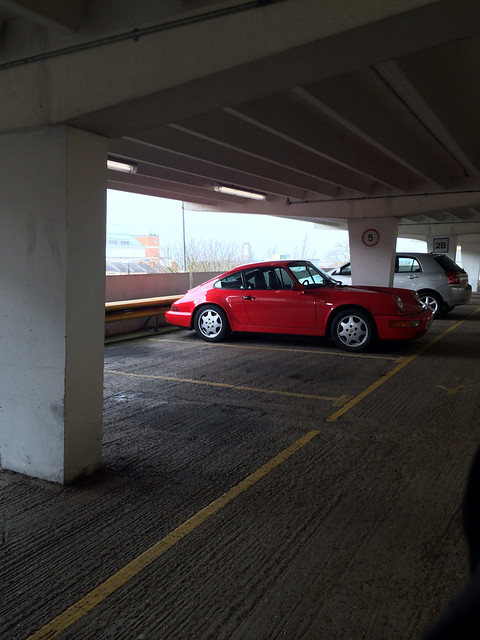
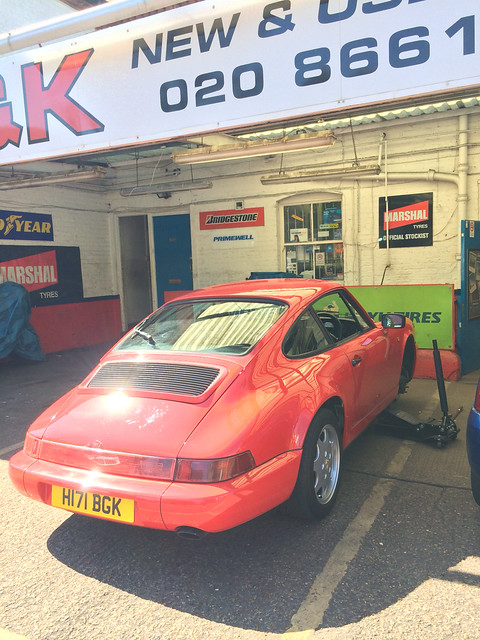
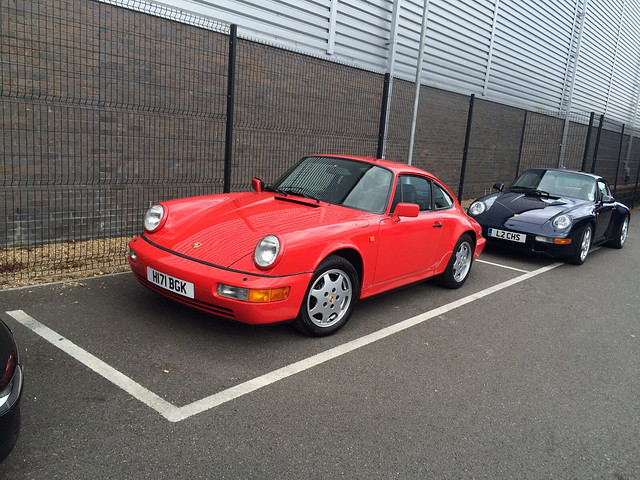
A picture of it in the parking area of the bodyshops new premises.
Oh that's another thing, I bought a Pipercross filter for the sake of it being black, rather than some odd orange thing! I haven't noticed any increase in performance or noise if anyone considers one..
Some random pictures after I cleaned the pair.
Does anyone have a Carrera badge they wish to sell? Looks naked without one.
[img]https://c2.staticflickr.com/4/3937/18845374544_339ed4bfe8_z.jpg[/img]
August 28th 2015
Nothing overly exciting to add to this as yet, the car had an outing to Brands Hatch to watch a mate race, it seemed to draw a crowd when parked in the paddock, was quite surprised.
A few weeks prior, I took the car along with my 997 down OPC Brooklands for their service clinic. Was a really good event and met some good people, the guys at Brooklands were all very welcoming and certainly won my business for the future servicing of my Porsches.
I was surprised how dry it was underneath, some weaps from the rear chain covers but that was all!
Got talking to a nice guy, James who owned this beautiful RS
Some great cars turned up and were on display
The restored Targa which is now for sale. It was immaculate!
If anyone wants to swap a 993, let me know
The historic Brooklands track.. and on the left, Tesco
Was really good to get talking to the techs about both cars, both had great things to say. I was surprised at how thorough the inspections were, thankfully no surprises and everything pointed out is due to be sorted and I have replacement parts for. My girlfriend drive the 964 which she has now claimed as hers and changed her mind from trying to push me to sell it to now keeping it.
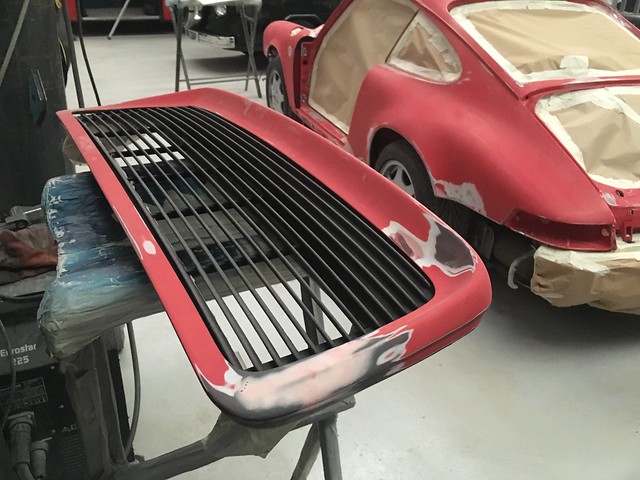
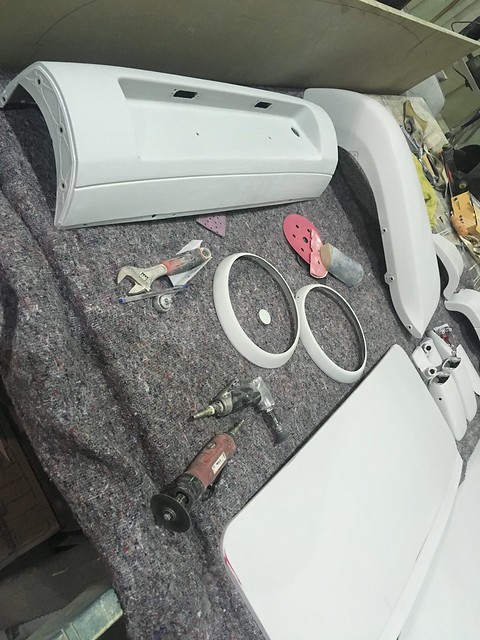
I have a huge collection of parts now, all in prep for the respray.
A small job I could do now and not wait for the respray, new fuel pump cover and some new stainless bolts to replace some rusty looking originals on the underside. All noticed when cleaning the underside :roll:
New LED compartment lights, I'm always leaving the boot/bonnet open so less draw and more light can only be a benefit!
Managed to give the car a good clean and finished with Zaino, it then rained!
Home time now, will add some more to this over the weekend.
Feb 17th 2016
A bit of an update, after a little while of just remaining stored away, I got some time to crack on and progress with getting some bits and pieces done. All minor bits, ordering a fair few new parts from Porsche and finally getting her in to the bodyshop!! Wooo
So wheeled out into my "work bay", I started work, back in November I think, on replacing the rusty oil return pipe that had managed to develop a small hole which was weeping oil, this was a job I was not looking forward to as I thought I would have to remove the heat exchangers, luckily, after some advice on here, I was able to replace it quite easily.
Said pipe, after some pokery, now gone from a weep to a pour.. I had drained the oil prior to this.
I did have a little fight with it and ended up just tearing the end part away from the rest of the pipe
Old Vs New
New pipe in place with new stainless jubilee clips. I am hoping to get around and replace all OEM jubliees with these nice stainless ones to future proof!
Always impressed with how dry and clean it remains under here, I like to clean all gunk off as it makes it easier to locate oil weepage at times like this.
While under it, I wanted to remove the bumpers to replace some of the rusty support brackets and check the car for any rusty as I have seen that rust can sometimes hit the areas where the bumper reinforcement brackets attached to, thankfully, this car has remained in great condition with no rust to anything other than some minor replaceable parts and the tiny bits on the body.
In it's original 25+ years worth of dirt and grime.
I did spend an age cleaning everything but strangely, didn't take a picture of the finished article, it was probably dark!
This was a bit odd, BMW and Porsche?
Horrible rusty bumper brackets
Old Vs New
The remains of the central rear bump reinforcment bar and new one
Exhaust clamp bolts were all shot, so replaced these with staineless items
Bumper brackets refitted with stainless bolts
Next, I wanted to look at the conditon of the PAS rack and brakes, see if anything untoward was going on, but all factory fresh with a little patina.
Next was removing the front bumper and looking under here.
The first thing I wanted to do with get the area that sits just behind the lower grille back to black and protected, this has some wear from stone chips I guess, so I thought I'd waxoyl this area and do the same on the underside.
Waxoyl'd
Enlisted the girlfriend to help as she wanted to "do more stuff together"... Not what she had in mind..
The old undertray had seen some action, so I replaced with a new one. I assume the new one is for a C4 but no issue, will cool the steering rack :floor:
Bracketry given a coat of paint
Fog insert replaced with proper one
Wing supports replaced for some really nice and light, yet still impossible to flex ally items. Cheap and perfectly made, can't fault them.
Painted
After all of this, I took it for a drive, the first since the oil pipe change... I think the remains of oil which had leaked and mainly WD40 were taking a while to burn off and causing some stares at the lights..
I decided I wanted to smoke the lights, just the silver trim thing at the bottom, I used plastidip as this can be peeled off if I didn't like it. I am still undecided but I will wait until the car is back from the bodyshop.
Before
Apart
Plastidip for your reference.
TO BE CONTINUED!!
More to come but I have spent 45 minutes typing all of this so computer time is over for today.
Next is the stripping of the car, mainly in the dark freezing December temperatures, for the bodyshop!
:bandit:
Cheers
Feb 18th 2016
I was initially very scared of working on this car but it turns out to be quite a simple beast, very well put together and I have really grown fond of it, especially after seeing how solid it is underneath.
The next bits, on a slightly warmer day, fixing some small jobs and then strip down 8)
The sunroof wind deflector was a bit loose on one side, I narrowed this down to 2 clips being broken, a nice easy 5 minute fix, love jobs like that.
Broken!
Old vs new parts
All done
Next was the exhaust tip, this was looking a bit tired so I gave it toa friend who was going down to the local powder coaters, it came back and is lovely and fresh but sadly, didn't get a picture!!! This is what happens when I'm working in the dark.
As it was before, very tired!
I thought I would remove the scuttle panel seals, I thought it would take me a few mintues but they turned out to be right b&st$rds!! Much swearing was done removing these, probably the hardest job on the car so far!!
It is a case of removing the first allen bolt you can see when you open the door and then loosening the further one, then just pull up, so I was told. It took a lot of levering and pulling with pinchers!
The result, this was the good one, the other side was in 5 or 6 pieces, I didnt take any pictures as I was probably pissed off :lol:
Even though they would be coming off, I thought I would try my new scraper seals, mine had shrunk, so new ones went on and fill the big gaps left by the old seals. An easy 5 min job, drop the window, lever the trim up and off, slide old seal out, new one in, push trim back.
Hopefully you can see the difference in size
Trim removed
New on, old short enough to let alot of water down
On an inspection at Porsche, they noted that my front bump stops had seen better days, I had some spares and this looked like an easy swap so I spent a couple of hours dropping the fronts down and popping the replacements in... This is an area I am going to revisit, I have some shocks from a low miler car which I think I will fit as these shocks seem a bit weak on rebound.
This gave me access to that dirty area just behind too :roll:
Replacement on - Its ok, I was sure not to strain the brake lines
I then got on to removing the side skirts, I was always a bit worried about this as I had seen some horror stories here on other cars, thankfully, I felt nothing but relief, my underskirts are totally rust free, phew!!
Front area stripping of loose items
Sunroof and interior door cards removed
Mirrors were next, I found that the drivers one had never been removed as wires were intact, I had the sad job of cutting them but thankfully, in a nice place where I plan to use a waterproof connector to join them back up once it's all painted.
All was going well with the passenger side..
Then I came across a wiring job done by an 8 year old!! Wires twisted together!! Who does this on a Porsche?!! I guess this is what happens when cars drop to a low value, they get low value treatment. Grrr
Tea tray off
Bye badge!
Every nut, bolt and clip I remove goes into here in labelled sections
STUFF in the spare room
Spare engine lid
Casing off and split so that they can be painted properly.
Lacking pictures again, sorryyyy
The morning I was due to take the car to the bodyshop came, I ended up refitting the drivers mirror housing so that I could be legal, although I didn't refit the wipers and it rained a bit, lucky the windscreen had Gtechniq on, so it just beaded straight off..
Weirdly, the rev gauge fogged up, never had this happen before!!
Outside Xquisite
Tea tray was cable tied in place
Lights were all removed and here she is inside, nice and warm
Not only warm and dry, in good company too
That’s it, next jobs are just cleaning up light lenses and working out what other stainless bolts I need.
I'll hopefully have some progress shots of the windows out, doors off repaint soon, planning on making a few visits
Cheers
21st Feb 2016
It's been a bit slower than planned due to having to wait in line for the bodyshop after it's move but that has given me time to put some miles on the car to makes sure it's spot on, which it is thankfully
A total pleasure to drive. I didn't see the fuss but I totally get it now, even with the tiptronic which suits it as a road car imo (I normally HATE autos)Cheers chief, I wish it was your build! The bodyshop is great, the work has always been perfect with them working on show cars - secret super car projects etc, now they've got a premises which reflect their work, I wish them all the best on their new move. Truly deserved having used them from day 1.
Just a couple progress shots.
Windows are due to come out on Monday and then it will be full steam ahead to have her rubbed down. I would rather them take their time as it's one less stress to worry about while I haven't got it, also saves me from rebuilding it in the cold :thumb:
I took a trip to a local dealer yesterday and got my 964
fix while there, just a taste of what was on display.. What a treat!
[img]https://farm2.staticflickr.com/1612/24549362783_363deca988_z.jpg[/img]
Latest from Xquisite Automotive, they certainly are flying through this, I literally cannot wait to see the finished article.
No surprises around the Windows
That's the latest as of an hour ago, eager to get her back together, hopefully in time for Goodwood 74th members meeting.
Really happy, yet again with how the team at Xquisite are coming on with the car, the updates, speed and detail, can't wait!!! :thumb:
Feb 28th 2016
Another update
The car is soon to be ready for paint :worship:
I'll be sticking with the original guards red but this time, it will be a clear coated finish to help extend its life. The body will be going into white primer, as some other parts already are on Monday and may get its first coat of red
23RD May 2016
It’s been a few months but finally we have a nice little update.
There was a slight delay which I was made aware of from the start, I wasn’t at all fussed as it meant that the car would be kept in the workshop rather than outside through the rest of the cold season, plus, I’m having a double garage built so the delay could have been an extra blessing.
This was the cause of the delay. A last minute rush job to build this for the gumball rally.
[img]https://pbs.twimg.com/media/C3r4ymYW8AA3JW4.jpg[/img]
Anyway, back to the real star
Once that was out of the way, attention turned back to my 964 and in it went for paint.
Now done, original Guards Red but with a lacquered finish for durability, it has been put in a clean room to sit for a few days before being polished, once polished, I can bring her home and start the refit, fit some H&R coilovers and start to enjoy her all over again!
It’s been a complete pleasure popping down to see the guys at Xquisite, the enthusiasm and shared excitement over seeing the 964 complete is really reassuring and pleasing, knowing that it is in good hands, part of why I have always used these guys, it just results in perfect jobs.
Think the next updates will be of the car once I bring it home, shouldn't be long
June 14th 2016
Update;
Not much, I went down to see the new Top gear being filmed, got to meet Chris Harris :worship: , was a good day out and on the way back, I thought I would pop in with a few friend and the missus to see the guys along with the 964 at Xquisite.
Before I got to the car, I got to see some interesting cars.
Someone very very high up at Mclaren's own personal toy, in for a complete restoration.
And a recently returned, AMG GT which the guys at Xquisite had custom built a GT3 replica bodykit for. It has now been returned to them for it to all be recreated in carbon fibre panels, not overlays but actual 100% carbon panels! Crazy.
Enough about those, the 964 had been brought back in for sitting alone for a couple of weeks and it was now being wet sanded and its first polish. Pictures do the paint work no justice, it is SO SO SO red and SO flat, yet they have another stage of polishing to do on the panels that have been polished already! Amazing job.
These were in the other booth, not sanded as yet.
So that was last Thursday.
Apparently the car now has the doors back on and is shaping back up so I may need to shoot down later this week
:thumb:Not long now...
August 16th 2016
The car is back but frustratingly, I just haven't had the time I would like to get it back together and to a standard that I want to show it off (It's filthy). I have only been able to spend the odd few hours on it fitting the new bits and pieces, things are taking much longer than planned (Sunroof seal!!!), I now have to be really careful when doing anything in fear of causing any damage and I keep coming across new nuts/bolts/things that I have to order which I didn't anticipate which slow progress.
But, here'a pic after I fitted the front H&R coilovers. I can't fit the rears as yet as upon doing so, I discovered that the kit I've bought is for a late 964! I am after the adapters and late top mounts in order to complete the job.
Few bits missing and things not buttoned up, but you get some idea
I hope to lower the rear of the car, just a touch once I manage to get the rear coilovers on.The paint is pure perfection!! I have not come across one single fault, it truly has been an amazing job by the guys, it was a shame to hide areas like the door shuts as even these areas are perfect. I am really happy with the work and it is every bit of the show quality job I wanted, perfectly flat. I will have to see if I can share some videos which one of the guys took which shows how flat the job is. The painter strives for perfection out of the gun.
Will be sure to update properly very soon.
Last edited by MarkGolf; 10-24-2019 at 10:04 AM.

The following users liked this post:
heliolps2 (05-22-2021)
10-24-2019, 10:06 AM
#2
Instructor
Thread Starter
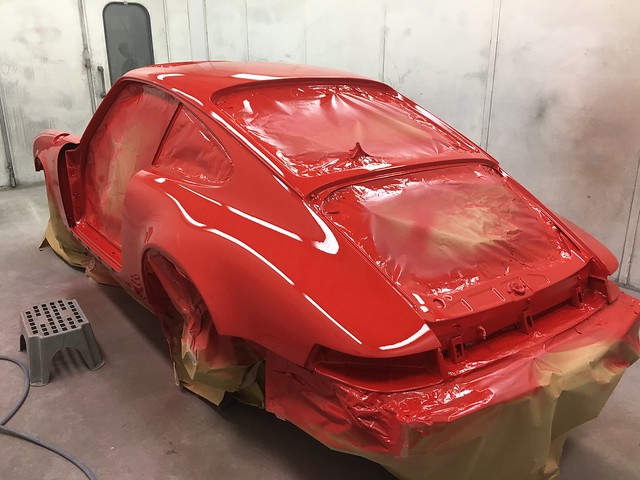
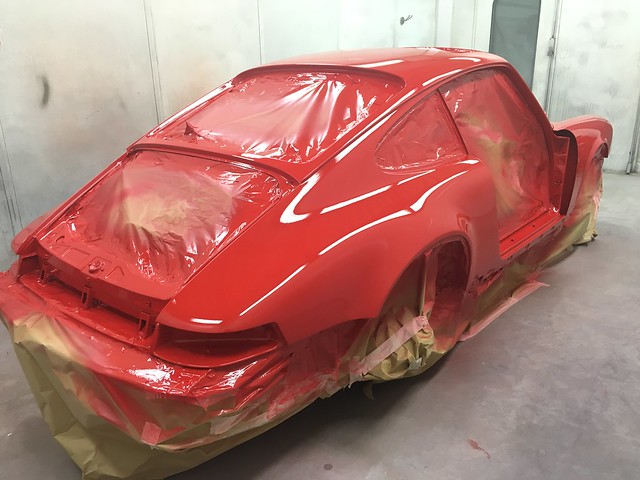
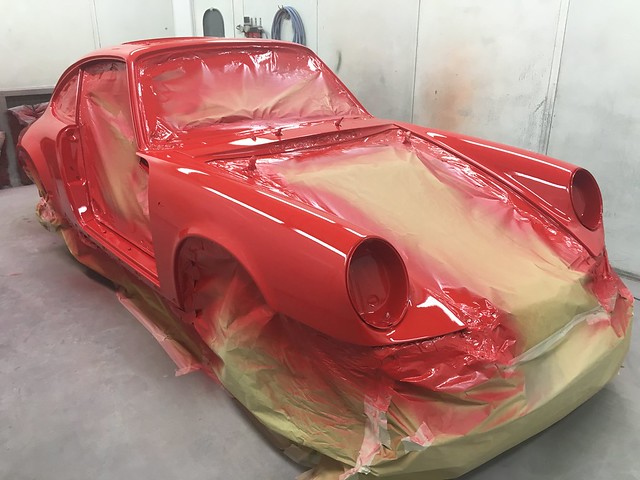
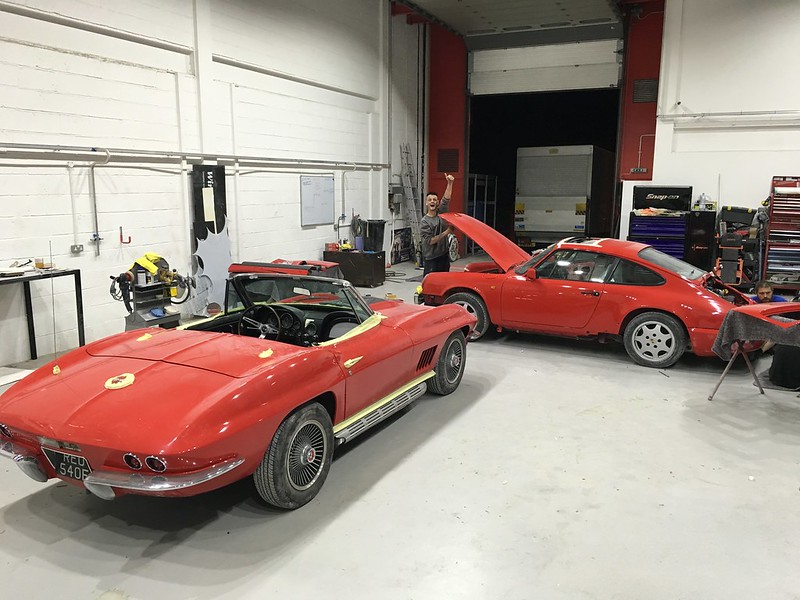
August 17th 2016
Small update on some bits
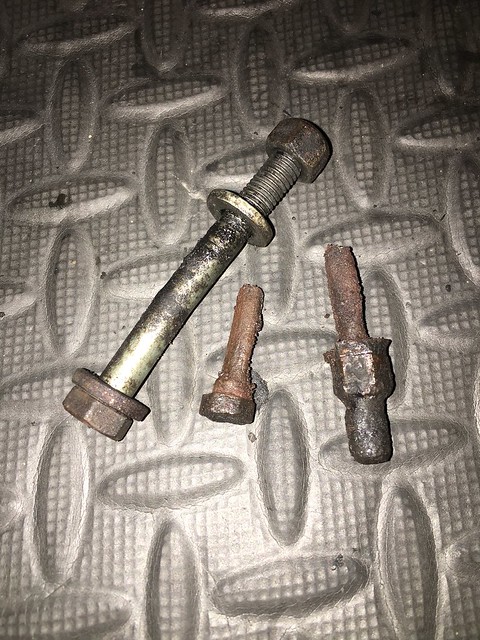
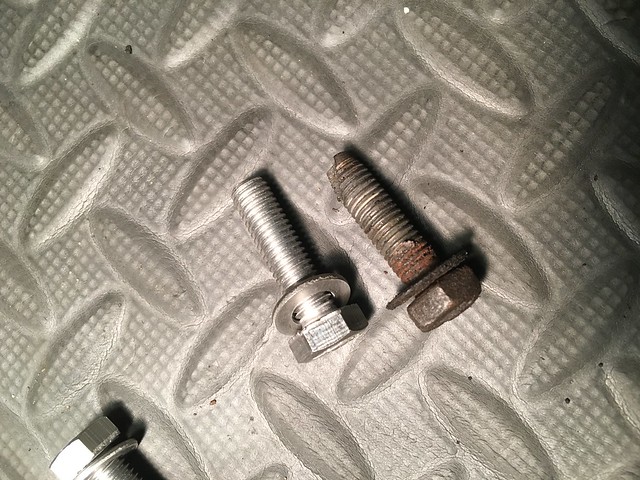
Getting ready for me to take home, I thought I'd go down and pitch in seeing as I had many of the new hardware to bolt things back on with. Cant be using rusty old things with the fresh paint.

Fresh bits and pieces
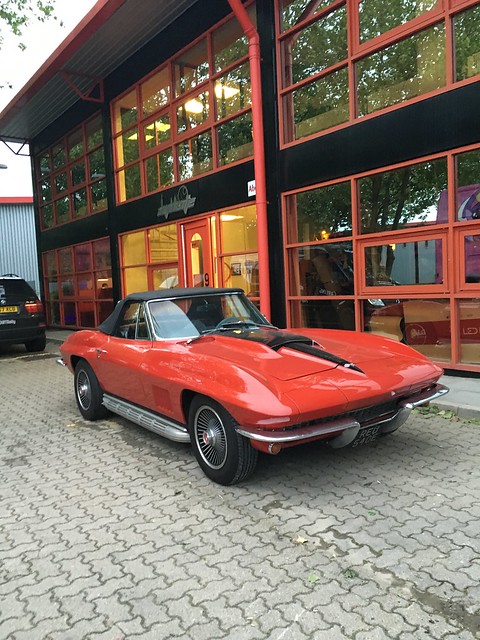
Along with the Corvette which was undergoing some finishing.
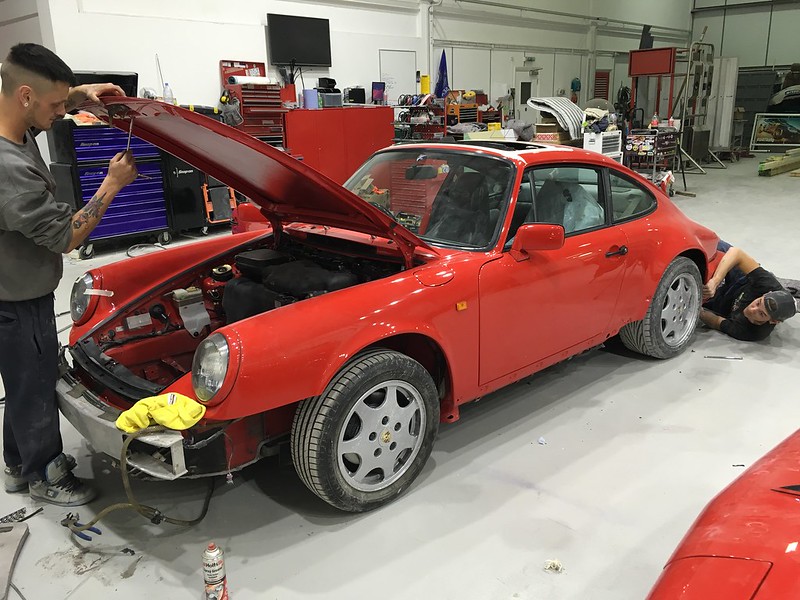
The headlight trims had to come back off as they had been painted on the inside which was making them just too tight to fit back on properly.
Was a fairly late night once the car was in a state to be driven, they could have shut up early but they insisted they get the job done, didn't bother me as I got to have a nice 1am drive home on clear roads, finally reunited with the 964! What a feeling I took it fairly easy as the car hadn't been driven in so long and I was a little paranoid about anything falling off :grin: Just as well as the MOT had expired. :cop:
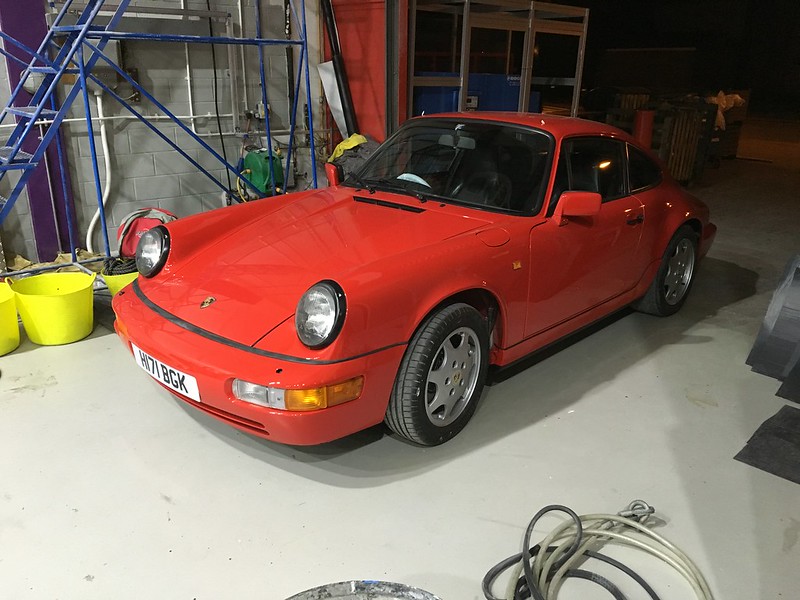
The next day, my first time seeing it out in the daylight
It also revealed all of the little jobs which were ahead of me! :roll:
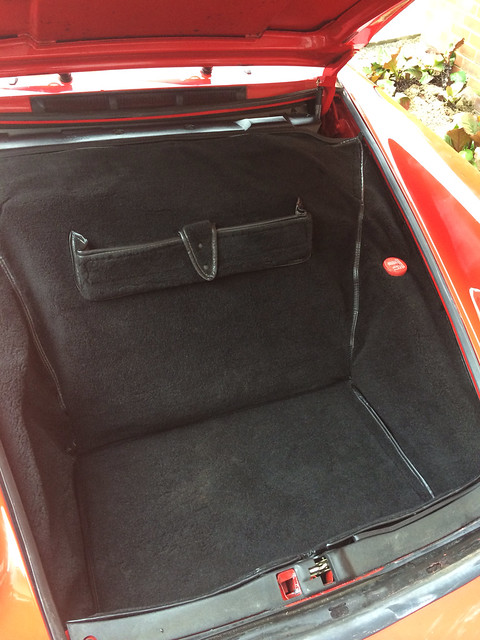
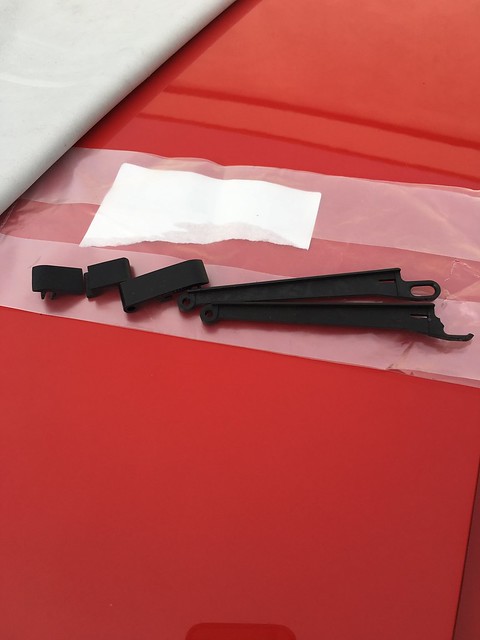
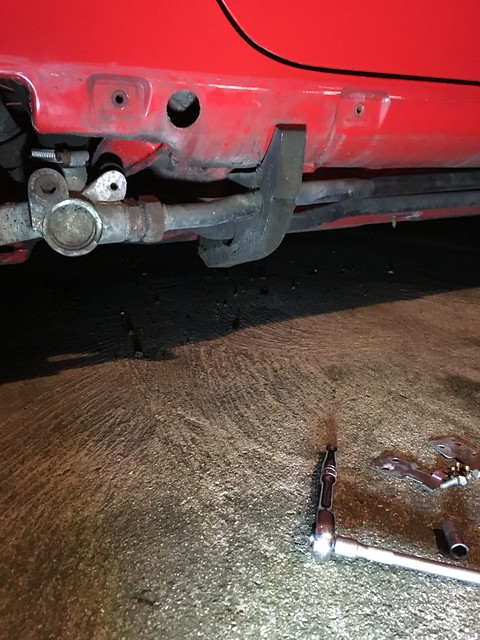
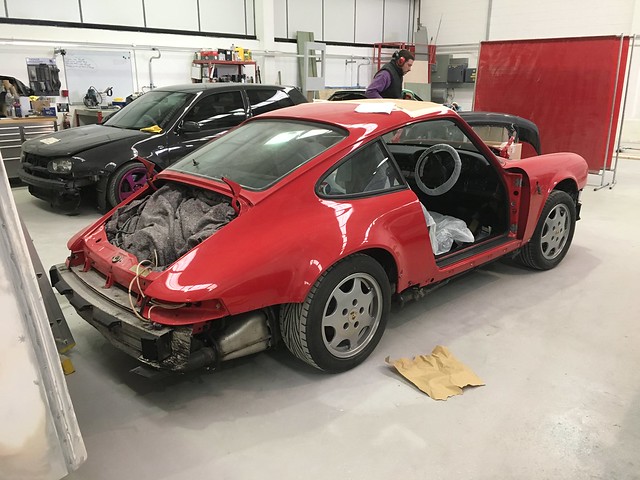
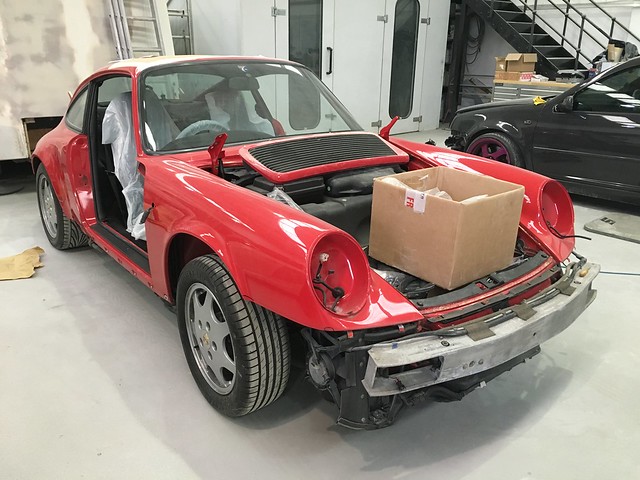
One of the first jobs I set about doing was fitting up the tailgate, a lot of the parts were left at home as I had previously stripped the car so it was time to dig everything out. Excuse the grubby finger prints :hand:
All the trim plastics were given a once of with Aerospace 303 protection.
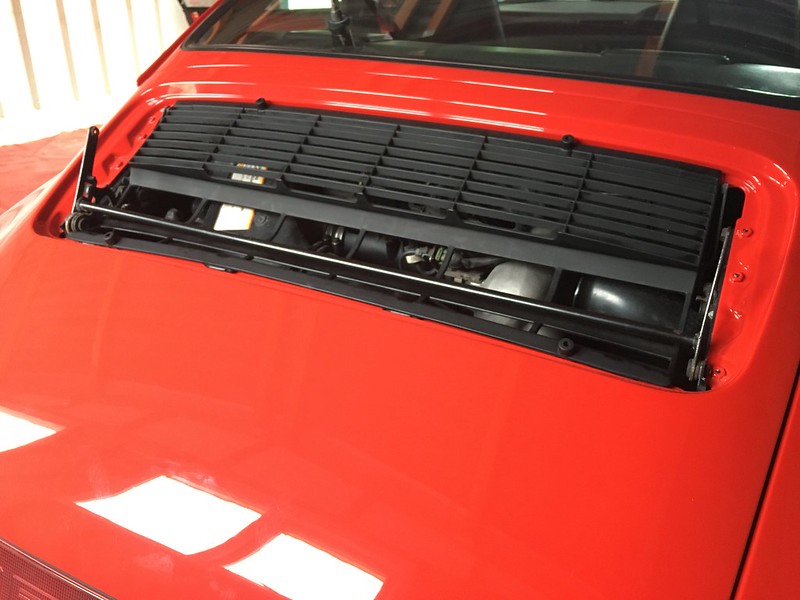
Loom cleared and everything coated, inside of lid sealed. I need to replace the killer heavy duty struts, the lid could easily send a kid miles when opened!
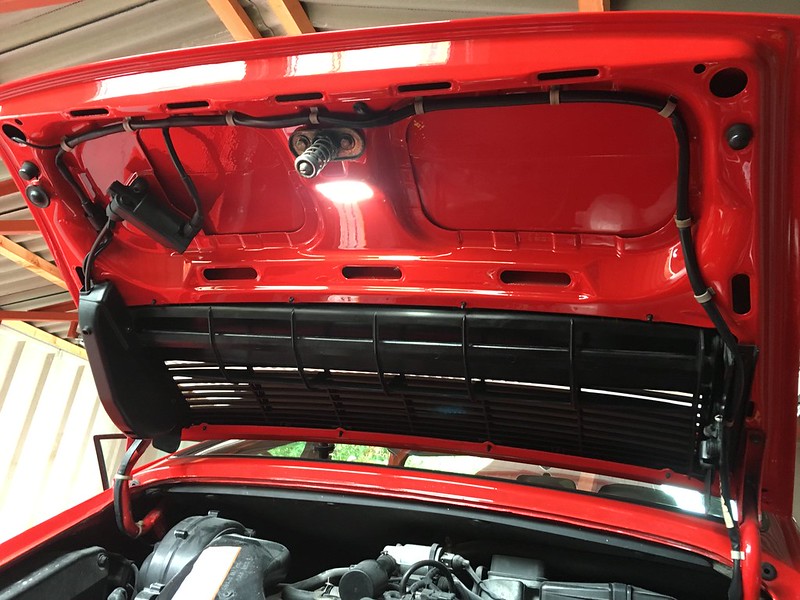
New rubber washers for the plastic trim and I decided to grease the spoiler bolts.
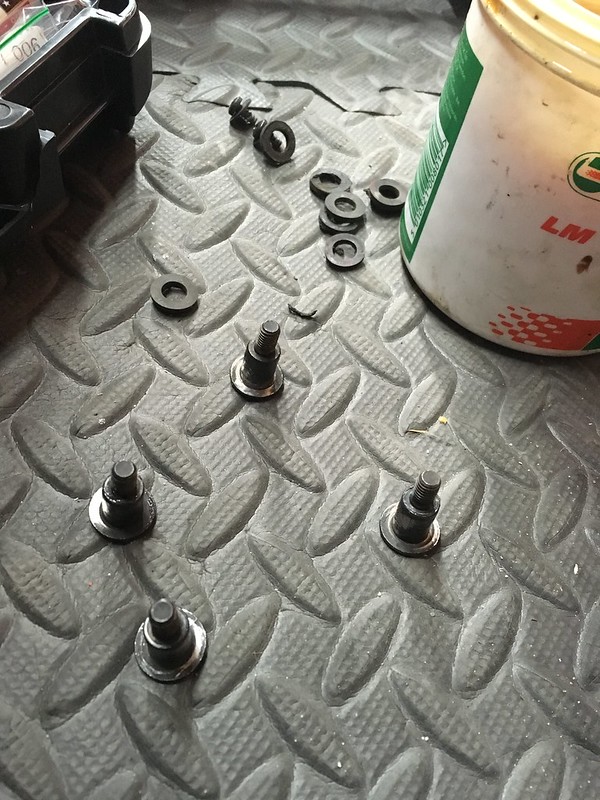
New curtain and everything here complete!
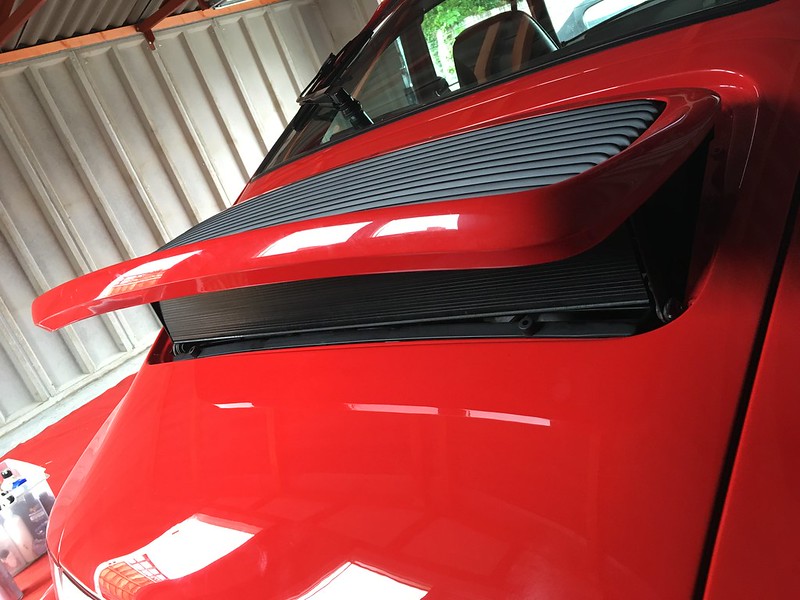
While at the back, I turned my attention to the rear plate lights. My original ones were a bit tired, the internals were slightly corroded so I decided to get some LED versions.
I bought some from eBay, �14 or so but I was not a fan of the clear housing. I could just imagine dirt showing so I set about transferring the LED unit into the original housing.
Once done, I fitted up and found remembered why I never normally fit LED number plate lights. They are always a clinical white colour and OVER bright, I do not want to illuminate my number plate like some sort of garden feature..
Out came some tint film and a heat gun
The difference is clear. Much better, a non LED looking light colour and dim

Next on the list, wire mirrors back up.
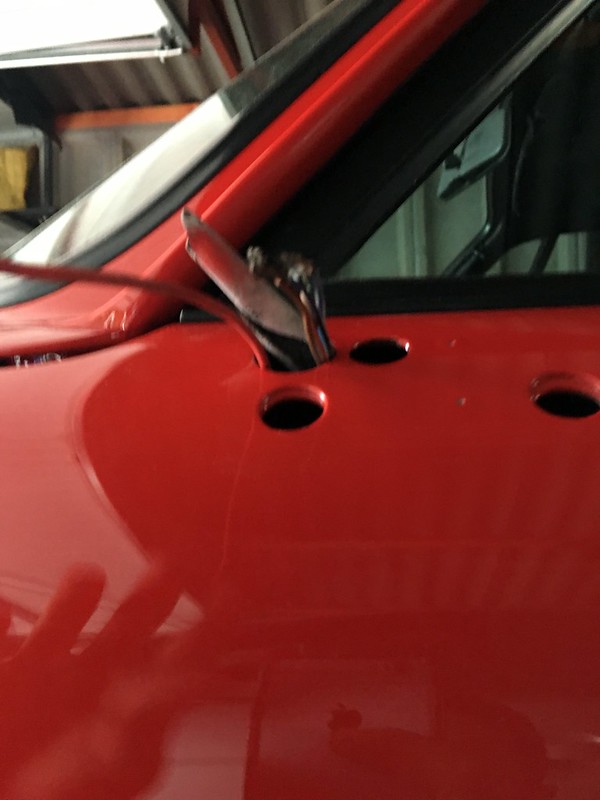
Stupidly, I had bought some flash waterproof plugs to use, totally not realising the holes are way too small!!
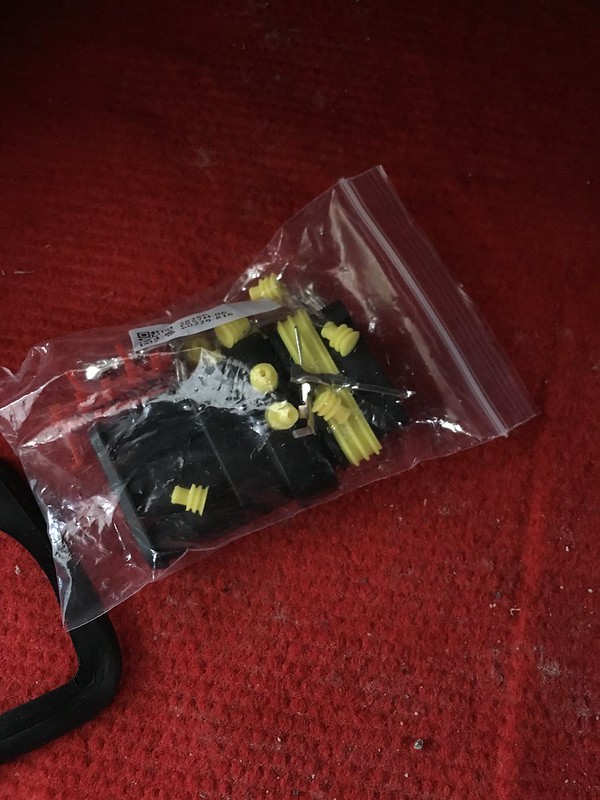
So, not knowing what else to do, I decided to use some connectors which I really don't like. I'm not sure what alternatives are out there and I wasn't too keen o soldering as the wires are too close to the paintwork for me to comfortably hold a soldering iron close.
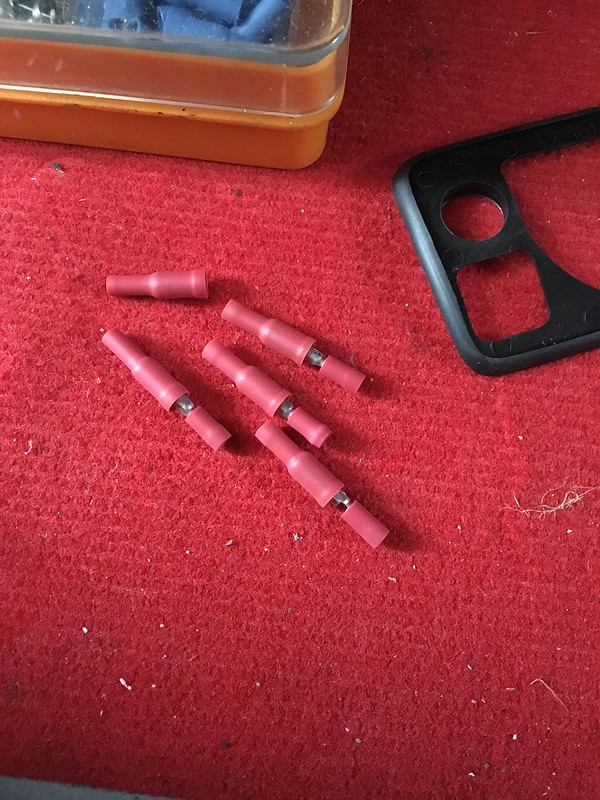
Crimped on along with some heatshrink
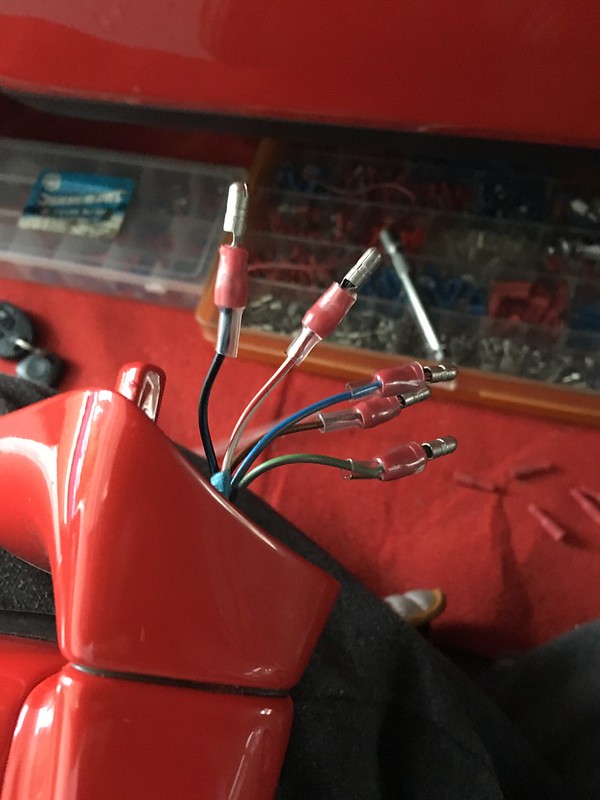
Before placing the mirrors back on and getting the bastard seal to sit correctly, I used some fabric tape on the legs of the mirror to minimise the metal on metal contact
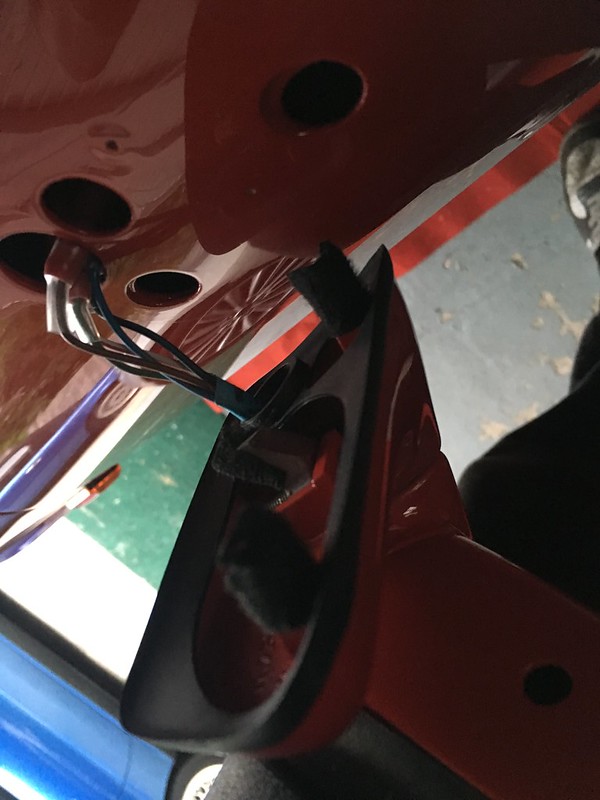
Now for a simply quick job. I was going to leave the flip thing off but decided to put it back on later, always gets in the way!
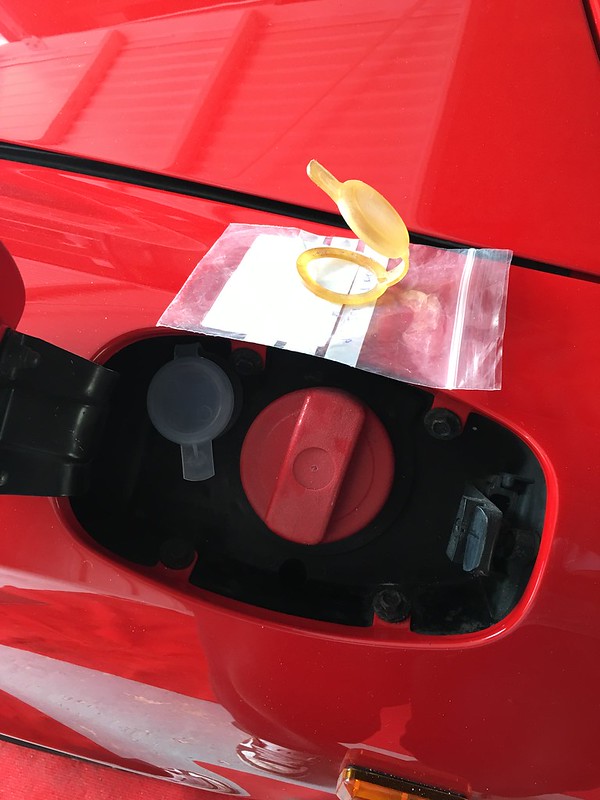
Coilover time. Out with the old
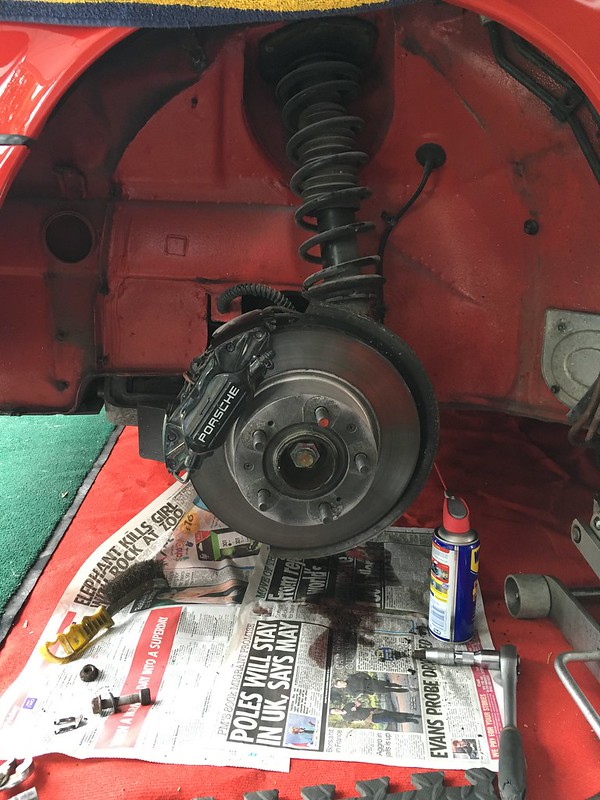
In with the new.
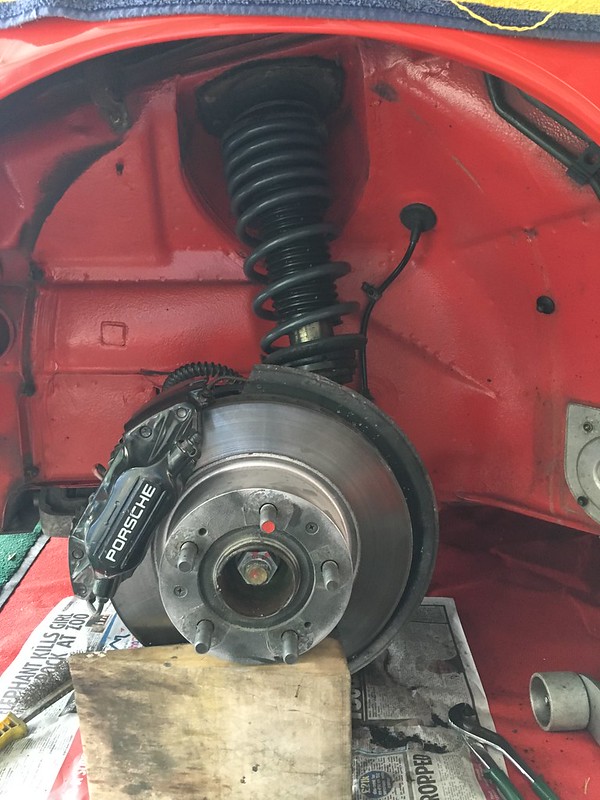
Going to give under here a decent clean another time.
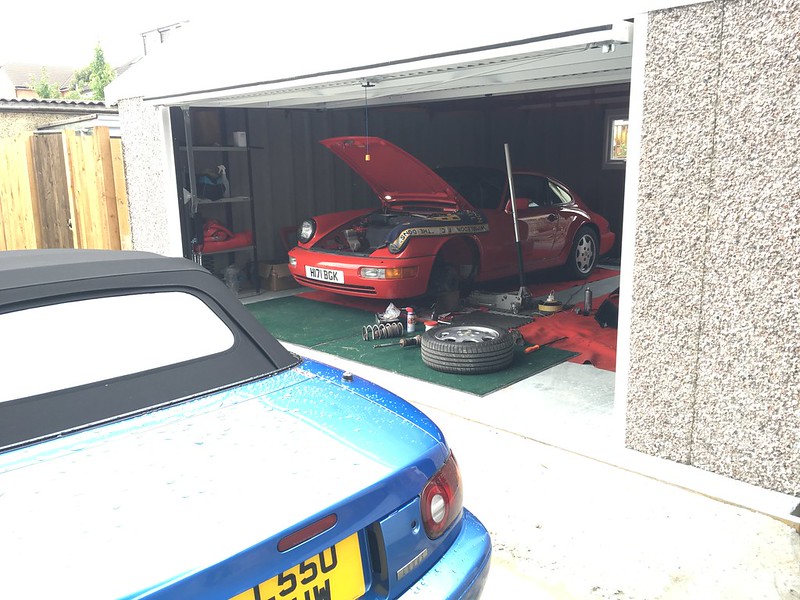
When it came to fitting the rears, I ran into a problem in that things did quick fit properly, 2 hours wasted and thanks to some members here, the light was switched on as to what was wrong. I need the late spec adapters and mounts. :nooo:
The next job, one I was not looking forward to and wish to never do again as it tested my patience. Sun roof seals. I had new seals and they have to be glued on!! I coated these with some Autoglymn fabric protecter which I use on my MX5's mohair roof, hopefully topping up every 6 months or so will help prolong the life of these so that they never need to come off again.
Thanks to another member for supplying the glue for a beer, much appreciated!
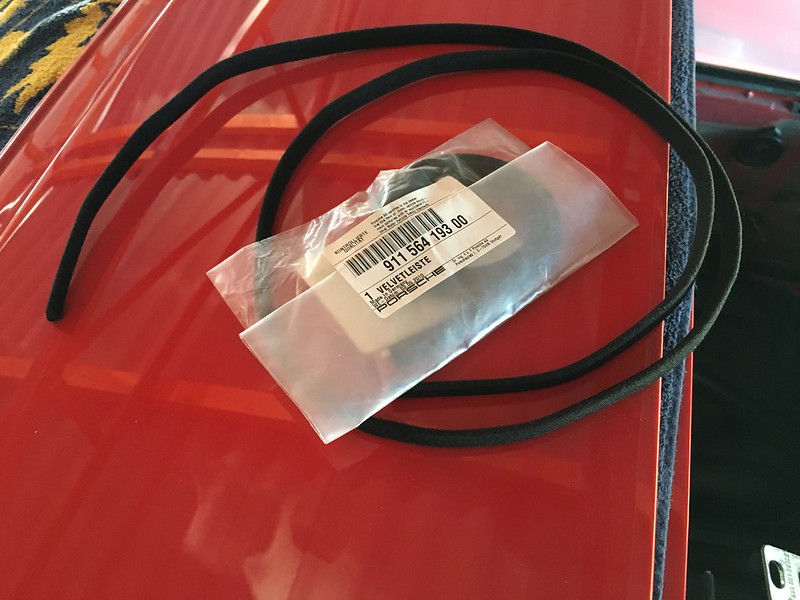

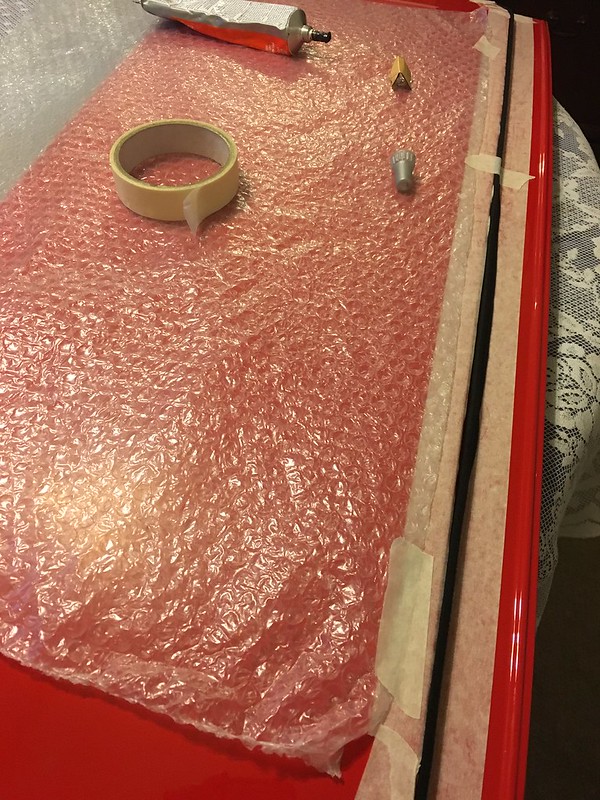
I fitted the seals into position with masking tape and went around, bit by bit adding some glue and sticking the seal back down with the tape.
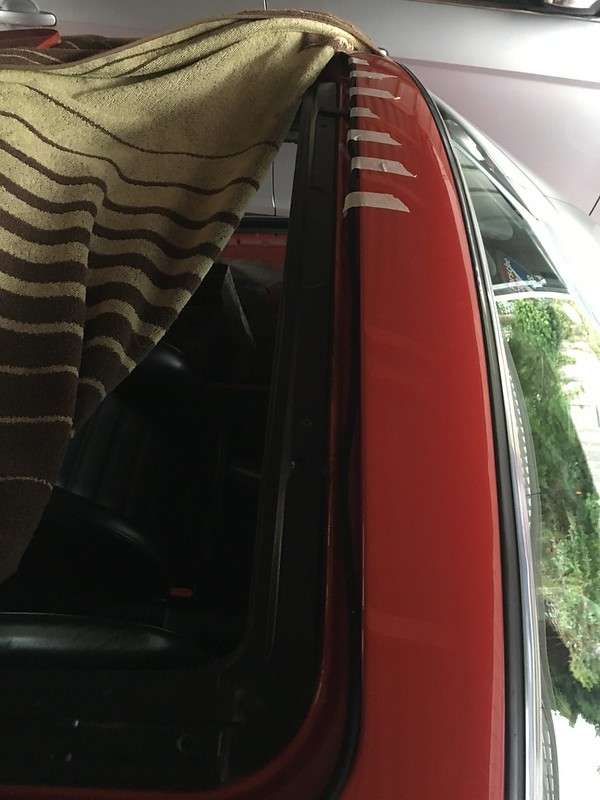
It dries in minutes but I left it over night. Pretty happy with how it came out, a couple of high and low spots but nothing obvious and I'm sure I will soon forget about it. Never again though!
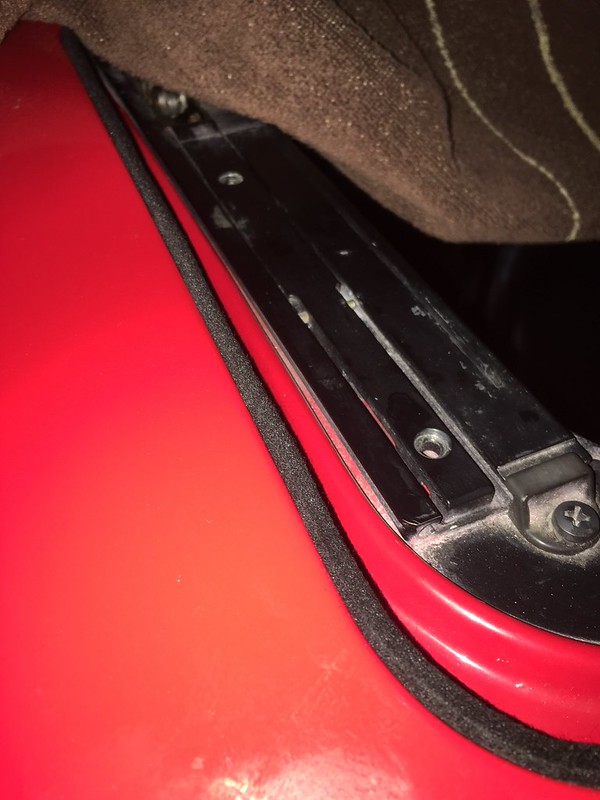
I had an issue with the front suspension struts, I noticed that they were poking up way too high, I later found out that some shims were missing which go under the spring cup and onto the top of the strut. H&R in germany were slow with replies and then stopped altogether when trying to ask what is happening so I had some made up for �5, far less hassle. I had to drop the struts, remove the spring cap and factory shim and pop 1 of these on.
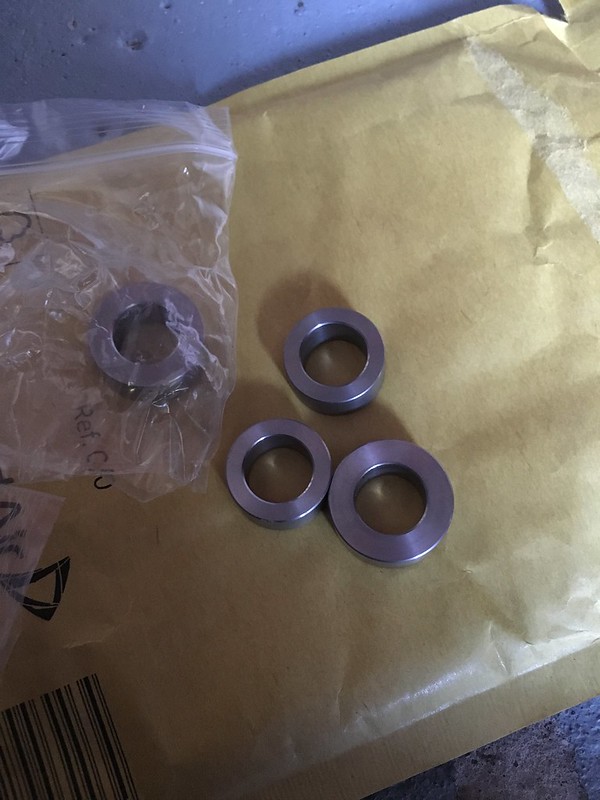
So, I'm nearly there. The exterior needs a wash, with the new garage, it's very dusty while I await some new flooring to be laid. The interior is in desperate need of a clean and I need to fit my headlight trims but I feel like leaving that as one of the last jobs to mark completion. I should get her all buttoned up over the coming weekend, minus the rear coilovers. Then I will be on to getting the leather renewed and the CCU sorted out.
As she stands
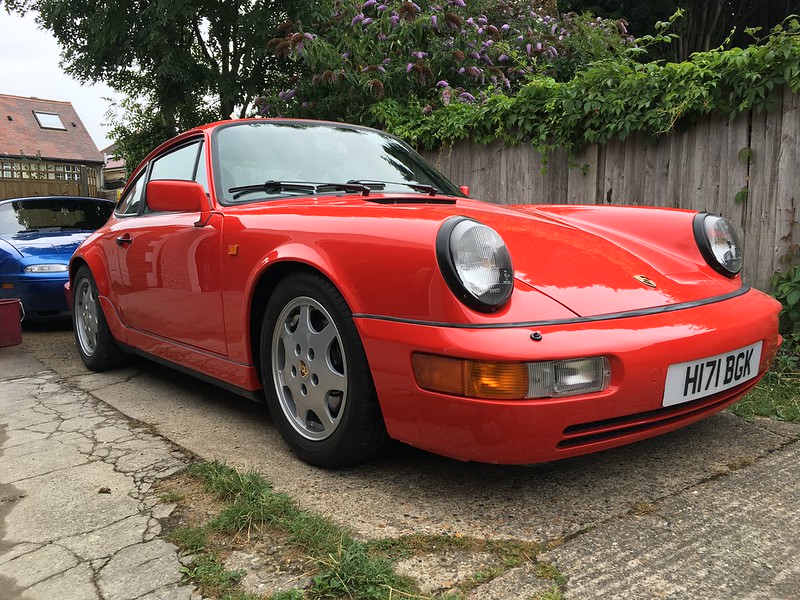
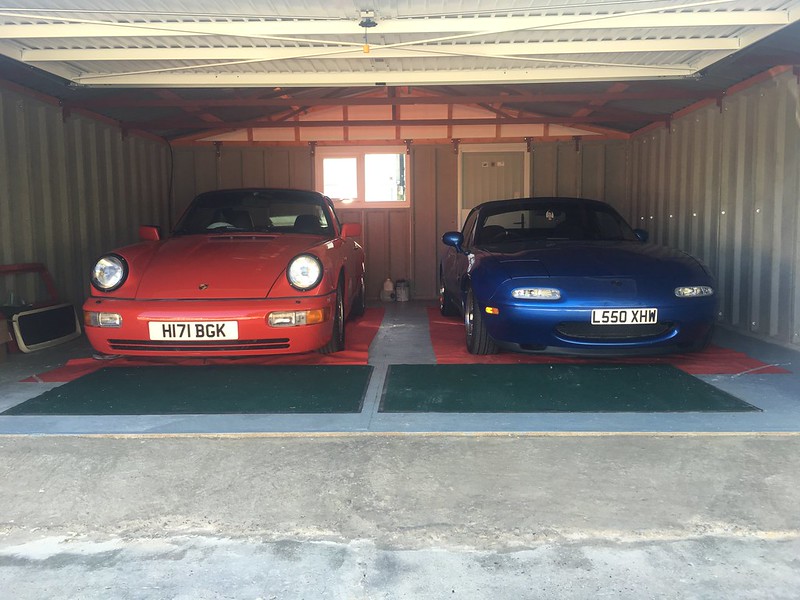
So many more little bits have happened in between all of the above but I simply didn't stop to take pictures. I'll get some decent pictures to show off the bodywork once it has been cleaned
April 22nd 2016
Has been a busy few days, initially getting it ready for the MOT and then having to get it ready for a BBQ around a friends house which turns out to be more like a car show in our circle.
I had managed to leave the interior light on so I was welcomed by a flat battery so a jump was required from the younger sibling.
I set about doing some quick jobs in order to reduce the size of my to do list.
Small window trim clip had split

New one
She was then moved outside

I applied Gtechniq C4 to all black window trim, mirror surrounds and some interior plastics which appeared faded such as the door pull and seat belt retainers. This is brilliant stuff, it is permanenet and really takes everything back to it's original finish. You wipe on and then wipe off to a satin sheen.
Pre-wipe off
Inner pull looks better in the picture than it was pre Gtechniq
After
Inner arches to go back on but treated to aerospace 303 inside and out.
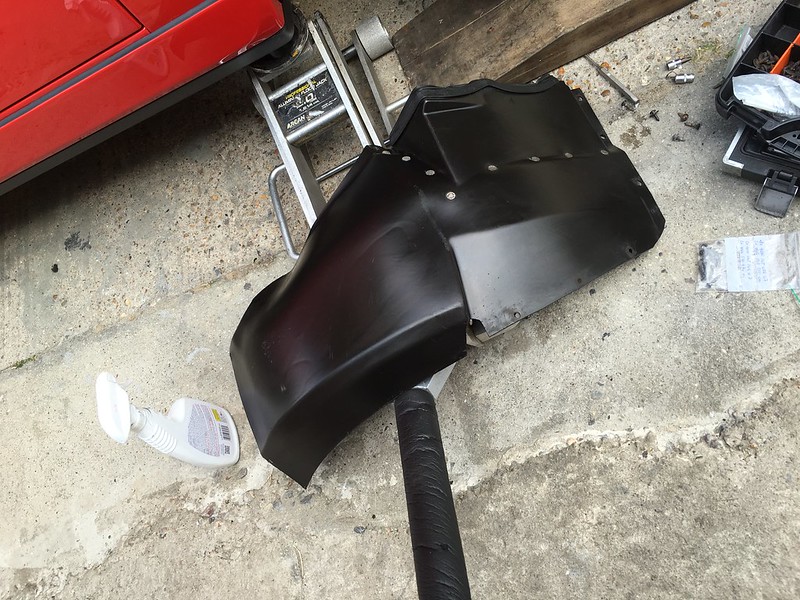

Even the window switches got it, before and after
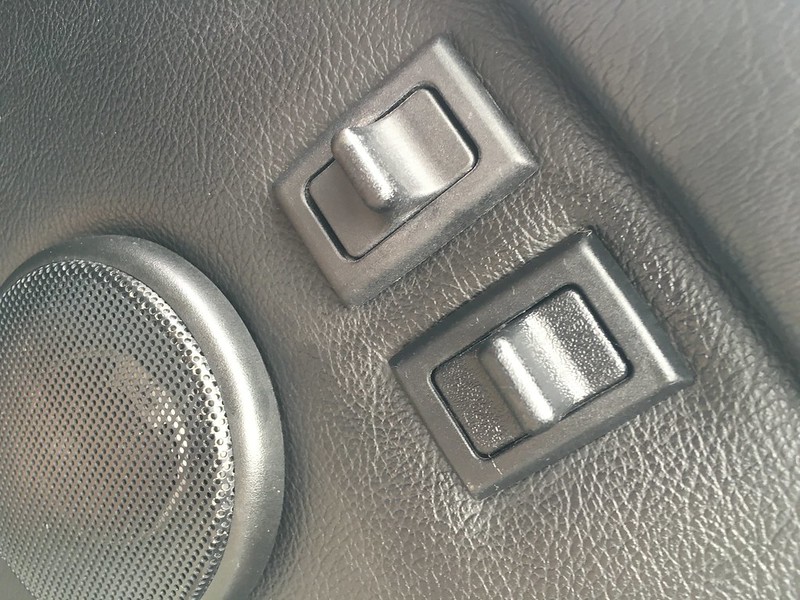
No pictures but I also waxoyled the areas which the bumpers bolt upto on the front and rear inner wings. There is essentially a ledge here where dirt will gather and eventually lead to rusting the body and hardware holding the bumpers on.
The front bumper under trim was missing a few speednuts, thankfully these arrived while I was working on it so I was able to put those on and screw the under trim back on, this was treated to Gtechniq to save me having to reapply 303 every other time I wash the car.
My headlight trim returned, now with a thinner coat of paint on the inside, I used some hard wax in here to help protect it that little bit more before popping them on. I had been looking forward to getting these on!
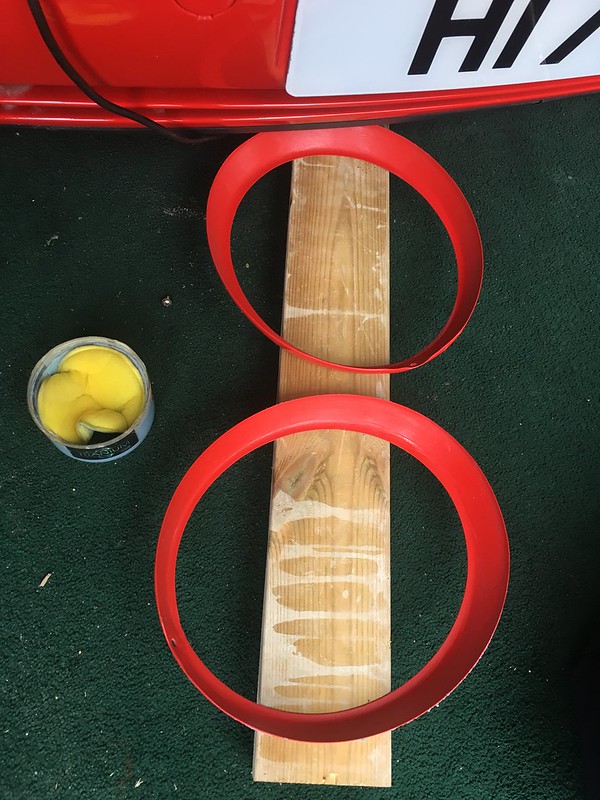
I was then able to give the car it's first wash, it was too dark at this point so no pictures again, slacking I know.
But, the next morning arrived, sunny skies upon setting off for my MOT, only to reach 2 minutes from the station for the heavens to open! :frustrated:
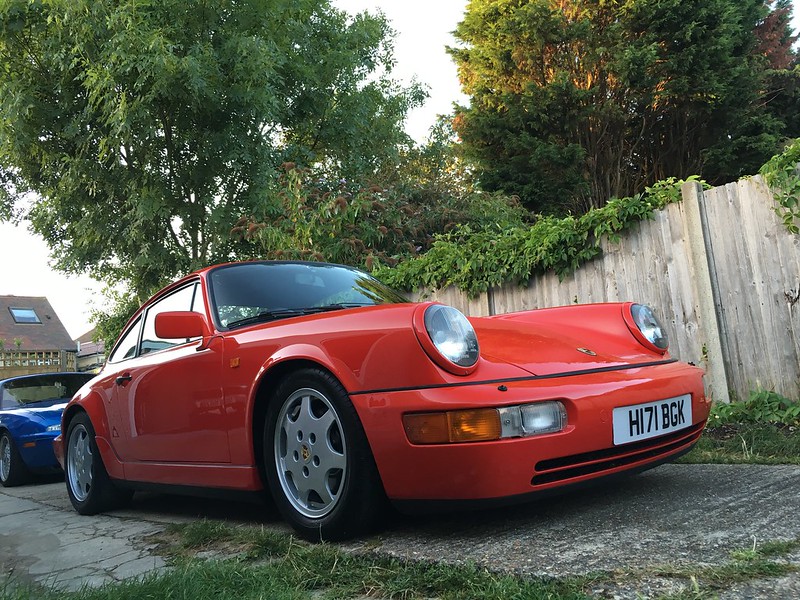
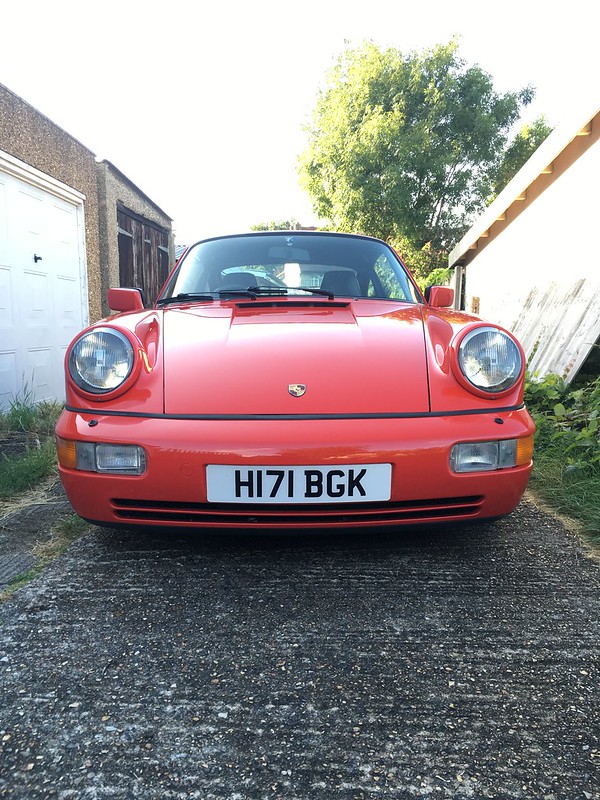
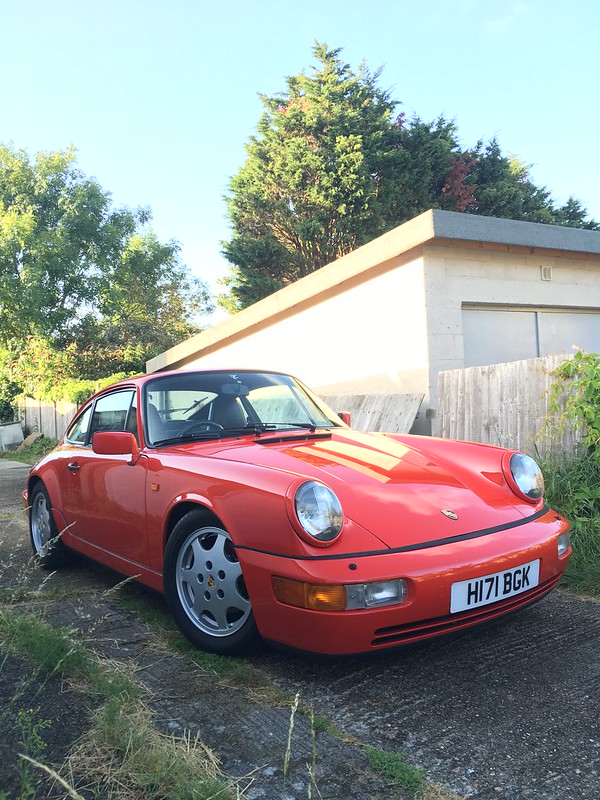
Being checked over. The guys at the MOT station are good friends so while on the ramp, having come prepared, I used some quick detailer and aerospace to give the underside a wipe down. :thumbs: I also have an oil leak from the chain area cover but it can wait until it goes in for a service.
Road worthy for another year and back out into the wet she goes. Never happy about that, I'm not one to drive my cars in the rain, especially after so much work going into cleaning the underside and of course the new paint.
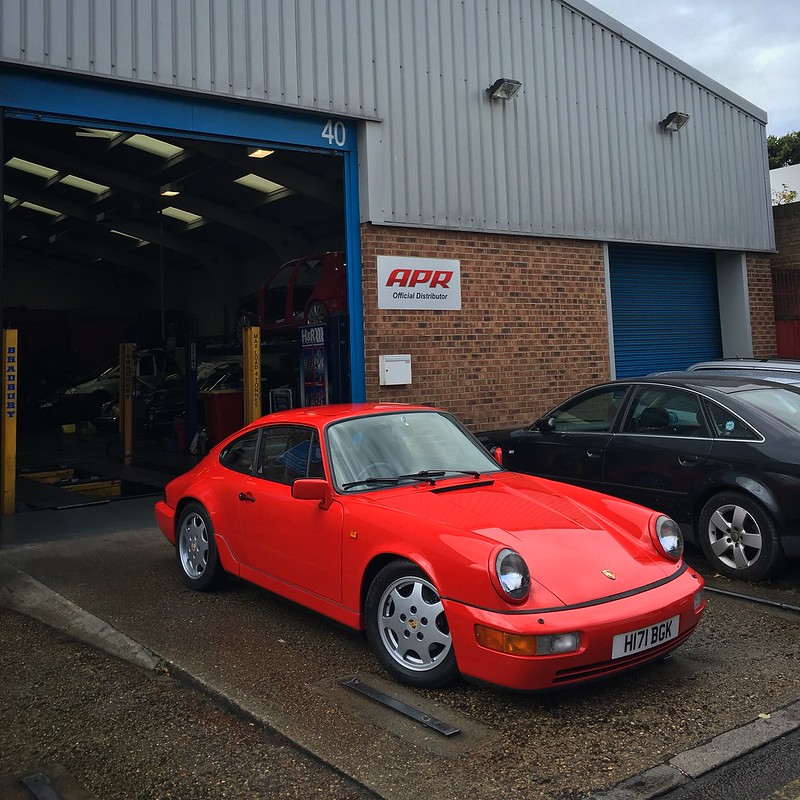
Back home and dry again, it was time to clean the interior. As much as the bodyshop tried to keep the inside clear, it is just impossible to escape the dust from the workshop, it goes everywhere! So armed with a toothbrush, ear buds, leather cleaner, nail brushes and a hoover, the interior clean up begain. (I officially hate the rear shelf and rear window, what a pain that is to clean)
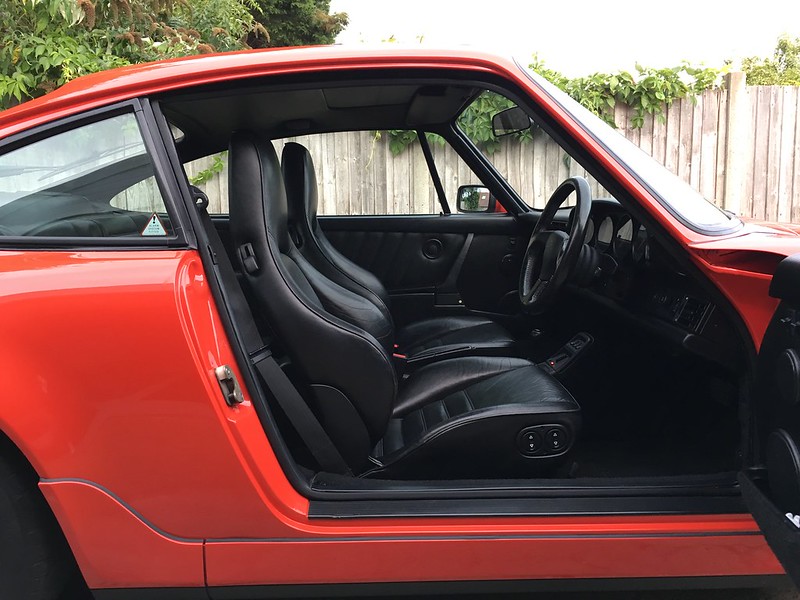
Next on my list is to have someone come and make the leather look newer, I don't want a retrim as that will look too new so I have found a guy that can remove/fill some of the creasing, recolour the faced and overall, present the seats in a fresher light :thumb: Steering wheel also. He comes to you and it doesn't cost the earth, of course, I'll report back when that happens.
I then popped out for a drive and dropped the missus off so decided to get some quick snaps
I seem to only like taking pictures from this angle, sorry.
The passenger rear shock is higher than the drivers side rear so this just looks awful here but it's a rear shot. New lenses to go on soon along with the rear H&R's.
Bunch of new stickers
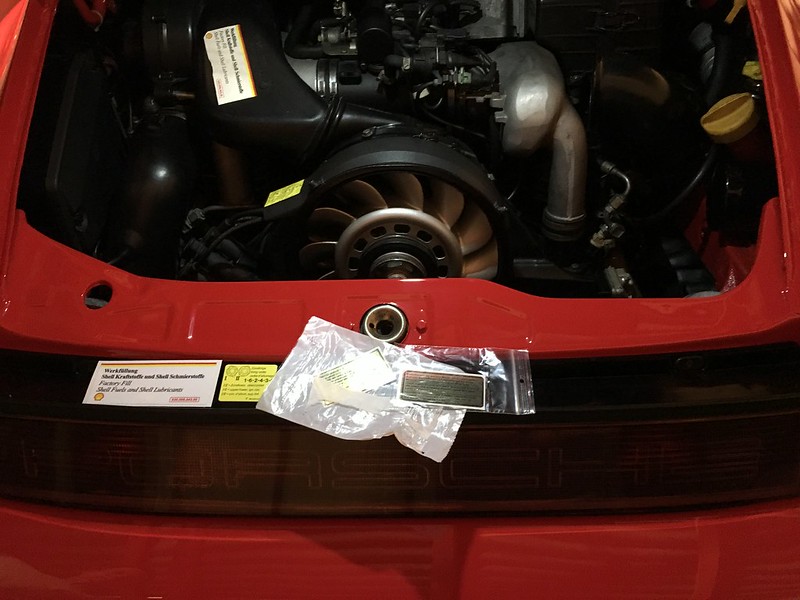
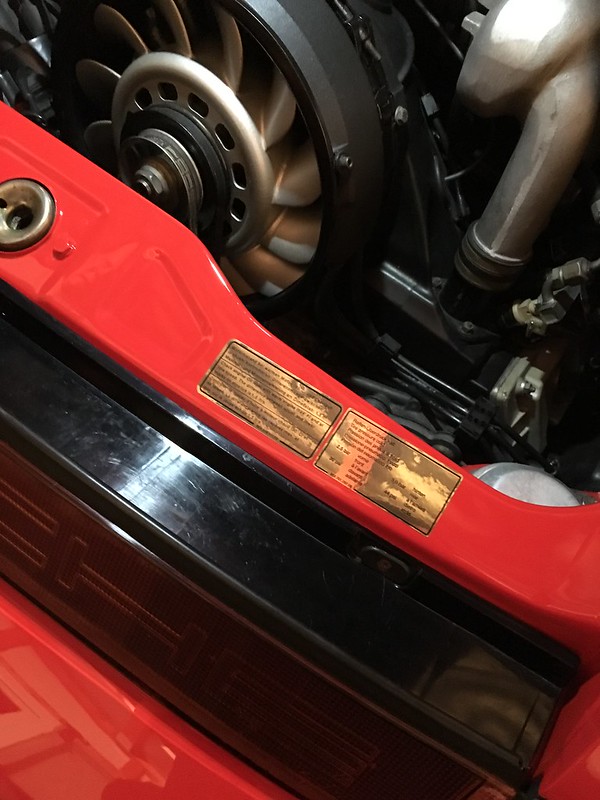
I then spent until 1:30am working on the body, I machine polished the car, simply to remove any polish which the bodyshop may have applied and then set about applying Zaino Z5pro with ZFX. This has been a long time favorite of mine.Smells great and leave a glassy finish, I've won a few best paint awards with my Golf when wearing this stuff so I like to stick with it and the whole Zaino kit.
Awaiting an electrician to come and fit strip light so I had to improvise.
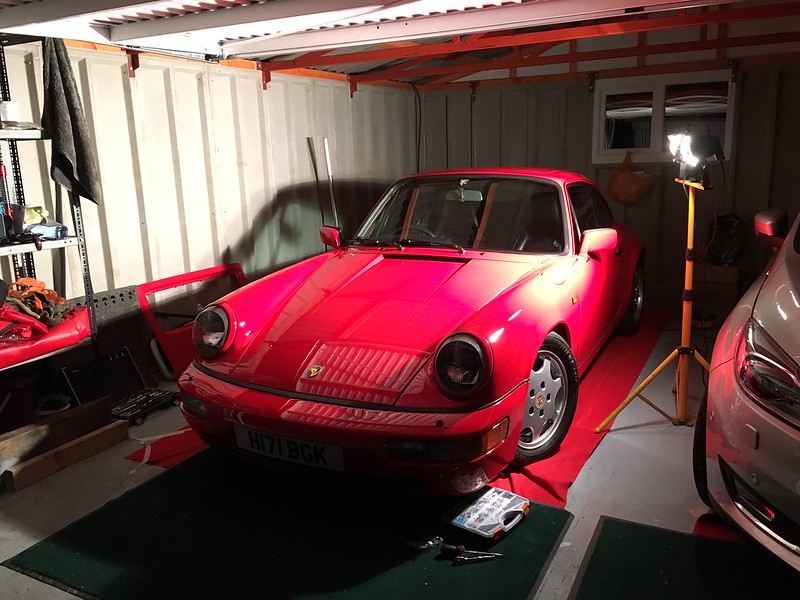
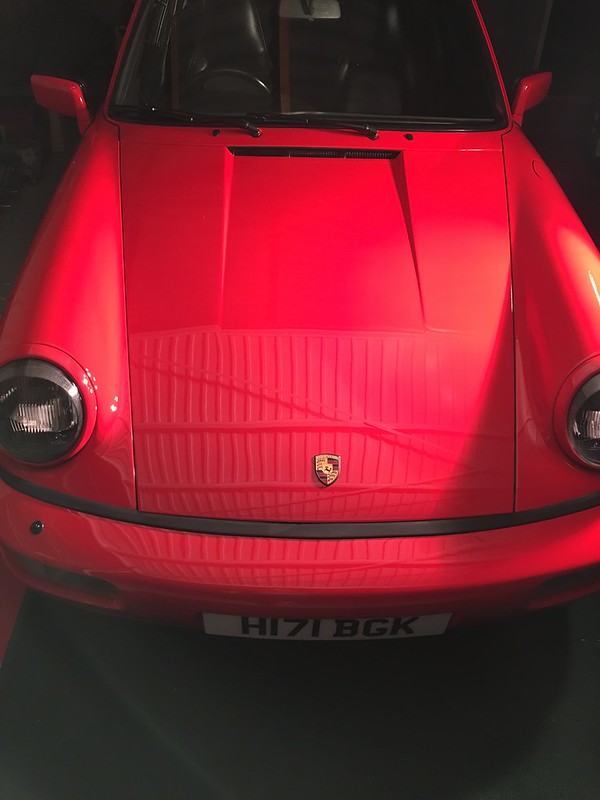
The next morning, I woke up like a kid at Christmas, I wanted to see the results of my efforts and wow, I thought it was bright before but this was like it was painted another colour.
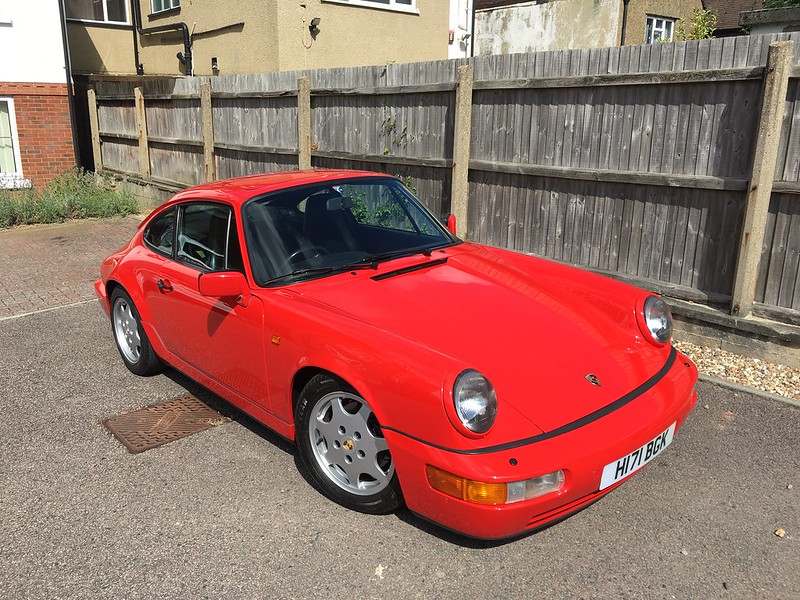
Crap pic but evidence that I do drive it
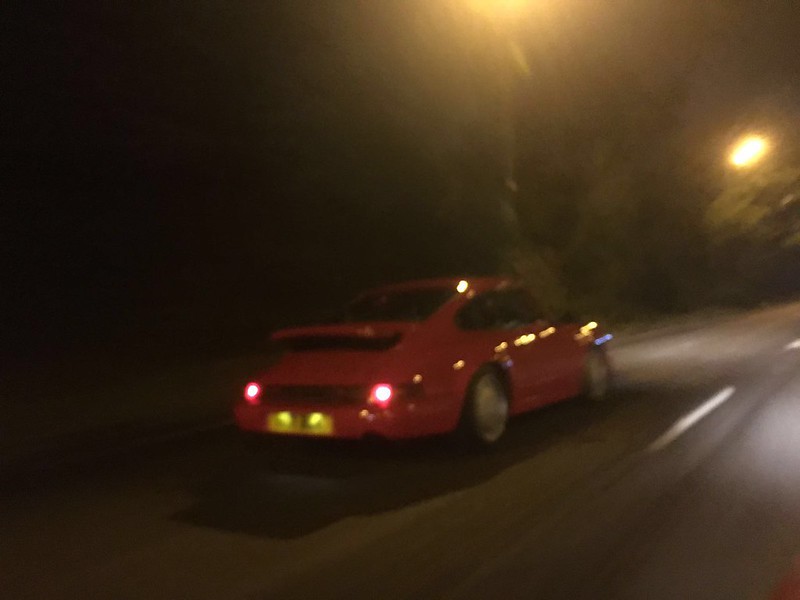
A long way since 16 months ago
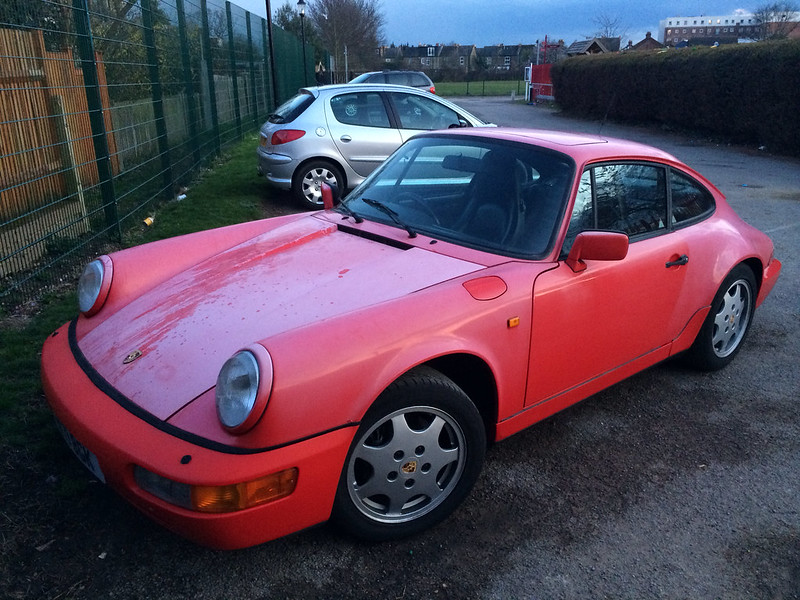
Decided to take it to work today, the ABS light came on but after a restart, disappeared

Had to throw a loose cover much to the amusement of my colleagues, the company next are forever creating dust by chopping wood!
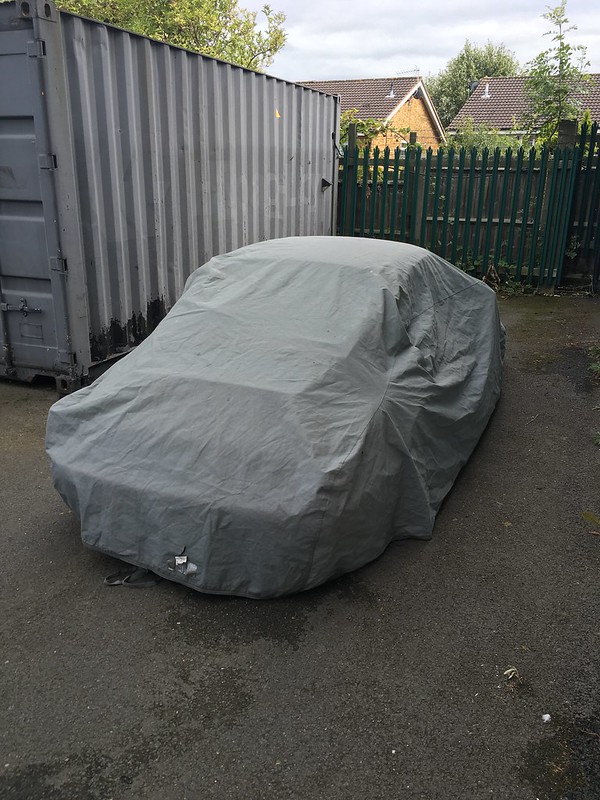
:nooo:
More to come soon I'm sure :thumbs:
August 30th 2016
Yes, I am interested in the 5 spoke twist ETA's, 18" I think...
Finished up the small jobs on the car over the weekend and gave it a clean, again.
New rear wiper bolt cap
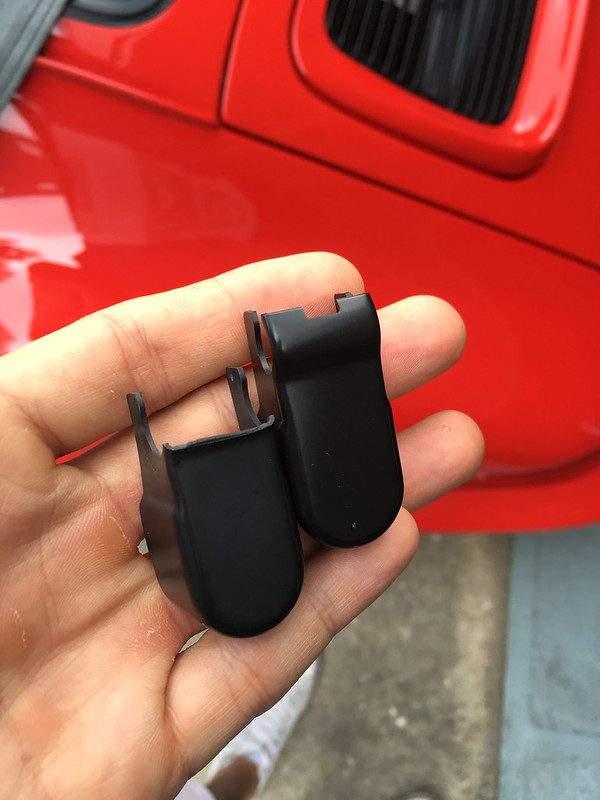
Cap was missing on drivers side seat belt mounting.
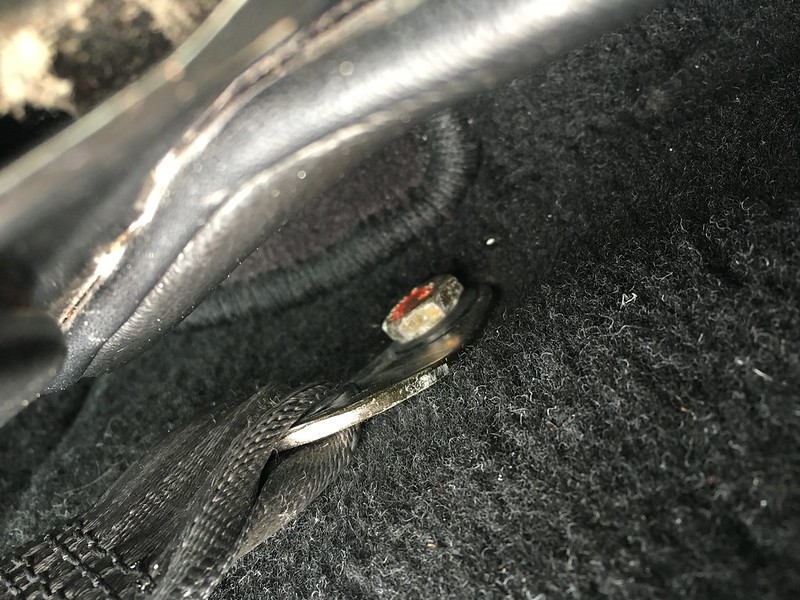
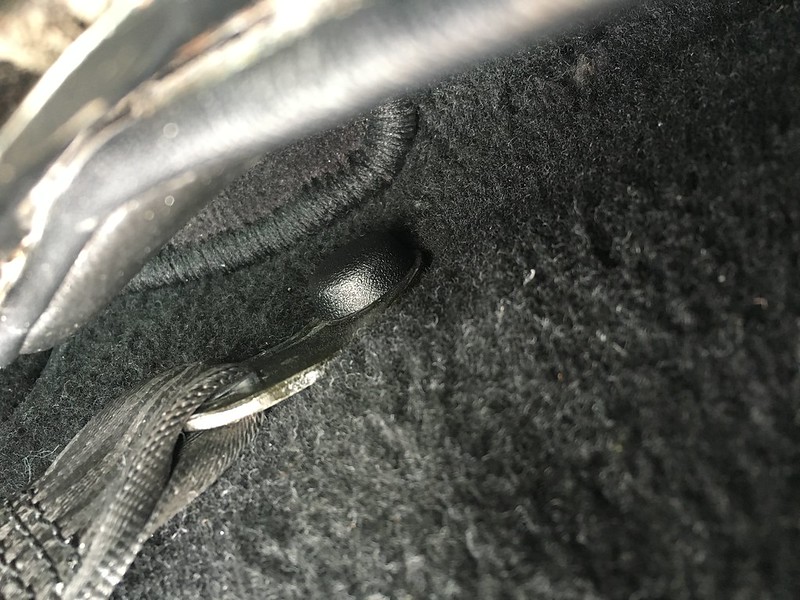
New mirror mushroom button
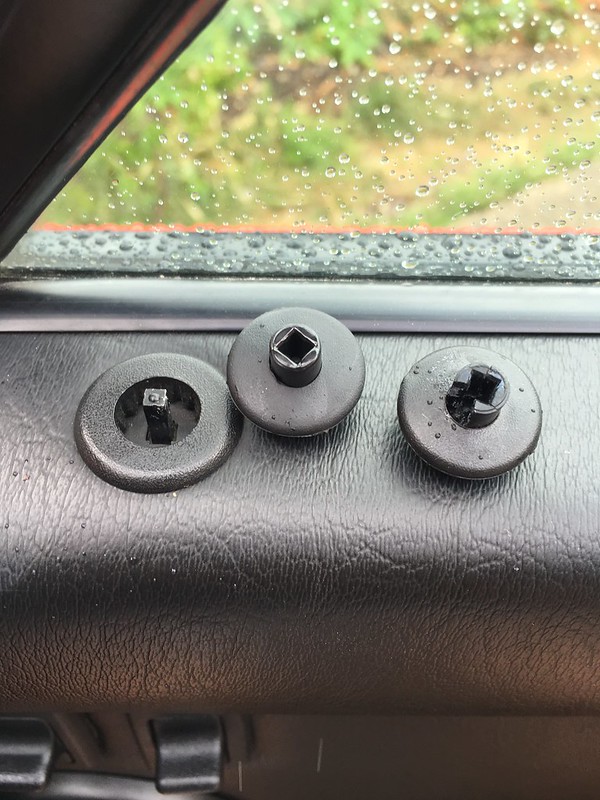
New rear door card top washers
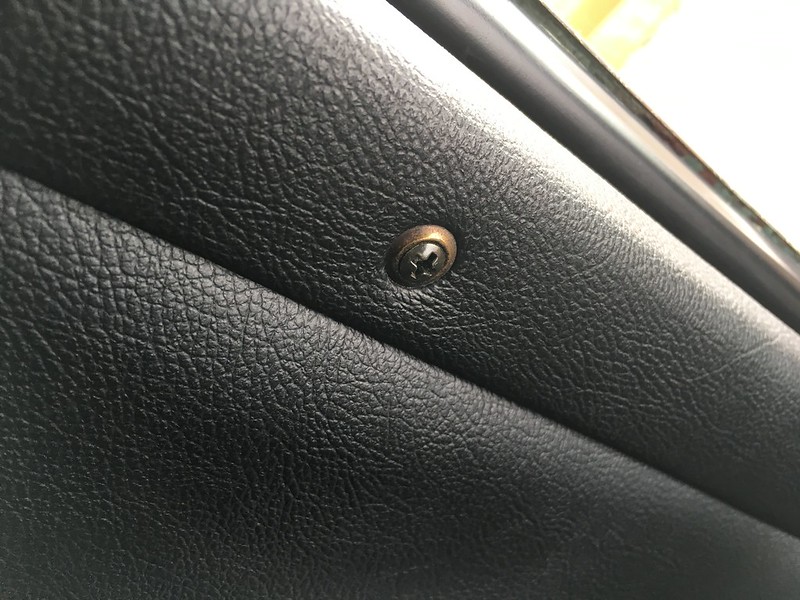
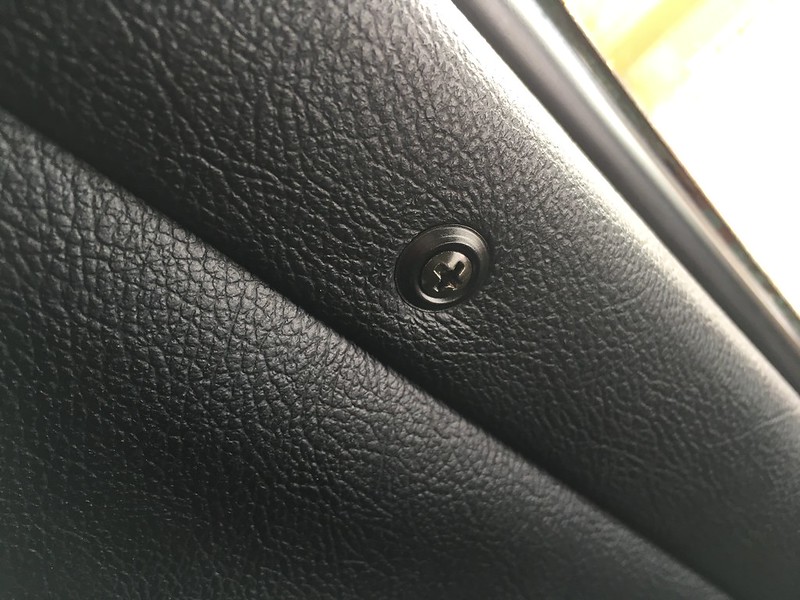
New drain grommets
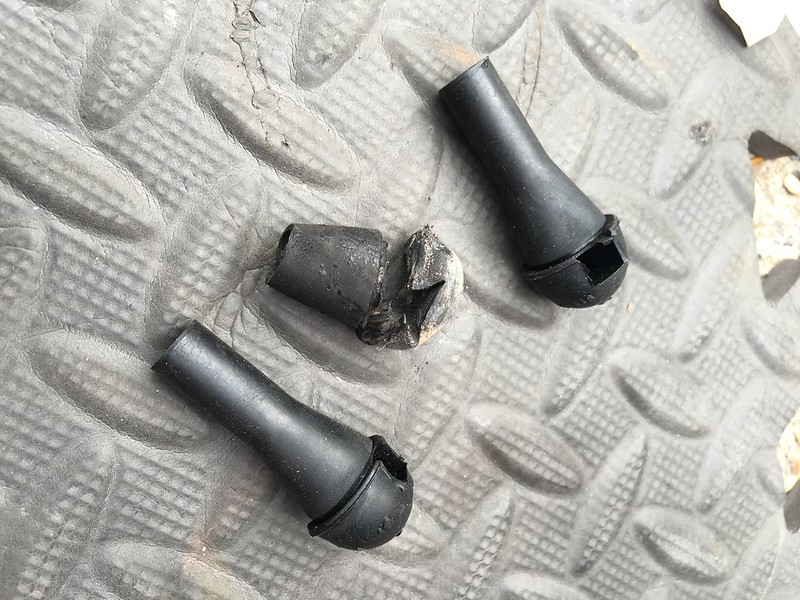
Can see that I've already managed to scrape the underside coming out from my drive!! Ordered some new waxoyl so I can repaint the marks.
New reinforcement strip
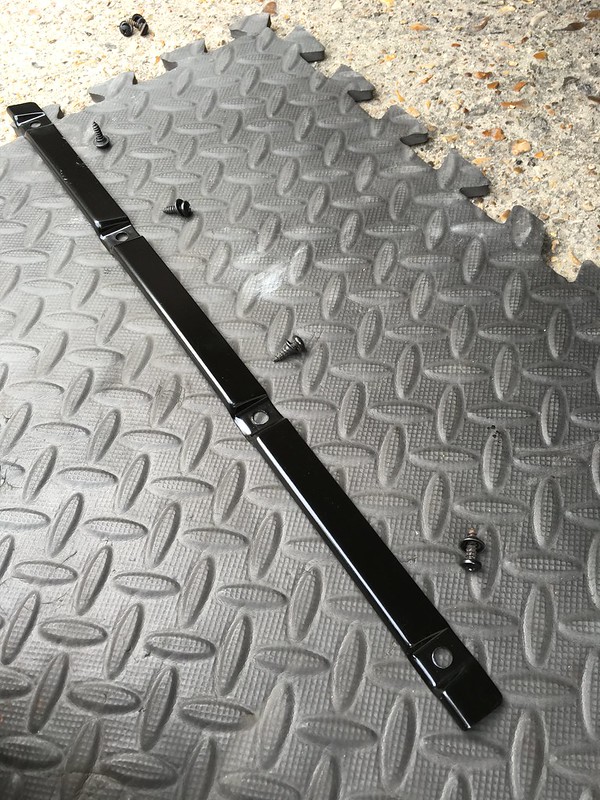
Can see that I've already managed to scrape the underside coming out from my drive!! Ordered some new waxoyl so I can repaint the marks.
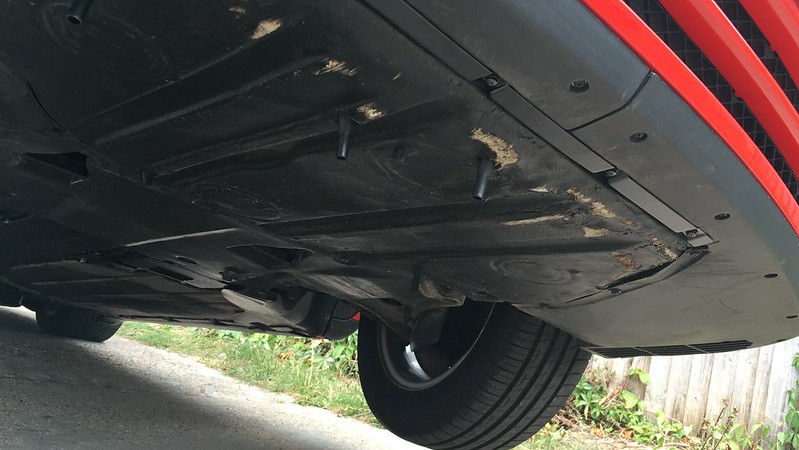
One thing after another, managed to spot a leaking PAS pipe, found the exact point so I've got a replacement return pipe on order, not sure if that's going to be an awkward job.
Finished up fitting parts and gave both the cars a good wash and top up of Zaino.
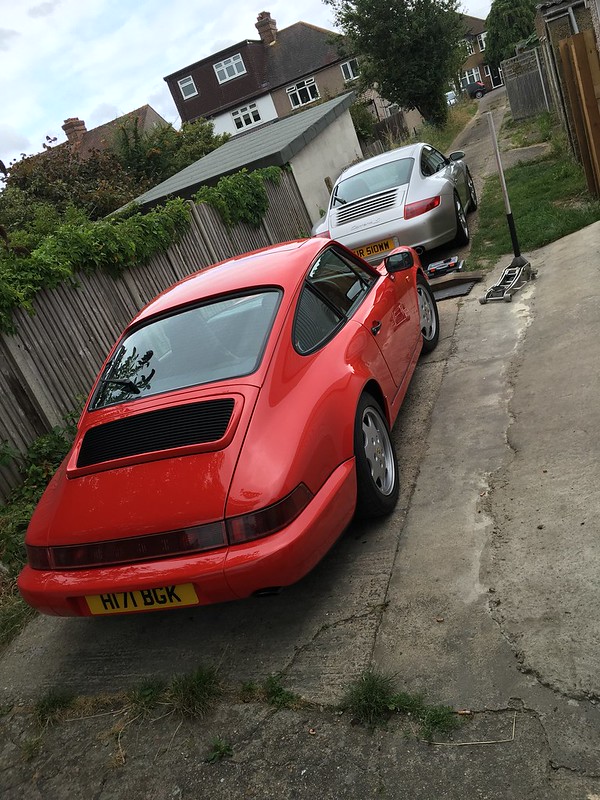
This is a photoshop but I'm undecided about stickering her with a Carrera badge, I have a genuine one for the rear but not sure on it...

That's that for now. Cleaned and covered ready to take to a wedding in 2 weeks times. In the meantime, collecting a new toy and annoyingly going away for a week the next day
Don't burn me, I can't wait, so much so I'm collecting it at midnight tomorrow :bandit:
[img]https://c1.staticflickr.com/9/8612/28674047232_4fab63be91_c.jpg[/img]
September 15 2016
Thanks! I am happy with how it has turned out, still a few more bits to do but I've taken a break from it at the moment as the Focus is taking my attention at the minute. There is no way in hell I would have achieved what I have without being a bit handy, I would probably have to spend half of what the car is worth! Luckily I enjoy jumping into projects, I'll be looking for the next soon no doubt
So not much has happened, I went away for a week to Amalfi Coast and the day after I got back, I had a wedding to attend so I decided on taking the 964 as the forecast was good and it would be a nice run from home over to Ascot.
I find just how small the 964 is compared to the Focus, or probably more how big the Focus is, completely dwarfs the 964!
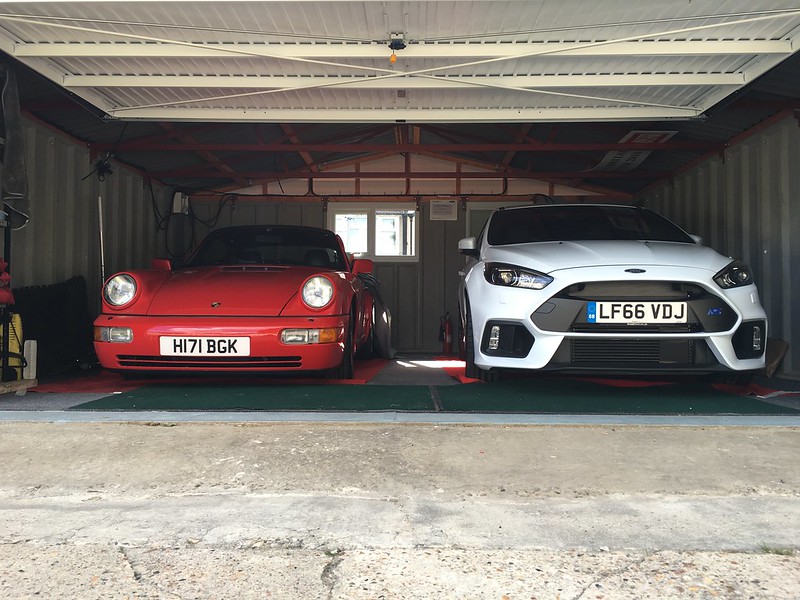
Arriving at the venue

The car park was filled with various exotica but while I was hanging around, the 964 was the one which seemed to draw people over.
Anyone on here? 991 Turbo with T11RBO as the plate
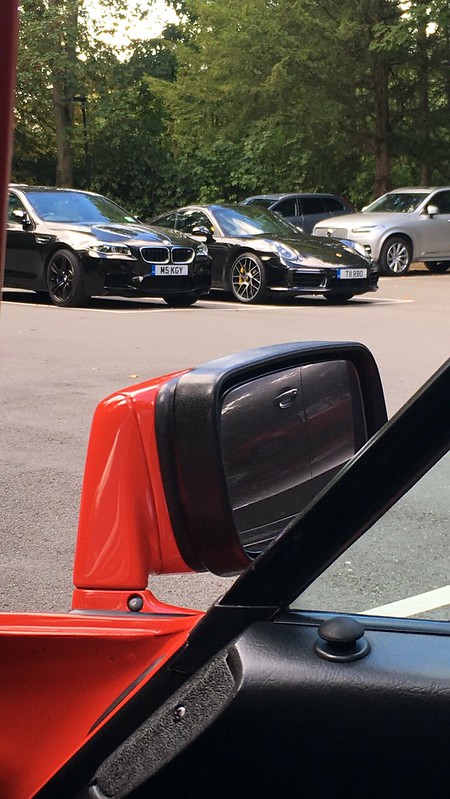
:?:
And some snaps on the way back, was the driver for the night while she got merry. Not a problem when getting to drive this back through clear roads.
Wish I didn't leave the spoiler up here

Home for the night
Cleaned the next day as the front picked up a fair few bugs
[img]https://c4.staticflickr.com/9/8184/29070524123_724267bd49_c.jpg[/img]
September 26th 2019
The novelty of the RS has worn off a bit now so I'm back to working on the cars. Yesterday I thought I would tackle the job of replacing the weaping PAS return pipe. I under estimated this, in my mind, I thought I would simply be able to get under the car and simply pull pipe out once undone.. If I were to write instructions after the whole experience, I would still write that but I would need to add loads of swear words in the middle. What a pig of a job it turned out to be but it's 90% of the way done at the time of typing this.
I'm sure the OPC way of removing this pipe would be to remove the rear trailing arm and ARB but I managed to get the pipe out by just undoing the shock mount to give a few extra mm's of much needed clearance.
So, this is the shiny new pipe from Porsche. Judging by the bag. it looks like it's sat around for many many years but the pipe itself is pristine and in perfect shape.
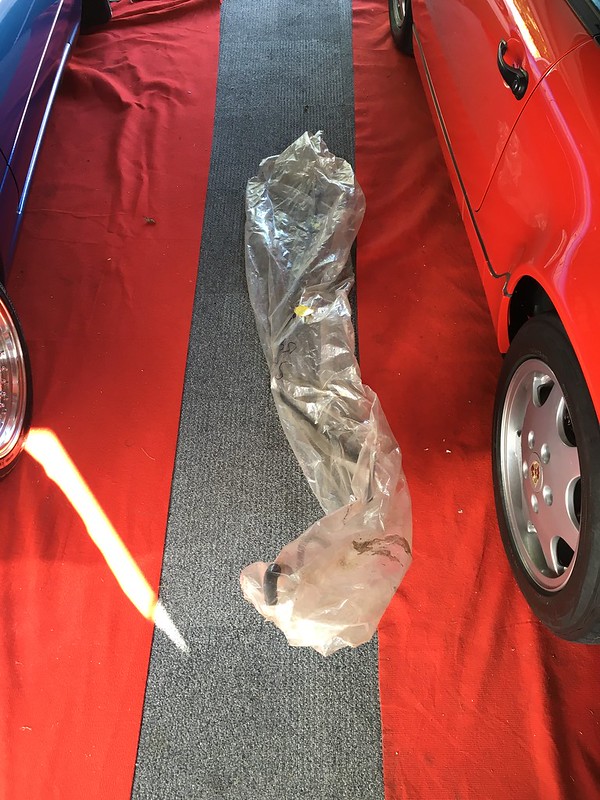
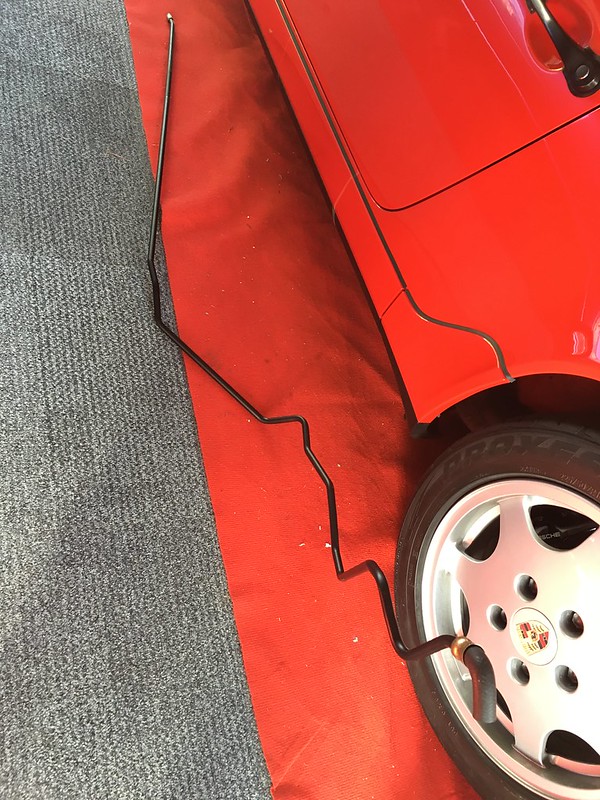
Hard to tell the leak from the wax sealent that's been sprayed everywhere but the pipe has a tiny tiny hole from sitting inside this little rubber bracket and when the system is working, i.e under pressure from steering, it weaps out and eventually drips.
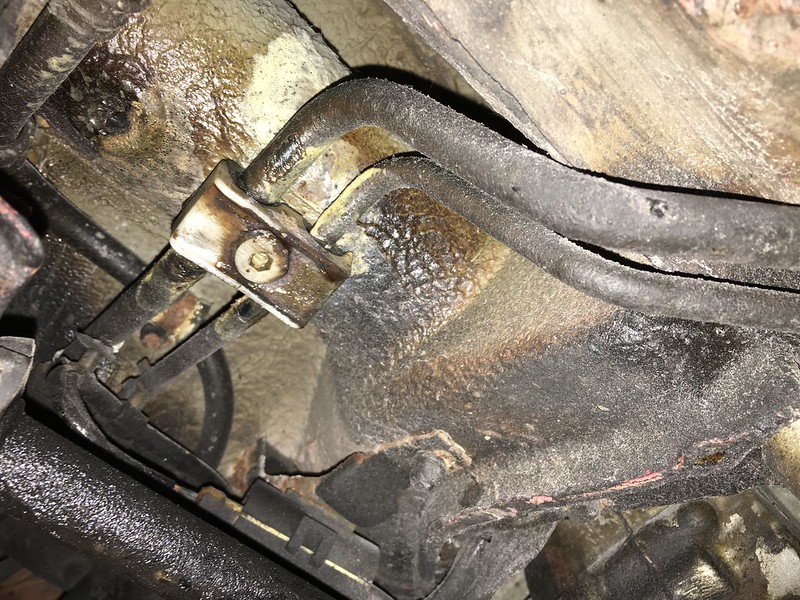
First thing was to get the car in the air and I set about removing a metal under tray that covers the tunnel area in the centre of the car. Removing this exposes some lines, throttle cable and base of shifter.
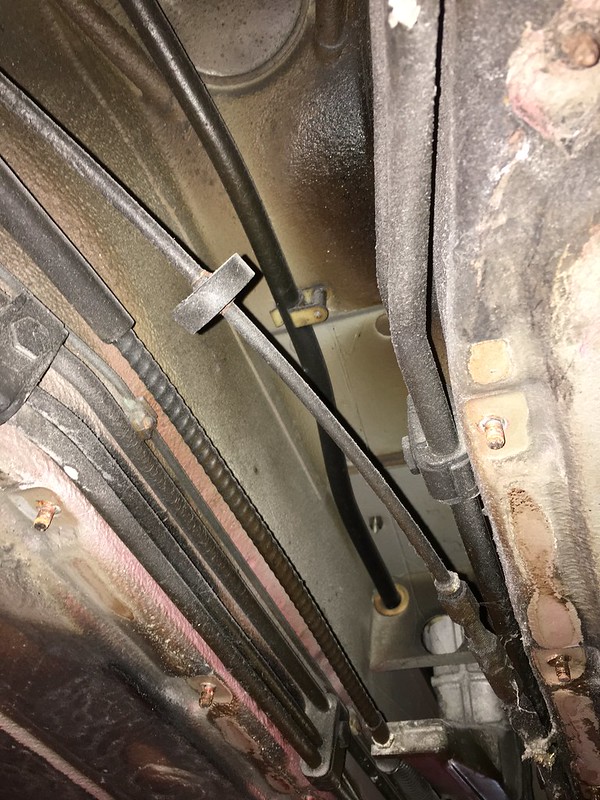
I'm sure this had never been removed before and it was completed welded in place!
Undid the hose I was replacing and let the fluid drip into a catch tank. The fluid was black with a hint of red. I believe that this is ATF as opposed to PAS fluid. I have read that I should use Pentosin CHF11S but some say just refill with ATF Dextron 2 or 3... I have yet to refill so I will probably ask a question to fellow UK 964's rather than go off of the 10 year old Rennlist forum posts that are very varied in opinion.

No pictures happened for about 3 hours of wrestling with the bloody pipe. I could have cut it and pulled it out but I wanted to pull it out in one piece to make sure that I could get the new one in.. If I couldn't pull it out in 1 piece, then I wouldn't be able to slot the new one in Logic!
So as I couldn't find any DIY guides for this at all, I was well and truly on my own and learning as I went, I try to do things in the easiest way possible and try and not disturb bolts that I don't need to but as my patience was wearing thin, my ideas were growing and undoing the rear trailing arm was becoming a reality, something I reallyyyyyyyyyyyyy didn't want to do. I took a break and had a coffee, wiped the dirt out of my hair and face and thought I'd give it one more go, it's a case of twisting and pulling and finding an angle that works, well, within 1 minute of taking that break, it popped out!! Woohooo!!
Pictures resumed
Although 2 pieces here as I took pride in showing it who was boss by snapping the bloody thing where the hole was.
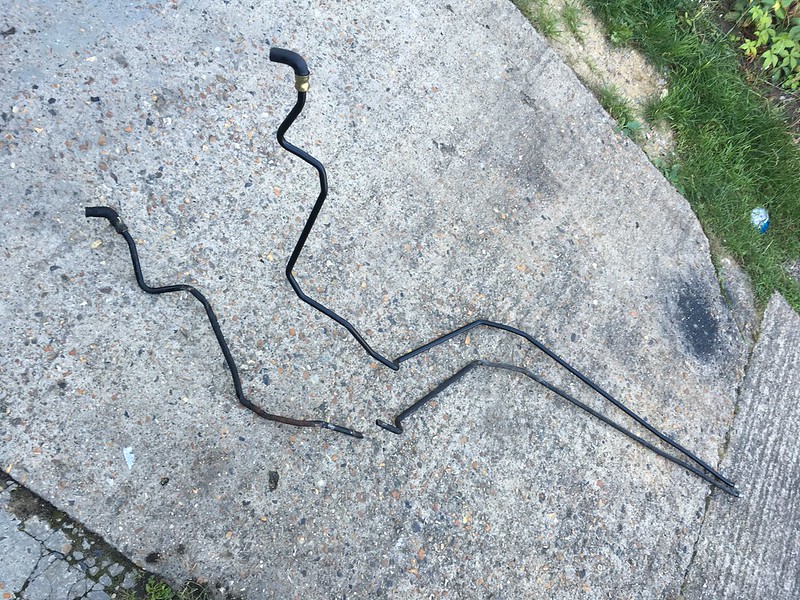
A better view of the rust
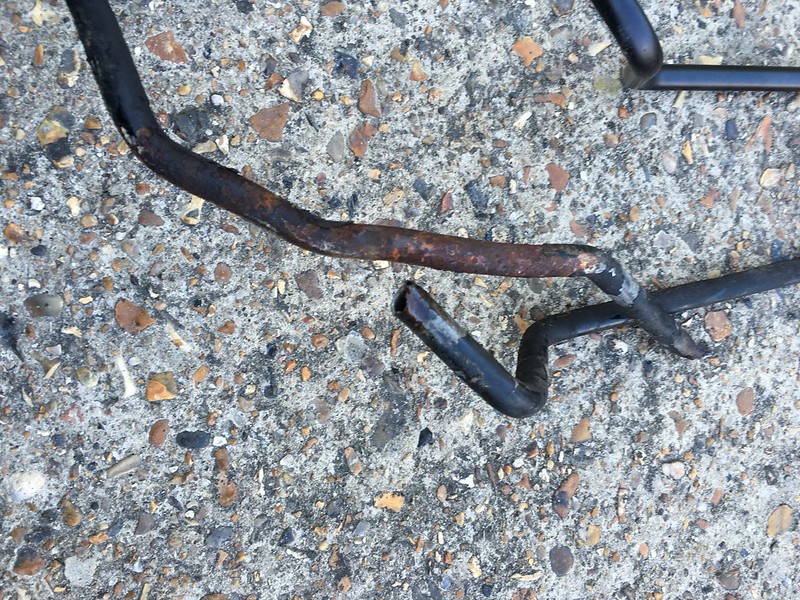
i find it straight how it has rusted considering the rest of the car is rust free, this is now the last of the rusty pipes, it was only ever this and an engine oil return that were rusty and everything is perfect. Strange.
Refit time, I was expecting to have similar trouble, but the new pipe popped into place with ease, it was a bit tricky pointed the engine bay side up, I kept getting it caught up with the rear shock and having it go up inside the turret but after a little wiggle, it went where it needed to.
A simple job of popping all of the support brackets in place, new jubilee clips at both ends, centre tunnel cover refitted, rear shock and wheel bolted back on and that was me done for the day.
If you find yourself having to do this job, good luck, it's a ball ache, especially laying on a floor, a 4 poster and you'll have an easier life.
Feel very happy that it is complete, I just need to decide on a fluid and then bleed. :thumb:
Boring update I know, sorry.
My rear shock adapters are on the way from the US so once those arrive and I get some newer style rear top mount rubbers, I'll be able to drop the rear end by fitting the coilovers finally.
Must get around to send Tore my CCU now, leather clean up and OPC service and then that's my to do list for this complete
Until next time! :bye:
September 30th 2016
Not much to update here, I don't think I have driven it since the last update.
I've been spending many many many many hours making sure the paintwork is 1000% perfect as I'm about to apply Gtechniq Crystal Serum + Exo in order to protect the paintwork from swirl marks and save it from needing a polish for years to come. I have never spent so long perfecting a car and considering it was only just painted, it's taken longer than I thought.
Gave the car a pre-wash with fairy liquid, this removed all polish/wax/silicon on the car, bloody dulled some of the rubber too but nothing I can't sort.
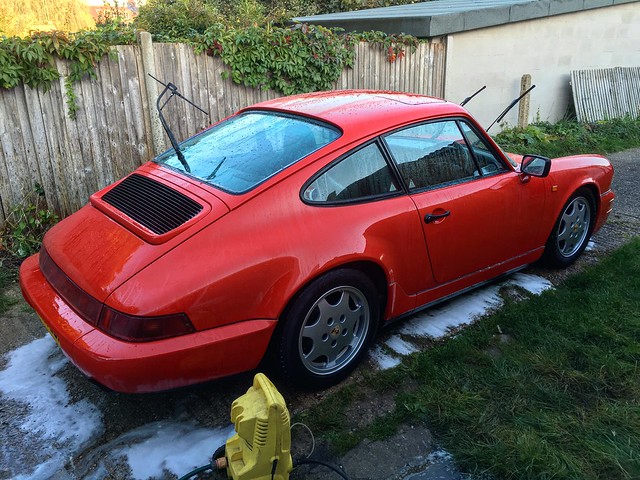
Beginning of the process using a DAS PRO / Megs MF kit here. A safe option as opposed to a rotary with waffle pad.
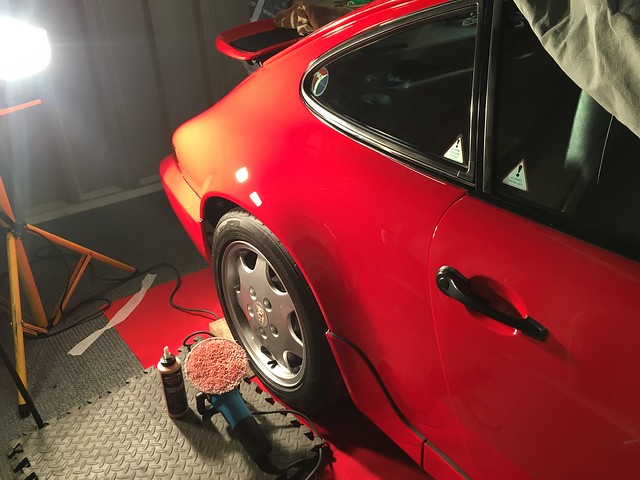
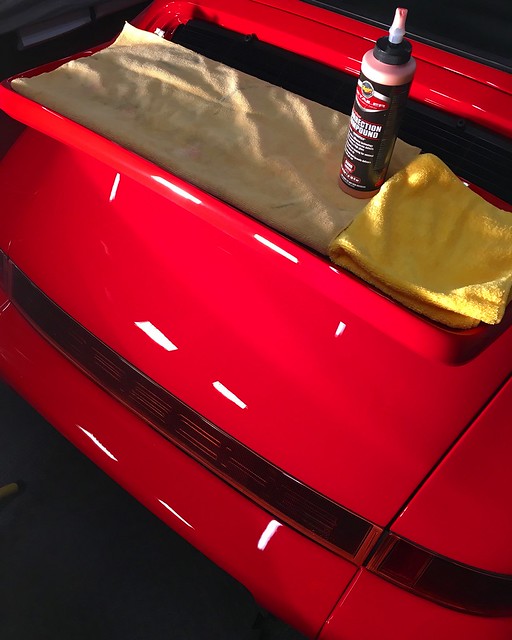
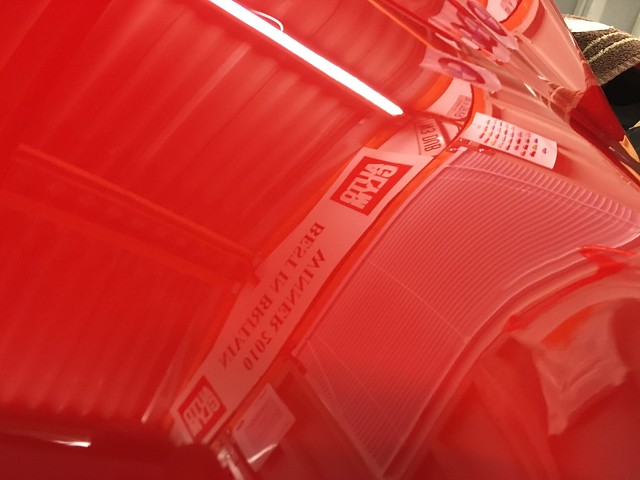
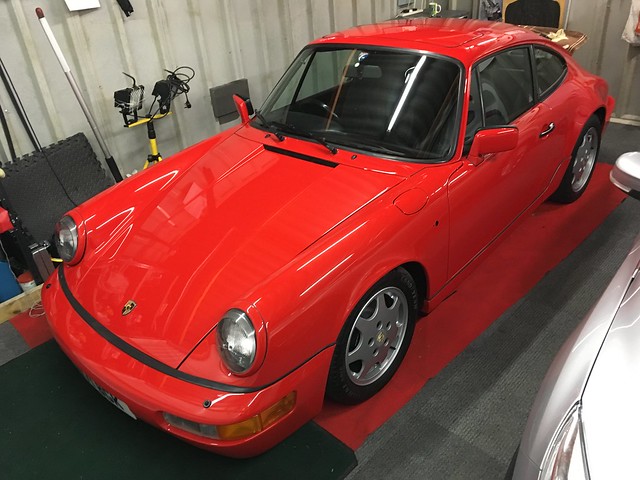
Over the moon with the result of a bare finish, there isn't a single micro scratch on it, really looking forward to seeing how this looks once the gtechniq has been applied and everything else dressed.
I have my rear top mount adapters now so I plan to get the rear coilovers fitted over the Christmas break and then start using it again, can't wait!!
Feb 06 2017
Small update.
Sadly I've not driven the car in months, mainly because I've just not had the time, Christmas, Wedding planning :roll: , fitting a turbo to my MX5 and I haven't completed the Gtechniq Crystal Serum coating so I can't use the car until I have as it will require cleaning again.. I'll do that soon as I'm dying to drive it, although the roads are far too filthy so I'm not feeling too bad.
It did come out briefly for a family photo
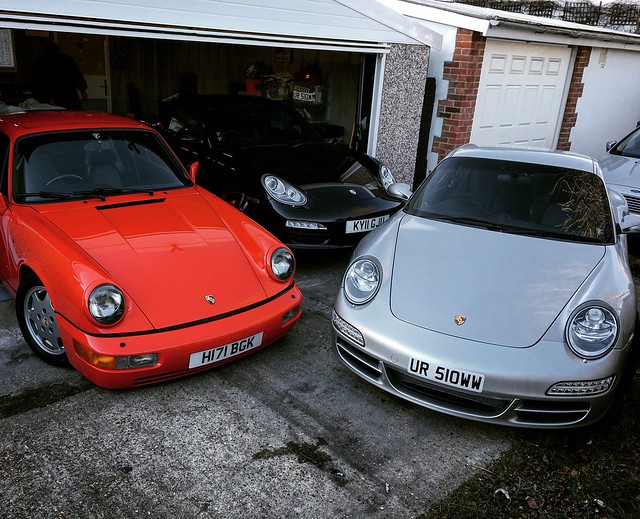
Thanks to Chris and him tackling his rear lights, he inspired me to make a start on mine, a nice job to do in the warmth of home.
Really not difficult, just takes some time. I did one at a time and put them in the oven at 100 degrees (fan) for about 10 mins, sometimes I did need to pop them back in. It doesn't melt the glue as I expected, heating them just makes the glue more brittle. Using a knife and screwdriver helps separate the lens from the body, once off, you just need to clean the surfaces of old glue.
I was trying to get the lens off in 1 piece for some reason, then I realised it doesn't matter, which made life easier.
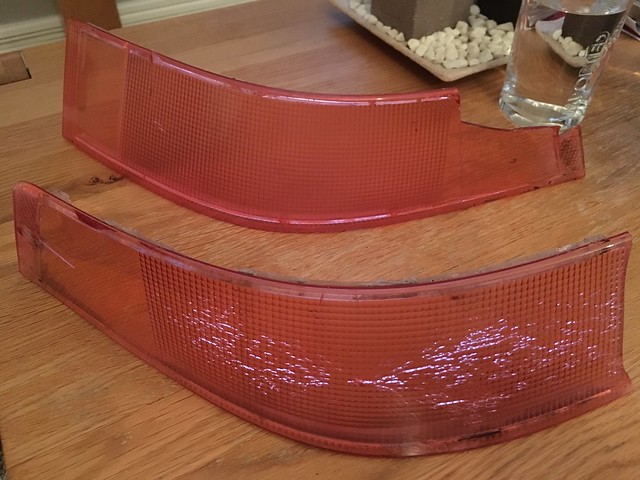
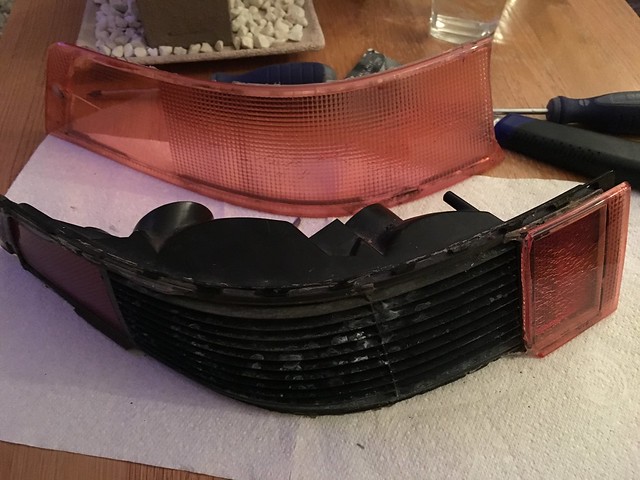
I found that my lights were different, one had a plastic grill and the other was metal and this had ages, so a quick rub down and spritz with satin black sorted that.
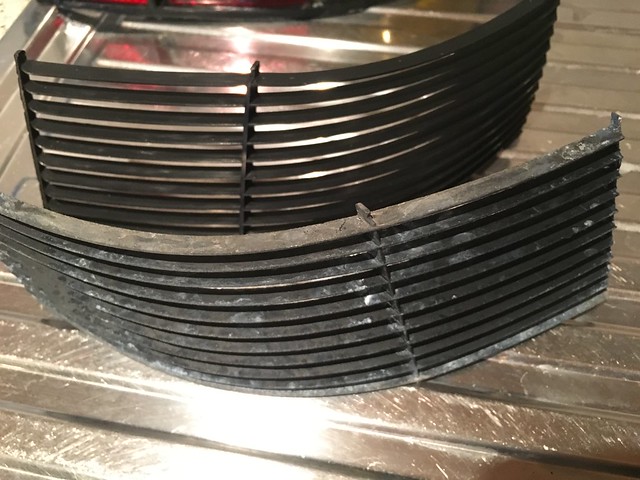
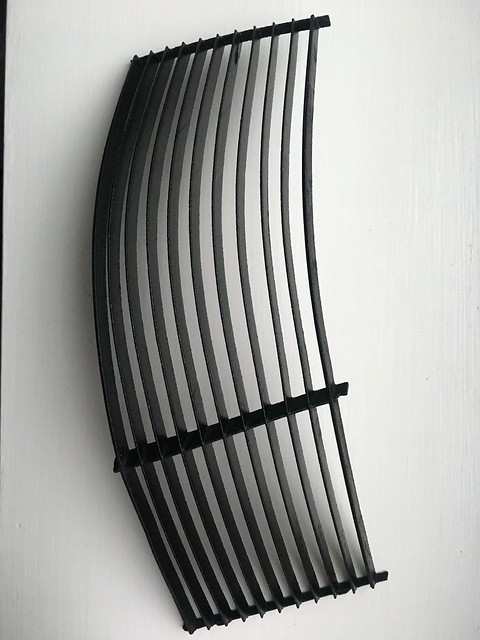
As the grills were out, I polished the lenses up to a shine and cleaned out the housings.
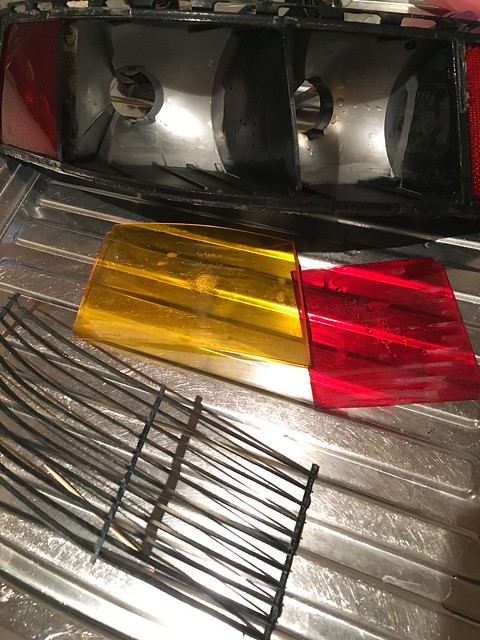
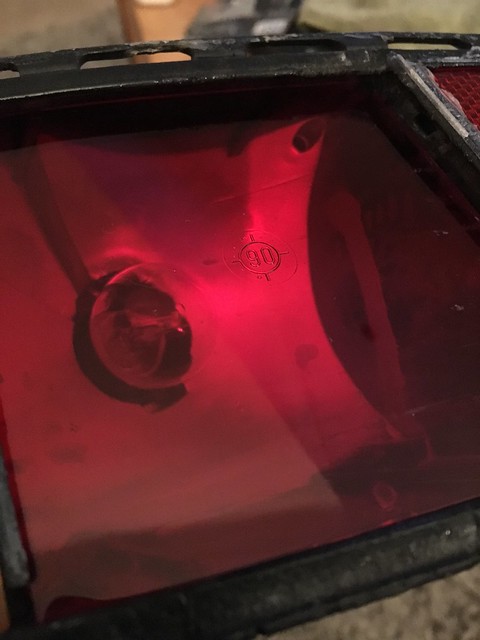
Once done, just built back up. I need to order some glue then I can do the important bit of sticking the new ones on!
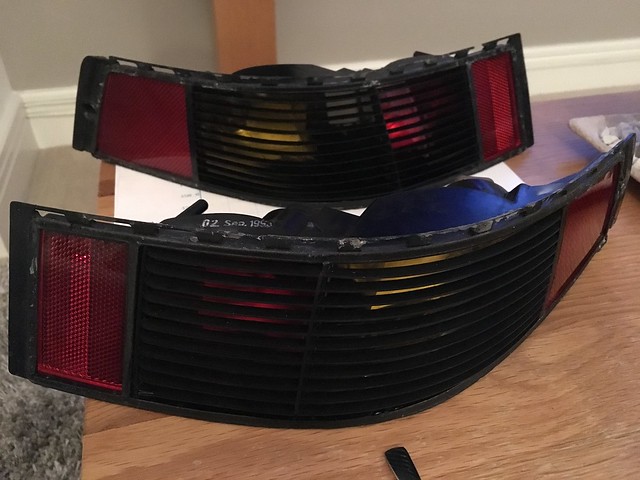
Thanks Chris!
Glue arrived, so I wrapped this job up! Now I just need to sort the centre light out.
[img]https://farm5.staticflickr.com/4757/40614290872_09c72ce2c5_c.jpg[/img]
August 29 2017
I'm back, been very busy recently, however, I've finally made some time for the 964!
I've pretty much spent the odd few hours here and there over the last year detailing the paintwork, making sure I got rid of any swirl marks etc in order for me to apply the gtechniq crystal serum and exo. I finally finished the job and I have to say, it's looking better than ever and happy to know the paint is protected, I'm still half tempted to have the front done in PPF to fully protect it.
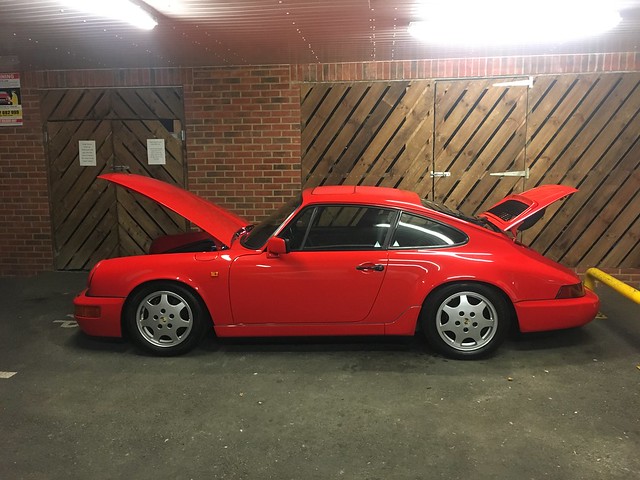
Having not used it pretty much since last year and only covering 10 miles between MOT's, it was time to start using it, especially as the weather has been brilliant!
Performed a few jobs which had been on the list for a little while to start with, fitting a decat pipe which I've had sitting around for ages and getting the CCU repaired.
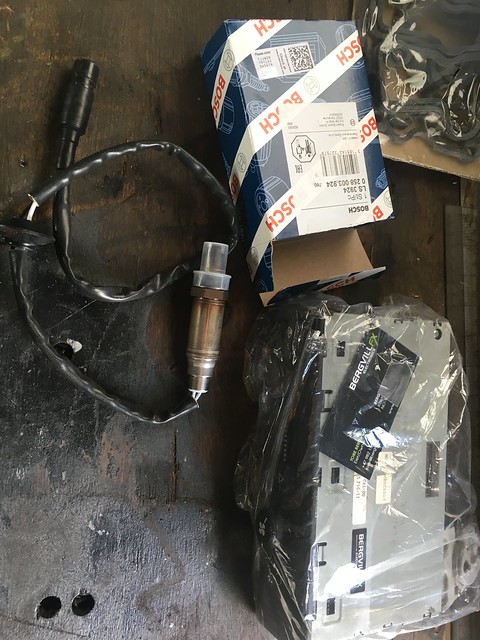
First off, the CCU. My CCU never worked, none of the servo's operated at all, so no ability to choose hot/cold, windscreen, feet etc etc, so for a while, I manually moved the servos into a half way position. I tried troubleshooting it myself but was getting no where and decided that the problem had to be the CCU itself. After many many many emails with Tore of https://www.bergvillfx.com/, I sent him my CCU.
Now Tore is one of those staples of a car community, his website basically offers all the information you could need to go about fixing one of these yourself, all the troubleshooting measures, everything and all freely available to view, most people would keep this kind of info to themselves! I would! So Tore deserves great credit for this, not to mention the emails he must get, he received plenty from me over the last 2 years that's for sure and all of his replies were pretty damn comprehensive! I have no idea where else I would go for this serivce, Porsche wanted to sell me a new CCU!
In the end, I sent him my CCU, I want his expertise to source the problem and resolve it. I packaged it up and shipped it over to Norway, within a couple days, I had an email from Tore with a full report of the issues found and my options. Once I commissioned the repair work, the CCU arrived back within day, the whole job was turnt around within 10, that's the CCU leaving me and arriving back, most of those were transit!
Tore gave me some info of things to check on my car and as he suspected, one of my chamber temp sensors was also busted and as he suspected, it would be a corroded thermister! I got hold of 2 replacements and soldered these in (A ball ache of a job due to limited movement in wire length), I then put my CCU in and as if by magic, loads of crap blew out my vents from above the dash and in the foot wells!! I've never been so happy to have my interior messed up. All operations work perfectly, all servos dance and I can now modulate the cabin temperature, fantastic!
All in all, I think the repair came to �230 and I'm over the moon with that, cheaper than a dodgy second hand ebay unit which may be broken and a 5 year warranty along with an expert on the other side of an email.
I cannot recommend Tore's service enough, utterly professional and a really generous guy who is clearly helping us 964 and 993 owners world wide with wealth of information.
In my 13 years of working with cars, his service certainly stands out.
So, repaired and working CCU is in
Next was fitting the decat pipe, along with this, I wanted to change out some crusty nuts and bolts for stainless items.
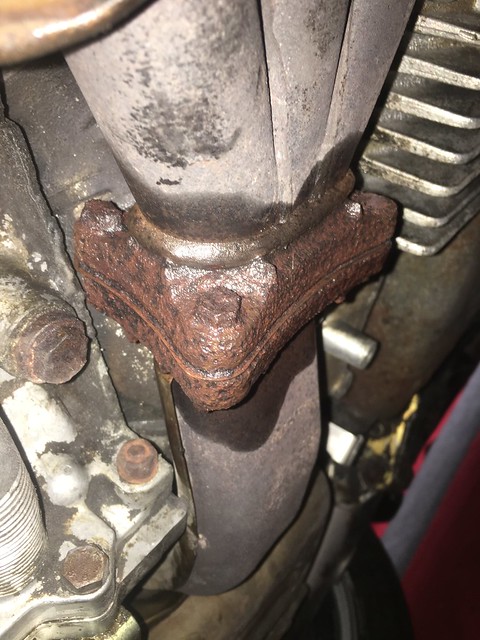
I was glad to see that Porsche had carried on tradition to the 997 from the 964 of using hardware which seems to rust like this, my 997 was the same!!
Got lucky with most but some did need cutting.
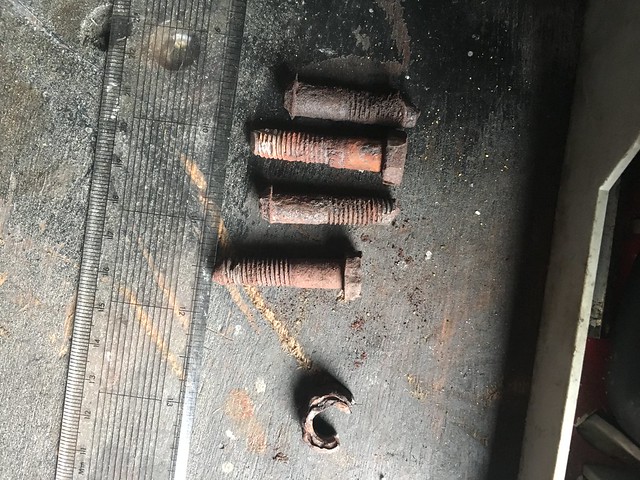
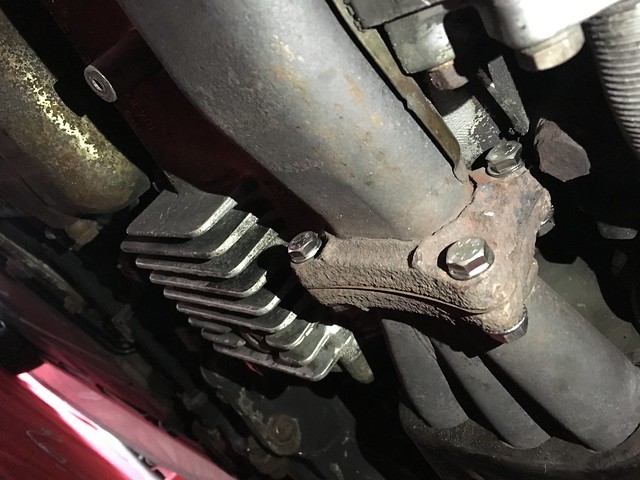

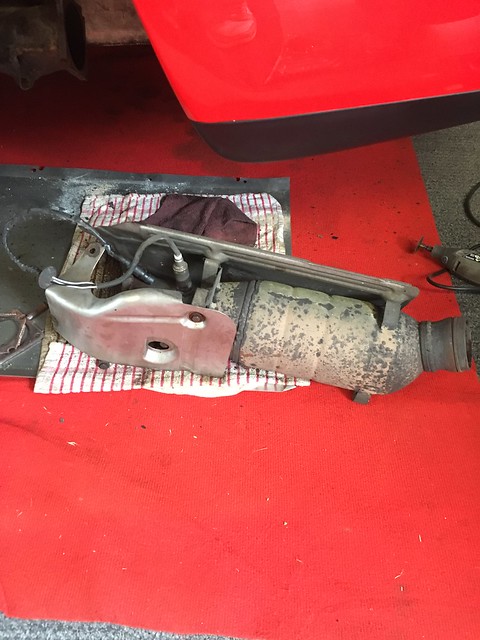
I had a nightmare getting the lambda out so I ended up leaving that in and buying a new one for the decat.
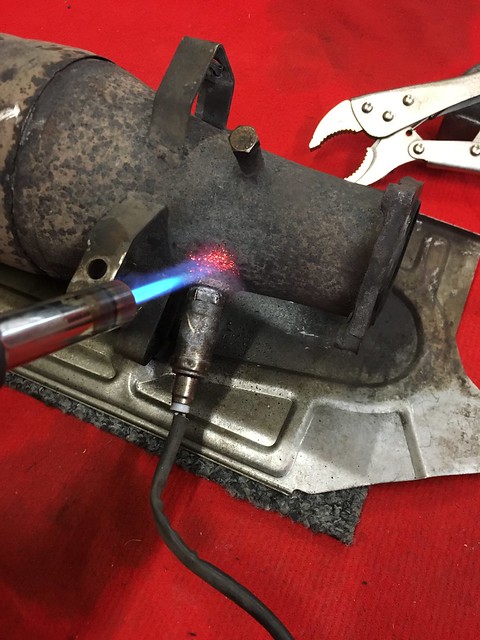
Would have liked to keep my heat shields in place but this will do for now.
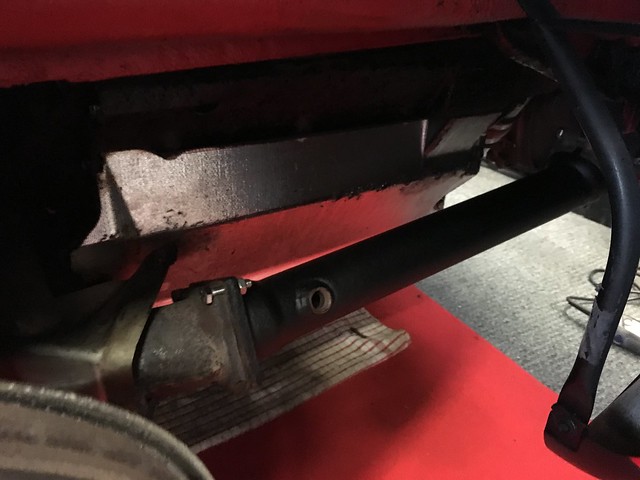
Now, I haven't stood outside while the car is on the move but I honestly can't tell a difference, the car still passed emissions on the MOT too. So I'm not sure if this was a waste of time but I'll reserve judgement until I hear someone drive it off.
Replace the last of the stickers
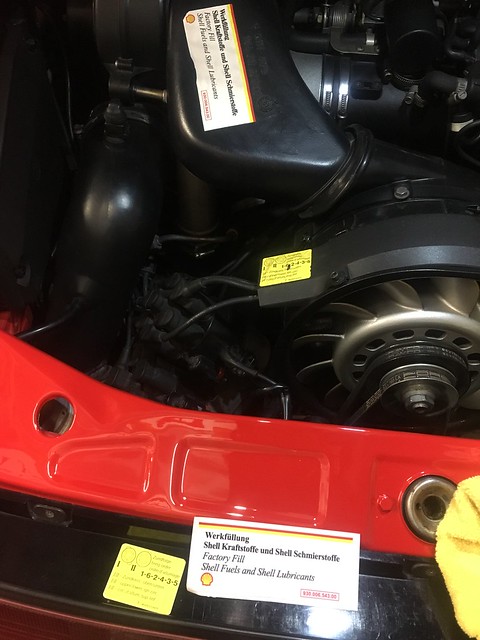
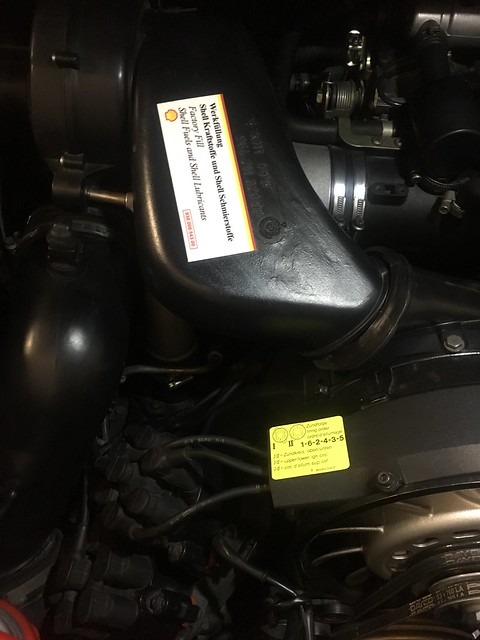
So MOT time, wasn't nervous and rightfully so, it flew through with NO advisories other than I should use it more, so as it was bank holiday, I did.

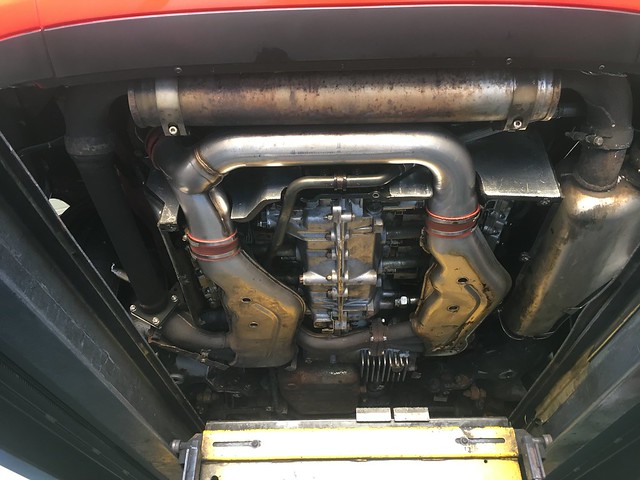
Took some pictures, drove it to the pub one night, this was a bad move, or maybe just my parking as I came back to the car to find some little **** had wiped their hands all over the drivers door and window. Took it shopping and then finished the weekend by popping it down to the R20 PCGB Ace Cafe meet which was brilliant! Excellent caliber of cars and great people.
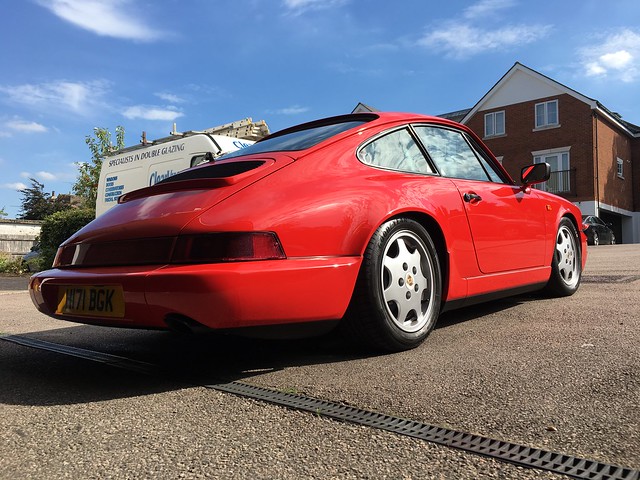
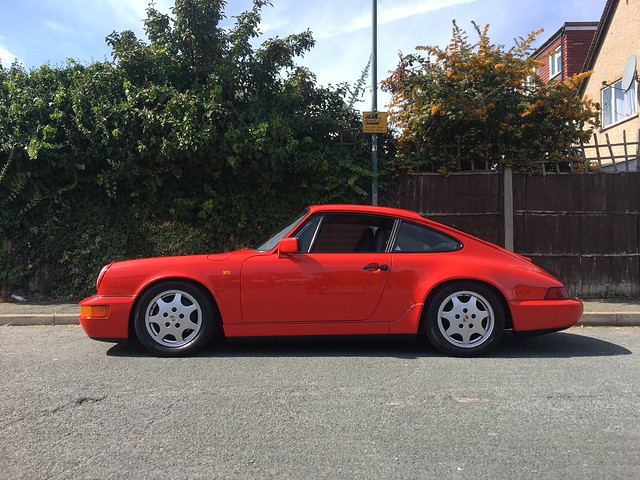
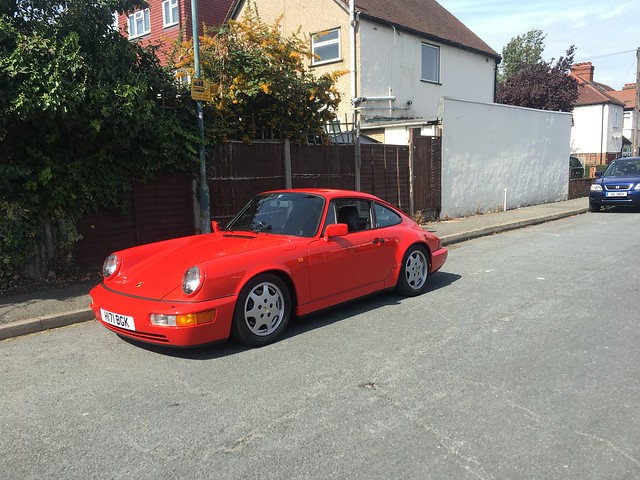
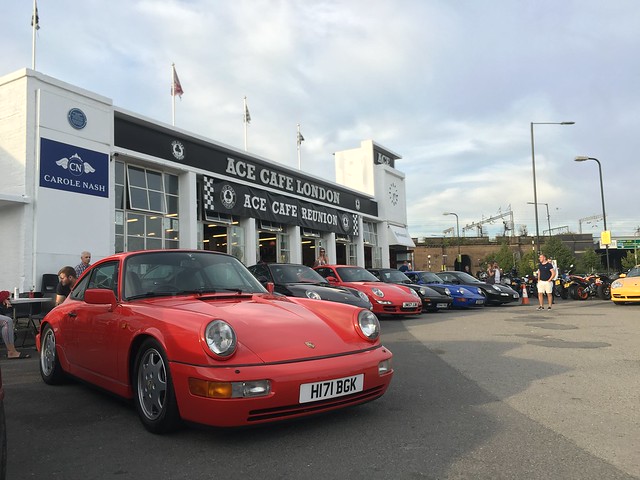
Was slightly optimistic with this one....

I'd love one of these!
The tartan interior (sorry no pic) was lovely!

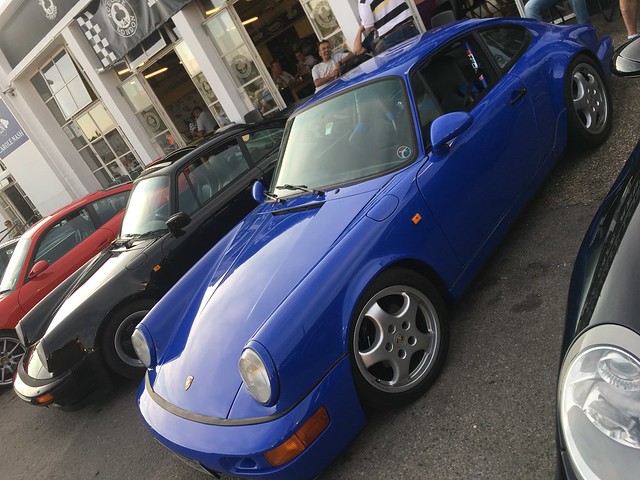
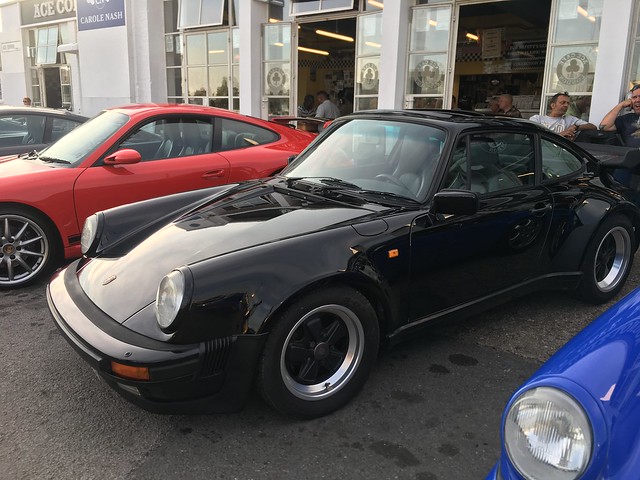
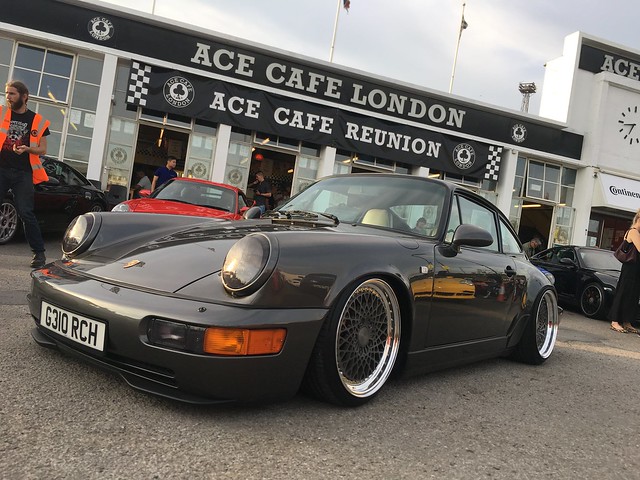
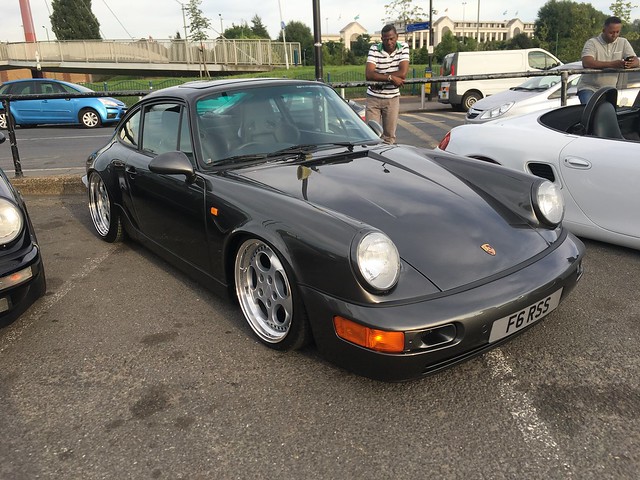
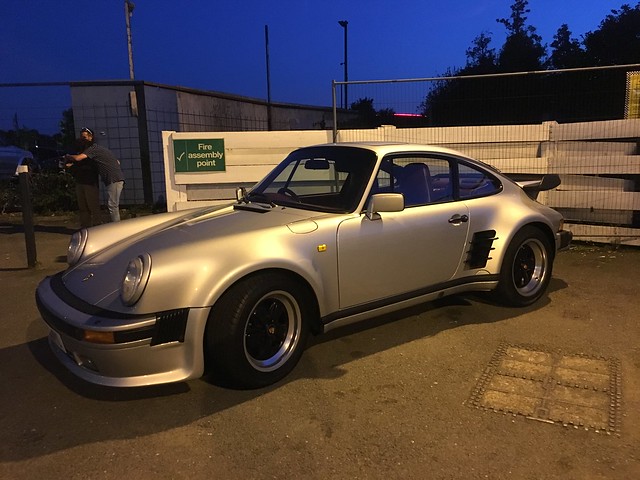
That's me done for now!
Next, I need to change the centre light bar as it doesn't match the new corners. Then on to new cam and chain cover seals along with an oil change, really not sure if I should book it in somewhere for a proper service and for the stamp now the car is of some value.
Cheers
Feb 20th 2018
I've come back to the 964 after some time, it has pretty much sat in the garage since I last used it with the occasional heat cycle and step outside.
I thought I would tackle the valve clearances, I have no idea when they were last done, the engine is a bit ticky and I want to put some fresh oil in there, mainly so I can fit my new red oil filter
Plan is to book her in for a service with someone, either Porsche or 9e for the sake of a stamp as the last stamp in the book was 2007, it has only done 5k miles since then and the previous owner did religious oil changes so that's not a worry but I would like some other eyes to go over it.
Anyway, I wanted to perform the valve clearances myself, it gives me a chance to further explore the engine, clean (lol) new areas and make sure they are done properly. I have done the job before on BMW M engines so I figured I can do this.
Anyway, at this point, I'm in the tear down stage, slowly removing bits, cleaning and taking my time. Thankfully, the exhaust was off in minutes thanks to the new bolts, so far, no trouble, everything has removed like new.
First up, was getting this feeler gauge, many places seem to sell it for �50 which is RIDICULOUS!!! I paid �25 and what arrived was something that should have been �4 but o well.
Love looking at this engine, much nicer without the blower!
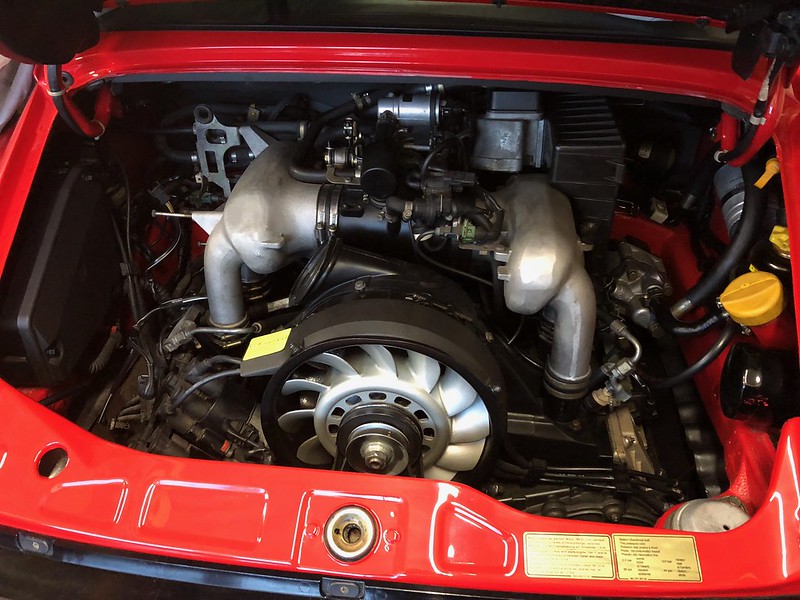
Removed this lump and then the main back box.
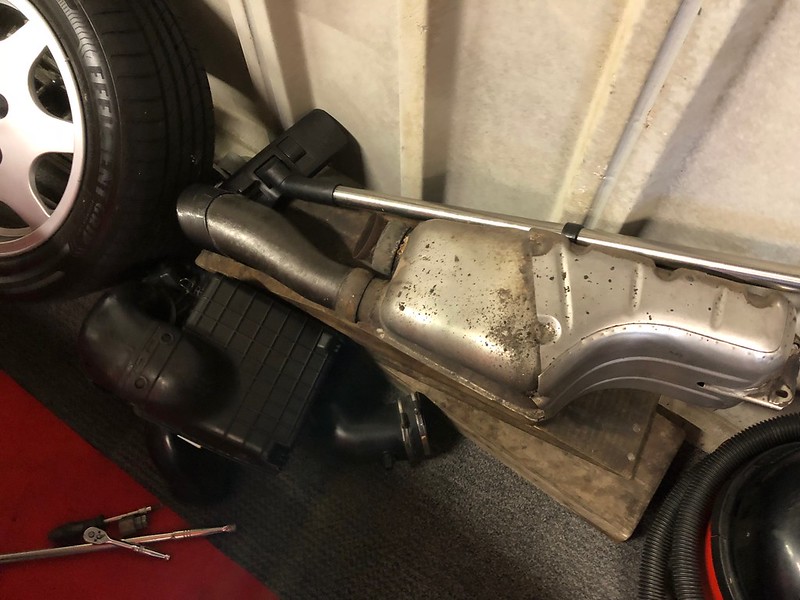
Need to address the rusting on the tin, it's solid so think I can save it.
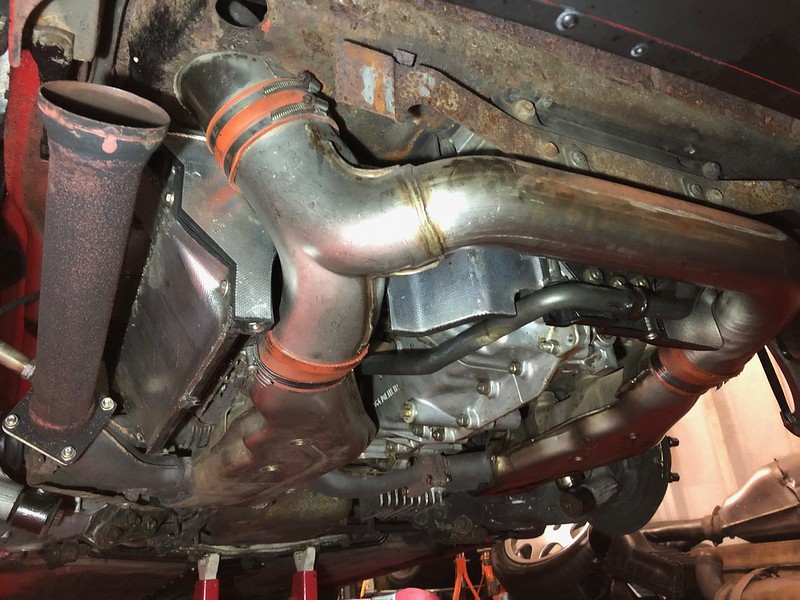
Tin removed from drivers side and this is as far as I had time to do..
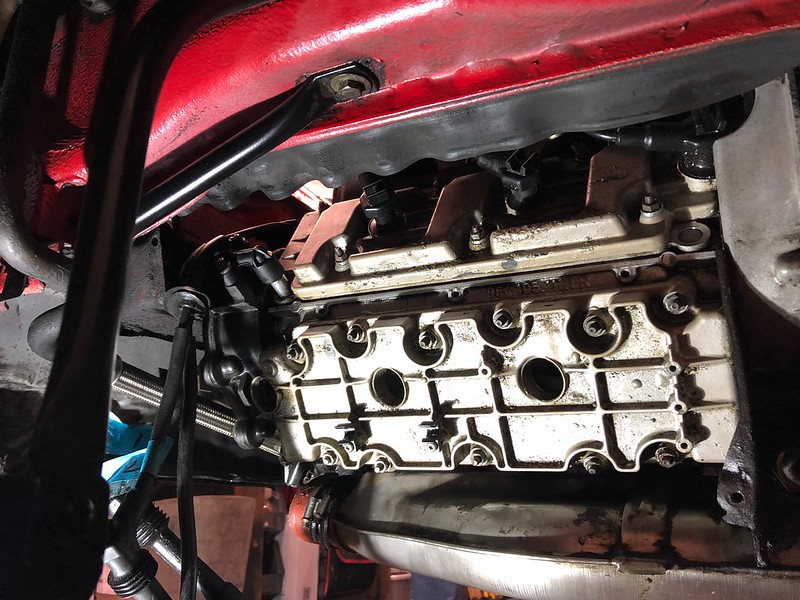
Updates shortly.....
Valve clearances all done, only 2 needed adjustment and to do the job without the special tool would have be near on impossible.
I'm glad I did the job, it made me realise how simple the engine is, nothing too complex about it, just an **** to access certain areas. Everything came apart perfectly and nothing unusual found along the way, always enjoy doing new jobs as it means cleaning up new areas and renewing bits.
So, on to the pics.
My work area, I left the decat pipe in place as it didn't get in the way.
Spotted a leak from here so got a new gasket and decided to fit that along with sealent.
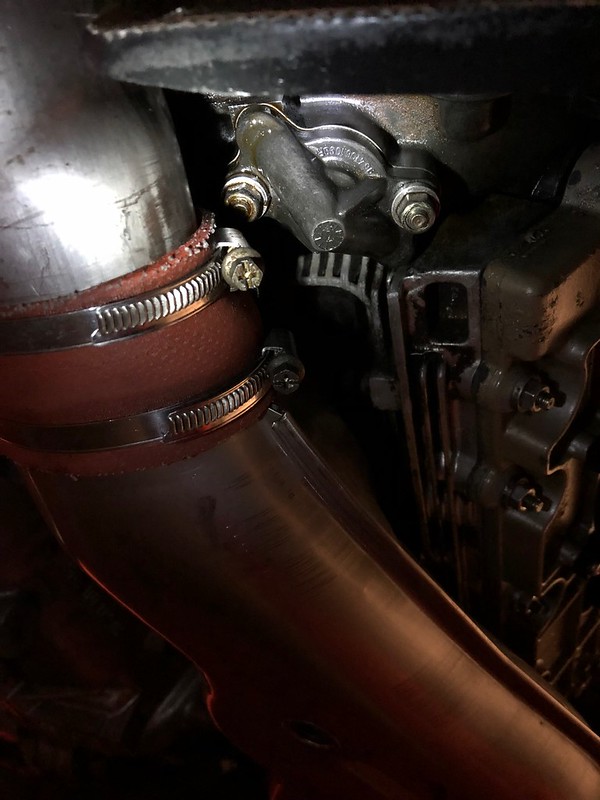

The view


Here is a rocker arm, nothing complex and if you can make it this far, you'll be more than competent enough to perform the valve adjustments.
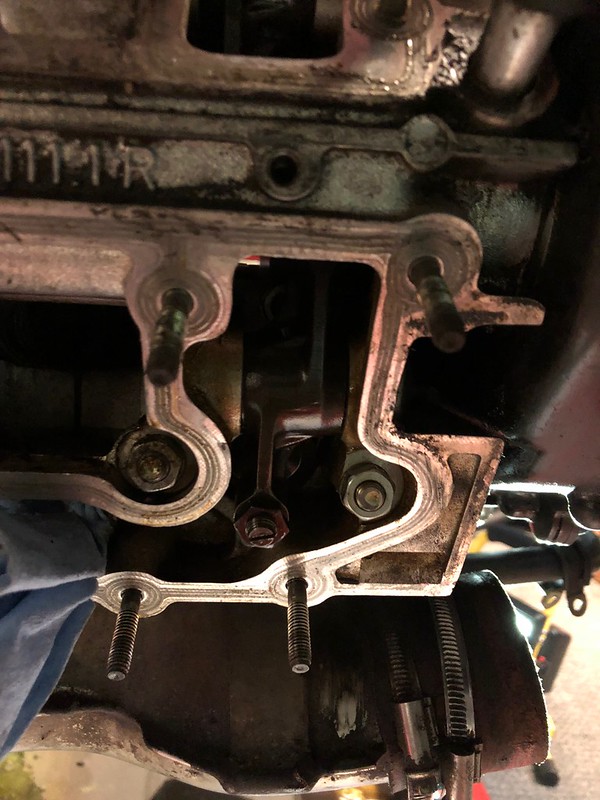
Passenger side chain cover looking fairly dry
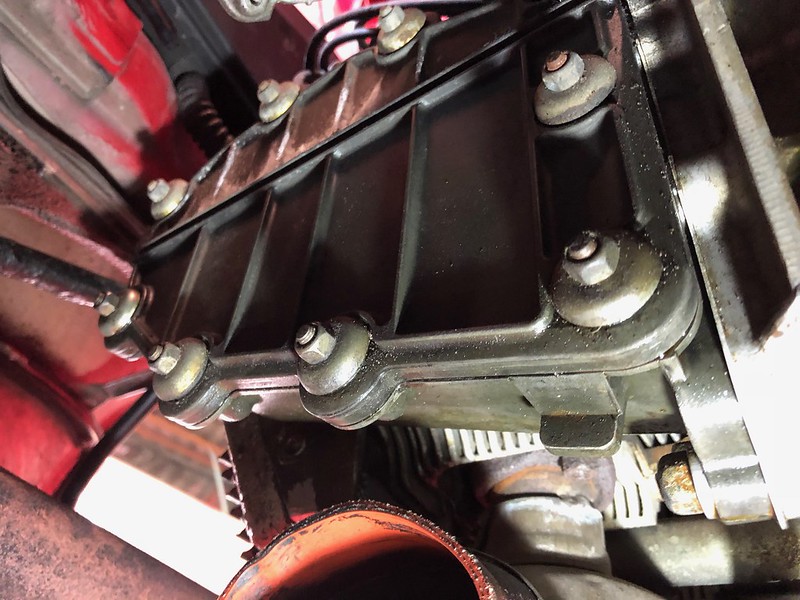
Upper and lower valve covers removed

Old plugs
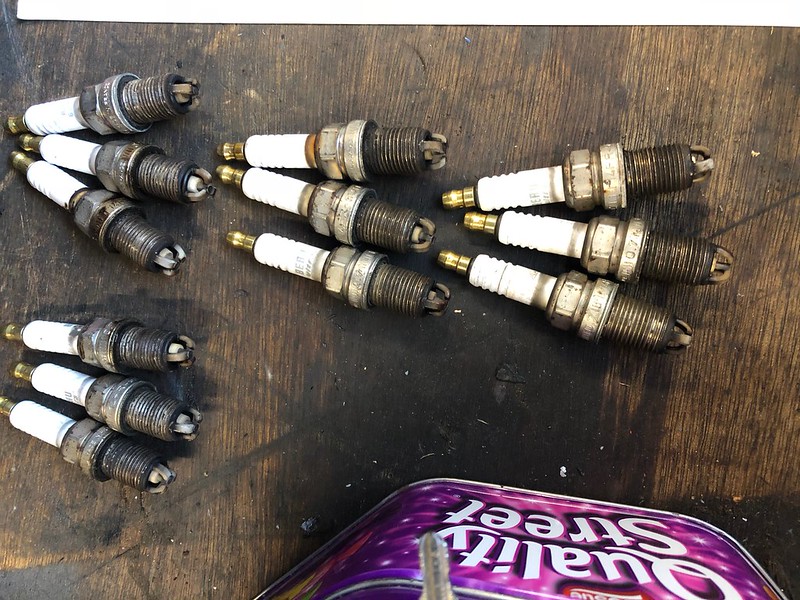
The over priced feeler gauge in action. Was pretty impressed that it wasn't overly tanned inside the engine.
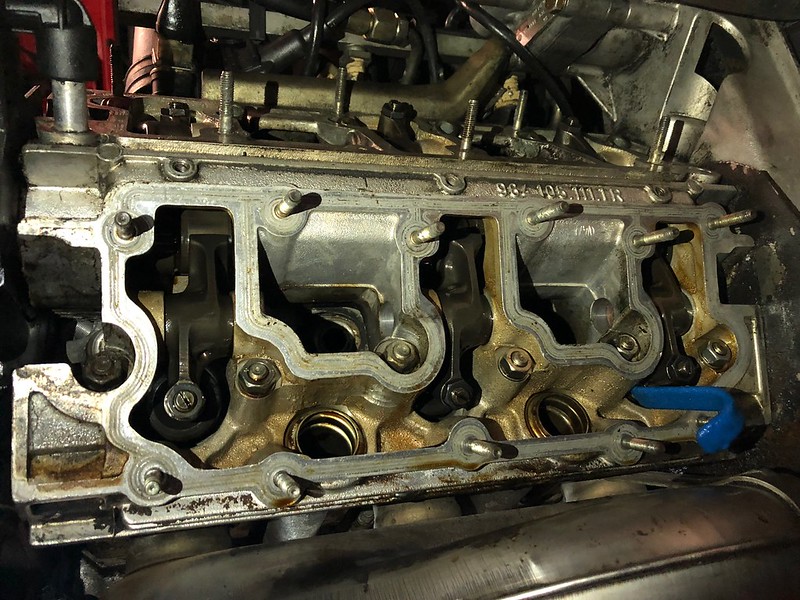
New same spec Beru Ultra plugs and passenger side tin
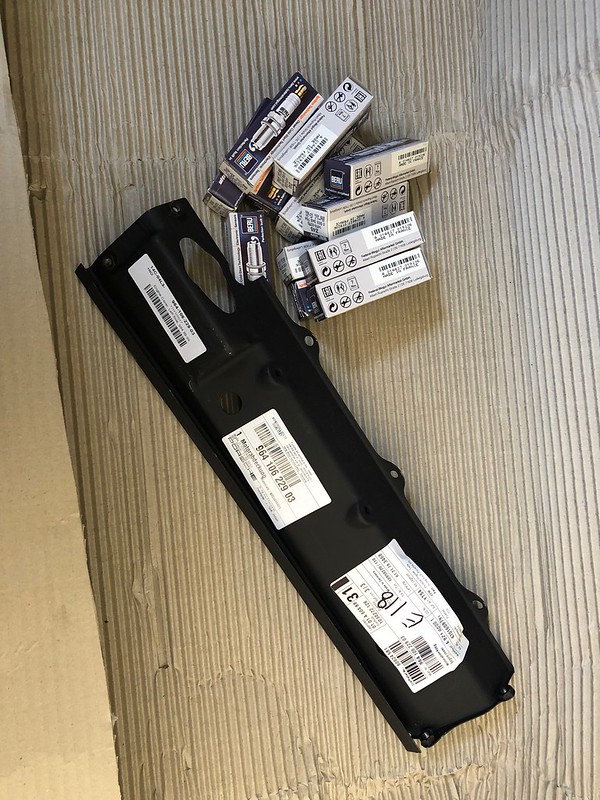
Old and new

New purolator filter fitted, waited ages to fit!
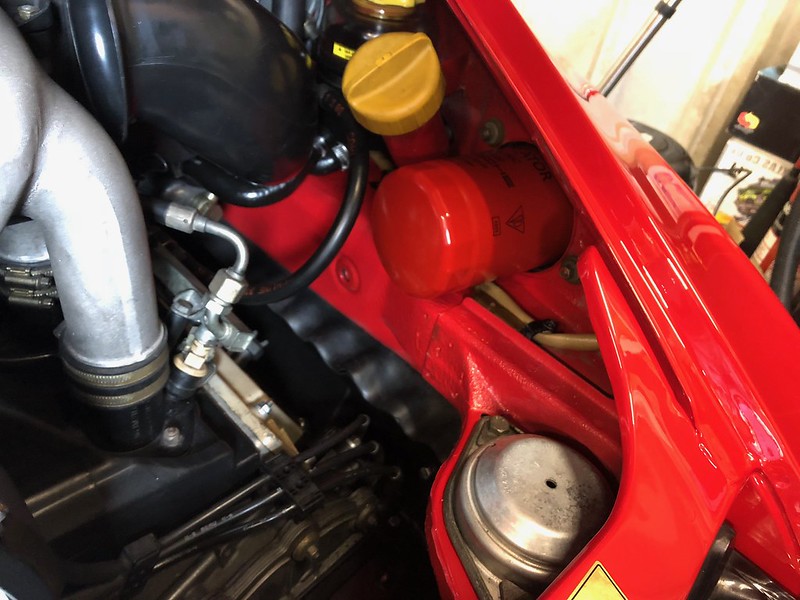
Buttoning back up, all tin ware protected and added some heatsheilding I had laying around as the metal was starting to thin.
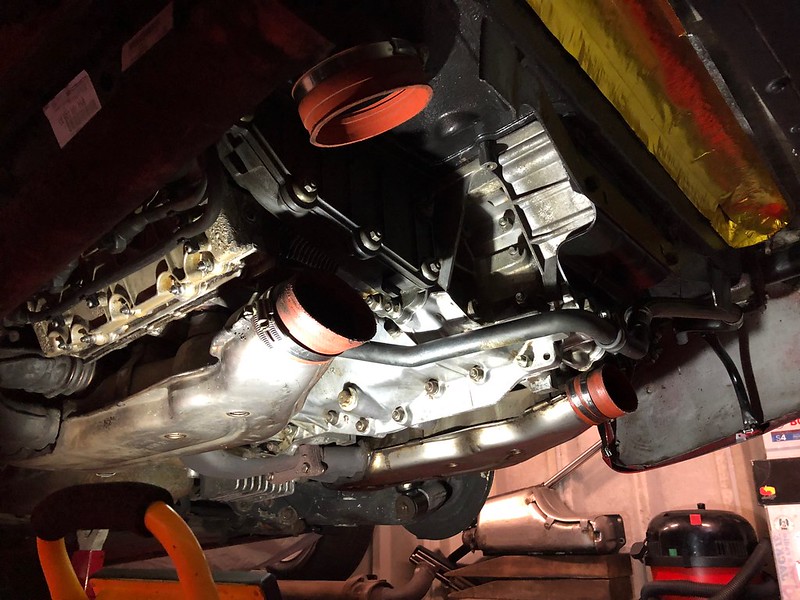
Everything refitted, just under 9 litres of oil back in (I had drained this amount out)
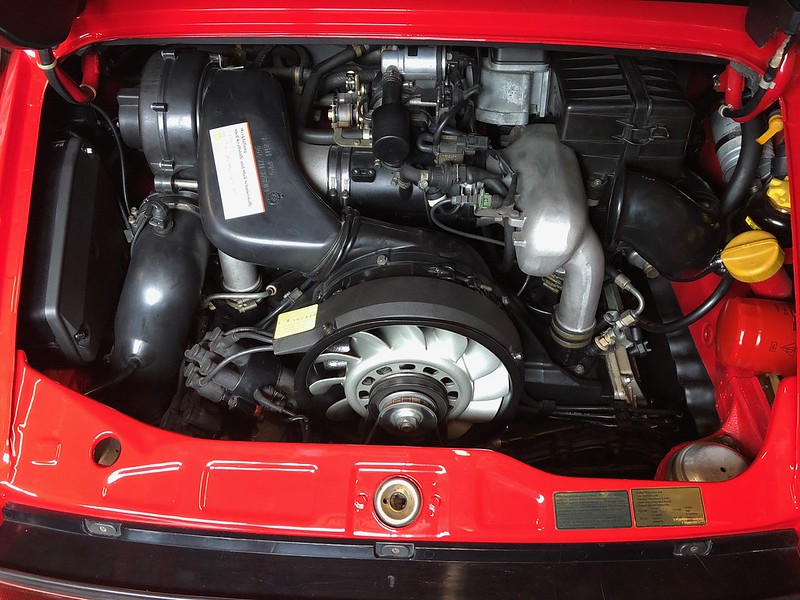
The runs lovely, it always did but knowing the valves are at tolerance and new oil, its good to know it's all good for dryer days.
Want to get it booked in to have a once over soon, I also need to do the gearbox fluid, I've got a new gasket and filter waiting, just need to get hold of a temperature gun.
I'd love to solve some of the leaks, one that I have found is coming from between the engine and where the rear engine mount plate bolts to it, weirdly, there isn't oil coming from the drain hole on the other side, this is between the engine and mount, would this be the crank seal? I thought if that leaks you would get oil come from the hole the other side, being blocked from site in pic 1 by the engine surround cover, any advice on that would be great.
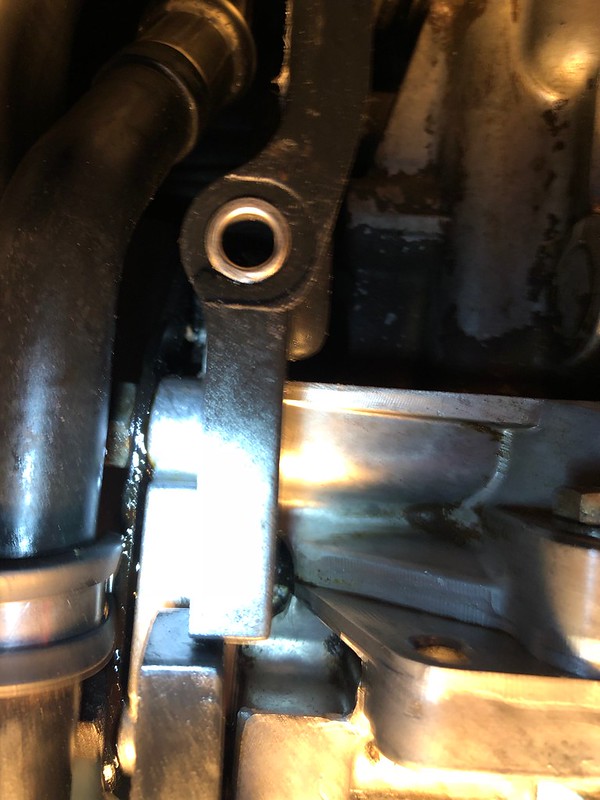
I should have tackled it while everything was off but it's not hard job to drop the exhaust to get at this and then support the engine.
That's it for now, just waiting for the salt to wash away from our roads and then I can take it out!
July 31st 2018
She's out of the garage!
Briefly...
New reg plate transferred from my 500SL.
I spent the majority of my Saturday cleaning the 964 up, properly fixing the new registration on with the view of taking it to Luftgekult the next day...
Unfortunately, upon waking up on the Sunday to the sound of heavy wind and rain smashing against my window, I decided against letting all my efforts go to waste on the 70 mile run up to Bicester and I'll save it for a nice evening run to the pub this week.
I was pretty gutted that I didn't take it but, in the end, I'm glad I didn't as I didn't miss having to spend another day cleaning it.
The missus boxster did the job just fine and is allowed to get wet.
Some pics from the glorious Saturday sunshine! (Just bloody typical that it has to rain on sunday!)

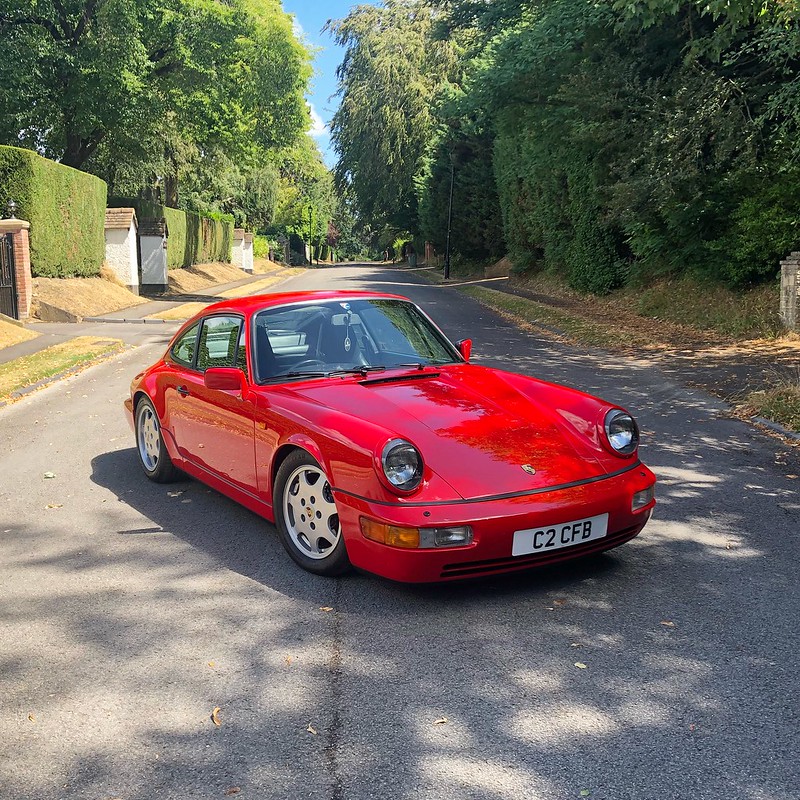
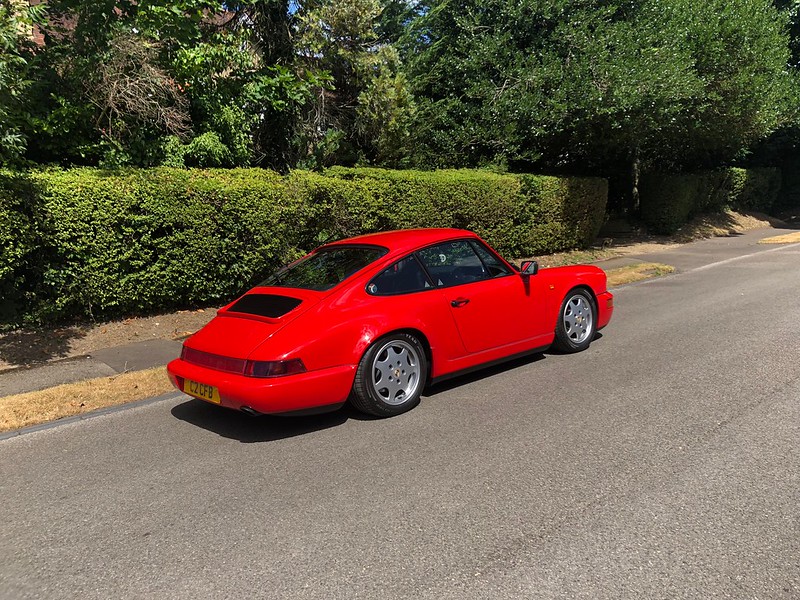
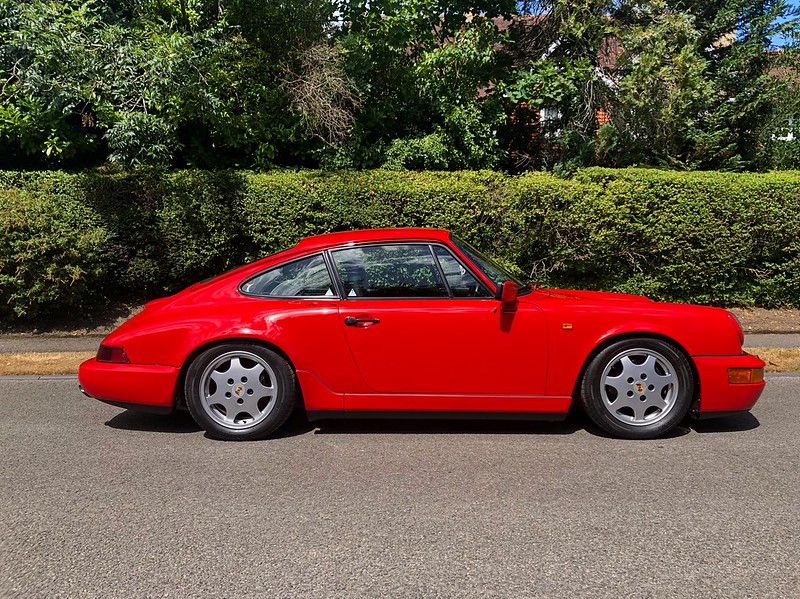
Was really nice to take it out Saturday, the thing does draw some attention, the red was blinding in direct sunlight.
August 07 2018
Been making the most of the dry days and it's been a pleasure to use this car.
Pub
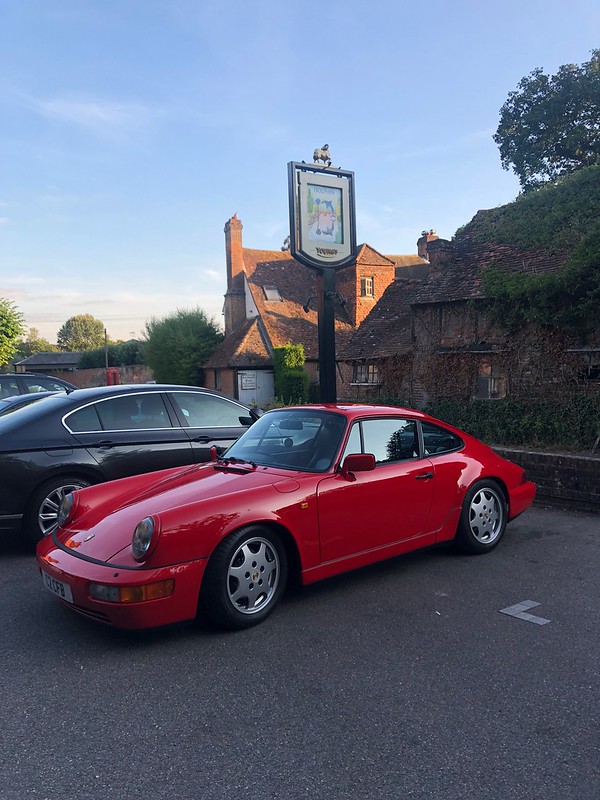
Out and about on Sunday - Came across a few aircooled cars over in Betchworth, 356, SC, 930 Turbo, 2 964's
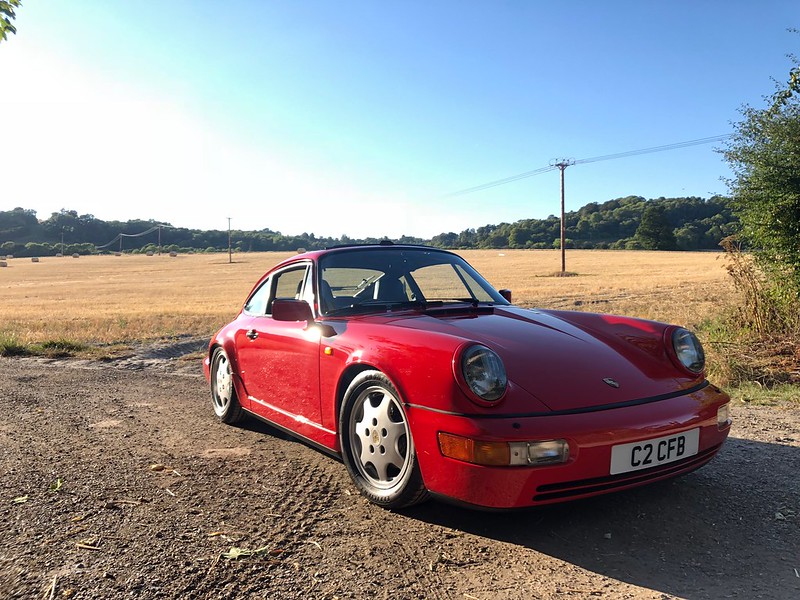
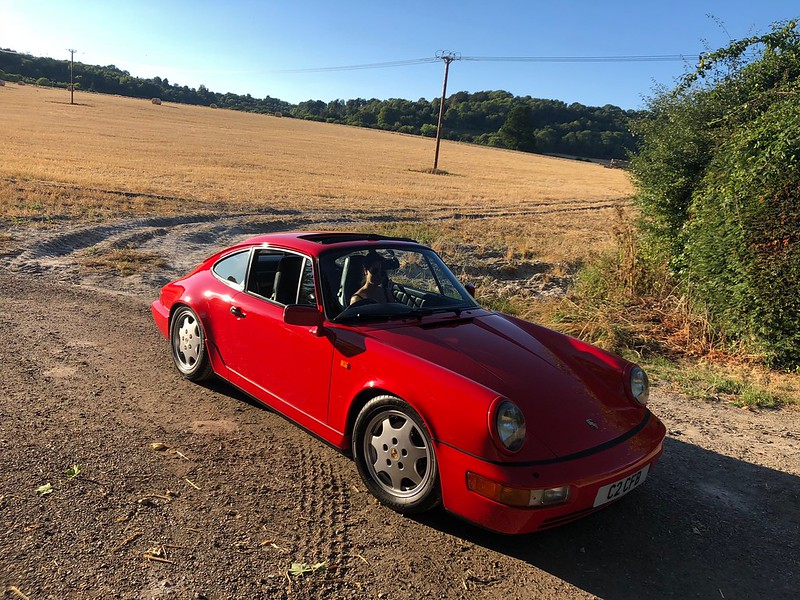
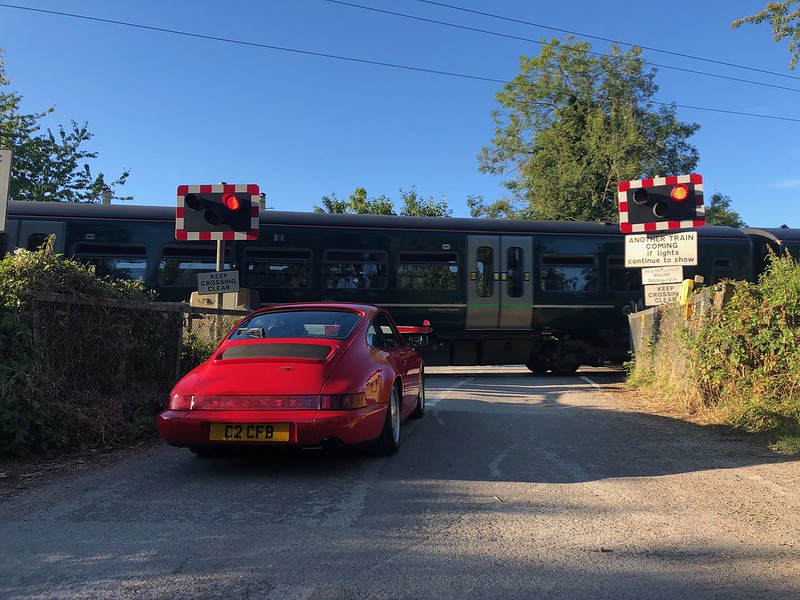

Thinking about some spacers to fill the arches a touch.
April 1st 2019
First trip out in 2019!
Tax was due to renew and I had no MOT on the car, so had that booked for Saturday just gone.
The sun was out for the 964!!


Got to the garage and parked outside, only to find the car wouldn't start!! A piece of wood and a smack with a hammer got things working again, it seems I have a sticky start solenoid, so at some point, I'll have to get that off and clean it up. Looks like removing the starter is going to involve removing other bits,! c: c: c:
Car was restarting fine after this.

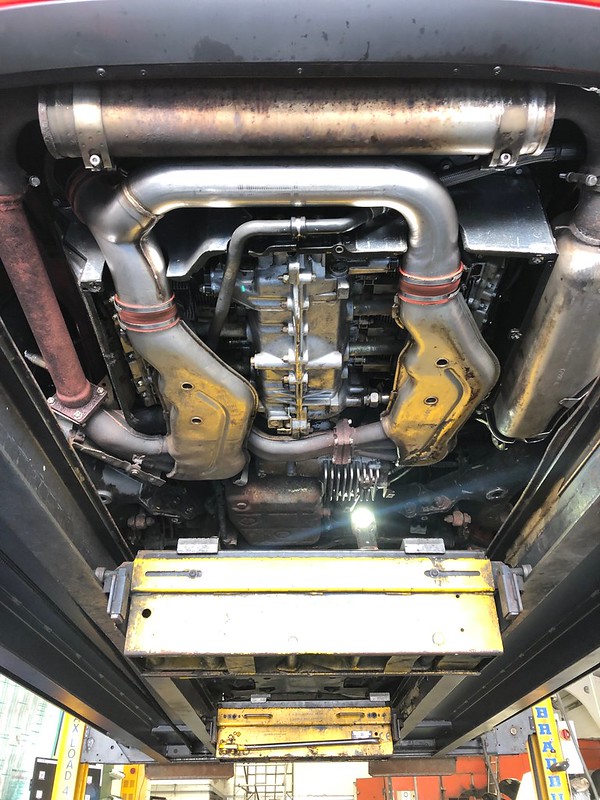
Passed MOT just fine, no advisories.
Got some oil appearing on the drivers side heat exchanger but can't quite see where it's coming from, I thought I stopped this by changing the rocker gaskets but obviously not! :x It isn't major so I'm not overly worried and everyone tells me that if a 964 isn't leaking, it probably doesn't have oil.. :floor:
July 18th 2019
Had the old girl out last night
Started off with a heart attack, somehow something has clearly hit the car and chipped a big bit of paint off!! Really pissed about that but I should be able to sort it with some touch up which I've got, dabbed a bit on for now.

Met up with my mate and headed to the Fairmile.
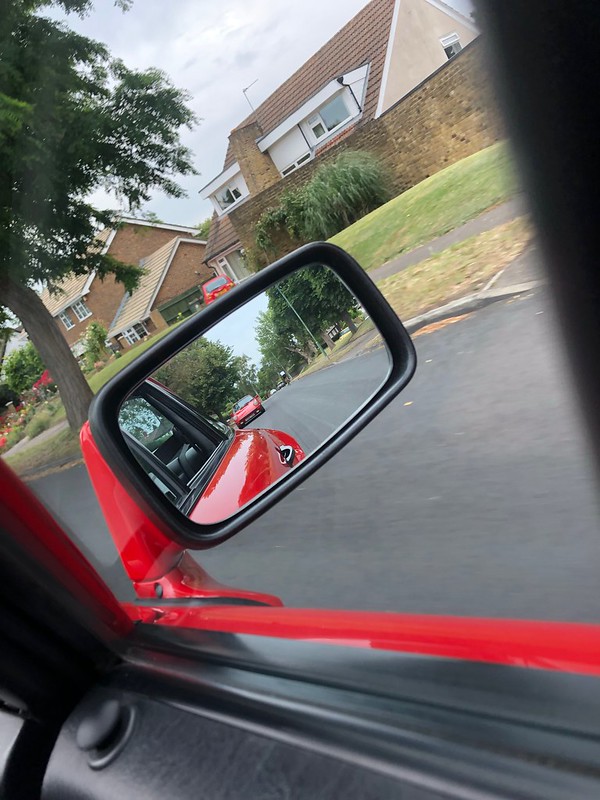

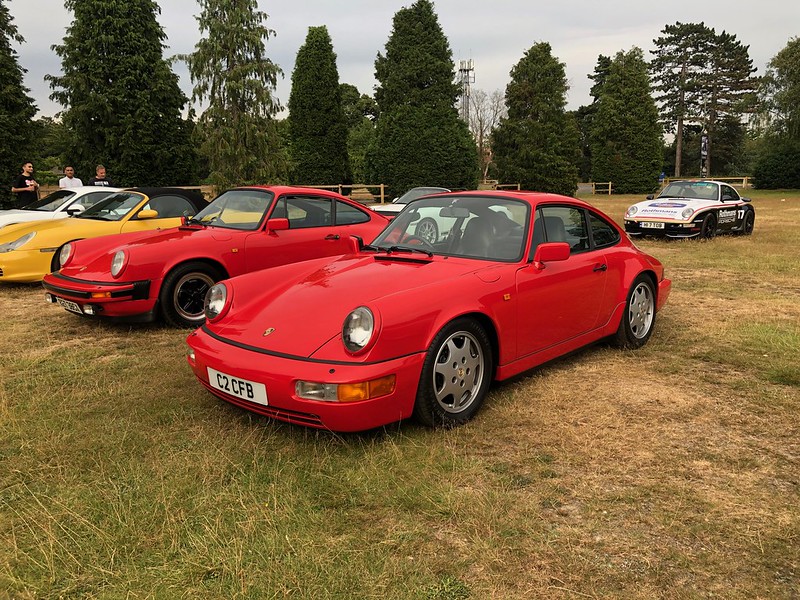
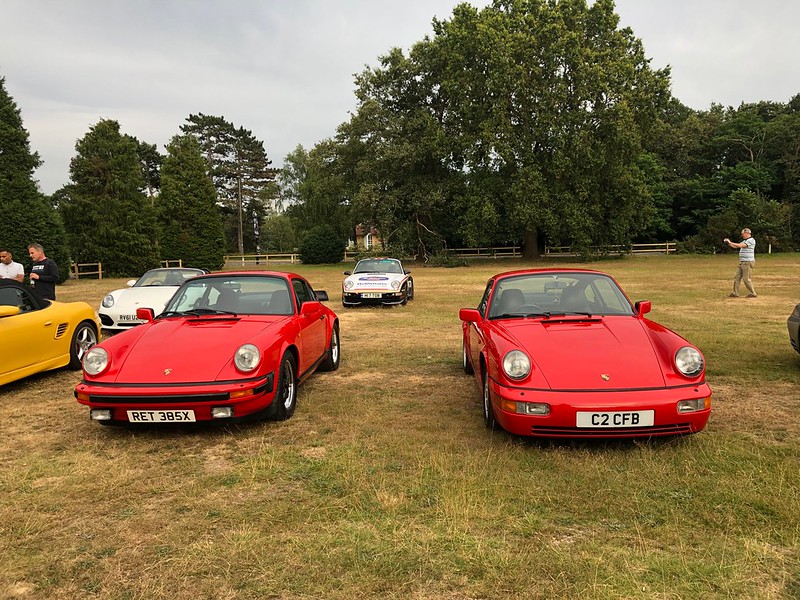


Was really good to be out with a few mates on a nice mild night, roads were clear and could have the windows down, drove perfectly and no trouble from the starter solenoid, still haven't got around to giving that a clean but it seems to be behaving at the moment.
August 27th 2019
Another meet, it's a great feeling driving this car along with my mates SC on some nice clear roads.
I was having a great drive home, all until I was about 40 seconds away from home, under load, a misfire seemed to show up, I suspect it is the caps and rotor arms as they are getting on a bit now, while I'm at it, I plan to change the disti drive belt as I am not sure when that was last changed. Firstly I'll pull it all off and check the condition of the bearings etc and then order all the pieces to get this running perfect again! It was an intermittent misfire and only under load so it will be a minor issue to resolve :thumb: :thumb:

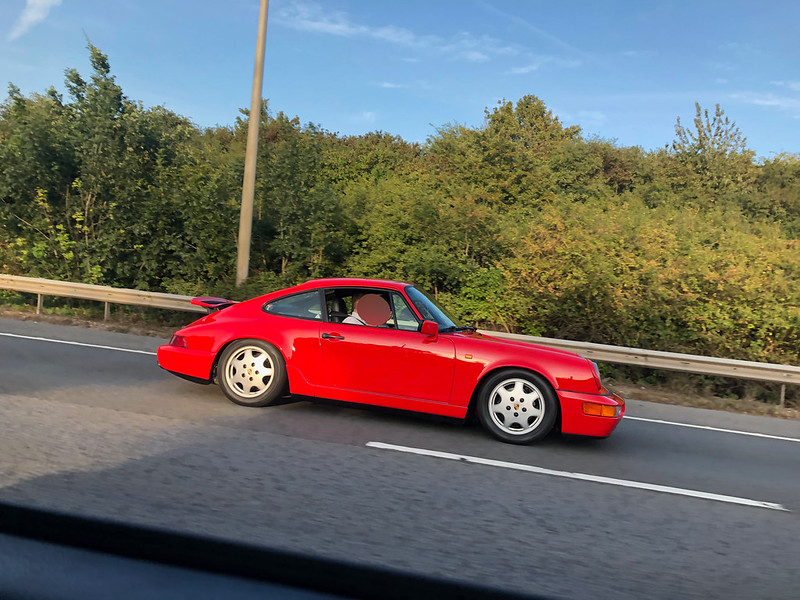
[img]https://live.staticflickr.com/65535/48599916226_94e64c48d6_c.jpg[/img]
That’s me up to date on the 964, tucked away for winter now and I have the distributor apart for a rebuild, new bearings, belt, caps and arms.
Small update on some bits
Getting ready for me to take home, I thought I'd go down and pitch in seeing as I had many of the new hardware to bolt things back on with. Cant be using rusty old things with the fresh paint.
Fresh bits and pieces
Along with the Corvette which was undergoing some finishing.
The headlight trims had to come back off as they had been painted on the inside which was making them just too tight to fit back on properly.
Was a fairly late night once the car was in a state to be driven, they could have shut up early but they insisted they get the job done, didn't bother me as I got to have a nice 1am drive home on clear roads, finally reunited with the 964! What a feeling
I took it fairly easy as the car hadn't been driven in so long and I was a little paranoid about anything falling off :grin: Just as well as the MOT had expired. :cop: The next day, my first time seeing it out in the daylight
It also revealed all of the little jobs which were ahead of me! :roll:
One of the first jobs I set about doing was fitting up the tailgate, a lot of the parts were left at home as I had previously stripped the car so it was time to dig everything out. Excuse the grubby finger prints :hand:
All the trim plastics were given a once of with Aerospace 303 protection.
Loom cleared and everything coated, inside of lid sealed. I need to replace the killer heavy duty struts, the lid could easily send a kid miles when opened!
New rubber washers for the plastic trim and I decided to grease the spoiler bolts.
New curtain and everything here complete!
While at the back, I turned my attention to the rear plate lights. My original ones were a bit tired, the internals were slightly corroded so I decided to get some LED versions.
I bought some from eBay, �14 or so but I was not a fan of the clear housing. I could just imagine dirt showing so I set about transferring the LED unit into the original housing.
Once done, I fitted up and found remembered why I never normally fit LED number plate lights. They are always a clinical white colour and OVER bright, I do not want to illuminate my number plate like some sort of garden feature..
Out came some tint film and a heat gun
The difference is clear. Much better, a non LED looking light colour and dim
Next on the list, wire mirrors back up.
Stupidly, I had bought some flash waterproof plugs to use, totally not realising the holes are way too small!!
So, not knowing what else to do, I decided to use some connectors which I really don't like. I'm not sure what alternatives are out there and I wasn't too keen o soldering as the wires are too close to the paintwork for me to comfortably hold a soldering iron close.
Crimped on along with some heatshrink
Before placing the mirrors back on and getting the bastard seal to sit correctly, I used some fabric tape on the legs of the mirror to minimise the metal on metal contact
Now for a simply quick job. I was going to leave the flip thing off but decided to put it back on later, always gets in the way!
Coilover time. Out with the old
In with the new.
Going to give under here a decent clean another time.
When it came to fitting the rears, I ran into a problem in that things did quick fit properly, 2 hours wasted and thanks to some members here, the light was switched on as to what was wrong. I need the late spec adapters and mounts. :nooo:
The next job, one I was not looking forward to and wish to never do again as it tested my patience. Sun roof seals. I had new seals and they have to be glued on!! I coated these with some Autoglymn fabric protecter which I use on my MX5's mohair roof, hopefully topping up every 6 months or so will help prolong the life of these so that they never need to come off again.
Thanks to another member for supplying the glue for a beer, much appreciated!
I fitted the seals into position with masking tape and went around, bit by bit adding some glue and sticking the seal back down with the tape.
It dries in minutes but I left it over night. Pretty happy with how it came out, a couple of high and low spots but nothing obvious and I'm sure I will soon forget about it. Never again though!
I had an issue with the front suspension struts, I noticed that they were poking up way too high, I later found out that some shims were missing which go under the spring cup and onto the top of the strut. H&R in germany were slow with replies and then stopped altogether when trying to ask what is happening so I had some made up for �5, far less hassle. I had to drop the struts, remove the spring cap and factory shim and pop 1 of these on.
So, I'm nearly there. The exterior needs a wash, with the new garage, it's very dusty while I await some new flooring to be laid. The interior is in desperate need of a clean and I need to fit my headlight trims but I feel like leaving that as one of the last jobs to mark completion. I should get her all buttoned up over the coming weekend, minus the rear coilovers. Then I will be on to getting the leather renewed and the CCU sorted out.
As she stands
So many more little bits have happened in between all of the above but I simply didn't stop to take pictures. I'll get some decent pictures to show off the bodywork once it has been cleaned
April 22nd 2016
Has been a busy few days, initially getting it ready for the MOT and then having to get it ready for a BBQ around a friends house which turns out to be more like a car show in our circle.
I had managed to leave the interior light on so I was welcomed by a flat battery so a jump was required from the younger sibling.
I set about doing some quick jobs in order to reduce the size of my to do list.
Small window trim clip had split
New one
She was then moved outside
I applied Gtechniq C4 to all black window trim, mirror surrounds and some interior plastics which appeared faded such as the door pull and seat belt retainers. This is brilliant stuff, it is permanenet and really takes everything back to it's original finish. You wipe on and then wipe off to a satin sheen.
Pre-wipe off
Inner pull looks better in the picture than it was pre Gtechniq
After
Inner arches to go back on but treated to aerospace 303 inside and out.
Even the window switches got it, before and after
No pictures but I also waxoyled the areas which the bumpers bolt upto on the front and rear inner wings. There is essentially a ledge here where dirt will gather and eventually lead to rusting the body and hardware holding the bumpers on.
The front bumper under trim was missing a few speednuts, thankfully these arrived while I was working on it so I was able to put those on and screw the under trim back on, this was treated to Gtechniq to save me having to reapply 303 every other time I wash the car.
My headlight trim returned, now with a thinner coat of paint on the inside, I used some hard wax in here to help protect it that little bit more before popping them on. I had been looking forward to getting these on!
I was then able to give the car it's first wash, it was too dark at this point so no pictures again, slacking I know.
But, the next morning arrived, sunny skies upon setting off for my MOT, only to reach 2 minutes from the station for the heavens to open! :frustrated:
Being checked over. The guys at the MOT station are good friends so while on the ramp, having come prepared, I used some quick detailer and aerospace to give the underside a wipe down. :thumbs: I also have an oil leak from the chain area cover but it can wait until it goes in for a service.
Road worthy for another year and back out into the wet she goes. Never happy about that, I'm not one to drive my cars in the rain, especially after so much work going into cleaning the underside and of course the new paint.
Back home and dry again, it was time to clean the interior. As much as the bodyshop tried to keep the inside clear, it is just impossible to escape the dust from the workshop, it goes everywhere! So armed with a toothbrush, ear buds, leather cleaner, nail brushes and a hoover, the interior clean up begain. (I officially hate the rear shelf and rear window, what a pain that is to clean)
Next on my list is to have someone come and make the leather look newer, I don't want a retrim as that will look too new so I have found a guy that can remove/fill some of the creasing, recolour the faced and overall, present the seats in a fresher light :thumb: Steering wheel also. He comes to you and it doesn't cost the earth, of course, I'll report back when that happens.
I then popped out for a drive and dropped the missus off so decided to get some quick snaps
I seem to only like taking pictures from this angle, sorry.
The passenger rear shock is higher than the drivers side rear so this just looks awful here but it's a rear shot. New lenses to go on soon along with the rear H&R's.
Bunch of new stickers
I then spent until 1:30am working on the body, I machine polished the car, simply to remove any polish which the bodyshop may have applied and then set about applying Zaino Z5pro with ZFX. This has been a long time favorite of mine.Smells great and leave a glassy finish, I've won a few best paint awards with my Golf when wearing this stuff so I like to stick with it and the whole Zaino kit.
Awaiting an electrician to come and fit strip light so I had to improvise.
The next morning, I woke up like a kid at Christmas, I wanted to see the results of my efforts and wow, I thought it was bright before but this was like it was painted another colour.
Crap pic but evidence that I do drive it
A long way since 16 months ago
Decided to take it to work today, the ABS light came on but after a restart, disappeared
Had to throw a loose cover much to the amusement of my colleagues, the company next are forever creating dust by chopping wood!
:nooo:
More to come soon I'm sure :thumbs:
August 30th 2016
Yes, I am interested in the 5 spoke twist ETA's, 18" I think...
Finished up the small jobs on the car over the weekend and gave it a clean, again.
New rear wiper bolt cap
Cap was missing on drivers side seat belt mounting.
New mirror mushroom button
New rear door card top washers
New drain grommets
Can see that I've already managed to scrape the underside coming out from my drive!! Ordered some new waxoyl so I can repaint the marks.
New reinforcement strip
Can see that I've already managed to scrape the underside coming out from my drive!! Ordered some new waxoyl so I can repaint the marks.
One thing after another, managed to spot a leaking PAS pipe, found the exact point so I've got a replacement return pipe on order, not sure if that's going to be an awkward job.
Finished up fitting parts and gave both the cars a good wash and top up of Zaino.
This is a photoshop but I'm undecided about stickering her with a Carrera badge, I have a genuine one for the rear but not sure on it...
That's that for now. Cleaned and covered ready to take to a wedding in 2 weeks times. In the meantime, collecting a new toy and annoyingly going away for a week the next day
Don't burn me, I can't wait, so much so I'm collecting it at midnight tomorrow :bandit:
[img]https://c1.staticflickr.com/9/8612/28674047232_4fab63be91_c.jpg[/img]
September 15 2016
Thanks! I am happy with how it has turned out, still a few more bits to do but I've taken a break from it at the moment as the Focus is taking my attention at the minute. There is no way in hell I would have achieved what I have without being a bit handy, I would probably have to spend half of what the car is worth! Luckily I enjoy jumping into projects, I'll be looking for the next soon no doubt
So not much has happened, I went away for a week to Amalfi Coast and the day after I got back, I had a wedding to attend so I decided on taking the 964 as the forecast was good and it would be a nice run from home over to Ascot.
I find just how small the 964 is compared to the Focus, or probably more how big the Focus is, completely dwarfs the 964!
Arriving at the venue
The car park was filled with various exotica but while I was hanging around, the 964 was the one which seemed to draw people over.
Anyone on here? 991 Turbo with T11RBO as the plate
:?:
And some snaps on the way back, was the driver for the night while she got merry. Not a problem when getting to drive this back through clear roads.
Wish I didn't leave the spoiler up here
Home for the night
Cleaned the next day as the front picked up a fair few bugs
[img]https://c4.staticflickr.com/9/8184/29070524123_724267bd49_c.jpg[/img]
September 26th 2019
The novelty of the RS has worn off a bit now so I'm back to working on the cars. Yesterday I thought I would tackle the job of replacing the weaping PAS return pipe. I under estimated this, in my mind, I thought I would simply be able to get under the car and simply pull pipe out once undone.. If I were to write instructions after the whole experience, I would still write that but I would need to add loads of swear words in the middle. What a pig of a job it turned out to be but it's 90% of the way done at the time of typing this.
I'm sure the OPC way of removing this pipe would be to remove the rear trailing arm and ARB but I managed to get the pipe out by just undoing the shock mount to give a few extra mm's of much needed clearance.
So, this is the shiny new pipe from Porsche. Judging by the bag. it looks like it's sat around for many many years but the pipe itself is pristine and in perfect shape.
Hard to tell the leak from the wax sealent that's been sprayed everywhere but the pipe has a tiny tiny hole from sitting inside this little rubber bracket and when the system is working, i.e under pressure from steering, it weaps out and eventually drips.
First thing was to get the car in the air and I set about removing a metal under tray that covers the tunnel area in the centre of the car. Removing this exposes some lines, throttle cable and base of shifter.
I'm sure this had never been removed before and it was completed welded in place!
Undid the hose I was replacing and let the fluid drip into a catch tank. The fluid was black with a hint of red. I believe that this is ATF as opposed to PAS fluid. I have read that I should use Pentosin CHF11S but some say just refill with ATF Dextron 2 or 3... I have yet to refill so I will probably ask a question to fellow UK 964's rather than go off of the 10 year old Rennlist forum posts that are very varied in opinion.
No pictures happened for about 3 hours of wrestling with the bloody pipe. I could have cut it and pulled it out but I wanted to pull it out in one piece to make sure that I could get the new one in.. If I couldn't pull it out in 1 piece, then I wouldn't be able to slot the new one in
Logic!So as I couldn't find any DIY guides for this at all, I was well and truly on my own and learning as I went, I try to do things in the easiest way possible and try and not disturb bolts that I don't need to but as my patience was wearing thin, my ideas were growing and undoing the rear trailing arm was becoming a reality, something I reallyyyyyyyyyyyyy didn't want to do. I took a break and had a coffee, wiped the dirt out of my hair and face and thought I'd give it one more go, it's a case of twisting and pulling and finding an angle that works, well, within 1 minute of taking that break, it popped out!! Woohooo!!
Pictures resumed
Although 2 pieces here as I took pride in showing it who was boss by snapping the bloody thing where the hole was.
A better view of the rust
i find it straight how it has rusted considering the rest of the car is rust free, this is now the last of the rusty pipes, it was only ever this and an engine oil return that were rusty and everything is perfect. Strange.
Refit time, I was expecting to have similar trouble, but the new pipe popped into place with ease, it was a bit tricky pointed the engine bay side up, I kept getting it caught up with the rear shock and having it go up inside the turret but after a little wiggle, it went where it needed to.
A simple job of popping all of the support brackets in place, new jubilee clips at both ends, centre tunnel cover refitted, rear shock and wheel bolted back on and that was me done for the day.
If you find yourself having to do this job, good luck, it's a ball ache, especially laying on a floor, a 4 poster and you'll have an easier life.
Feel very happy that it is complete, I just need to decide on a fluid and then bleed. :thumb:
Boring update I know, sorry.
My rear shock adapters are on the way from the US so once those arrive and I get some newer style rear top mount rubbers, I'll be able to drop the rear end by fitting the coilovers finally.
Must get around to send Tore my CCU now, leather clean up and OPC service and then that's my to do list for this complete
Until next time! :bye:
September 30th 2016
Not much to update here, I don't think I have driven it since the last update.
I've been spending many many many many hours making sure the paintwork is 1000% perfect as I'm about to apply Gtechniq Crystal Serum + Exo in order to protect the paintwork from swirl marks and save it from needing a polish for years to come. I have never spent so long perfecting a car and considering it was only just painted, it's taken longer than I thought.
Gave the car a pre-wash with fairy liquid, this removed all polish/wax/silicon on the car, bloody dulled some of the rubber too but nothing I can't sort.
Beginning of the process using a DAS PRO / Megs MF kit here. A safe option as opposed to a rotary with waffle pad.
Over the moon with the result of a bare finish, there isn't a single micro scratch on it, really looking forward to seeing how this looks once the gtechniq has been applied and everything else dressed.
I have my rear top mount adapters now so I plan to get the rear coilovers fitted over the Christmas break and then start using it again, can't wait!!
Feb 06 2017
Small update.
Sadly I've not driven the car in months, mainly because I've just not had the time, Christmas, Wedding planning :roll: , fitting a turbo to my MX5 and I haven't completed the Gtechniq Crystal Serum coating so I can't use the car until I have as it will require cleaning again.. I'll do that soon as I'm dying to drive it, although the roads are far too filthy so I'm not feeling too bad.
It did come out briefly for a family photo
Thanks to Chris and him tackling his rear lights, he inspired me to make a start on mine, a nice job to do in the warmth of home.
Really not difficult, just takes some time. I did one at a time and put them in the oven at 100 degrees (fan) for about 10 mins, sometimes I did need to pop them back in. It doesn't melt the glue as I expected, heating them just makes the glue more brittle. Using a knife and screwdriver helps separate the lens from the body, once off, you just need to clean the surfaces of old glue.
I was trying to get the lens off in 1 piece for some reason, then I realised it doesn't matter, which made life easier.
I found that my lights were different, one had a plastic grill and the other was metal and this had ages, so a quick rub down and spritz with satin black sorted that.
As the grills were out, I polished the lenses up to a shine and cleaned out the housings.
Once done, just built back up. I need to order some glue then I can do the important bit of sticking the new ones on!
Thanks Chris!
Glue arrived, so I wrapped this job up! Now I just need to sort the centre light out.
[img]https://farm5.staticflickr.com/4757/40614290872_09c72ce2c5_c.jpg[/img]
August 29 2017
I'm back, been very busy recently, however, I've finally made some time for the 964!
I've pretty much spent the odd few hours here and there over the last year detailing the paintwork, making sure I got rid of any swirl marks etc in order for me to apply the gtechniq crystal serum and exo. I finally finished the job and I have to say, it's looking better than ever and happy to know the paint is protected, I'm still half tempted to have the front done in PPF to fully protect it.
Having not used it pretty much since last year and only covering 10 miles between MOT's, it was time to start using it, especially as the weather has been brilliant!
Performed a few jobs which had been on the list for a little while to start with, fitting a decat pipe which I've had sitting around for ages and getting the CCU repaired.
First off, the CCU. My CCU never worked, none of the servo's operated at all, so no ability to choose hot/cold, windscreen, feet etc etc, so for a while, I manually moved the servos into a half way position. I tried troubleshooting it myself but was getting no where and decided that the problem had to be the CCU itself. After many many many emails with Tore of https://www.bergvillfx.com/, I sent him my CCU.
Now Tore is one of those staples of a car community, his website basically offers all the information you could need to go about fixing one of these yourself, all the troubleshooting measures, everything and all freely available to view, most people would keep this kind of info to themselves! I would! So Tore deserves great credit for this, not to mention the emails he must get, he received plenty from me over the last 2 years that's for sure and all of his replies were pretty damn comprehensive! I have no idea where else I would go for this serivce, Porsche wanted to sell me a new CCU!
In the end, I sent him my CCU, I want his expertise to source the problem and resolve it. I packaged it up and shipped it over to Norway, within a couple days, I had an email from Tore with a full report of the issues found and my options. Once I commissioned the repair work, the CCU arrived back within day, the whole job was turnt around within 10, that's the CCU leaving me and arriving back, most of those were transit!
Tore gave me some info of things to check on my car and as he suspected, one of my chamber temp sensors was also busted and as he suspected, it would be a corroded thermister! I got hold of 2 replacements and soldered these in (A ball ache of a job due to limited movement in wire length), I then put my CCU in and as if by magic, loads of crap blew out my vents from above the dash and in the foot wells!! I've never been so happy to have my interior messed up. All operations work perfectly, all servos dance and I can now modulate the cabin temperature, fantastic!
All in all, I think the repair came to �230 and I'm over the moon with that, cheaper than a dodgy second hand ebay unit which may be broken and a 5 year warranty along with an expert on the other side of an email.
I cannot recommend Tore's service enough, utterly professional and a really generous guy who is clearly helping us 964 and 993 owners world wide with wealth of information.
In my 13 years of working with cars, his service certainly stands out.
So, repaired and working CCU is in
Next was fitting the decat pipe, along with this, I wanted to change out some crusty nuts and bolts for stainless items.
I was glad to see that Porsche had carried on tradition to the 997 from the 964 of using hardware which seems to rust like this, my 997 was the same!!
Got lucky with most but some did need cutting.
I had a nightmare getting the lambda out so I ended up leaving that in and buying a new one for the decat.
Would have liked to keep my heat shields in place but this will do for now.
Now, I haven't stood outside while the car is on the move but I honestly can't tell a difference, the car still passed emissions on the MOT too. So I'm not sure if this was a waste of time but I'll reserve judgement until I hear someone drive it off.
Replace the last of the stickers
So MOT time, wasn't nervous and rightfully so, it flew through with NO advisories other than I should use it more, so as it was bank holiday, I did.
Took some pictures, drove it to the pub one night, this was a bad move, or maybe just my parking as I came back to the car to find some little **** had wiped their hands all over the drivers door and window. Took it shopping and then finished the weekend by popping it down to the R20 PCGB Ace Cafe meet which was brilliant! Excellent caliber of cars and great people.
Was slightly optimistic with this one....
I'd love one of these!
The tartan interior (sorry no pic) was lovely!
That's me done for now!
Next, I need to change the centre light bar as it doesn't match the new corners. Then on to new cam and chain cover seals along with an oil change, really not sure if I should book it in somewhere for a proper service and for the stamp now the car is of some value.
Cheers
Feb 20th 2018
I've come back to the 964 after some time, it has pretty much sat in the garage since I last used it with the occasional heat cycle and step outside.
I thought I would tackle the valve clearances, I have no idea when they were last done, the engine is a bit ticky and I want to put some fresh oil in there, mainly so I can fit my new red oil filter
Plan is to book her in for a service with someone, either Porsche or 9e for the sake of a stamp as the last stamp in the book was 2007, it has only done 5k miles since then and the previous owner did religious oil changes so that's not a worry but I would like some other eyes to go over it.
Anyway, I wanted to perform the valve clearances myself, it gives me a chance to further explore the engine, clean (lol) new areas and make sure they are done properly. I have done the job before on BMW M engines so I figured I can do this.
Anyway, at this point, I'm in the tear down stage, slowly removing bits, cleaning and taking my time. Thankfully, the exhaust was off in minutes thanks to the new bolts, so far, no trouble, everything has removed like new.
First up, was getting this feeler gauge, many places seem to sell it for �50 which is RIDICULOUS!!! I paid �25 and what arrived was something that should have been �4 but o well.
Love looking at this engine, much nicer without the blower!
Removed this lump and then the main back box.
Need to address the rusting on the tin, it's solid so think I can save it.
Tin removed from drivers side and this is as far as I had time to do..
Updates shortly.....
Valve clearances all done, only 2 needed adjustment and to do the job without the special tool would have be near on impossible.
I'm glad I did the job, it made me realise how simple the engine is, nothing too complex about it, just an **** to access certain areas. Everything came apart perfectly and nothing unusual found along the way, always enjoy doing new jobs as it means cleaning up new areas and renewing bits.
So, on to the pics.
My work area, I left the decat pipe in place as it didn't get in the way.
Spotted a leak from here so got a new gasket and decided to fit that along with sealent.
The view
Here is a rocker arm, nothing complex and if you can make it this far, you'll be more than competent enough to perform the valve adjustments.
Passenger side chain cover looking fairly dry
Upper and lower valve covers removed
Old plugs
The over priced feeler gauge in action. Was pretty impressed that it wasn't overly tanned inside the engine.
New same spec Beru Ultra plugs and passenger side tin
Old and new
New purolator filter fitted, waited ages to fit!
Buttoning back up, all tin ware protected and added some heatsheilding I had laying around as the metal was starting to thin.
Everything refitted, just under 9 litres of oil back in (I had drained this amount out)
The runs lovely, it always did but knowing the valves are at tolerance and new oil, its good to know it's all good for dryer days.
Want to get it booked in to have a once over soon, I also need to do the gearbox fluid, I've got a new gasket and filter waiting, just need to get hold of a temperature gun.
I'd love to solve some of the leaks, one that I have found is coming from between the engine and where the rear engine mount plate bolts to it, weirdly, there isn't oil coming from the drain hole on the other side, this is between the engine and mount, would this be the crank seal? I thought if that leaks you would get oil come from the hole the other side, being blocked from site in pic 1 by the engine surround cover, any advice on that would be great.
I should have tackled it while everything was off but it's not hard job to drop the exhaust to get at this and then support the engine.
That's it for now, just waiting for the salt to wash away from our roads and then I can take it out!
July 31st 2018
She's out of the garage!
Briefly...
New reg plate transferred from my 500SL.
I spent the majority of my Saturday cleaning the 964 up, properly fixing the new registration on with the view of taking it to Luftgekult the next day...
Unfortunately, upon waking up on the Sunday to the sound of heavy wind and rain smashing against my window, I decided against letting all my efforts go to waste on the 70 mile run up to Bicester and I'll save it for a nice evening run to the pub this week.
I was pretty gutted that I didn't take it but, in the end, I'm glad I didn't as I didn't miss having to spend another day cleaning it.
The missus boxster did the job just fine and is allowed to get wet.
Some pics from the glorious Saturday sunshine! (Just bloody typical that it has to rain on sunday!)
Was really nice to take it out Saturday, the thing does draw some attention, the red was blinding in direct sunlight.
August 07 2018
Been making the most of the dry days and it's been a pleasure to use this car.
Pub
Out and about on Sunday - Came across a few aircooled cars over in Betchworth, 356, SC, 930 Turbo, 2 964's
Thinking about some spacers to fill the arches a touch.
April 1st 2019
First trip out in 2019!
Tax was due to renew and I had no MOT on the car, so had that booked for Saturday just gone.
The sun was out for the 964!!
Got to the garage and parked outside, only to find the car wouldn't start!! A piece of wood and a smack with a hammer got things working again, it seems I have a sticky start solenoid, so at some point, I'll have to get that off and clean it up. Looks like removing the starter is going to involve removing other bits,!
c: c: c: Car was restarting fine after this.
Passed MOT just fine, no advisories.
Got some oil appearing on the drivers side heat exchanger but can't quite see where it's coming from, I thought I stopped this by changing the rocker gaskets but obviously not! :x It isn't major so I'm not overly worried and everyone tells me that if a 964 isn't leaking, it probably doesn't have oil.. :floor:
July 18th 2019
Had the old girl out last night
Started off with a heart attack, somehow something has clearly hit the car and chipped a big bit of paint off!! Really pissed about that but I should be able to sort it with some touch up which I've got, dabbed a bit on for now.
Met up with my mate and headed to the Fairmile.
Was really good to be out with a few mates on a nice mild night, roads were clear and could have the windows down, drove perfectly and no trouble from the starter solenoid, still haven't got around to giving that a clean but it seems to be behaving at the moment.
August 27th 2019
Another meet, it's a great feeling driving this car along with my mates SC on some nice clear roads.
I was having a great drive home, all until I was about 40 seconds away from home, under load, a misfire seemed to show up, I suspect it is the caps and rotor arms as they are getting on a bit now, while I'm at it, I plan to change the disti drive belt as I am not sure when that was last changed. Firstly I'll pull it all off and check the condition of the bearings etc and then order all the pieces to get this running perfect again! It was an intermittent misfire and only under load so it will be a minor issue to resolve :thumb: :thumb:
[img]https://live.staticflickr.com/65535/48599916226_94e64c48d6_c.jpg[/img]
That’s me up to date on the 964, tucked away for winter now and I have the distributor apart for a rebuild, new bearings, belt, caps and arms.
The following users liked this post:
iangray100 (10-29-2019)
10-29-2019, 05:48 AM
#3
Intermediate
Great read and you not too far from myself just out side Guildford .
Most of the work you have carried out I've also sorted over the years as well . I went as far as rebuilding the engine myself years ago . Ended up as an article in Total 911
Are you still pleased with the paint job and can I ask what the paint job cost as I need to get my sorted soon & was looking to strip some of the car before hand .
10-29-2019, 06:49 AM
#4
Instructor
Thread Starter
Hi Ian,
Not far at all, I'm in Banstead. Just about to shoot down to Guildford OPC actually.
Engine rebuild is on my mind, the engine runs and sounds good but I do have a small leak from rear crank area and one of the heads, nothing major so I'm going to leave it a little longer as it has just ticked over 80k miles. How did you find the rebuild? I have rebuilt a VR6 and MX5 1.8 turbo engine but the 964 seems a much more daunting job..
Paint job is still show winning quality, I'm very very particular about paint. I got a bit of a special deal on the paint as a close friend did it but it should have cost �7000. Stripping the car certainly helps and at least you get to see how things come apart and you can put it back yourself knowing you it's correct, I'm not a fan of others working on my car, if I had the means to paint and weld, I would have done that myself too although it wouldn't have been as good as the car is now. The bodyshop I use are known for their work so it was a no brainer to use them again. (They painted another car of mine before which won many awards, including best paint). They are based in Leatherhead. I am also using another friends bodyshop, they are based in Bracknell, he currently has my Cayenne and his methods and finish are second to none also.
The following users liked this post:
Ruskiedog (03-02-2020)
10-29-2019, 07:56 AM
#5
Intermediate
Great thanks for the reply and I know Paul in spares @ OPC Guildford quite well as I've kept him in job over the years with what I've spent ;-)
That is not a bad price as I've been quoted �10K + for a windows out and I'm Mr Fussy with paint finish .
I uploaded a lot of the rebuild online but I've not updated it for a while but keep working on the car as and when , and had to drop the engine a few years ago for a diff rebuild and I replaced all the rear wheel bearing at the same time
http://forums.pelicanparts.com/911-e...d-over-uk.html
10-29-2019, 08:44 AM
#6
Instructor
Thread Starter
Holy crap, that is incredible!! What a thread, however, it has scared the hell out of me!! I will get the car to 100k I think before I drop the engine out.
I must get mine on a dyno, I would be really interested to see how it performs, mine is totally original with the exception of a decat and panel filter. Runs on V power and currently, it has 10/40 magnatec but I do want to put in something heavier on the next oil change. I would love to change the fluid in the tip box also, not sure when that was last performed.
I must get mine on a dyno, I would be really interested to see how it performs, mine is totally original with the exception of a decat and panel filter. Runs on V power and currently, it has 10/40 magnatec but I do want to put in something heavier on the next oil change. I would love to change the fluid in the tip box also, not sure when that was last performed.
10-29-2019, 08:58 AM
#7
Intermediate
Over the years I have found the Miller range fit the bill and the wallet
Matches the Porsche Classics Oil recommend now by Porsche for the 964
https://www.millersoils-shop.co.uk/c...lus-engine-oil
+ the red Porsche filter 93010776403 = Red Classic "PUROLATOR"
I also use the Miller Automatic oil in the Tip gearbox
All available from https://www.opieoils.co.uk/ and the are discount codes on the web as l well
Trending Topics
11-27-2019, 10:35 PM
#8
AutoX

Join Date: Aug 2018
Location: Melbourne, Australia.
Posts: 13
Likes: 0
Received 0 Likes
on
0 Posts
What an amazing transformation! Your attention to detail is fantastic, loved reading through the thread.
Did the late to early coilover adapters work in your early car? Were they the ones from Car-Bone? I'm assuming you had to use the late model rear shock mounts as well with the adapters?
Did the late to early coilover adapters work in your early car? Were they the ones from Car-Bone? I'm assuming you had to use the late model rear shock mounts as well with the adapters?
The following users liked this post:
heliolps2 (05-22-2021)
11-28-2019, 05:38 AM
#10
Instructor
Thread Starter
What an amazing transformation! Your attention to detail is fantastic, loved reading through the thread.
Did the late to early coilover adapters work in your early car? Were they the ones from Car-Bone? I'm assuming you had to use the late model rear shock mounts as well with the adapters?
Did the late to early coilover adapters work in your early car? Were they the ones from Car-Bone? I'm assuming you had to use the late model rear shock mounts as well with the adapters?
They worked perfectly, I didn't know about the differences between early and late coilovers, so when I came to fit my late rear shocks, things didn't work out.. I think the ones I bought are in the link below; I got them from ebay and they did come from California so I'm pretty sure this is the same seller. They worked great and the quality was as good as a bit of billet with some threads poking out could be
https://www.ebay.com/itm/Porsche-911...-/232088326105
Thanks, it sure did, I was lucky to get hold of it and do what I enjoy
Minor update;
Not much going on here, it's covered up in the garage while the distributors stripped down in the house, going to order some bearings from Diddi.
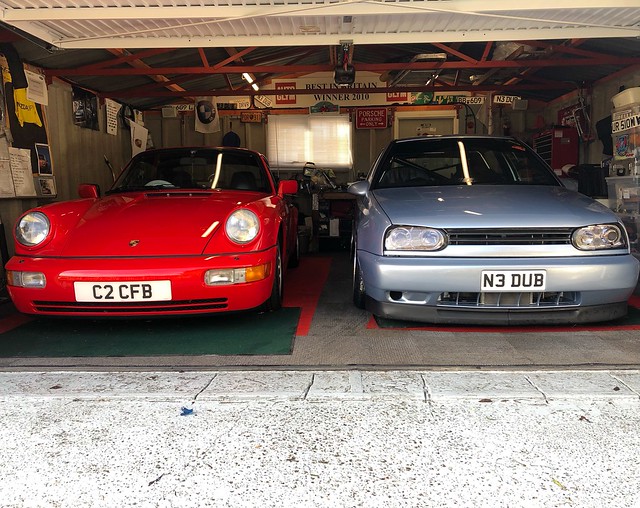

Someone had been here before.. thankfully, belt was OK, a bit hard if anything.

Wanted to support Drew of Cooled Collective, really good YouTube videos of the US porsche scene, we're doing it wrong here in the UK.
 12-12-2019, 08:34 AM
#11

I've really enjoyed readng this thread and anyone who's not afraid, or is capable of swinging a spanner gets my vote.
I have just purchased my first 964, a 90 Siilver C2 Tip, low miles, lots of history and one owner and currently on it's way from Japan. A friend of mine over there gave it the thumbs up and it'll be here mid-Feb. Apparently not a spot of rust and really good OG paint. It's a shame to be bringing it to the UK, but it won't be there for long, it's coming to Italy with us. I've only seen videos of it....eeeek. A warranty and my buddies inspection gives me some comfort, but we'll see.
I imagine I'll be doing most of what you have done.
Out of curiosity, I guess yours is also a 90 without the head gaskets? If so, did it receive the upgrade and necessary head machine work to accept them? Any problems with oil leaks between barrels and heads?
I was told not to discount a gasket-less 90 purely for it not having head gaskets, since it's not a big job to put right and most 964s of this age could probably do with a top end rebuild anyway, with or without gaskets. Sounds like reasonable advice to me.
Keep up the good work, will enjoy keeping myself abreast of your developments. And nice to see you keeping it stock.
Not even tempted by 993 RS style mirrors, or 17" Cups?
01-31-2020, 05:47 AM
#12
Instructor
Thread Starter
Wow, get some pictures up! Silver is my favourite colour for a car, I would have loved my 964 in silver, my other 3 Porsches are silver.
I believe mine to not have head gaskets, I have no idea if they have ever been removed, it certainly doesn't look like it and I don't have any receipts to suggest it. I have a mist around one of the barrels, where it meets the head but a few guys have said, unless it develops into a trip, leave it. I just figured that I'll keep running it until it needs a top end rebuild rather than pull the engine out now. It sounds good, runs perfect so I can't justify it over an mist of oil on one cylinder.
I always get tempted by cups and the cup mirrors but then it just looks like everyyyyyyyyyyyyyyy other 964.. I take some satisfaction in not seeing many with the flag and D90 combo. I do prefer the look of the cup setup but I just find that I stop myself from following the look, I even have a set of cup wheels!! I may try them one day. I plan to just add some spacers behind the D90's to fill the arches a bit more.
Put some pics of yours up!
The following users liked this post:
mundo-kombi (02-08-2020)
01-31-2020, 05:53 AM
#13
Instructor
Thread Starter
Woohoo, the bearings finally arrived which enabled me to finally put my distributor back together!
Easy enough, had to use a valve spring compressor to get the circlip back on the secondary shaft and used a vice to press the pin in for the drive gear. All fresh and ready to be refitted, I can't wait to get it going again.
One thing I realised, I didn't get the engine at TDC before removing, so I need to work out where TDC is, I can line the crank Z mark up but I guess I am going to have to pull a plug and find where the piston is to be sure! Not looked in to this yet.
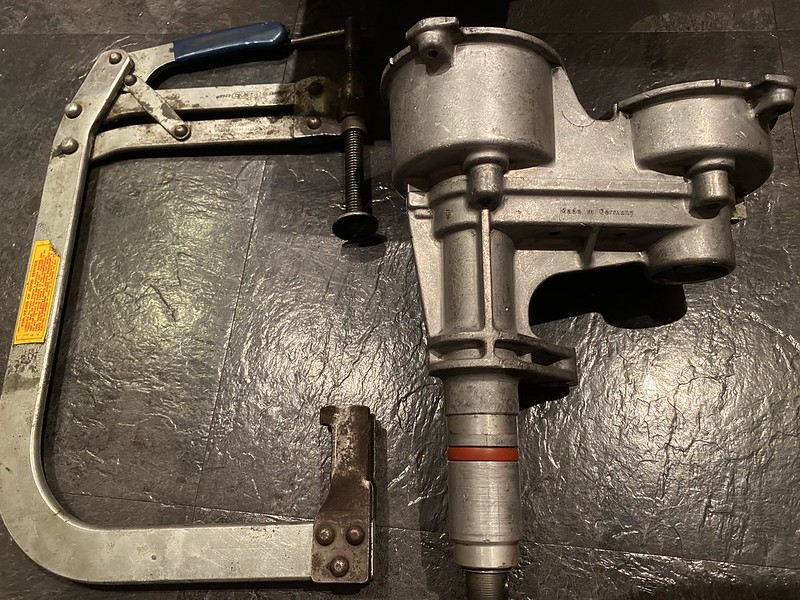
The following users liked this post:
MarkGolf (02-04-2020)