When you click on links to various merchants on this site and make a purchase, this can result in this site earning a commission. Affiliate programs and affiliations include, but are not limited to, the eBay Partner Network.
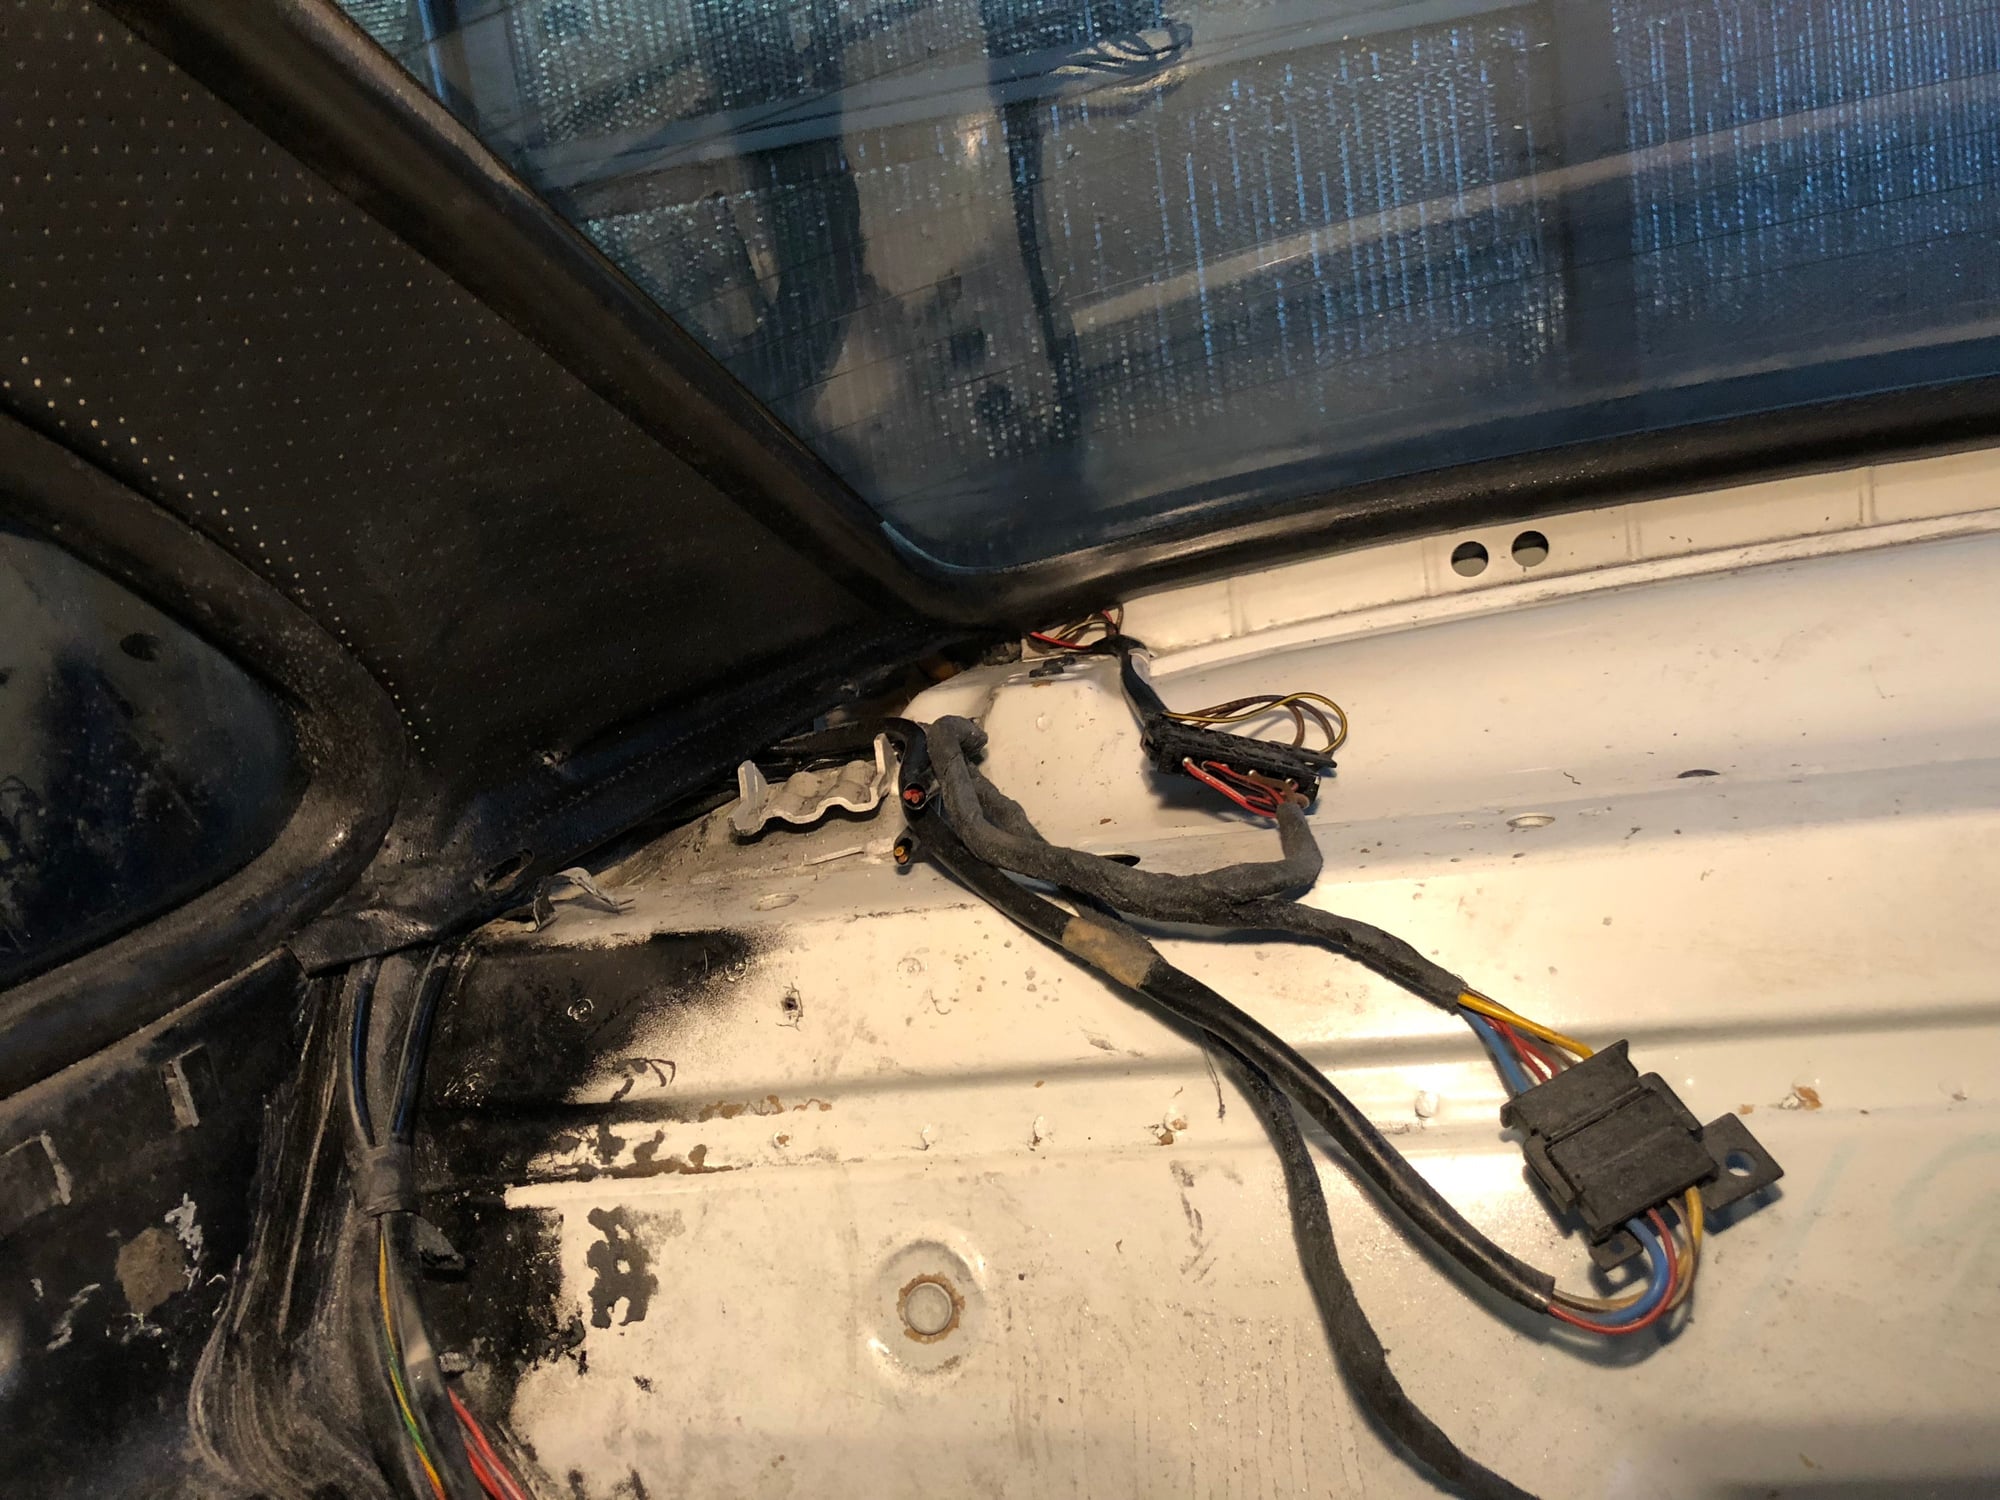
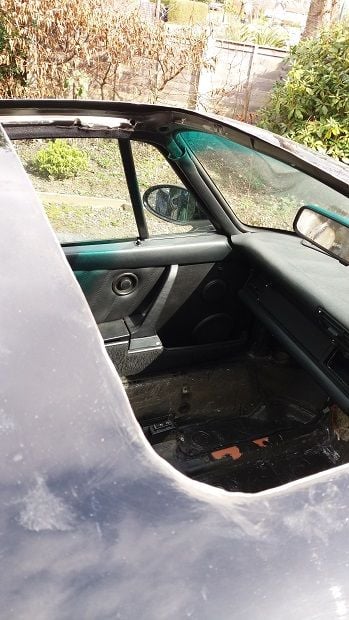
Your water in the rear looks very similar to the damage I have. I’m pretty sure I had three distinct leaks, including what I gather are the two sunroof drains where they connect by the rear windshield. I discovered that both hoses were disconnected when I pulled back the roof liner. I took a few photos last night to show precisely where the hose connection is. I’m guessing you were were also leaking at those two corners, and the water soaks down the seats and eventually to the floor boards.
Keep up the good work. It’s a pig of a job, I know.
Jim
Water appears to have been leaking out of these drains in corner under the roof liner (both corners). Leaks were where surgical tubing connects at base. Make sure connections are secure on both sides.
The 993 rear quarter seals are more aesthetically pleasing and a flusher fit, doing away with the external metal frame, I'm on a big weight loss drive and every lb helps
I've just had the dash fans replaced in my HVAC so it gets nice and toasty in the cabin now, to be fair it was warn before with just the heat turned up and no fans going, but now there is movemont of air around the cabin too, which is good.
I've also removed my rear wiper and plugged with a glass insert from the VW crowd, looks so much better.
When you say fix it closed, are you having it welded shut? I like the idea of it but love the sunroof in the summer.
My car also lives outside but I'm hoping that now the bonnet seal has been replaced, most of my issues will be resolved.
Which glass insert did you get, sounds like a nice solution. I was fed up with the sunroof, I am sure the drain pipes are leaking somewhere and I prefer the look of the interior without it. I am going to remove all the motor and brackets and use the sunroof panel to plug the gap. I got some info from, robt964 ( see his build thread ) about how to fit and finish the panel without needing a respray etc. Ordered some 993 side seals and door seals and a rear window seal as I realised when taking out the headliner the top of the window seal was a little bit ripped, as was a bit of one door seal. On close inspection of the rear seal, water was getting in along the rear demister wires, so I will replace that one too. I may delete the rear demister to get rid of any future issues. I would prefer a misty rear window to water in the car. I would consider the sunroof delete if you want to lose weight.
Last edited by 5hrine; 03-14-2018 at 03:36 PM.
Reason: spelling
Your water in the rear looks very similar to the damage I have. I�m pretty sure I had three distinct leaks, including what I gather are the two sunroof drains where they connect by the rear windshield. I discovered that both hoses were disconnected when I pulled back the roof liner. I took a few photos last night to show precisely where the hose connection is. I�m guessing you were were also leaking at those two corners, and the water soaks down the seats and eventually to the floor boards.
Keep up the good work. It�s a pig of a job, I know.
Jim
Water appears to have been leaking out of these drains in corner under the roof liner (both corners). Leaks were where surgical tubing connects at base. Make sure connections are secure on both sides.
Ha, I thought the picture you posted was my car! almost identical problem. I also have water tracking along the rear demister wires and getting in. Feel happy now the headliner has been ripped out as i can get a proper look at things... I only want to do this once.
Ha, I thought the picture you posted was my car! almost identical problem. I also have water tracking along the rear demister wires and getting in. Feel happy now the headliner has been ripped out as i can get a proper look at things... I only want to do this once.
Take your time and isolate all the leaks before you lay down the Dynamat, MLV and carpet. That�s something you don�t want to do twice.
I�m also planning a sunroof delete, so the sunroof liner will be coming out altogether soon enough. I purchased a Fenn Lane panel from Chris a few weeks ago, but that project is going to have to wait until next winter. Interested to see how you make out with fixing the sunroof in place. Any reason why you didn't go with the Fenn Lane panel? It�s a lot of work, but it looks great when done correctly, and it�s welded solid.
May still go the Fenn Lane panel route, but I read robt964 build thread and liked his way of dealing with the sunroof. I will remove all the metalwork and if its a fairly easy fix, use the existing panel, if not I will revert to the Fenn Lane panel and leave it , as is, until funds allow the cosmetic finishing touches. I originally was only going to do the bonnet seal, but on inspection there were a few rust areas coming in the wing gap and then I decided to do those, then more water in the car so the interior came out, so really funds are being allocated towards the essentials for now, rather than the cosmetic. Plus I really want to get some decent suspension so I lose the 4x4 look.
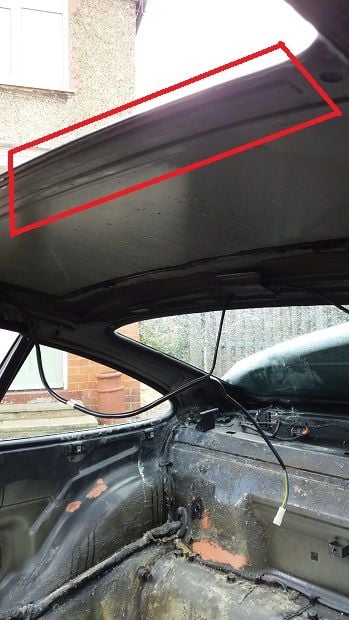
Removed most of the sunroof and associated motors/ cams/ metal etc. just unsure about the final reinforcing beam at the back of the aperture and how to deal with the double thickness sides where the original roof is folded over the sunroof supporting box.
Should the beam be removed, if so how?
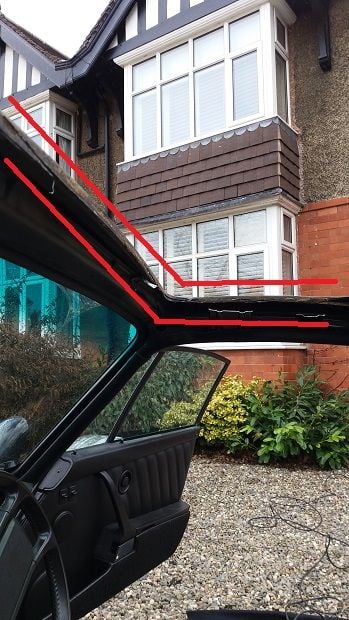
Double thickness where the roof folds over the supporting box.
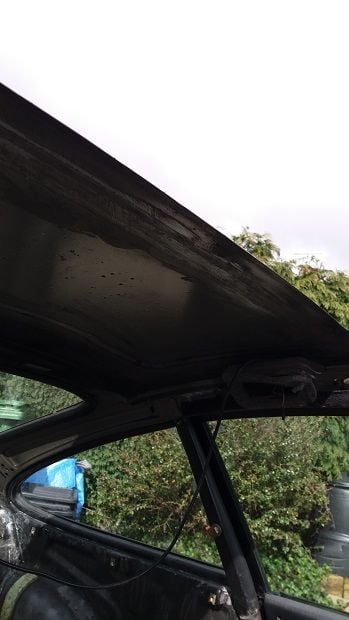
It is difficult to tell from a picture, but I suspect the Fenn Lane panel needs a completely flat roof to fit properly, not sure about how to support the existing sunroof in the aperture. Cutting out the sunroof support was something I had been worried about doing, but it all went okay. Although I noticed I had made two tiny raised bumps in the rear of the roof panel when I was scraping the glue off the underside of the roof. A shame, but these can be sorted when the sunroof delete is being finished off.
Hi, I didn�t remove that support behind the aperture. I thought it better to leave as-is as it provides a good bit of support to the centre of the panel. I�m pretty sure a I reformed the front edge, carefully bending it to create a sort or flanged edge to support the sunroof panel.
Managed to get a bit of time to work on the sunroof delete. had a chat with Chris from Fenn Lane Motorsport and decided to get one of his sunroof delete panels. He spot welds them in, but I am going to bond it in with some 3M panel bond. i have cut all the sunroof cassette out and needed to grind down the aperture to release the sides and from what looked like a fairly indestructible fold. It is also glued in place and quite hard to release even after cutting and grinding.
Taken the cross brace off.
Front edge nicely flat.
I am awaiting the panel and in the mean time will get on with removing the oil cooler and get the wing off for rust treatment.
Did you get the drivers side wing off yet...
Would be good to see some pics of the damage I can expect to see!!!
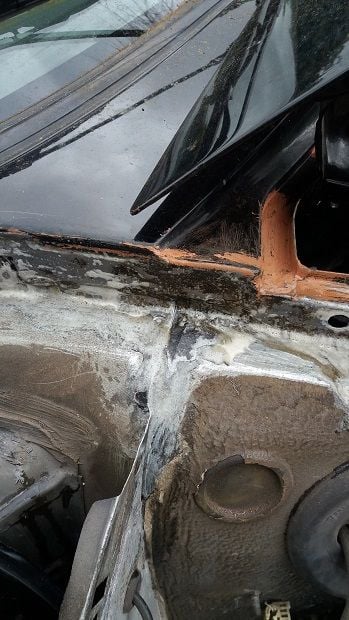
Wing off, it was a real pain to get the underseal to come away from the inner wing. also I needed to file down the small weld behind the wing up by the scuttle panel. I was really annoyed when I creased the wing, its on the upper double skinned part, so not sure how to tackle it yet.
Now the wing is off I could see some of the rust, so that was taken back to metal and doused liberally in Phospheric acid, which really did the job. one coat of Coroless inhibitor, then glass infused top coat, then Underseal. When the wing goes back I will seam seal all seams on inner/outer wings as water is getting through one seam into the frunk. Cleaned up a load of fasteners with the Phospheric too.
Phospheric on the bare metal, works wonders
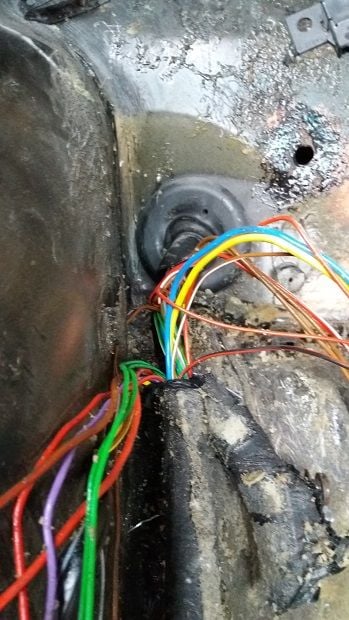
Need to delete the side indicators before the wings go back, should be okay with the lower wrap around indicators. Also started slimming the electrics down, interior lights/ spoiler delete/ sunroof delete/ rear wiper delete/ heated screen delete, thats a lot of wires not needed.
spoiler/wiper/screen/sunroof/interior light wiring to go.

 03-14-2018, 02:23 PM