When you click on links to various merchants on this site and make a purchase, this can result in this site earning a commission. Affiliate programs and affiliations include, but are not limited to, the eBay Partner Network.
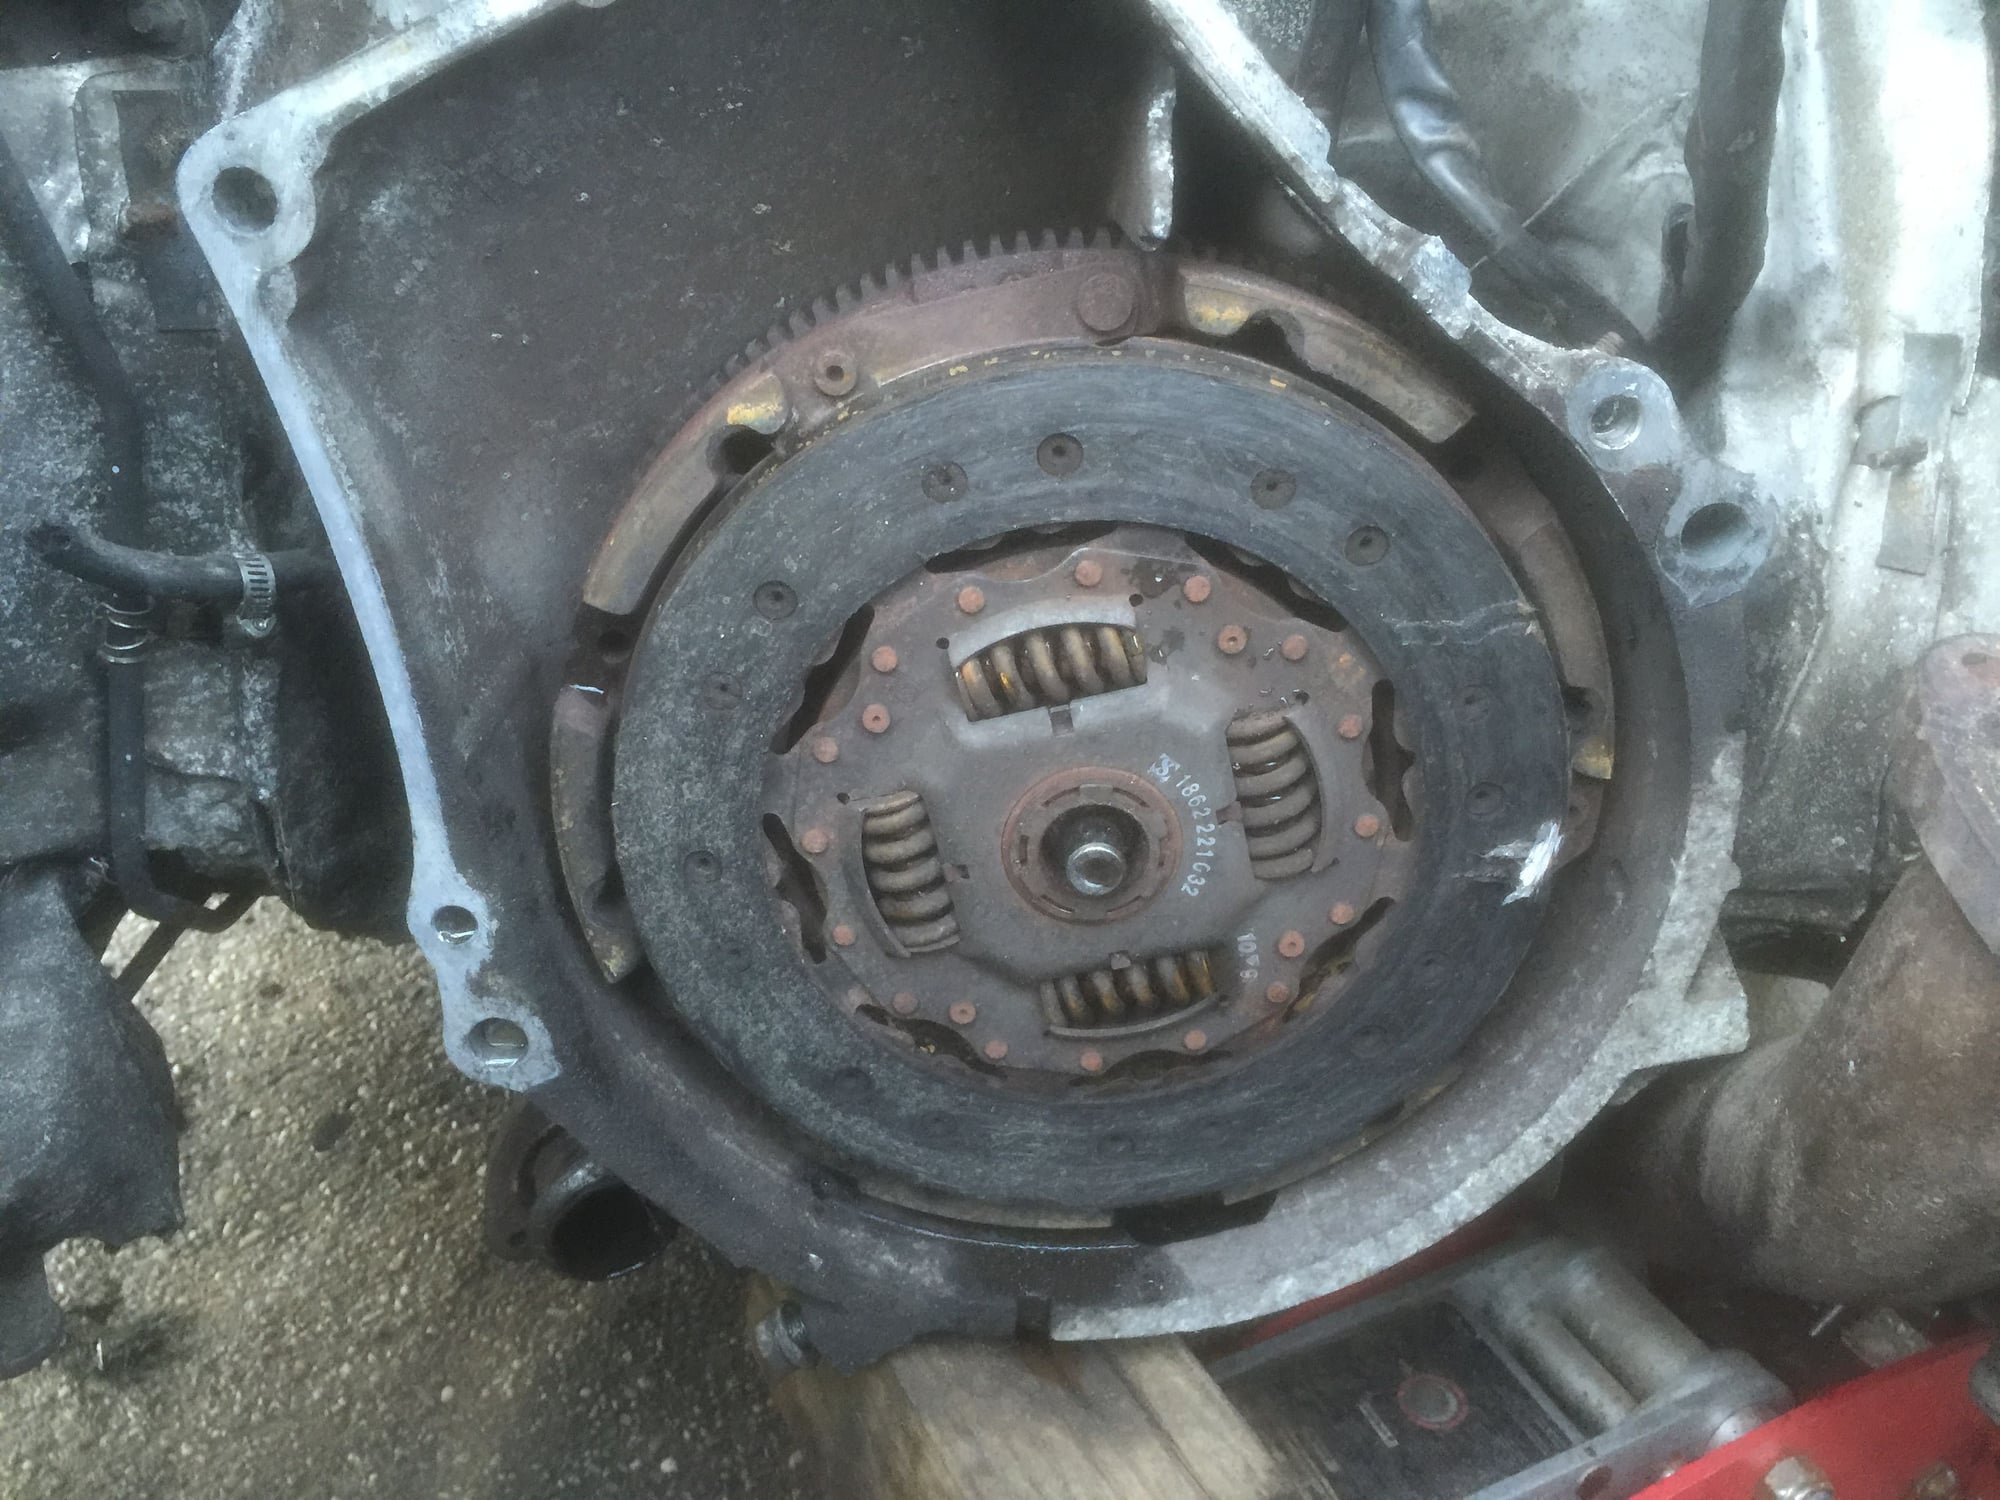
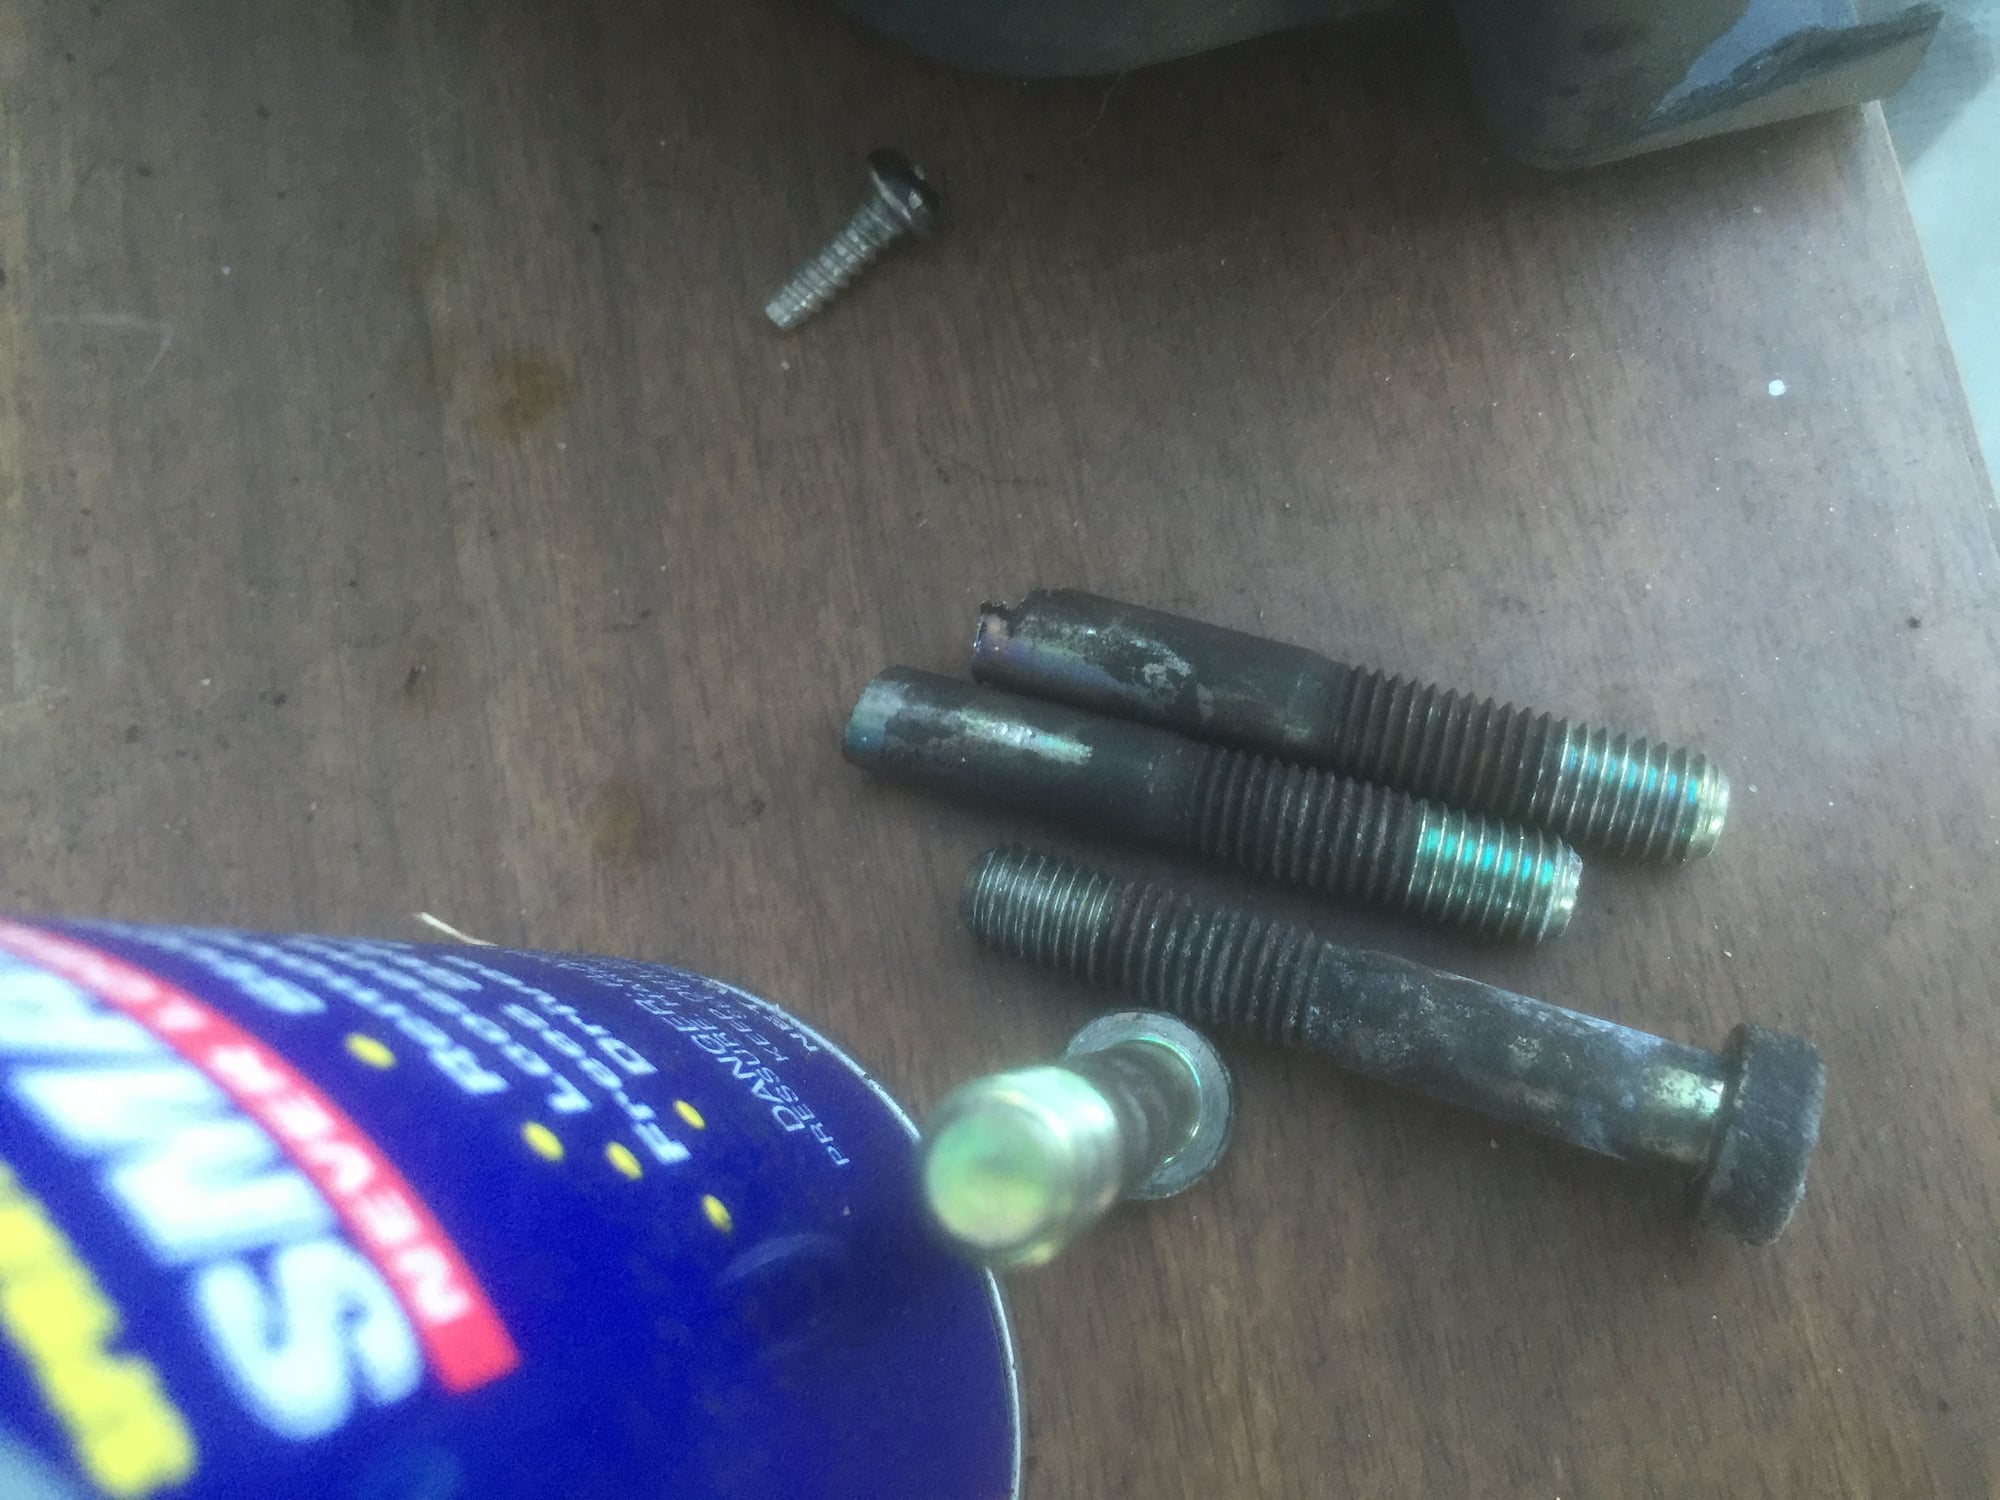
so more progress, weather has sucked so it set me back about a week, I finally was able to pull the engine yesterday, although I f'd the clutch disc up in the process due to two pressure plate bolts stripping out on me, what a dumb *** design the cheese head bolts are! Definitely replacing with Allen heads!
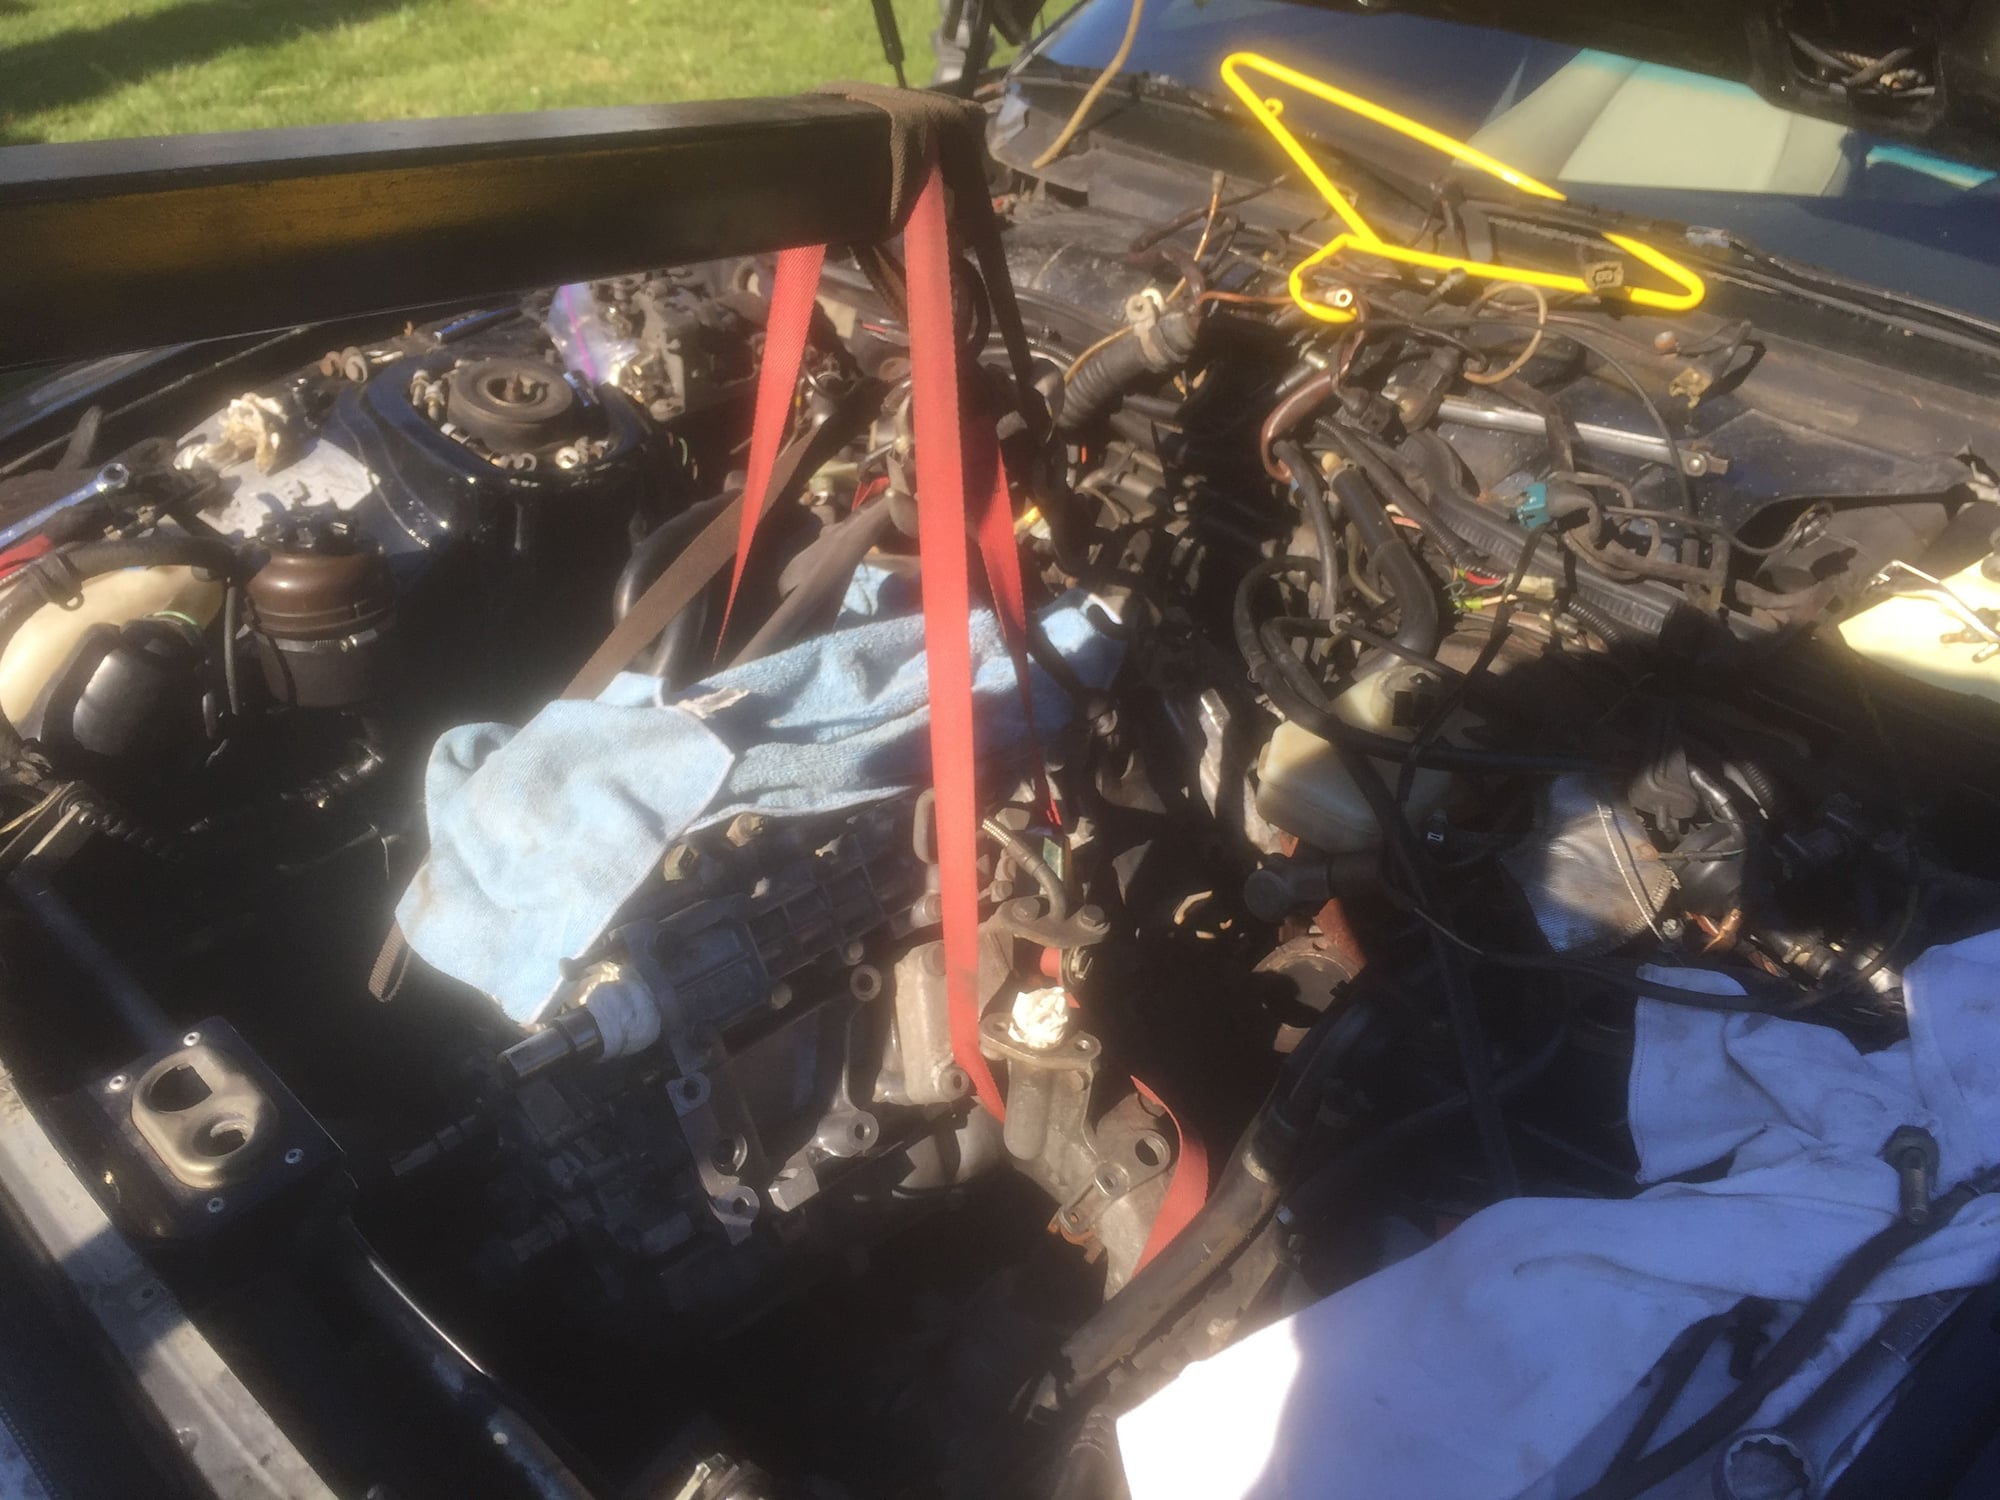
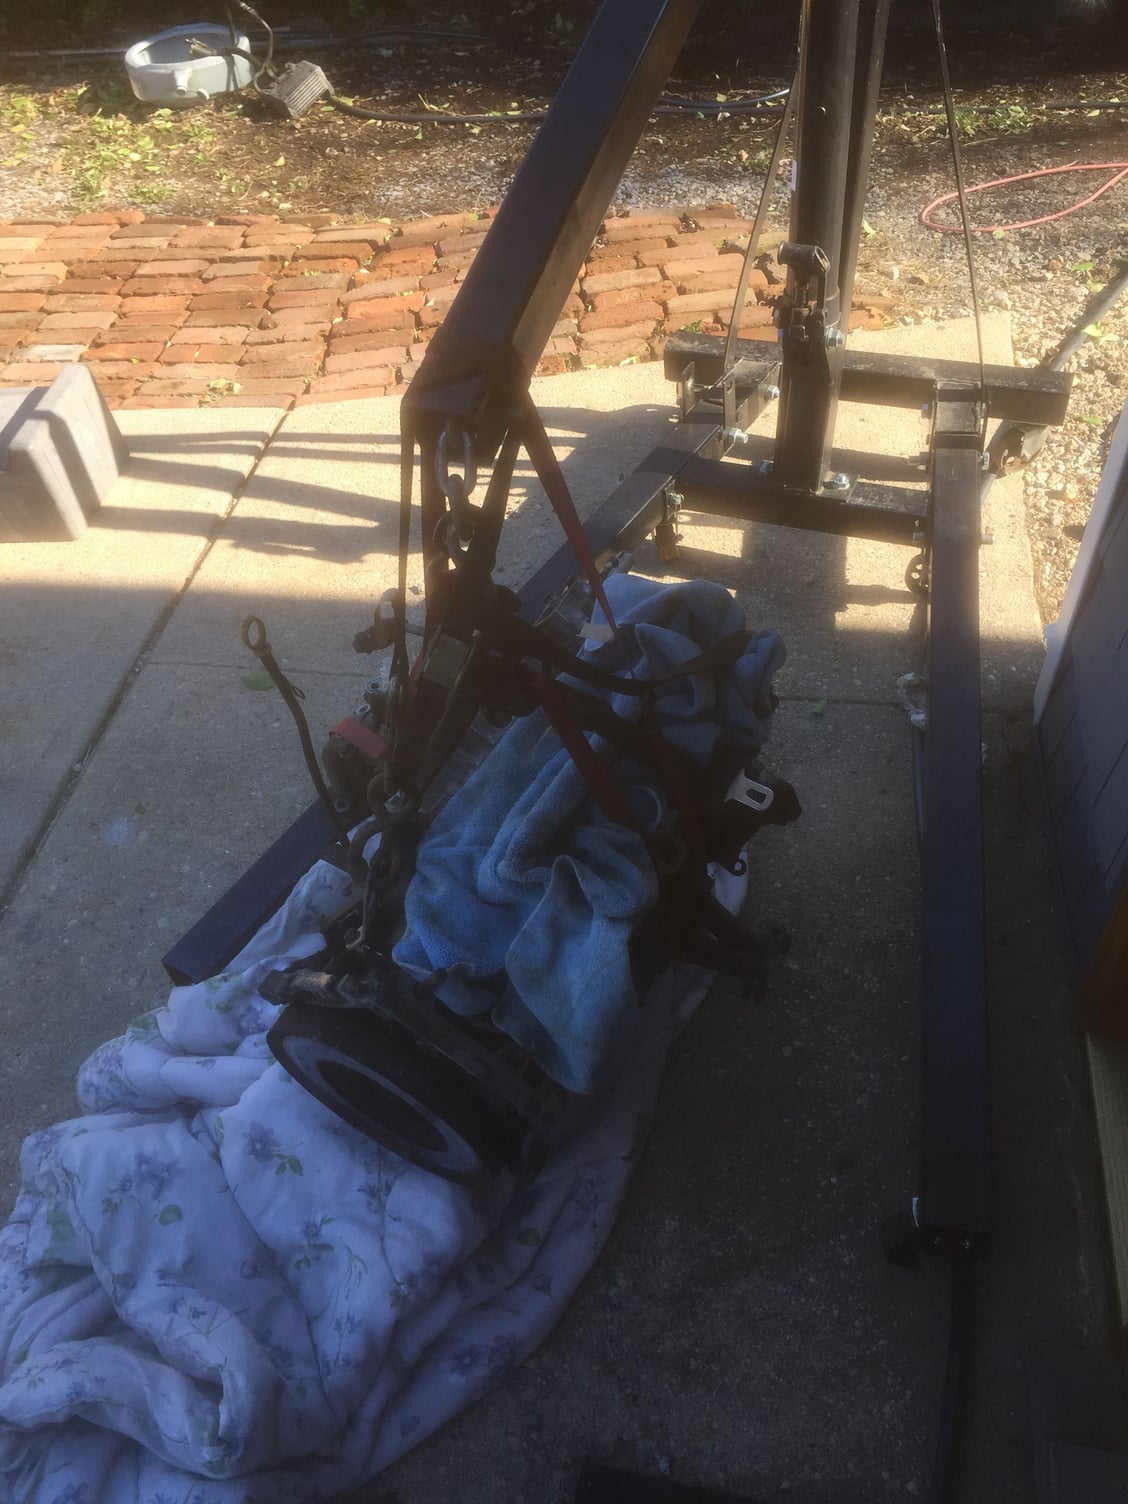
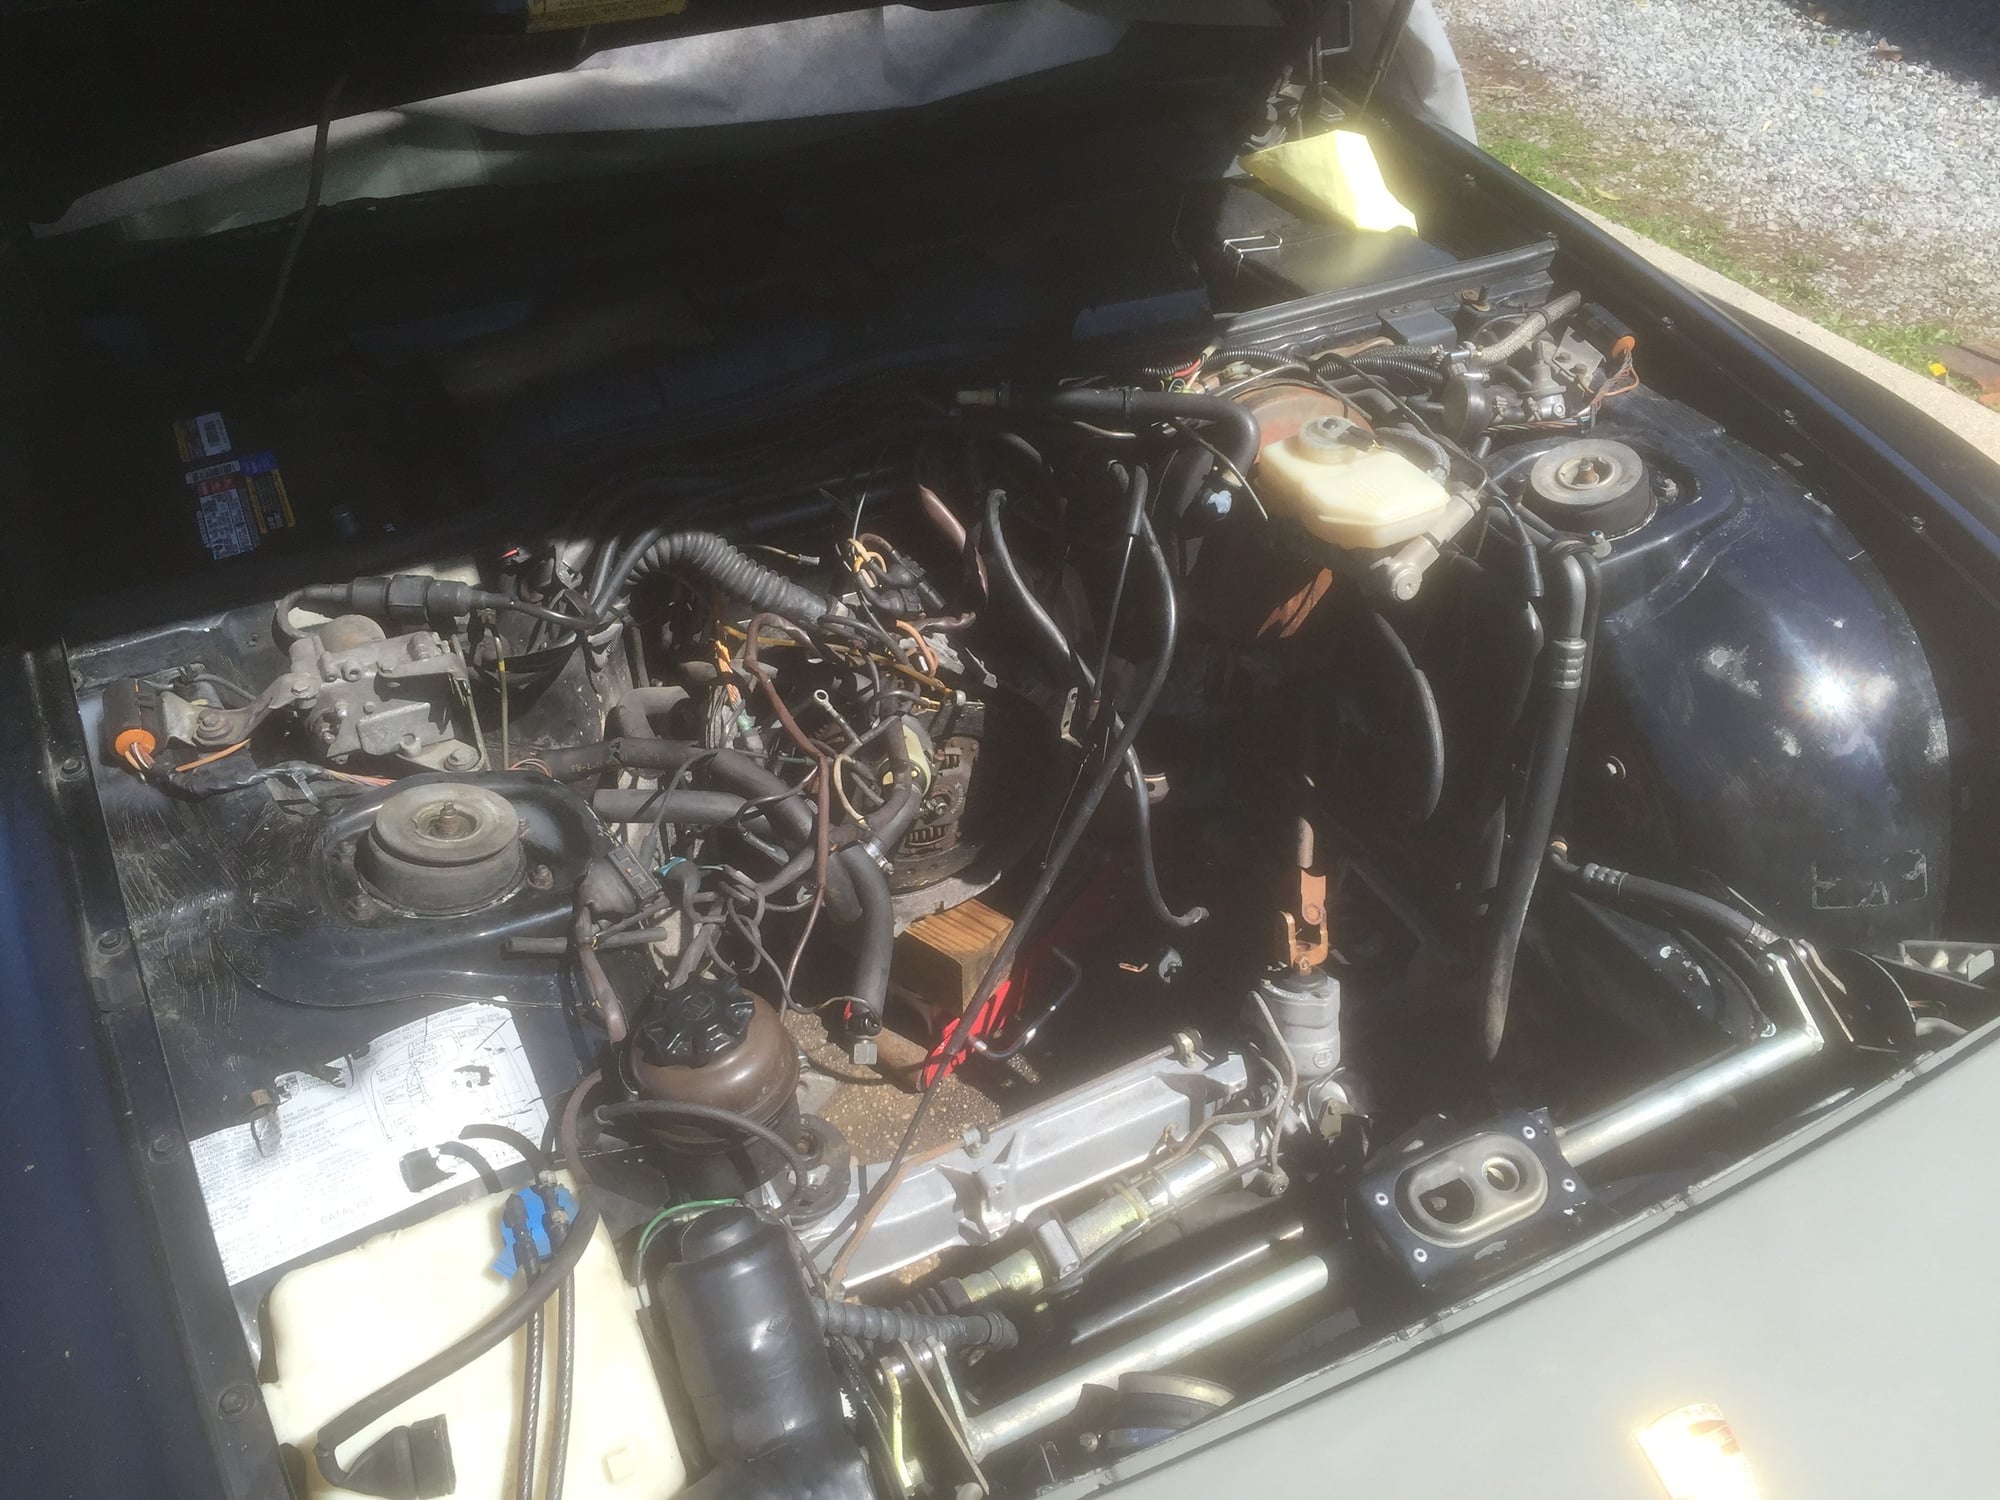
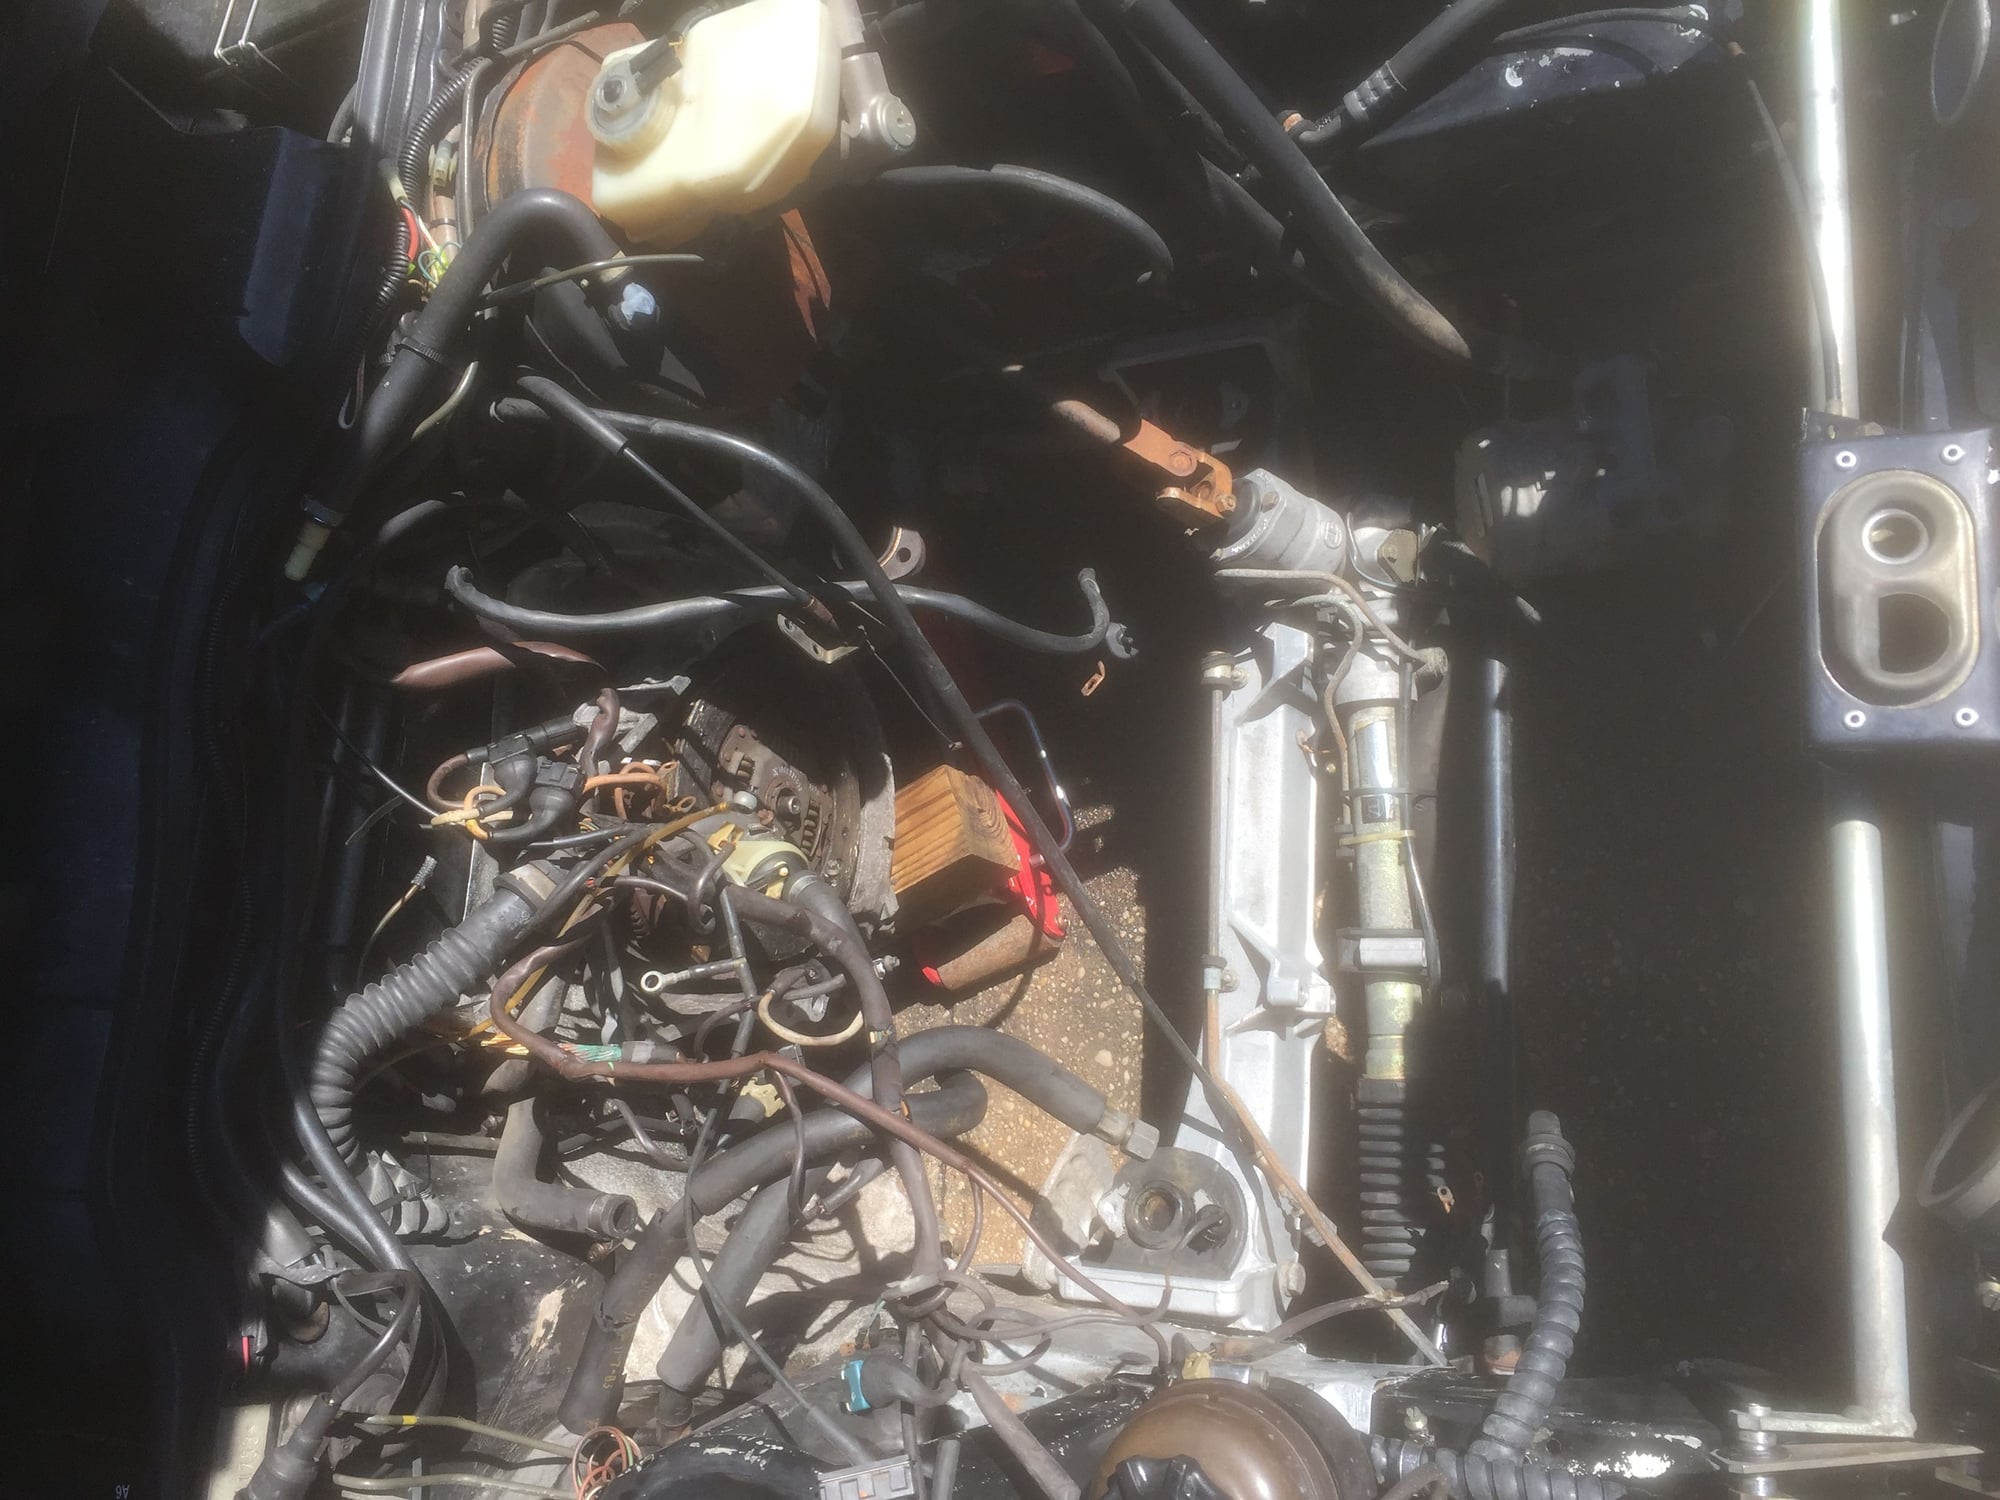
Glad I decided to try pulling the motor out the top, seemed much easier than dropping the whole front suspension!
Out the top she went! Surprisingly easy!
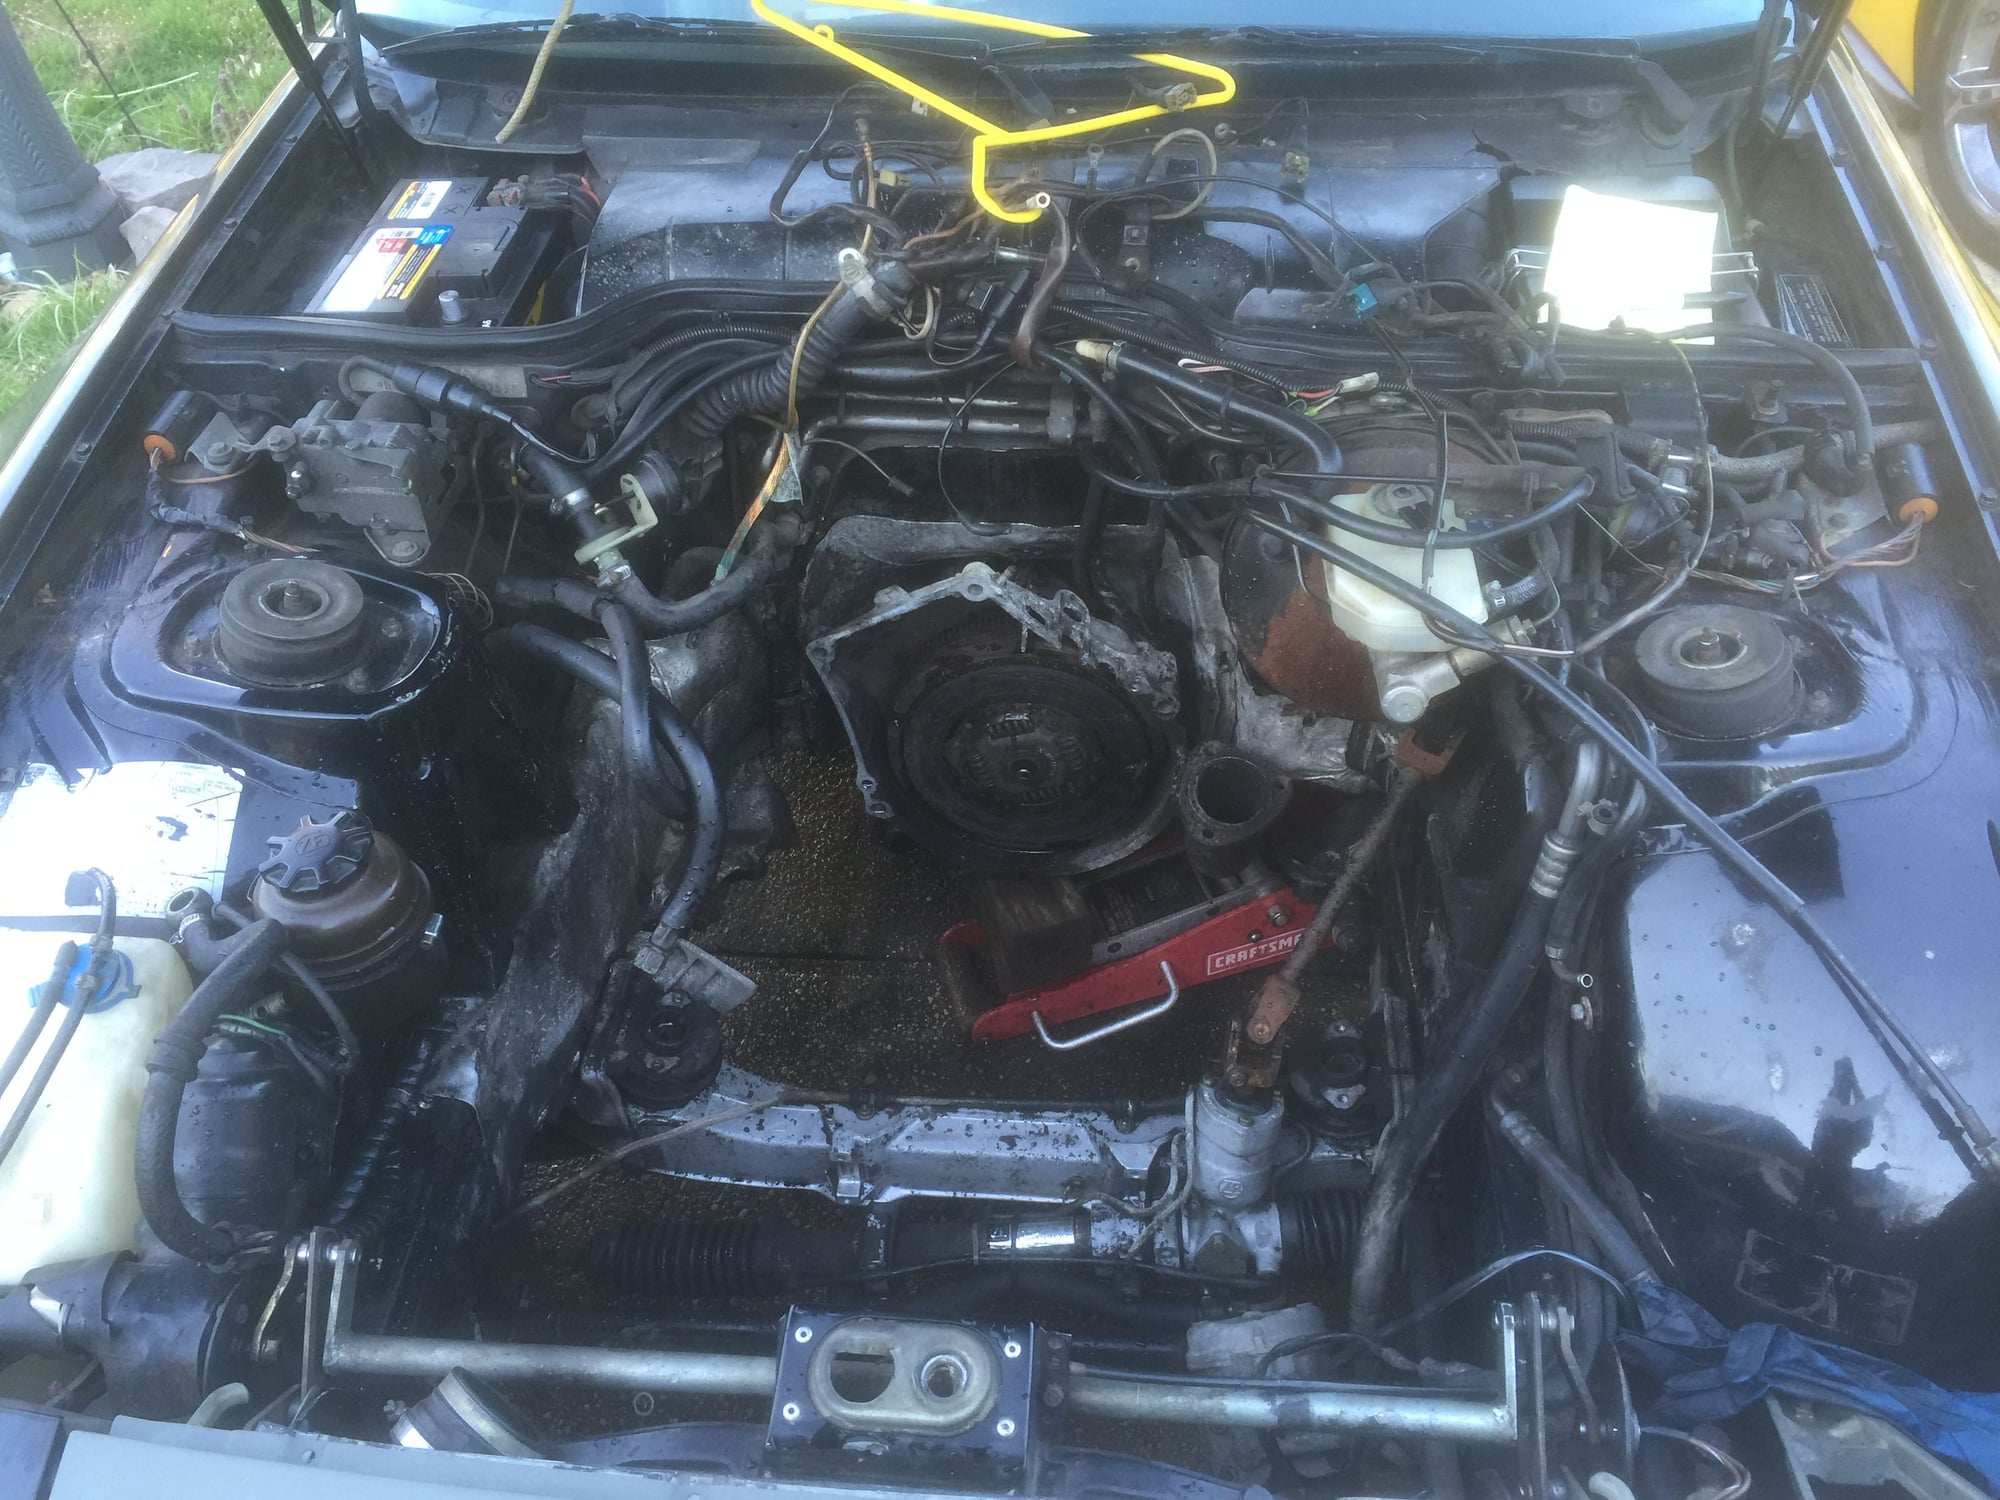
Now I can clean the rest of the grease and grime out of the engine compartment! Tired of everytime I touch something in here My hands get so dirty I need to use goop!
Up close shot of the damage I did to the clutch disc! That really sucks, but honestly I had expected and planned to change it anyway, cup or 930 disc? Opinions? Which one will give less bs? Don't want to have to do this again for a while!!!
POS cheese head screw design that stripped, requiring the heads to be drilled out and then f'd up my clutch!
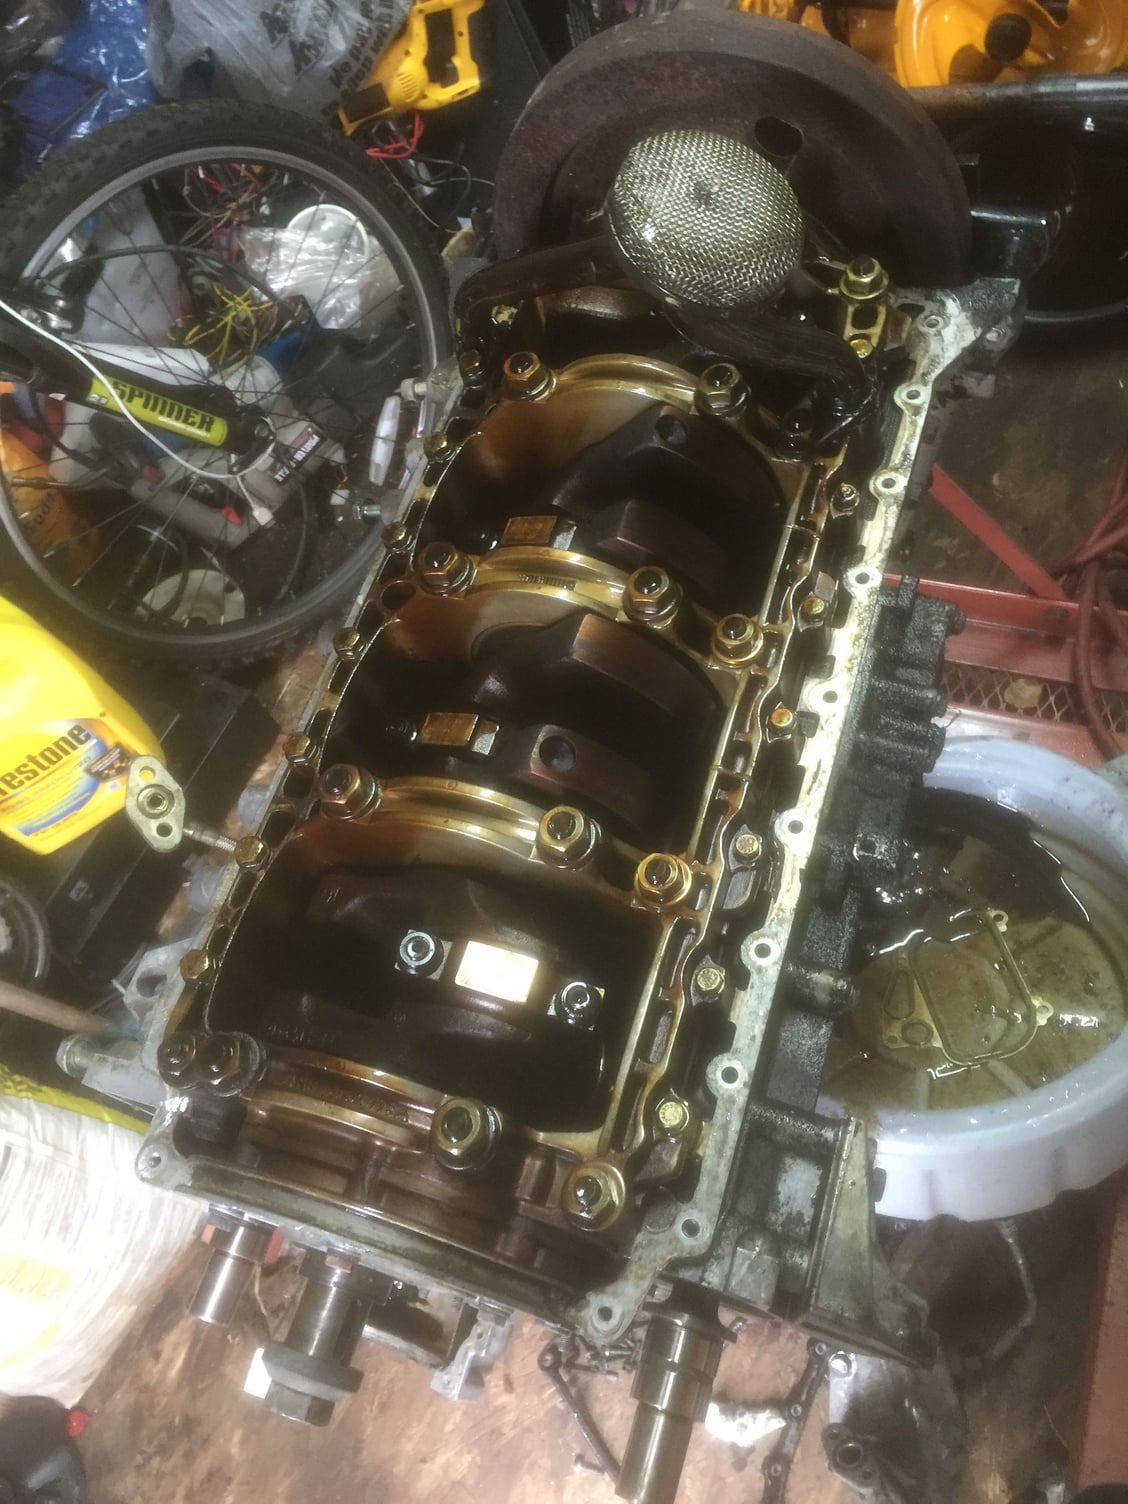
Working on mounting to engine stand, found Ace Hardware sells the necessary bolts
Seems like I'm posting to myself here, anyway I have the motor in pieces and debating on whether or not to do the main bearings or just replace the piston rings and the rod bearings, this is more preventative and for the fact that "I'll" know what's been done to the car, which will basically be a rebuild in a sense. Again any feedback on the topic is appreciated
Power washer does wonders
Finally can touch with my bare hands and no grease!
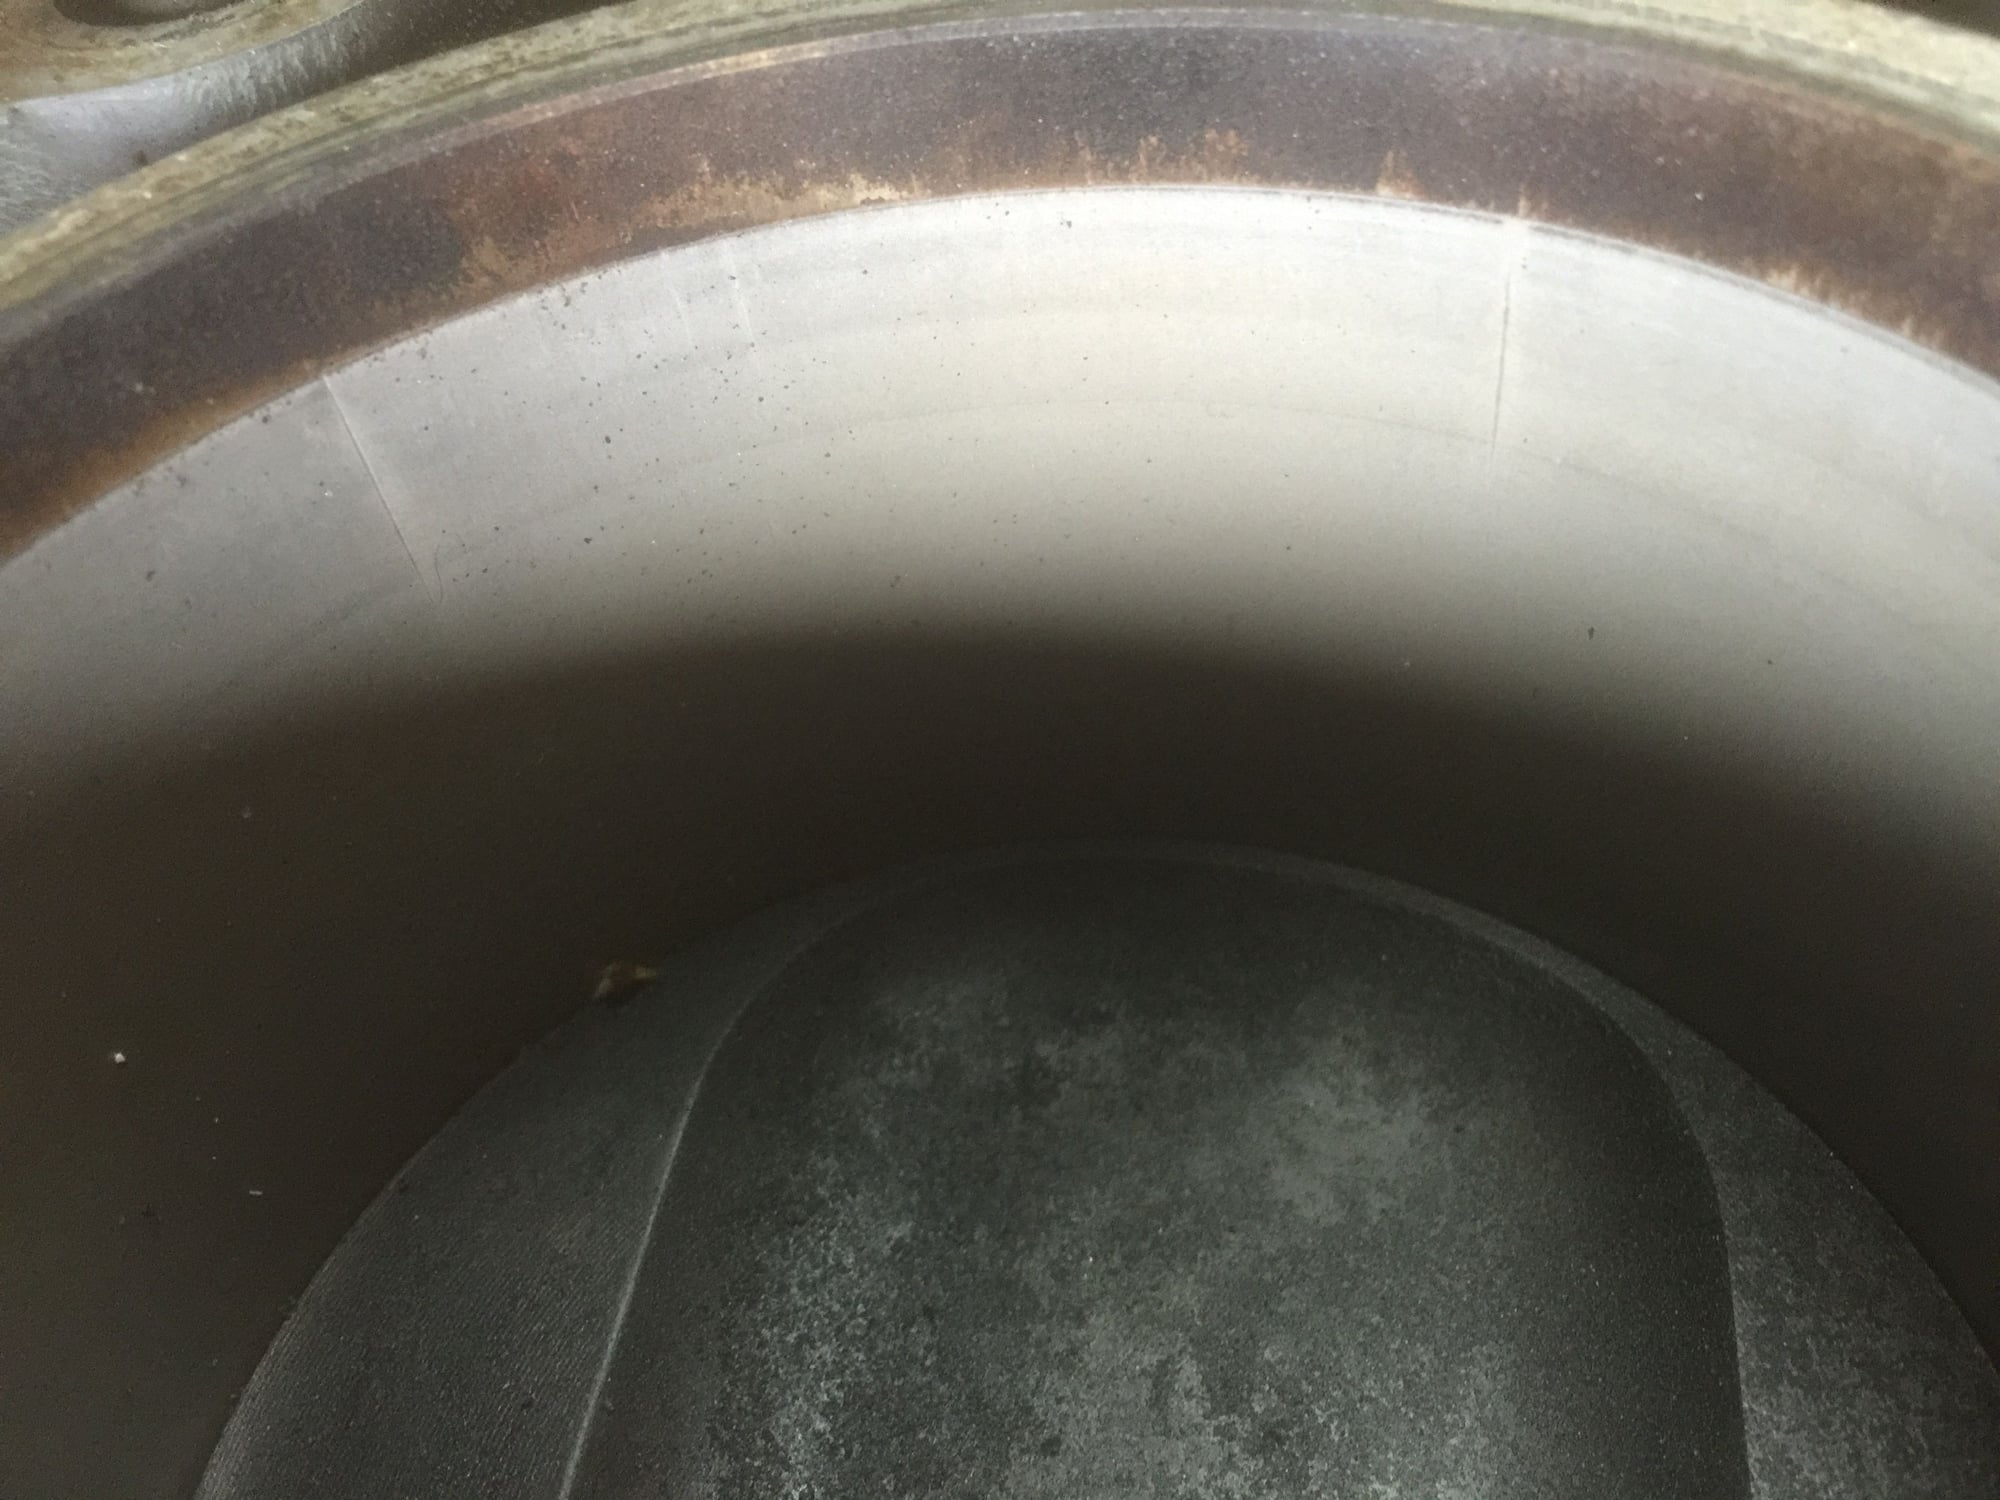
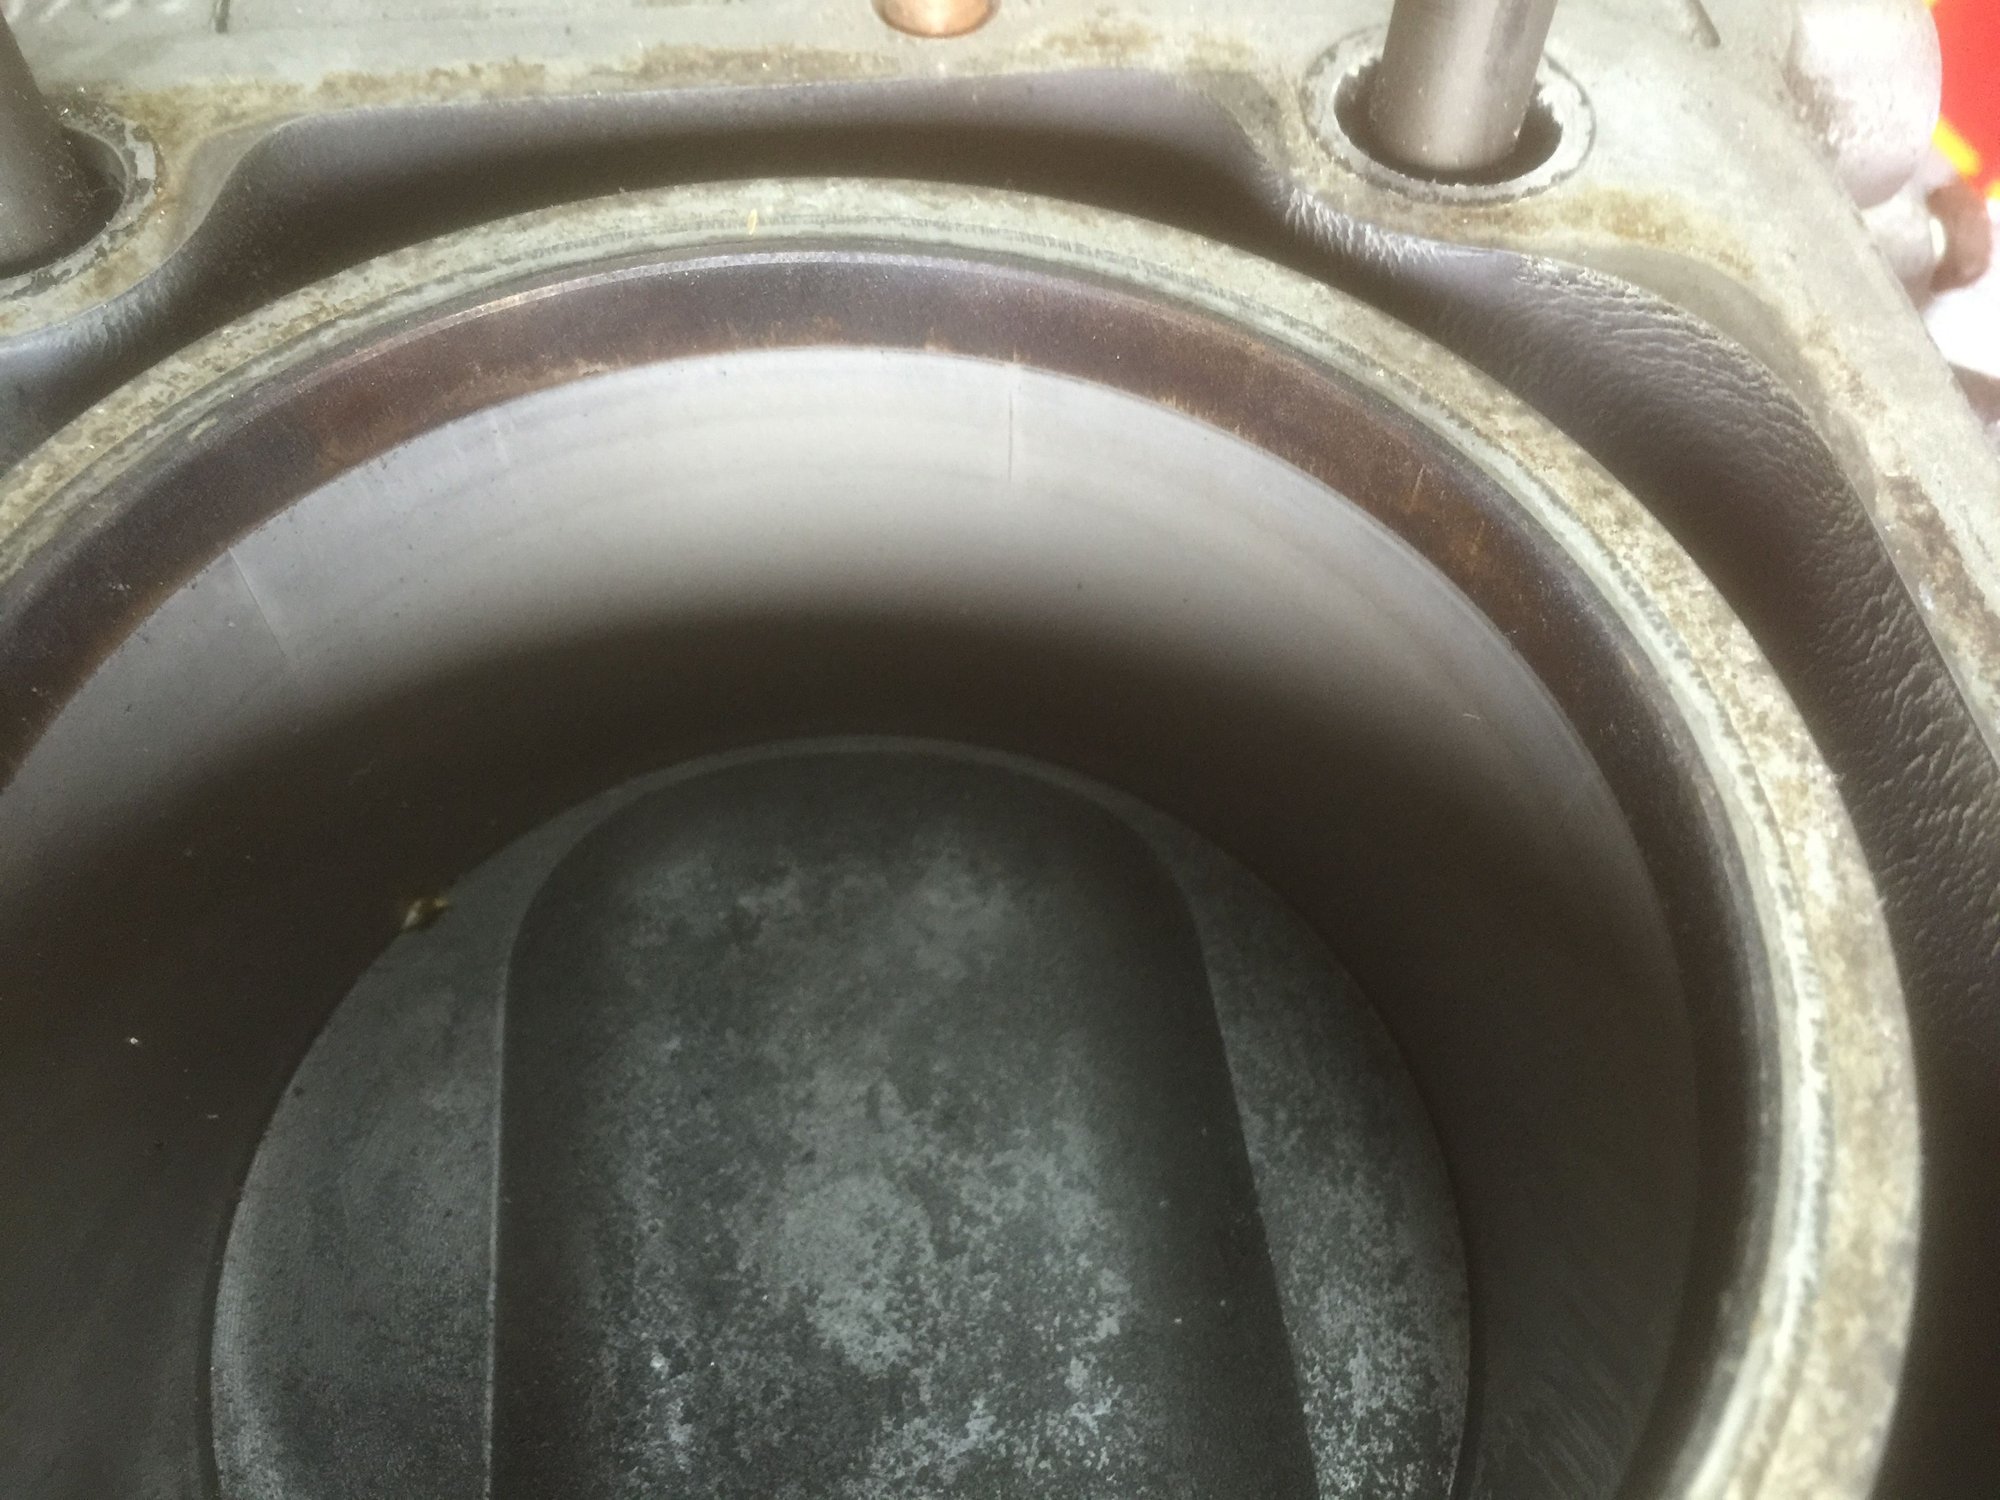
Does that look bad?
Any thoughts?
Can't catch a finger nail on it, only two small ones in the 4th cylinder
Pan off and ready for some clean up
main bearings; to do or not to do that is my question?
I would do the Main bearings since you now have the engine out why not ? They are expensive sure but no better time to change them the engine has even passed 200k miles.
As for the score in the cylinder bore i belive that is quite normal, almost every block i have had or seen has had some damage to it .
Check if the bore is slightly oval and by how much .
Do the rear main seal or else you will wish you did later on
Thanks for the input, glad I took your advise, ordered a set of mains after finding the following:
The PO or whoever worked on this brilliantly used silicone to seal the pan gasket, that crap is all over the inside of the pan
Not much carbon on the Pistons for >200k miles!
More gunk degreaser
Power washed the block again after gunk, and lots of scrubbing
Pretty damn clean
Engine serial # for reference
Rear or # 5 main bearing
This is the reason I'm glad I listened and pulled the crank! The weird thing is the crank doesn't really feel grooved?
The # 4 main again! Damn glad I caught this before it destroyed the crank!
#3 main, not too bad
#2 main
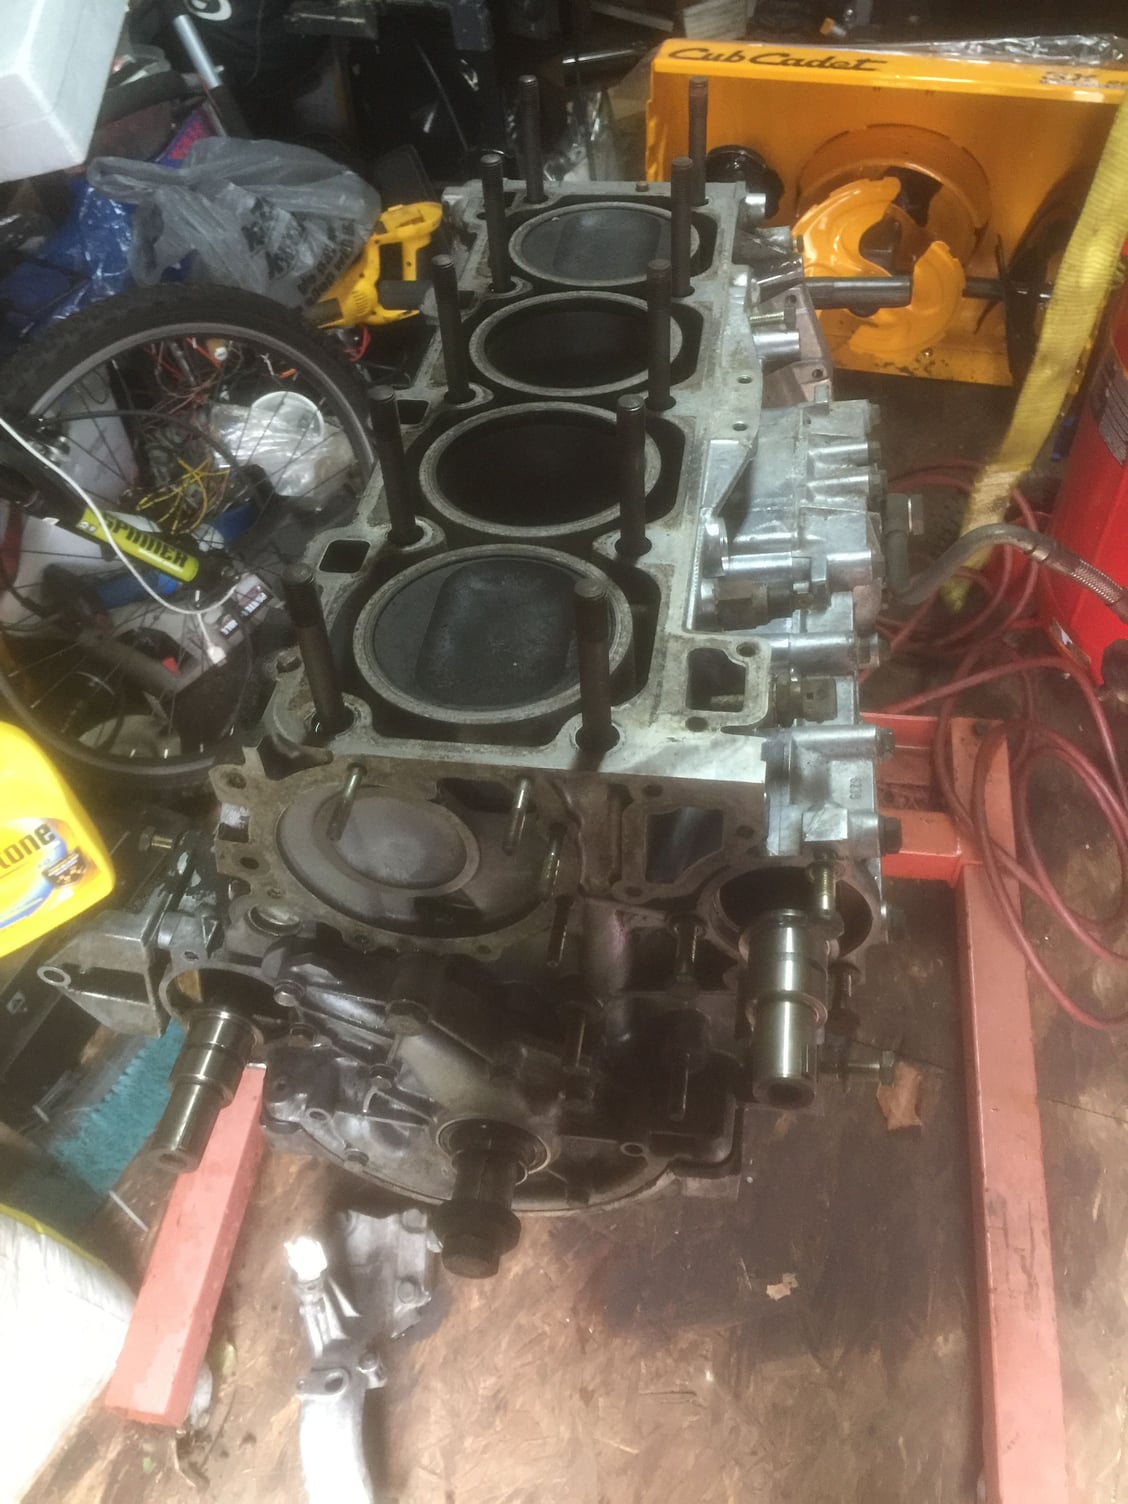
Nice clean block
Don't know if I created more of these when I pulled the Pistons!
The #2 rod bearing, doesn't look too good but think I caught it in time!
Closer pic of the #2 rod bearing, damn guess I choose wisely to rebuild the engine!
This is the #1 main bearing
The #1 main bearing again
Crank #1
Rod #1
Main #2
Rod #2
Main #3
Rod #3
Main #4, do you think this can be polished out? Can barely pick with fingernail
Rod #4
Main #5, does the area where the rear main seal go look ok?
Rod #4
#3 rod bearing
As always any thoughts and recommendations are well appreciated, as this project has gone deeper than I had expected, but at this point I'm all in and no turning back!
What an inspiration!! its been 10 years since i'ved owned one due to an accident, but finally got another one...well the wife bought one for me as a project car for retirement.
Sorry for not having any recommendations but I am closely following this , as I am planning on doing the same thing.
Awesome documentation of your work. keep it up. i greatly appreciate all that you are doing.
Are you using Clarke's Garage as a guide? are there any other references that you would highly recommend?
Thanks in advance
Carl
Congratulations thus far. I always love seeing old run down cars being restored back to their former glory. Are you planning on keeping the motor totally stock? Be nice when you get all the carpets and interior done too.
I bet that groove on the crank will be fine. I had a groove where the RMS seals against the crank and he tried, but it wouldn't polish out. I wouldn't worry about it though. I would still have him polish it just in case there are any high spots along it. Definitely plastigage when you reinstall to see if it sits tighter where the groove is.
Screw stock - if you are that far into the tear down, go for a stroker rebuild!
Very nice documentation.
Thanks, I wish I could afford to go to a stroker but the cost was just too much! I'll probably go with a MAF kit and better turbo at some point! I want to get a spare 2.7 or 3.0 block and make it a beast!
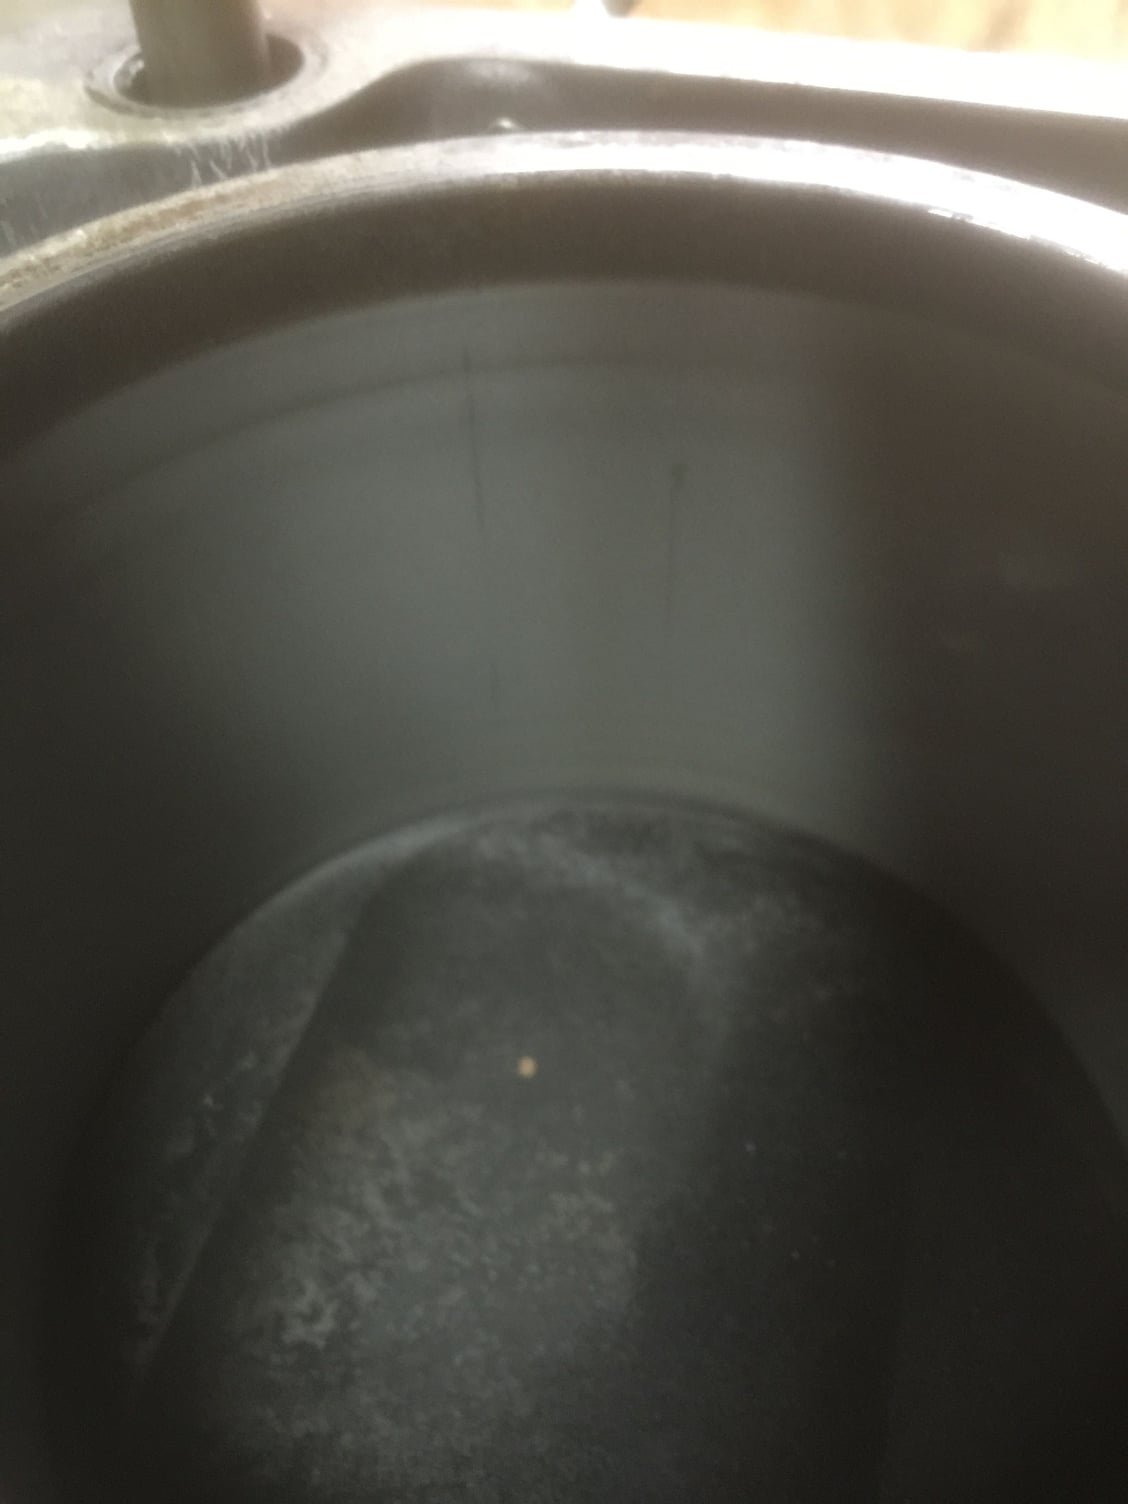
Concerned about these marks on the cylinder walls I chose to get the lapping compound from Goodson
This one had me most concerned
More cleaning.......
Freshly cut flywheel needed some bling factor, mainly I didn't want to it to look all rusty the next time I see it!
Much better!
This crank came out amazing, like brand new! Only cost me $45!
New main bearings
Front main bearing
Crankshaft back in
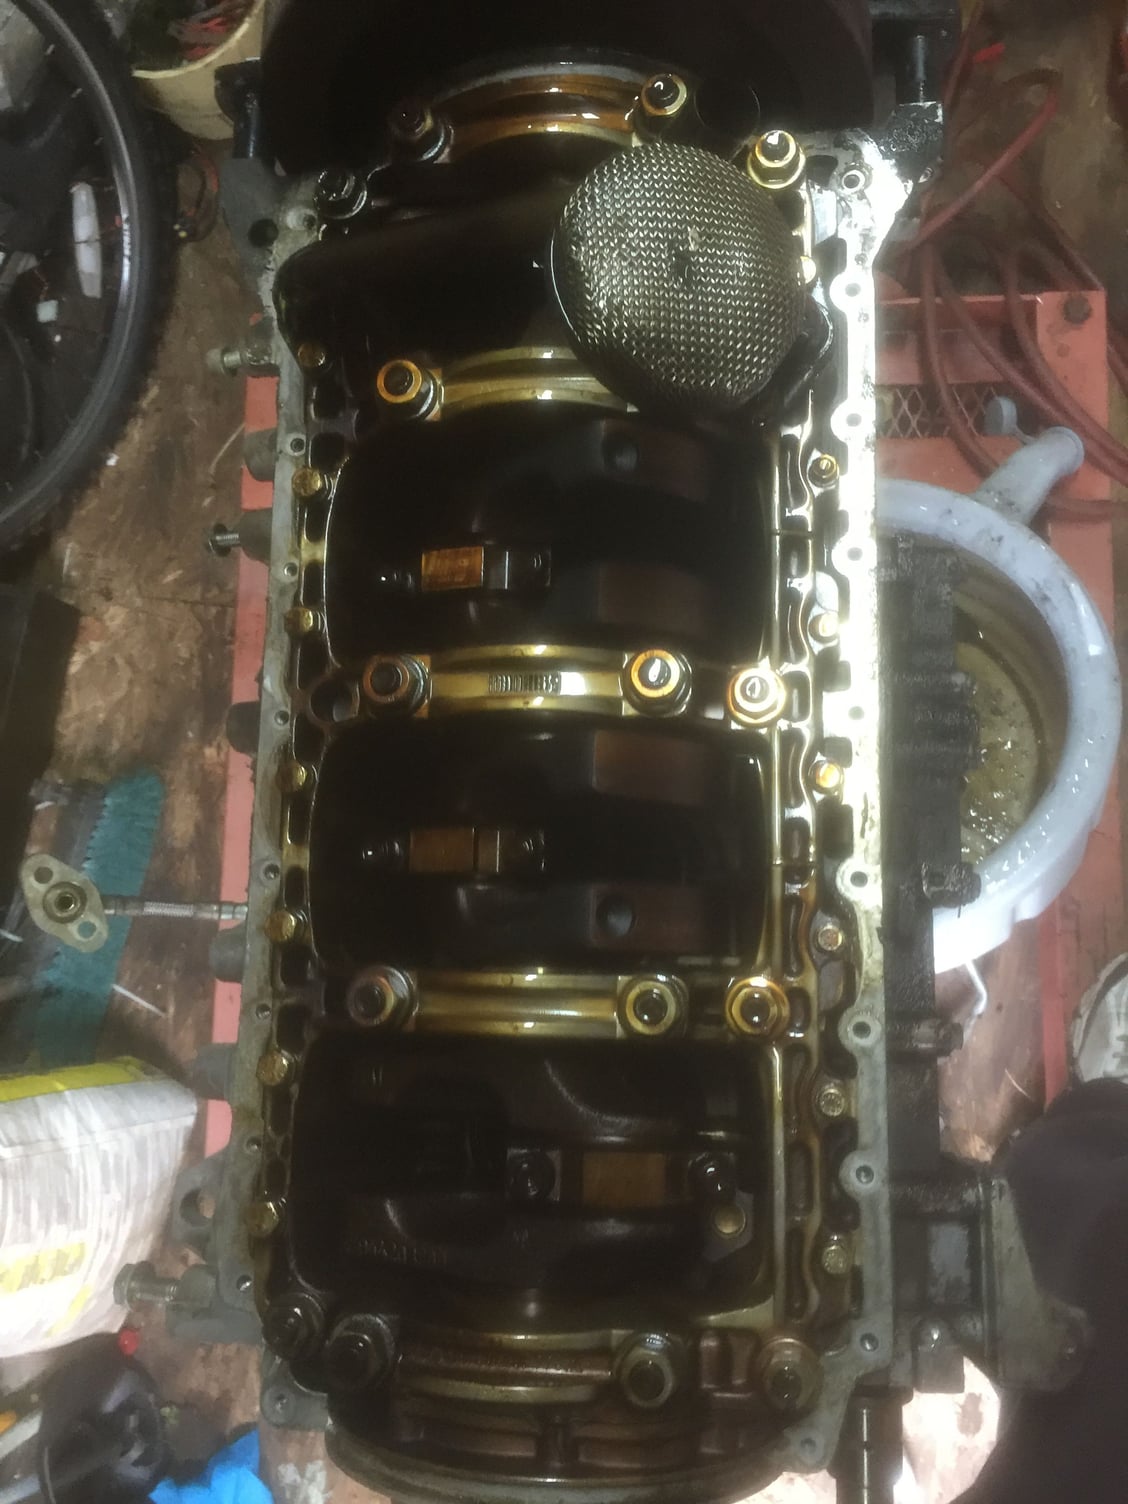
Girdle with mains installed
Here the lapping compound is applied and I used a tool from a cylinder hone to lap the cylinders, (don't know why these pics are out of order)
Finished outcome of the cylinder lapping
These came out awesome for the first time attempting this on an alusil engine!
This was the one I was concerned about, while the mark is still there it is not as bad as it was beforehand
My welder added this brace but I had to remove it because the plastic baffle caused interference, this is in addition to the L-shaped bracket I bought from paragon
What an inspiration!! its been 10 years since i'ved owned one due to an accident, but finally got another one...well the wife bought one for me as a project car for retirement.
Sorry for not having any recommendations but I am closely following this , as I am planning on doing the same thing.
Awesome documentation of your work. keep it up. i greatly appreciate all that you are doing.
Are you using Clarke's Garage as a guide? are there any other references that you would highly recommend?
Thanks in advance
Carl
Thanks Carl, glad to be an inspiration! Best of luck with your new ride, you'll have to post some pics! And yes there a several resources I use: clarkes, this forum, pelican parts is great for both guides and parts!
Cleaned up bellhousing
New pressure plate
Engine installed!
It's almost lookin complete!
Sprayed it with aluminum engine paint
While expensive, well worth the cost for replacing 30 year old rubber hoses with a silicone kit from Lindsey, even comes with new clamps and every single hose needed!
Engine a tdc and starting to come together
New head gasket
Rebuilt head: cut valves, new guides, springs, etc, this is basically a brand new head!
The letters were hand painted with white engine paint
Stock headers were sandblasted, repaired at all flanges and coated in silicon, I wanted to keep it fairly original, aftermarket headers are either cheap OBX or $1000 Billy boat options, I went with repair and coat the oem
Head and headers installed
Camshaft housing installed and timing belt, balance belts installed
Timing dead on!
Working on installing the turbo and rest of exhaust and wiring, more to come................
awesome job!!! did you happen to keep a tally of all expenses, parts, machine work, etc?
you work fast btw.
4 mths left on this contracting job in saudi.
how expereinced are you in rebuilding engines?
reason is, ived never done one ever. but i'm a bit mechanically inclined.
Amazing work! You are really going to enjoy the car after all this is done. Keep posting with your progress really like detailed threads like this.
As for Cheese head bolts are fine as long as you have a very high quality bit for them i have removed 5 or 6 clutch discs on different 944 cars and yet to strip one when using a impact gun.
For stock to medium power it is hard to beat the cup cluch feels only slightly stiffer than stock and supports more.
Mine slipped like crazy with 24psi boost and E85 5th gear above 5000 rpm but was always fine for 15-18psi when the setup is suppose to give around 300-330whp
Nice build! I would atleast pull the turbo apart to check the bores/bearings. Worst case get it balanced and reassembled. Check my build thread for some pics on how my turbo looked


 04-11-2016 | 11:20 PM