When you click on links to various merchants on this site and make a purchase, this can result in this site earning a commission. Affiliate programs and affiliations include, but are not limited to, the eBay Partner Network.
Blade 7 . There is a reason as to why I built 944 spec engines in San Diego and why I now work in the Vehicle Engineering Test Group at Tesla Motors
Can't imagine what working at Tesla has to do with measuring piston bore diameters!
Seriously, though, any tips to share on using snap gauges to measure piston clearance? I couldn't do it. Bought a .0001" dial bore gauge on ebay (Starrett 84) which was much easier to use.
Seriously, though, any tips to share on using snap gauges to measure piston clearance? I couldn't do it. Bought a .0001" dial bore gauge on ebay (Starrett 84) which was much easier to use.
I find them tricky to use, making sure you are at the largest dia of the bore and locking it off it seems easy to read under. Trial setting the gauge in a mic or vernier until it fits the bore seems easier.
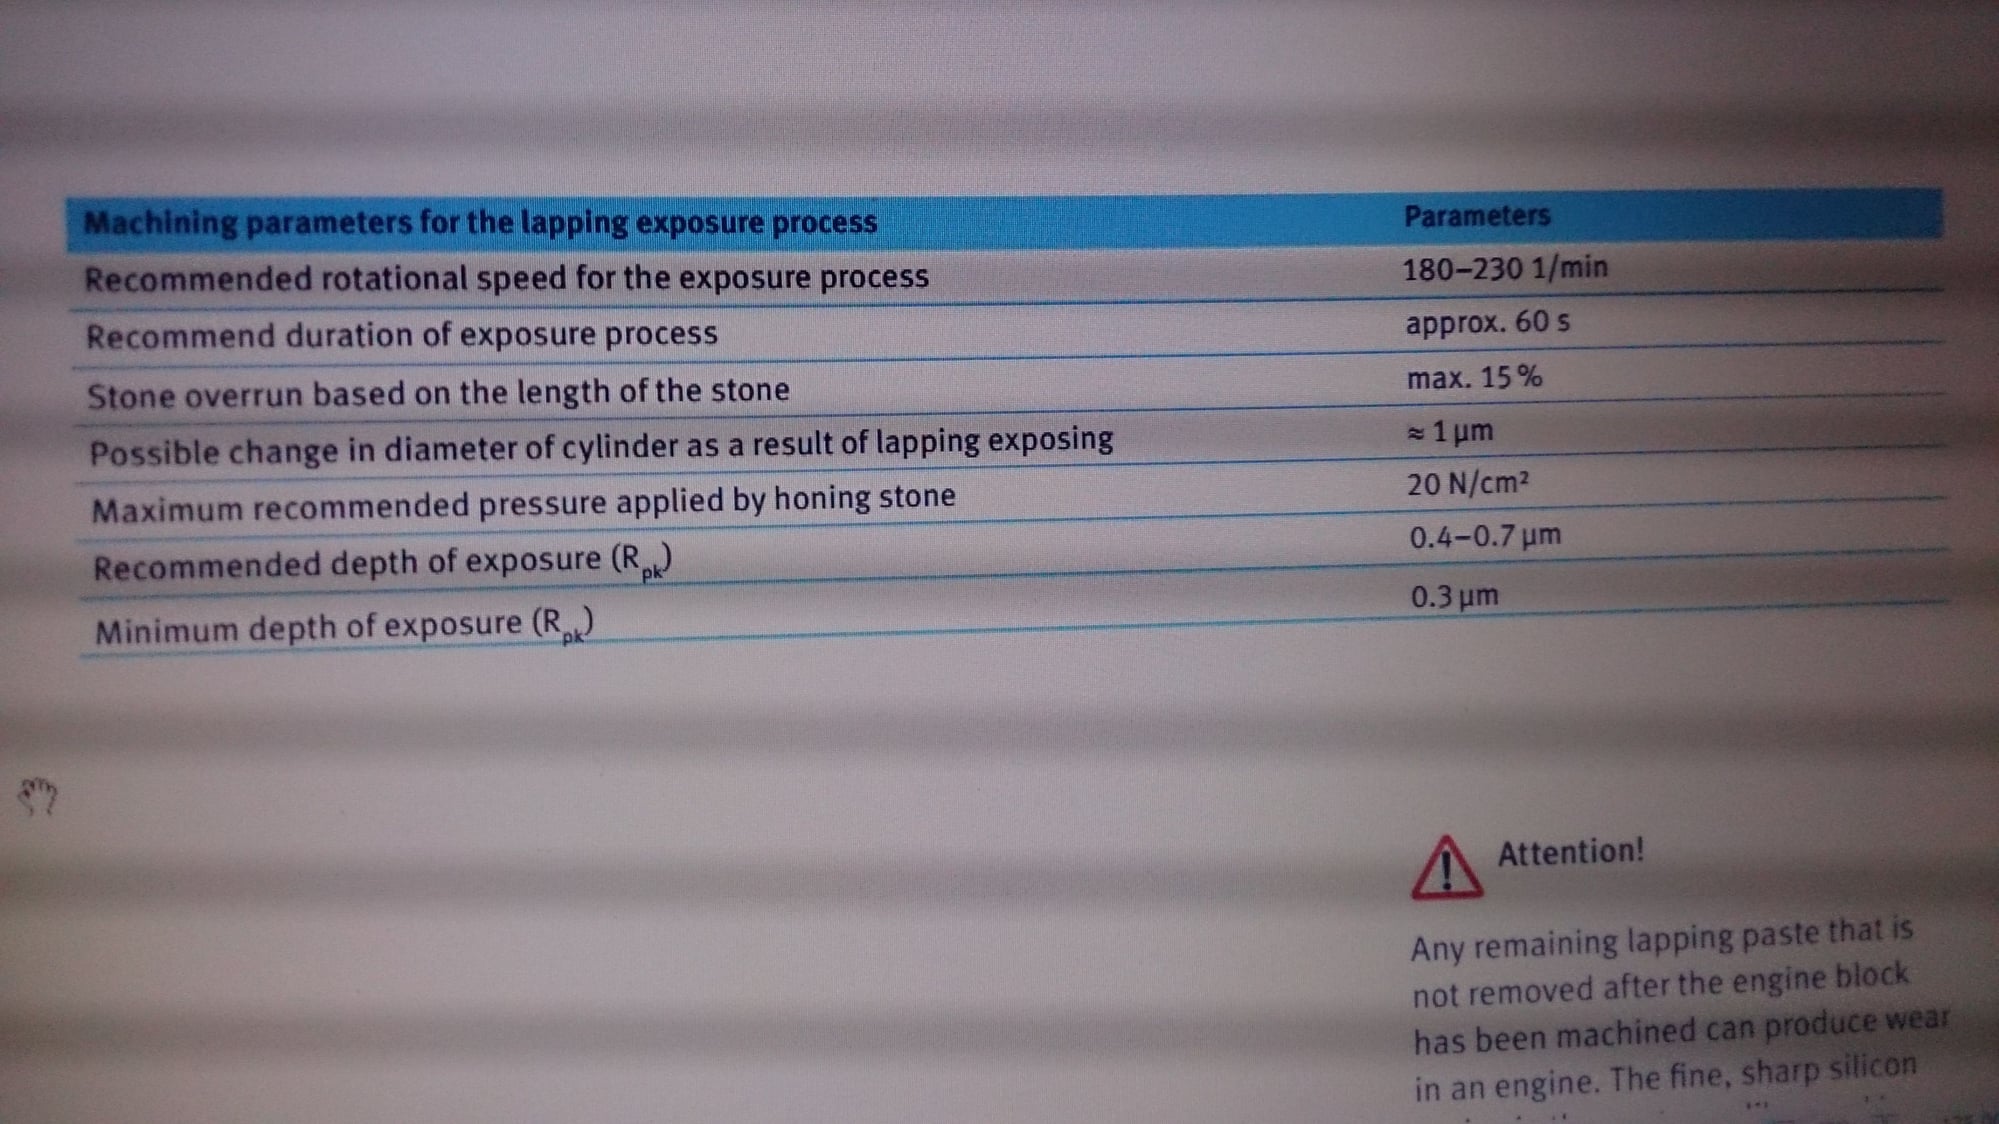
Better safe than sorrow. I will do the lapping part myself, manual says it it self limiting procedure so Id rather see silica is more exposed than less.
Havent seen the first one, Ive read other two trough and much of the KS AluSil manual.
Second link you posted contains this:
The final exposure step requires a new specially developed, elastomer-bond abrasive (XM27), using light honing force. For the exposure step, we recommend tooling with the greatest abrasive surface contact area. This step is based on time, typically 1-1 � minutes for 19 �in. (0.5 �m) exposure height. Longer cycle times are not harmful, because the process is somewhat self limiting. It is absolutely critical that honing force or pressure be kept as low as possibly, while still maintaining tool stability. Surfaces shown in the accompanying illustrations were honed with less than 5 lb/in2 pressure.
I will gently rub AN-30 in it for another minute per bore.
Better safe than sorrow. I will do the lapping part myself, manual says it it self limiting procedure so Id rather see silica is more exposed than less.


 03-07-2015, 10:21 AM