

Engine Stopped - HELP
 08-21-2012, 01:18 AM
#61
Race Car
My guess is going to be a broken rod. Probably number 3 cylinder. These things are just old and have been abused at various stages. I had a rod let go coming off idle once so it doesn't always happen under load.
In regards to pulling the engine, I'd just unhook the sensors at the clips and I actually do a quick connect for the oil pressure sensor.
I then undo the inner tie rods, undo the lower part of the suspension from the body and crossmember and tie them out of the way (even with wheels on)
I pull the radiator and then loosen the crossmember and disconnect the steering shaft. Once the hoist is on I remove the crossmember and slide it forward.
Obviously removing all the other little BS first
 08-21-2012, 01:52 AM
#62
Rennlist Member

Join Date: May 2005
Location: Mayflower, AR
Posts: 1,075
Likes: 0
Received 0 Likes
on
0 Posts
I second rod. I had #1 go through the block with cruise control set on level roads. It bent the lower balance shaft and knocked the oil filter housing off the side of the block. Had it been at idle, it may not have done that much damage. Happened so quickly rear wheel locked up before I could get the clutch pushed in.
Unlike Sid I drop the entire suspension. 4 bolts on shock tower, caster blocks, loosen steering shaft, attack engine Crane, pull harness through fire wall, remove radiator, fuel lines, AC Compressor, 4 bolts on torque tube, slave cylinder, cruise control, throttle cable, slide oil cooler out of front bumper, PS hoses, tensions on engine lift, remove bolts from cross member, slide forward and drop. Oh, remove exhaust down pipe back. Leave headers and crossover in place. This is just a quick run through, I am sure I left out a few steps. The WSM procedure is pretty easy to follow. It has you remove motor mount bolts and not remove caster blocks. I find it easier to just drop it all together. YMMV, do at your own risk....
I can send you the WSM procedure of you don't have it handy.
08-21-2012, 02:00 AM
#63
Basic Sponsor
Rennlist
Site Sponsor
Rennlist
Site Sponsor
I second rod. I had #1 go through the block with cruise control set on level roads. It bent the lower balance shaft and knocked the oil filter housing off the side of the block. Had it been at idle, it may not have done that much damage. Happened so quickly rear wheel locked up before I could get the clutch pushed in.
Unlike Sid I drop the entire suspension. 4 bolts on shock tower, caster blocks, loosen steering shaft, attack engine Crane, pull harness through fire wall, remove radiator, fuel lines, AC Compressor, 4 bolts on torque tube, slave cylinder, cruise control, throttle cable, slide oil cooler out of front bumper, PS hoses, tensions on engine lift, remove bolts from cross member, slide forward and drop. Oh, remove exhaust down pipe back. Leave headers and crossover in place. This is just a quick run through, I am sure I left out a few steps. The WSM procedure is pretty easy to follow. It has you remove motor mount bolts and not remove caster blocks. I find it easier to just drop it all together. YMMV, do at your own risk....
I can send you the WSM procedure of you don't have it handy.
Unlike Sid I drop the entire suspension. 4 bolts on shock tower, caster blocks, loosen steering shaft, attack engine Crane, pull harness through fire wall, remove radiator, fuel lines, AC Compressor, 4 bolts on torque tube, slave cylinder, cruise control, throttle cable, slide oil cooler out of front bumper, PS hoses, tensions on engine lift, remove bolts from cross member, slide forward and drop. Oh, remove exhaust down pipe back. Leave headers and crossover in place. This is just a quick run through, I am sure I left out a few steps. The WSM procedure is pretty easy to follow. It has you remove motor mount bolts and not remove caster blocks. I find it easier to just drop it all together. YMMV, do at your own risk....
I can send you the WSM procedure of you don't have it handy.
08-21-2012, 10:56 AM
#65
Rennlist Member
What I'm not sure about is the wiring harness. It seems easy enough to disconnect everything from the engine and lower it out and away from the harness, but Clark's says to disconnect the harness at the DME/KLR and pull them through the firewall. Is there any benefit to pulling that out of the car, or can I just flop everything up and out-of-the-way while I drop the motor?
On the other hand, with the engine out, it's pretty easy to get the harness out, especially if you have an extra set of hands around. If your harness is even a little questionable, I'd recommend taking the opportunity to take it out of the car, inspect and repair it.
Good luck!
08-21-2012, 11:02 PM
#67
Addict
Lifetime Rennlist
Member
Lifetime Rennlist
Member
Thread Starter
All - thanks for all the tips, keep them coming! 
Regarding pulling the harness, most of mine is new with the exception of TPS and MAF wires, so I'm leaning toward leaving it in the car if it doesn't really *need* to come out. Sure would be a great time to upgrade my battery and ground cables, but I need to keep costs down this time around.
Regarding the actual failure, I'll be very surprised if there is a broken rod. While it did quit suddenly at 1,500 rpm or so, I was able to crank it with the starter several times before it tightened up completely and seized. I really think it spun a a bearing and welded something together without breaking anything, but only time will tell.
Gary, I'll probably take you up on that engine crane if you can live without it for a bit. Remind me where you live? I work in Irving and can probably swing by one day after work with the truck.
Lart, I think I see something I need in one of those pictures...
10-08-2012, 11:16 PM
#68
Addict
Lifetime Rennlist
Member
Lifetime Rennlist
Member
Thread Starter
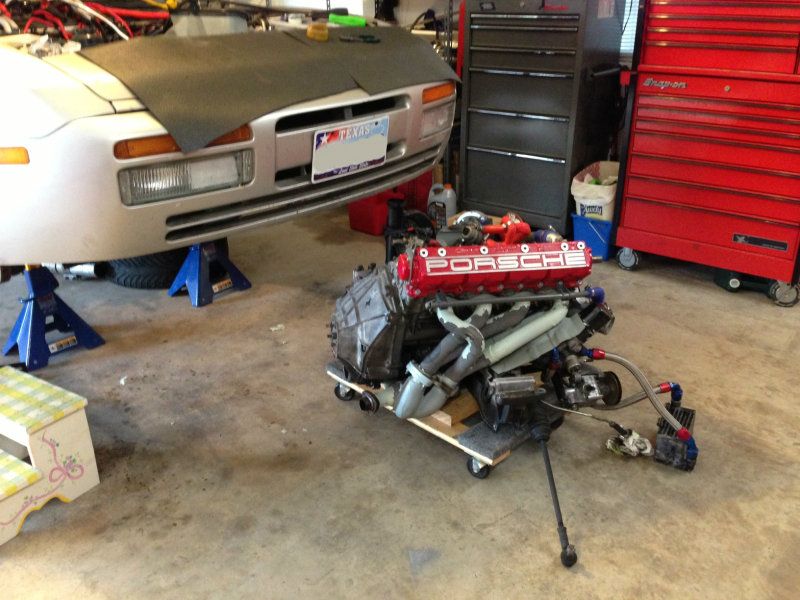
Finally had a few free hours to yank the motor on Saturday. Now to find some M12-1.50 x 70-80mm bolts so i can hang it on the engine stand...
 10-12-2012, 08:09 PM
#71
Addict
Lifetime Rennlist
Member
Lifetime Rennlist
Member
Thread Starter
I just wasted time trying to find M12 x 1.50 bolts at home depot, lowes, and fastenal. Finally picked some up at Zim's this afternoon. I wish I had seen this earlier...  10-13-2012, 12:42 AM
#73
Addict
Lifetime Rennlist
Member
Lifetime Rennlist
Member
Thread Starter
That's only because the picture was taken from a distance. The cam tower has been oozing oil since my reinstall, so I doubt i'll use the LR gasket that requires super-flat surfaces again unless I decide to have both surfaces milled.
I was able to spend a couple hours on it tonight, so the engine is on a stand now and I was able to get the head off. Everything appears to be fine from what I can see so far - there is no cylinder scoring that is obvious on 1 or 4, but I can only see about 3/4" of the cylinder walls on 2 and 3. That little bit looks fine, but I know that doesn't rule out damage, although I think I can see enough to make me hope that the damage is isolated to a rod and/or crank bearing.
The rest of my weekend is pretty well booked up, but I'm going to try real hard to get the pan off so I can see what's going on inside before the weekend is over.
The cam tower has been oozing oil since my reinstall, so I doubt i'll use the LR gasket that requires super-flat surfaces again unless I decide to have both surfaces milled.I was able to spend a couple hours on it tonight, so the engine is on a stand now and I was able to get the head off. Everything appears to be fine from what I can see so far - there is no cylinder scoring that is obvious on 1 or 4, but I can only see about 3/4" of the cylinder walls on 2 and 3. That little bit looks fine, but I know that doesn't rule out damage, although I think I can see enough to make me hope that the damage is isolated to a rod and/or crank bearing.
The rest of my weekend is pretty well booked up, but I'm going to try real hard to get the pan off so I can see what's going on inside before the weekend is over.
10-13-2012, 04:58 PM
#74
Addict
Lifetime Rennlist
Member
Lifetime Rennlist
Member
Thread Starter
Made it to the Zim's swap meet this morning... was nice seeing a bunch of Porsche-folks I haven't seen in a while, and a few that I've seen recently (Hi Gary (GarG on Rennlist), thanks for the engine stand!).
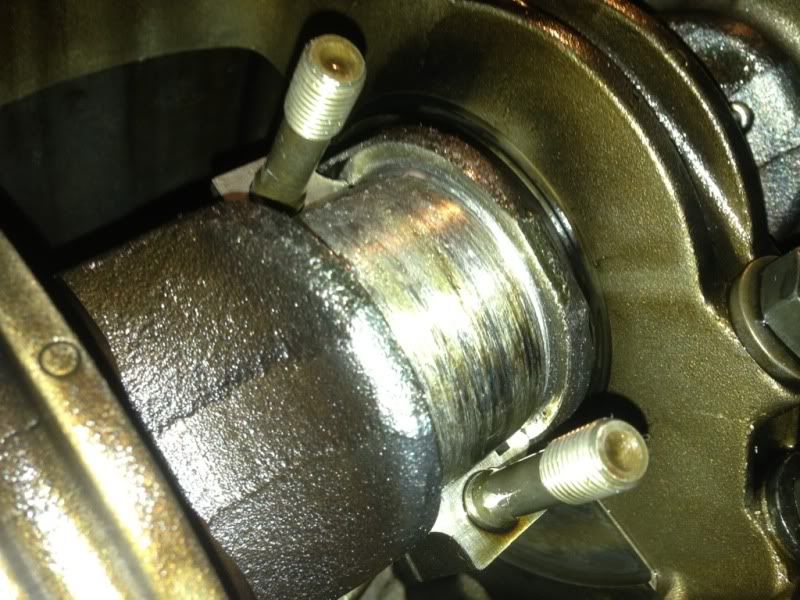
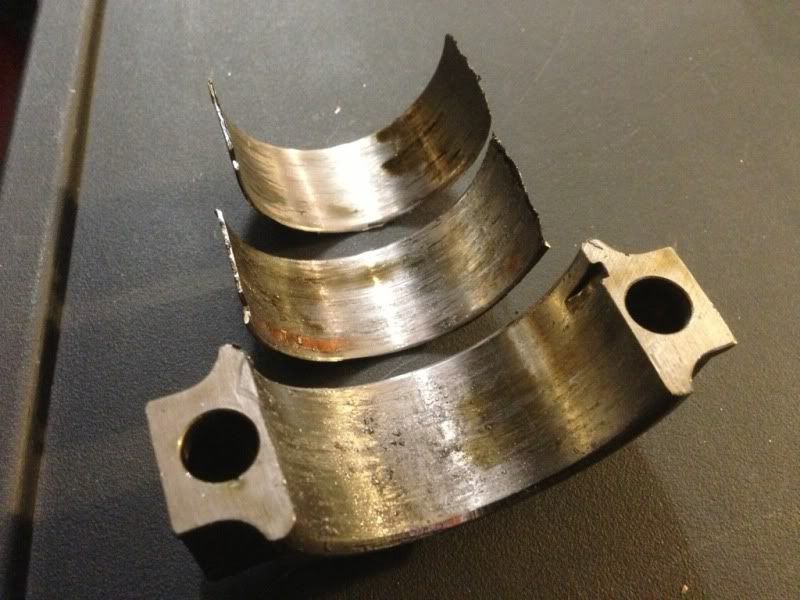
So I ended up with some free time today and was able to get the pan off and discover the problem. The #2 rod bearing spun. Nothing else appears to have suffered any damage.
Now I have to figure out how much work needs to be done to recover from this... obviously my crank and #2 rod need help. Can machining typically correct the damage done by a spun bearing? It seems like the crank could be salvaged, but I'm guessing not the rod? I want to do what's necessary (and smart) while I've got it open, but I'm NOT going to go nuts with bottom-end upgrades. Should I replace main bearings while I'm in here? I suspect that this is an unknown-mileage engine, so assuming it's got 200k+ miles... what are the "smart" things to do while I'm at it?
