When you click on links to various merchants on this site and make a purchase, this can result in this site earning a commission. Affiliate programs and affiliations include, but are not limited to, the eBay Partner Network.
Do you know the weight of the driveshaft by itself? Last night I weighed a fully-assembled torque tube (tube, bearings and shaft) and it was 59lb with the bathroom scale method.
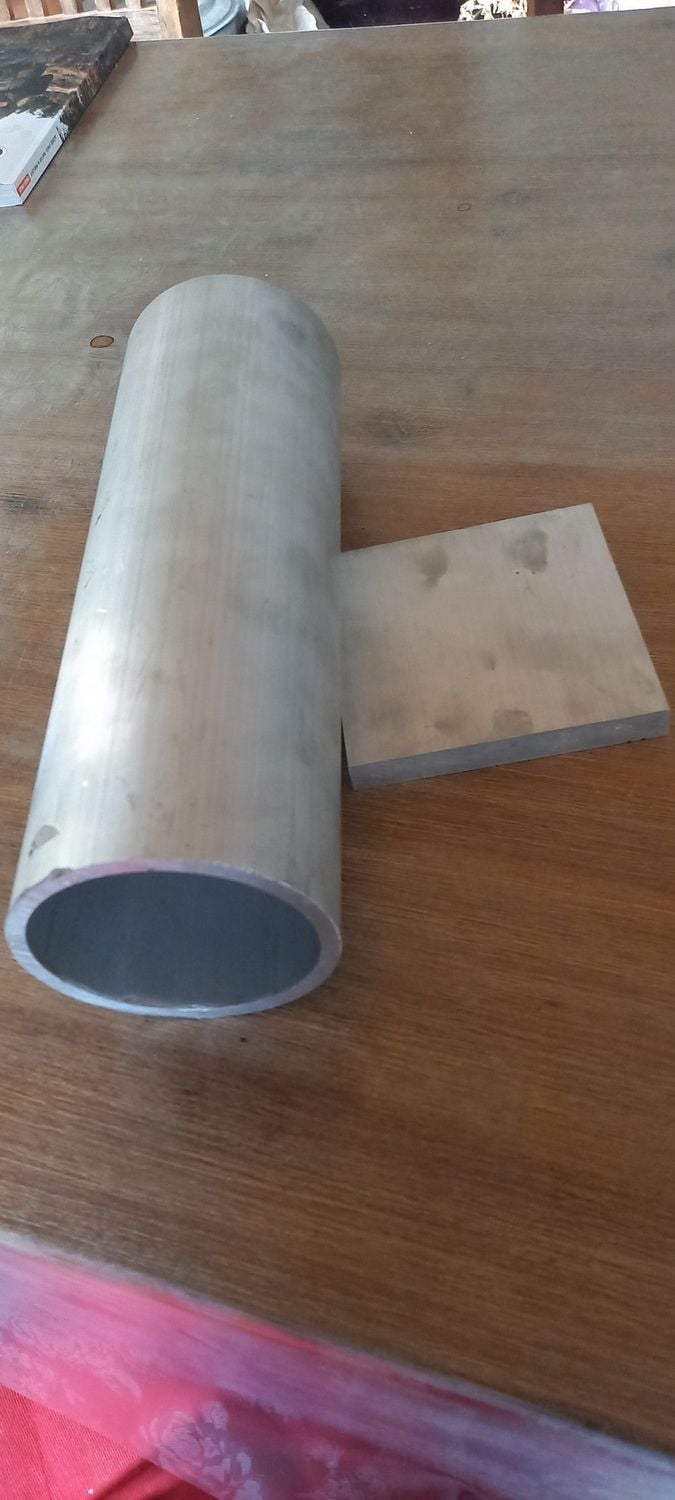
Doing some rough math your estimation of ~20lbs lost between stock steel tube/sched 40 aluminum is just about right.
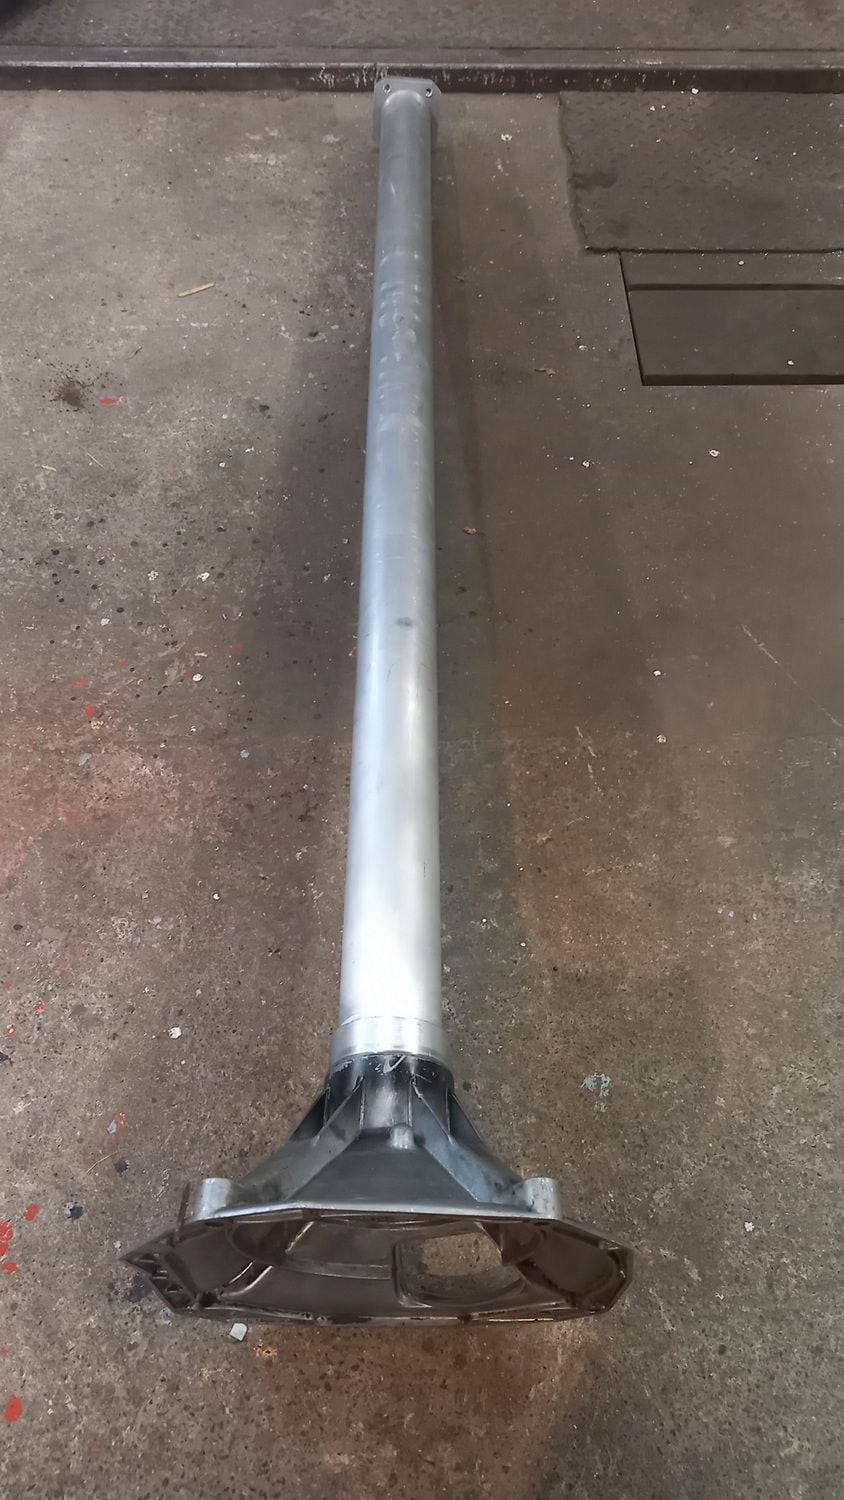
Ha, that's pretty interesting. It seems our bathroom scales are pretty close! I only lost 15lbs. That is easily accounted in the fact that I didn't turn the tube wall thickness to almost half of what it is now. That would have lost another 4lbs... at least. I also used a much thicker / larger bellhousing flange for the Chevy. If it were for the Porsche motor, it would have been 3lbs lighter. SO.. if for a Stock set up, then I'm almost damn sure at this point that it would be at least 20lbs lighter. But I kept the silly thick wall dimension and welded up a larger flange. SO.. only 15lbs lighter. The picture of the aluminum one has the drive shaft just sitting inside and not installed. It also has all 4 bearings and cages wrapped in a bag on top of it.. So this will truly be the weight when It is finished. Just not put together yet.. well. It might be a little tiny bit lighter after I cut off about 4 inches of drive shaft and respline it. . I still have to make locating holes for some locking allen plugs for the bearing cages. I also have to weld on some aluminum squares that are tapped so I can mount some sort of simple shift base. I will then be completely finished with the project when that happens. I hope to get all that done in the next couple weeks when time permits. - I am also working on restoring the fiberglass race panels.. Upgrading them a little. and then painting them a fresh white for now. Final paint job will happen last of course. All white first though.
I've been working on this thing rom 10:15 until just now.. I just finished. I have to get the hell outta here and go meet my mother for dinner!
With some quick math I'm coming up with around 16lbs for the weight of the driveshaft...seem about right? Do you still have the original steel tube section? Around 29lb? Any idea what the cast aluminum weighs?
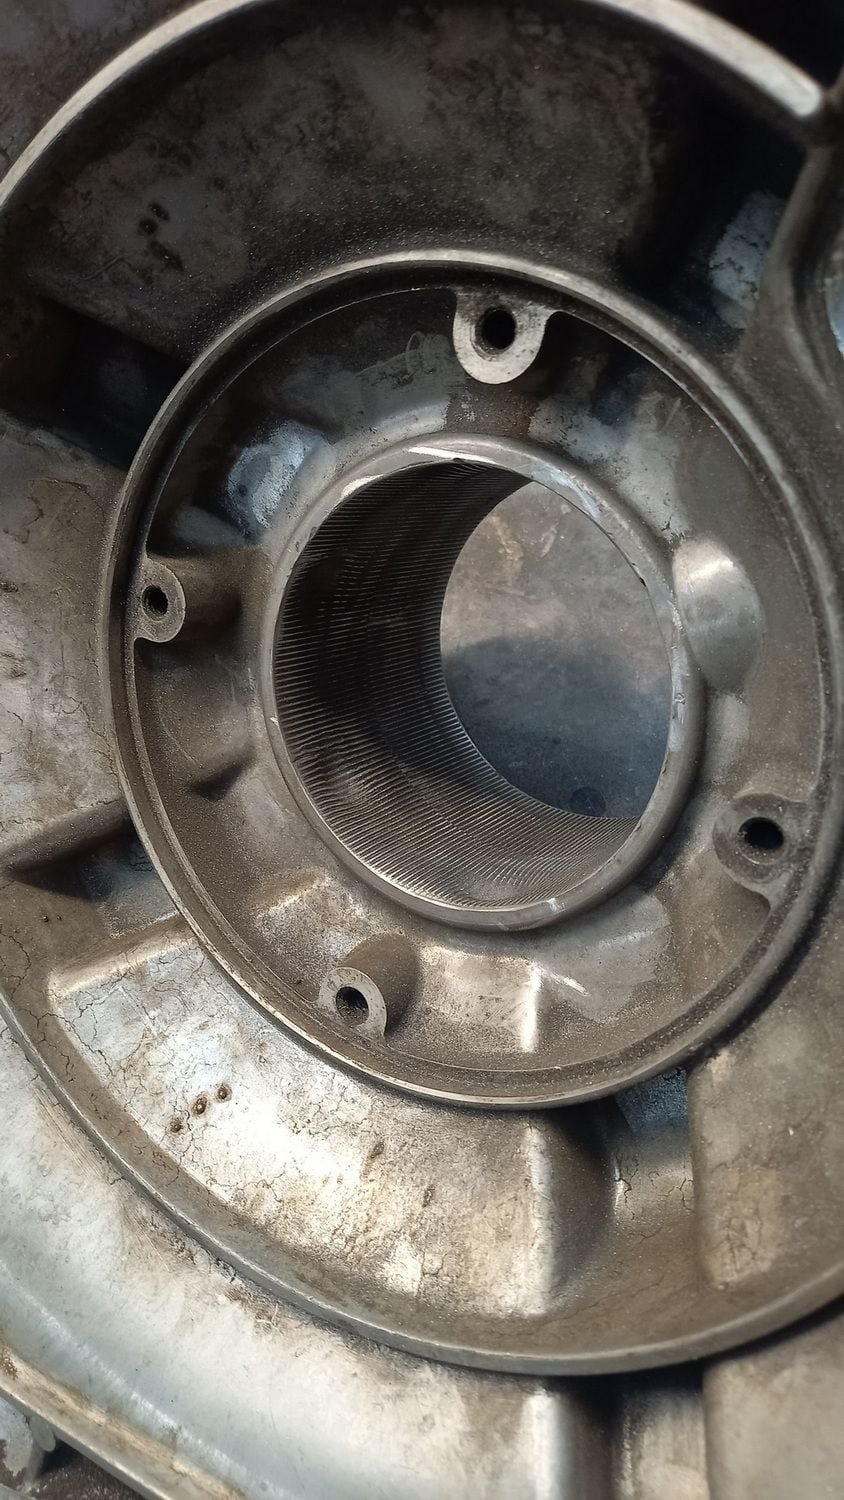
Also, what are the odds some of that casting could be cut down? I know it has ribbing but maybe you could cut it like so...trim the red lines and then weld braces between the open bolt holes at the green lines...****, at that point I guess you may as well just make a new flat flange to bolt on the trans...
Spence, I didn't do the structural 3d simulation or anything , but yeah, I don't see why you can't cut those off. Be sure to replace them with some sort of cover though. I have the driveshaft and bearings out.I can weigh those and subtract it from the 60lbs. That should get you the steel piece weight with the aluminum bell.
Well.. It's finally done. The final weigh in was 43.5 lbs. I cut off 1/2 lb when I shortened the drive shaft. I shortened it by about 3" SO Drumroll..
A total weight savings of exactly 17lbs. I'm shocked I shaved that much much weight off considering the thickness of the tube and the huge flange I added for the Chevy Bellhousing. I'm confident 20-22 is what you would save on one for the Stock 951.
I bought some Delrin bushings for the new bearings from Jager racing or something like that.
I also used an aluminum motor mount that we had laying around. I cut off one corner and used it for my rod end pivot point / mount for the shift lever. It was a nice looking piece, too bad the casting was terrible and extremely difficult to weld. It didn't turn out so bad in the end. The shift lever is pretty customized at this point also. I welded a bolt on top to match the shift handle I bought for extremely low weight. The Kokeln one would be nice, but this one will Suffice for now.
The carbon fiber Shift rod is now cut to length for this guy and complete. I had to wait until everything was finished before I could cut it to the exact length.. I saved 3 pounds on that guy when compared to the steel one. I think I mentioned that earlier.
I completely rebuilt the crappy E-bay short shift kit. I installed a quality rod end to replace the sloppy, about to fall out one that was there.
The big aluminum thing on top of the Gold solid trans mount is the spacer. The engine and trans sits lower in the car as much as it is tall. This is also why the Shift rod seems so tall off the tube. To reach the top of the tunnel! Believe me when I say it takes A LOT more than a few spacers to get this set up this low in the car.
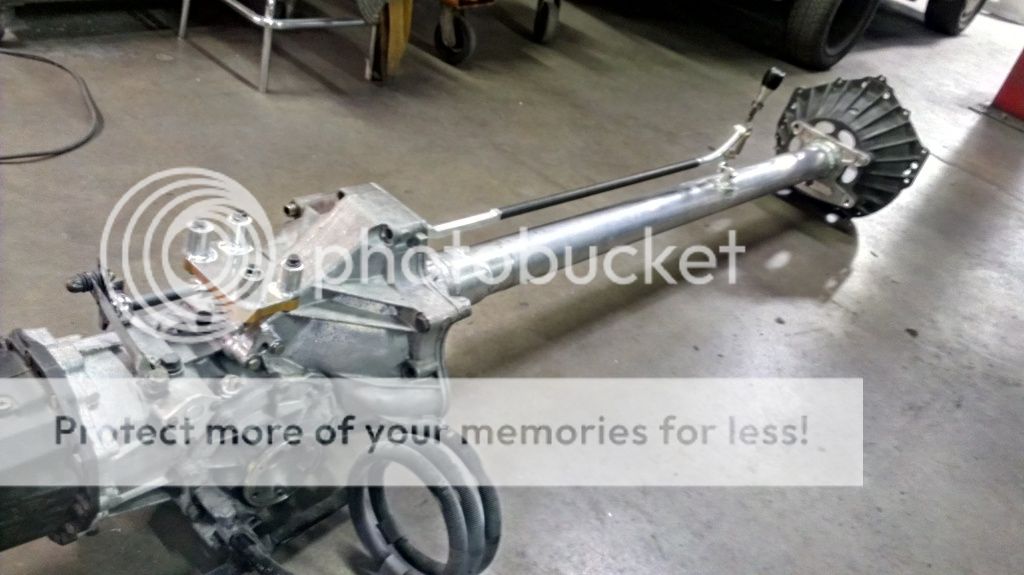
Well, Here are the pics. Not much Porsche left in any of those parts. I had to install everything like this to test every part of it. It shifts without hanging up on anything. The Drive shaft is the in the proper location for transaxle and engine fitment. I bolted the trans to the torque tube and bolted it in place with the coupler locked down. Turns nicely and went on well. It's nice when you plan ahead as much as you can. ...... And it actually works!!! I clearly had to take pics when all the testing was done, so I could share.
I will just describe the pics.
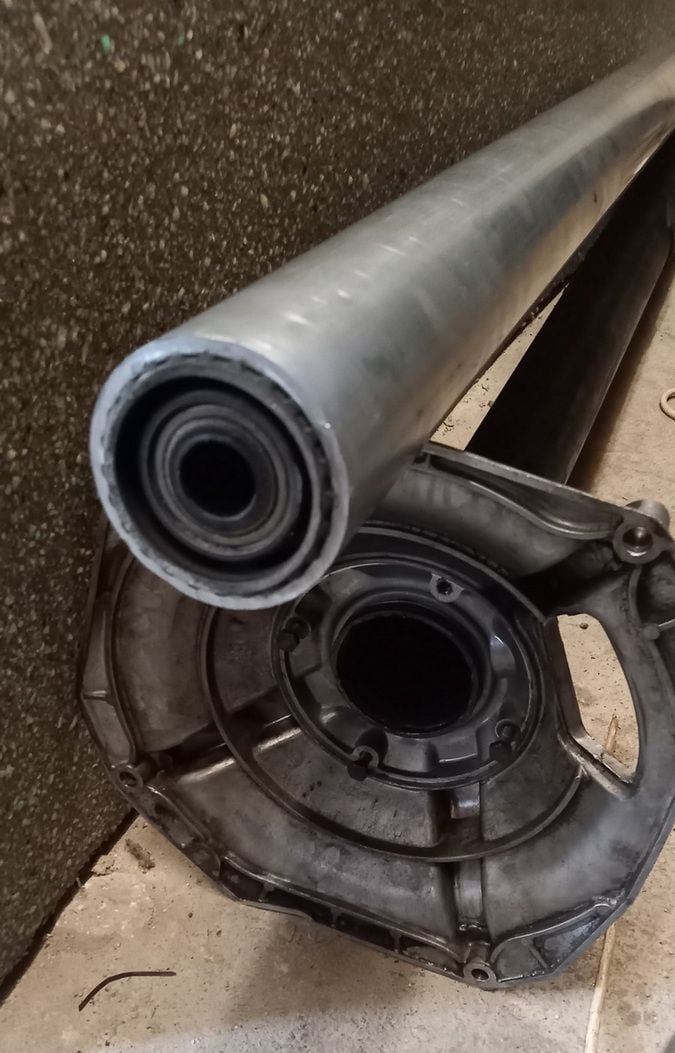
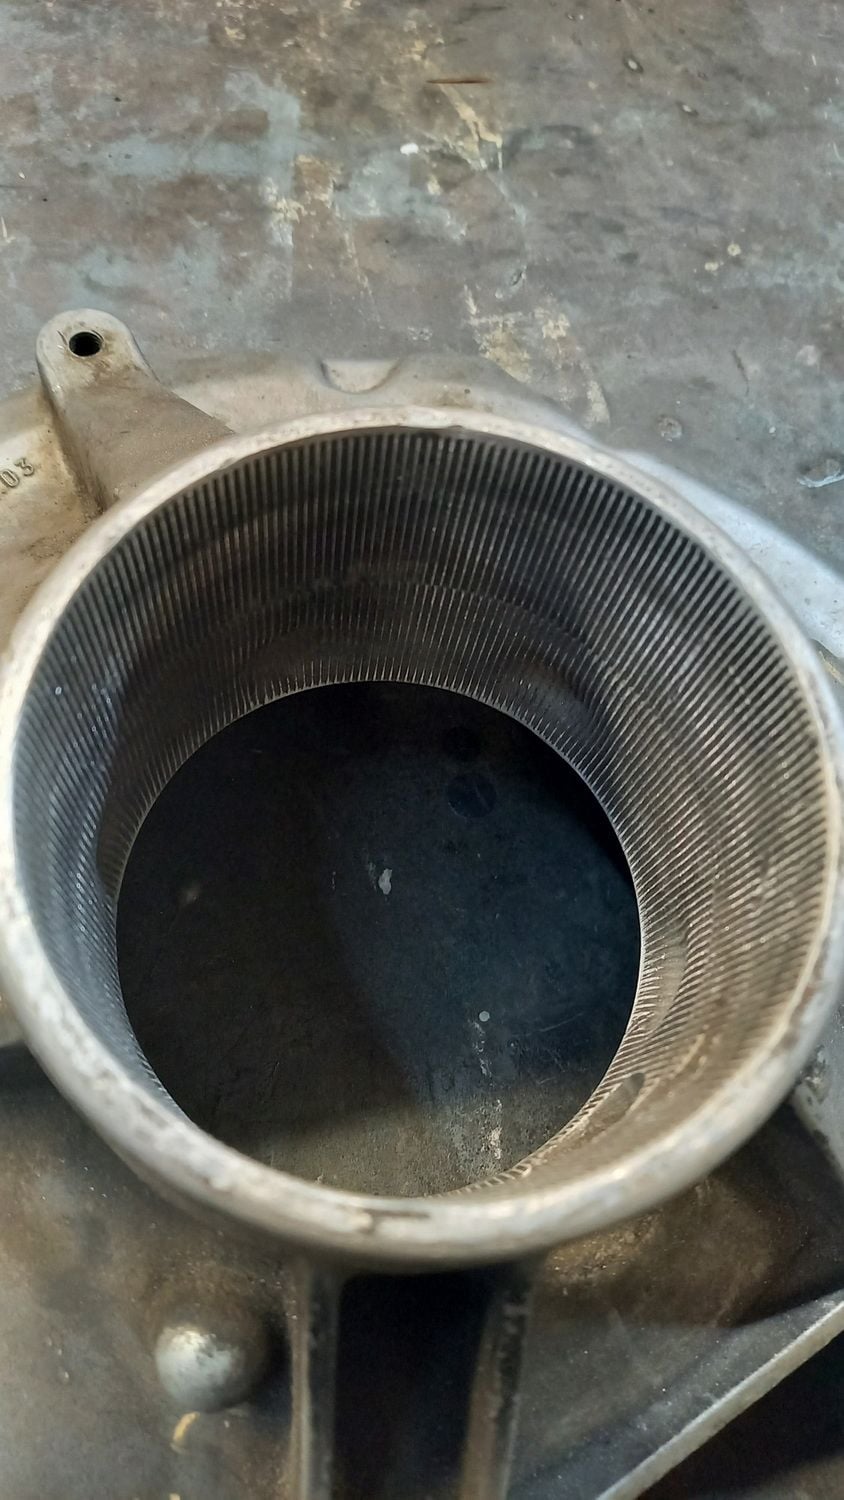
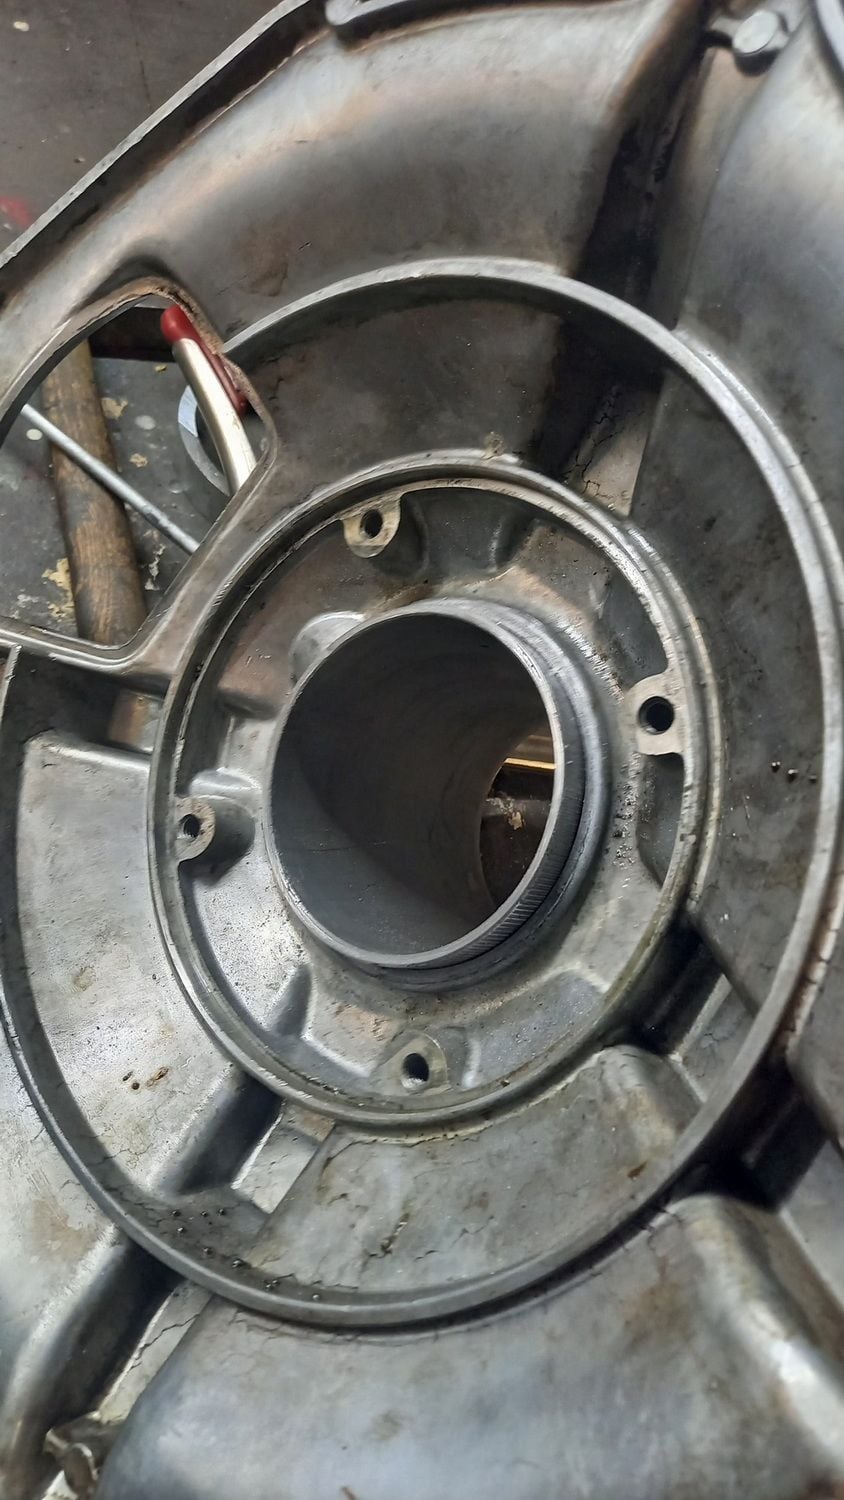
Pic 1. I drilled holes where the bearings where going to go
Pic 2. I tapped them to a M6 x 10 thread for the allen keepers ( I didn't really need them, but feel safe using them)
Pic 3. I installed the keepers with red loctite and screwed them in way past their torque rating.
Pic 4. Tube with axle installed.
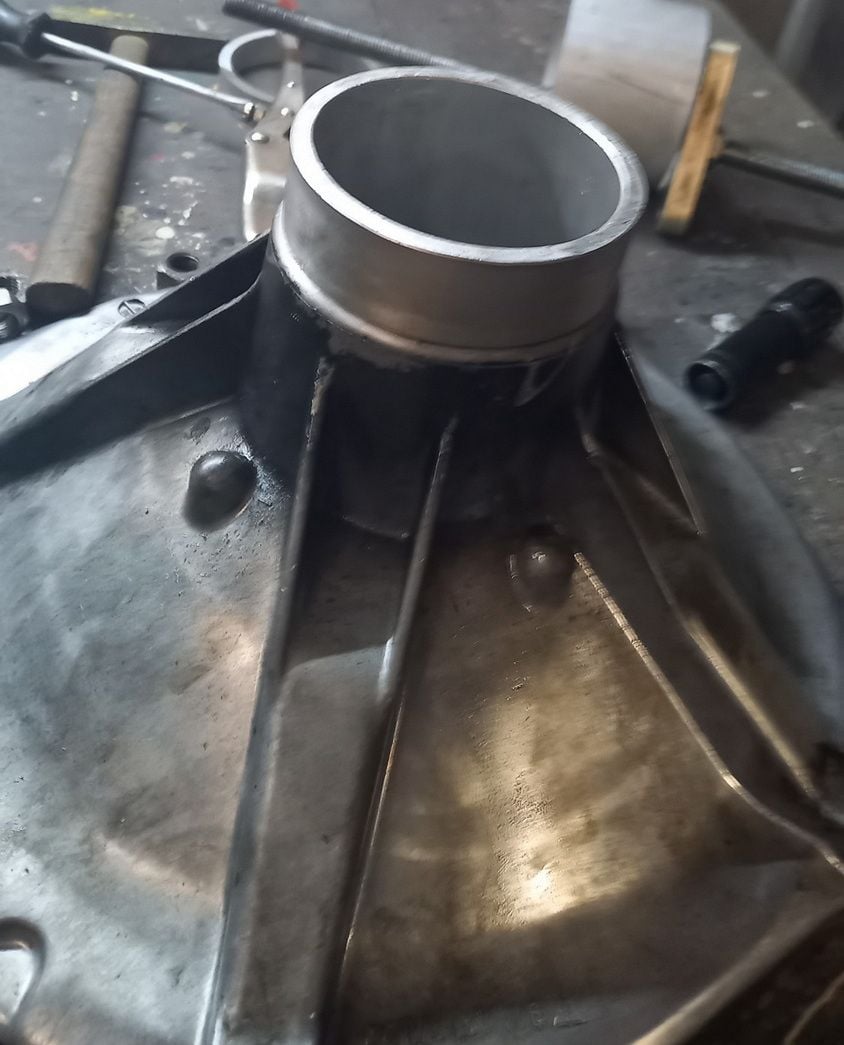
Pic 5. Shifter Mount made from Old engine Mount corner.
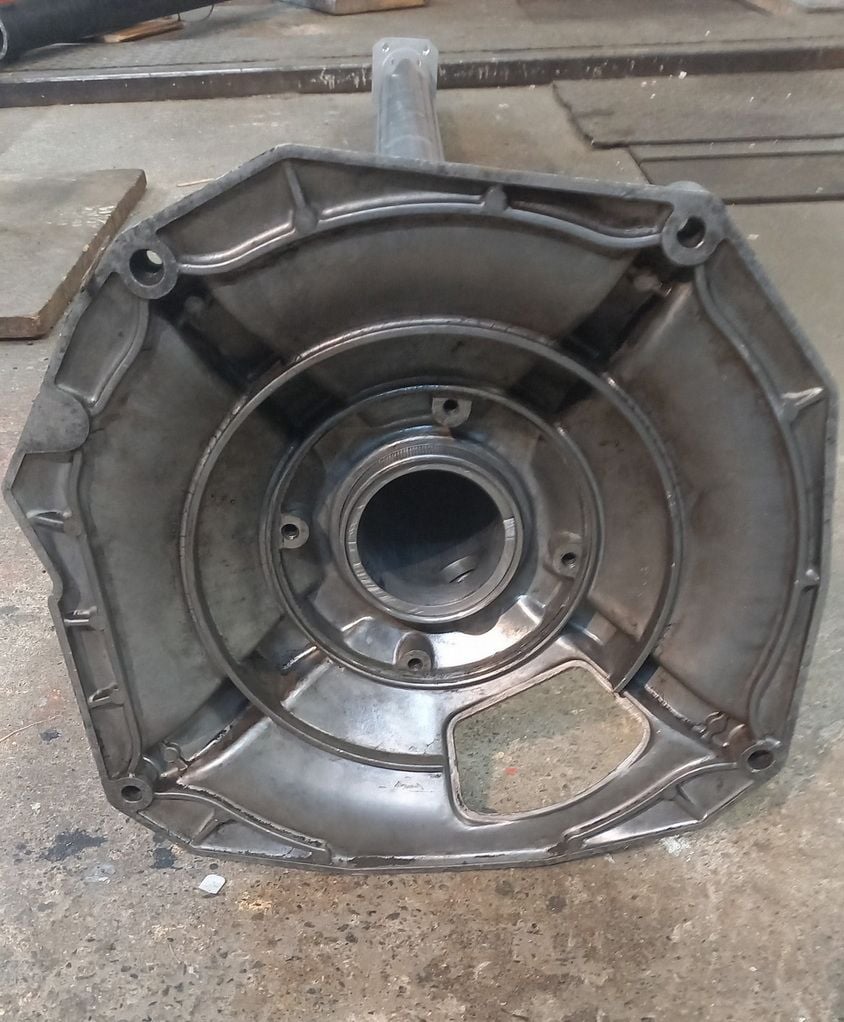
Pic. 6, 7 & 8 Tube with EVERYTHING. SO sad no one will ever see this at the track. These are more the things people can't see and don't know just HOW different you car is from theirs. LOL. .. "But I have a Renegade V8 kit!?, you're cheating, you just cant be that much faster" Yes, but...... lol
Guys, I can't tell you how nice it is to see this all together. Almost exactly 1.5yrs later!!!! I can't imagine how it's going to feel when I get to drive here. Probably terrifying .. lol. yeah, I'll be afraid to break her! Or crash.. or whatever! I hope I get over that soon enough too. Right now I'm just hoping the engine holds together long enough for one fun season. Ah... hopes and dreams.
Anyway.. This thread is done. Thank you for looking and letting me share.
very nice indeed! i like how you've connected the gear leaver to the torque tube.
surprised you didn't make a custom gear leaver at all.
It's a bit custom. I cut off the stock ball end and put in the rod end. It's adjustable so I can raise or lower it. I also welded the bolt on top for the shifter. But other than that....
Some things got more attention than others. That's the problem when you customize EVERYTHING. It takes too much time. So some things got more attention than others. I am starting to cut a few high dollar corners for regular ole stuff that gets the job done faster.
There's plenty of time for those items later.
I like the way you've done the ball thought, it's a lot better then the original factory in the plastic housing.
I'd think about putting a boot on it to protect it from what ever can find it's way up there.
more weight could be saved by turning the tube down to 3.4 or 3.38" OD, a few more lbs.
this is still on my project list...
Absolutely more weight to be lost. Post pics when you start on the project. PM me anytime.
Originally Posted by Paulyy
I like the way you've done the ball thought, it's a lot better then the original factory in the plastic housing.
I'd think about putting a boot on it to protect it from what ever can find it's way up there.
Thanks Pauly, That rod end solved 2 issues. 1- anything other than the plastic ball end. 2 - let the shifter become height adjustable.
I have a bunch of those protector boots for the rod ends. I will probably throw one one there. I already have everything in the pics broken back down and setting on shelves waiting for final assembly. So a little boot cover install won't be much hassle.
With some quick math I'm coming up with around 16lbs for the weight of the driveshaft...seem about right? Do you still have the original steel tube section? Around 29lb? Any idea what the cast aluminum weighs?
Also, what are the odds some of that casting could be cut down? I know it has ribbing but maybe you could cut it like so...trim the red lines and then weld braces between the open bolt holes at the green lines...****, at that point I guess you may as well just make a new flat flange to bolt on the trans...
I know it's been some time ago. But here some further informations about the weight topic. So with a titanium driveshaft you could save another 3.5 kg ≙7,7 lbs. I'm working on a lightweight torque tube too. Where can I buy such an Aluminium Tube, where the TT bearings fit nicely? Any hints and links are very appreciated.
Porsche 968 TT shaft on the scale: 7 kg ≙ 15,4 lbs
Porsche 968 TT (driveshaft incl.) on the scale: 28 kg ≙ 61,72 lbs


 05-13-2012, 06:40 PM


 These are more the things people can't see and don't know just HOW different you car is from theirs. LOL. .. "But I have a Renegade V8 kit!?, you're cheating, you just cant be that much faster" Yes, but...... lol