When you click on links to various merchants on this site and make a purchase, this can result in this site earning a commission. Affiliate programs and affiliations include, but are not limited to, the eBay Partner Network.
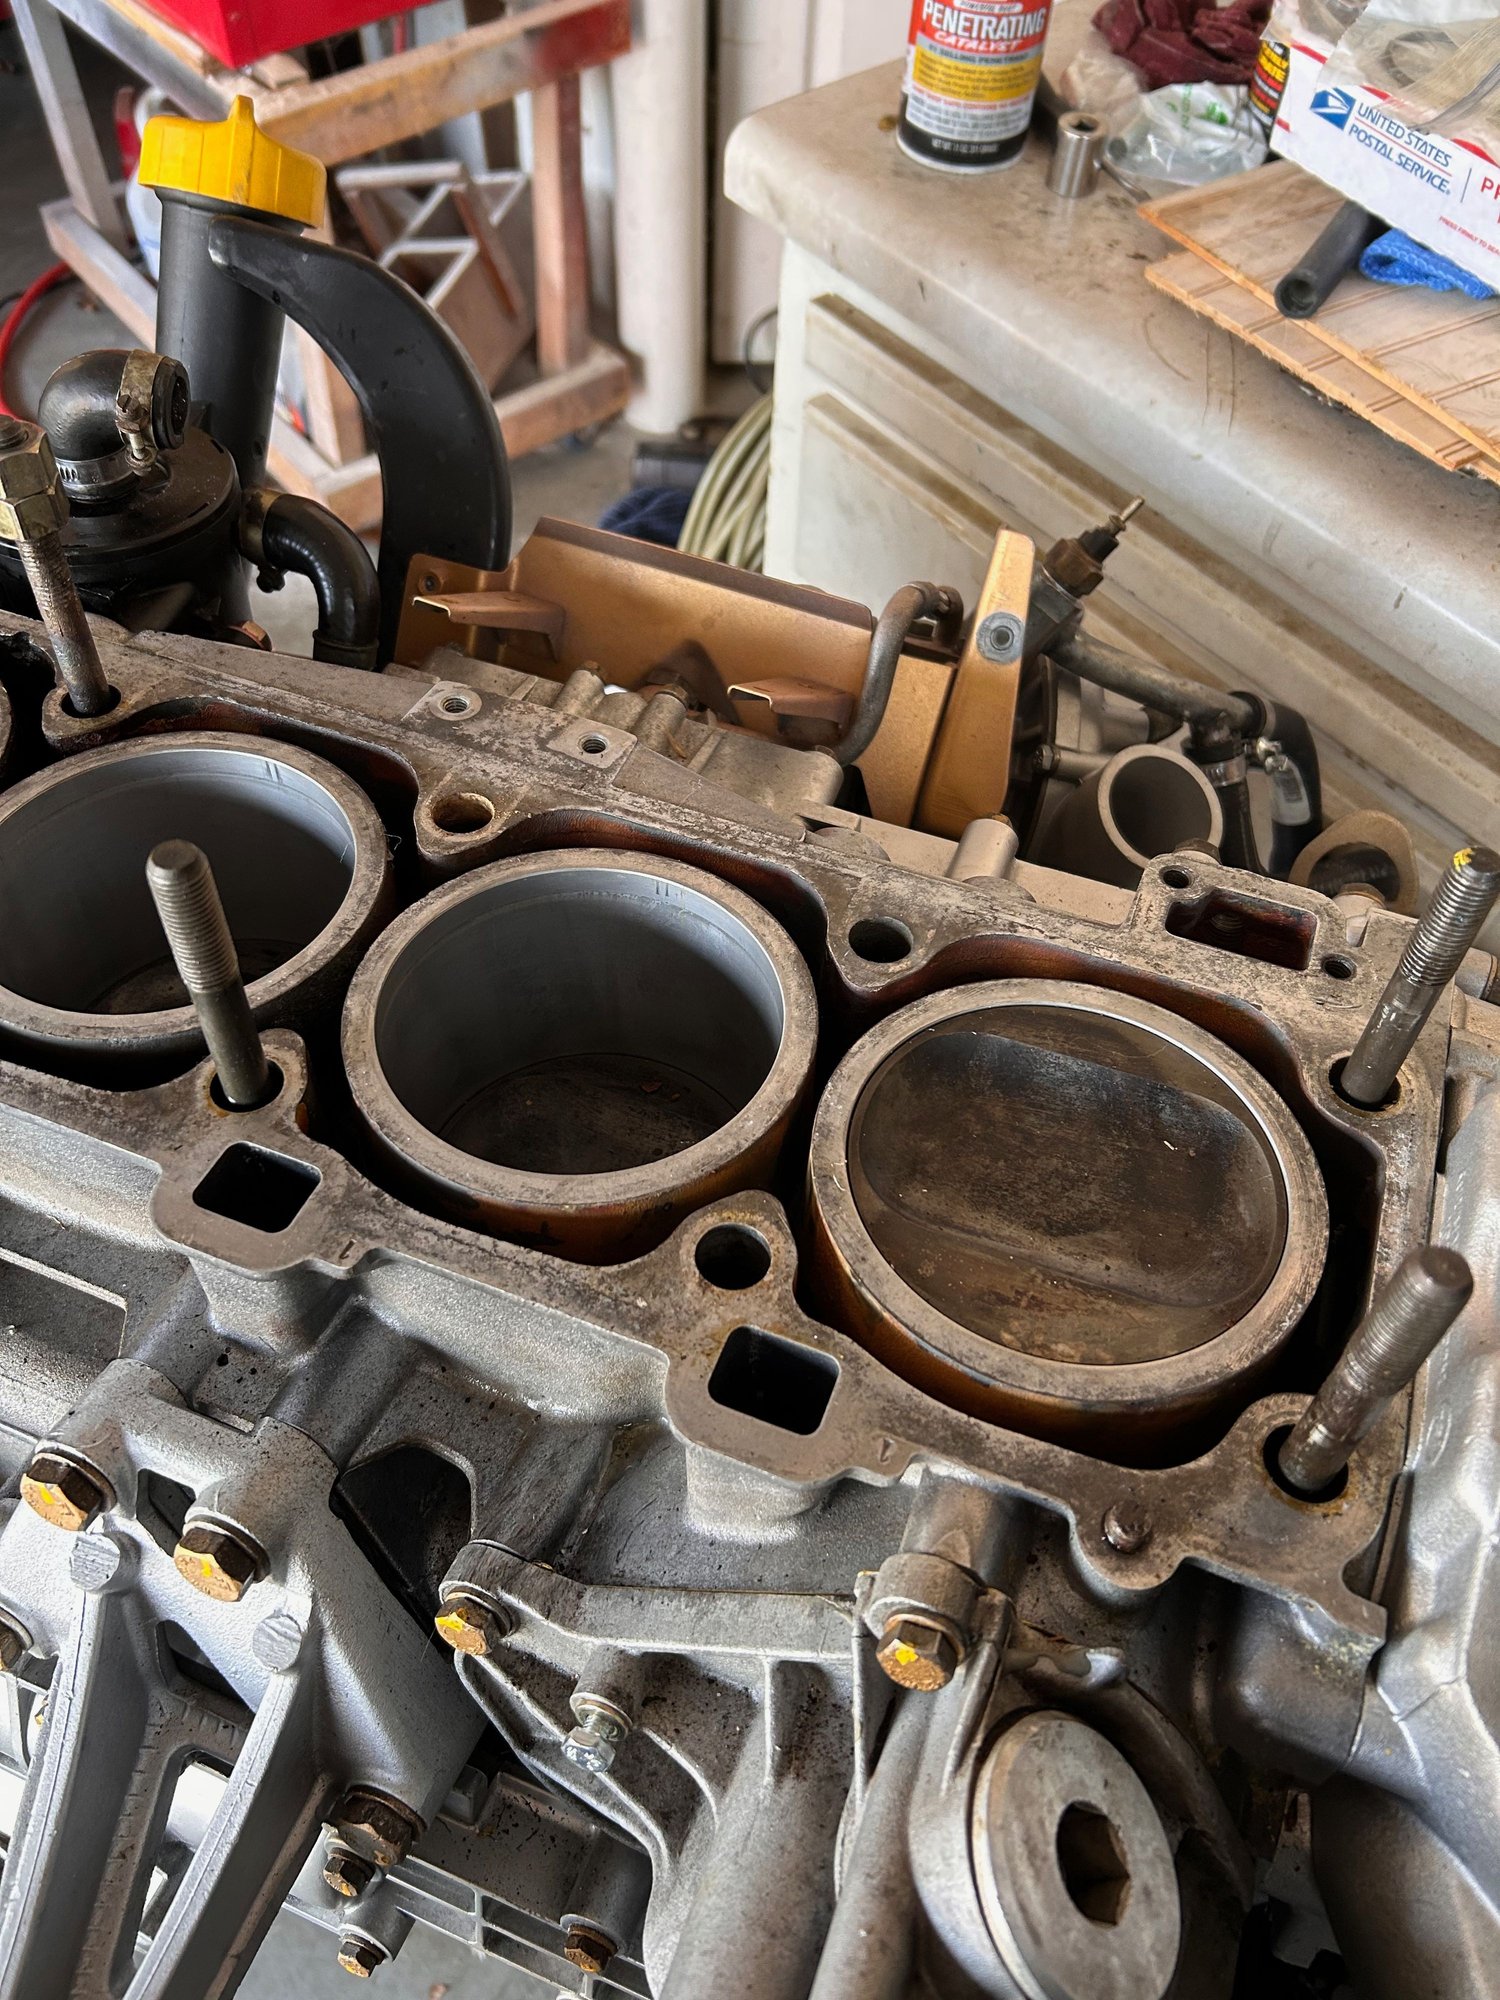
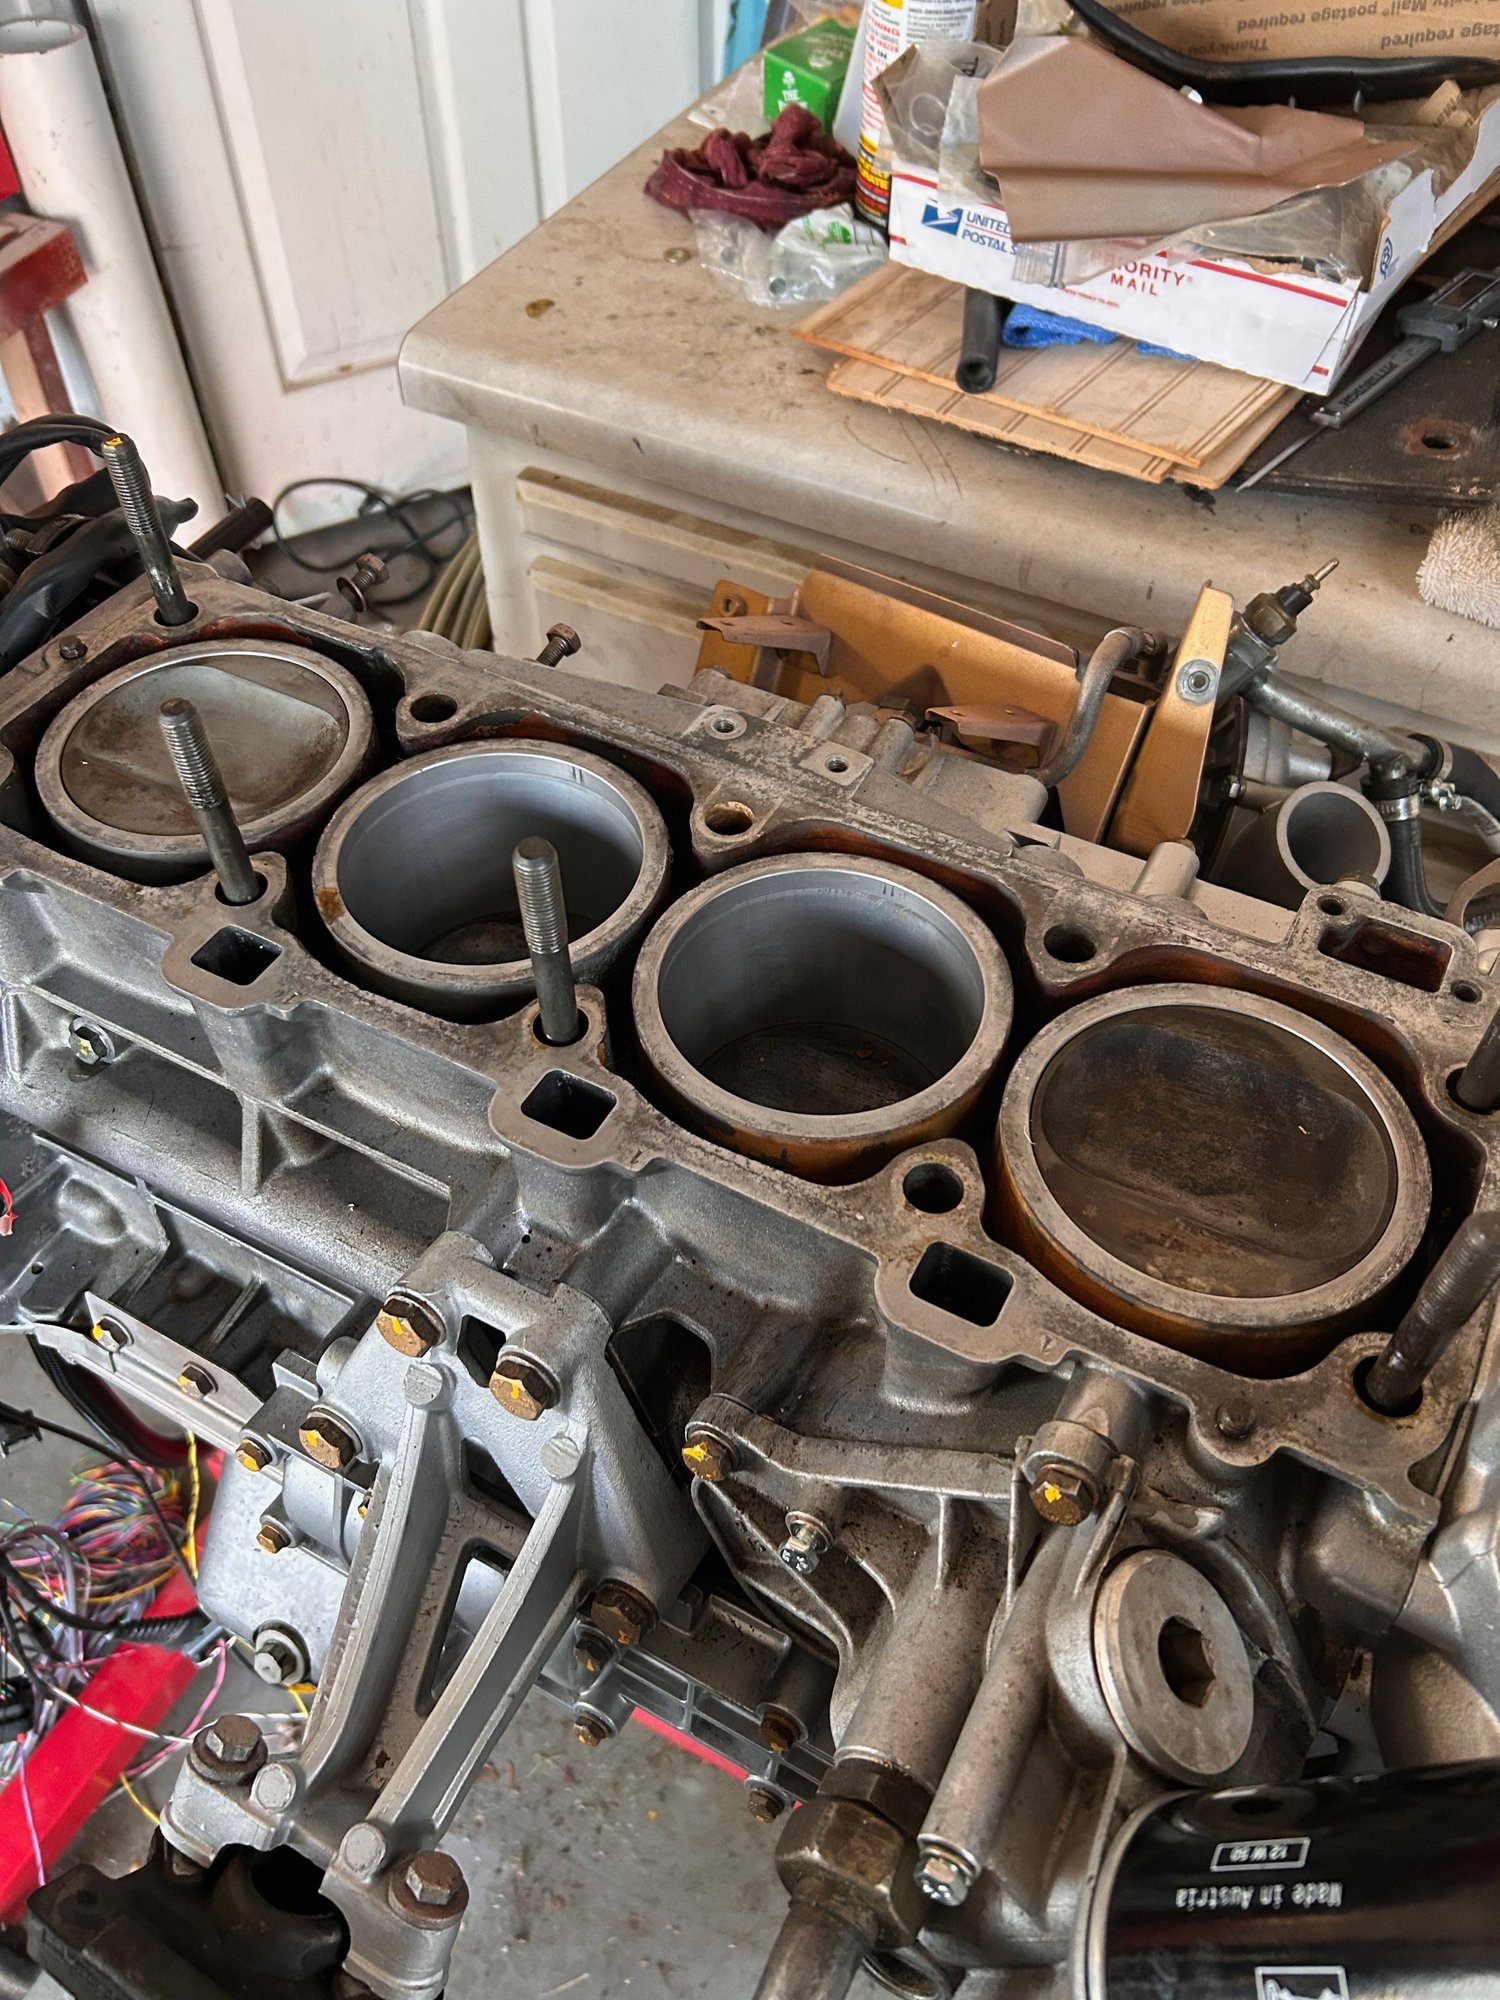
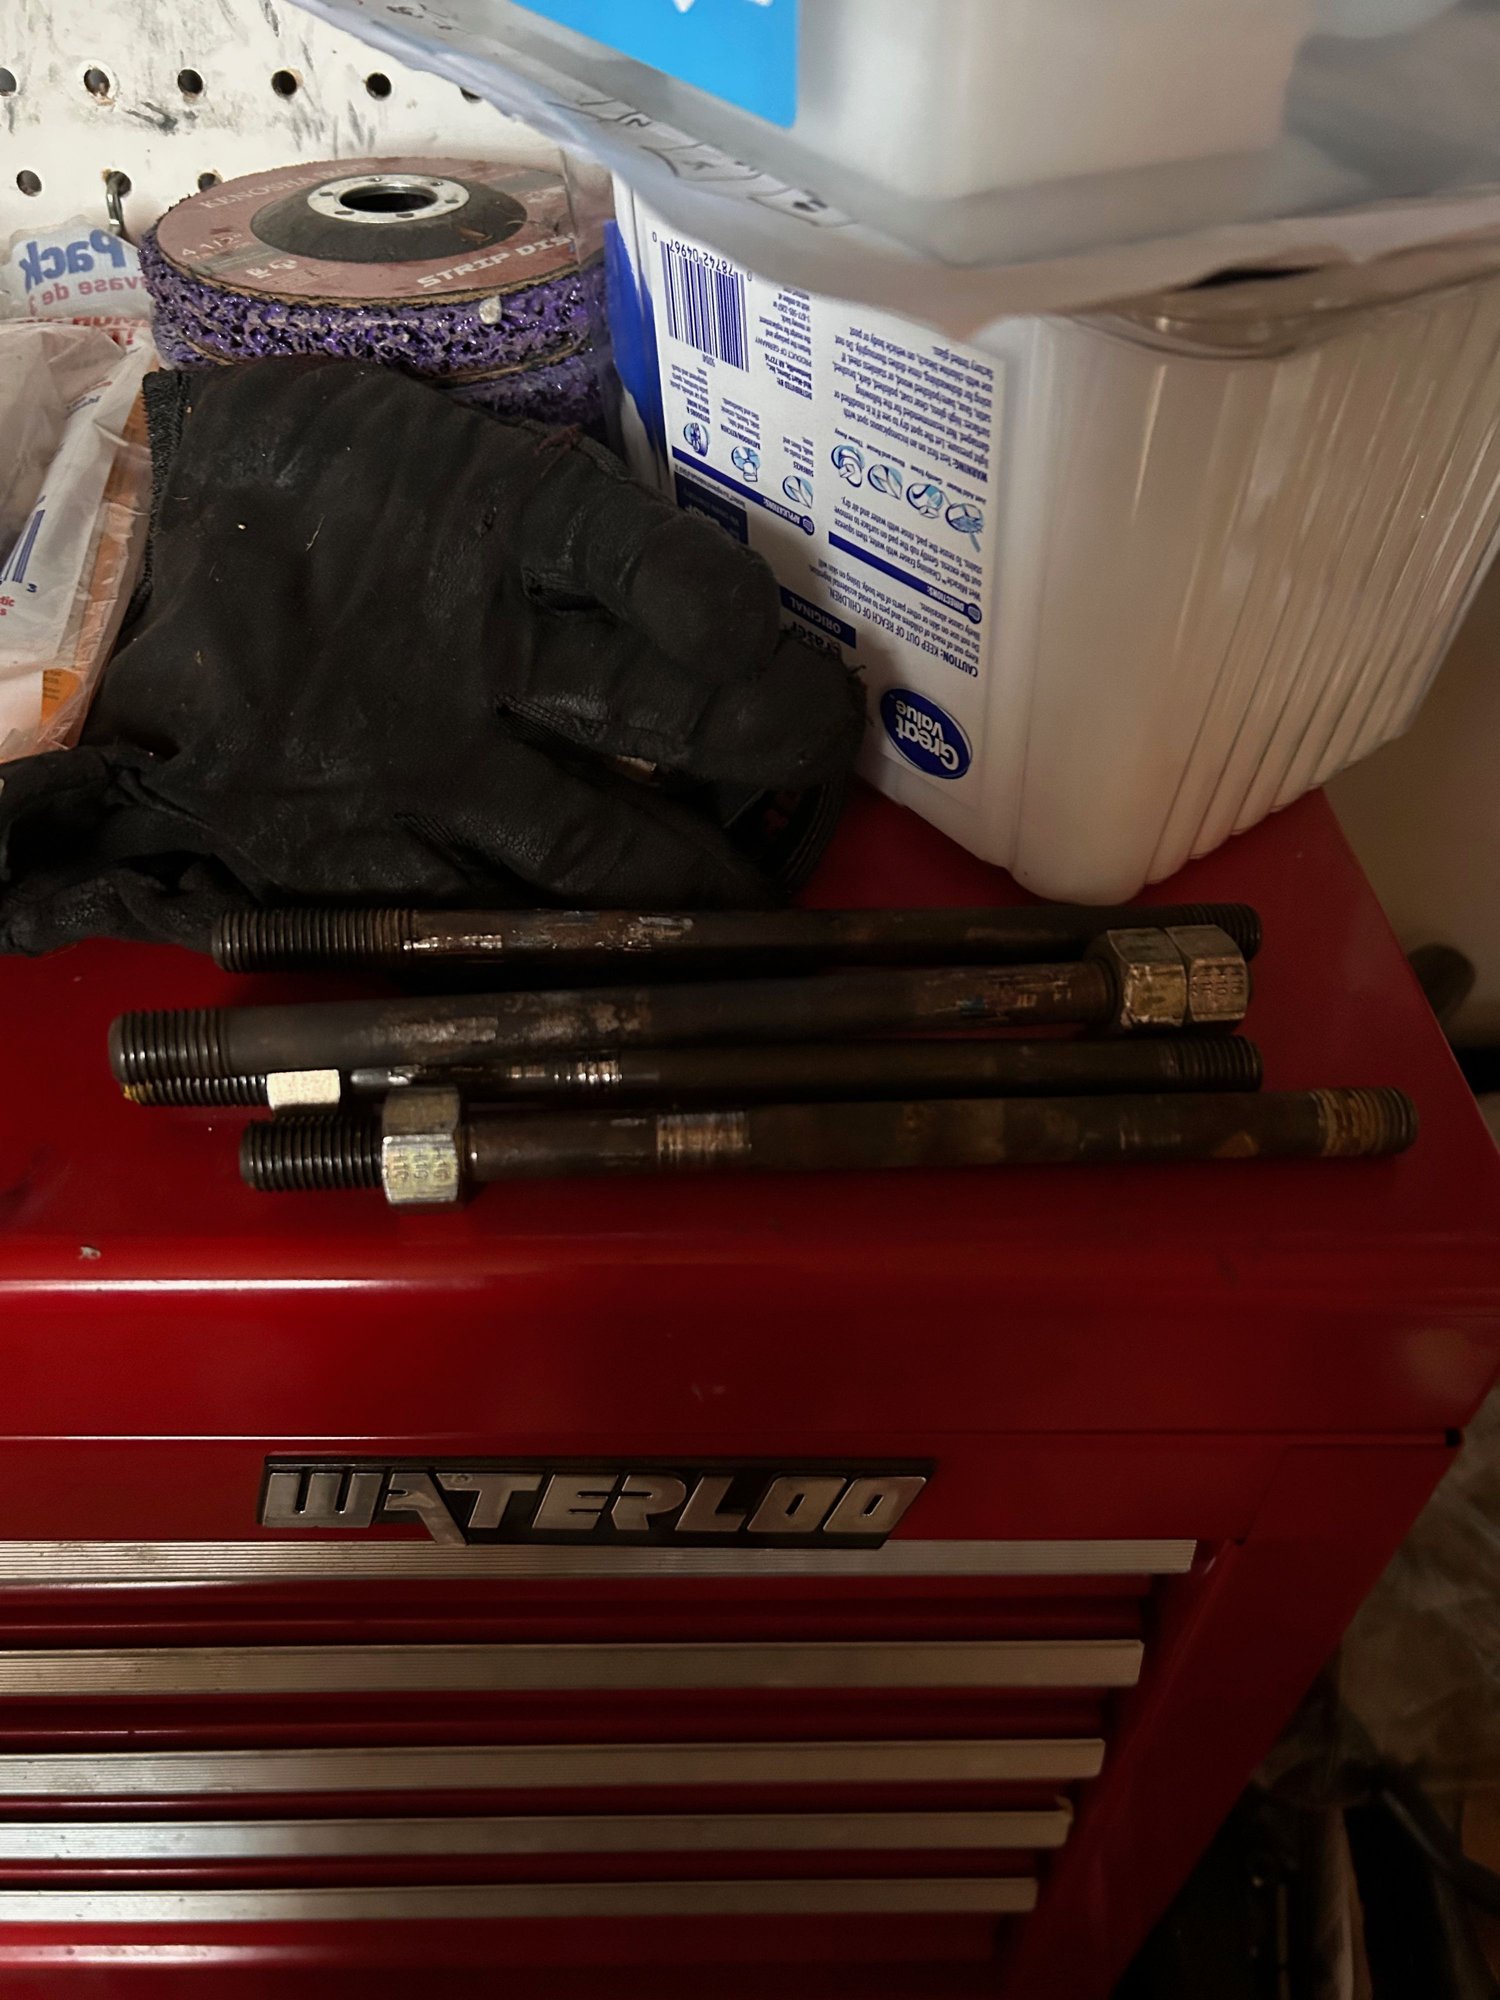
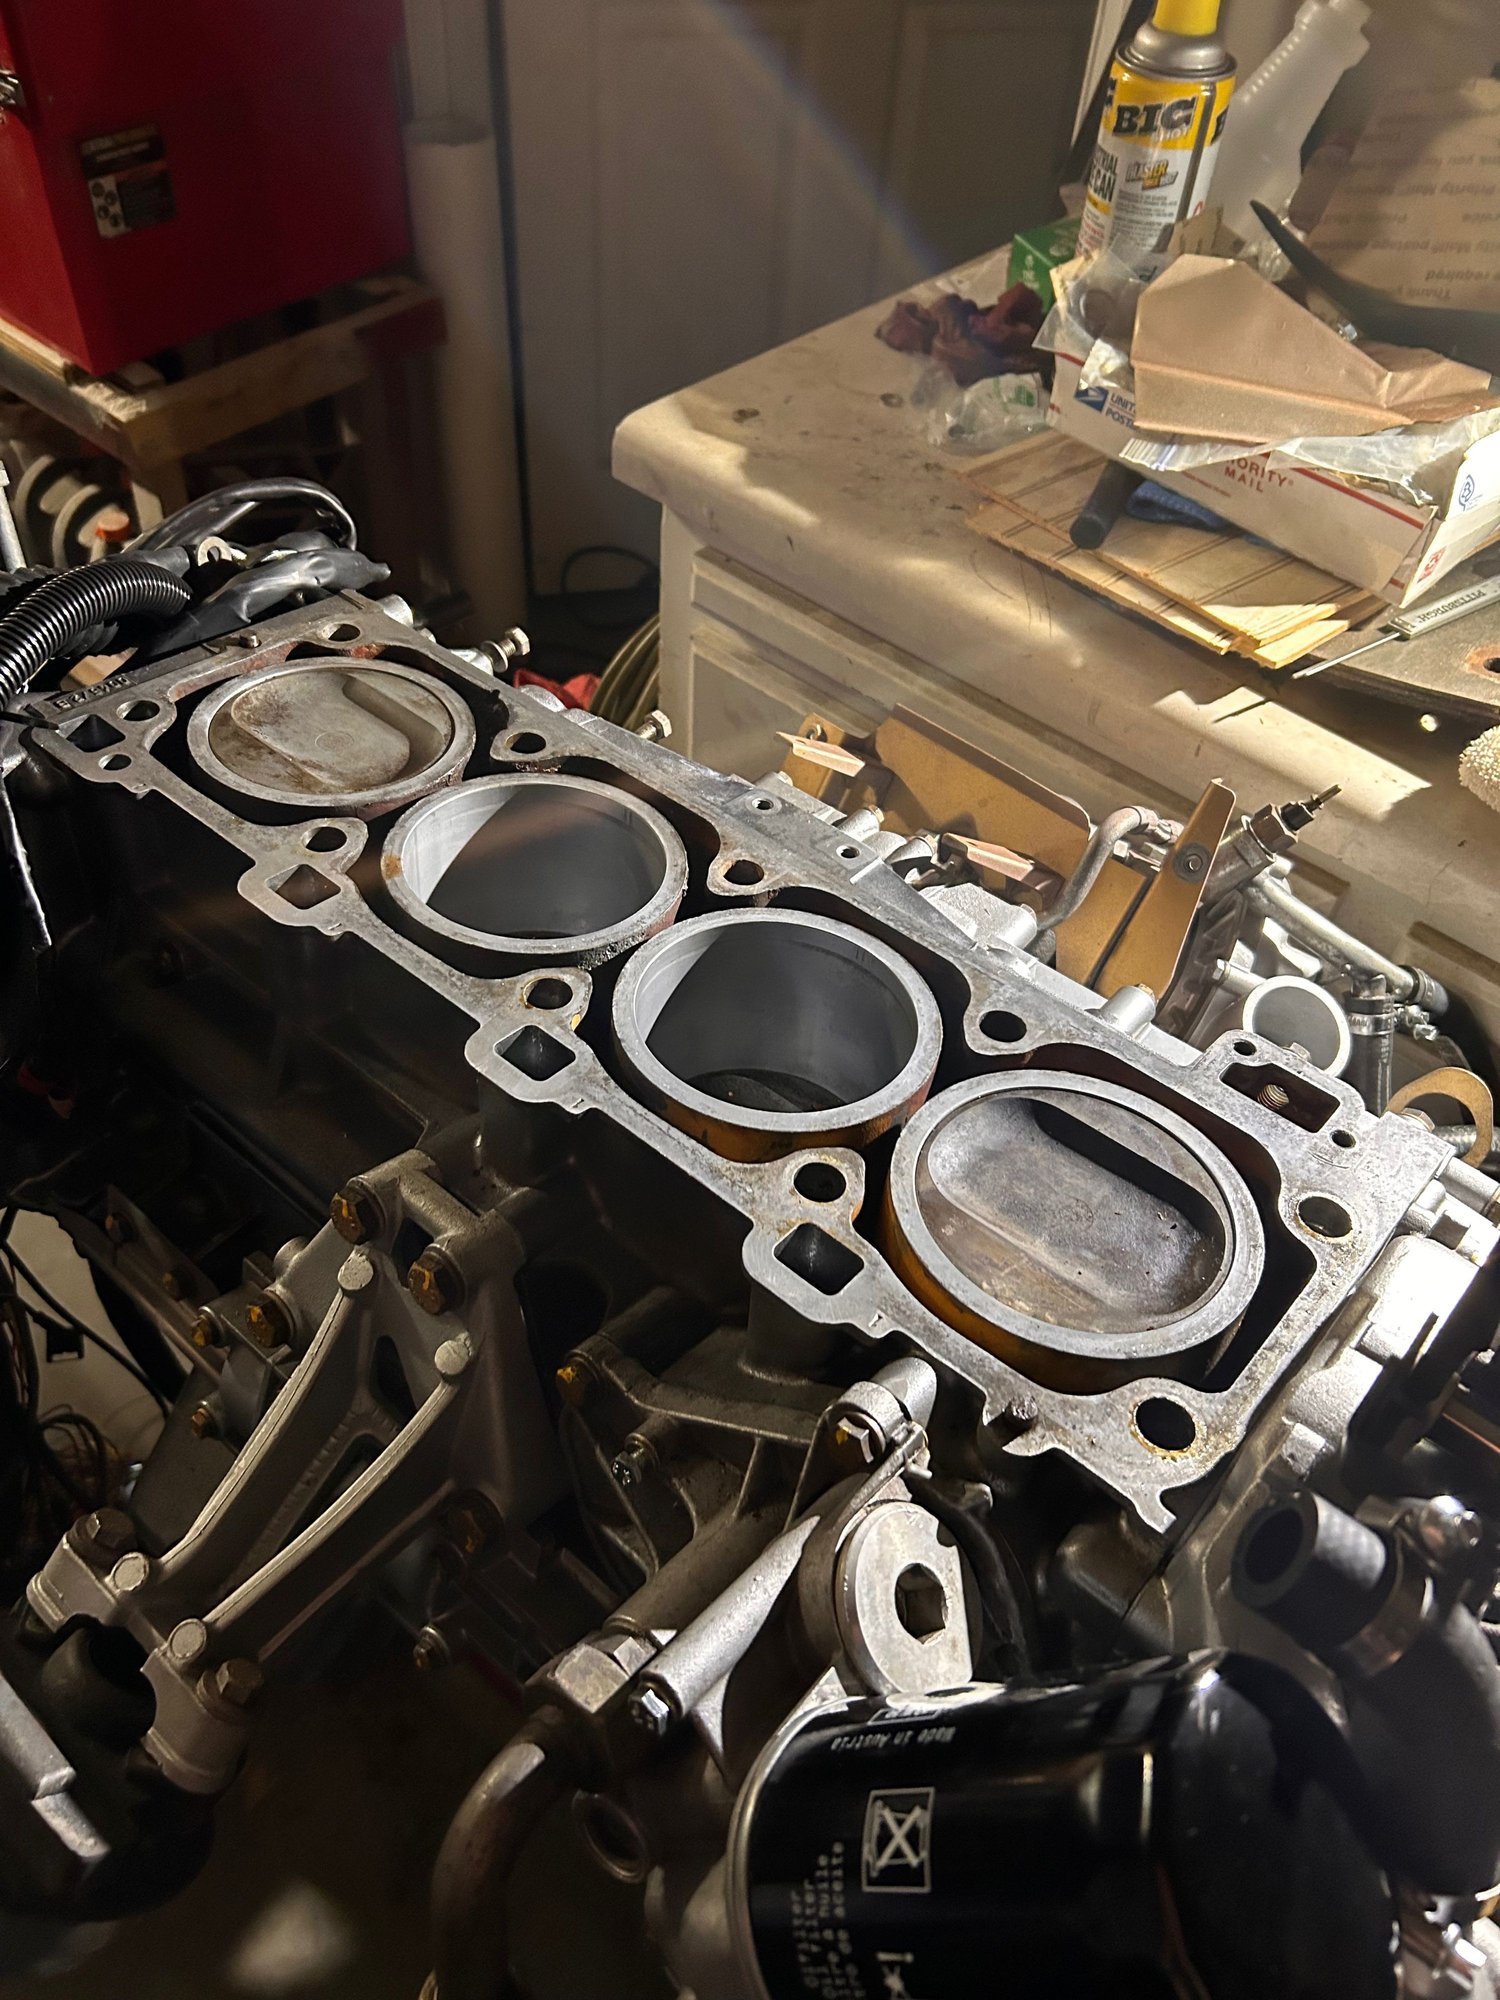
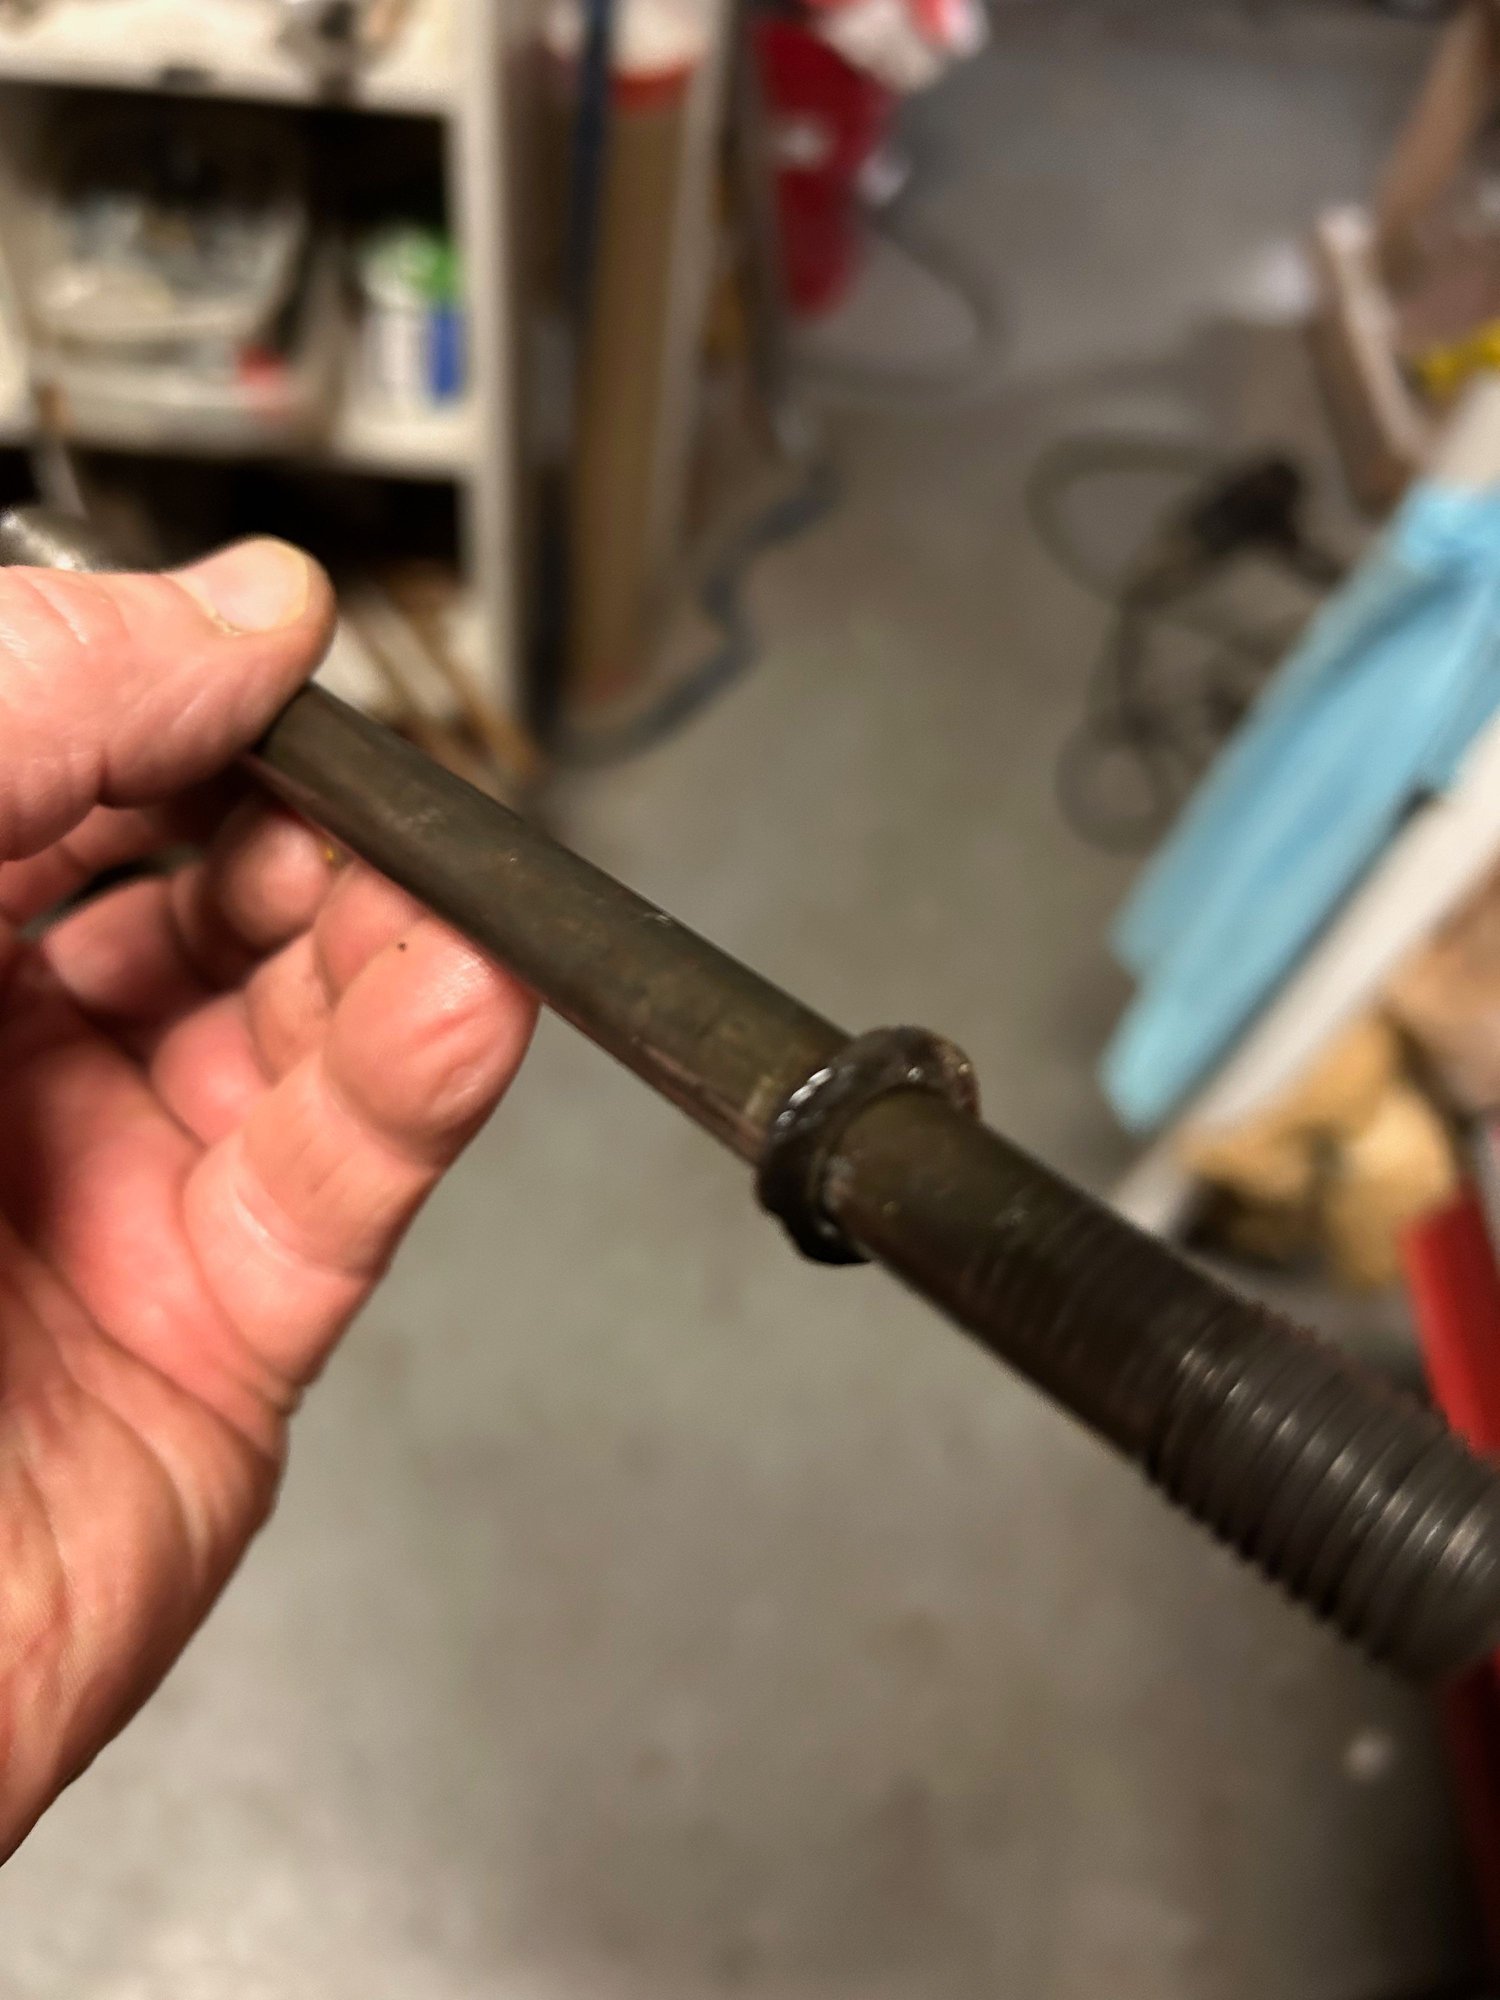
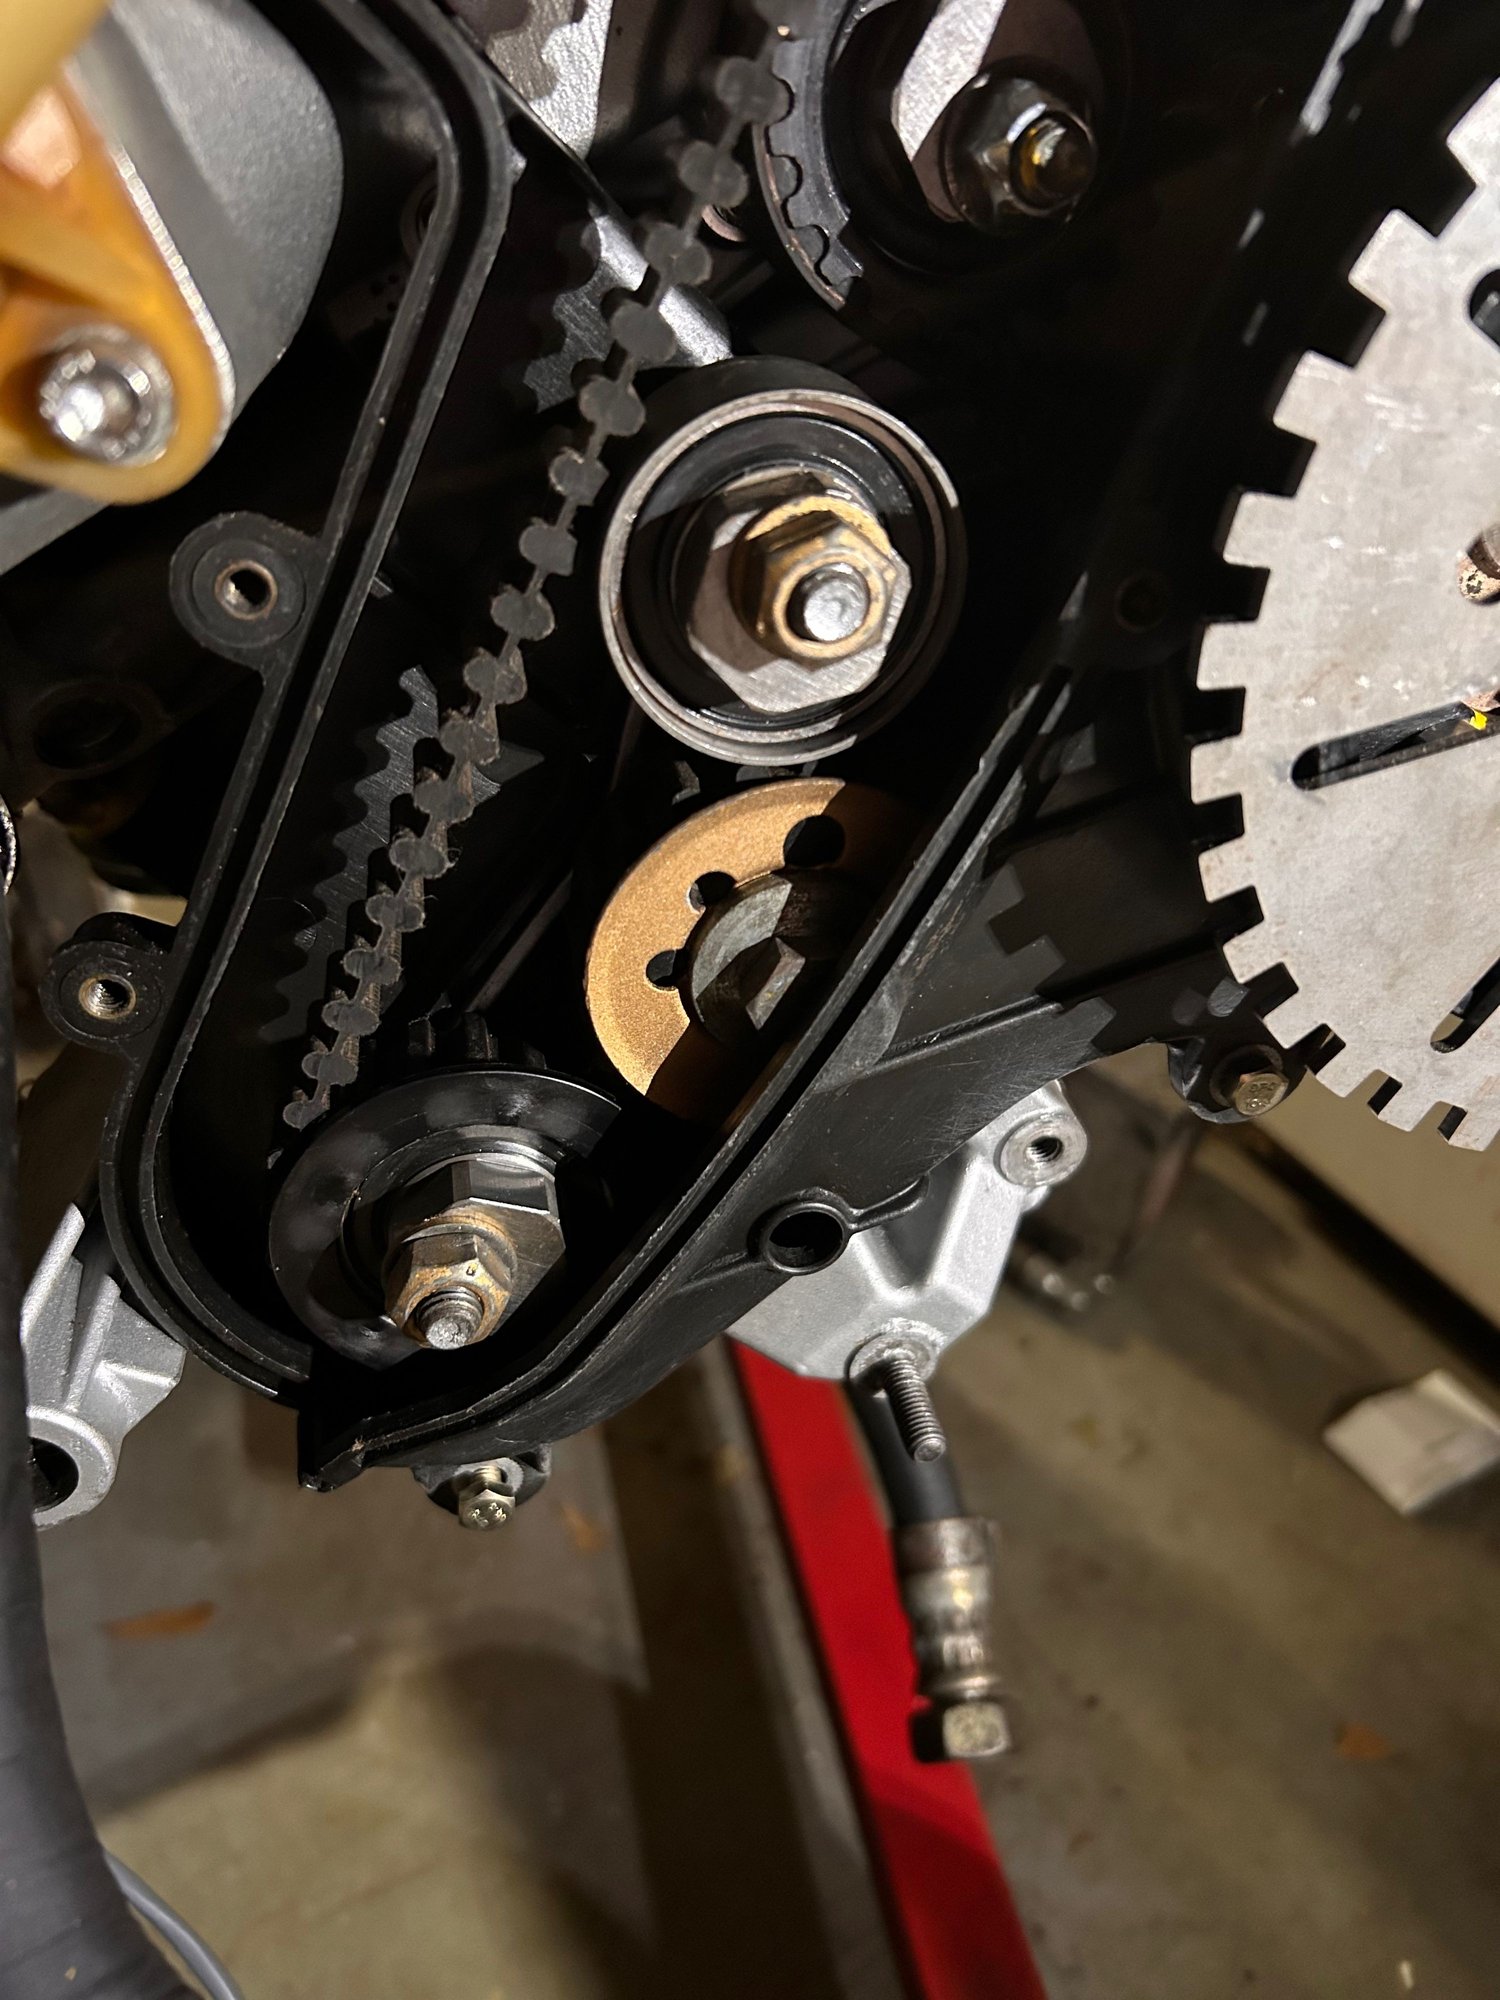
So here is where we are. I finally have the offending 4 head studs out - that was a bear. Only one was really corroded. I guess the factory locktite was still holding the others pretty good. So plan to replace these 4 and get it back together. Here are some pics of removal:
this one was the most corroded. And that was after wiping the threads off with a rag. three out at this point. What a bear. Heat and double nutting did the trick on 2 of 4. The third one had to have double nut with wrench + vise grips to get it started. 4 holes now. 4th one required me to take the air-oil separator back off and had my helper hold the torch flame and keep it hot while I worked the double nut forward and backward to start it. Used a 19" spanner on the lower nut and a breaker bar on the top to provide leverage on both sides and not snap it off. All 4 studs out
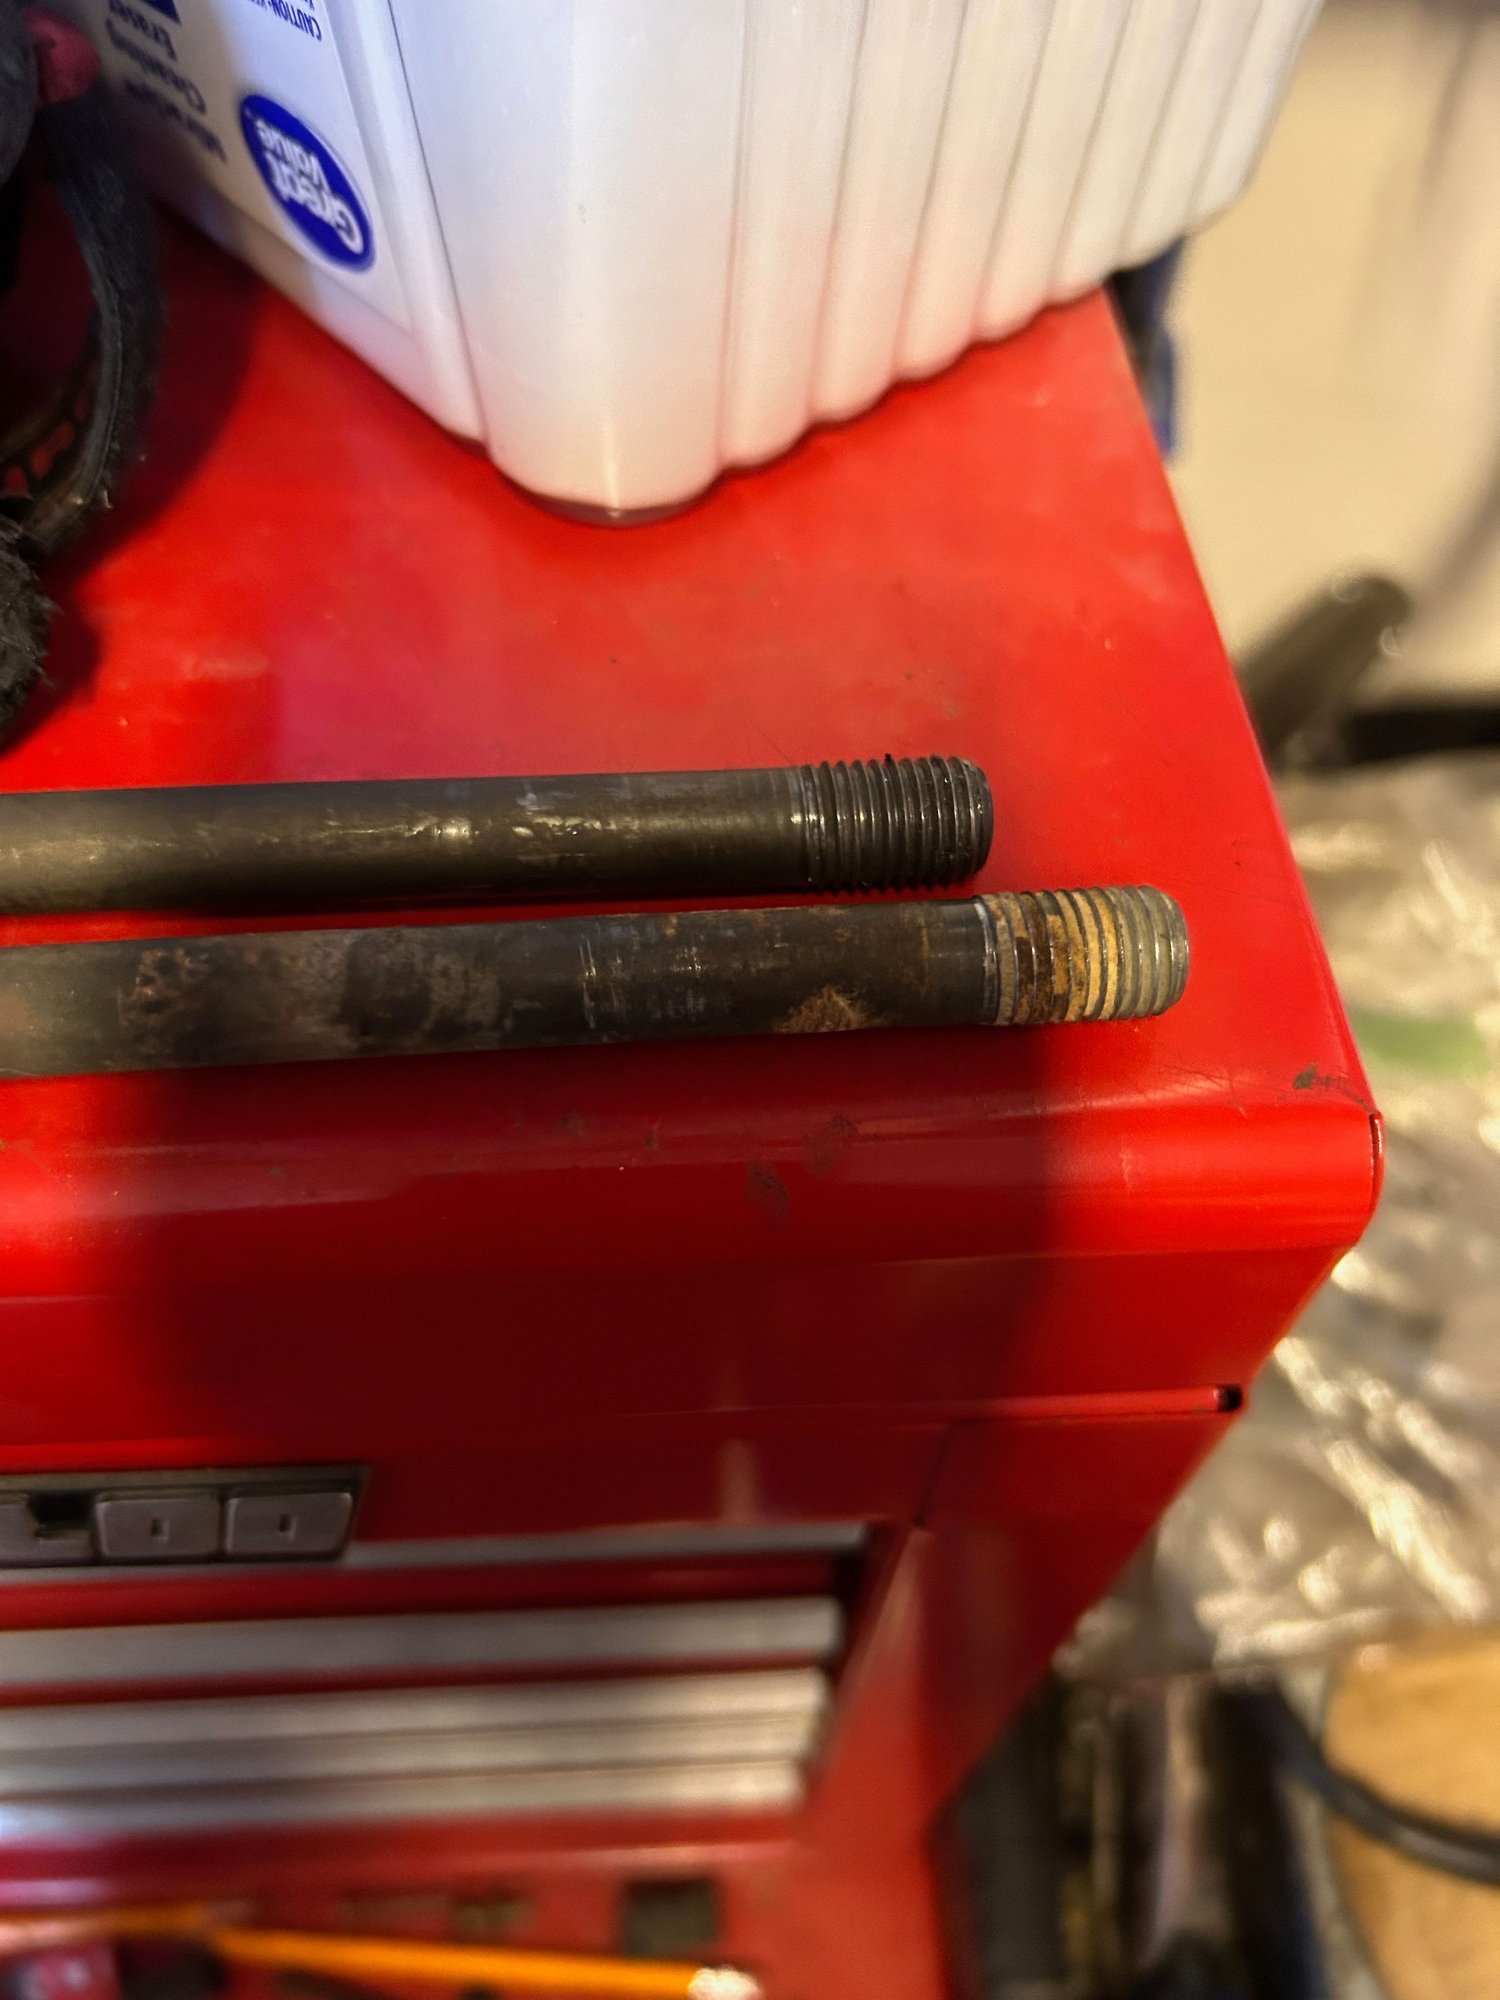
So - in looking at that last pic...these studs definitely have a short threaded side and a long threaded side. In this case, the short side was what was in the block. I assume they were backwards? So - obviously I am getting 4 new studs - suffice to say I should try to pull the rest of them and put them in "correctly"? I have no idea how this engine ran before it came to me. It had a blown HG - which I assume studs in backwards could have been a factor in.
Open to thoughts - remember this is a street car. No track work, and likely detuned a bit with MS for my son who will drive it some.
Still looking at the use of a blowoff/bypass valve with this setup?
Getting ready to have my new replacement intake tube made that will replace the AFM and J-boot. I have read conflicting write-ups on this and thus am coming to the experts. Since I am eliminating the AFM and going to an MAP setup with the Microsquirt, do I need a blow off valve? Some seem to say no, as the MAP will adjust off-throttle fast enough to combat the pressure difference. Some seem to have included a blow off valve either the factory recirculating type or a vent to atmosphere.
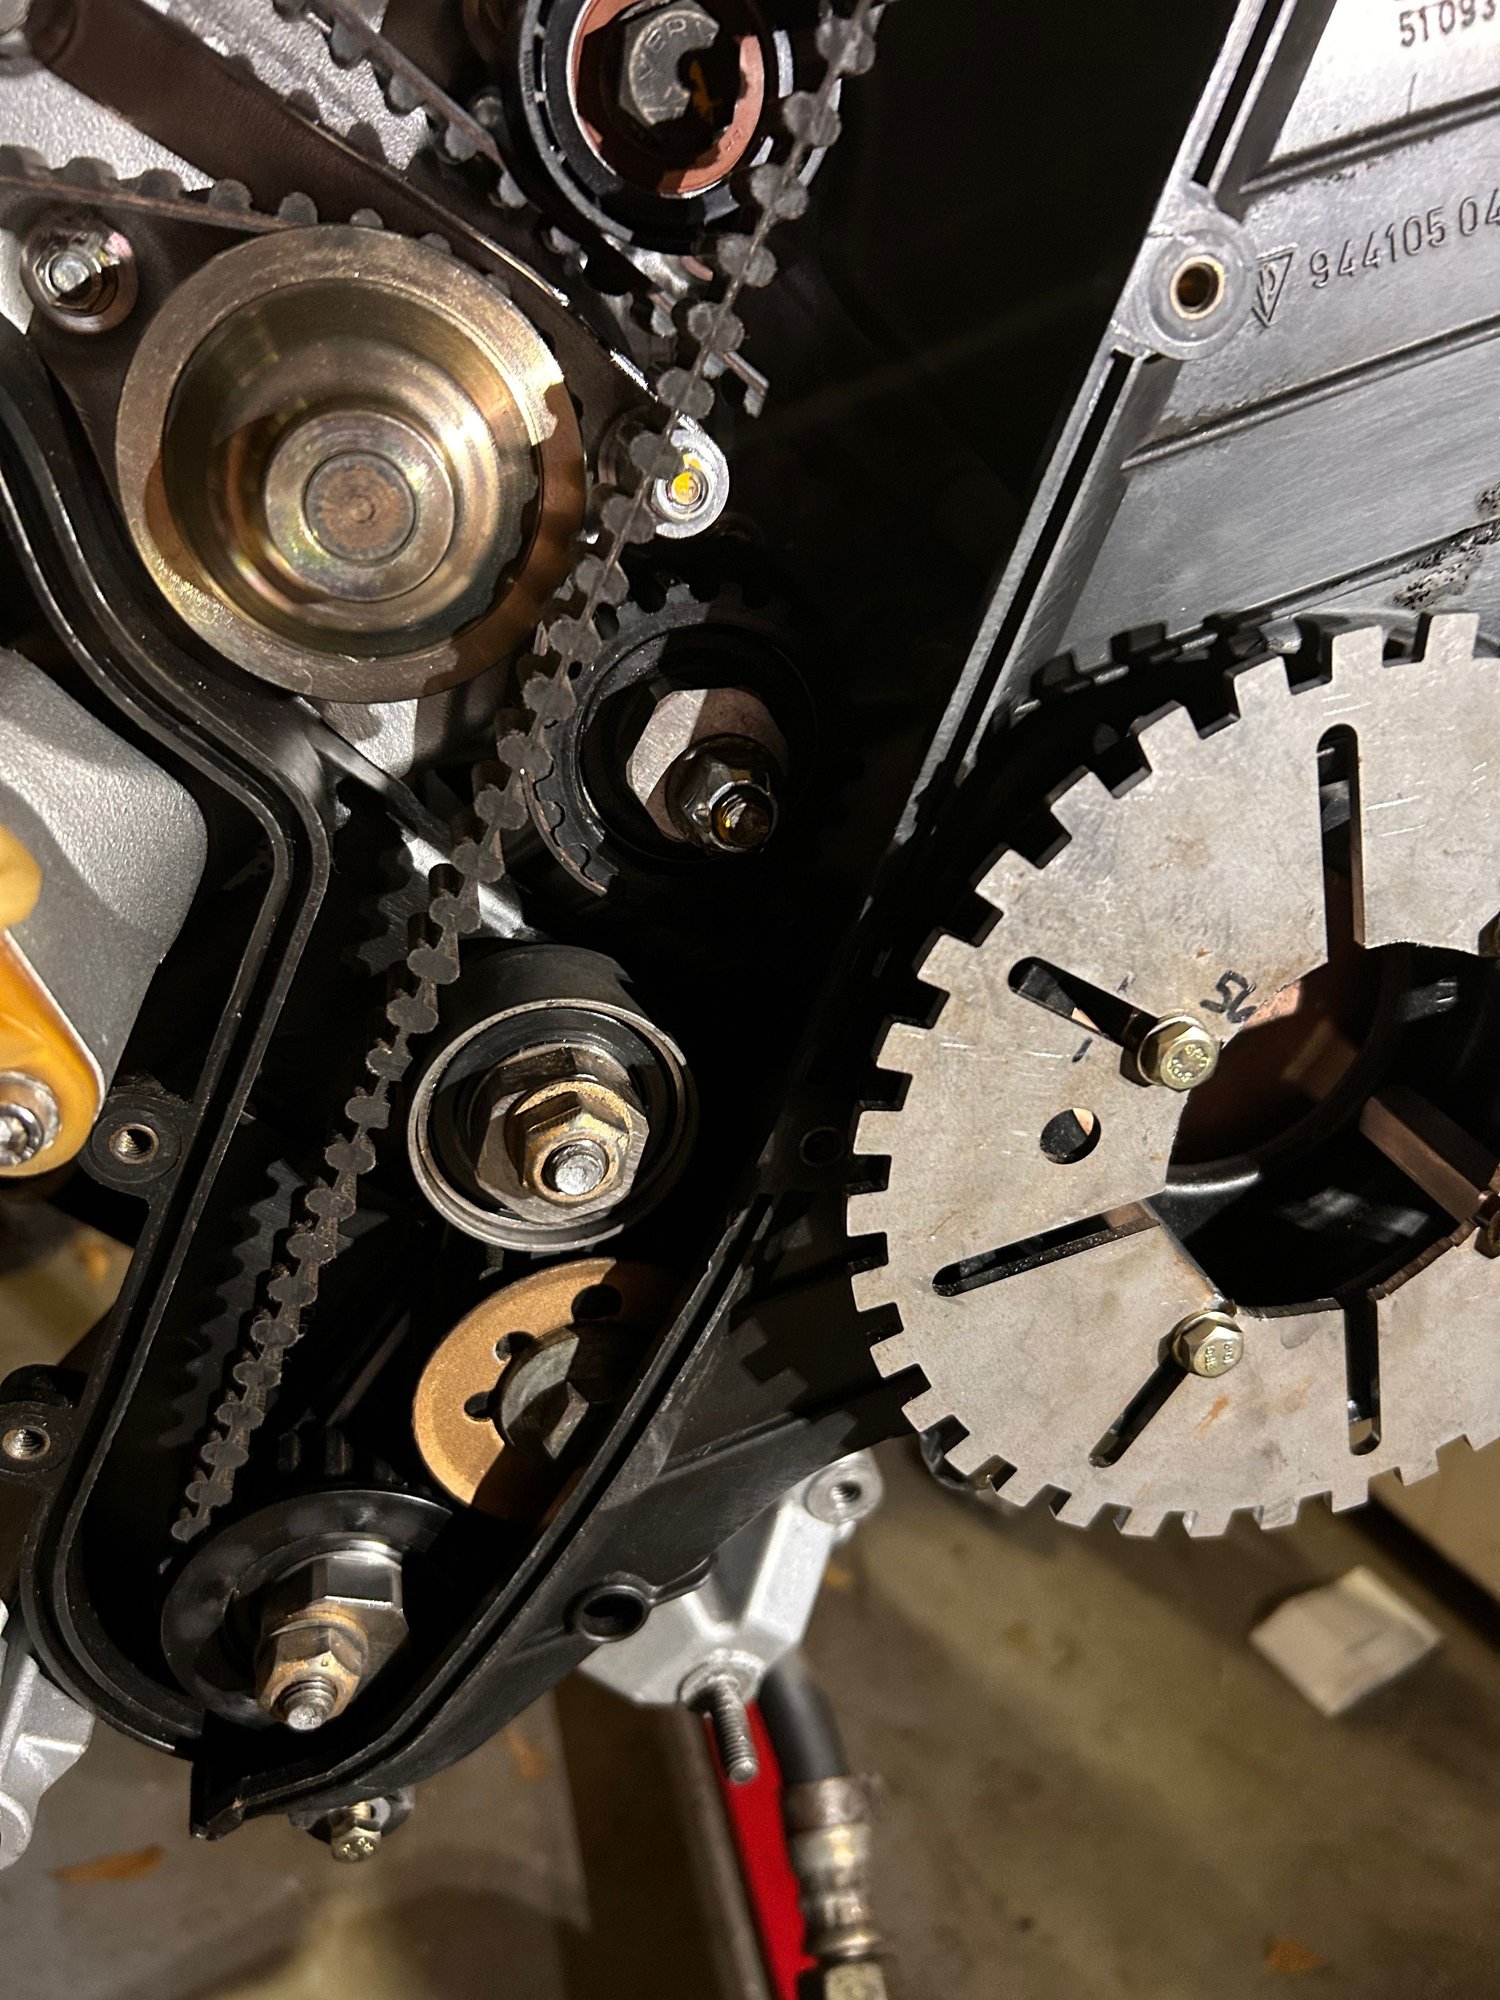
So here is where we are. I finally have the offending 4 head studs out - that was a bear. Only one was really corroded. I guess the factory locktite was still holding the others pretty good. So plan to replace these 4 and get it back together. Here are some pics of removal:
this one was the most corroded. And that was after wiping the threads off with a rag. three out at this point. What a bear. Heat and double nutting did the trick on 2 of 4. The third one had to have double nut with wrench + vise grips to get it started. 4 holes now. 4th one required me to take the air-oil separator back off and had my helper hold the torch flame and keep it hot while I worked the double nut forward and backward to start it. Used a 19" spanner on the lower nut and a breaker bar on the top to provide leverage on both sides and not snap it off. All 4 studs out
So - obviously I am getting 4 new studs - suffice to say I should try to pull the rest of them and put them in "correctly"? Open to thoughts - remember this is a street car. No track work, and likely detuned a bit with MS for my son who will drive it some.
The studs all appear to be installed upside down. The best course is to remove them all, carefully and fully clean the block thread sections and install 10 new studs.
Well I am happy to report I am just about back to where I was a month or so ago and then some. I was able to get most of the rest of the needed engine parts so am getting closer and closer to the return of the engine to the car.
Here are some results and next steps.
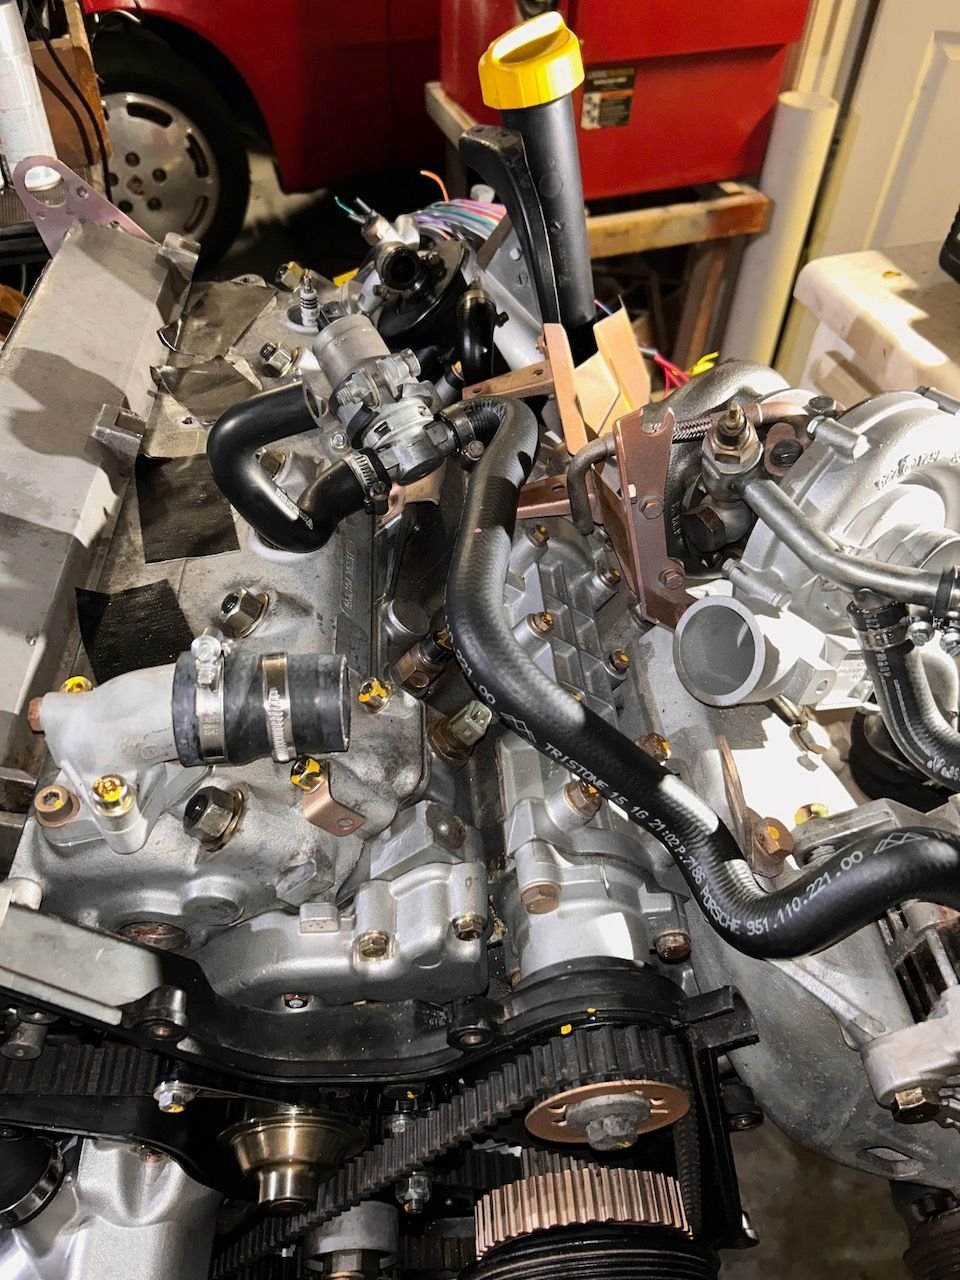
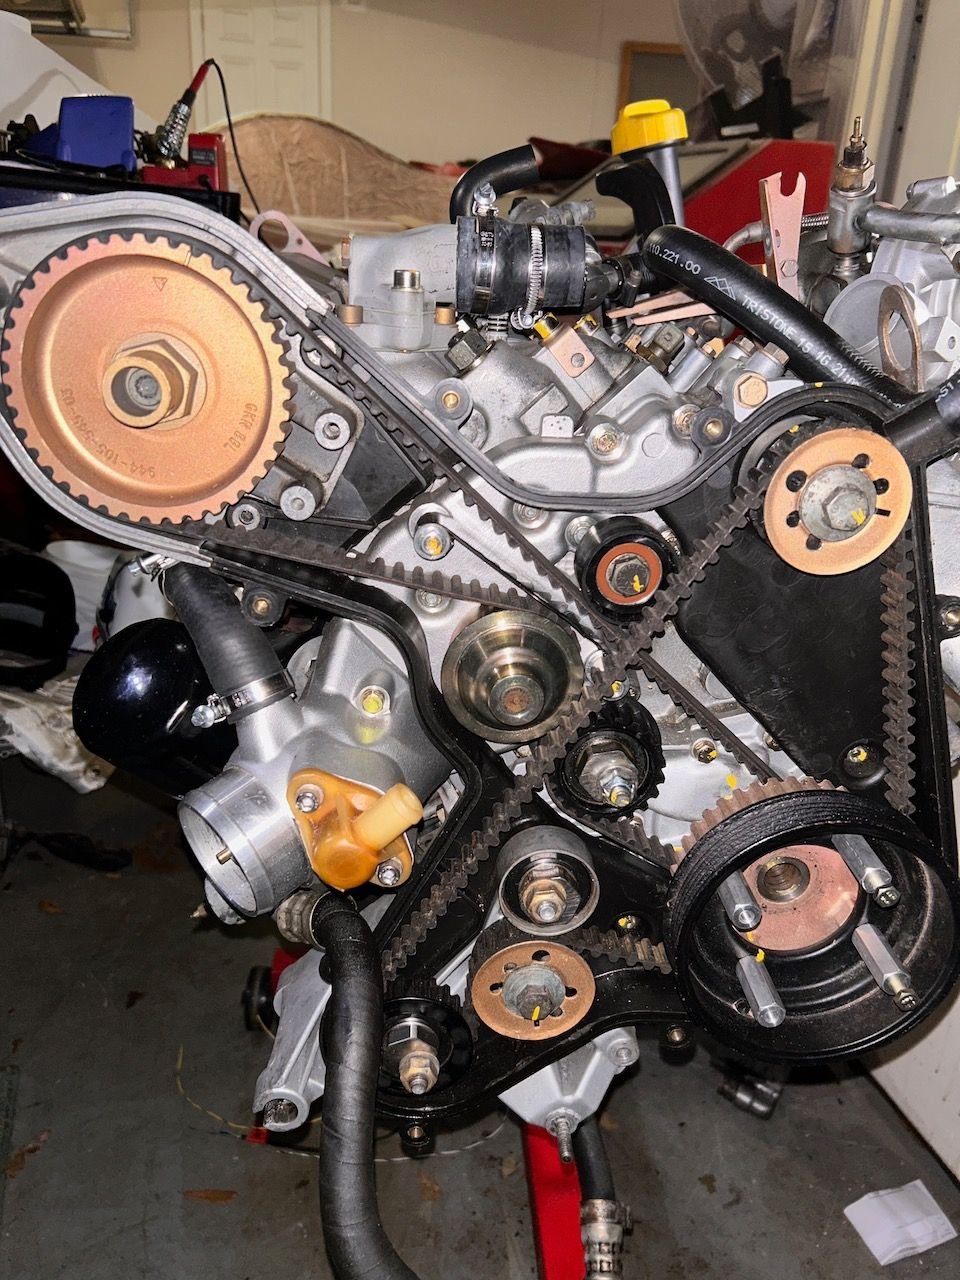
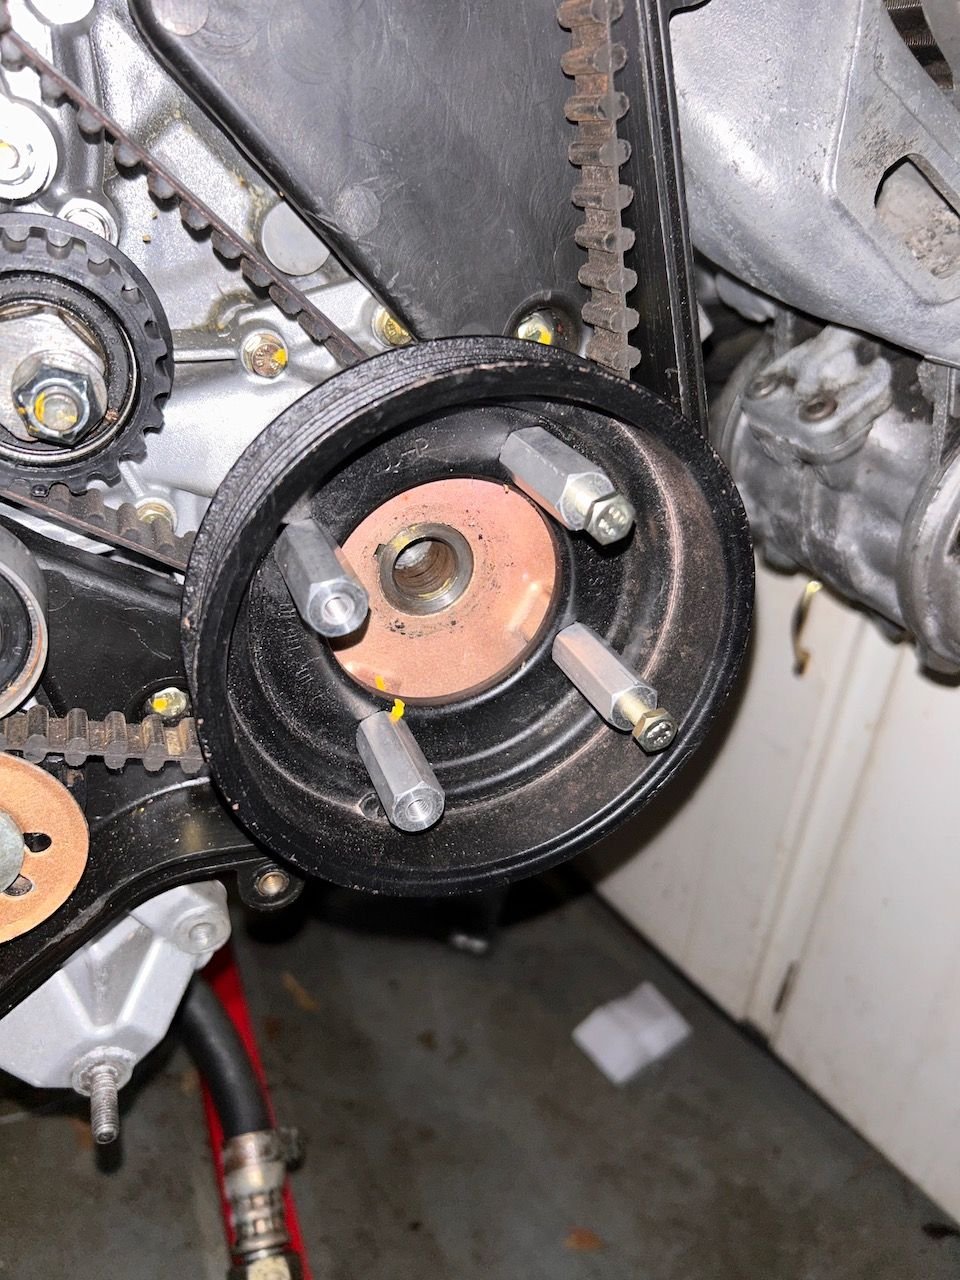
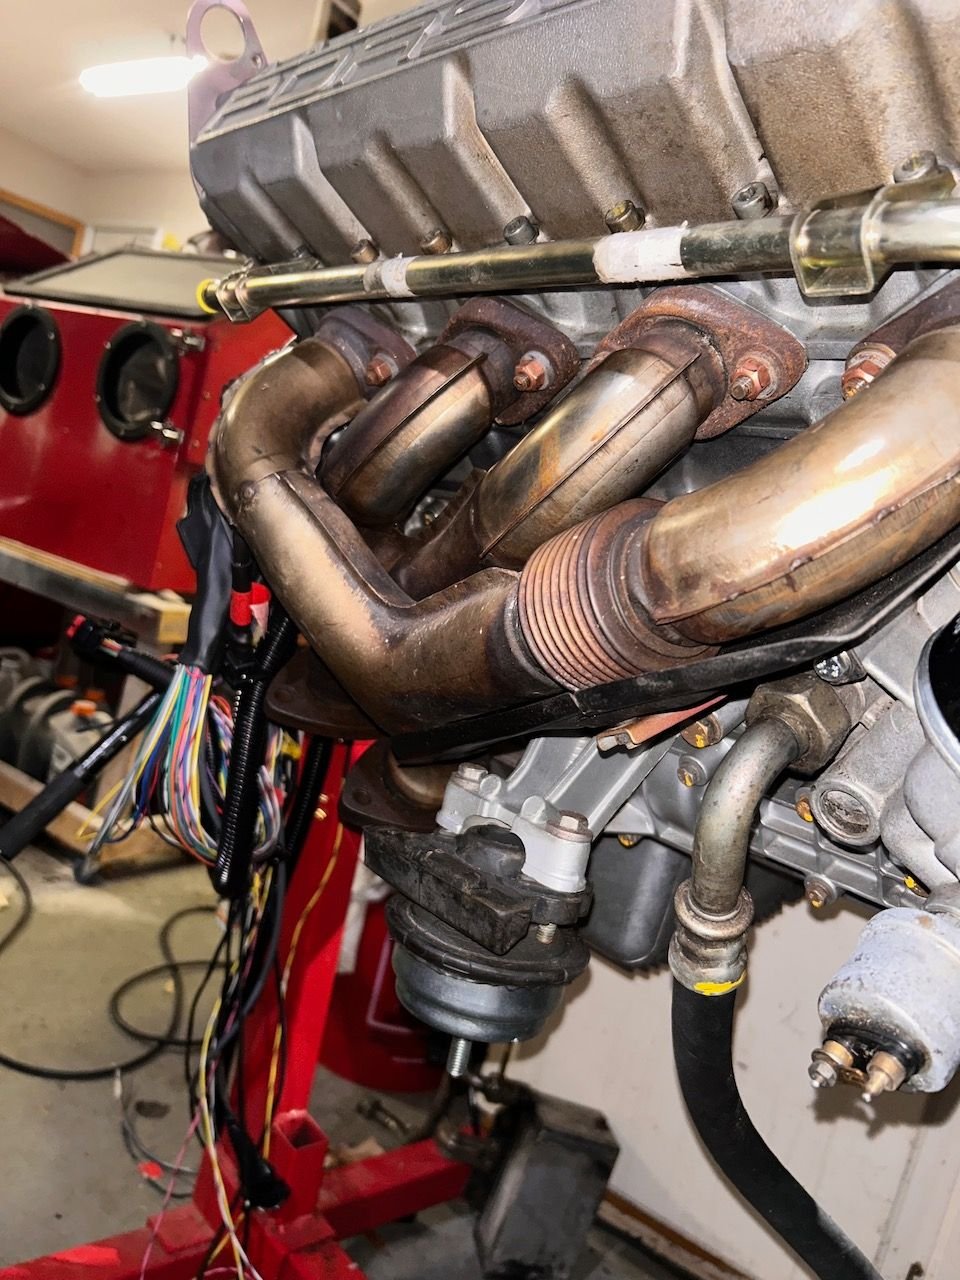
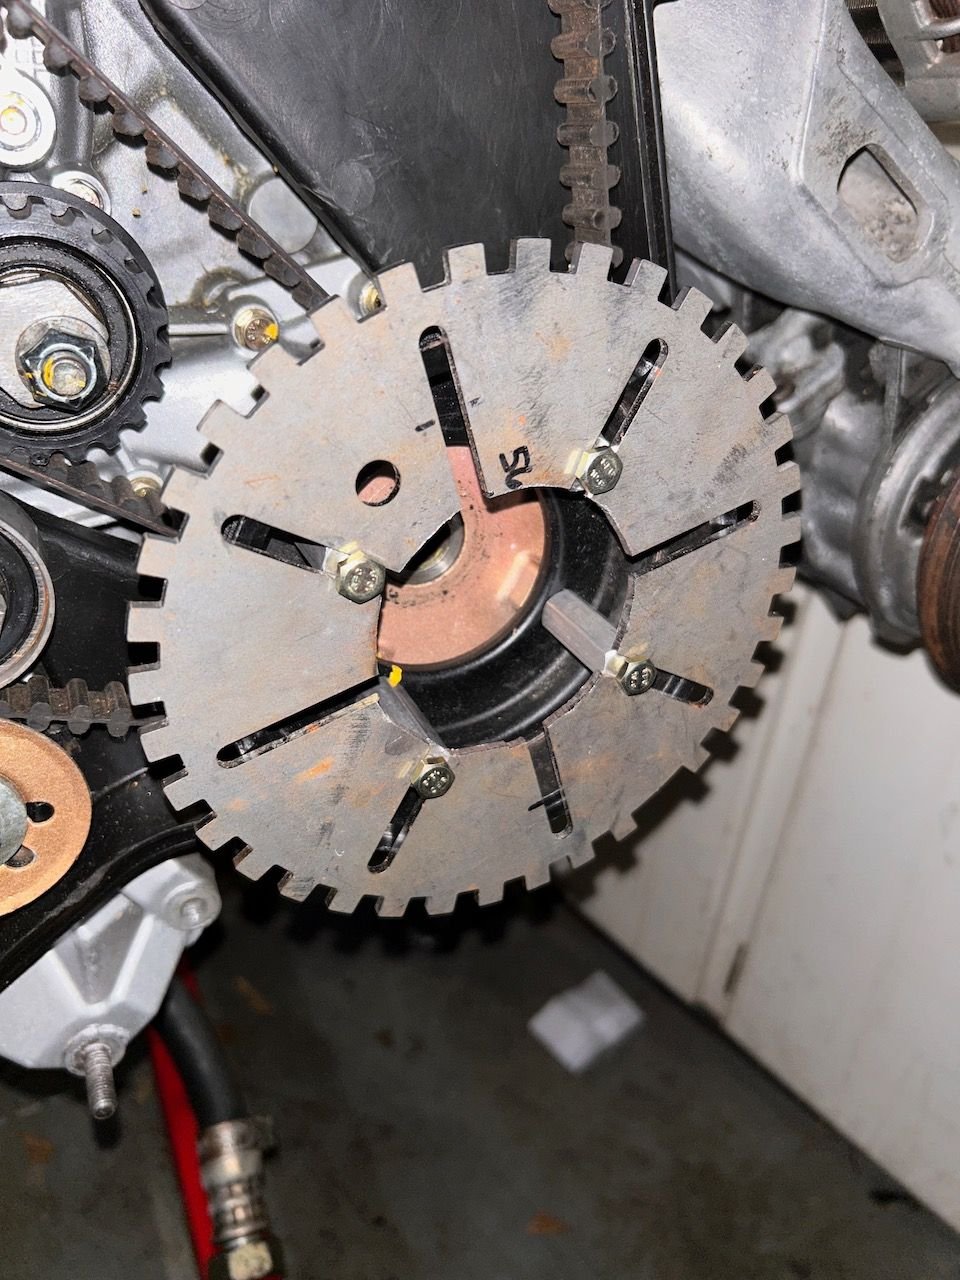
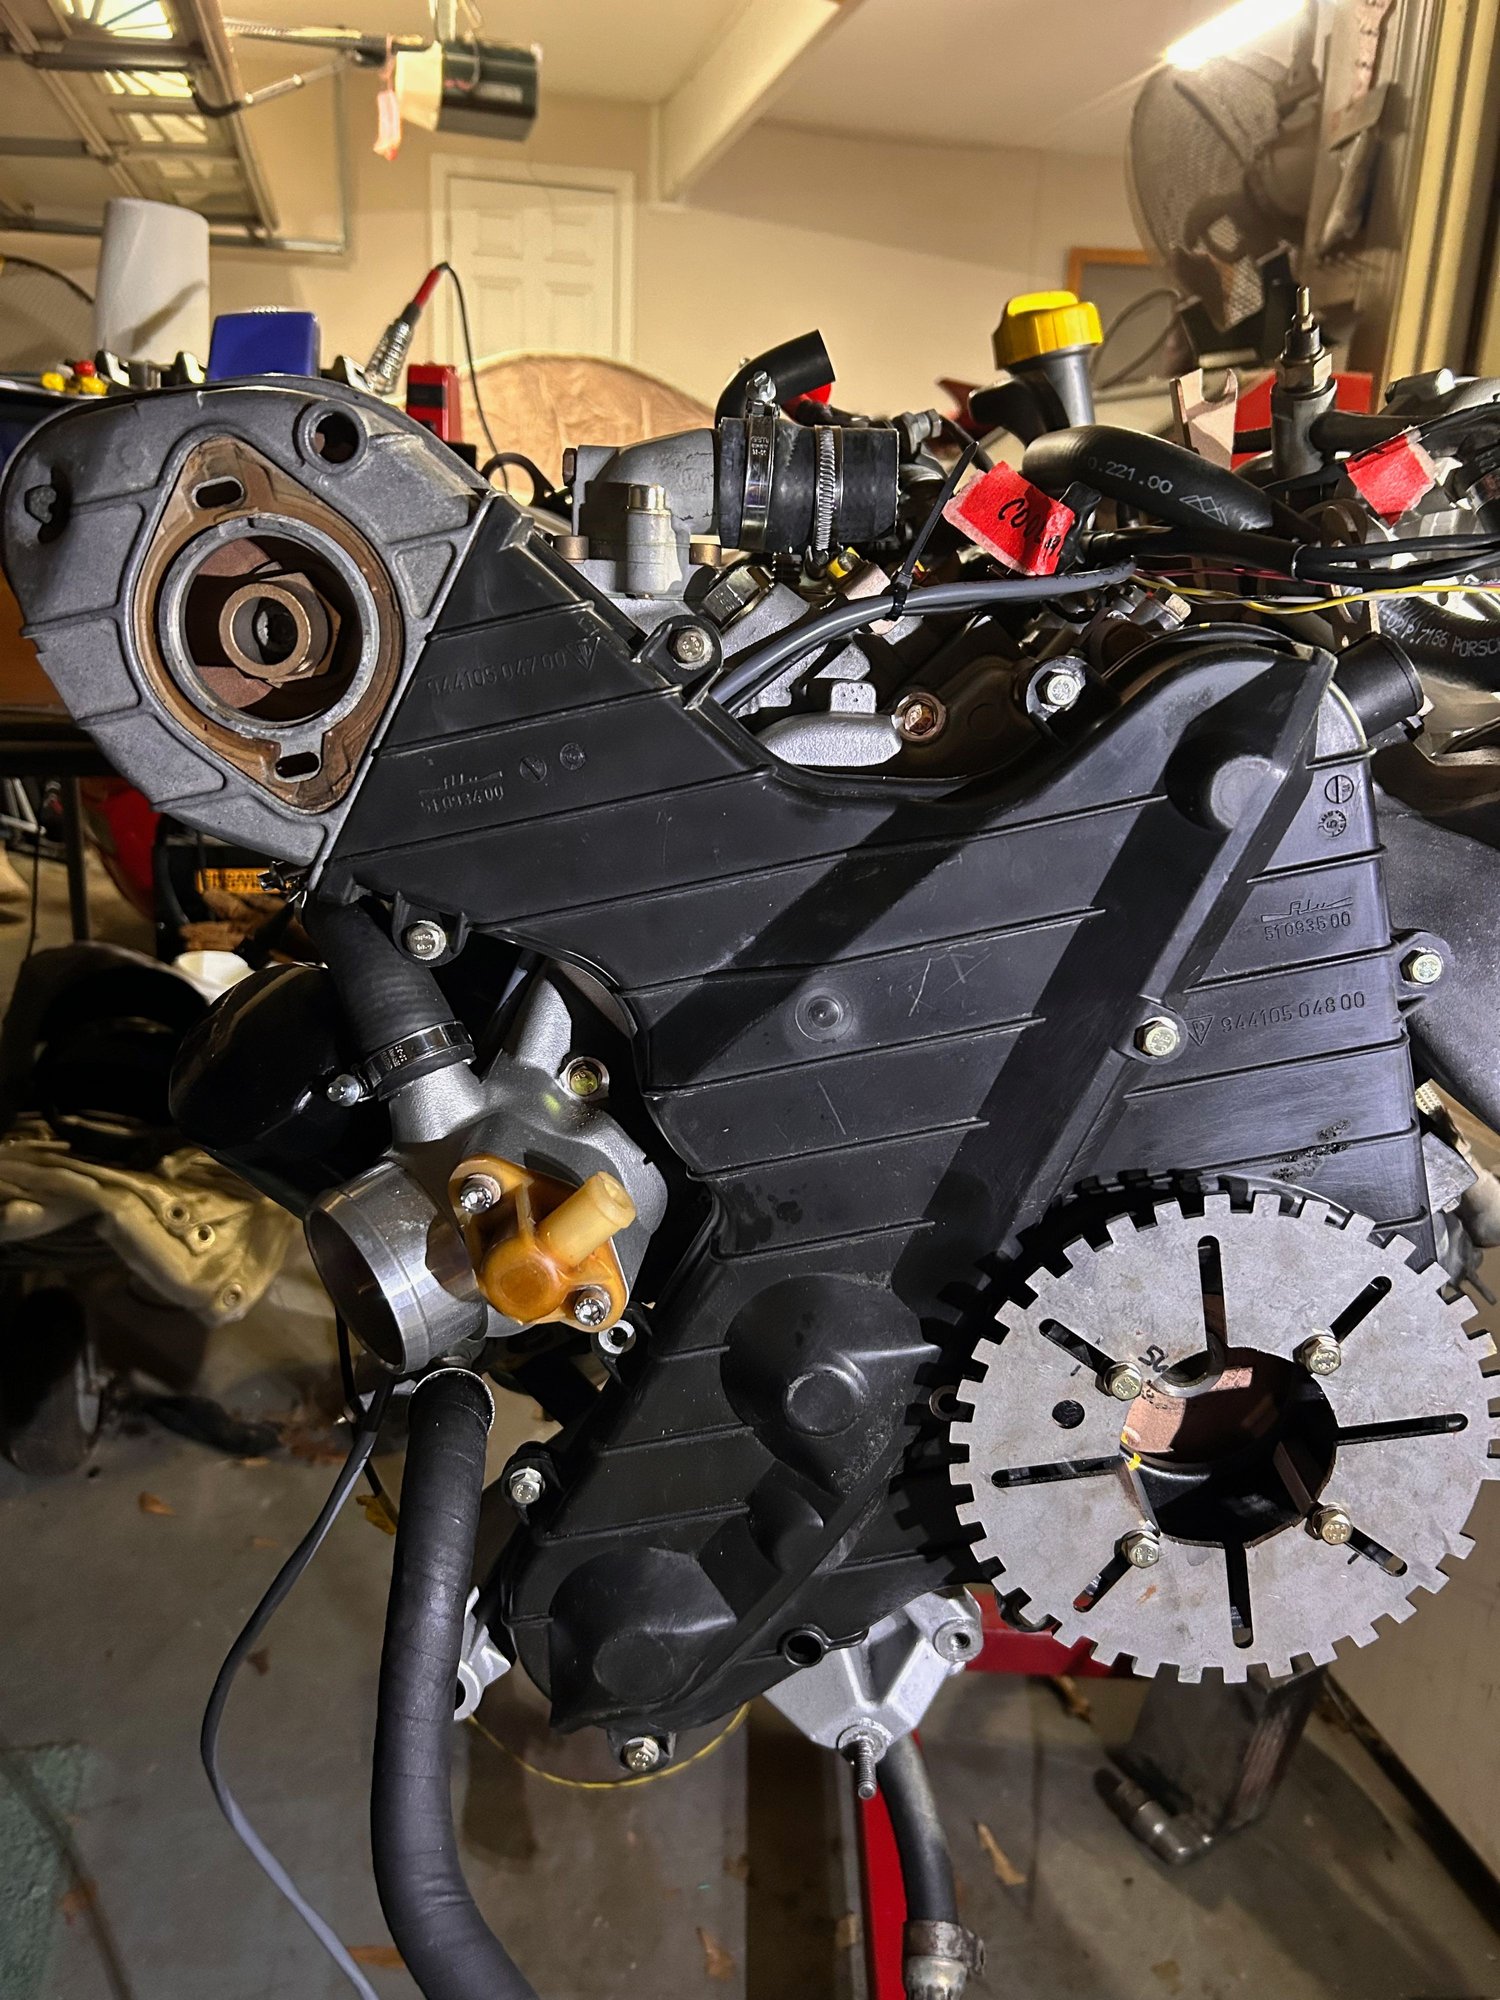
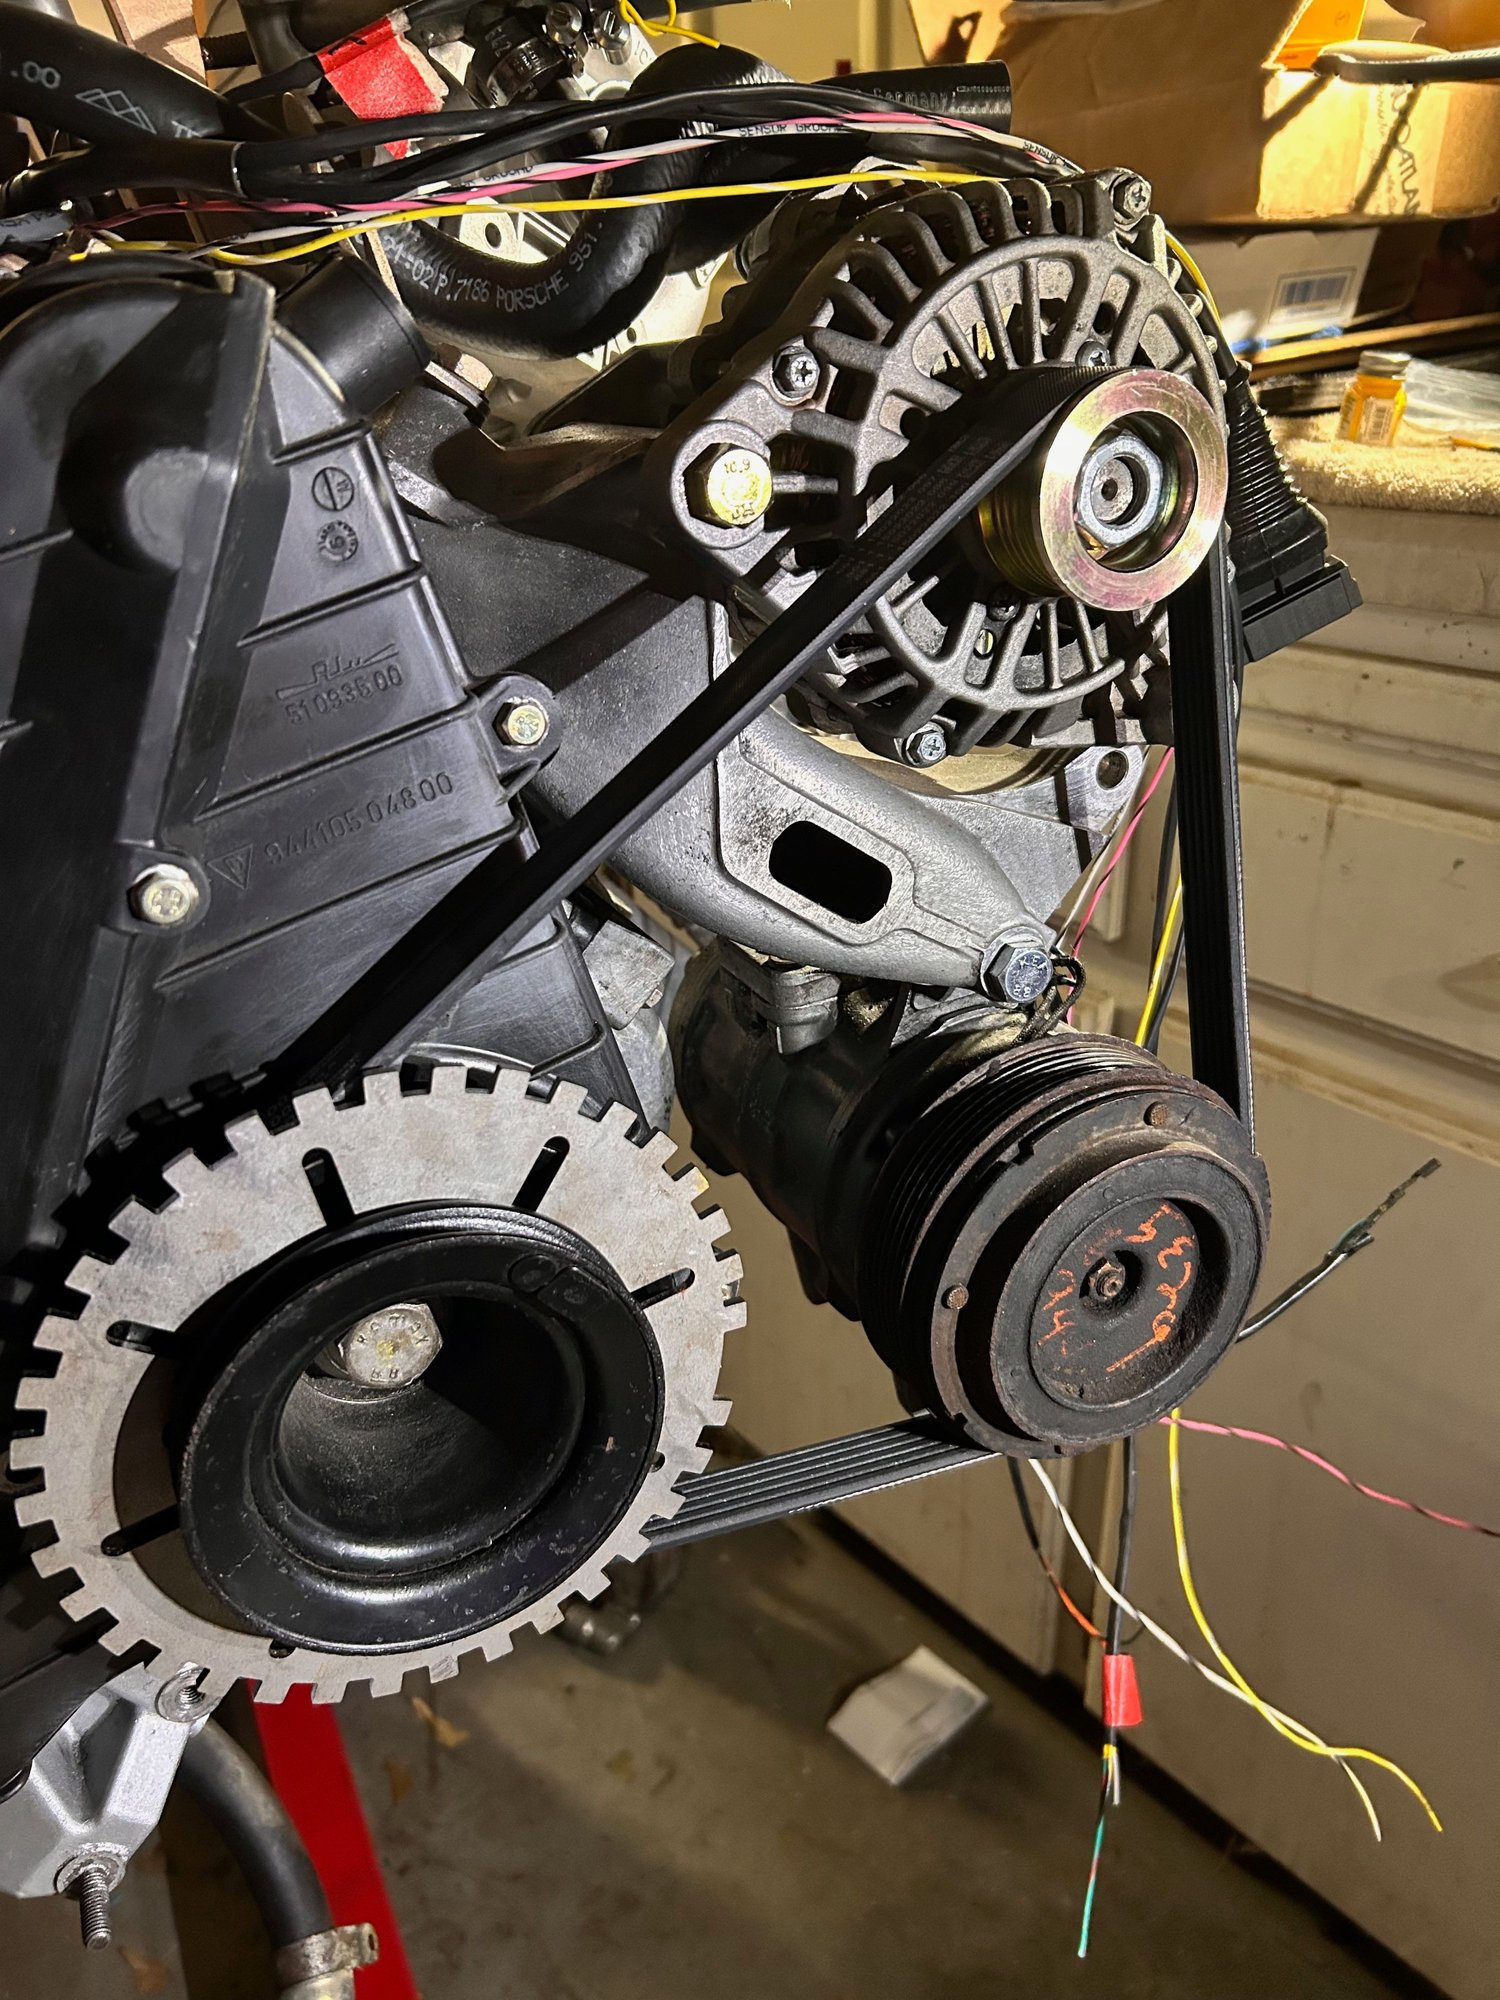
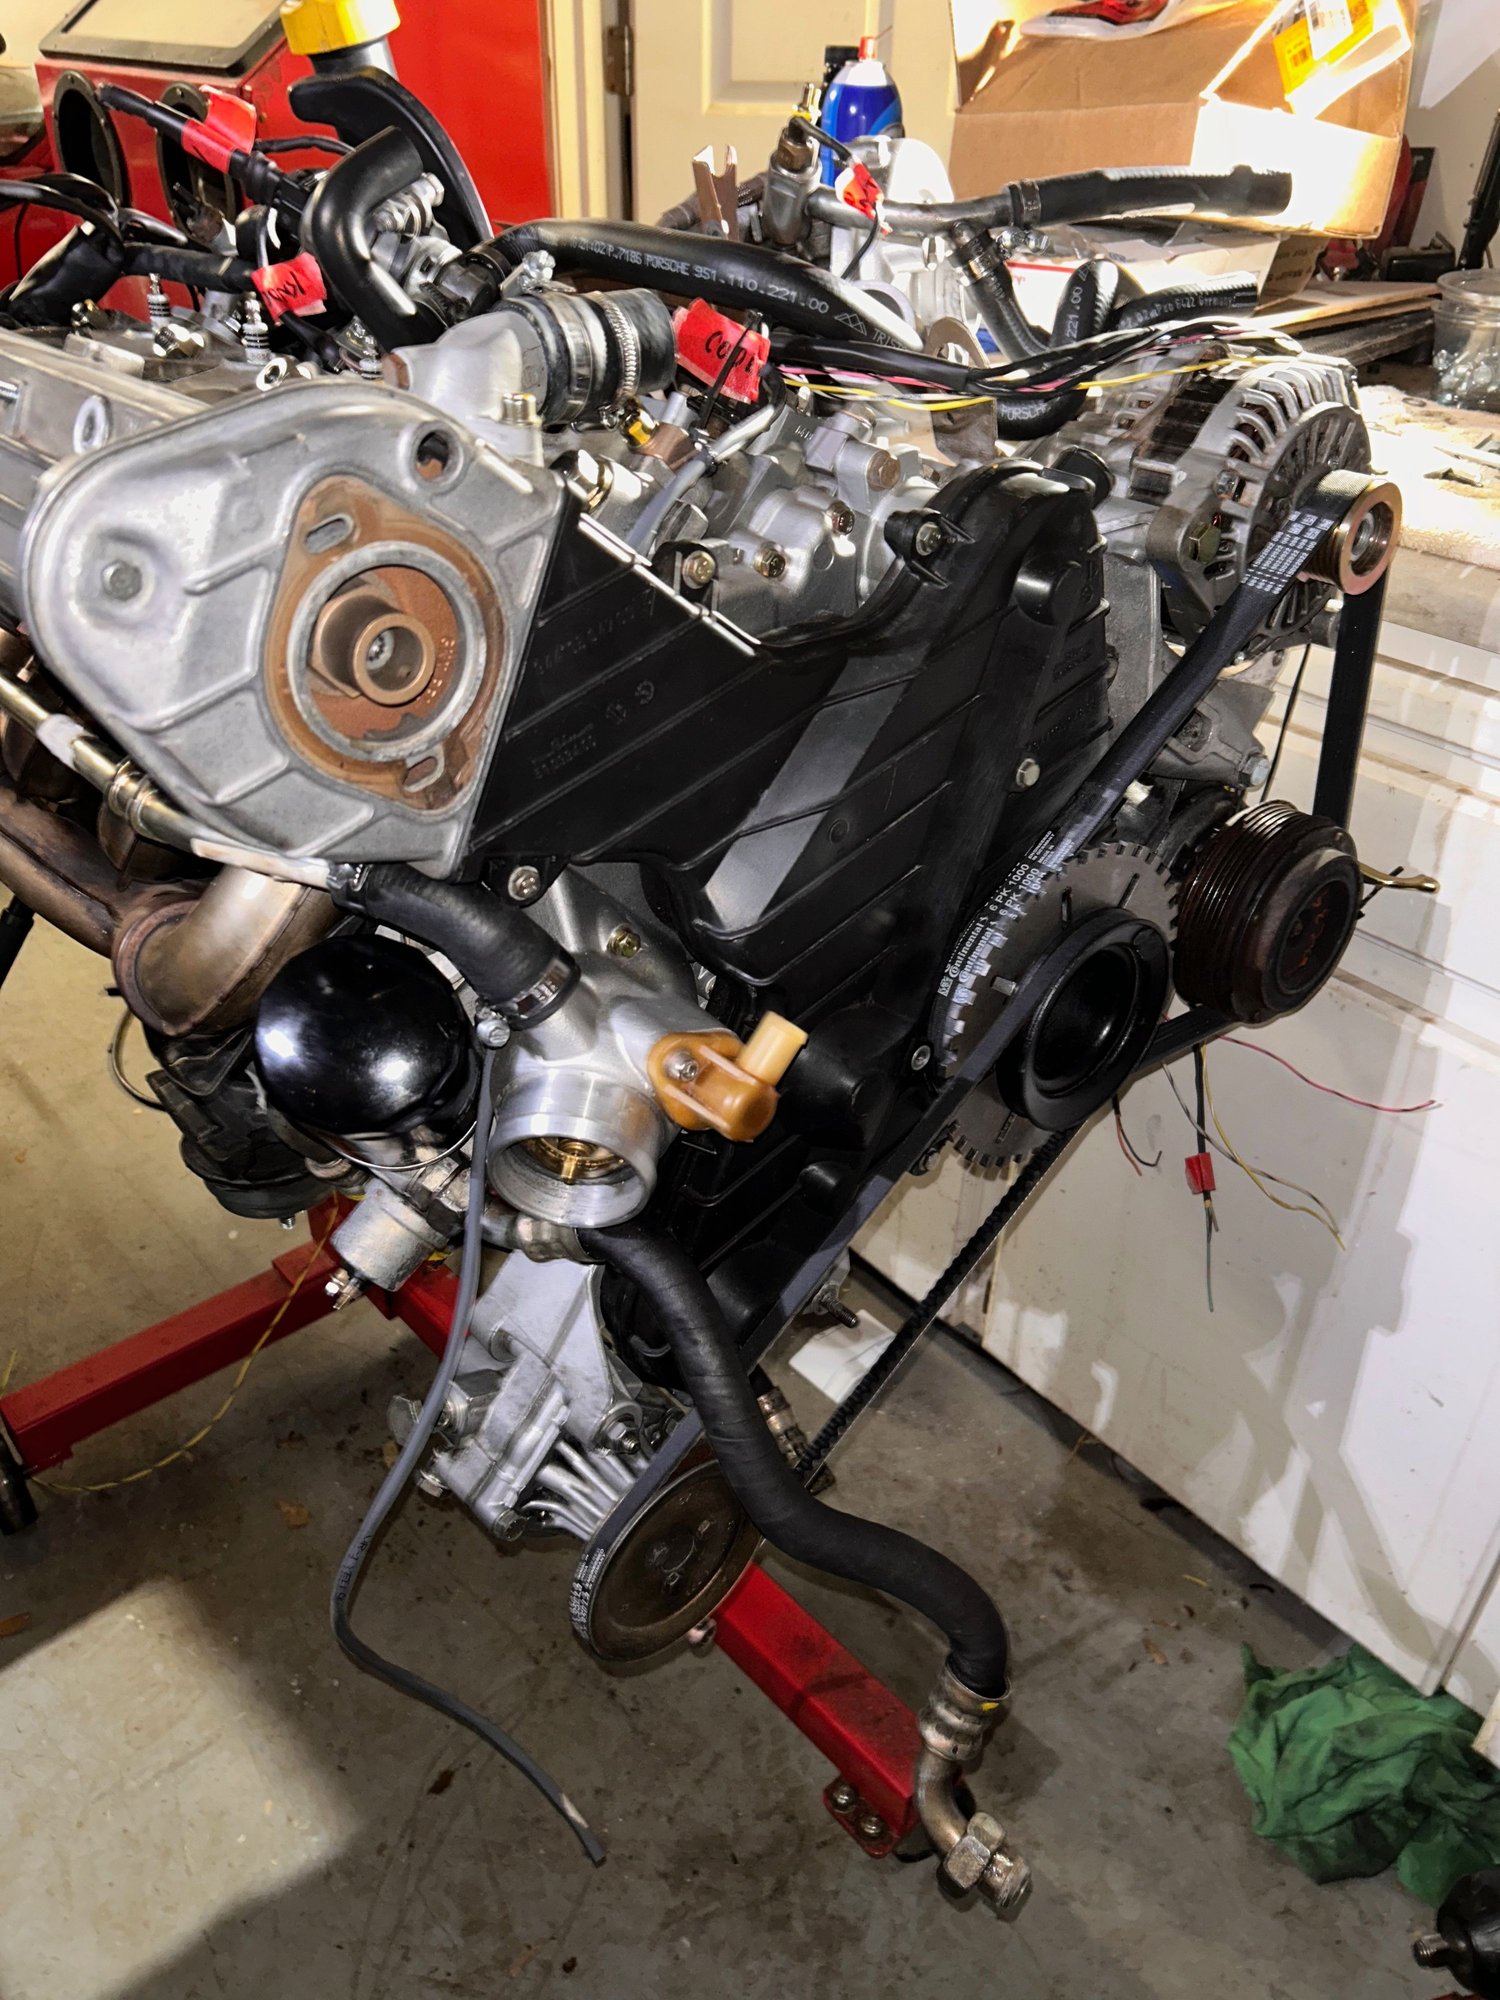
Everything on top just about back in place. Have to rerun wiring harness and finalize a couple of things there. Heat shields back in place and ready to go. Belts back on. Notice the standoffs on the alternator pulley that will support the toothed wheel. Closer shot of the standoffs with a couple of securing bolts for the trigger wheel in place. Exhaust side back in place. Have to tightened the oil cooler feed lines yet. Crank trigger wheel in place. You can see how it sits against the new standoffs perfectly. Have to put some washers on there so this is temporarily temporary.
Great job to stick with it!
An additional observation, and this is an easy one, is that the balance belt tensioner is tensioned in the wrong direction. It should be tensioned clockwise which will move the upper belt run down and allow the idler to be set with the correct relationship to both the belt above and the pulley below.
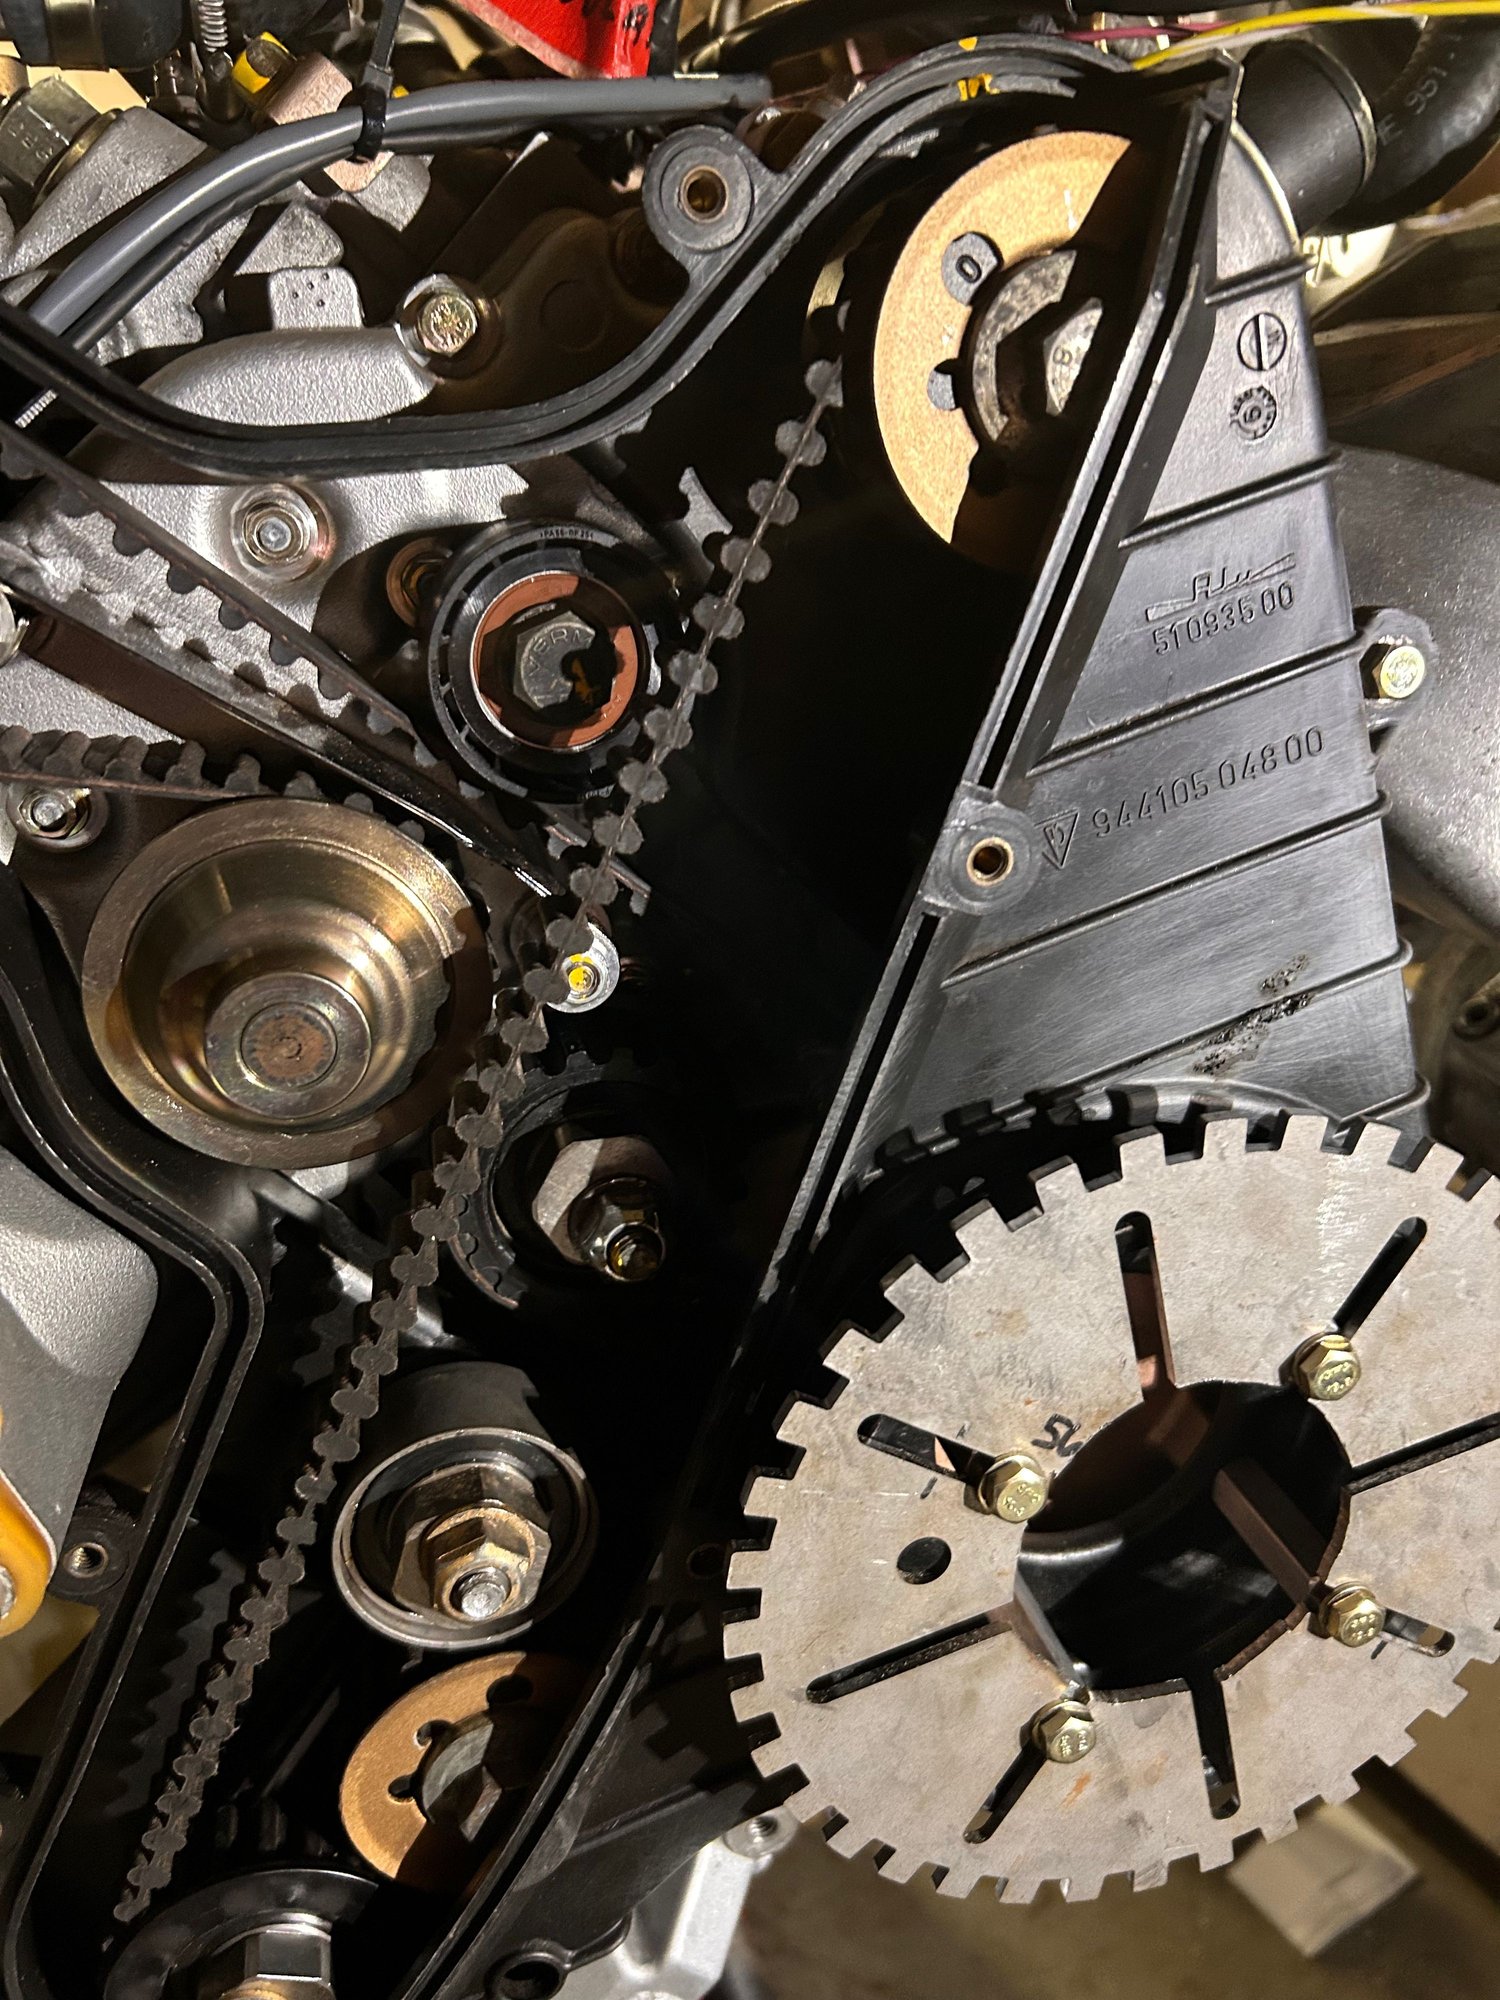
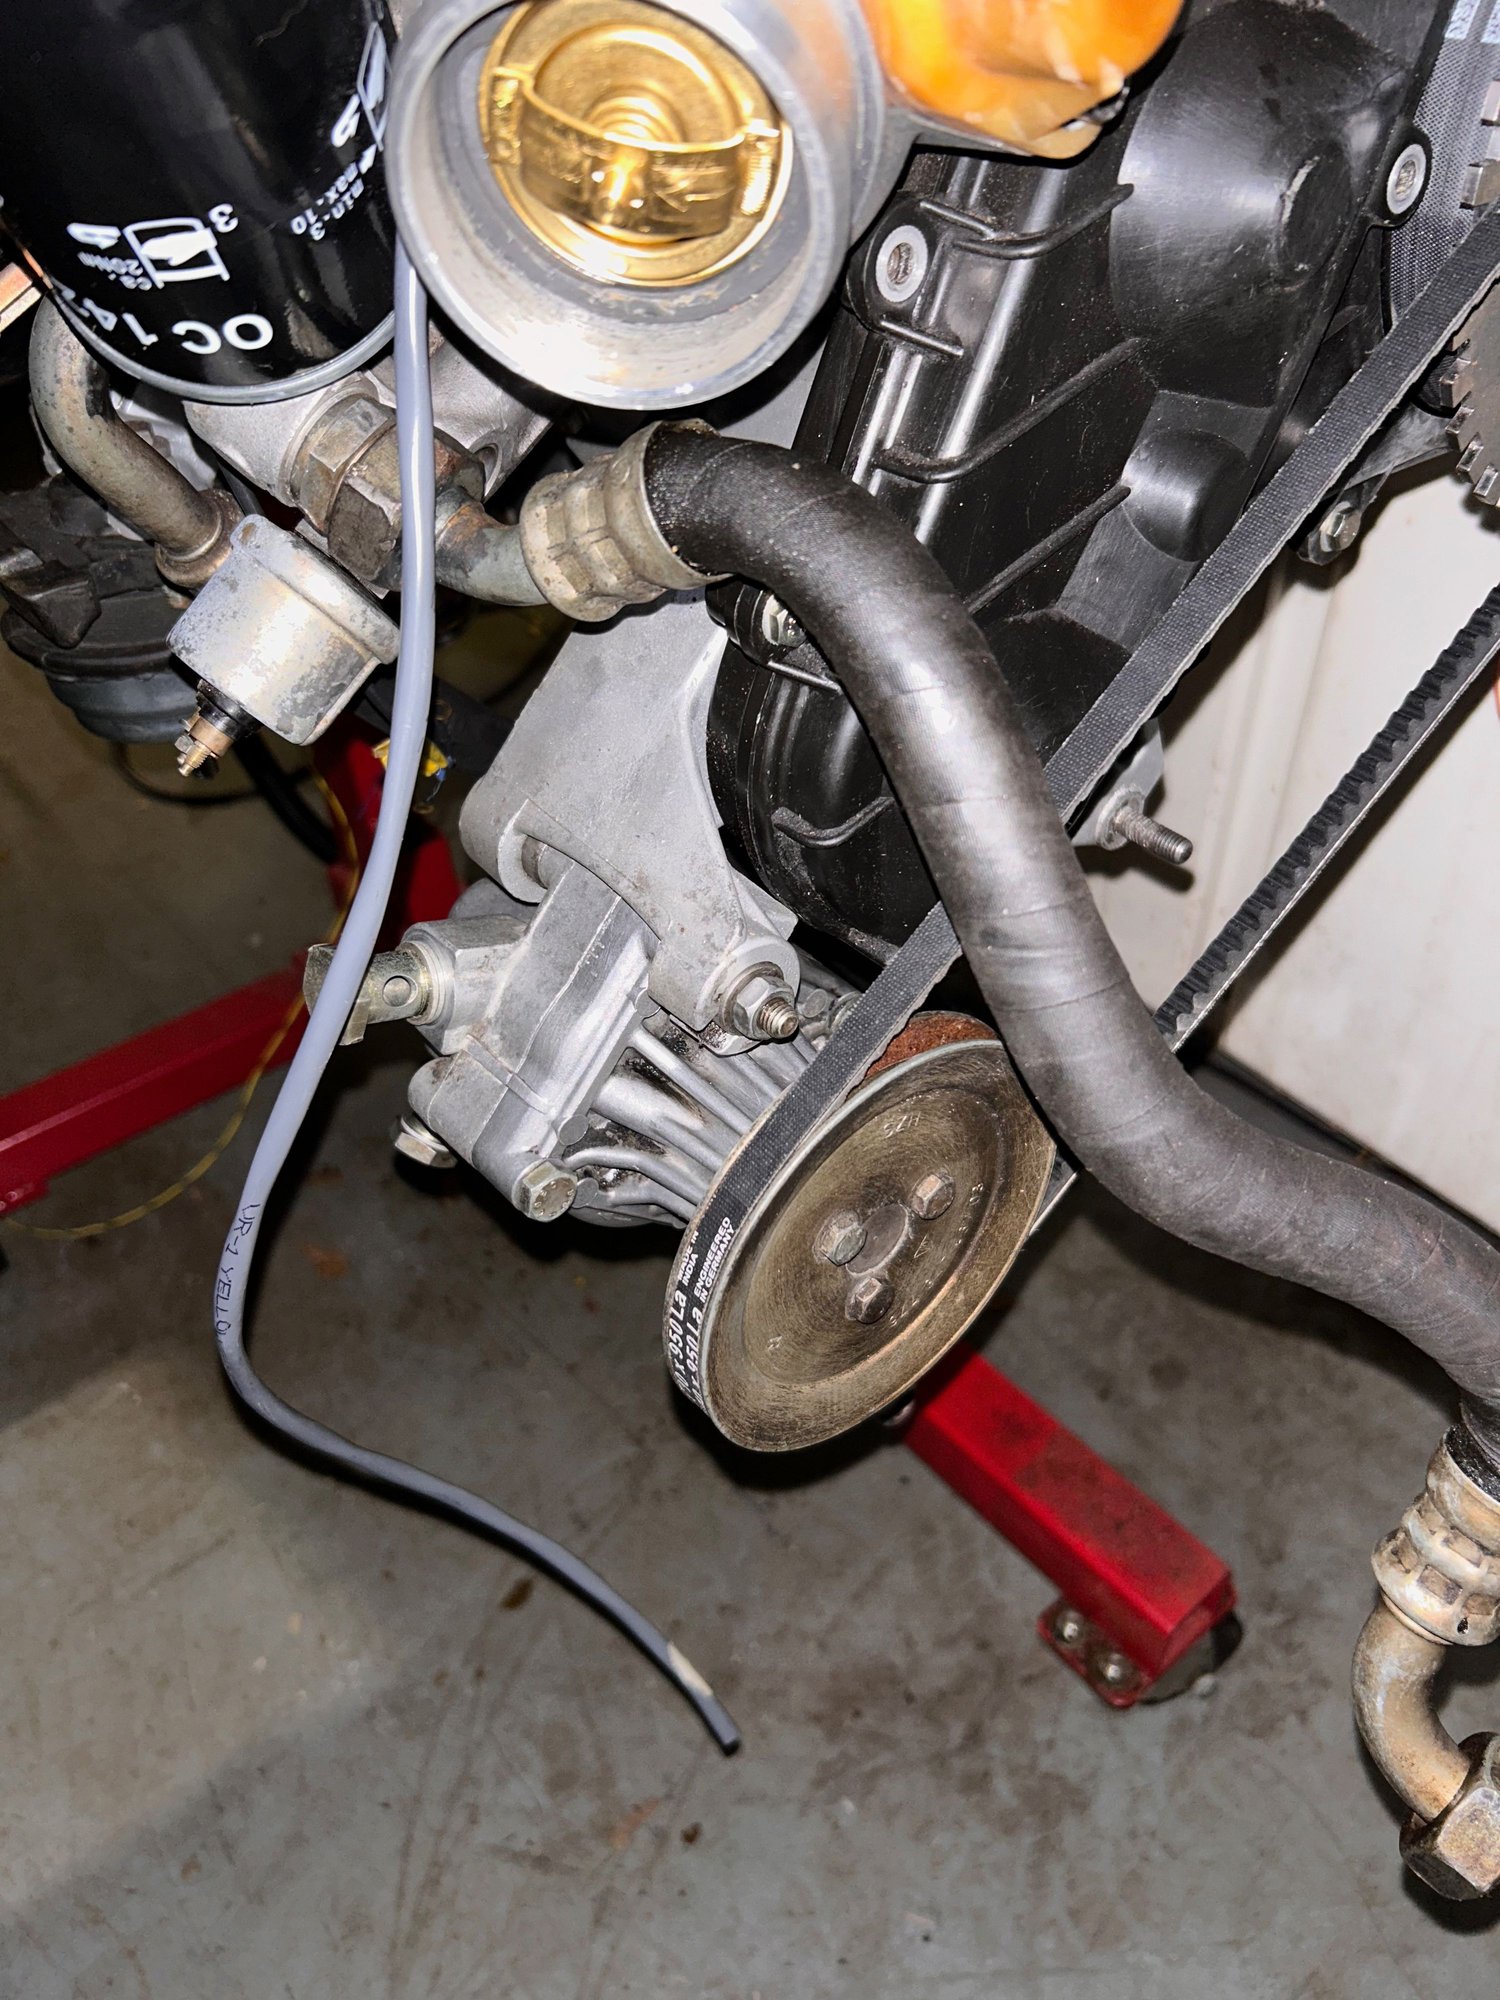
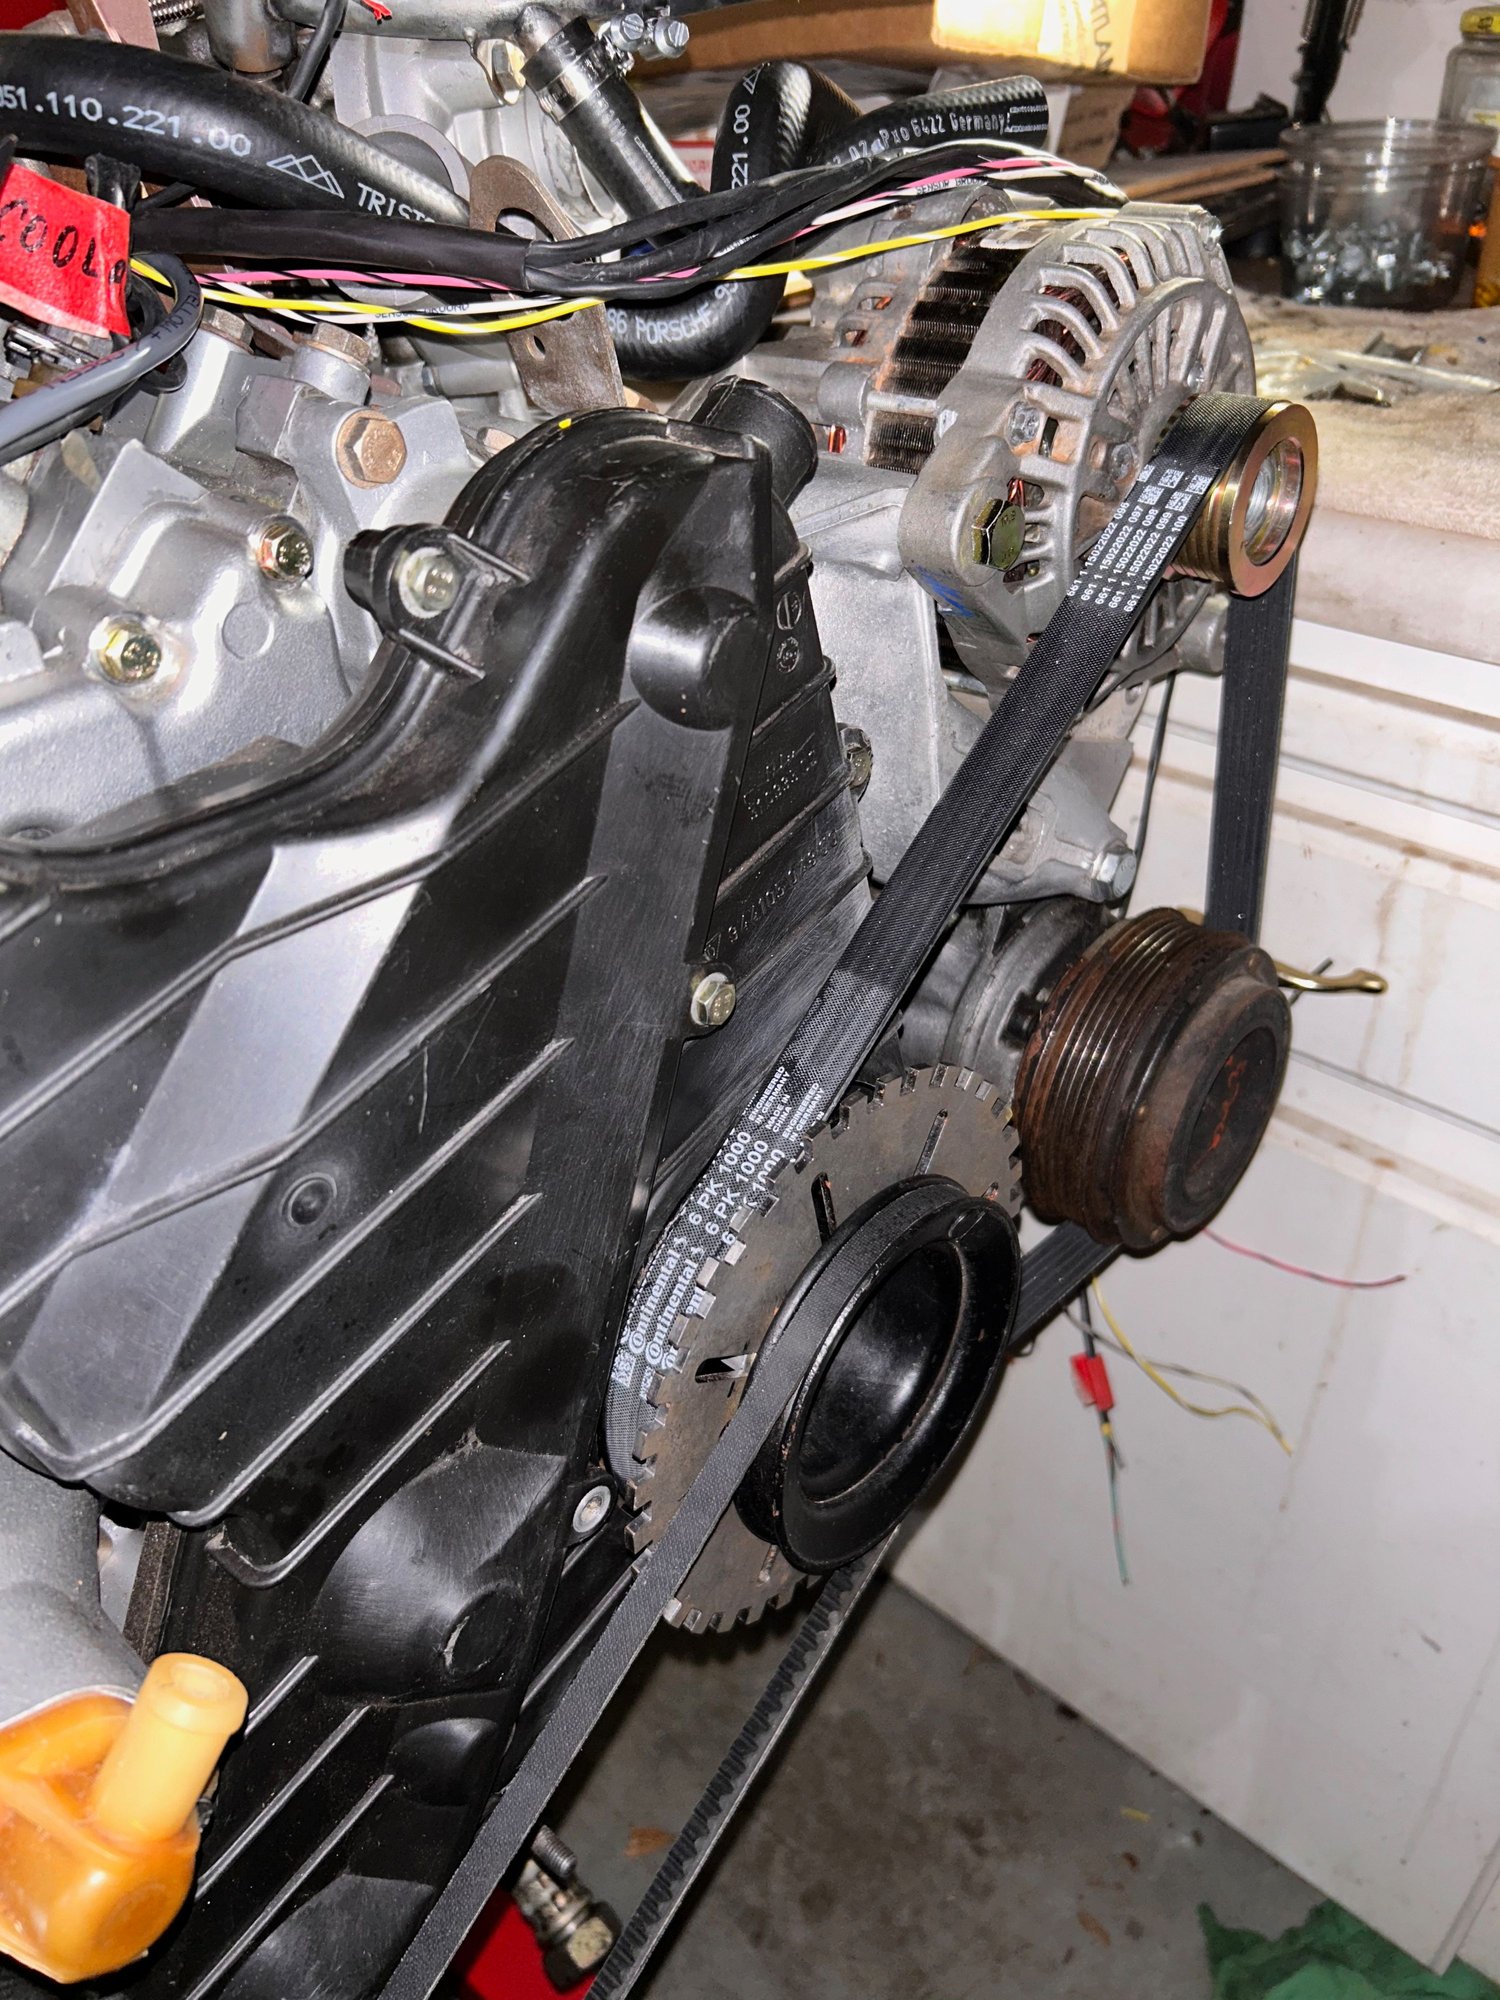
Here is the lower balance shaft belt eccentric...Gage does that look a bit better? Also used Brent's guide as a visual reference as well. Another shot of the lower area. Forgot to start taking pics before I put the lower belt cover on. One bad effect of the crank trigger is that the timing cover has to go on before the trigger wheel. Not the end of the world but a bit tedious. I am sure that is just getting rolling with the conversion to MS. Front of engine buttoned back up Test fit of new alternator belt. Seems to sit in place pretty well thus far. Power steering pump reinstalled after a slight rebuild debacle. Closer shot of PS pump in place. Belt area - 1st time I have seen accessory belts on this engine since I have had it. You know you are getting close when you can put the boots back on the oil pressure sender wires.
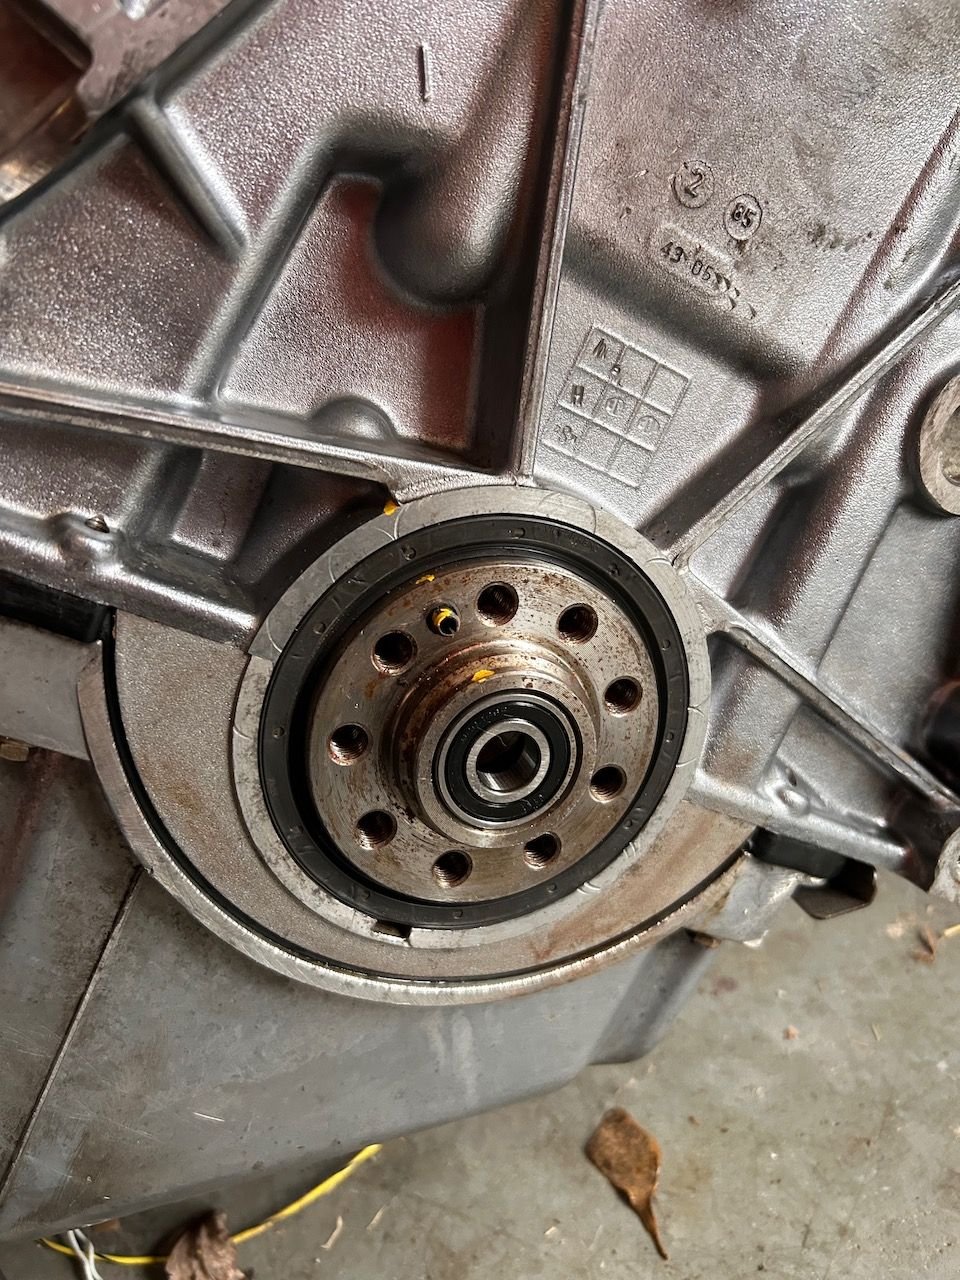
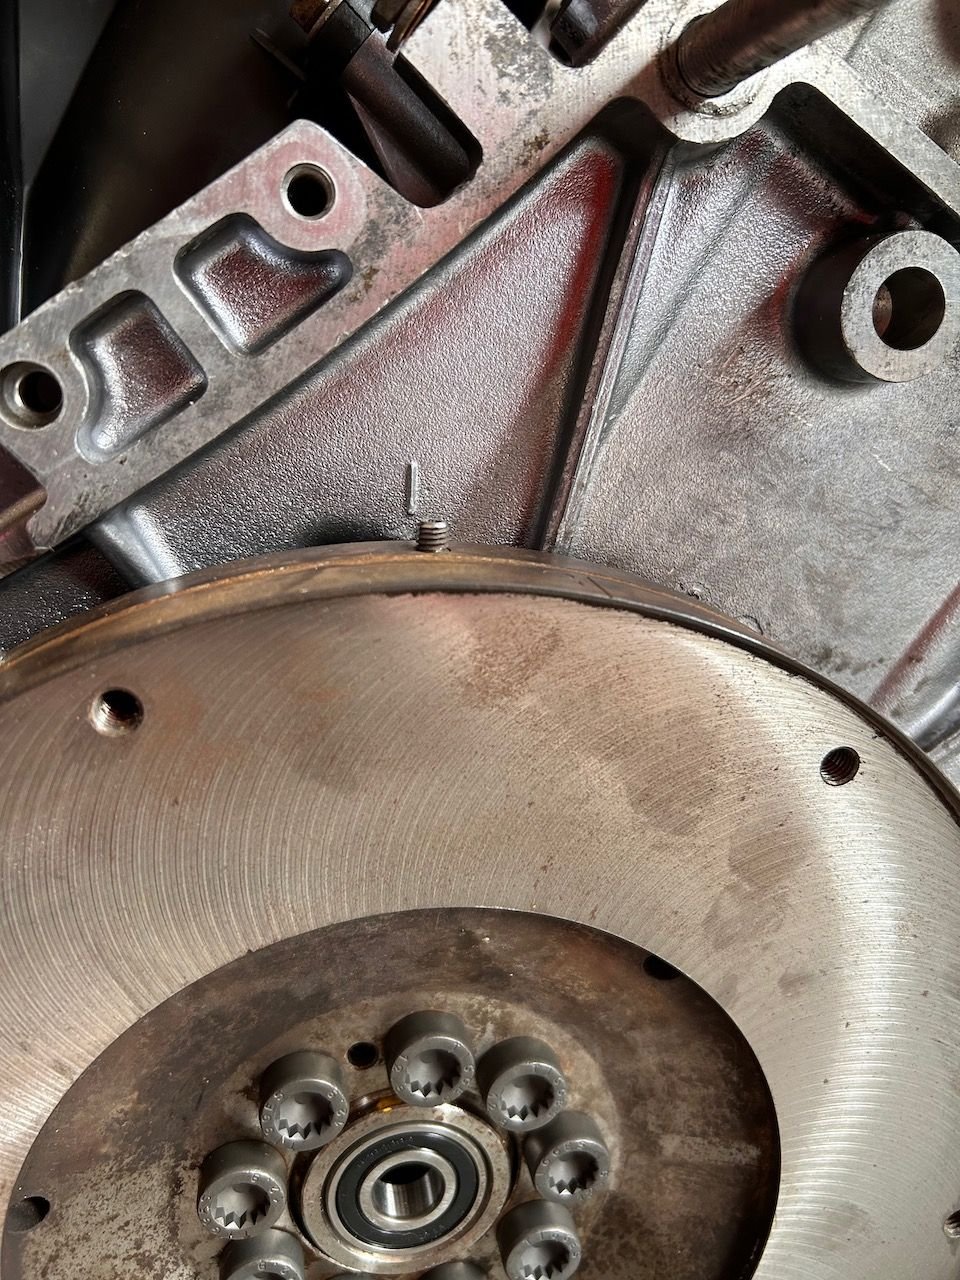
Feel like we are getting pretty close to setting the motor on the ground to replace the rear engine stuff - rear main seal, flywheel, clutch, etc. Then it will be time to get her reinstalled in the car. Now time to worry about forgetting something.
Got a little more work done this weekend and a big local surprise. Ended up taking the front apart again (for the 4th time now)...but all ended well and I'm glad I did.
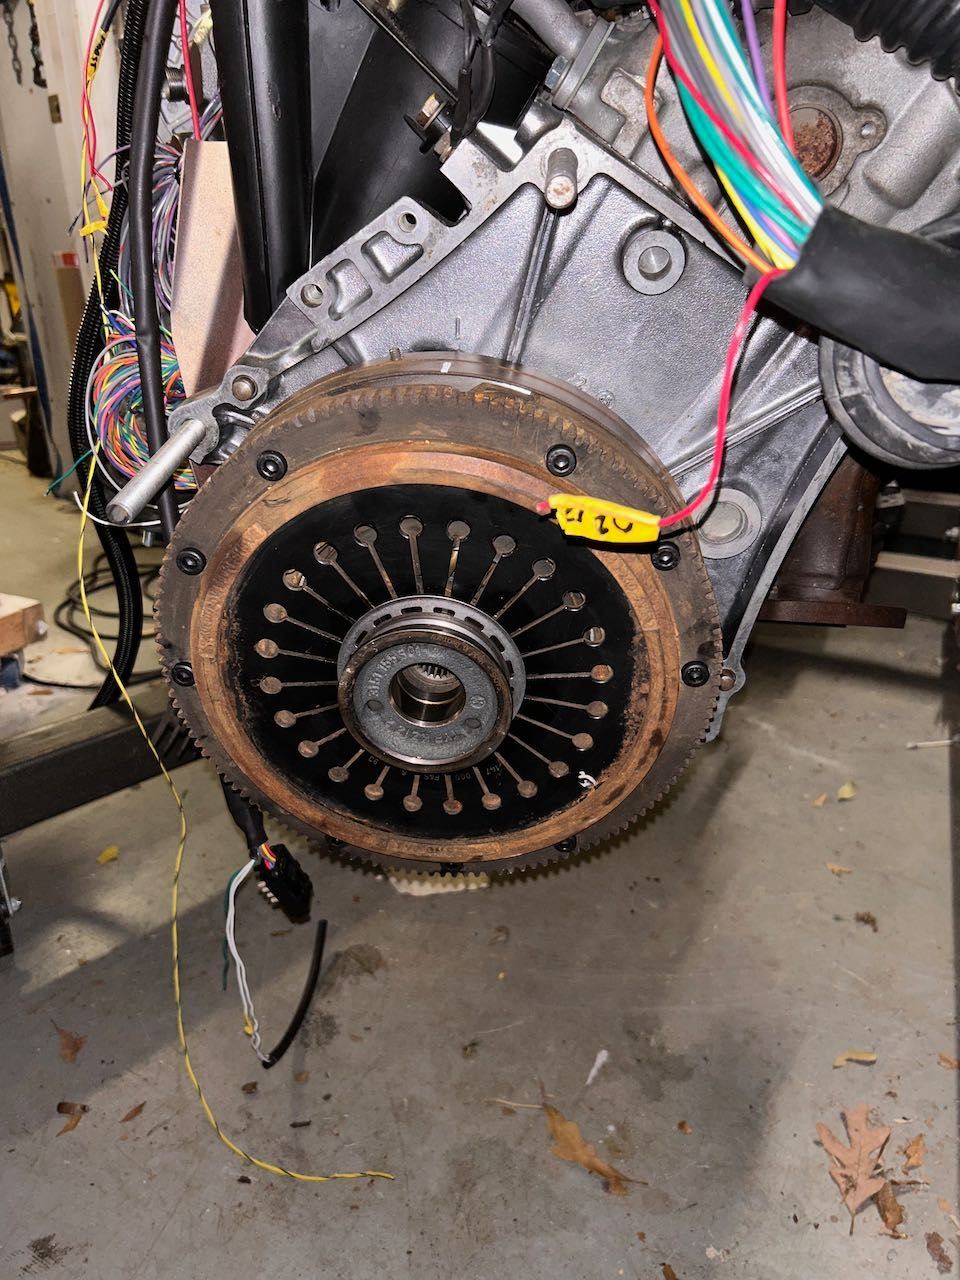
Got the pilot bearing replaced and the rear main seal in place...but... Went to install the flywheel and look! The engine is not fat TDC when the flywheel is correctly positioned. I must have bumped something during the reassembly last week. So off come the front covers, etc. again to have a look. Bumped the crank back so everything lines up and refit the timing and balance shaft belts. All seems good now and all lines up. Flywheel with new bolts is torqued to 66 lb/ft. When new release bearing comes in will reassemble clutch.
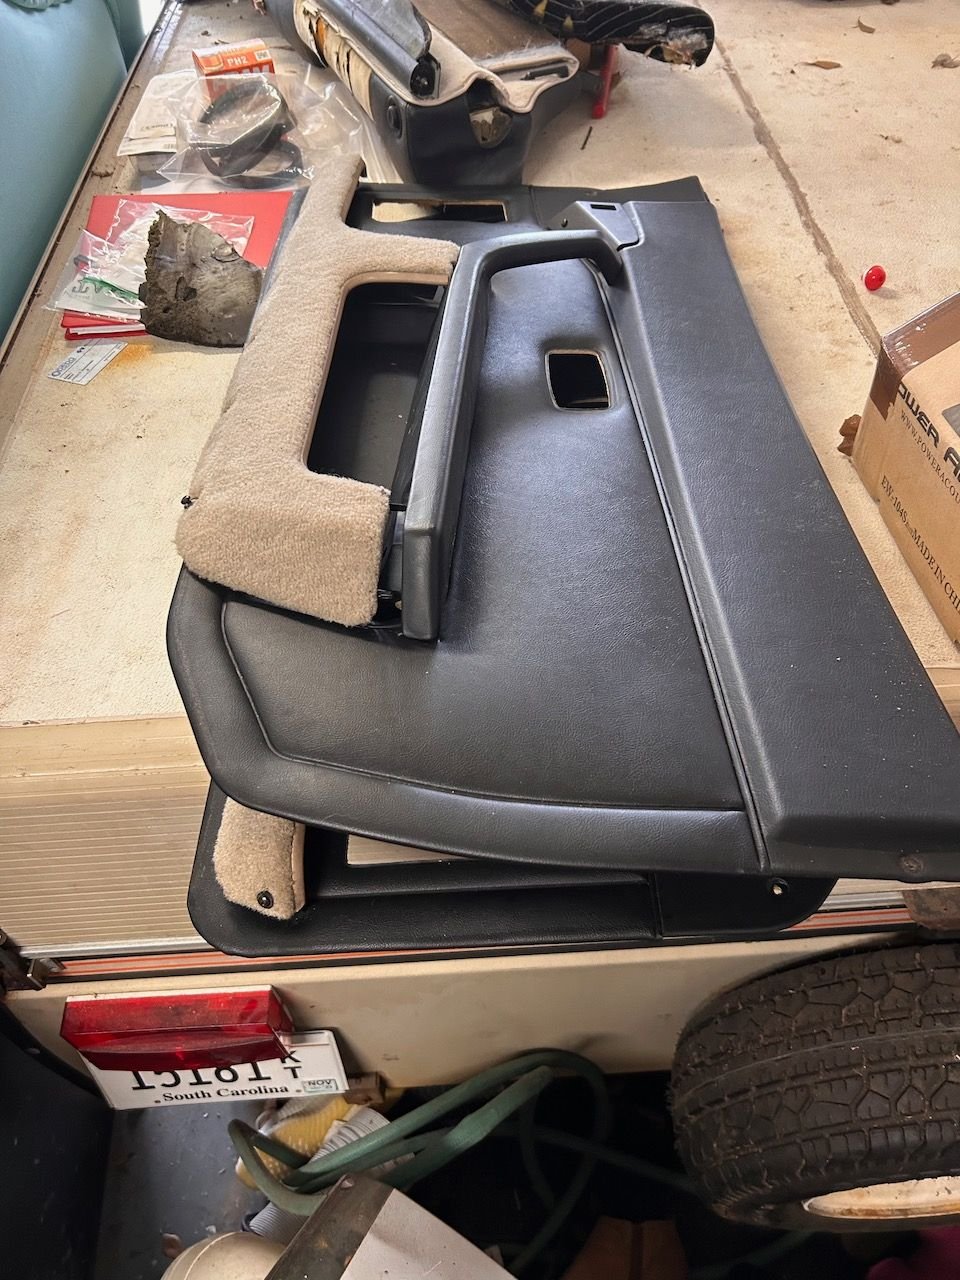
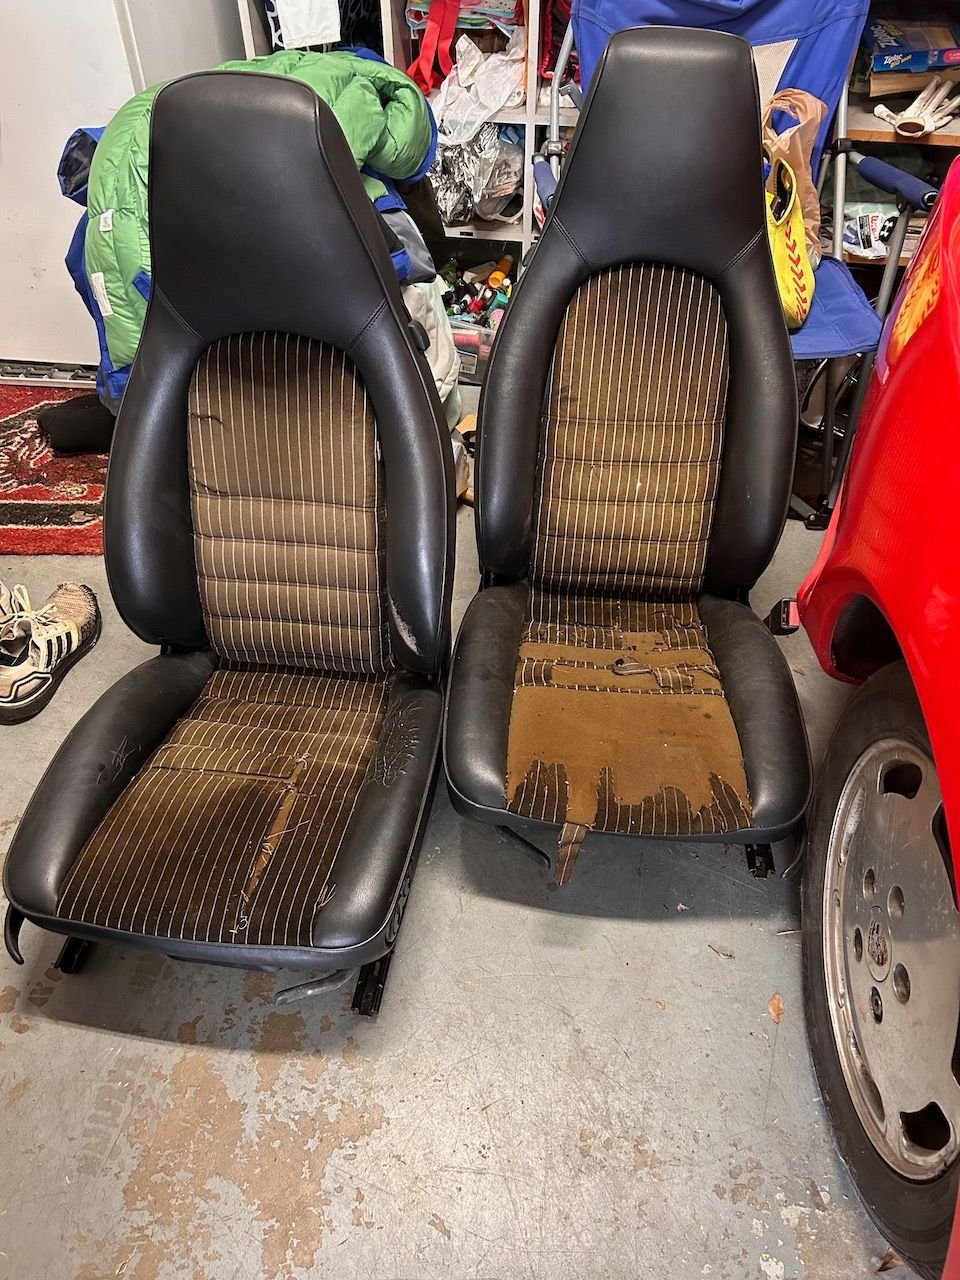
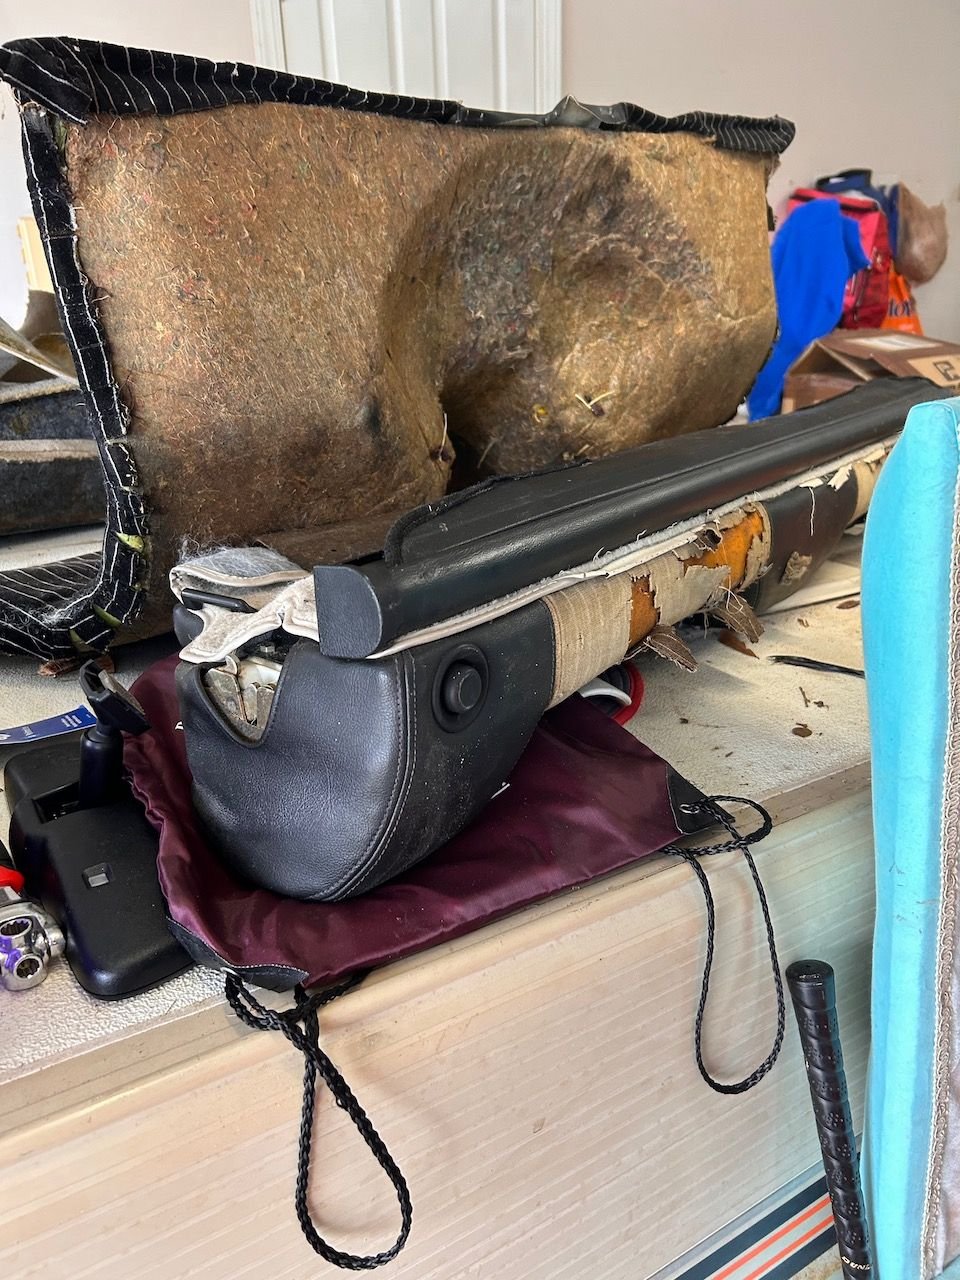
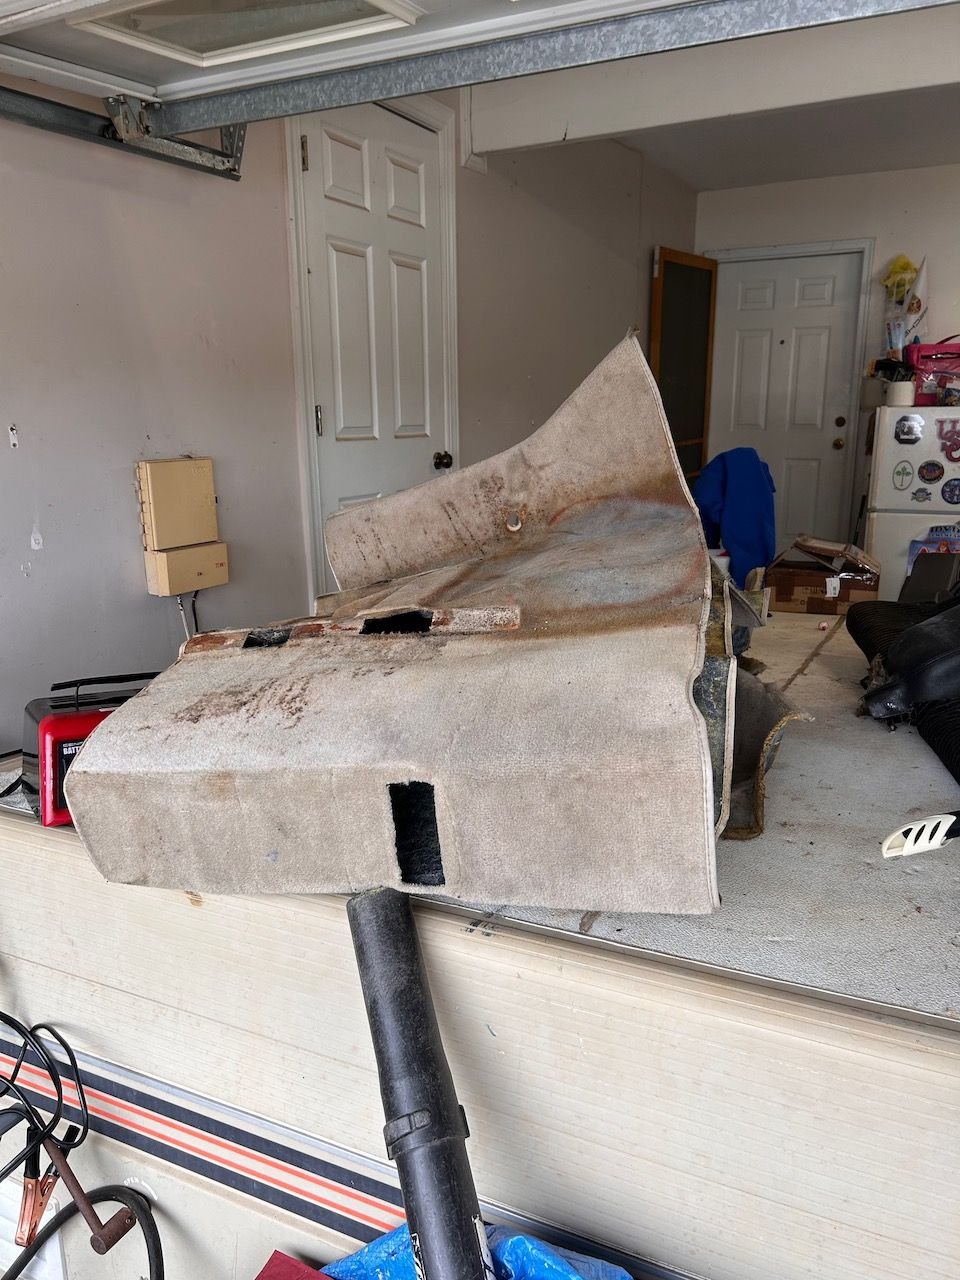
So here is the big surprise catch of the weekend. Found a fella 20 minutes up the road who is parting a 951. Lots of good parts in the inside as car had an engine fire. It's a Euro delivery no option car (no sunroof) so some nice things. Anyone picked up most of the interior from him. Door cards - probably the nicest of the lot. Front seats will be recovered. Love the idea of the pinstripe seats for this car. Somewhat unique I believe. Rear seats. Really need recovering as well but will probably hold off - no one will be back there anyway. Carpets. Need a very thorough cleaning but the alternative was to make my own.
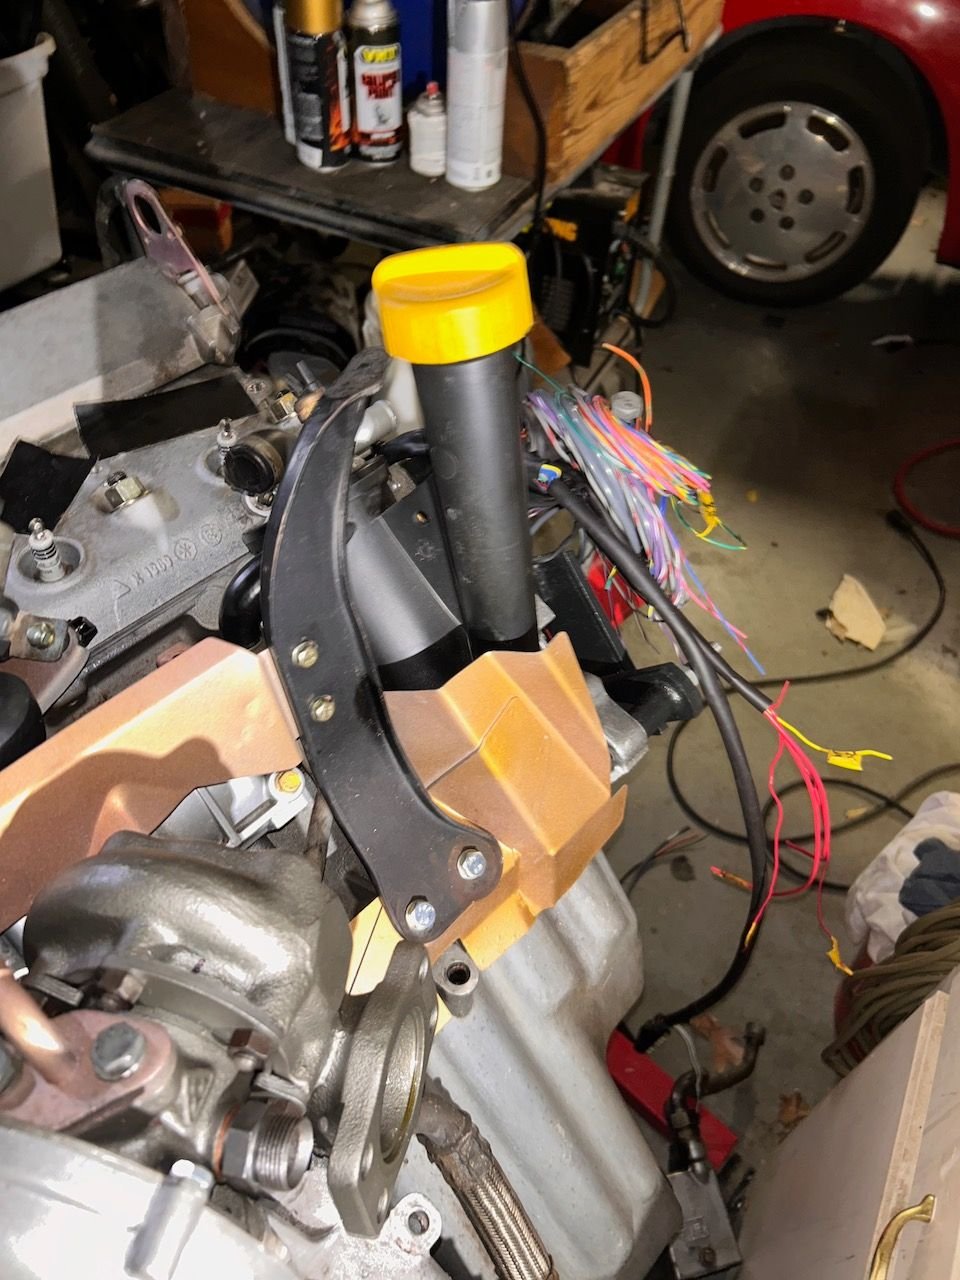
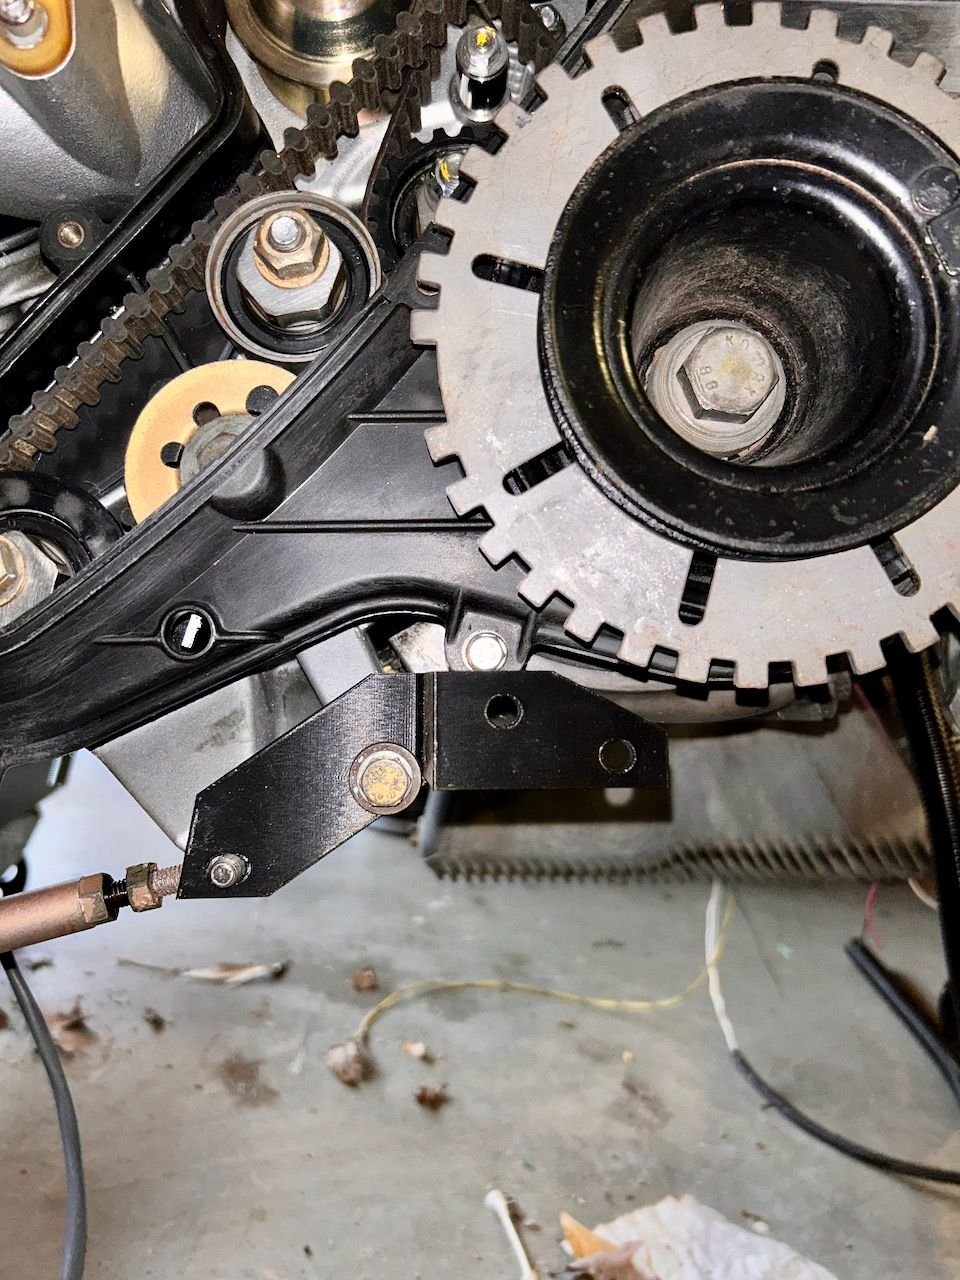
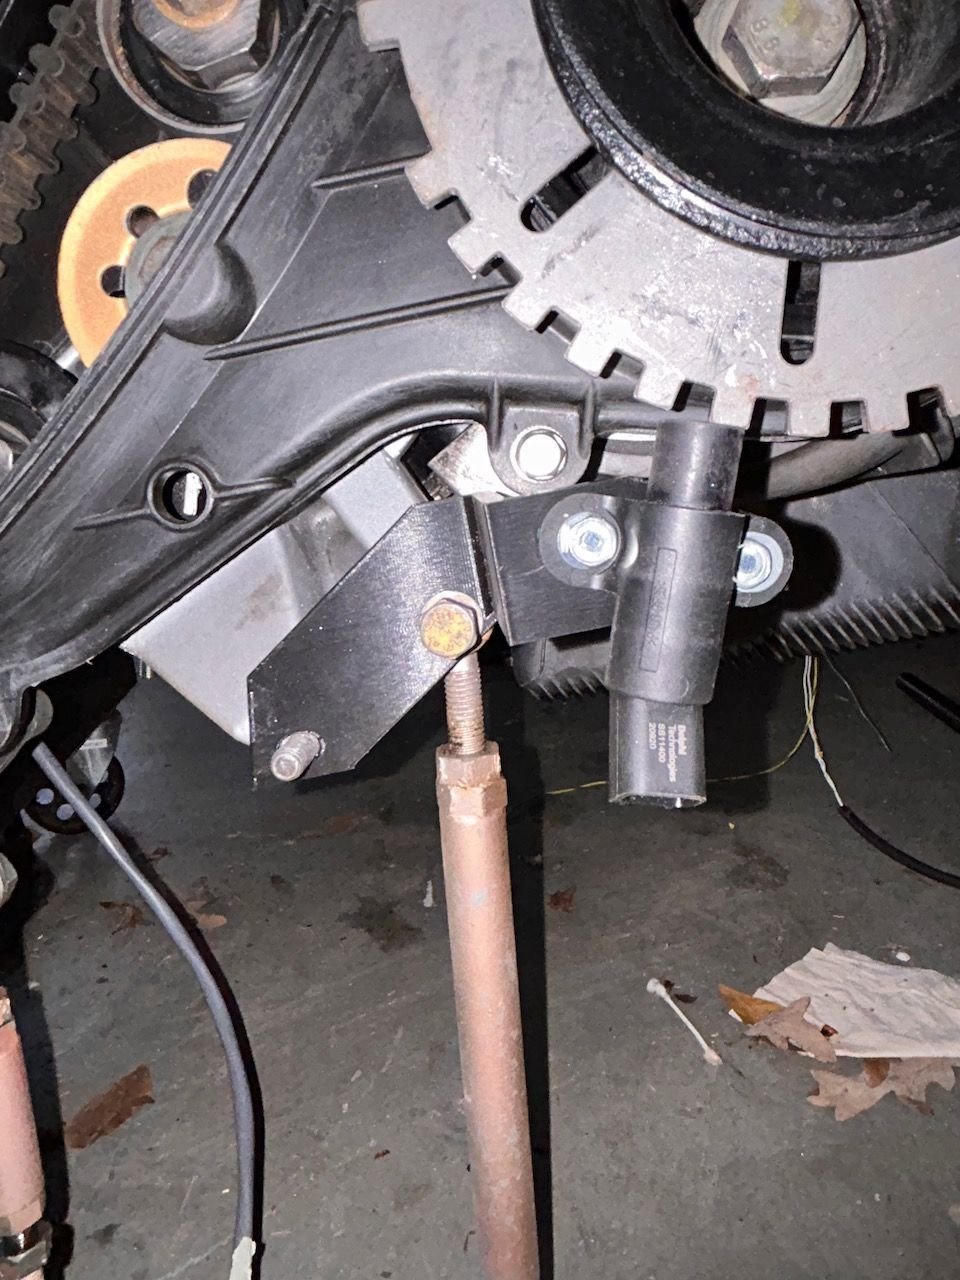
Got the first iteration of my new Trigger Wheel bracket today. Fits very nicely. Plan to get the guys to add a curved slot to the right side bracket mount (on AC adjuster bolt) and on the right side of the sensor itself to allow a arc-shaped pivot on both attachment points for adjustment.
The Ford sensor I am using (from a 1.9L Escort) has a wider "bushing" on the left side mounting hole which would imply the ability to pivot on that point.
Will also have them add a triangle-shaped brace at both 90 degree angles for additional rigidity.
So far so good! Bracket by itself. Bracket with sensor attached.
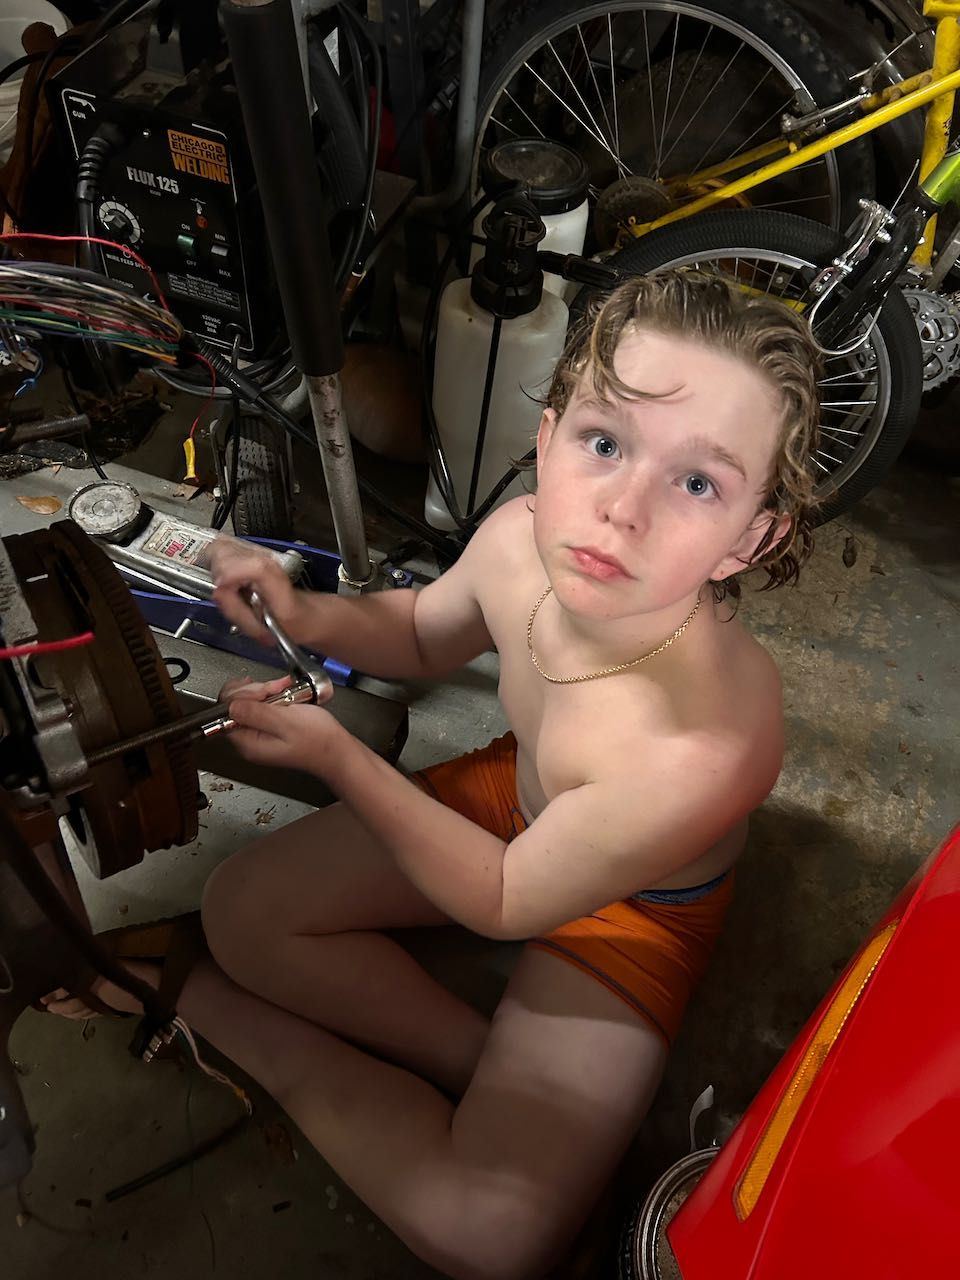
Clutch remounted over the weekend with a little help from the number two.
New hardware for exhaust bits should be here this week and once mounted, raise the front, remove crossmember, and set engine in place for reinstallation.
Learning the ins and outs of tightening across the circle and using a torque wrench. Remounted clutch pack with new release and pilot bearings.
Yep - it has been awhile, but I have been posting updates and questions in threads related to the specific topic instead of this general thread. I am going to regroup everything into this thread SOON since this is where we are.
As a side note, this was the absolute initial startup of the car. I was surprised that it ran at all - based on the fact that this is not only a full engine rebuild as well as conversion to a new engine management system. It was a great feeling to say the least.
The fast idle was caused by the ICV valve. I did not realize it defaulted open and I had it disconnected to try to get the engine running with as few variables as possible. Got that straight but I am still not running on all cylinders at idle. Compression test and leak down are good. Verified that all coils are firing and injectors are pulsing in test mode. Will post another updated video this week but a setting somewhere is not correct.


 01-28-2023, 06:09 PM