When you click on links to various merchants on this site and make a purchase, this can result in this site earning a commission. Affiliate programs and affiliations include, but are not limited to, the eBay Partner Network.
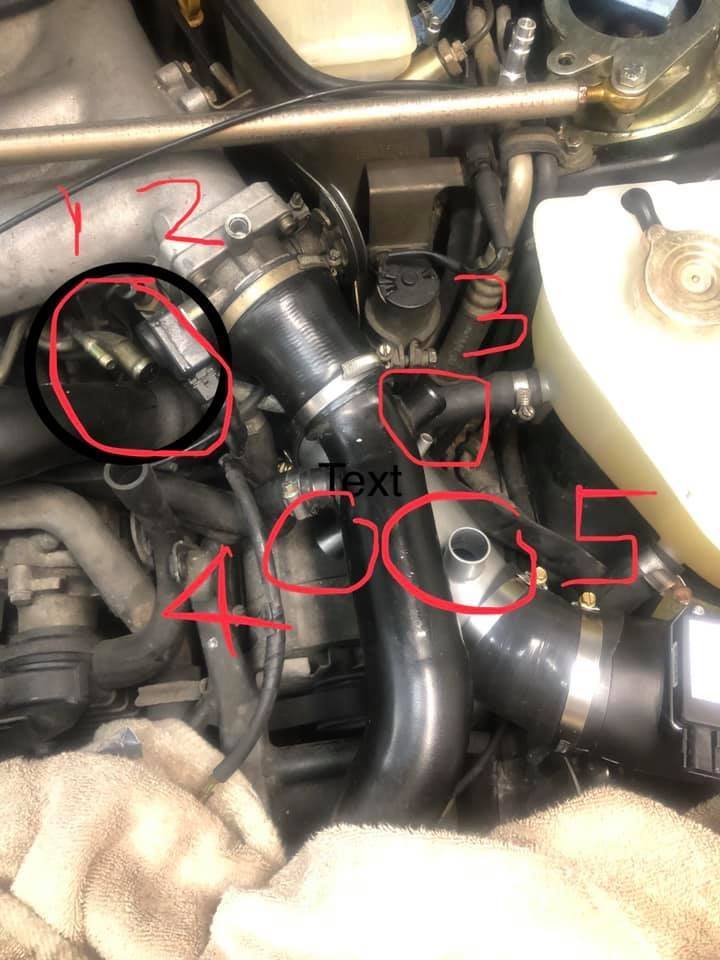
In midst of install of Vitesse MAF and other items.. FINALLY got intake to fit but am stuck on hoses and instructions are lacking. In theses photos, where do the go from>to?
the instructions I have are not clear and photos not as well on what goes where. HELP?
Other items being installed are:
Injectors
Swapping in 3 bar FPR
VITESSE modified OEM wastgate
Vitesse chip
The supplied metal J-pipe has the same ports as the factory J-boot. The only port that was eliminated is the return from the Cycling Valve, as 99.99% of the CVs has been eliminated.
It helps to take pictures before taking things apart for the first time.
On J-pipe:
- big Port by MAF #5 is for BOV, which also connects to Port #3 on IC pipe by TB. (as shown in the installation).
- small port under #3 in picture by turbo cooling pump is for brake booster, same place as it is on J-boot.
- #4 port toward engine is for crankcase vent. It ties in to large brass pipe #2 under manifold. (the second smaller brass pipe #1 is capped). Again similar to J-boot.
Not sure why you removed vacuum line from #7. It's for emissions and not related to MAF.
You may need to rotate J-pipe a bit toward the driver side to make it easier to install BOV. Look at the various pictures in the installation document.
Thanks John!
Not sure either on #7...
Do not have a BOV, remember you sent me the OEM wastegate which you welded and modified?
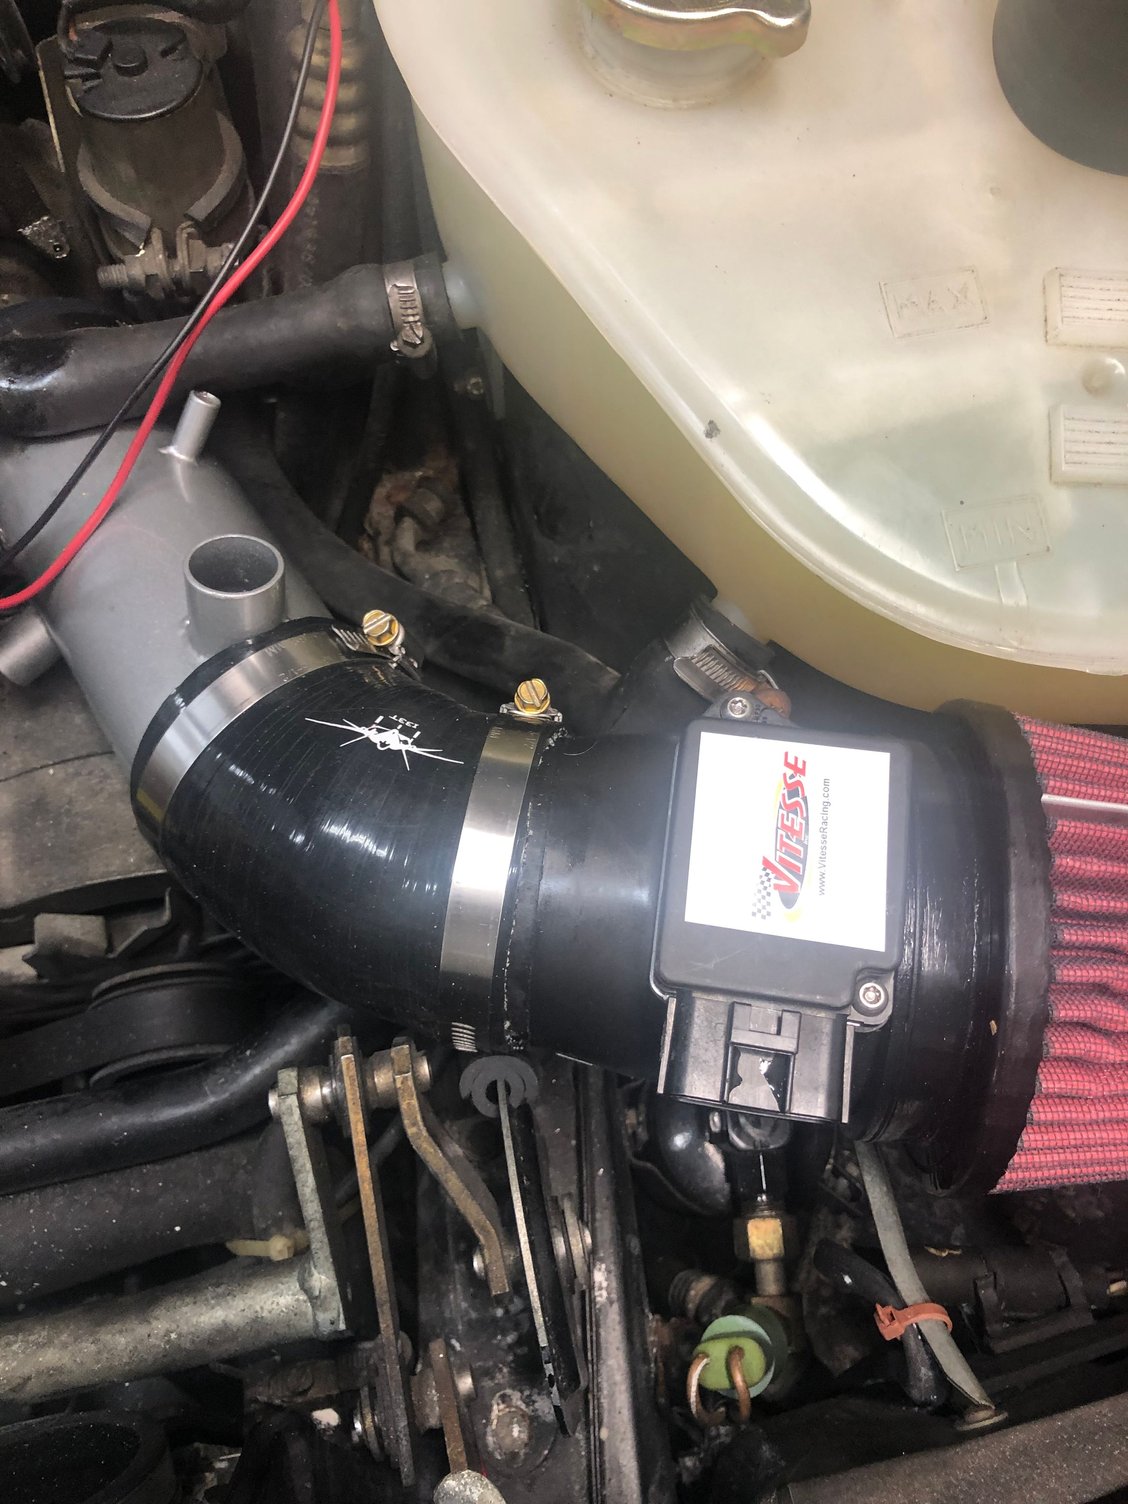
Had a bear of a time getting the filter to fit, have not yet tested to make sure headlights will still operate. Have a shorter filter and a 45 degree elbow will be trying if run into issues.
You must have a BOV. The WG has nothing to do with it. Maybe you are thinking of the CV, which you eliminate as you will be using a boost controller?
It's best to use the supplied filter as the MAF is calibrated with it. It's a tight fit, but it fits. Take your time....
Originally Posted by finally!
Thanks John!
Not sure either on #7...
Do not have a BOV, remember you sent me the OEM wastegate which you welded and modified?
Had a bear of a time getting the filter to fit, have not yet tested to make sure headlights will still operate. Have a shorter filter and a 45 degree elbow will be trying if run into issues.
OK, making progress. Much of the issues were my printer is crappy and thus when took photos to car not clear.
Here is where I am now.
- Put tee in line to FPR and ran other line to Innovate SCG-1 boost MAP sensor
- Got all the wires soldered and ready to go
Next
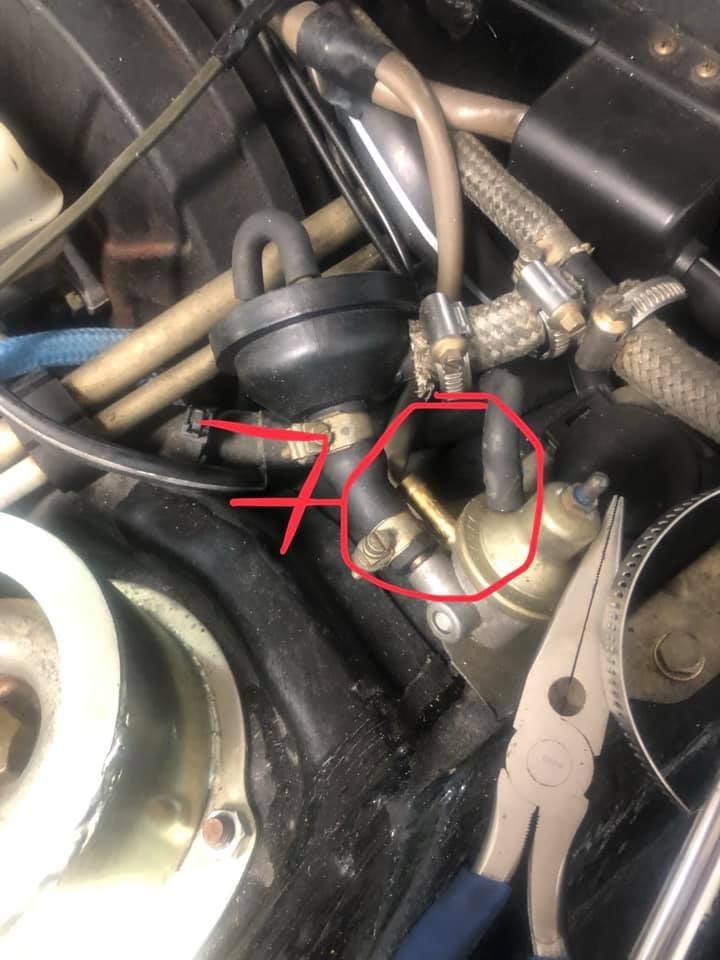
1. From what I read the CV needs to be deleted since using EBC. So just run hose per the photo below?
2. For install of the Innovate SCG-1 Boost contoller, it has three ports, one has the bypass screwed in (one with the cork), the others go as in the other photo below?
Hey, anybody know of a place that will re-plate the heat shields and things like that under the hood, like the clamps and stuff so they have the original look?
Unless you had a blow off valve welded to one of your charge pipes, you need a diverter valve in your DELETE THIS box
i didn�t get one welded
are you saying the CV there now in the photo has to be replaced with a BOV?
Asking as when John and I discussed the setup, etc I thought he said I had all I needed, which is;
- Vitesse chip and MAF kit
- Innovate SCG-1 EBC
- 80 lb injectors
- Vitesse modified OEM wastegate
- 3 bar FPR
The BOV in your picture "Delete this" must be used. You do not delete it. You do not need another one, just reuse the one you have (if it's in good condition).
Originally Posted by finally!
i didn�t get one welded
are you saying the CV there now in the photo has to be replaced with a BOV?
Asking as when John and I discussed the setup, etc I thought he said I had all I needed, which is;
- Vitesse chip and MAF kit
- Innovate SCG-1 EBC
- 80 lb injectors
- Vitesse modified OEM wastegate
- 3 bar FPR
The thing in your picture is a Bypass valve, which some people also call a Blow-Off Valve (BOV). You need a clamp or two, but it looks correctly installed in the "delete this" box. Keep that. The CV valve is the round brown/tan thing under the intake with 3 hoses connected to it. The CV is essentially the factory's version of a boost solenoid, which you won't need if you install an aftermarket boost controller. The wastegate is under the car and part of the exhaust. See the Lindsey vacuum diagrams I linked for basic hook up info -- study twice and install once, or something like that.
I assume the valve in your 'delete this' box is the stock valve. It needs to stay there, do not bypass/delete. Do you have the 'MAF Install' document that John included with the kit? It clearly shows the valve in the picture.
Edit: Looks like John and Tom beat me to it while I was talking to the wife...
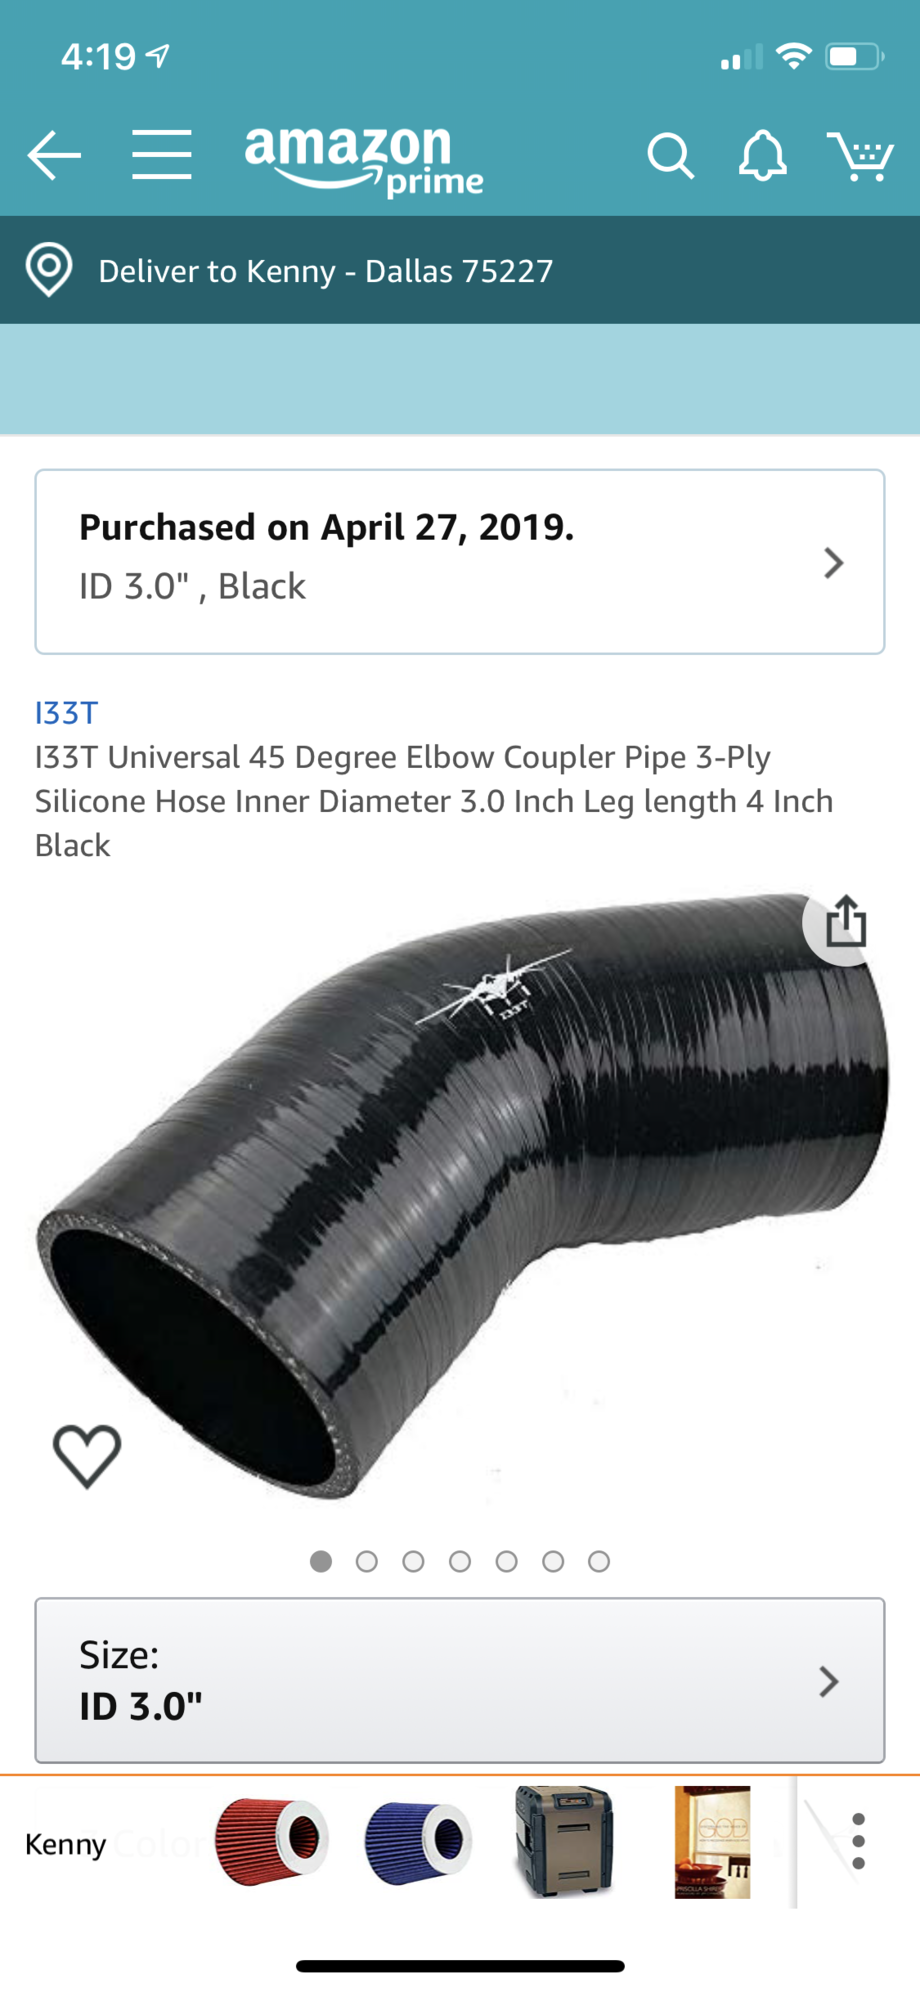
Got hoses, MAF,etc installed
Yesterday I beat up for 2-3 hours due to crazy tight fit. Never could get to fit without interfering with headlight .
Amazon to the rescue, got a 45 degree elbow, trimmed it, ten minutes later DONE! Fits much better. Put couple short pieces of hose on bracket to protect from rubbing
The thing in your picture is a Bypass valve, which some people also call a Blow-Off Valve (BOV). You need a clamp or two, but it looks correctly installed in the "delete this" box. Keep that. The CV valve is the round brown/tan thing under the intake with 3 hoses connected to it. The CV is essentially the factory's version of a boost solenoid, which you won't need if you install an aftermarket boost controller. The wastegate is under the car and part of the exhaust. See the Lindsey vacuum diagrams I linked for basic hook up info -- study twice and install once, or something like that.
therein lies my/the confusion - I AM installing an Electronic Boost Controller, Innovate SCG-1...

 04-27-2019, 07:18 PM