When you click on links to various merchants on this site and make a purchase, this can result in this site earning a commission. Affiliate programs and affiliations include, but are not limited to, the eBay Partner Network.
That valve looks like the one that raises the idle by letting more air into the engine when the AC is on to prevent the car from stalling when it comes off throttle from the extra AC load. On a 928, its mounted to the strut tower cross brace.
Hi Petza.
I figured out what the ac plug was for and it's still plugged in. I am referring to the two cut wires in the black wire jacket pictured in the photos. Plus the 2 inch long single wire connector that is loose.
Since my son decided to keep the existing phone dials even though they are for a later model 944, we will have to run spacers front and rear. I picked up a nice set of front and rear spacers that I need some guidance to install them properly and safely.
For the rears, they are about 1 1/4 inch thick and the factory studs are secured by open lugnuts and then these spacers have there own studs to mount the rear wheels using capped oem lugnuts.
For the fronts I found a nice pair of OEM spacers (Part # 477 501 701) that i discovered are approximately 15 to 17 mm thick. I will have to measure them myself to be completely accurate. I also picked up an original pair of early 85 front wheel hubs so I can press out the old studs and install longer ones. The factory studs are 45 mm long. I was looking into purchasing 66mm studs but need to confirm if they will be long enough. I don't wantbto go to 72mm if that is going to be too long.
Any additional info or suggestions from those members running spacers on their cars would be appreciated.
BTW, my replacement MAF arrived yesterday from the UK and I installed it.
I also received my replacement (used) radiator and condensor yesterday so I will be dropping both at the radiator shop to be pressure tested and/or sealed.
That style of rear spacer will work just fine as long as it has the hubcentric recess on the hub side and a hubcentric flange on the wheel mounting side. The OD of those needs to be exactly 71.6mm or you'll have high speed vibrations you'll never be able to resolve. As long as the wheels have pockets cast into them for the study to extend into between the wheel mounting holes so the face fits completely flush, you'll be good.
Whenever dealing with studs, either run open ended one to make sure you can torque the wheels properly and have the mating surfaces be completely flush without the stud bottoming out in the closed end lug nut. If you don't like the look of open lug nuts and the studs are too long, install open lug nuts to the torque spec and then snug a set of closed end nuts to those (don't need the same torque - just snug enough to not come loose).
The rear of my 84 928 is setup like this using open Titanium lug nuts on the inside and closed Ti lugs on top of them..
Can I ask what a car in this condition runs. I�m trying to see if I�m moving forward or backing out of this 944 project that I have sitting here.
thanks you can dm me if you wish to share.
Can I ask what a car in this condition runs. I�m trying to see if I�m moving forward or backing out of this 944 project that I have sitting here.
thanks you can dm me if you wish to share.
Hi there. Sorry for not responding sooner but my last three weeks have been terribly busy.
I don't want to out dollar amounts in my posts but i can send you a pm if you keep the info confidential. I can give you thd purchase price and " to date " parts expenses . Hope that helps.
I know many of us intend on grabbing a good cup of coffee and heading to the garage (im drinking one as i type) but let's not forget all the people who sacrificed everything so we can enjoy the lives we have today. And although we have our different beliefs and feelings about one another who don't happen to see things "our way" let's all do what we can to coexist and be a good neighbor and human being. I'm very gratetful for forums like this one and the other forums I have been part of over the years. Many of us used to sit in the garage pulling our hair out trying to figure out a problem or how to remove that bolt we just snapped off. I for one truly appreciate the ability to research my specific issues and repairs and reading a thread that describes what I'm going thru to a T. We are able to follow a members journey even though we may be next door or around the world. It is truly an amazing period of time we live in. So I wanted to say thank you to the forum as I continue down this path to get help my son get his dream car running and driving again.
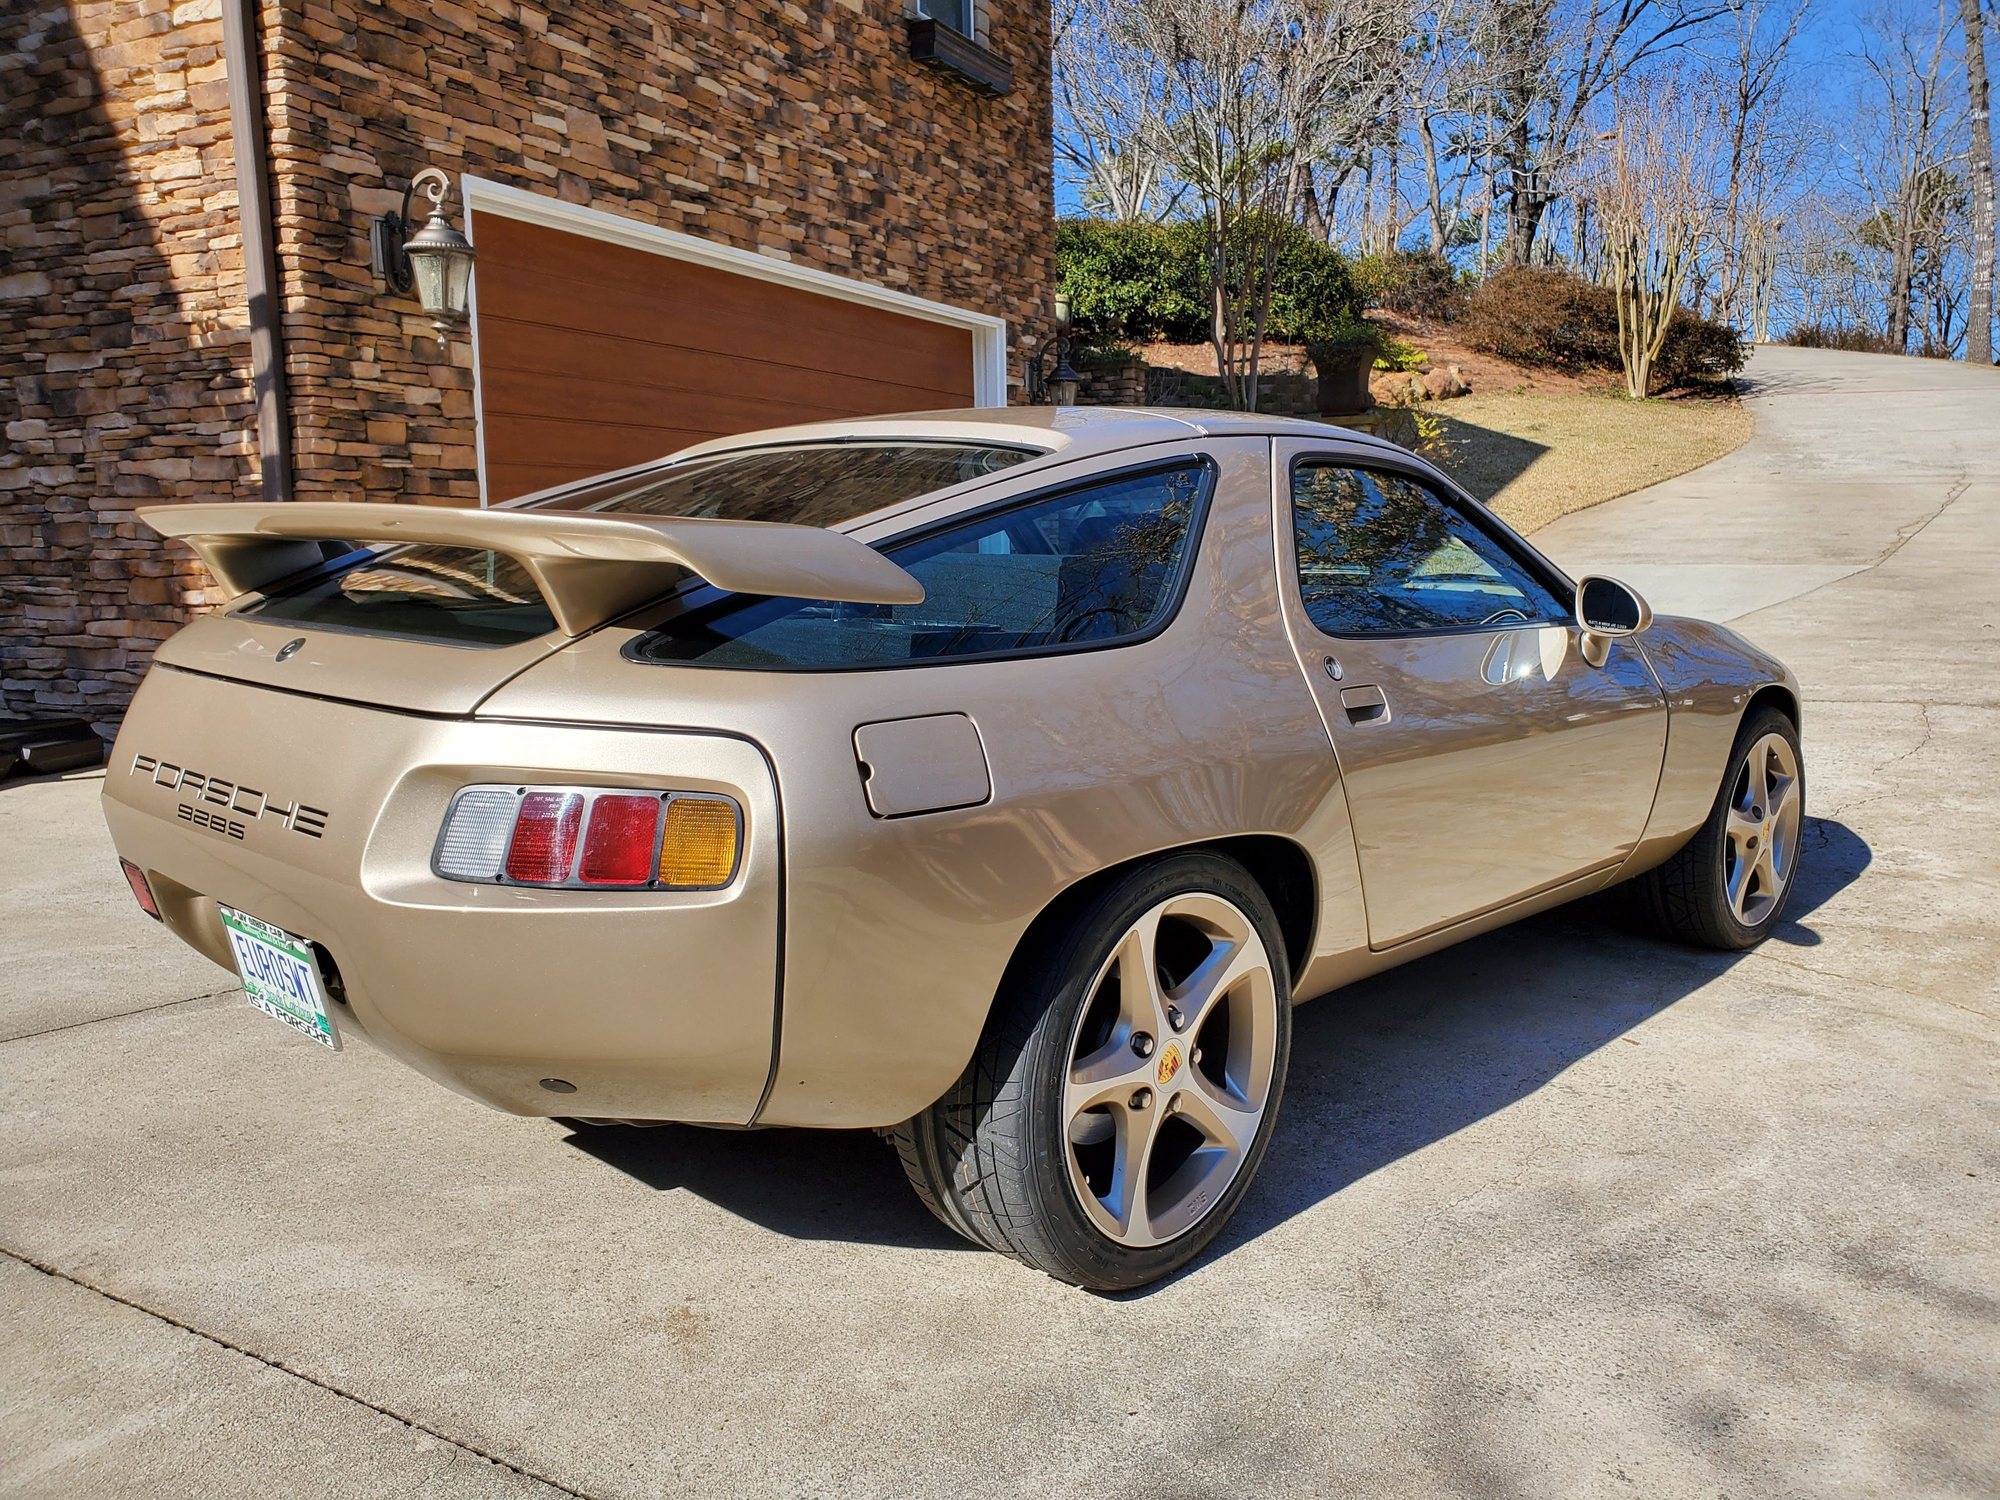
Its been a couple of weeks since i posted any progress on my sons project and there are quite a few things to check off the list. We ended up purchasing another set of 1 1/2" wheel spacers and mounted them. Totally transformed the look from anarexic to road resdy. Also bought a set of oem metal (no plastic caps) to complete the factory look.
Finished wet sand cut and buff on passenger fender, passenger door and passenger quarter panel. I posted another thread about removing the adhesive and what appeared to be Ultra Black gasket sealer someone used to resecure the side bumpstrips many moons ago. I tried everything with no luck and finally used a 3M decal eraser that mpunts to your drill. Got the material heated up to the point of smoking and softening the original basecoat underneath but little by little all the residual crap came off. Touched up all the stone chips on the passenger side and assessed the overall condition of the paint. No major dents or dings so of my PDR guy can pop out a couple of the bigger dents it will make a huge difference.
Finally received my steering wheel cluster switch stalks, cleaned them up and installed them. Still no lights on the left side of the car so im gping to reassemble the driver door wiring before I start troubleshooting this issue. I dont believe there are separate fuses for each side running lights but ill research that as well.
I purchased the correct alternator bracket and reibstalled the alternatot which now fits correctly. Im not getting a battery light on the dash with the key on so either the exciter wire has a short, the alternator is bad even though it tested fine or the two wire harness plug along the engine bay cowl needs to be cleaned.
Ran longer wires to hook uo the oil sending unit but no oil light on the dash. I am getting movement on tge oil pressure guage with the key on and it doesnt max out at 5 so i assume i have tge two wires on their correcf posts. Before i ran longer wires the oil light went on with the key when i grounded the wires on the engine casting so maybe the sending unit is no good.
So after all that i contunued to track down missing or replacement parts so we can make this car whole again. Ive already surpassed spending over 1/2 of the purchase price on parts but i knew that when i negotiated the deal. Still way ahead over finding a low mileage turn key vehicle with all these options in fully functioning condition.
So now for the best update for my son. I showed him how to perform a leakdown compression test. All four cylinders read 185 to 190. Very healthy engine and even cylinder compression. Showed him how to test the coil and had him do it.
Had him pull the plugs and look up the gap ( .28) checked each plug. Then had him hook up a test light to each plug and crank the enine to test spark at each plug.
I said "Do you want to see of it starts?" His eyes got wide and he daid of course. We had already disconnected the fuel line to the pump.and drained the tank and unhooked the pump wires. I sprayed some starting fluid into the TB and told hom to hit the key.
Car fired right up and ran until the starting fluid ran out. Gave him another try and it was almost as sweet sounding as the first start up. High fives all around a new milestone on his first resto project.
Once we get the front bumper and roof painted and cleared ill post some photos of where we are compared to when we started this journey.
Next will be to get the fuel lines replaced, fuel pump and filter replaced and then troubleshooting to get the car running and idling on ts own.
Ok so we started troubleshooting the fuel system and have done the following so far:
- replaced the fuel pump ( bench tested the new pump)
- replaced the fuel filter
- replaced the fuel hose from the tank to the pump
- removed and cleaned out the fuel strainer (nothing in the filter).
- flushed the fuel tank with two gallons of fresh fuel and let it drain out
- filled the tank with two gallons of fresh fuel
So now my son tried to start the car using the fuel pump but it does not turn on. First time he cranked it after we did the above repairs i did not notice any "tach bounce" and no sound from the pump.
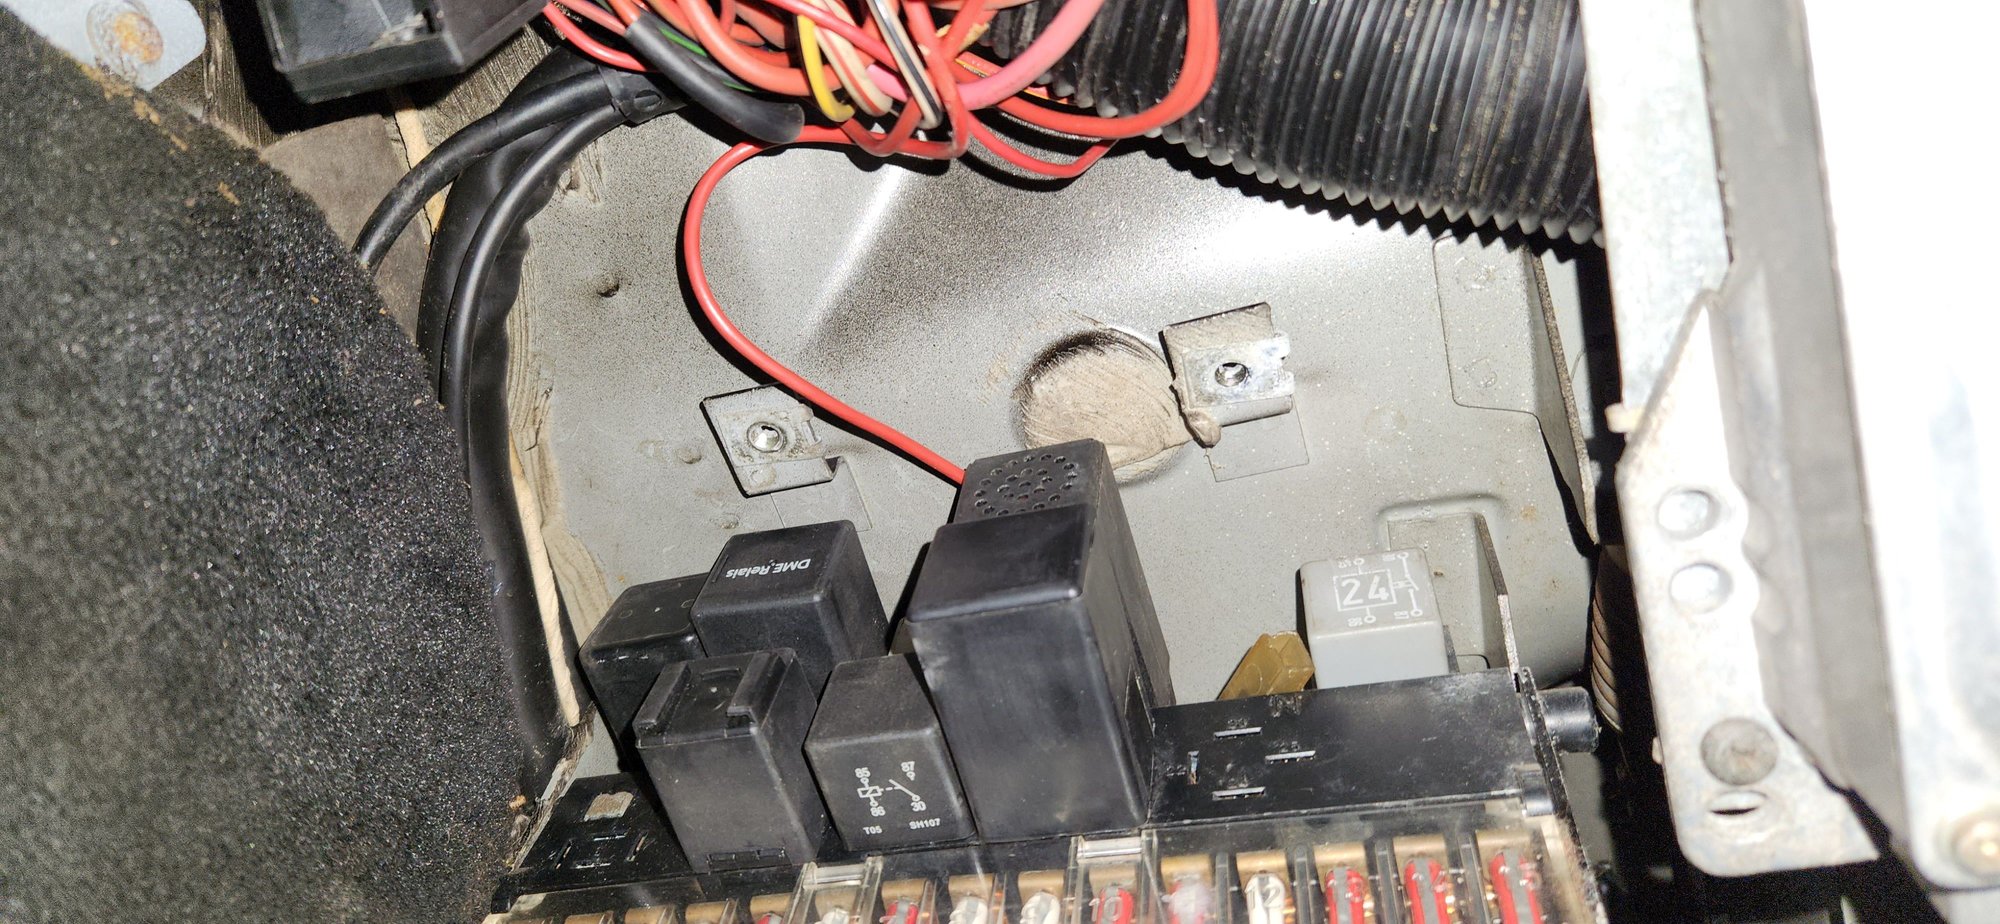
i ordered another reference sensor to rule that out. It should be here this coming week. Then i started to inspect the fuse block and snapped a few photos.
In the first photo there are two threaded holes that something is supposed to be attached there whether its a missing fuse block part or simply a fuse box cover. Any information would be appreciated.
I also took a closer photo that shows two open relay ports that i have no idea whether they are supposed to be open or of we have relays that are missing.
I will say that the hazards do not turn on, the turn signals dont turn on, im not getting any lights in the farthest left guage pod including dash light, battery light or oil light but i am getting fuel gauge movement and temp gauge movement with the key on.
Until we install the second reference sensor i am planning to jumper the fuel pump with 12 volts and attempt to start the car without the aid of starting fluid.
Then id like to finish paint and clearcoat on the front bumper and roof and complete the wet sand and buffing on the rear and left quarter panel.
i also need to complete reassembly of the driver door components and i have a new headunit and speakers to install.
Ill snap some photos and post the progress made so far.
I just had my first coffee and while reading more on the fuse block and looking at photos of the early 944s i found a photo of an 83 model that has an extra row of 9 fuses but i am unable to attach the photo clip.
Am i missing this entire row of fuses? According to Clarks there is supposed to be a fuel pump fuse and all the fan fuses. What the heck? Is this row of fuses supposed to be secured to those two threaded holes in my previous reply?
I will have to stick my head under there for a more thorough search in case someone has detached this row of fuses and then shoved them up into the spaghetti roll of wires.
I assume because my sons car is a "transitional" model being and early 1985 that it shpuld share the same wiring layput under the dash as the 83 and 84 model but please advise.
Ok second cup of coffee and increasingly curious mind forced me to grab a flashlight and shove my body under the dash.
FOUND THE MISSING AUXILARY ROW OF FUSES!!
Looks like they were unhooked and shoved behind the lower knee panel. All fuses intact except for number 7. Will have to look that one up.
Does anyone have a diagram of the relays they can share. Ive only seen a grainy hand drawn onecusung roman numetals but nothing attached on which relays they are.
Im planning to remove the entire dash so it can be smoothed out and refunished during which time my son will be snapping a bunch of photos and we will be cleaning and reattachjng all connections and dash bulbs will be replaced.
So my teenage son turned 15 on Friday so it was quite a weekend having friends and family stop by and racing go karts at the local K1 facility. No much work on the car but I had a few mins here and there to continue my electrical troubleshooting. No photos of my large body shoved under the dash, sorry.
We received the new reference sensor so i installed it and now can see evidence of tach bounce while cranking so thats a good sign.
I cleaned and treated the 9 pin connector and two pin connector along the cowl of the engine bay. Im trying a contact cleaner/corrosion eliminatie called Deoxit i purchased thru Amazon. It is supposed to remove oxidation, rust and dirt from all electrical connectors so im planning on using it extensively to clean up the entire wiring harness under the dash.
While checking for power to the fuel pump I tested for 12volts at each fuse. On the auxiliary fuse block im getting power on every fuse (9) with the key on except for no. 2 which is the fuel pump. I did not think to test no. 2 while i was cranking so ill do that this week.
I even pulled the connevctor to the DME and sprayed everything i could access.
i wasnt able to get the drivers door reassembled but i did run a new speaker wire and temp installed the new door speaker. Id like to get the door harness plugged in before i continue troubleshooting no lights on the left side of the car.
Ill post more as we continue on and hopefully finish paint and clear on the roof and front bumper.
Deoxit D100 is fantastic and all I use for electrical contact cleaning on the old Porsches. D5 is good too. The difference is D100 has more of the active ingredient that dissolves the corrosion - the D5 has some of the Deoxit dissolver but in a carrier solution more like traditional electrical contact cleaner, so better when you need to pressure blast into a connector and use the spray force to clean some stuff out as well as dissolve the corrosion. D100 is best when you have good access to the connector and don't have to spray as far or with as much pressure.

 05-01-2024, 09:38 AM