When you click on links to various merchants on this site and make a purchase, this can result in this site earning a commission. Affiliate programs and affiliations include, but are not limited to, the eBay Partner Network.
I understand. If you are speaking of the end seals, they were replaced during the WP/TB job last April. If you are speaking of the camshaft seals behind the belt sprockets, I had not thought of those.
If you are speaking of the camshaft seals behind the belt sprockets, I had not thought of those.
If they're not leaking, or just 'sweating' a little bit, don't bother. It's too easy to screw up the bore or the new seals unless you either have the right tools or are super-duper careful.
I only replace cam seals when the cams are out. I've not once seen a cam seal leaking. (I'm sure it can happen, but, haven't seen it yet.)
I've got to dig into the WSM for the significance of the different coatings and for the proper orientation of the washers in the stacks.
They are bi-metal Belleville washers. Originally dome shaped when cool, one side changes in size at a different rate than the other, flattening out the washer, approximating the reduction in free belt length due to the expansion of the engine.
The stacks amplify the effect.
Originally Posted by skpyle
what is the purpose of the tiny valve/piston that moves back and forth inside the rear piston at the back of the tensioner Bellville washer stack?
As Stan said, the valve and piston act like the valving in a shock absorber dampening the torque oscillations from uneven firing when cold. When the stack is hot (or old), the washers are flat so there is no reaction to dampen.
Sure enough, I nicked the bore when I was removing one of my cam seals. As far as I know, my "repair" isn't causing any problems, but I thought I was going to have a heart attack when it happened.
At the end of the video describing the Knipex pliers, the narrator says "There is no substitute." I put 'em on my wish list and I'll pick up a lottery ticket tomorrow.
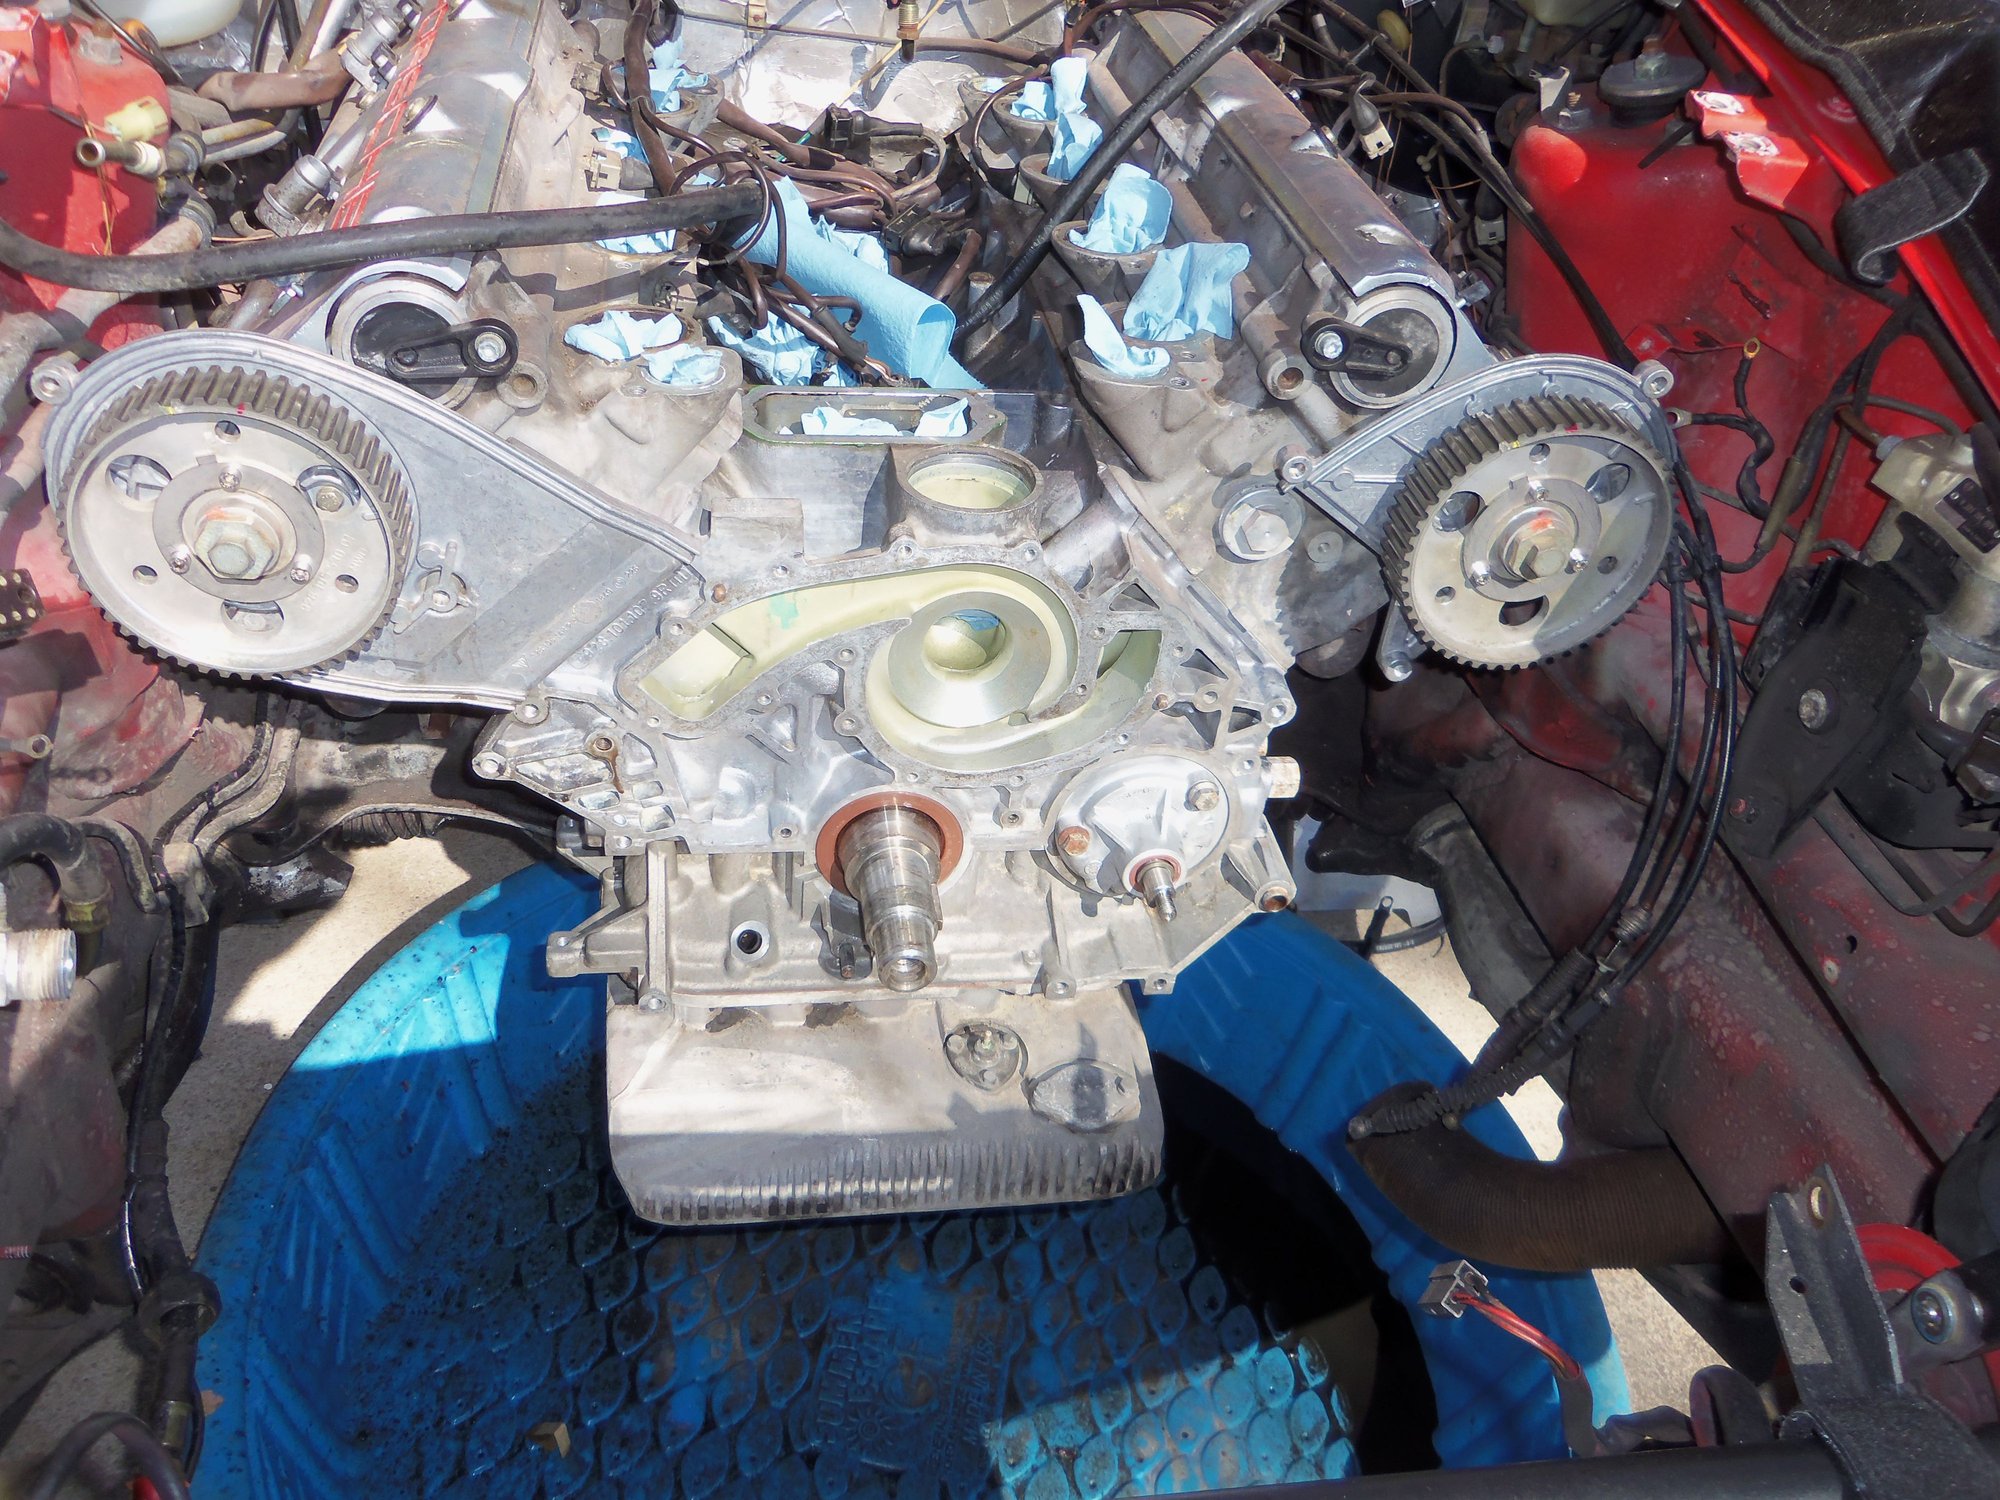
All the various parts came in a couple of weeks ago. Work and life got in the way, but I got alot done this weekend.
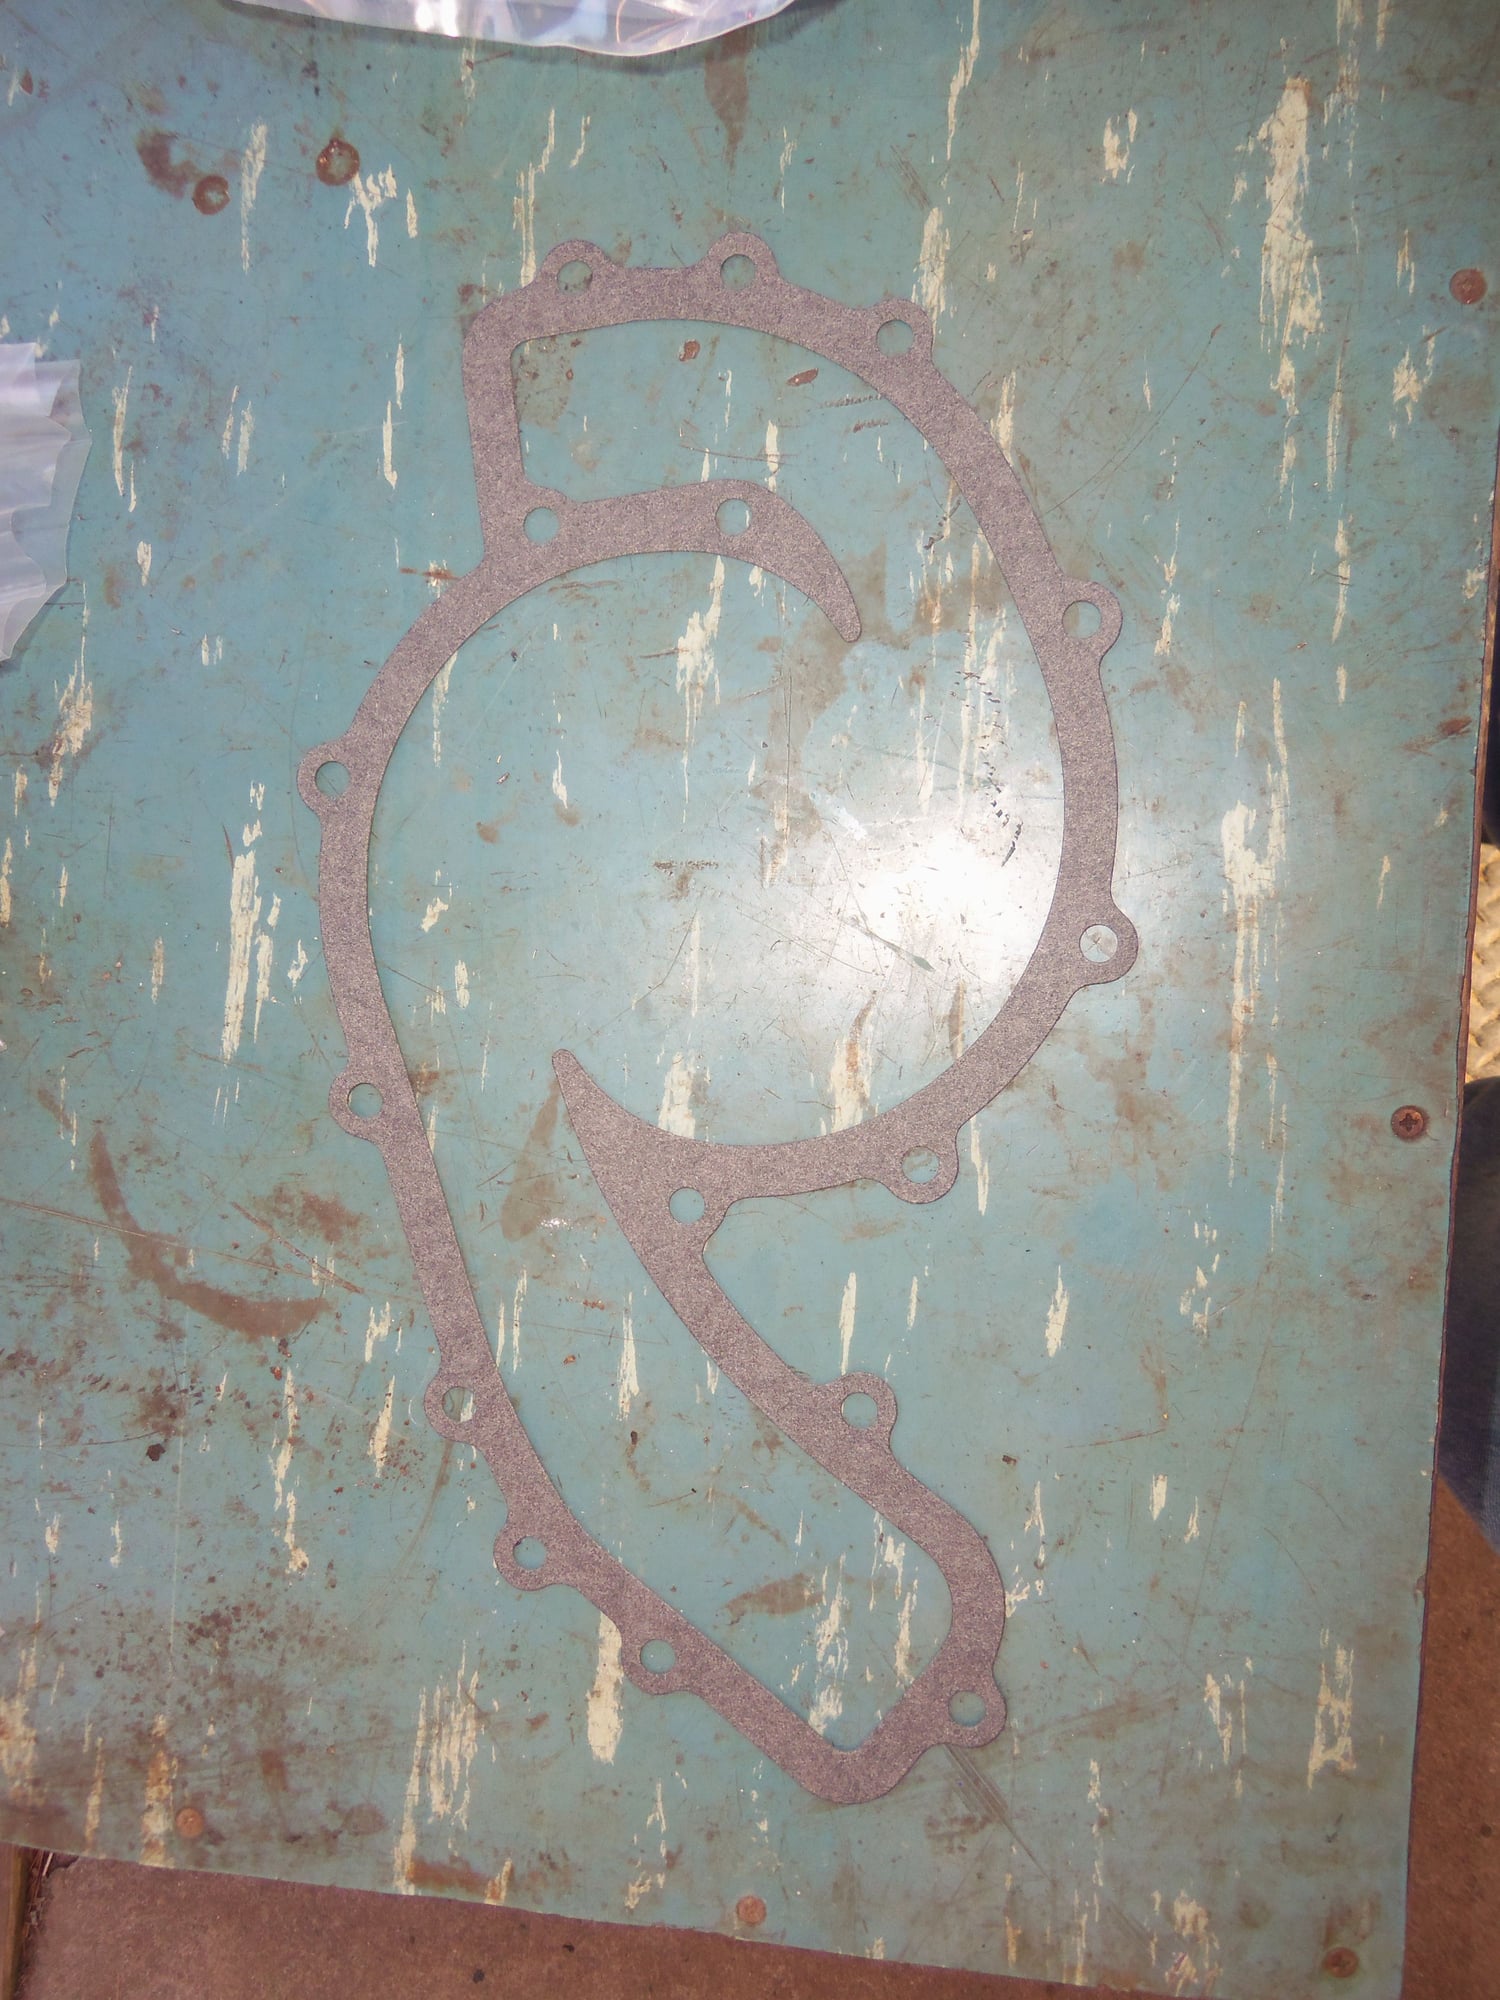
I started off with gasket removal and cleaning.
I have scraped many a gasket over the years. However, I have never used the razor blade perpendicular to the machined surface. That took alot of time and many razor blades. But, the results were worth it. The water pump mounting surface was nice and clean.
I filled a little spray bottle with mineral spirits and got happy with a toothbrush. Laugh if you will, but I have found the humble toothbrush to be an excellent cleaning brush on equipment and machinery. I did have the forethought to put a kiddie wading pool under the car. It worked quite well, no drips or mess on the drive way.
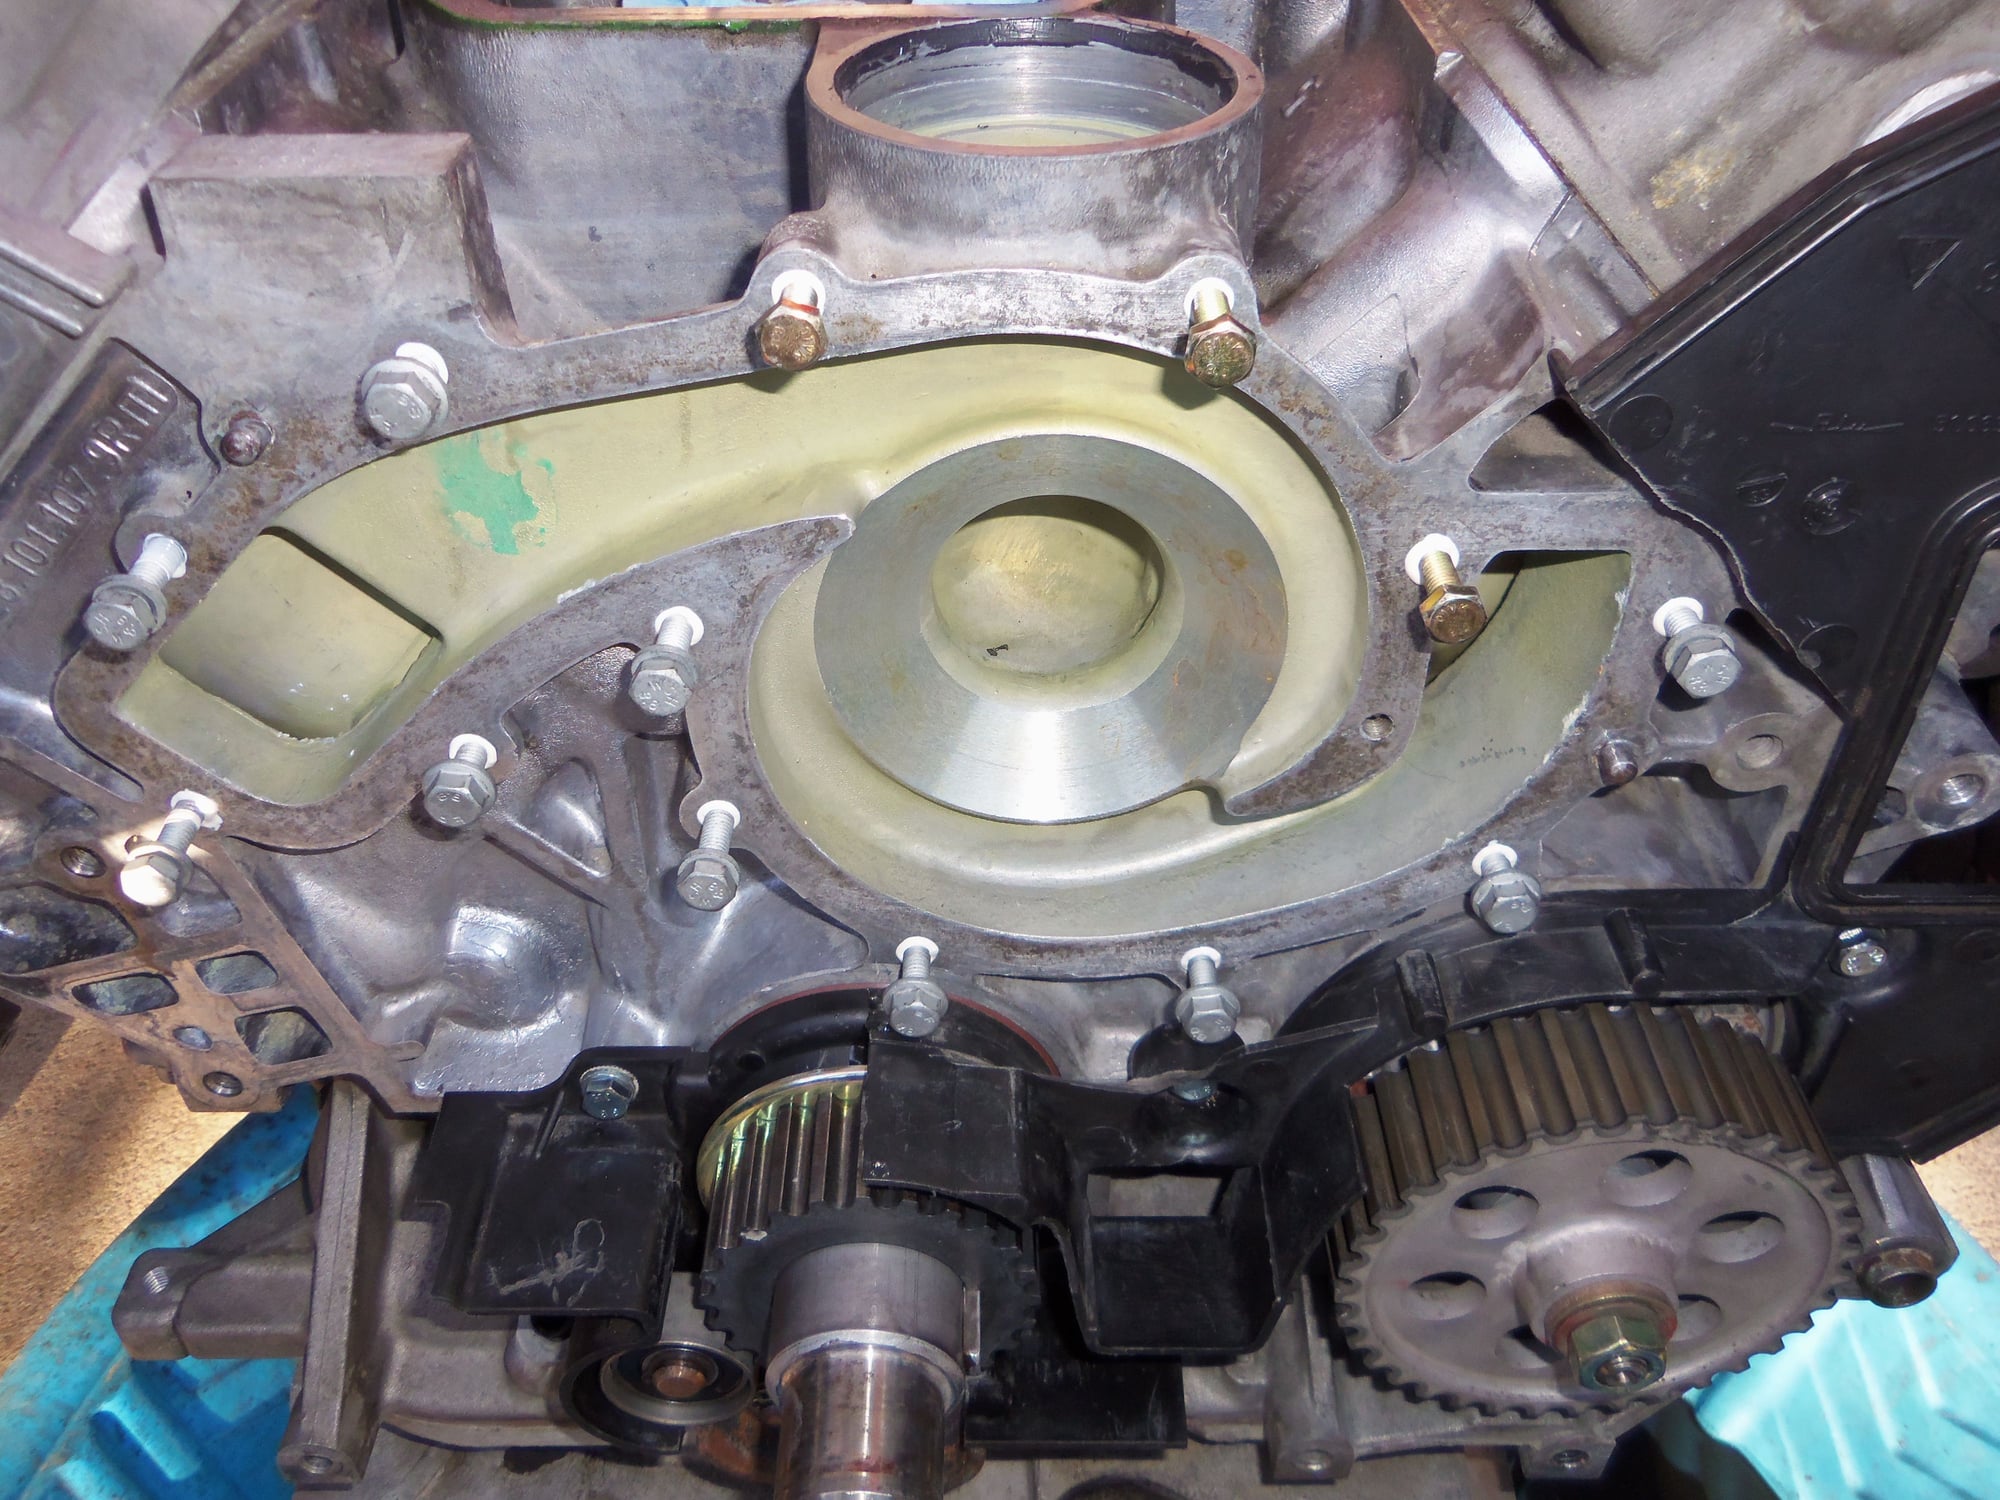
Front of the engine is now reasonably clean.<br/>I will clean the oil pan when I remove it.
I followed John Kelly's S3 Timing belt manual step by step for the rest of the reassembly.
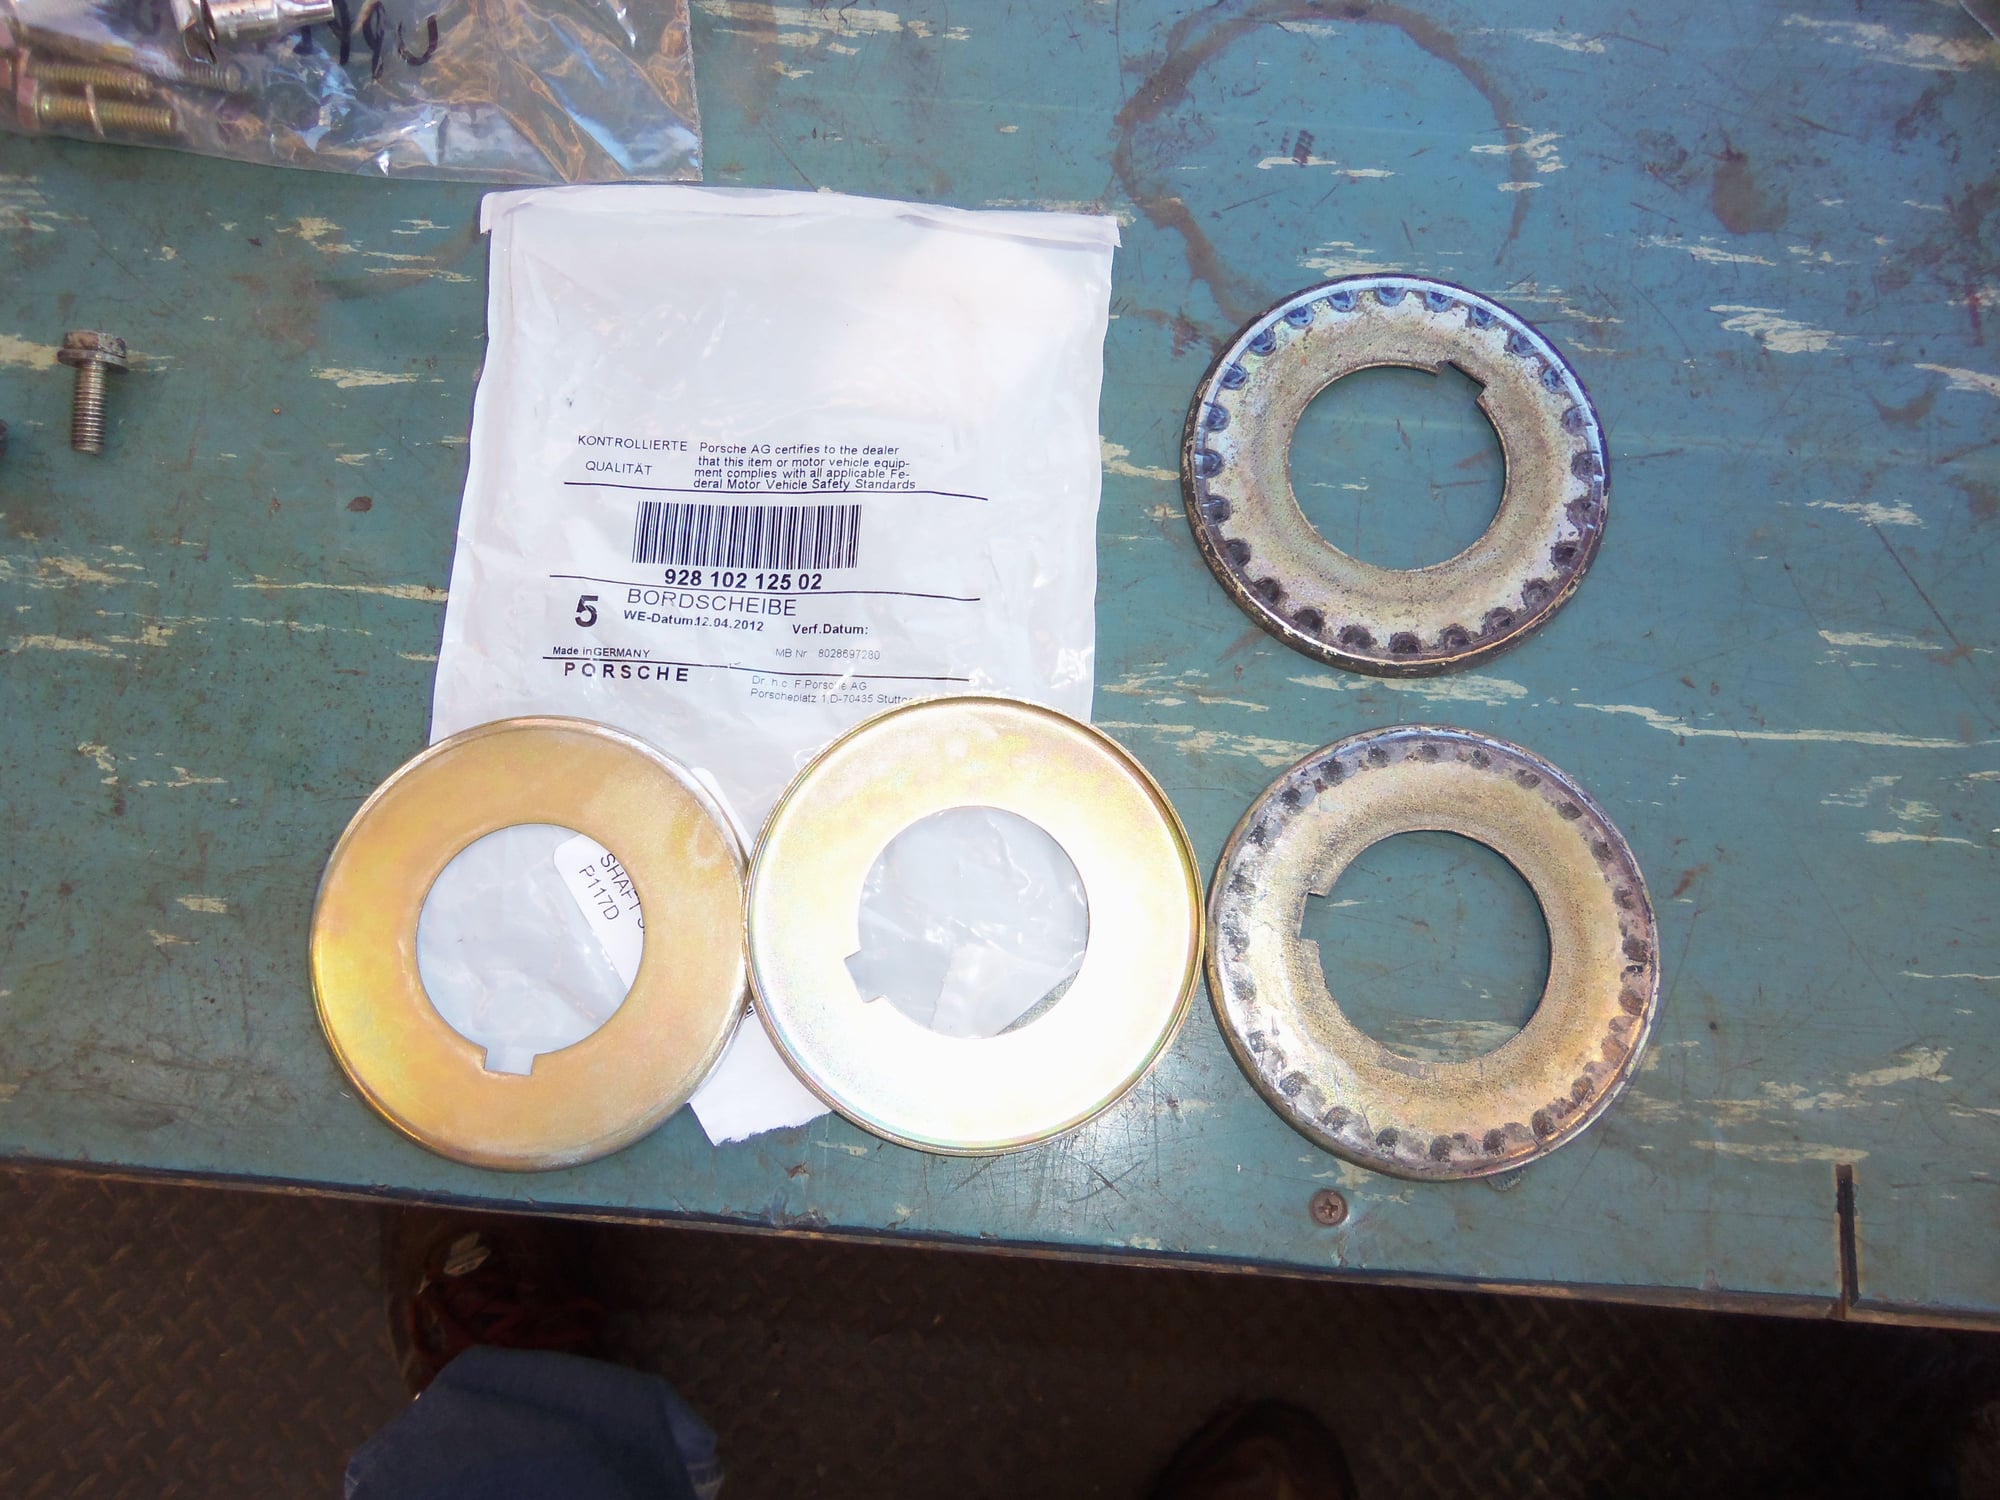
New thrust washers for the crank sprocket.
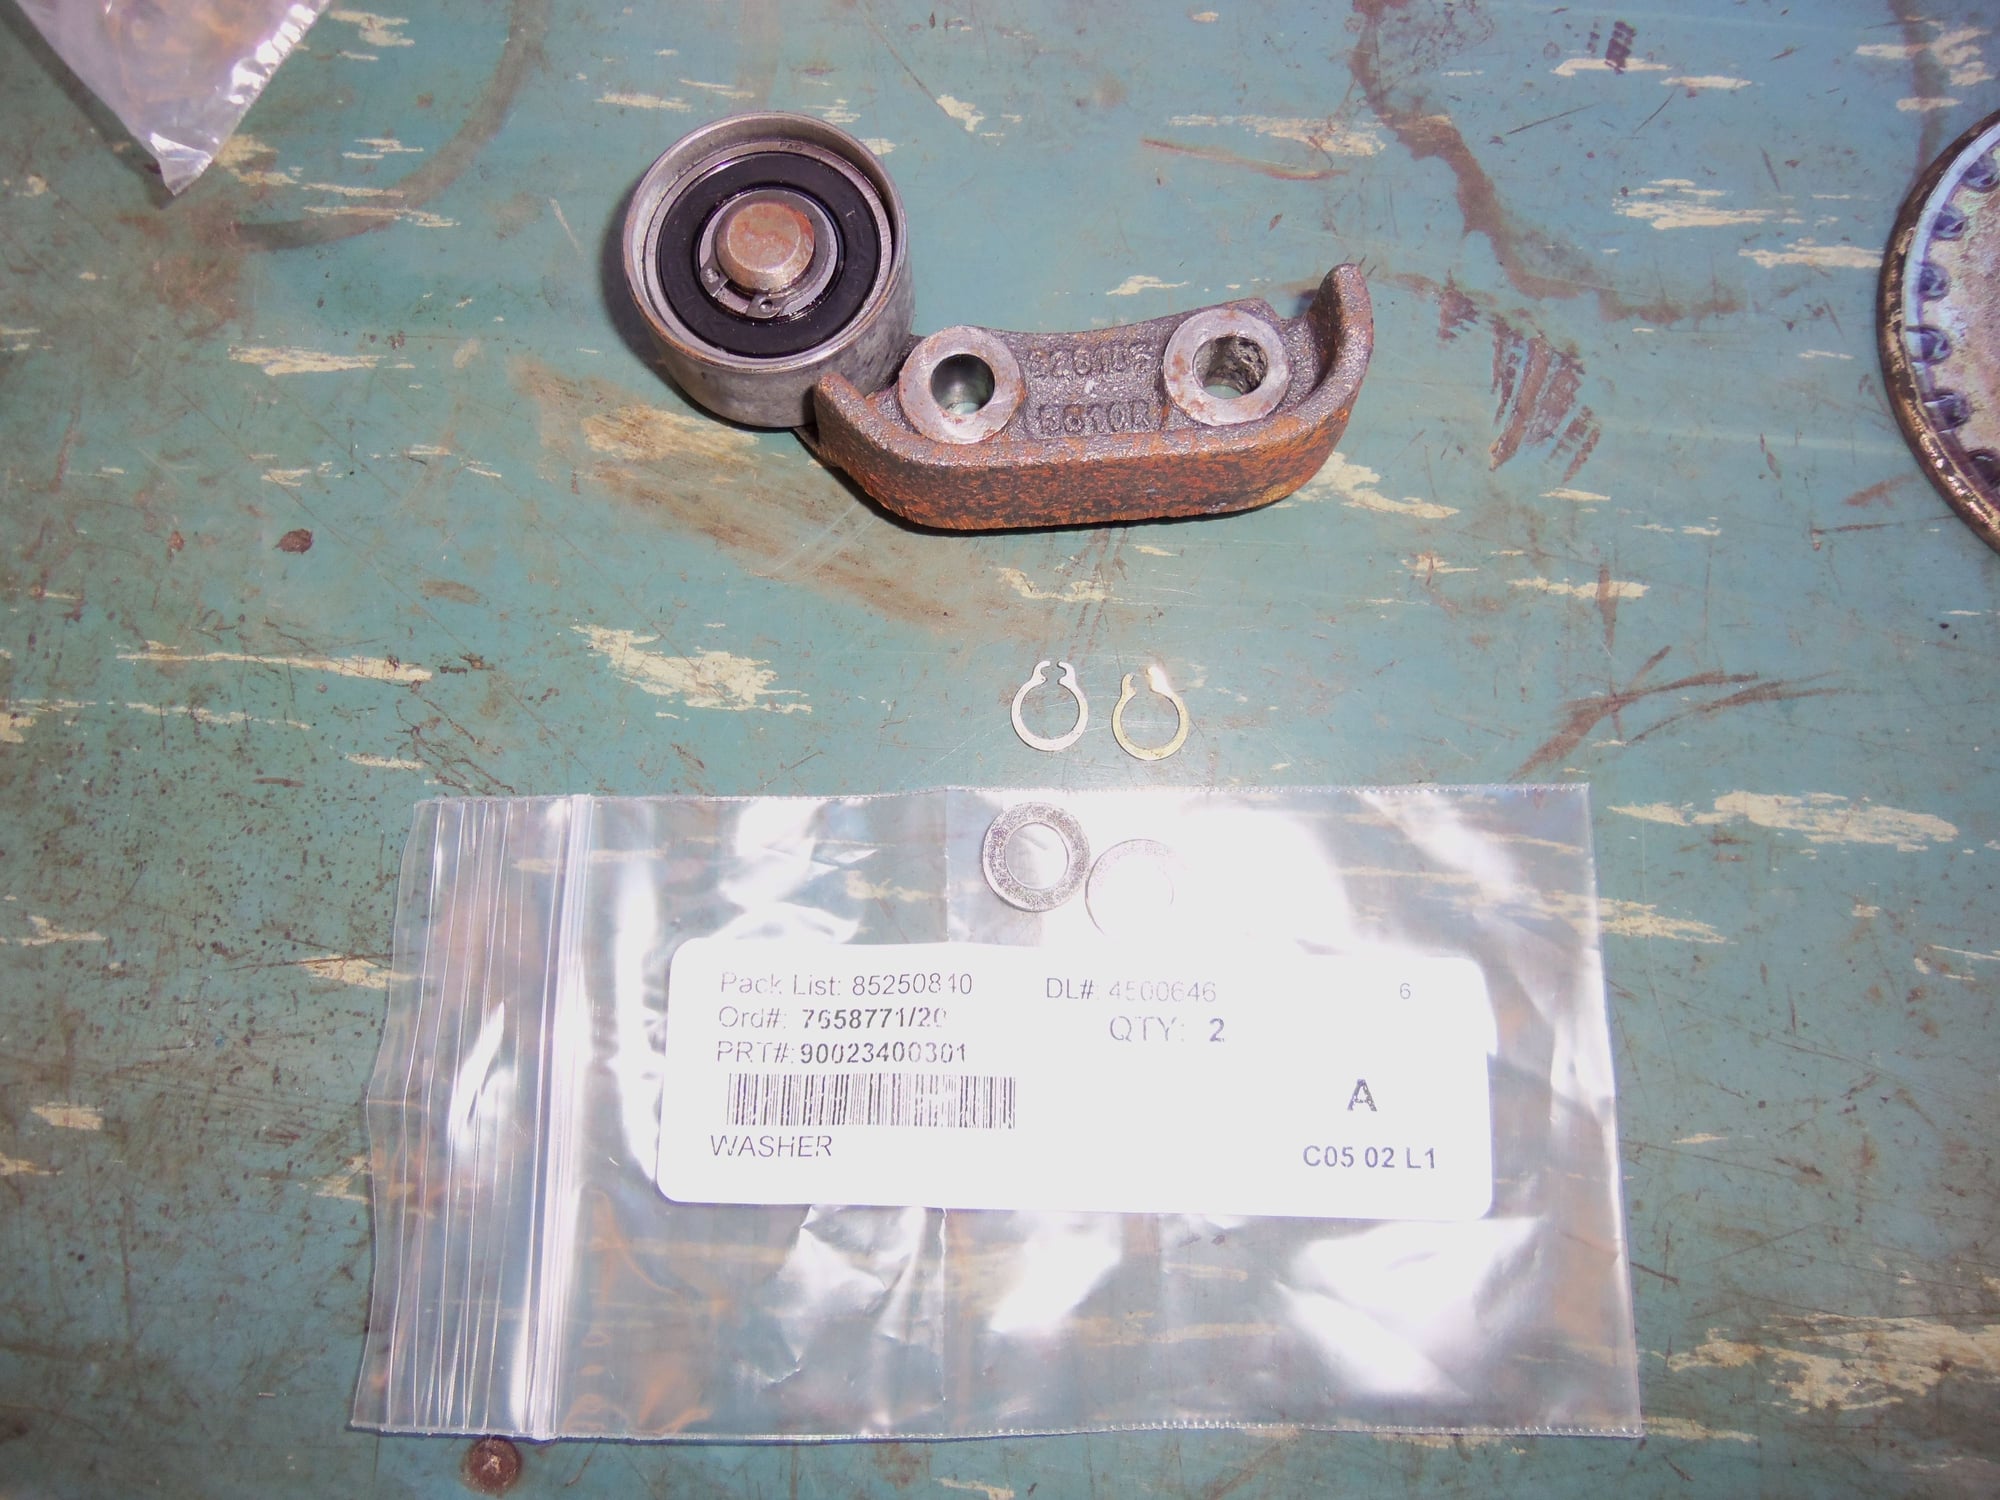
Replaced the missing washers for the lower roller pin circlips.
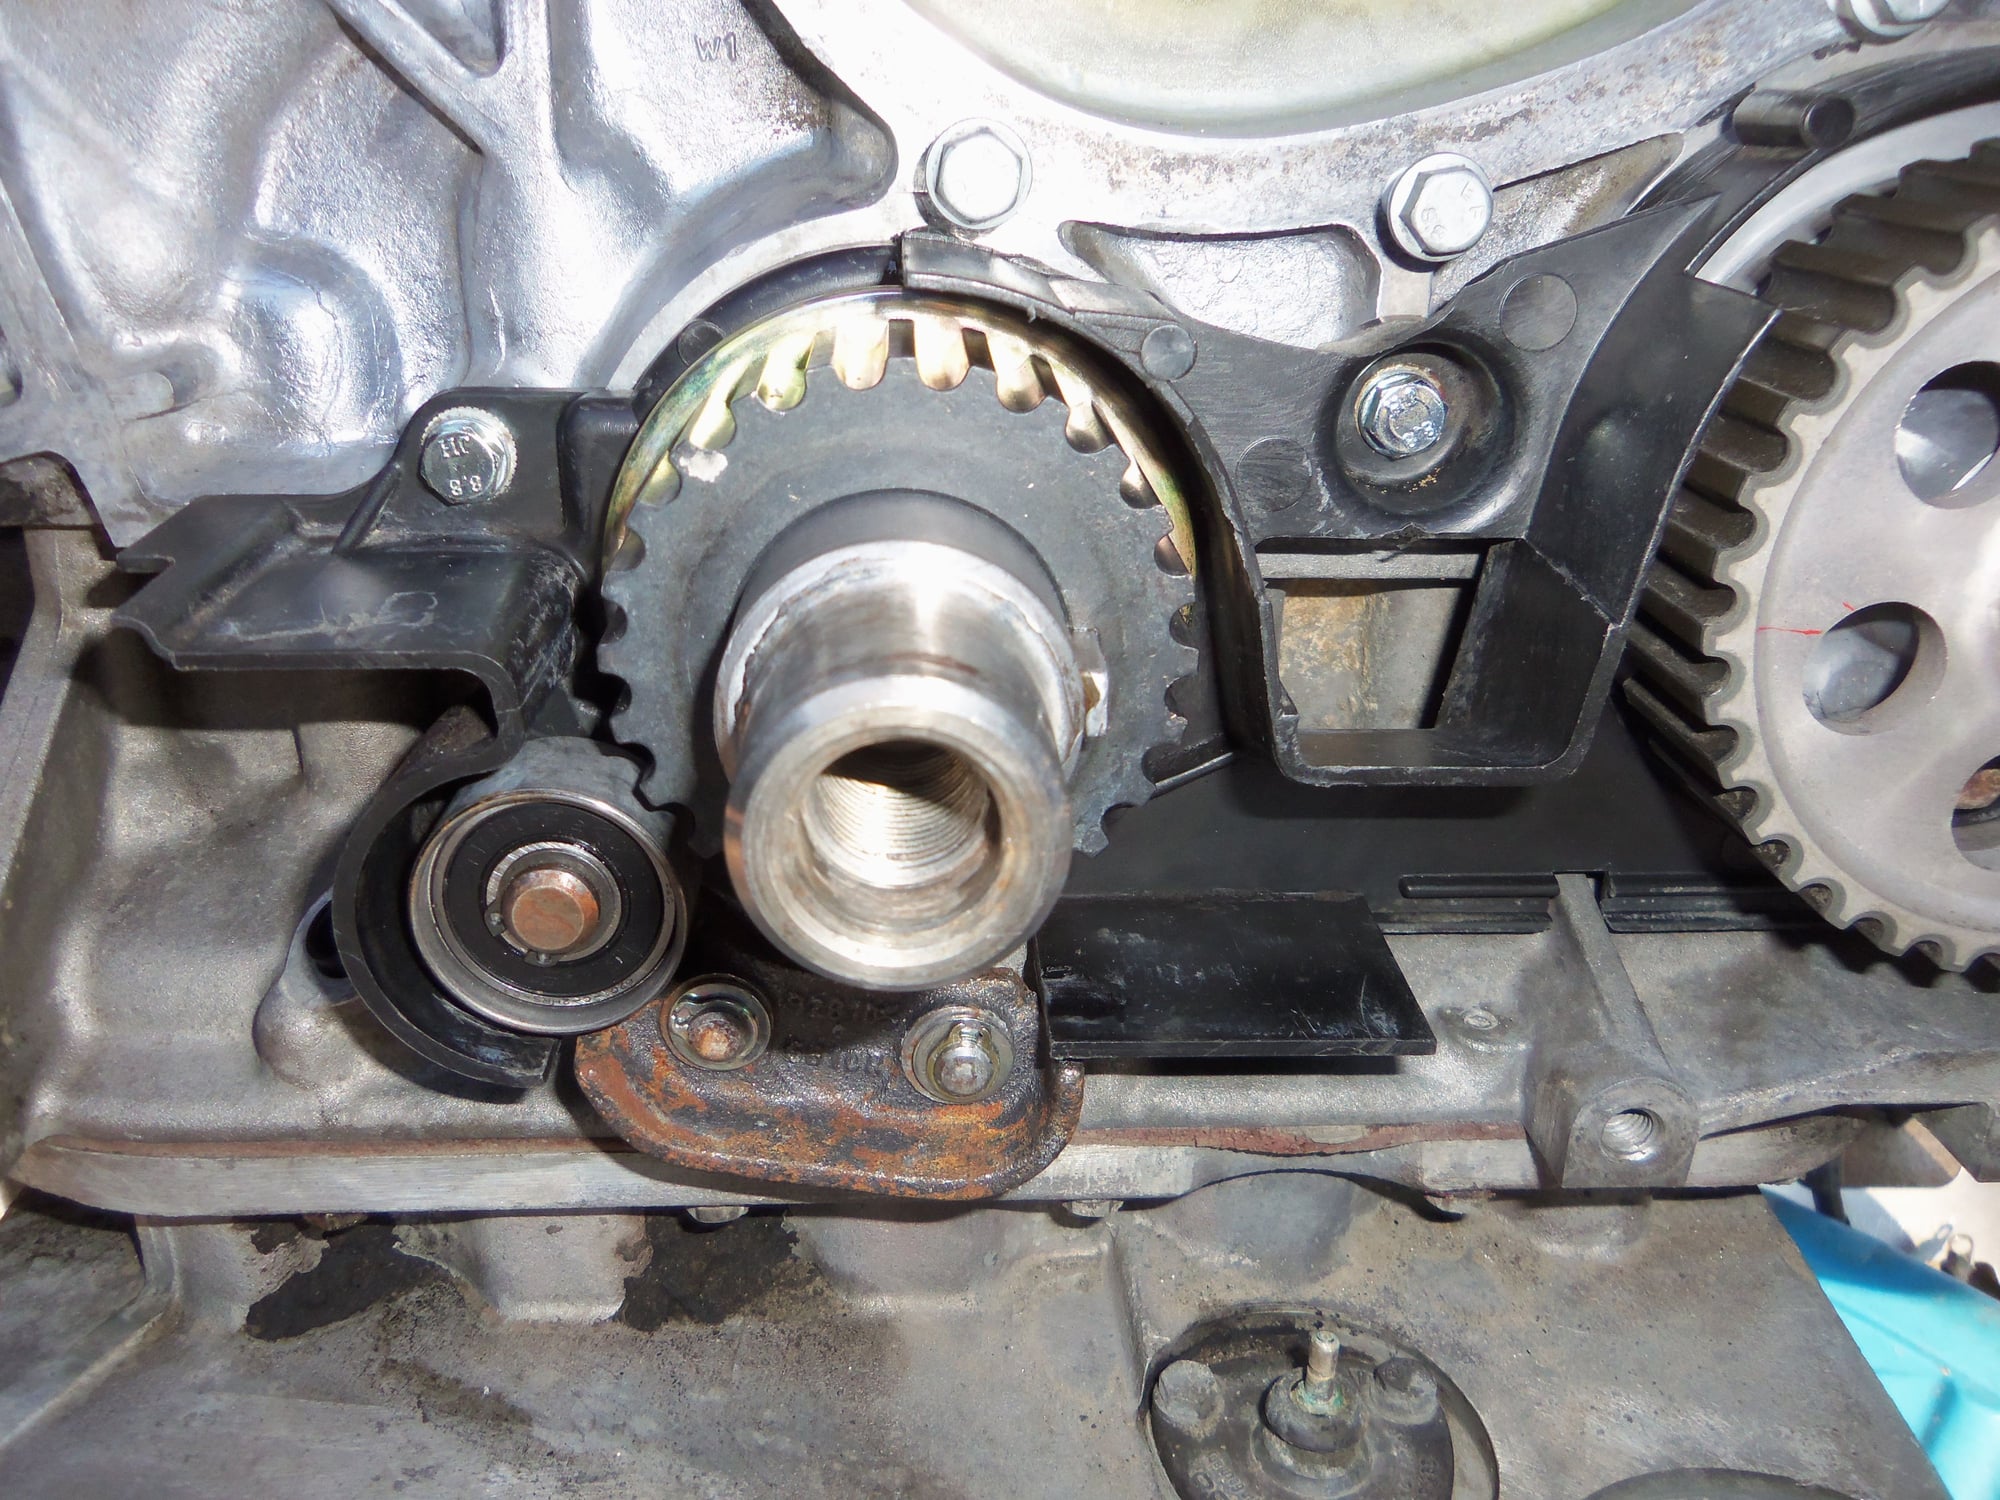
Dressed crank sprocket installed with new rear thrust washer.
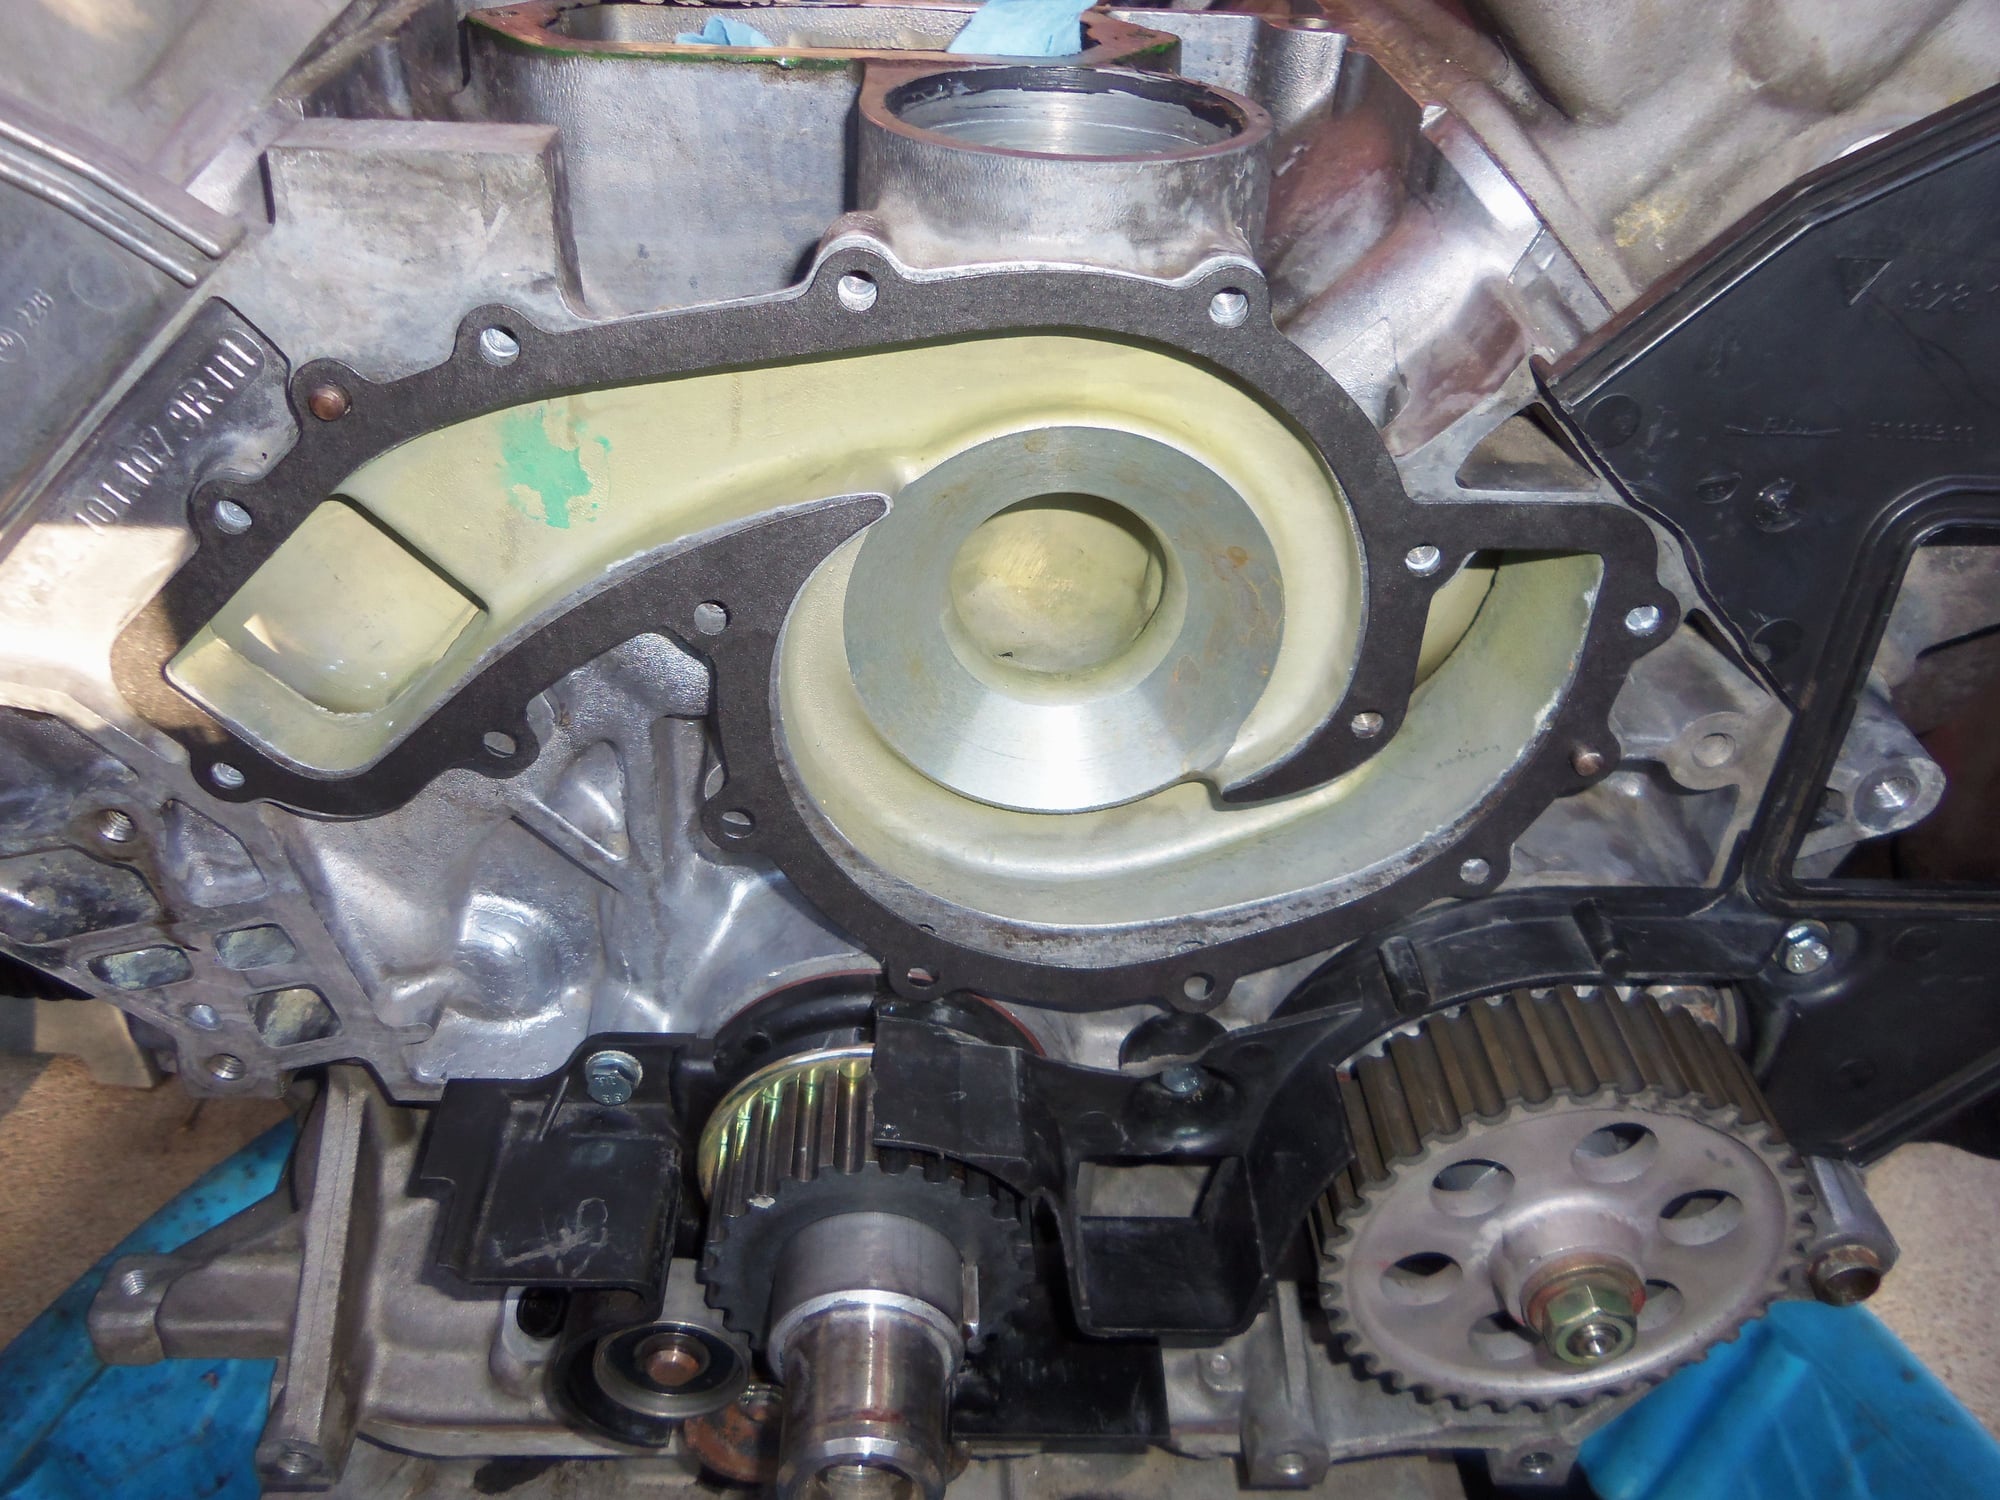
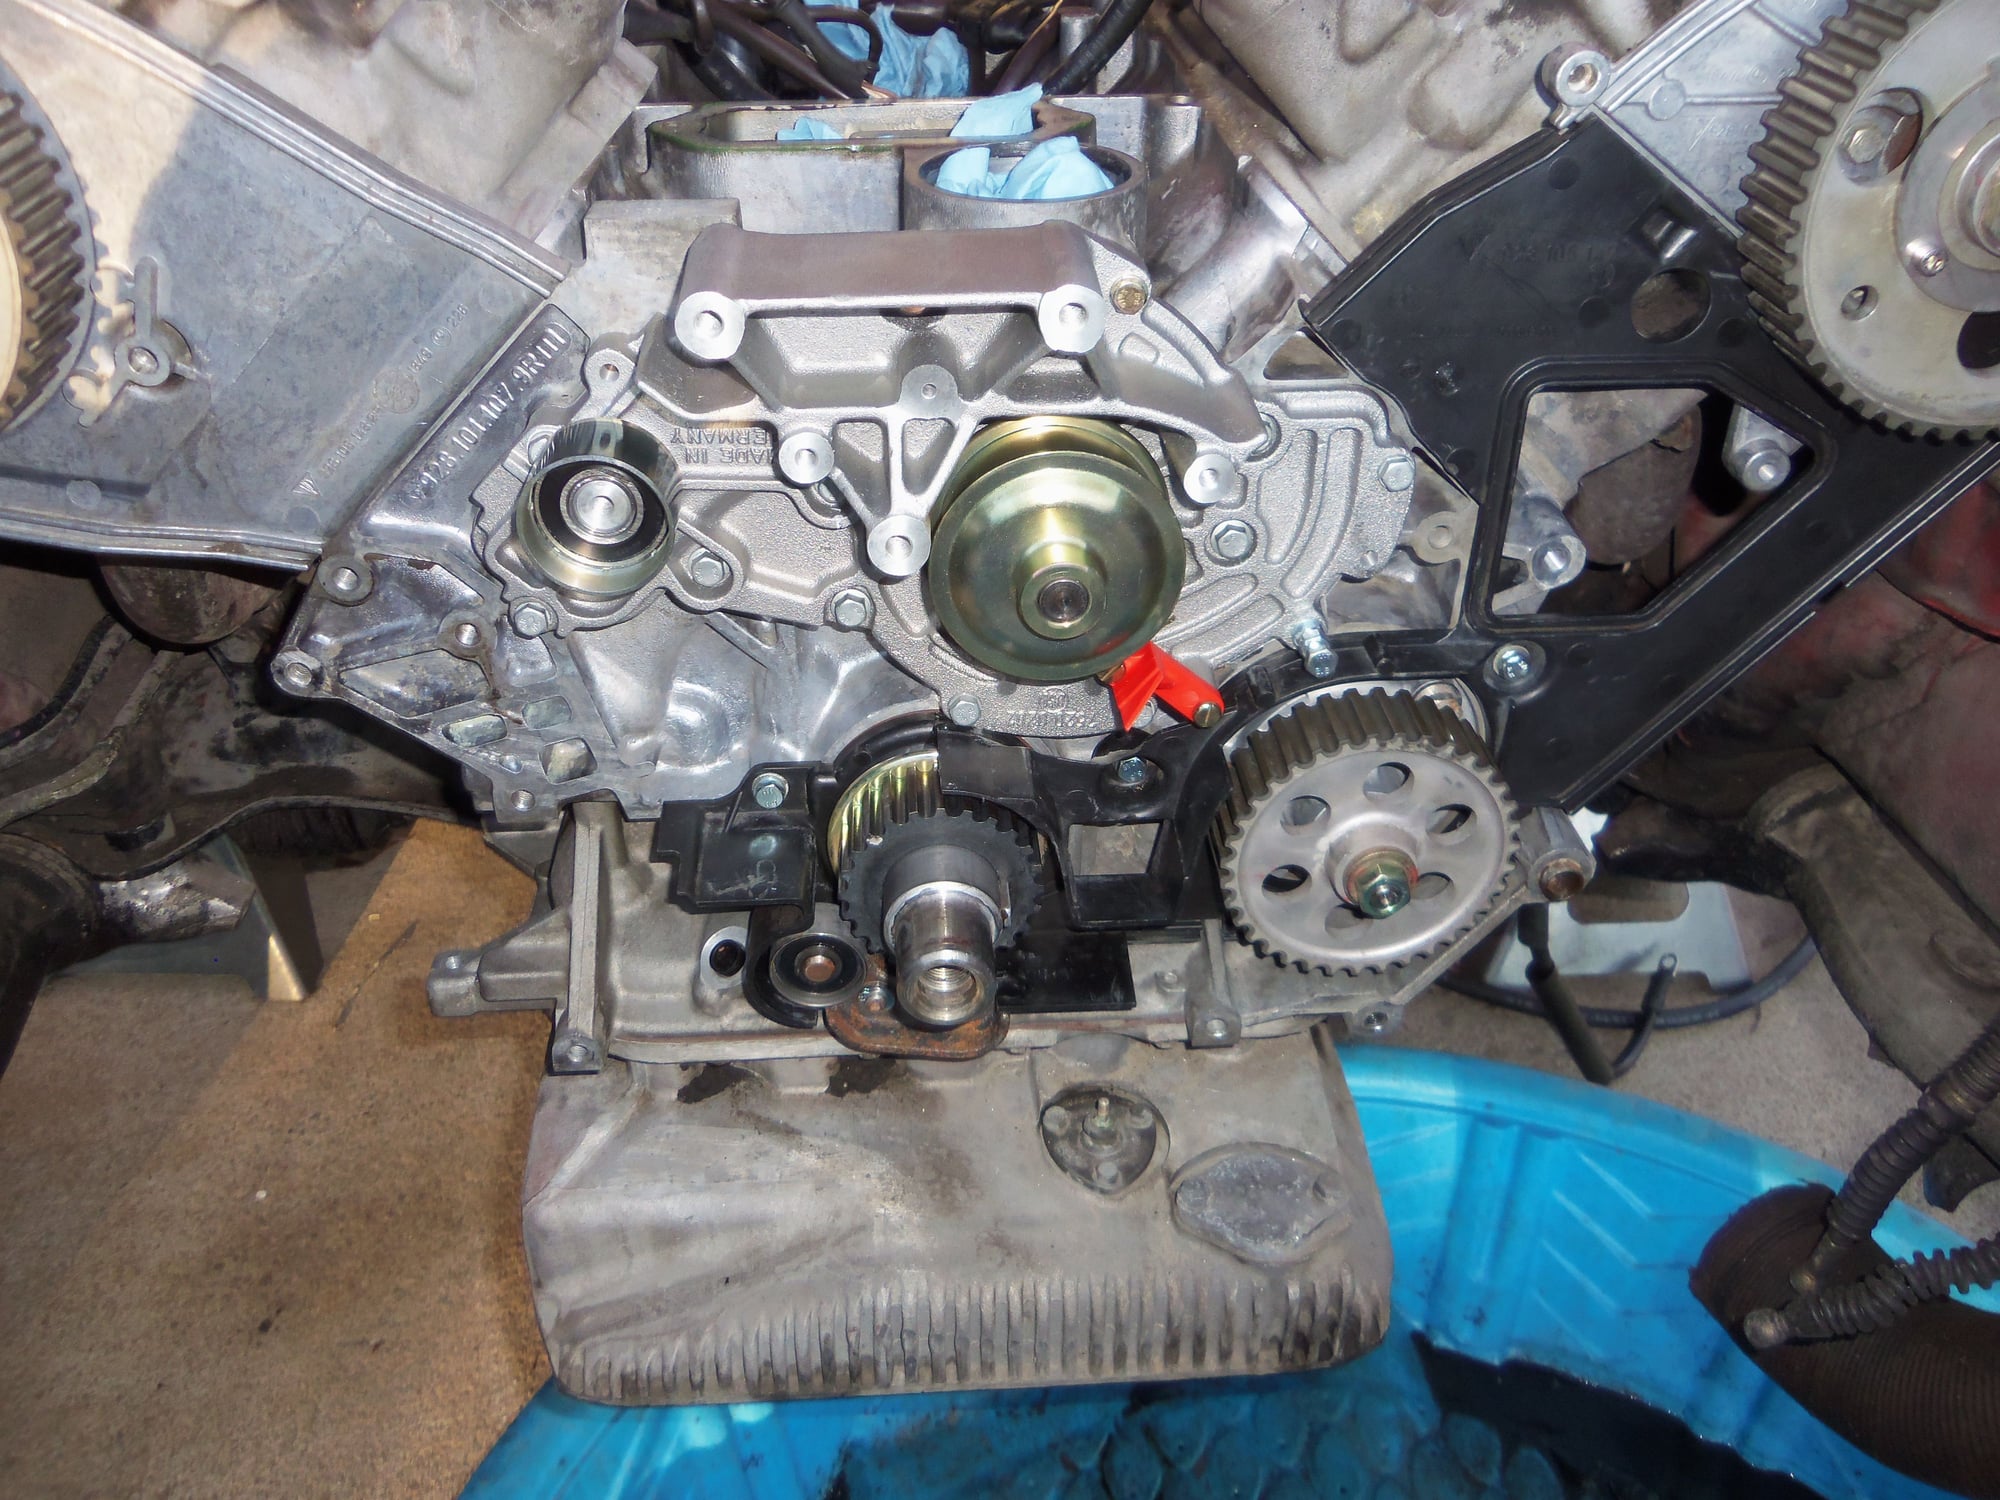
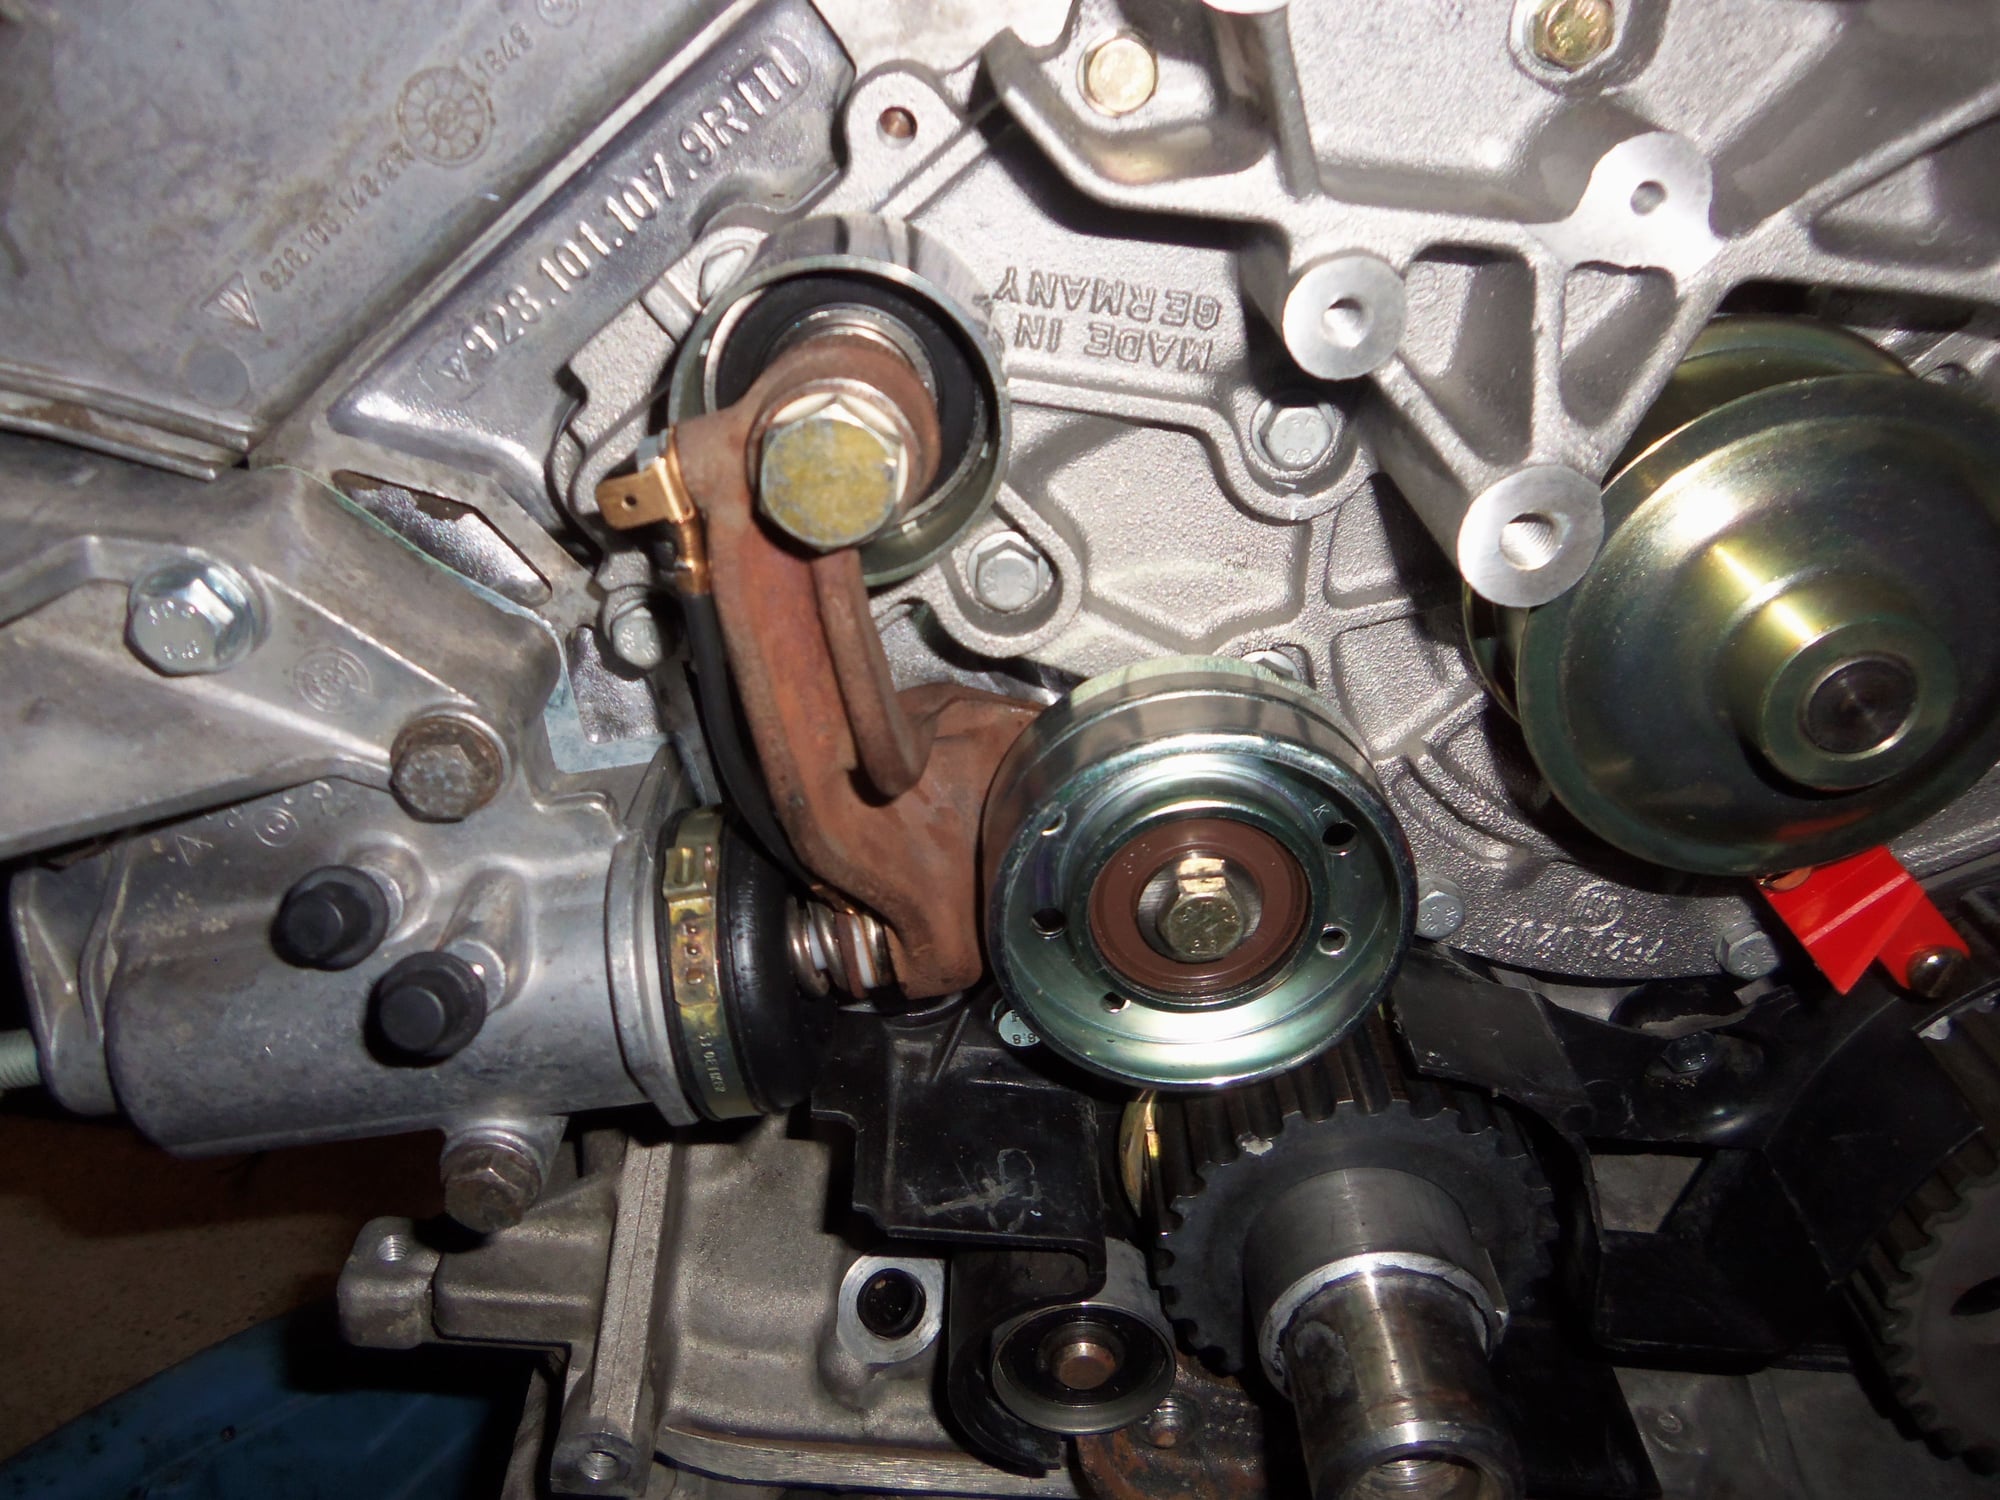
Timing cover back piece and oil pump sprocket installed.
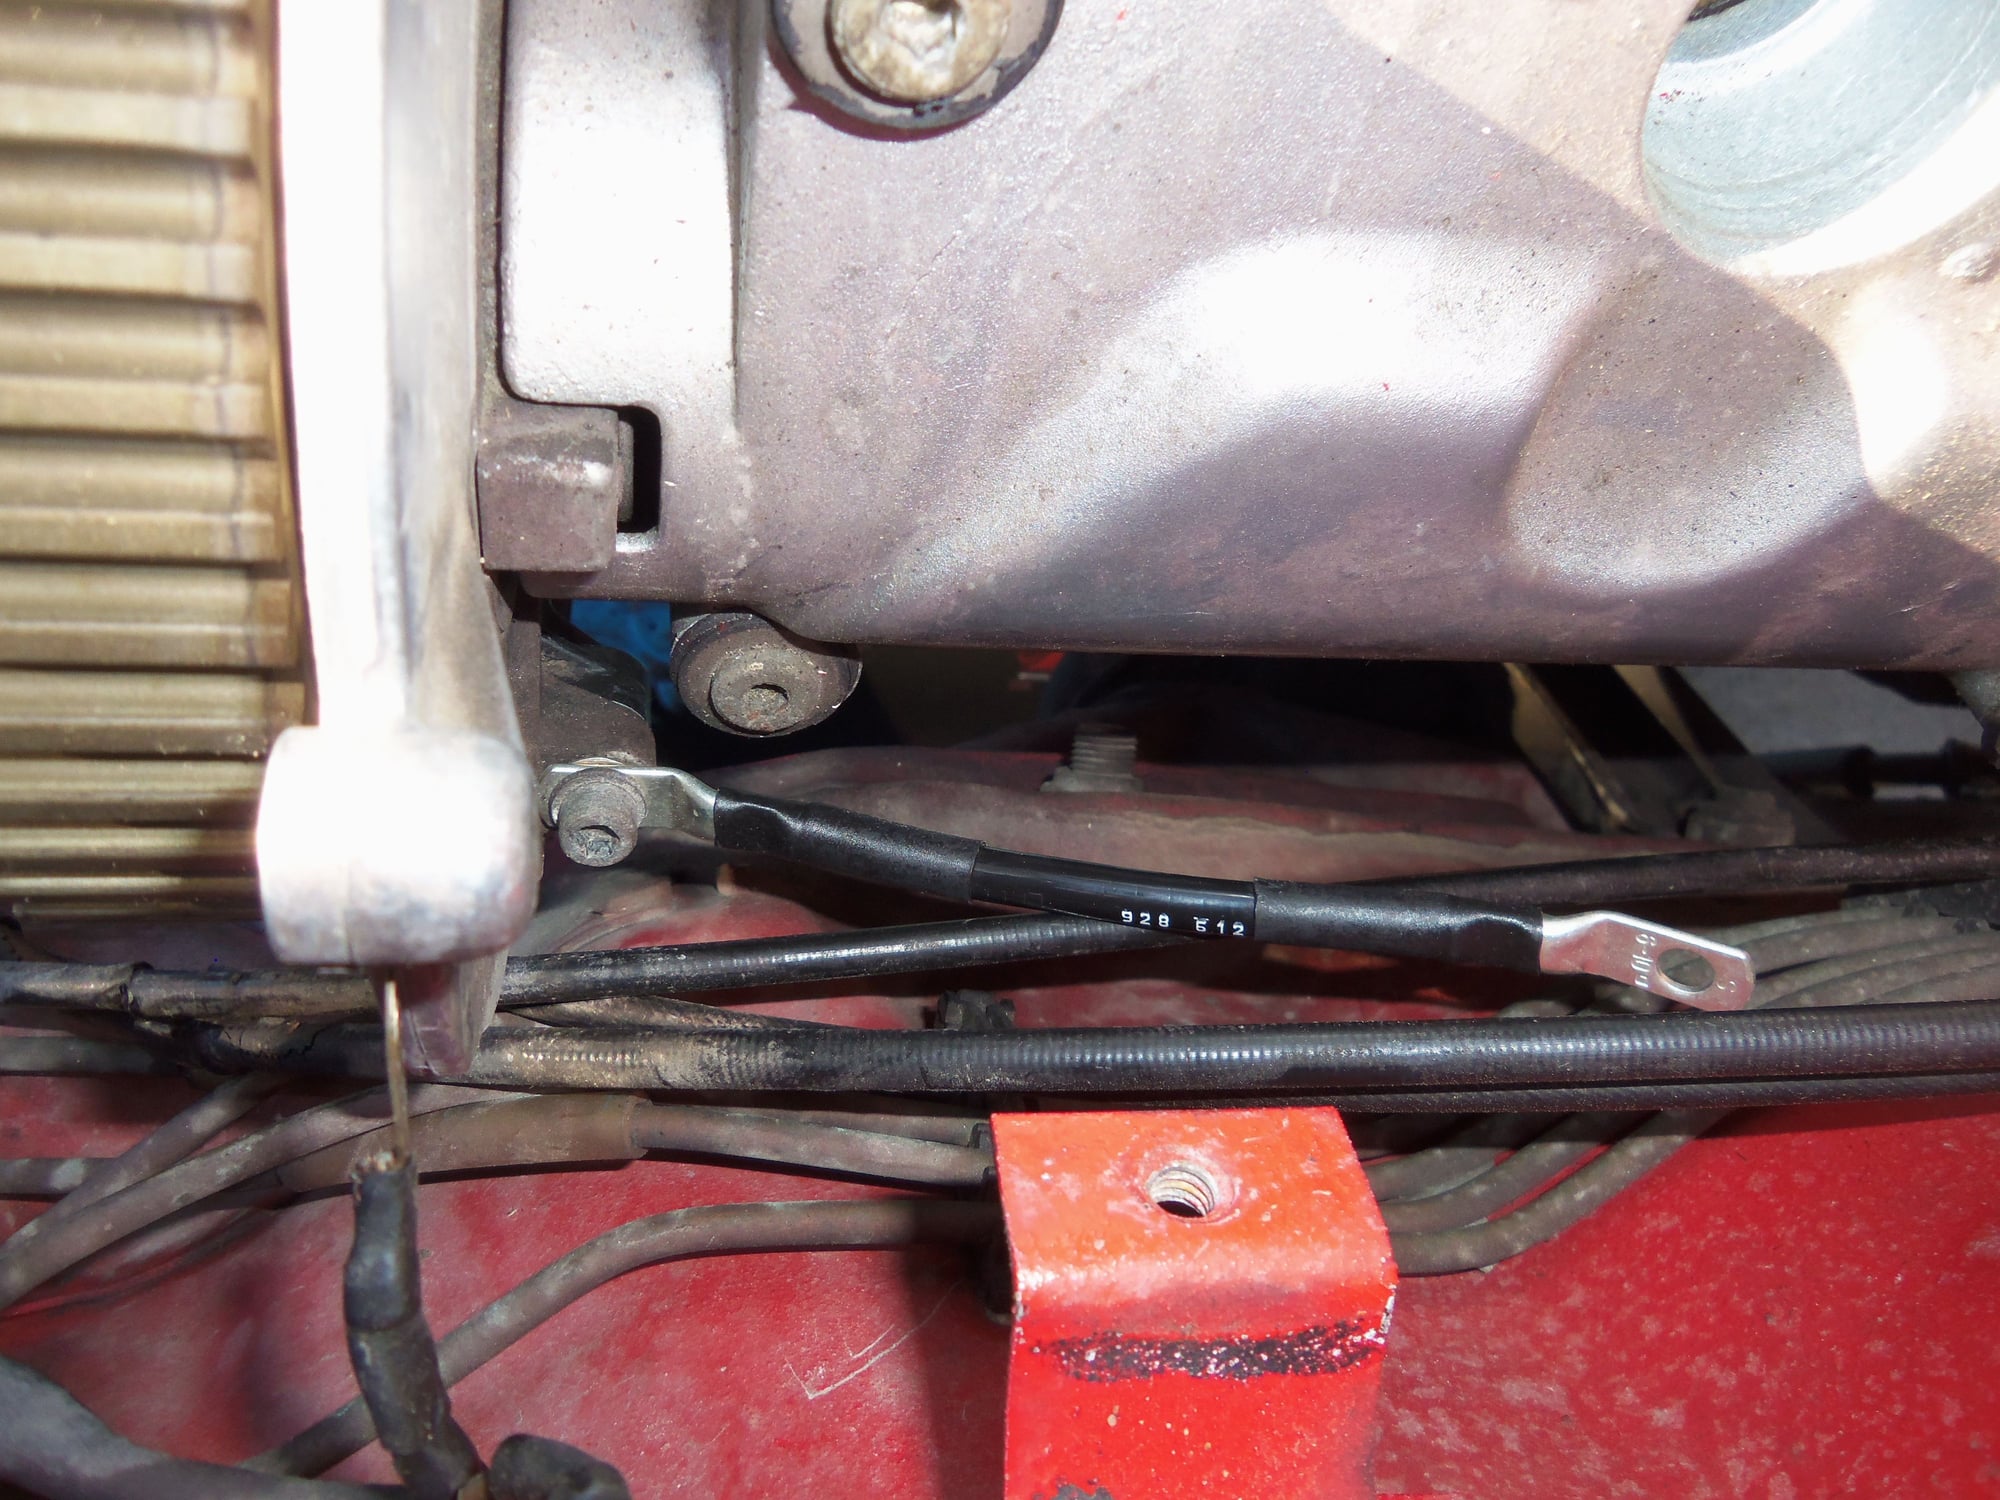
Installed new driver's side ignition coil ground wire at the same time as installing the timing cover back piece.
For the water pump, I mined Rennlist for detail ideas. I put a super thin layer of Victor Reinz Reinzosil on both sides of the water pump gasket. Yes, this will make it a b*tch when I change the water pump again in five years, but I'd rather it not leak.
For giggles, I put a smear of silver antiseize on the water pump alignment dowels. Keep them from corroding to the water pump casing as fast.
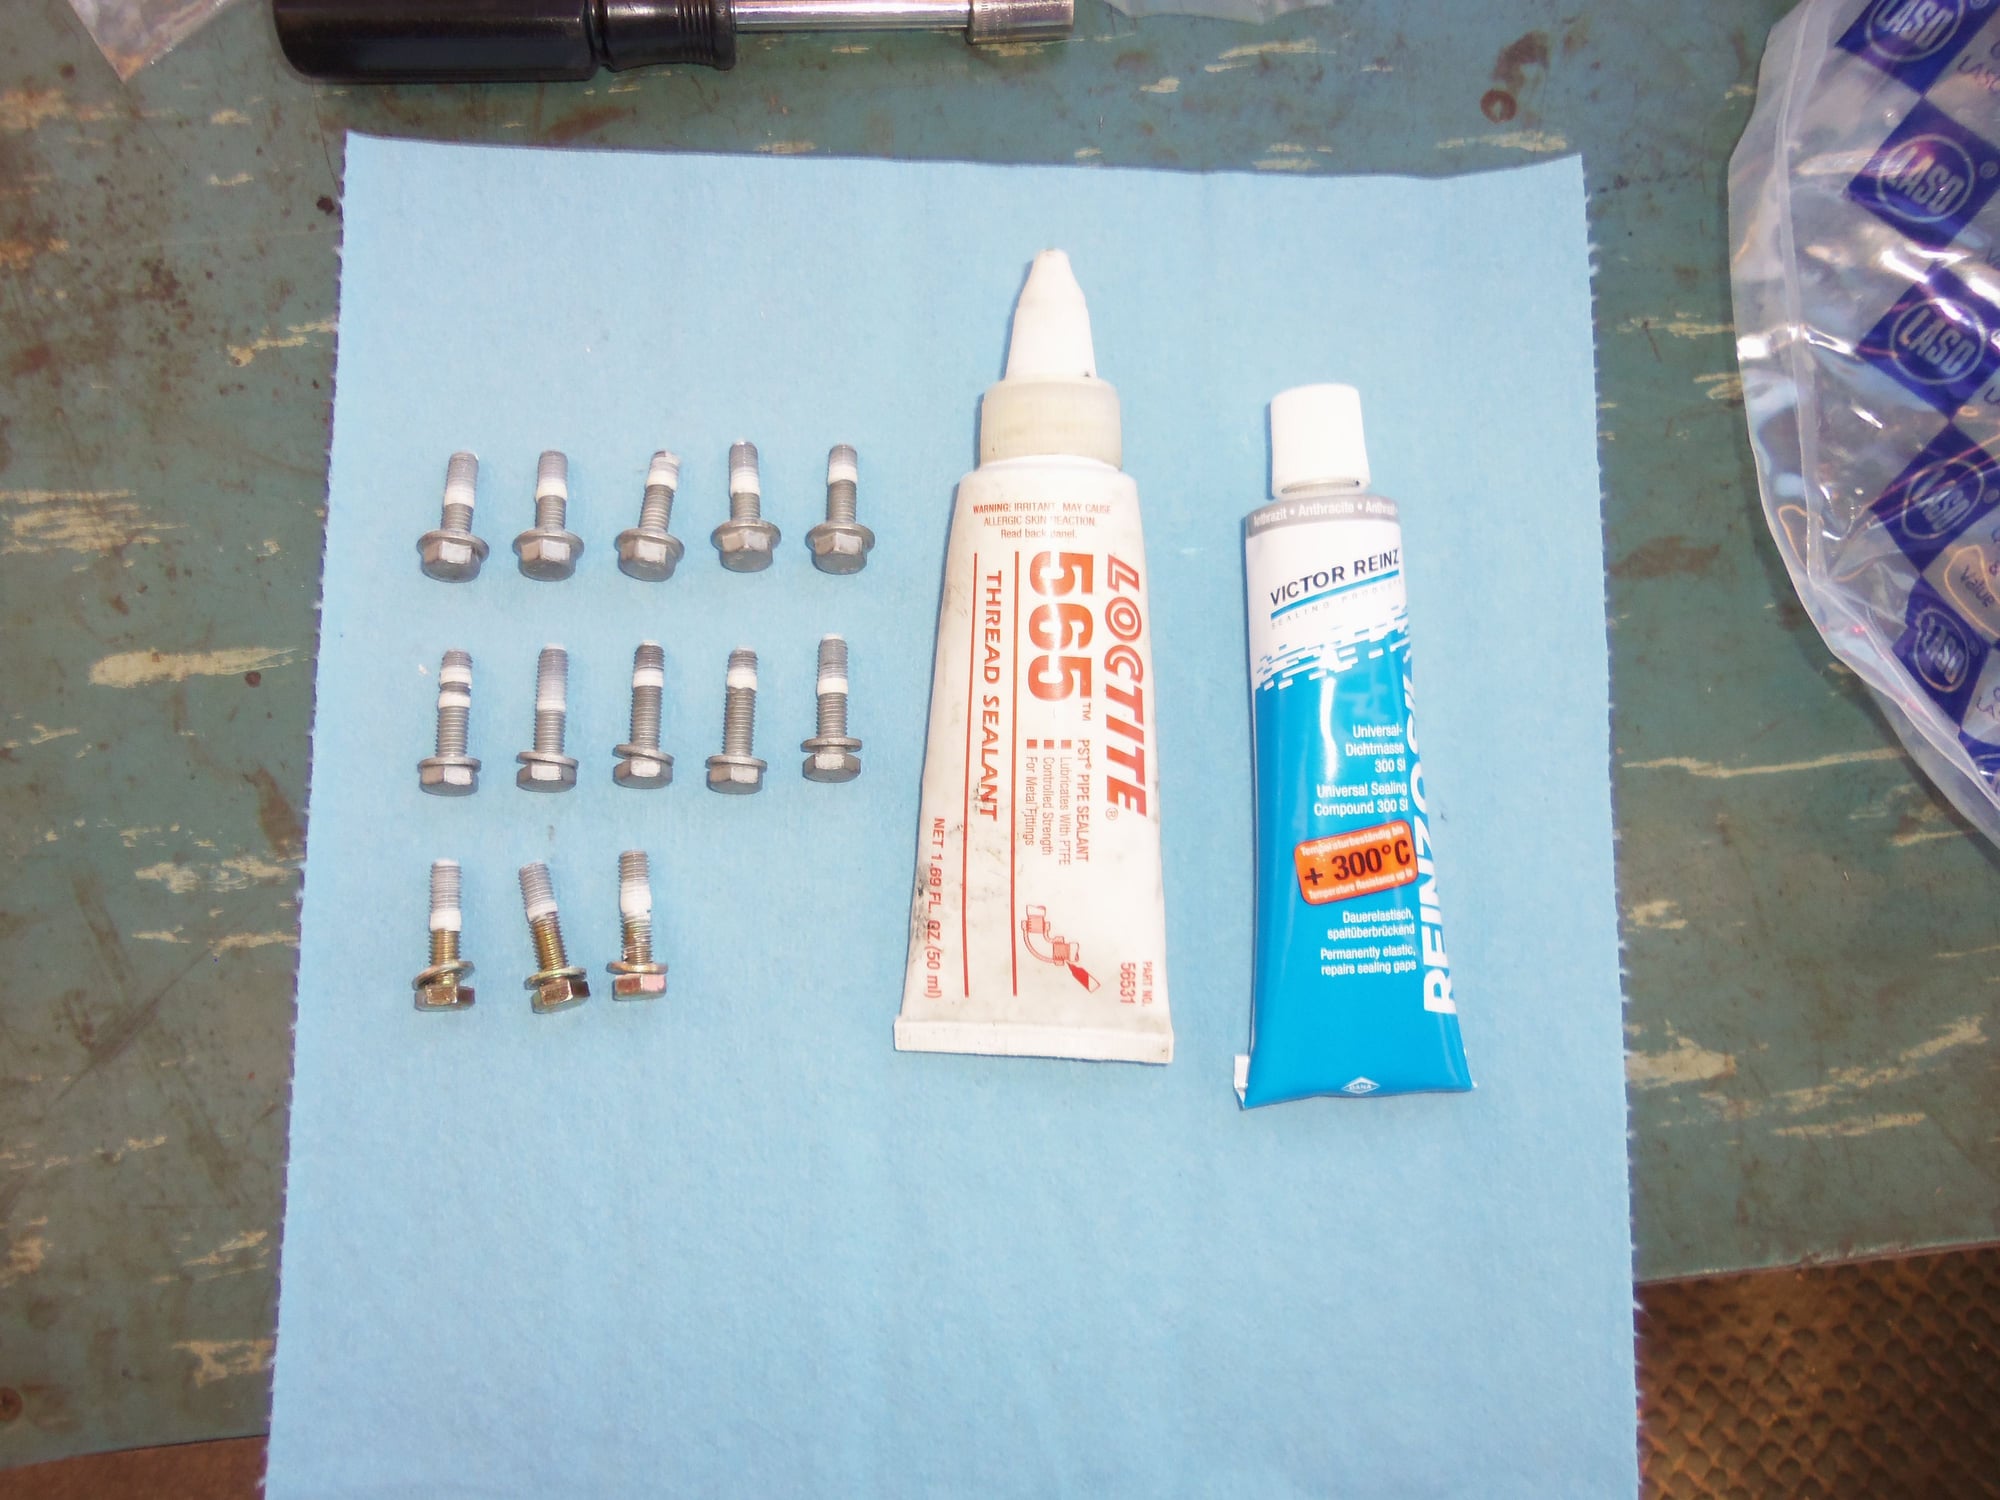
All I had to do for the hardware was clean it and chase the bolt holes. The shop installed new hardware with the failed water pump. I coated the threads of the water pump bolts with teflon pipe dope sealant. Torque spec was 71-89 in/lbs. I torqued the bolts to 50 in/lbs then to 75 in/lbs. I went a little low to account for the teflon paste on the threads.
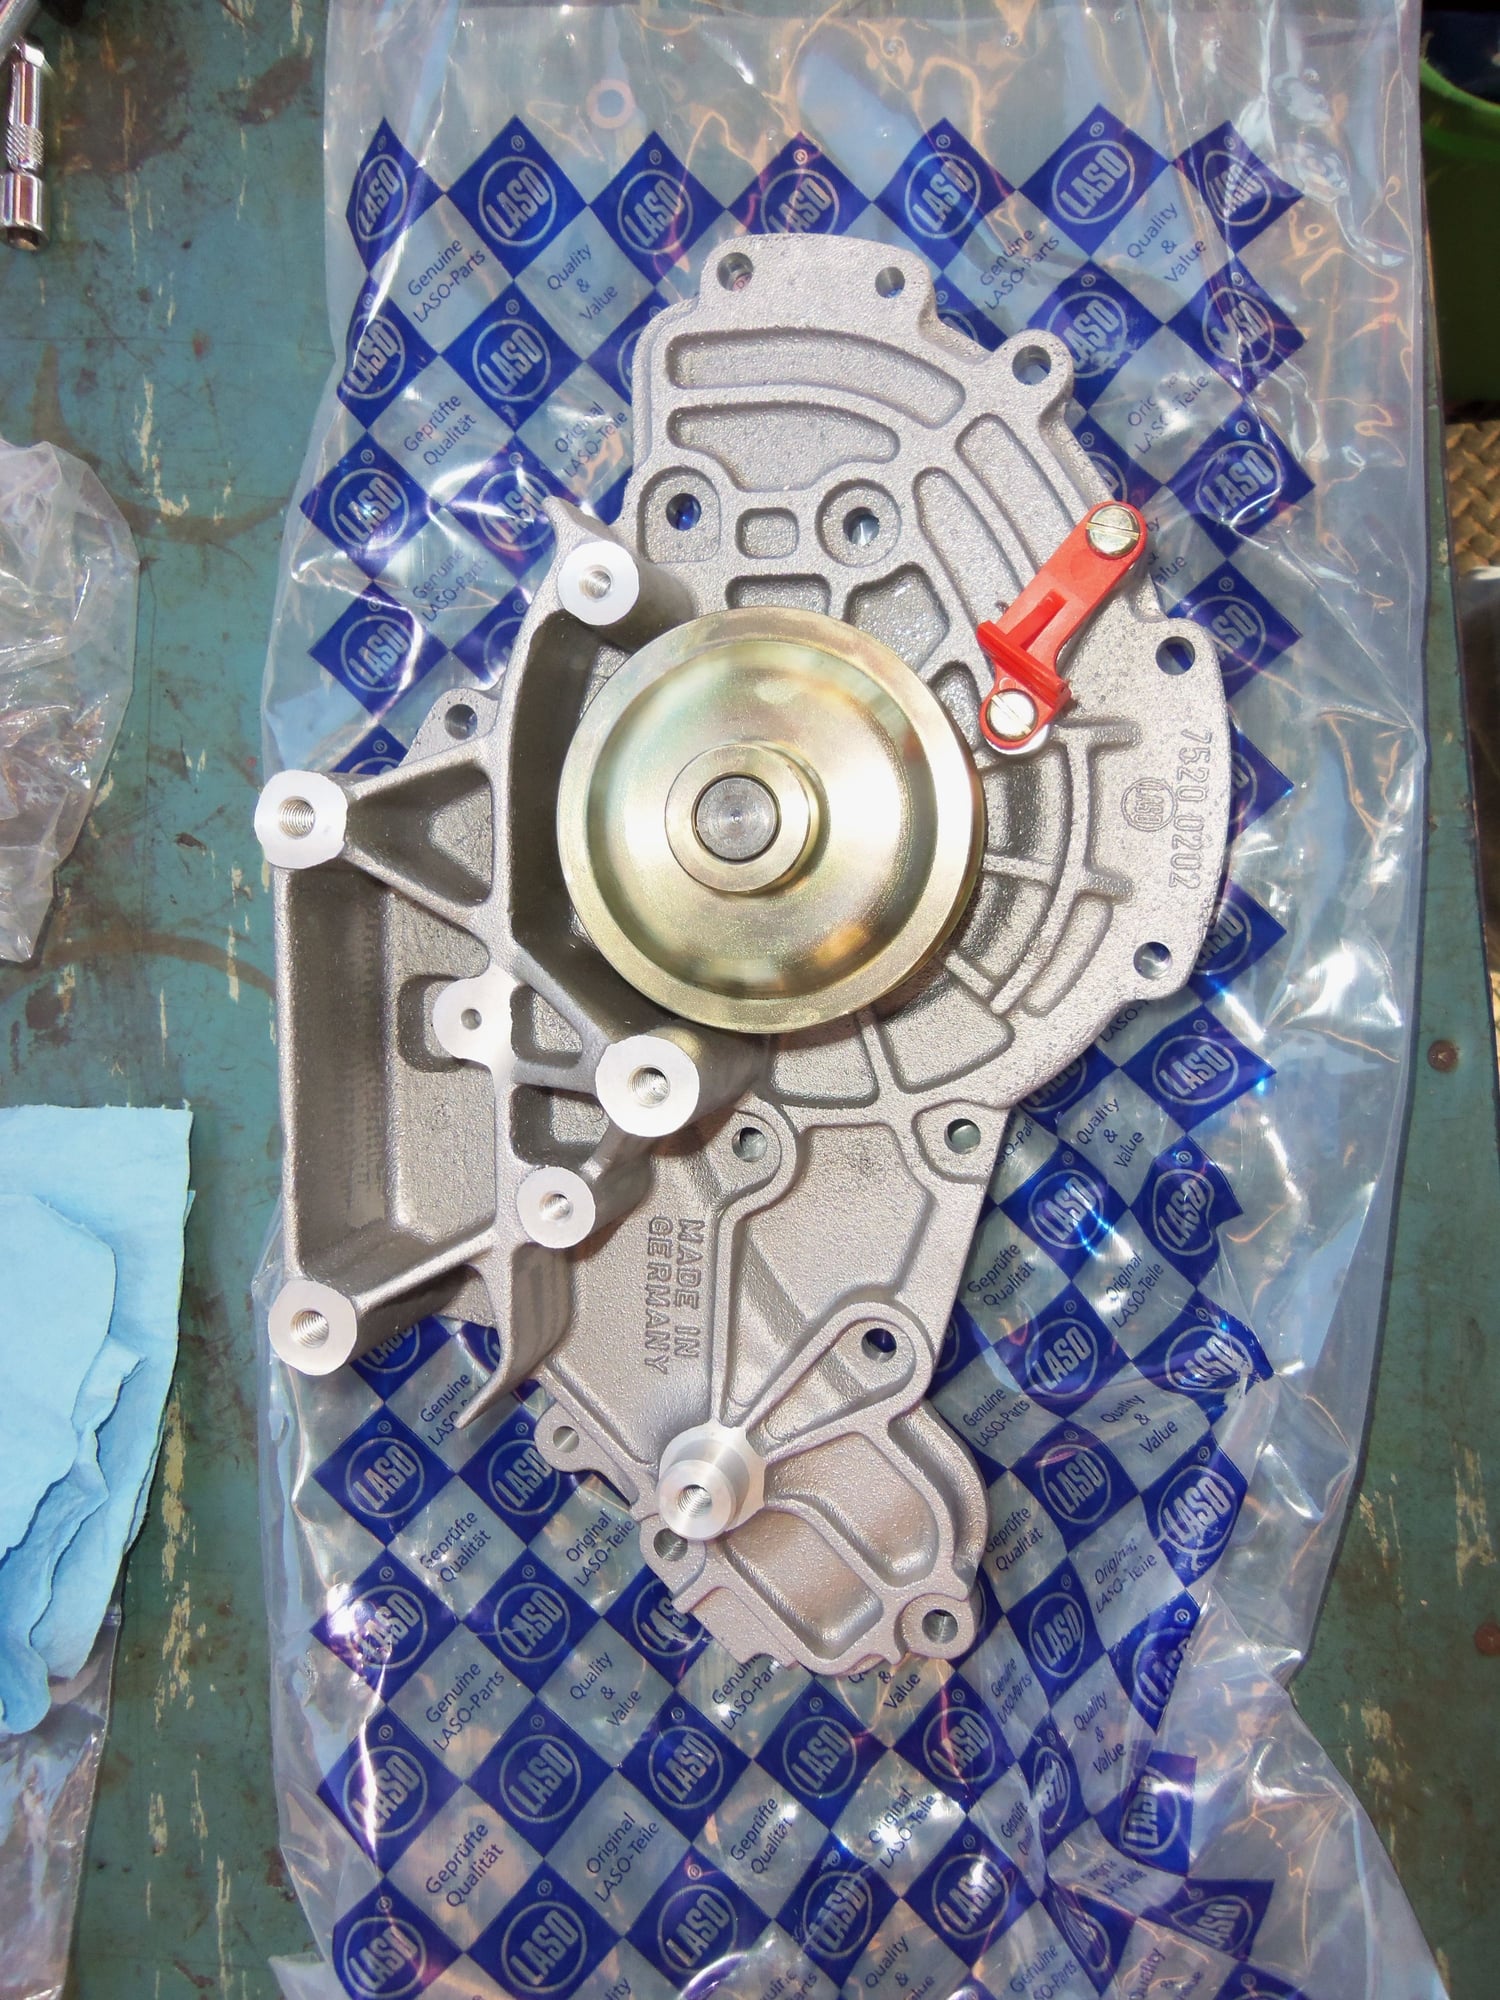
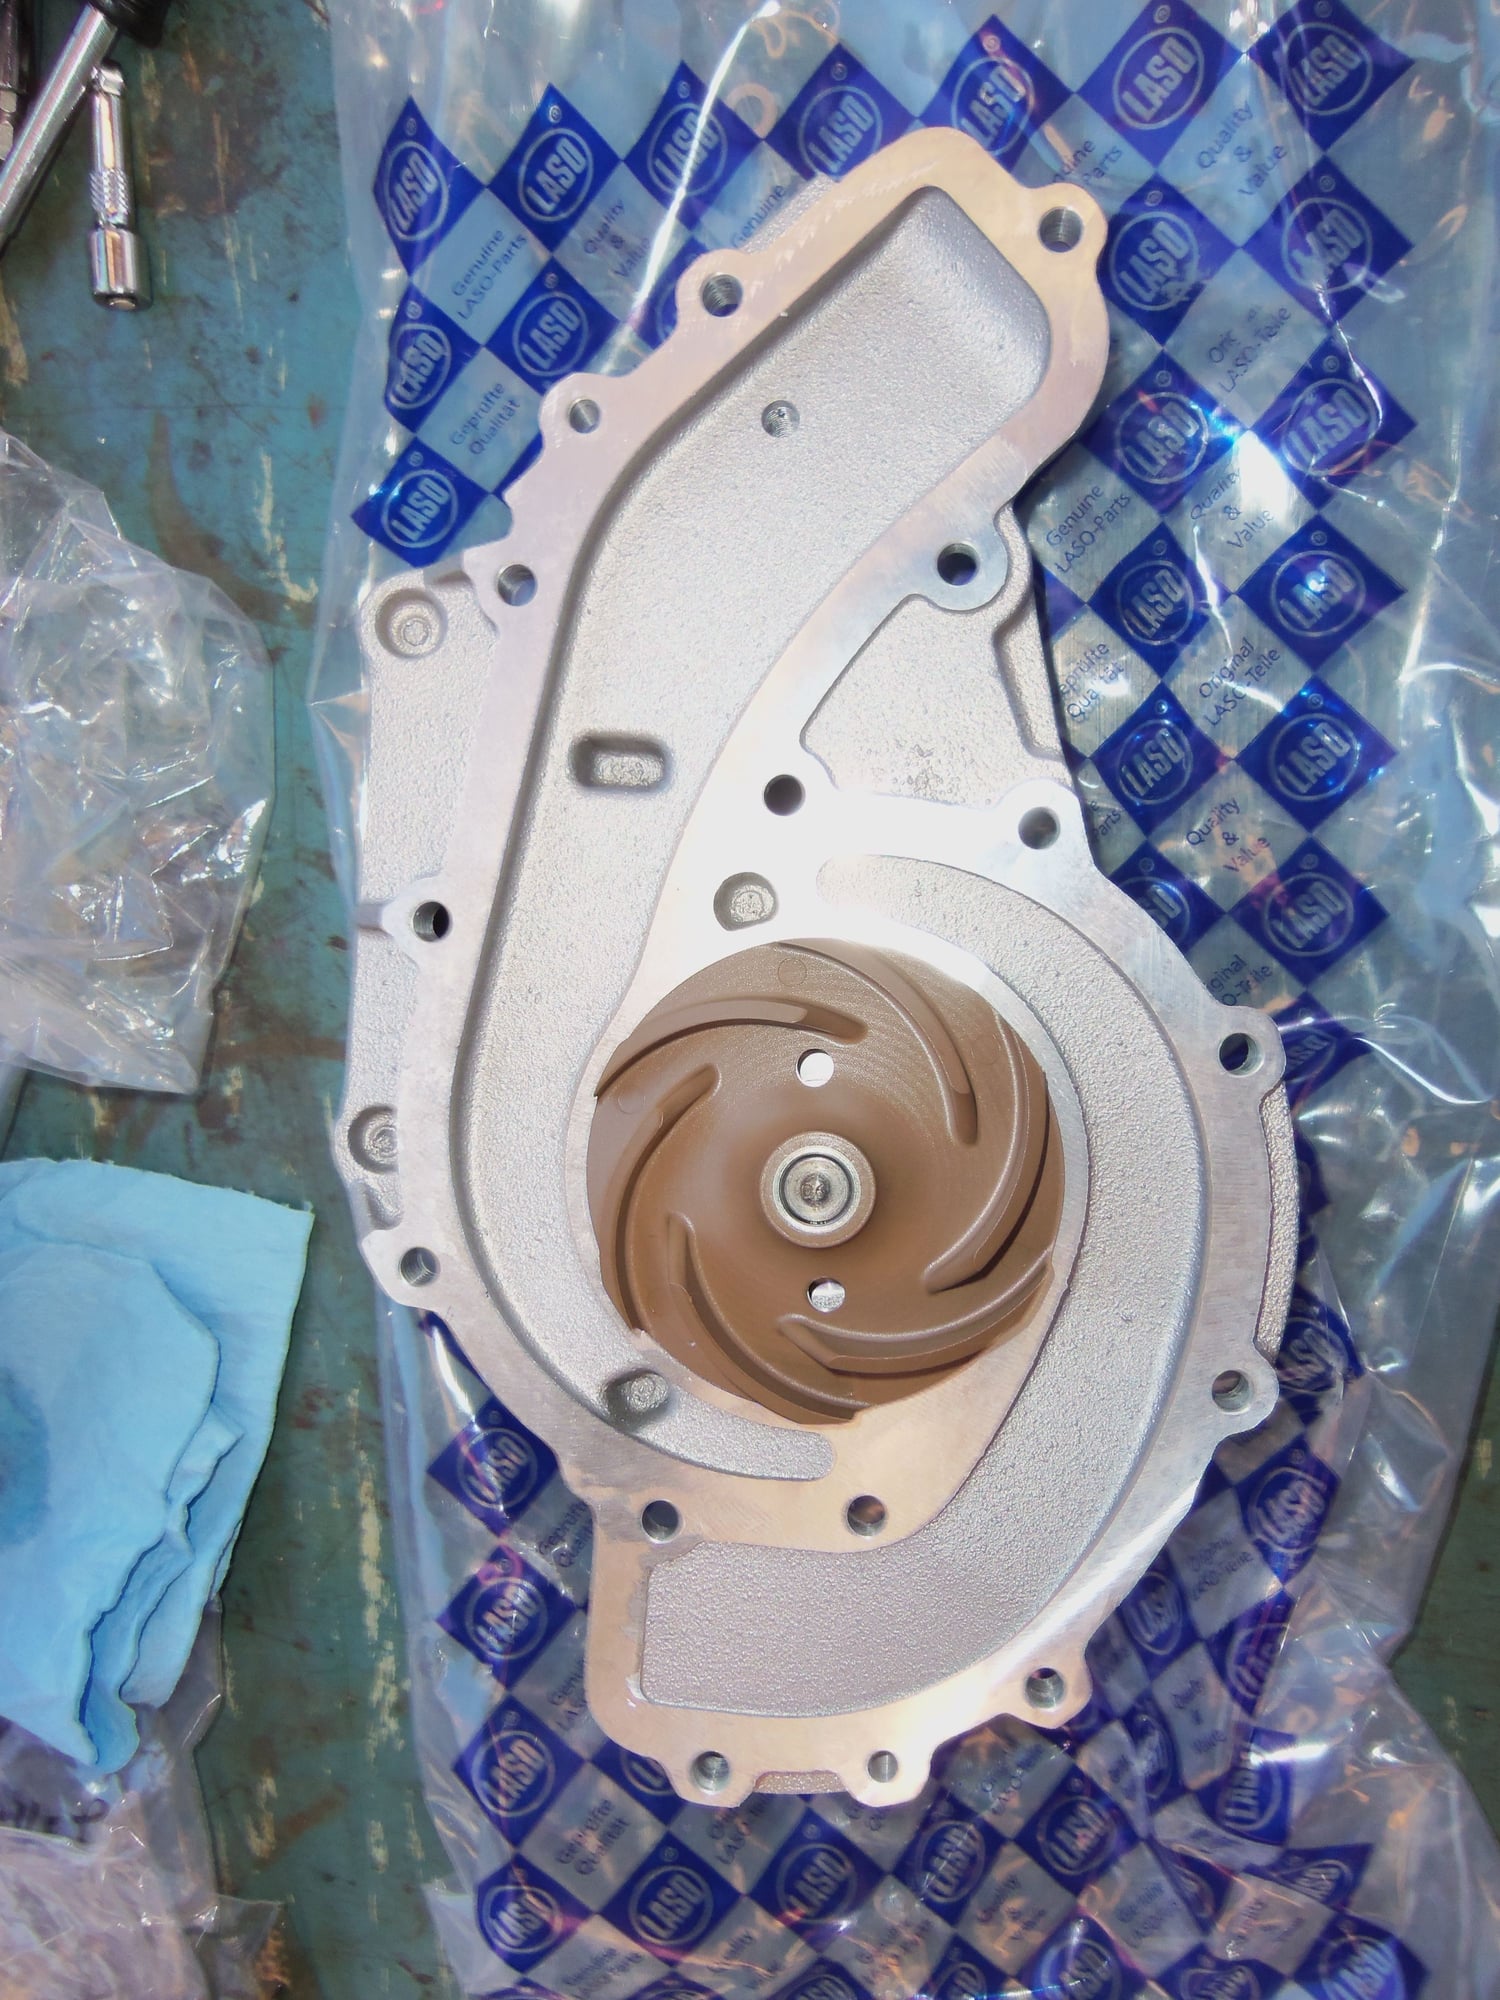
New Laso water pump.<br/>No axial play in the shaft!
Porsche water pump gasket.
Teflon paste for the bolts, Reinzosil for the gasket.
I ran the bolts in by hand to coat the threaded holes with teflon paste.
Water pump gasket located on alignment dowels, super thin coat of Reinzosil on both sides.
Ghetto bolt I had to rig up. I wanted a bolt in every hole for the gasket to set. I didn't have the proper lenghth bolt. So, I got a really long one and double nutted it. Instant correct length bolt. This will come out when I mount the timing belt covers.
New water pump installed.
Belt roller went on the water pump spigot with a thin coat of silver antiseize.
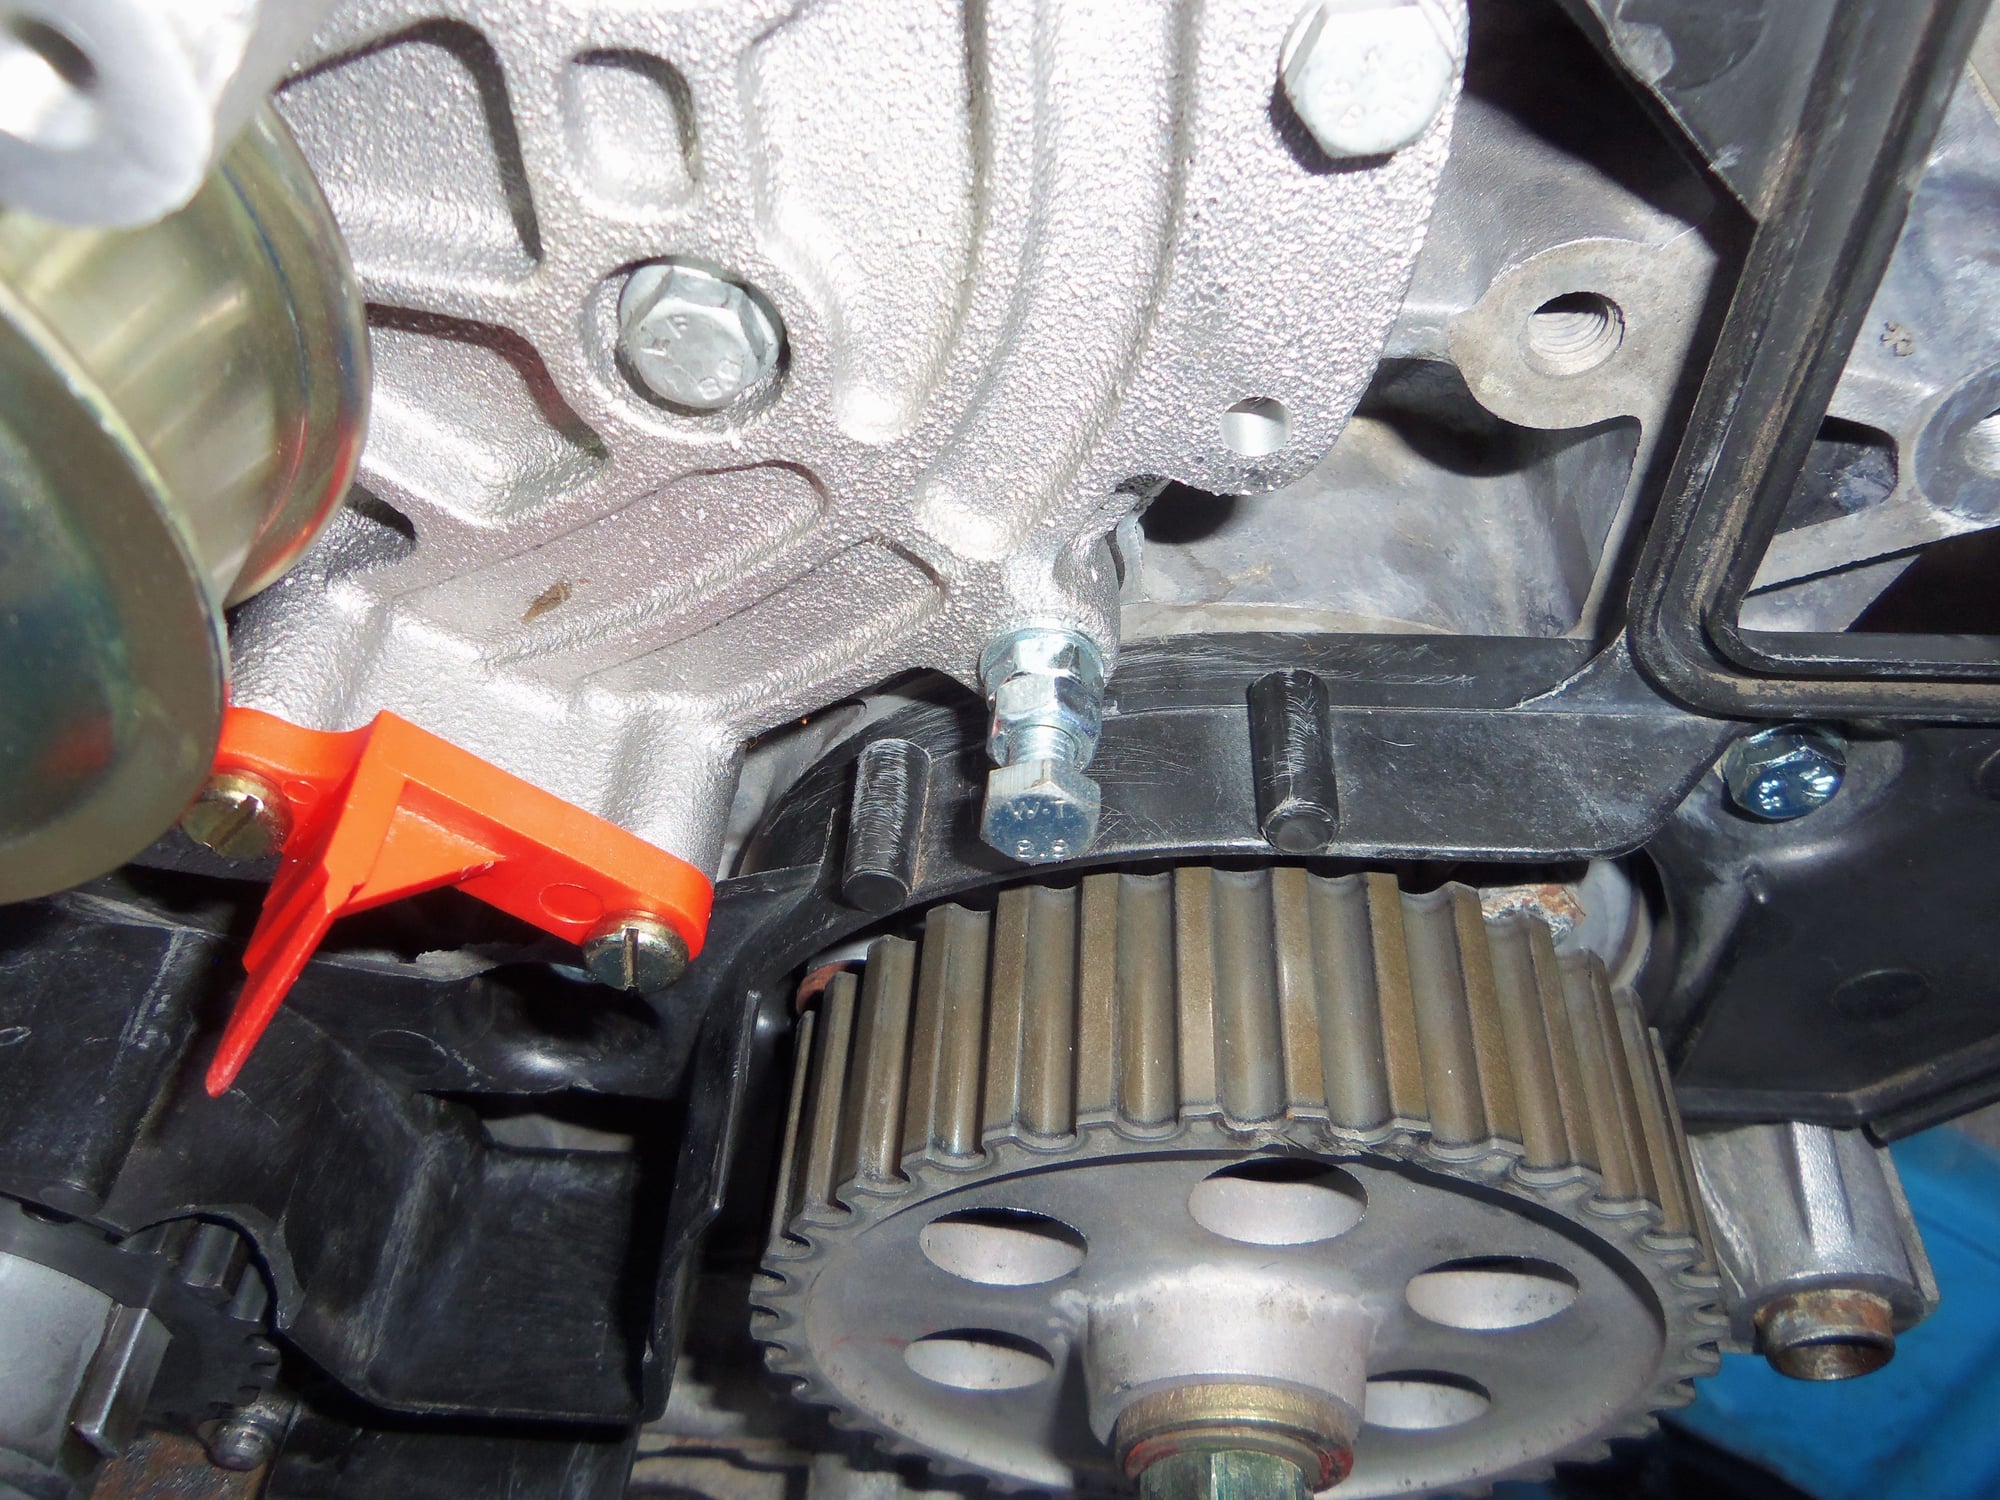
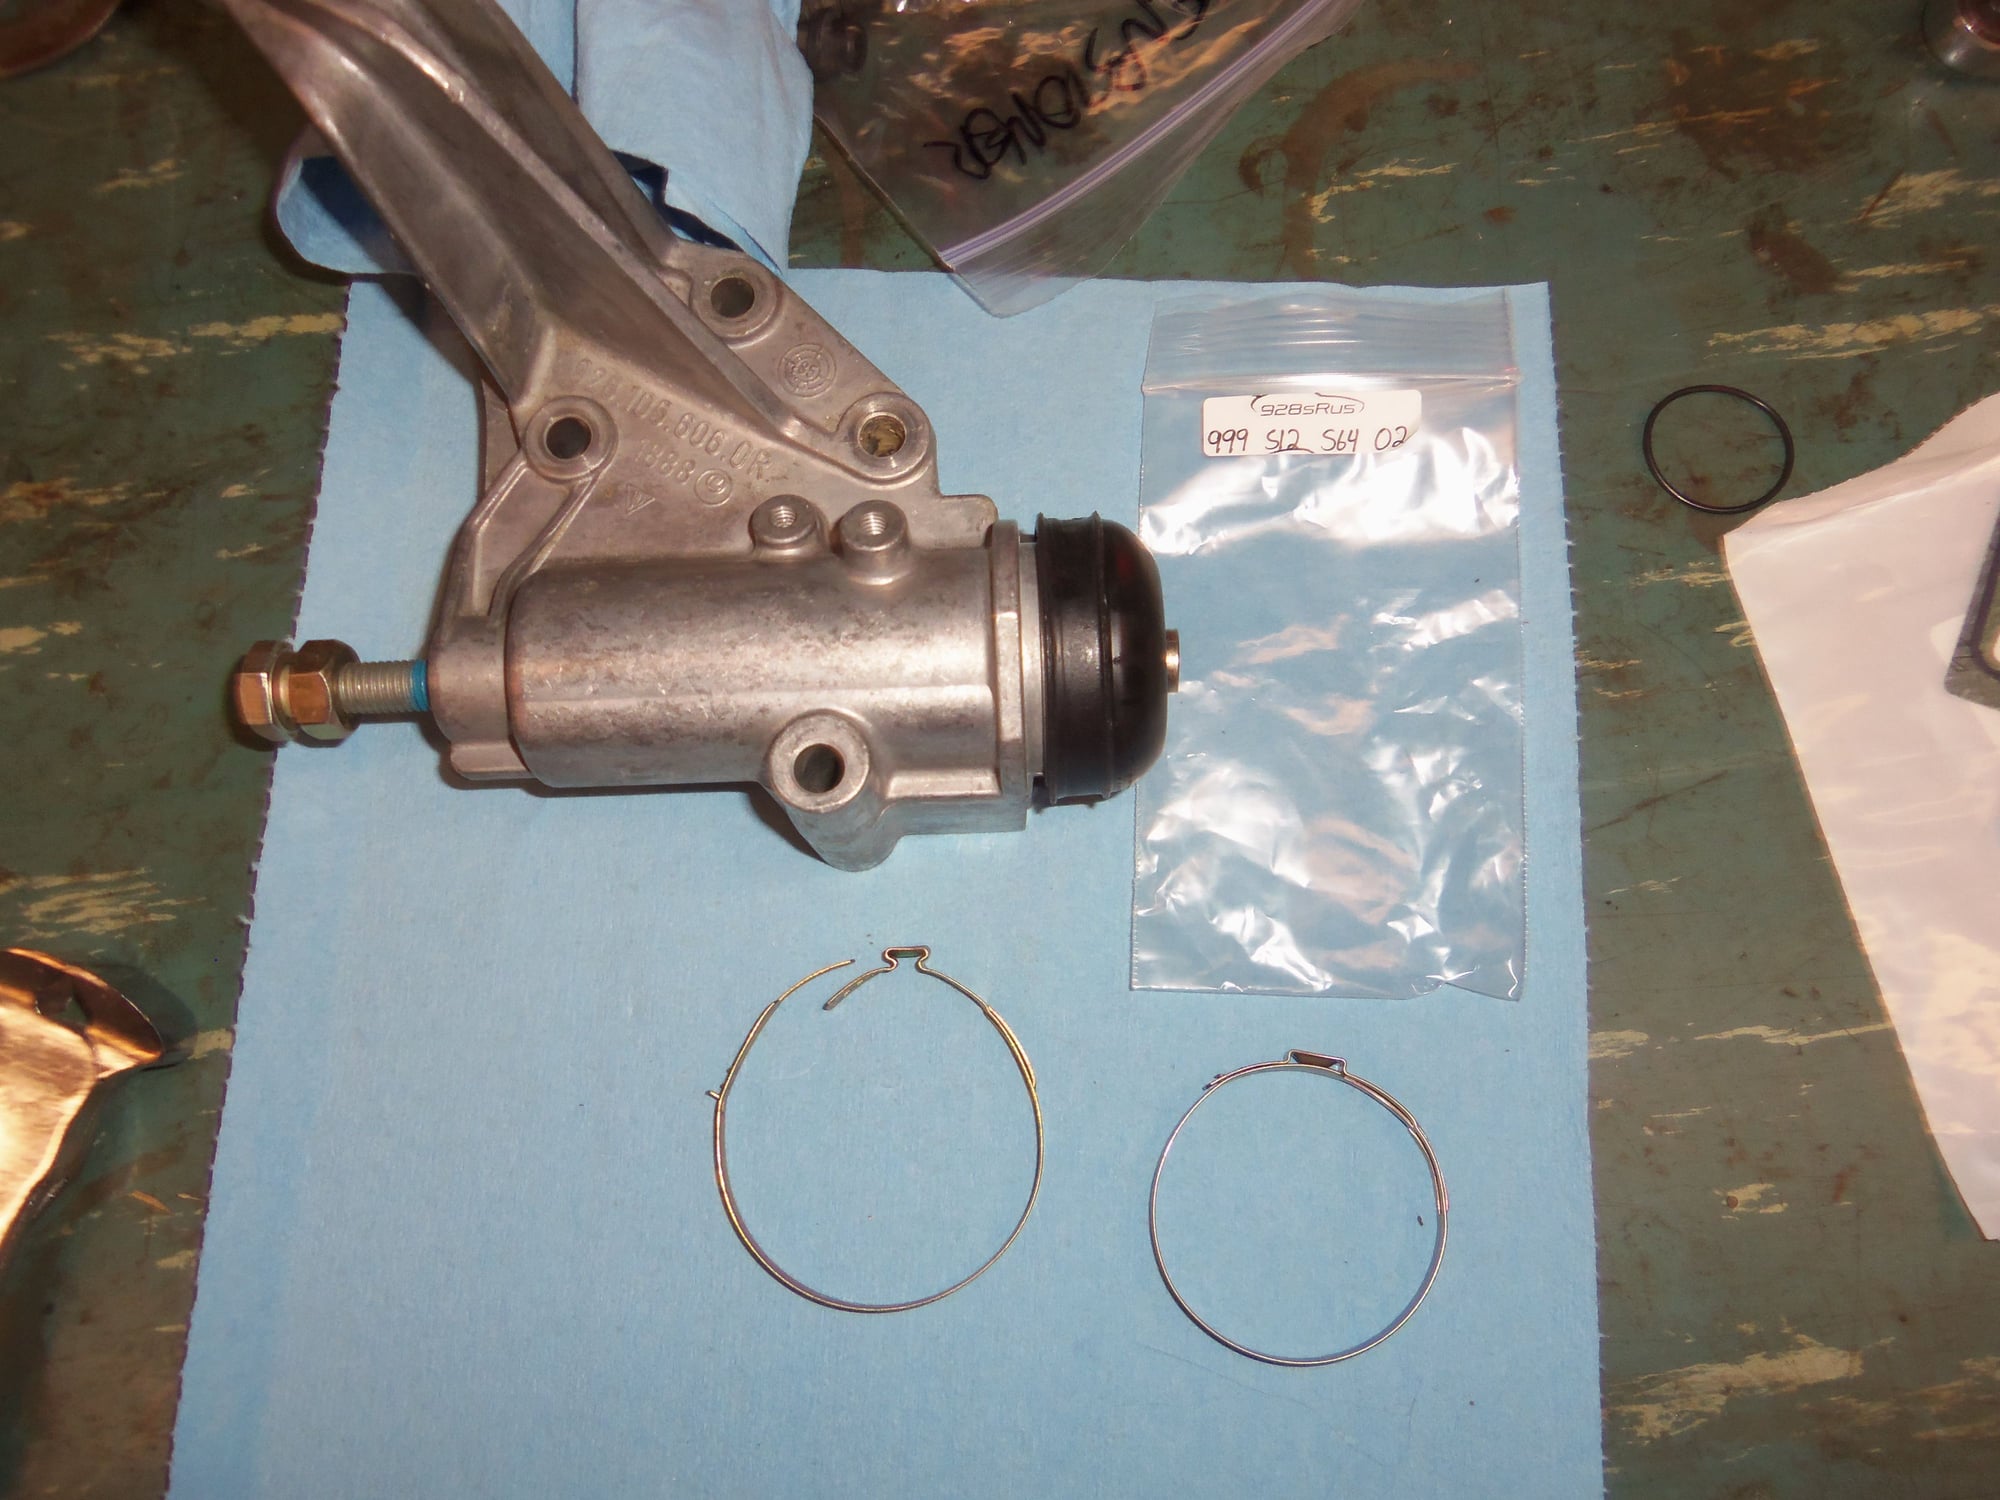
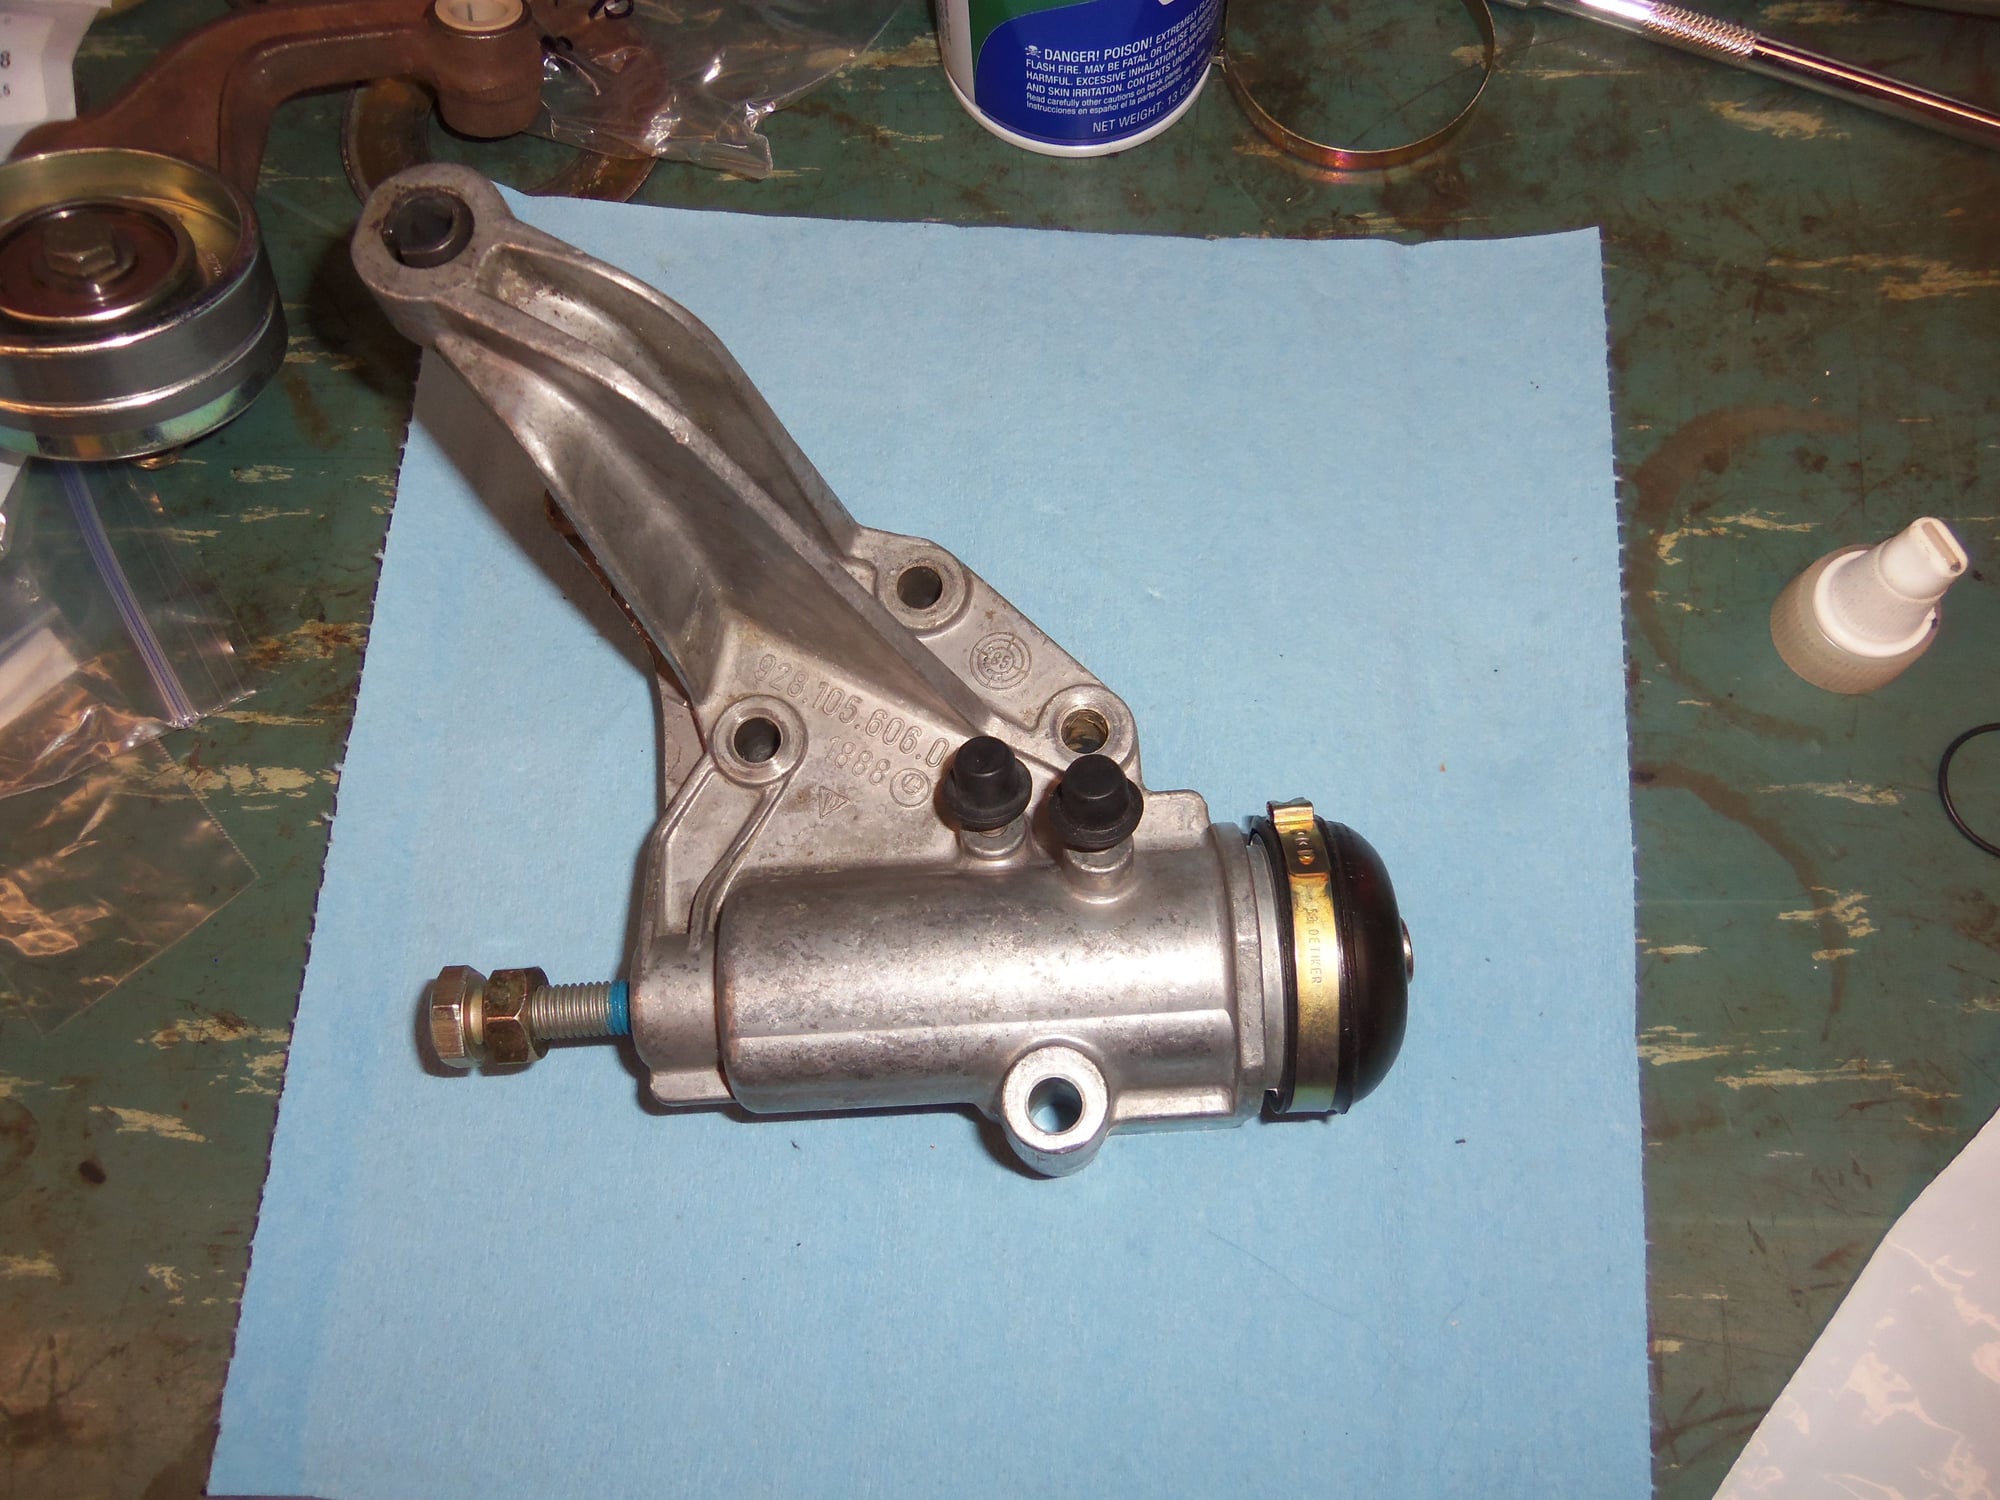
Using the WSM and Rennlist, I reassembled the stack of bimetallic washers for the tensioner. A new O-ring went on the valve plate. I poured some STP into the bore of the tensioner then rolled it around for an even coat.
I reassembled the tensioner with a new adjusting bolt and a new clamp on the still good boot. I set the clamp at approximately 11:00 before I crimped it.
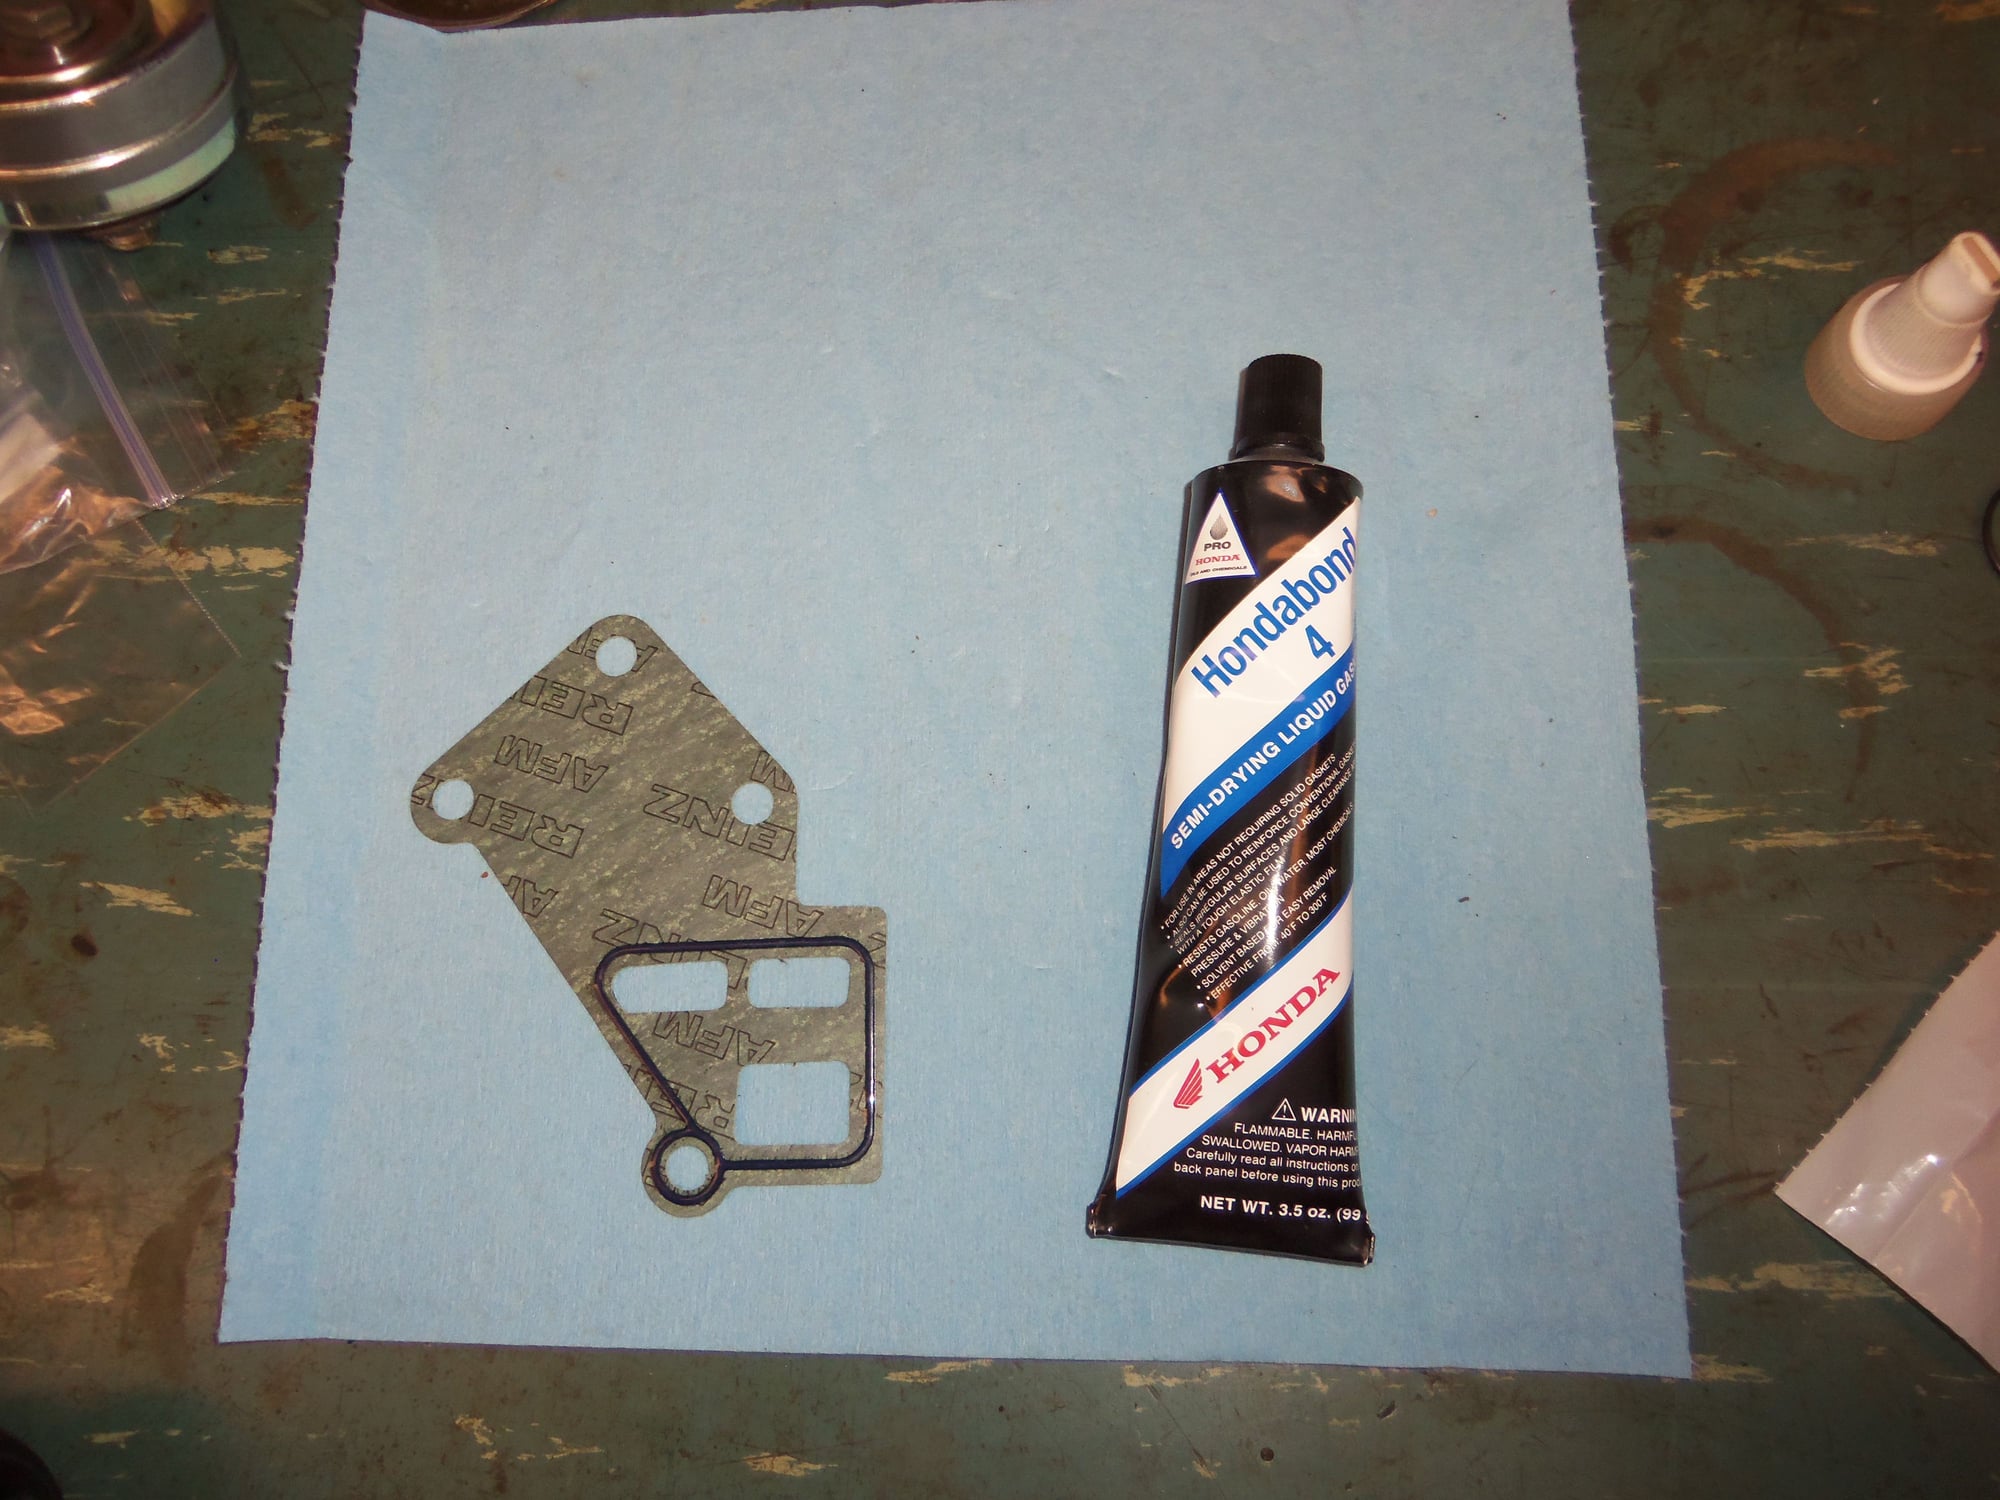
Following Stan's advice, I put a thin coat of HondaBond 4 sealant on both sides of the tensioner to engine block gasket. Man, that stuff is stringy and gets everywhere...
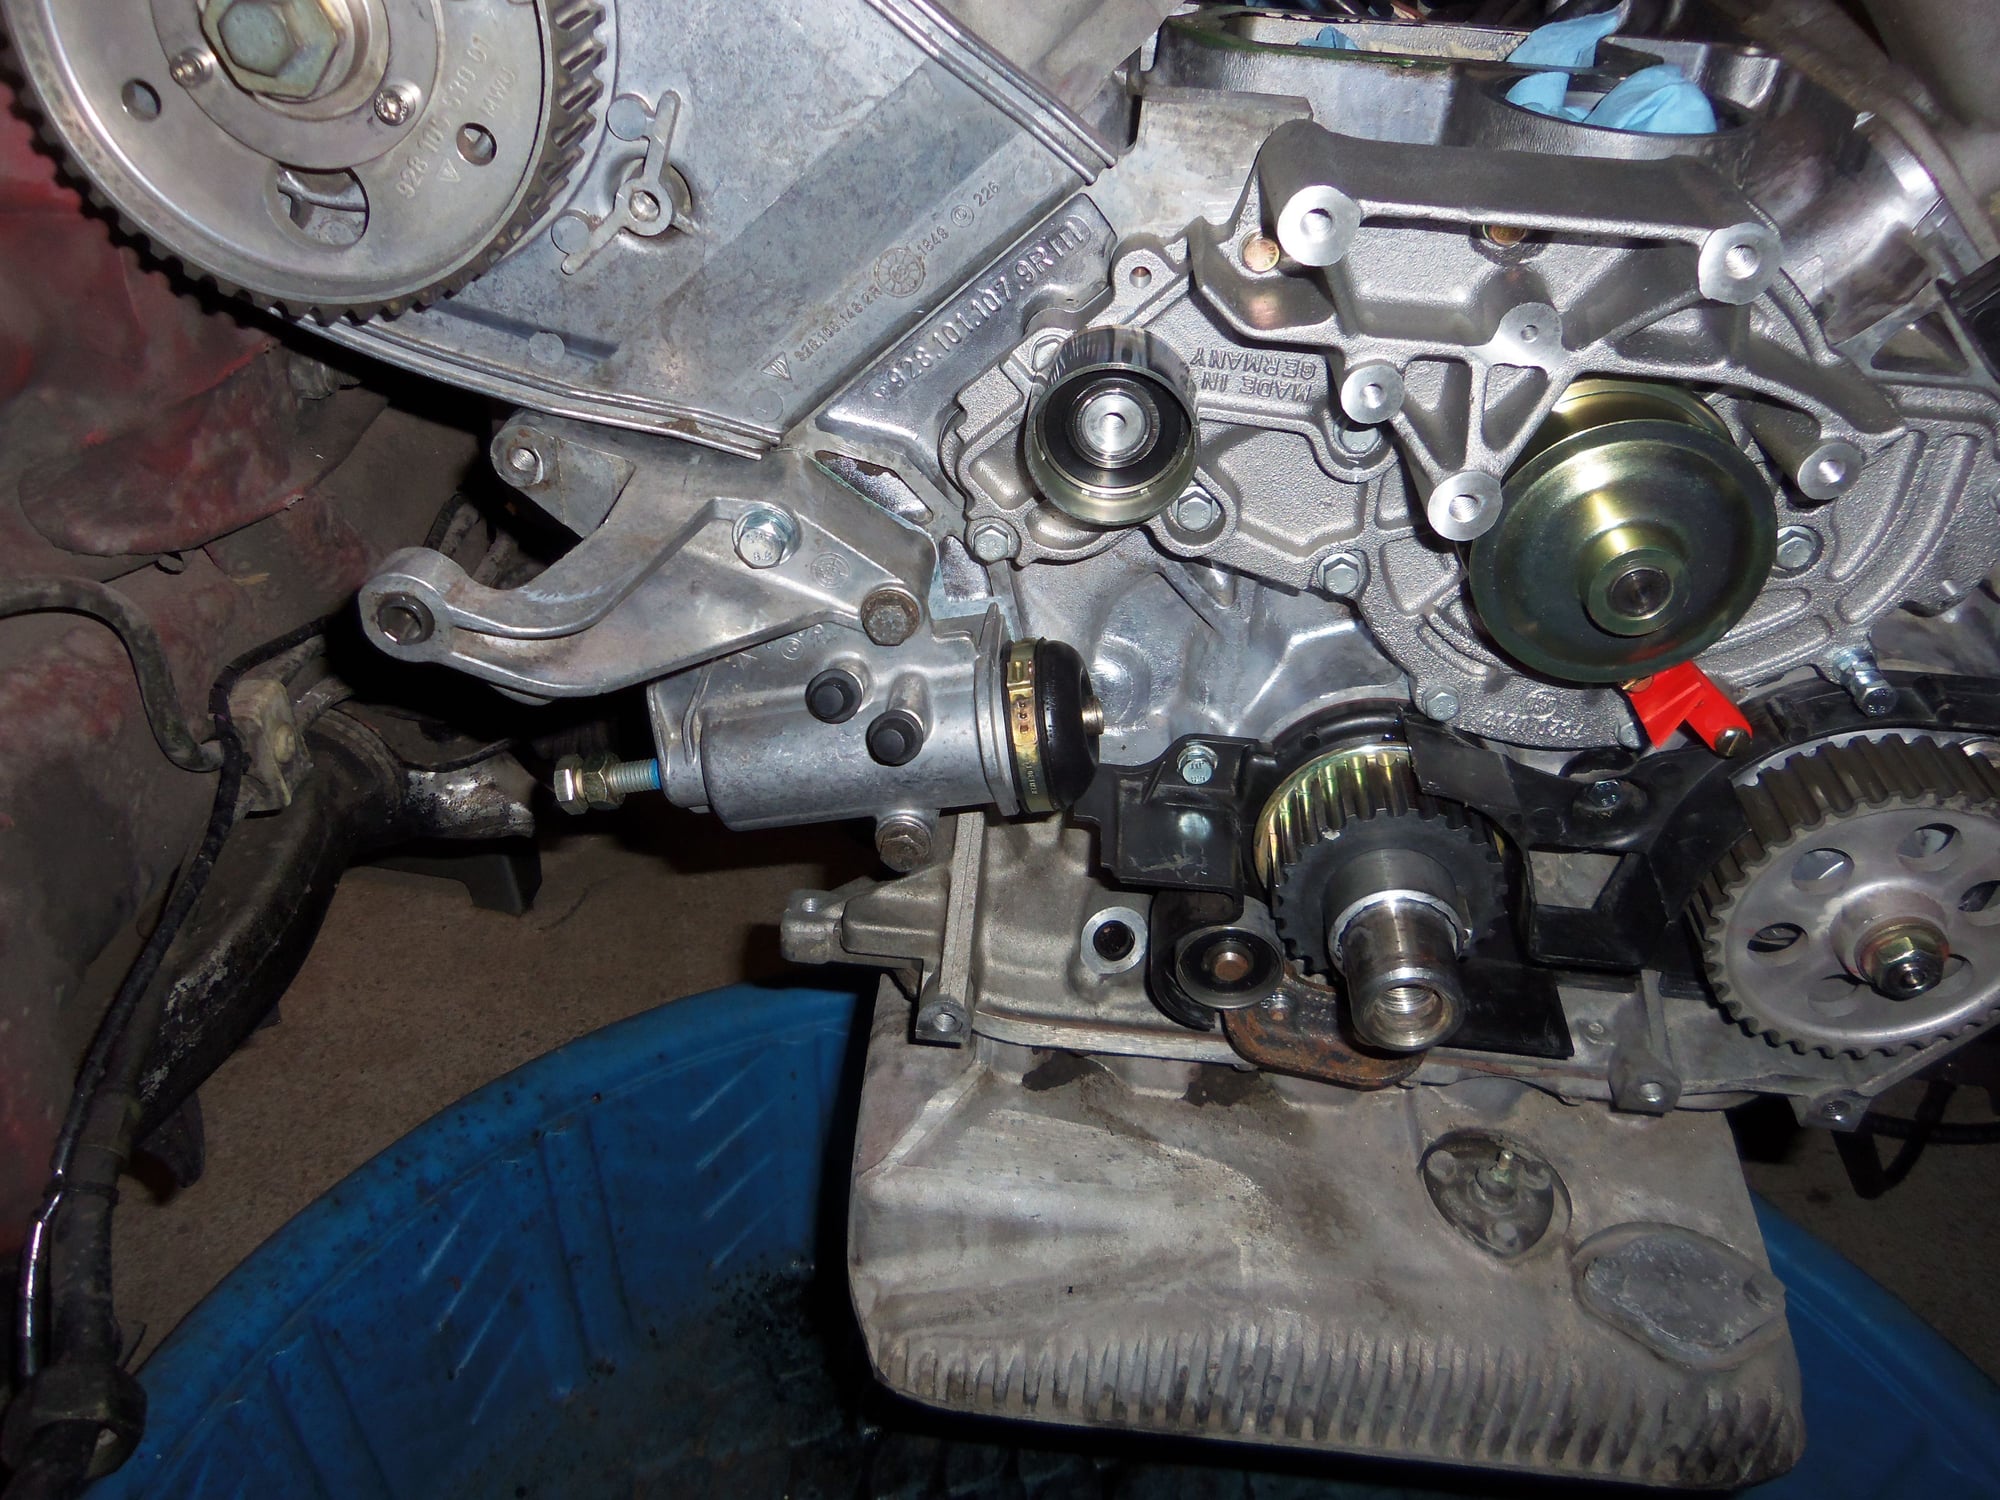
Upon mounting the tensioner, the bolt that goes into the oil gallery got teflon paste on its threads. The rest got silver antiseize. All got torqued to 180 in/lbs (15 ft/lbs).
Washers aligned in accordance with the WSM. New O-ring for the valve plate.
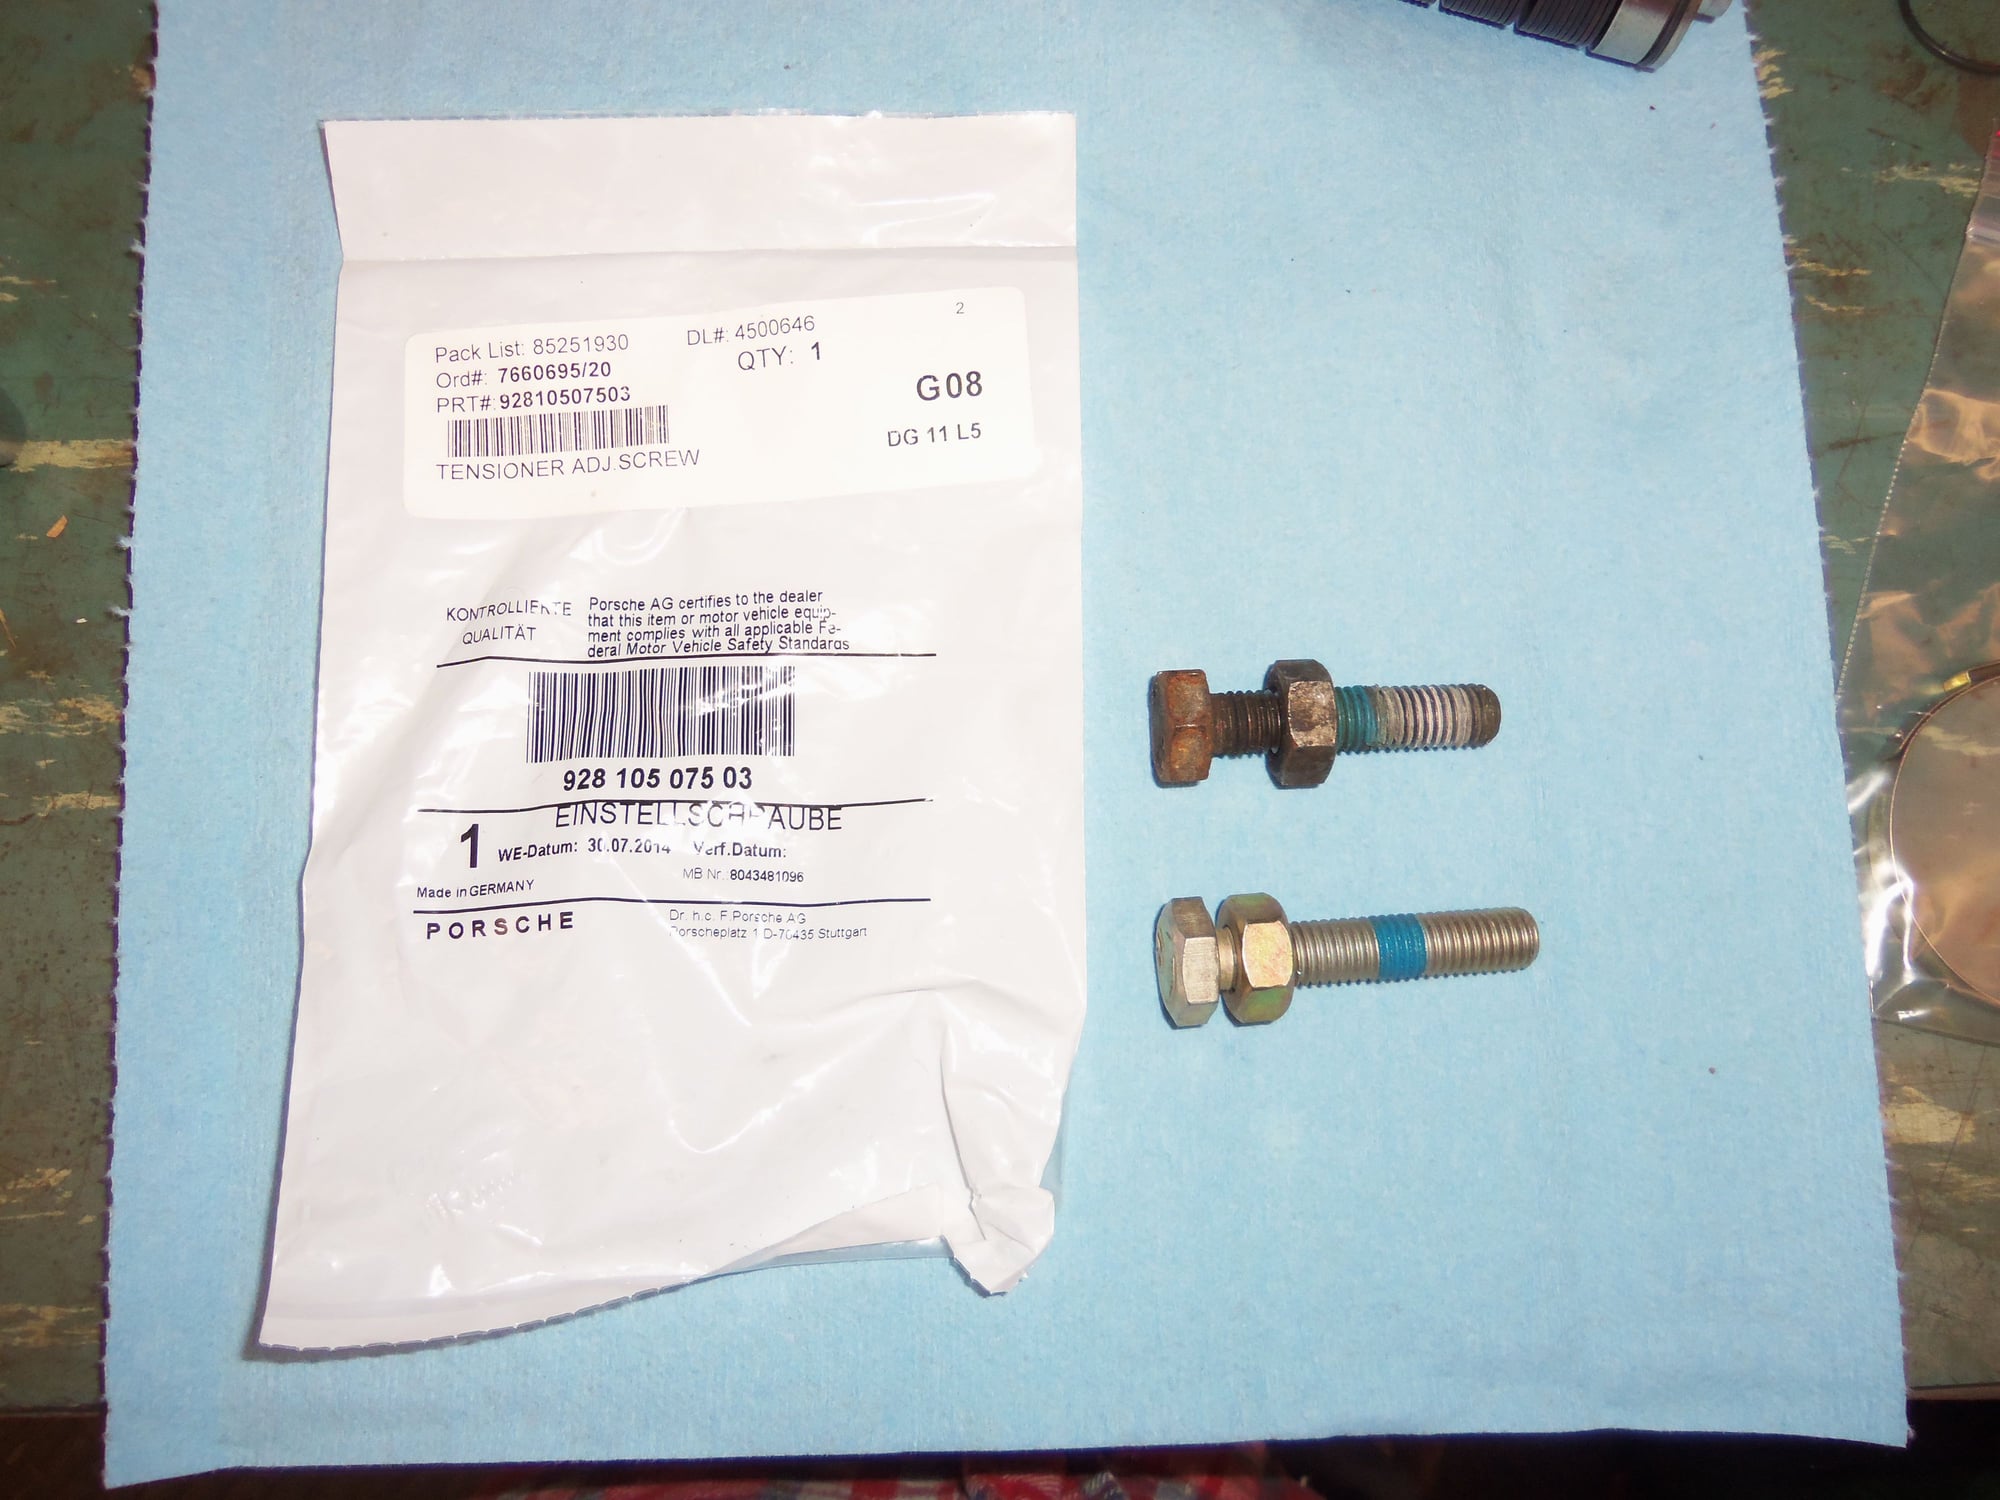
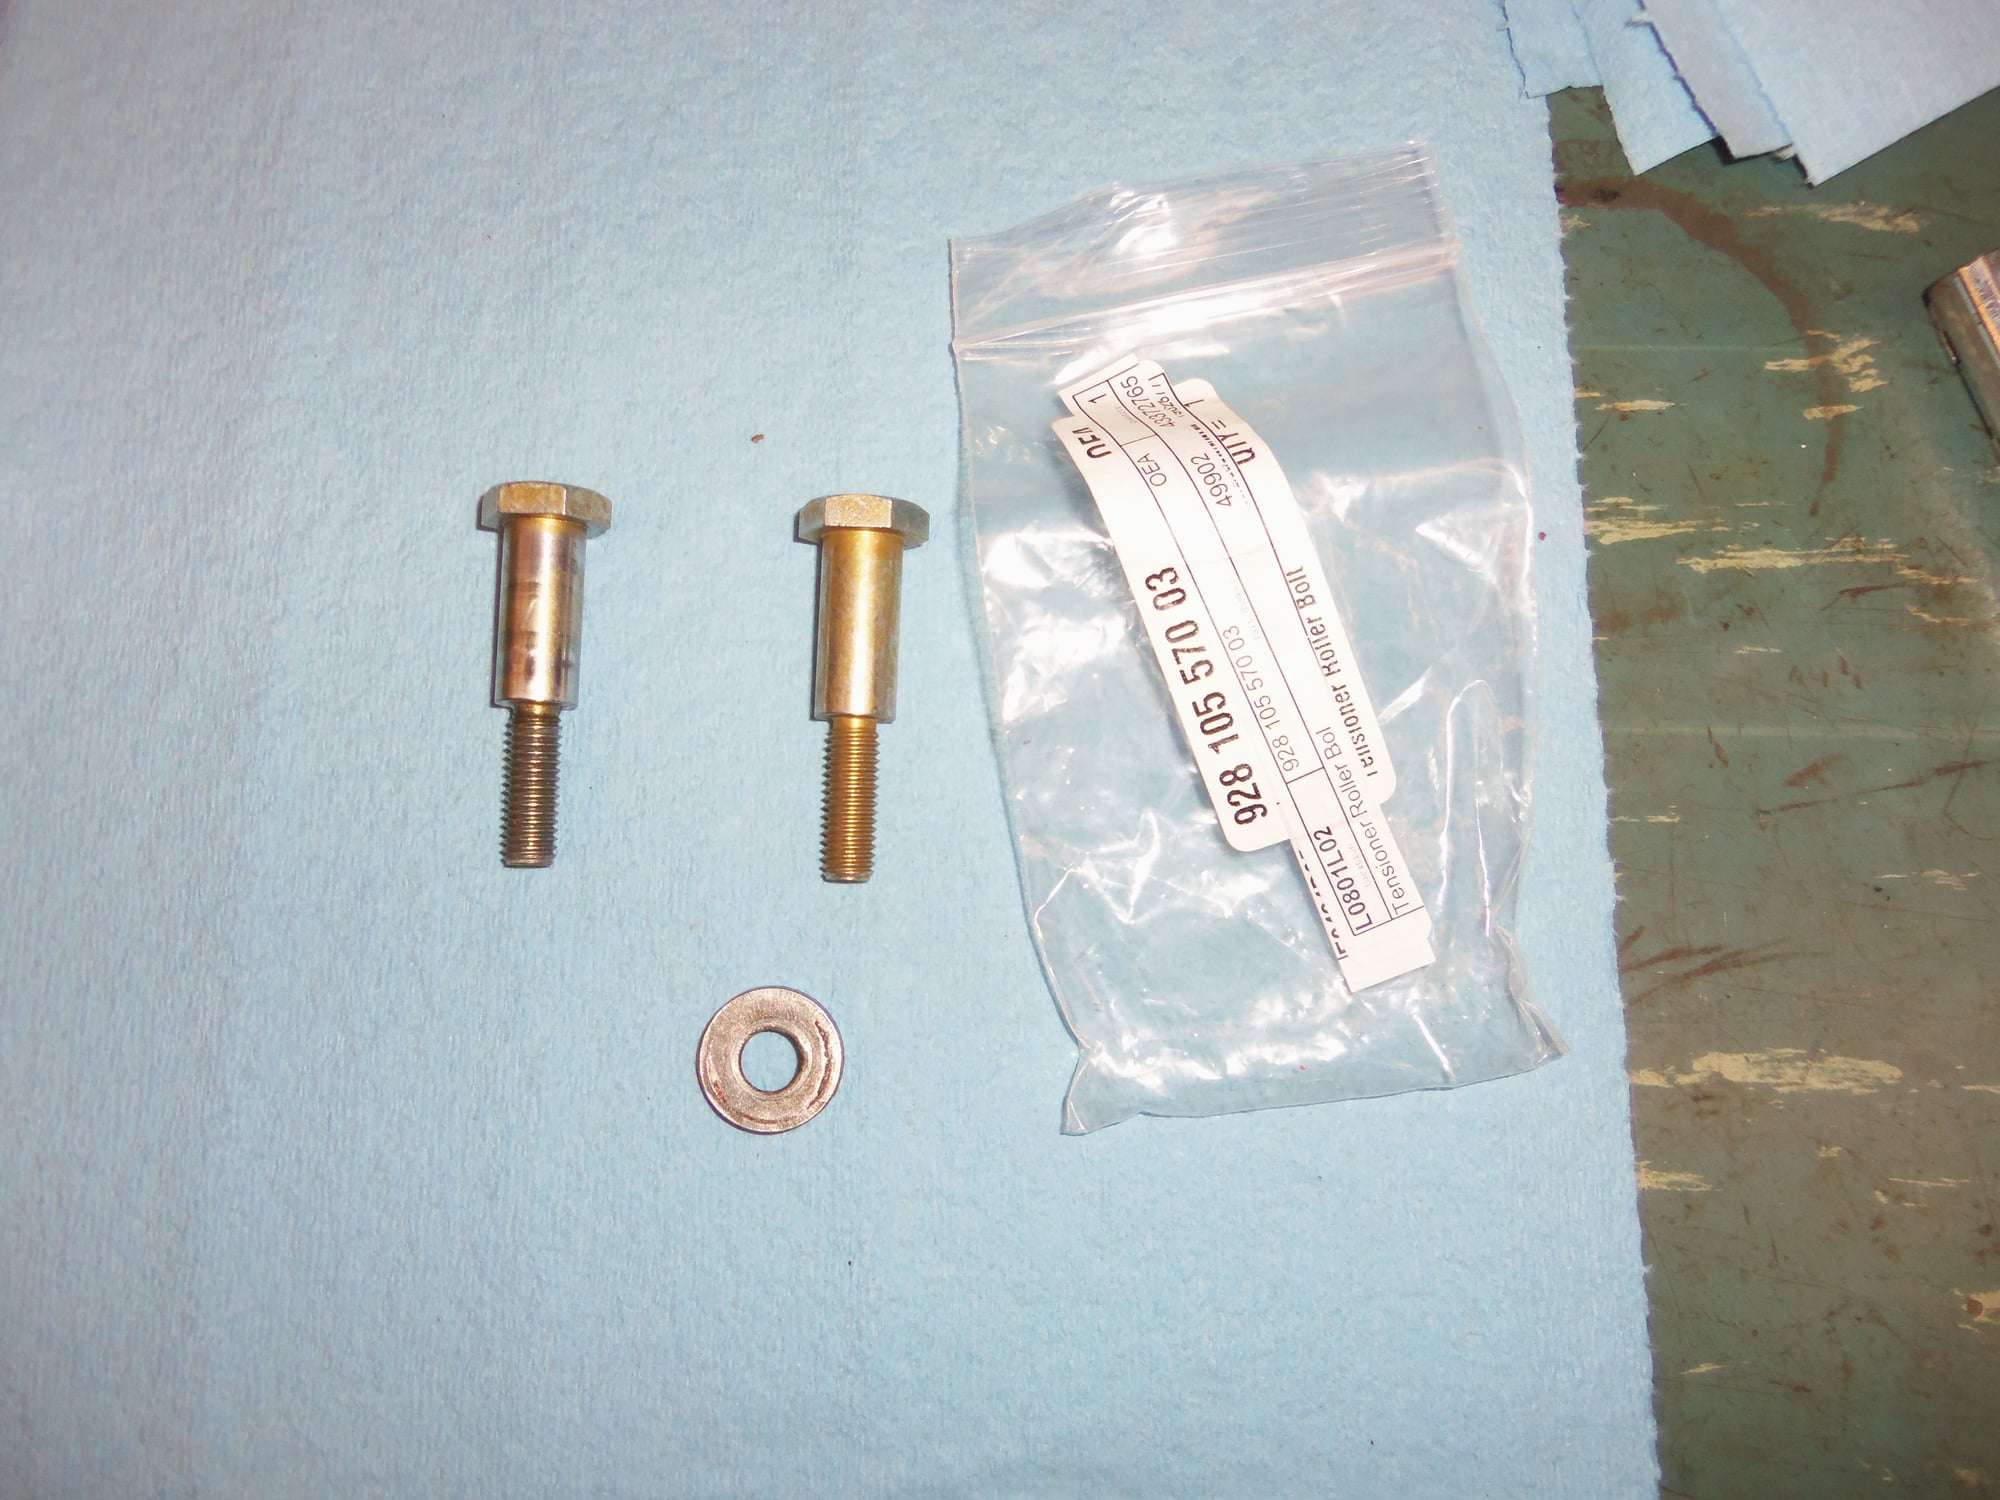
New adjusting bolt.
New boot clamp. Boot is still good, less than a year old.
Reassembled tensioner, ready to install.
New Porsche tensioner mounting gasket on the left. Removed gasket looks a little rough.
Thin coat of HondaBond 4 for the gasket.
Tensioner installed.
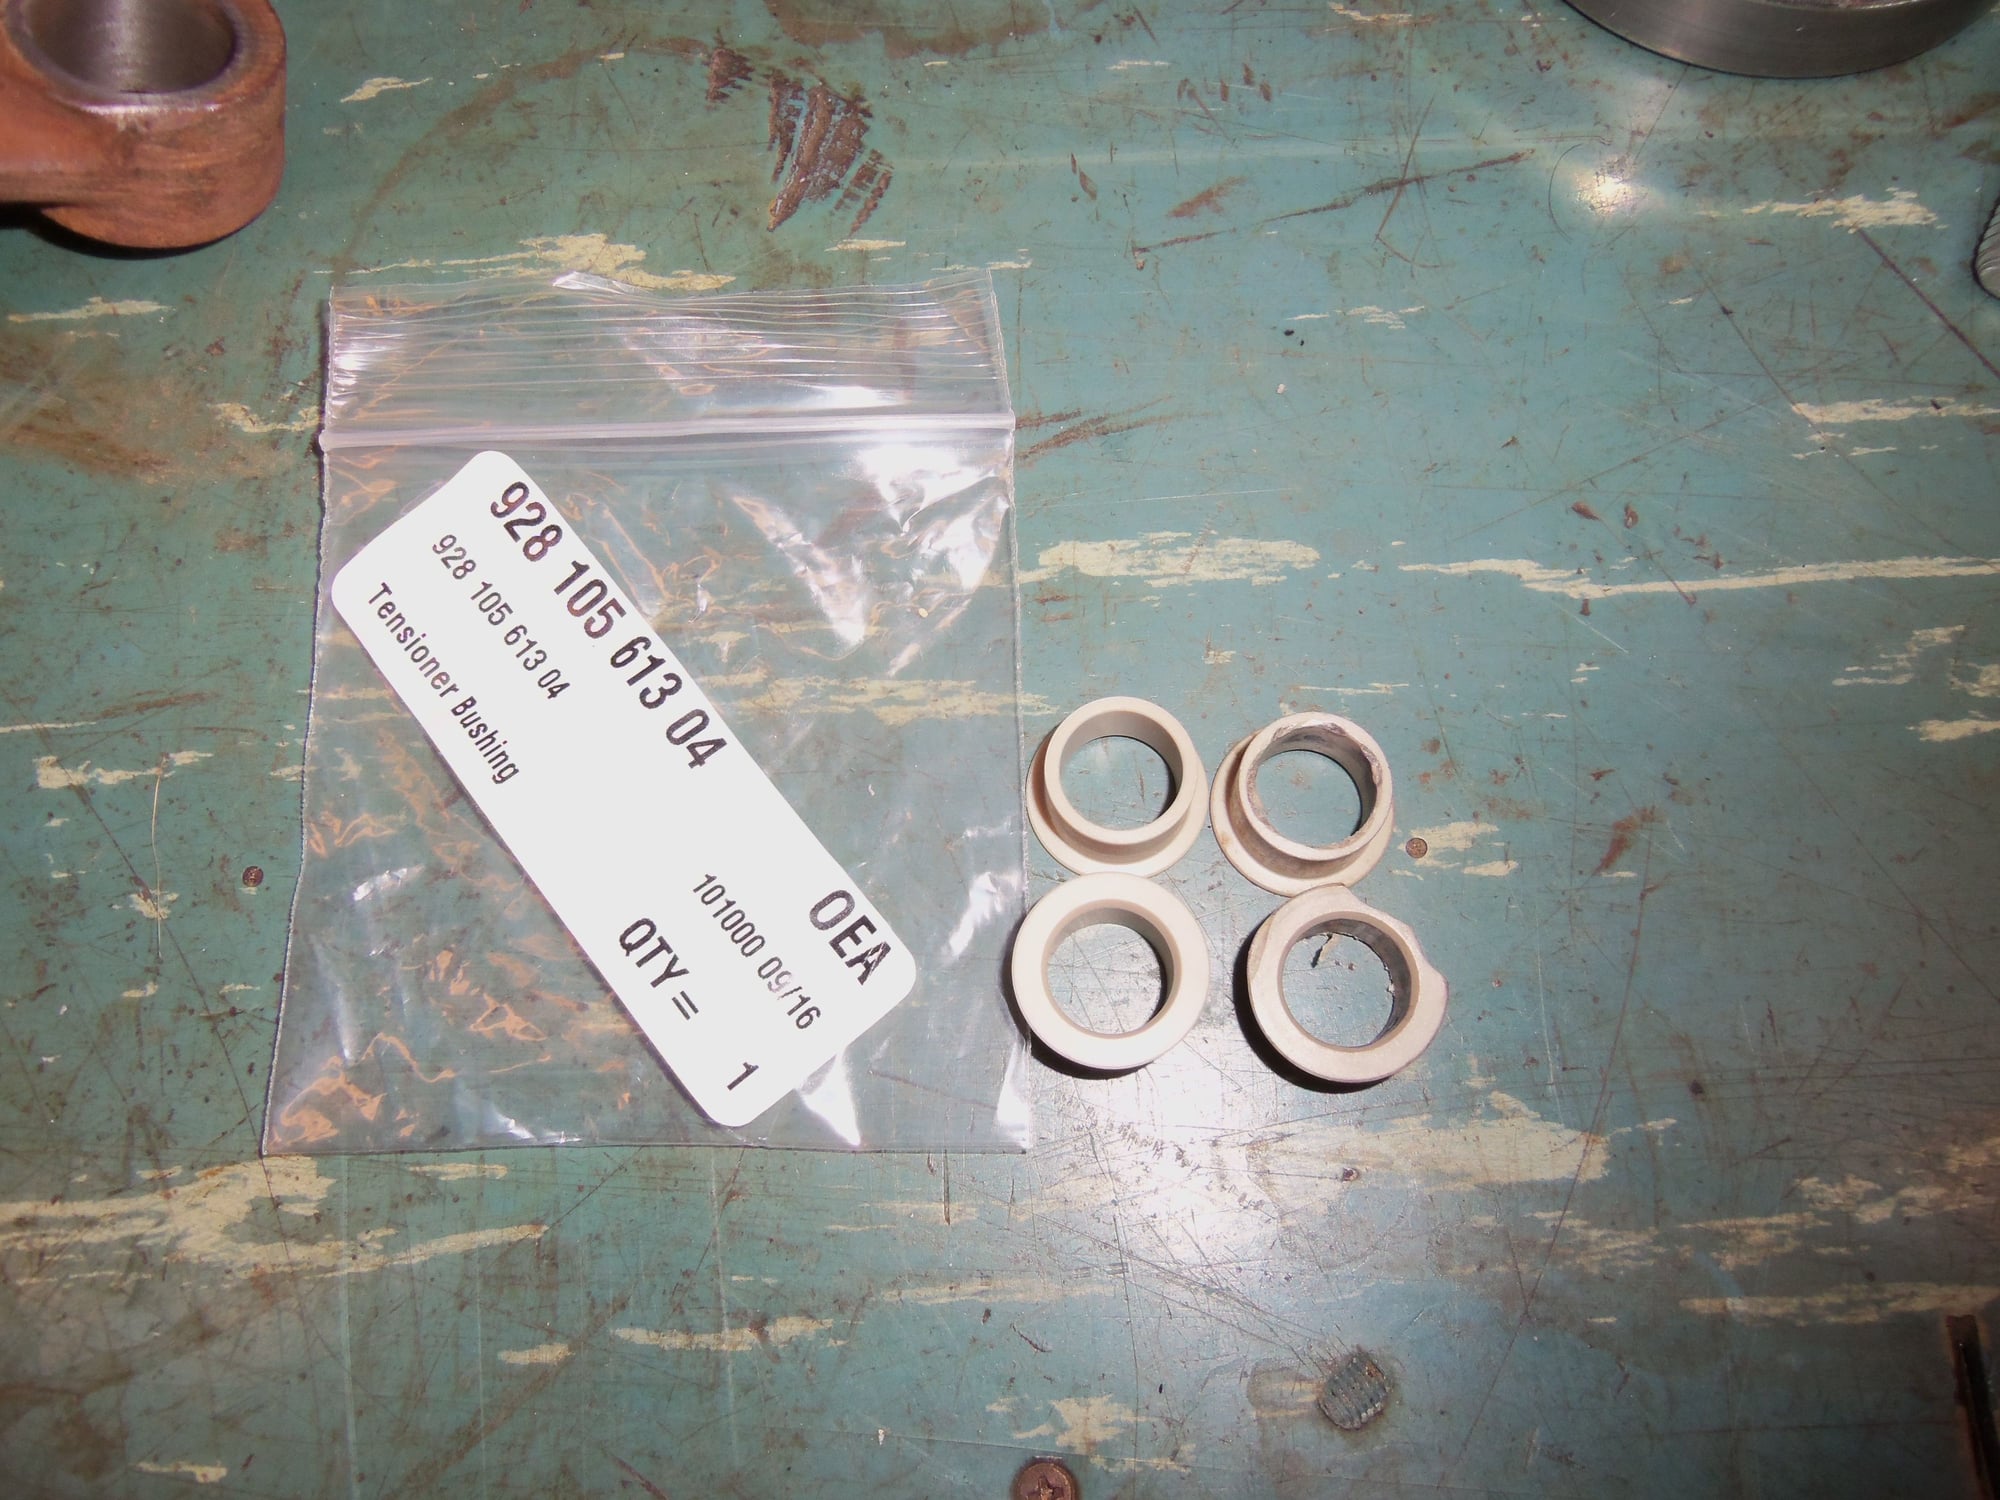
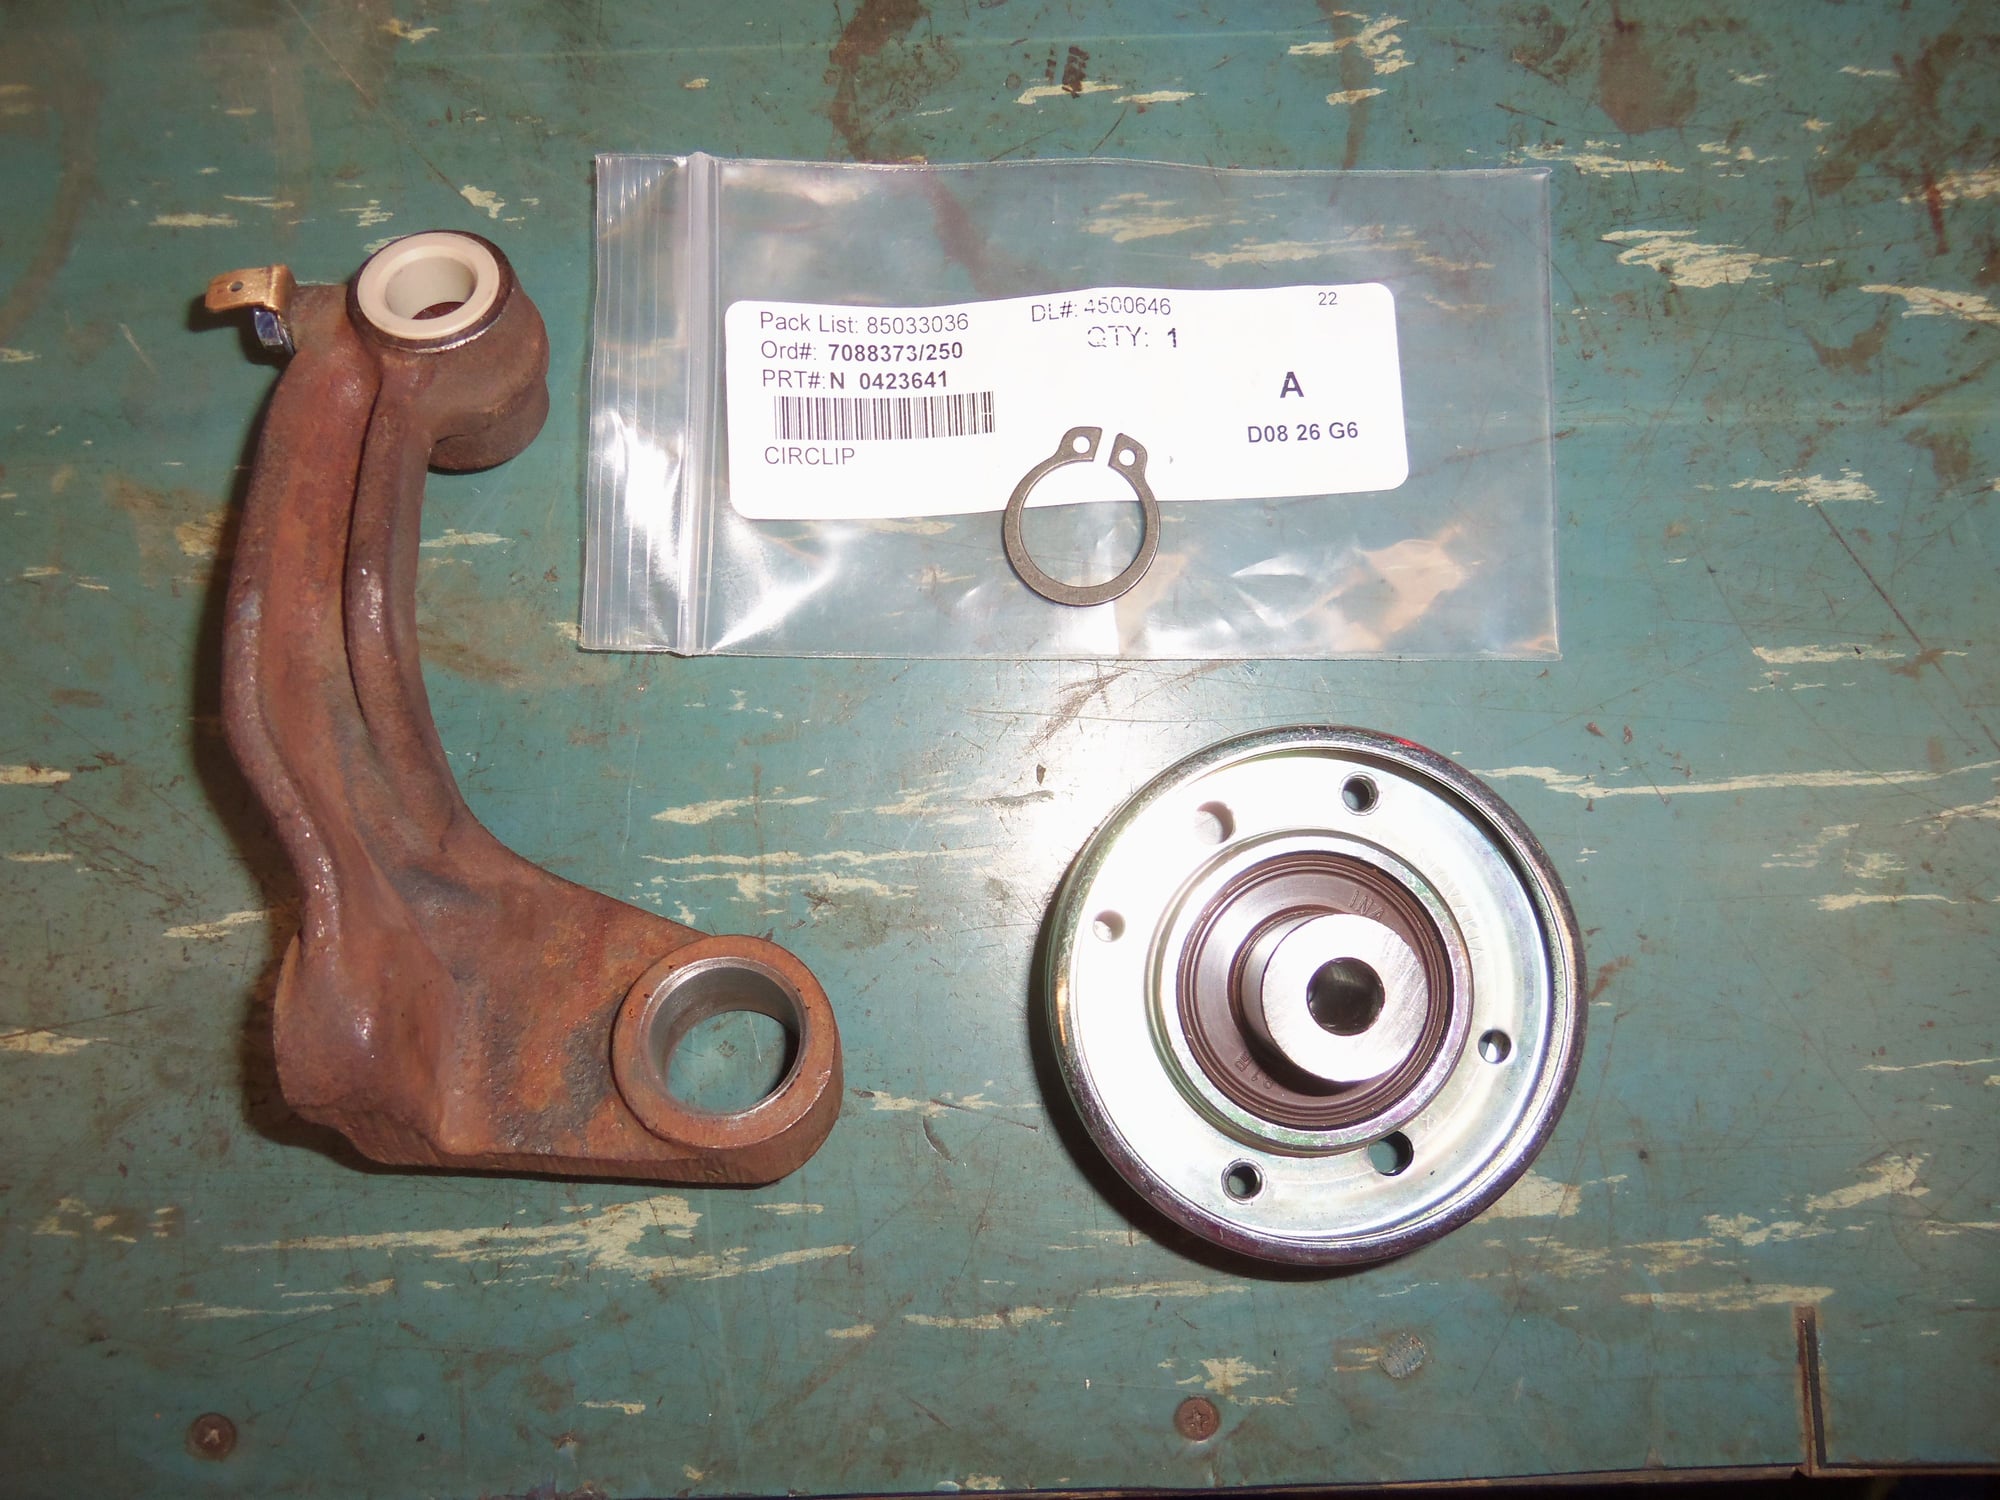
I installed the new bushings into the roller arm with a long bolt, nut, and washers as an impromptu bearing press. It worked fine. To combat corrosion, I put a smear of copper antiseize in the bore before I pressed in the bushings.
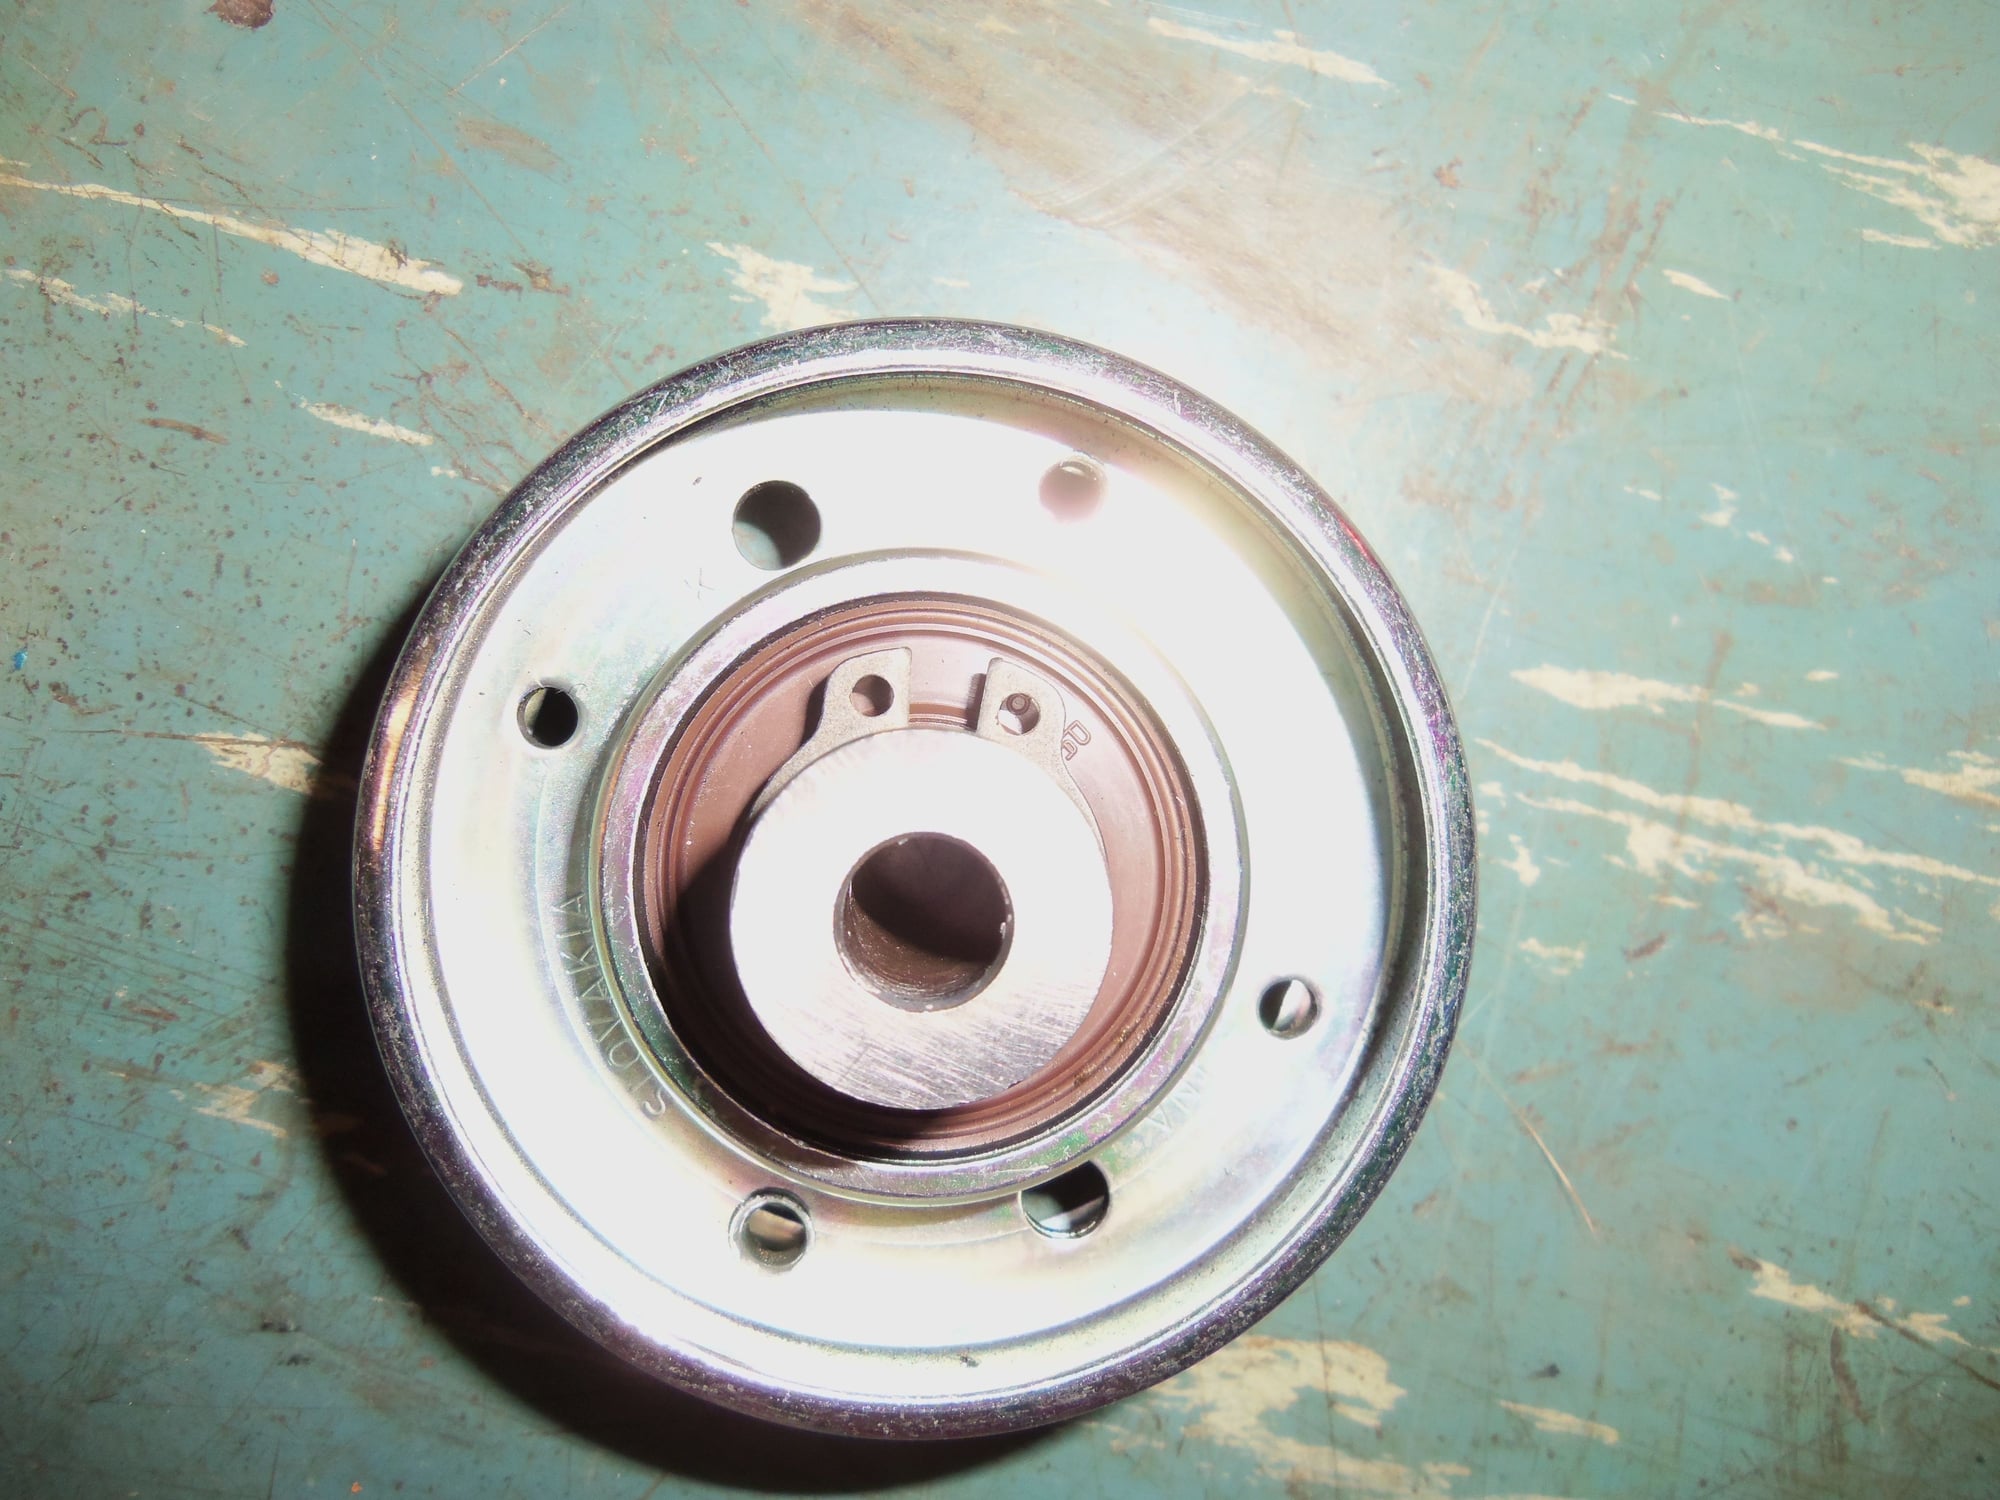
Next came the roller and the almighty circlip. I did verify the bolt, washers, and nut were oriented properly on the roller to prevent rubbing on the backside of the harmonic balancer.
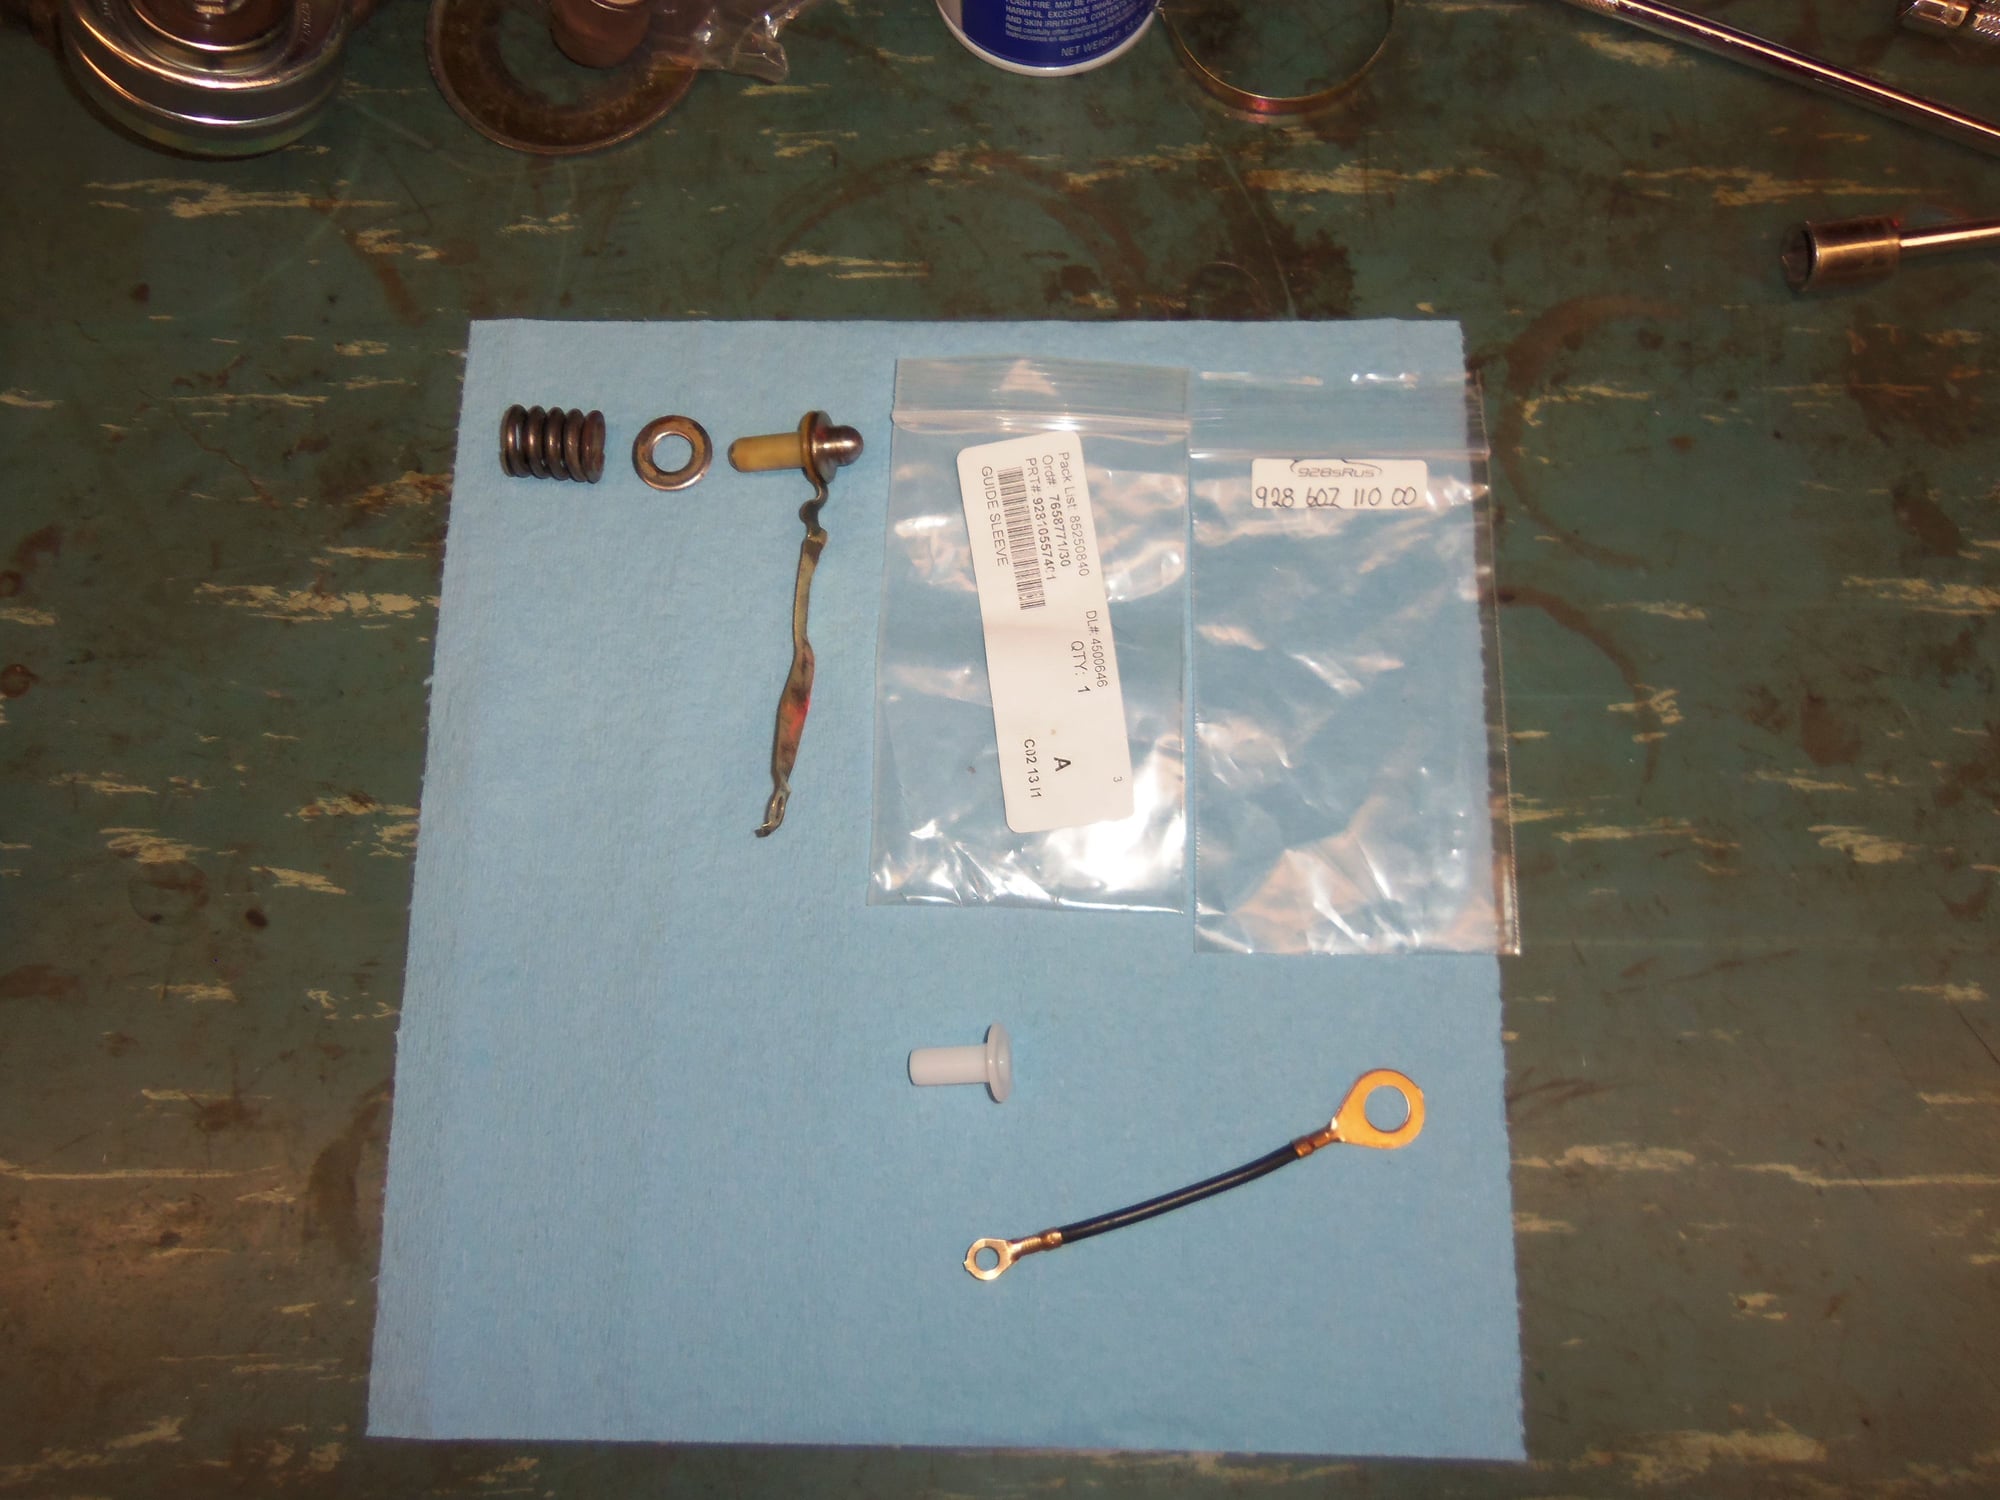
I replaced the janky looking copper bridge with a new wire for the later S4 tensioners. As well, I replaced the plastic bushing.
Taking worf928's advice, I got a new roller arm bolt. I installed the roller arm with teflon paste on the roller arm bolt. As I was tightening the bolt to 180 in/lbs, I was moving the arm back and forth. I wanted to make sure it did not bind up and bend the bolt.
New bushings on the left, old bushings on the right.
Bushings installed, and the almighty circlip.
Wire for later S4 tensioner replaces beat up copper bridge. New plastic bushing as well.
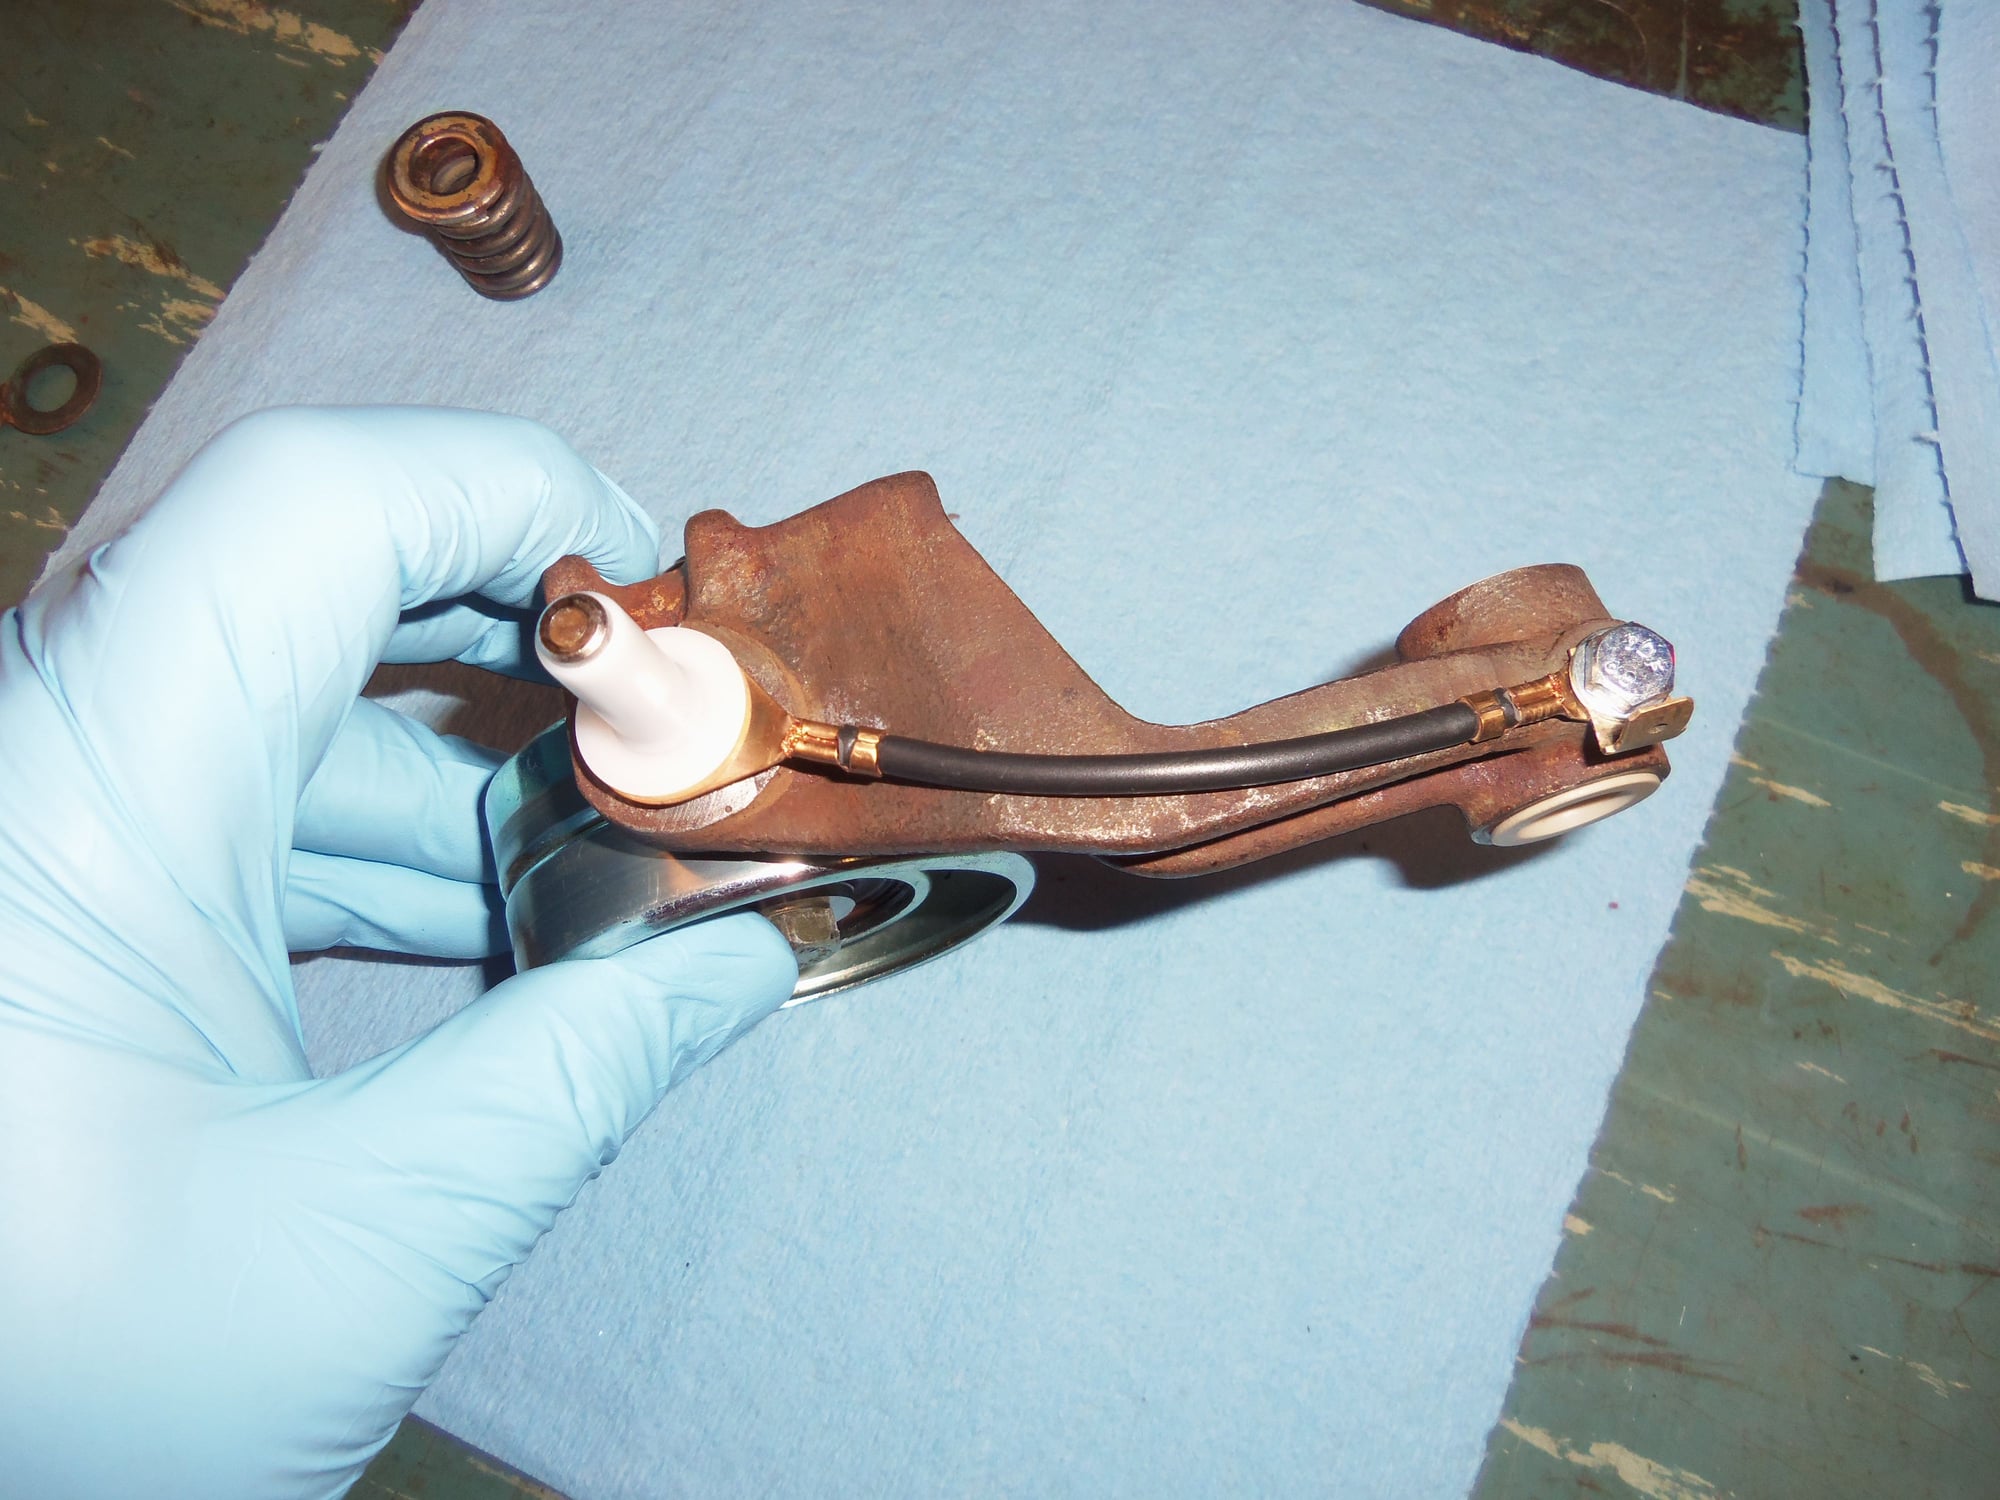
Wire installed on roller arm.
New roller arm bolt on the right, old one on the left.
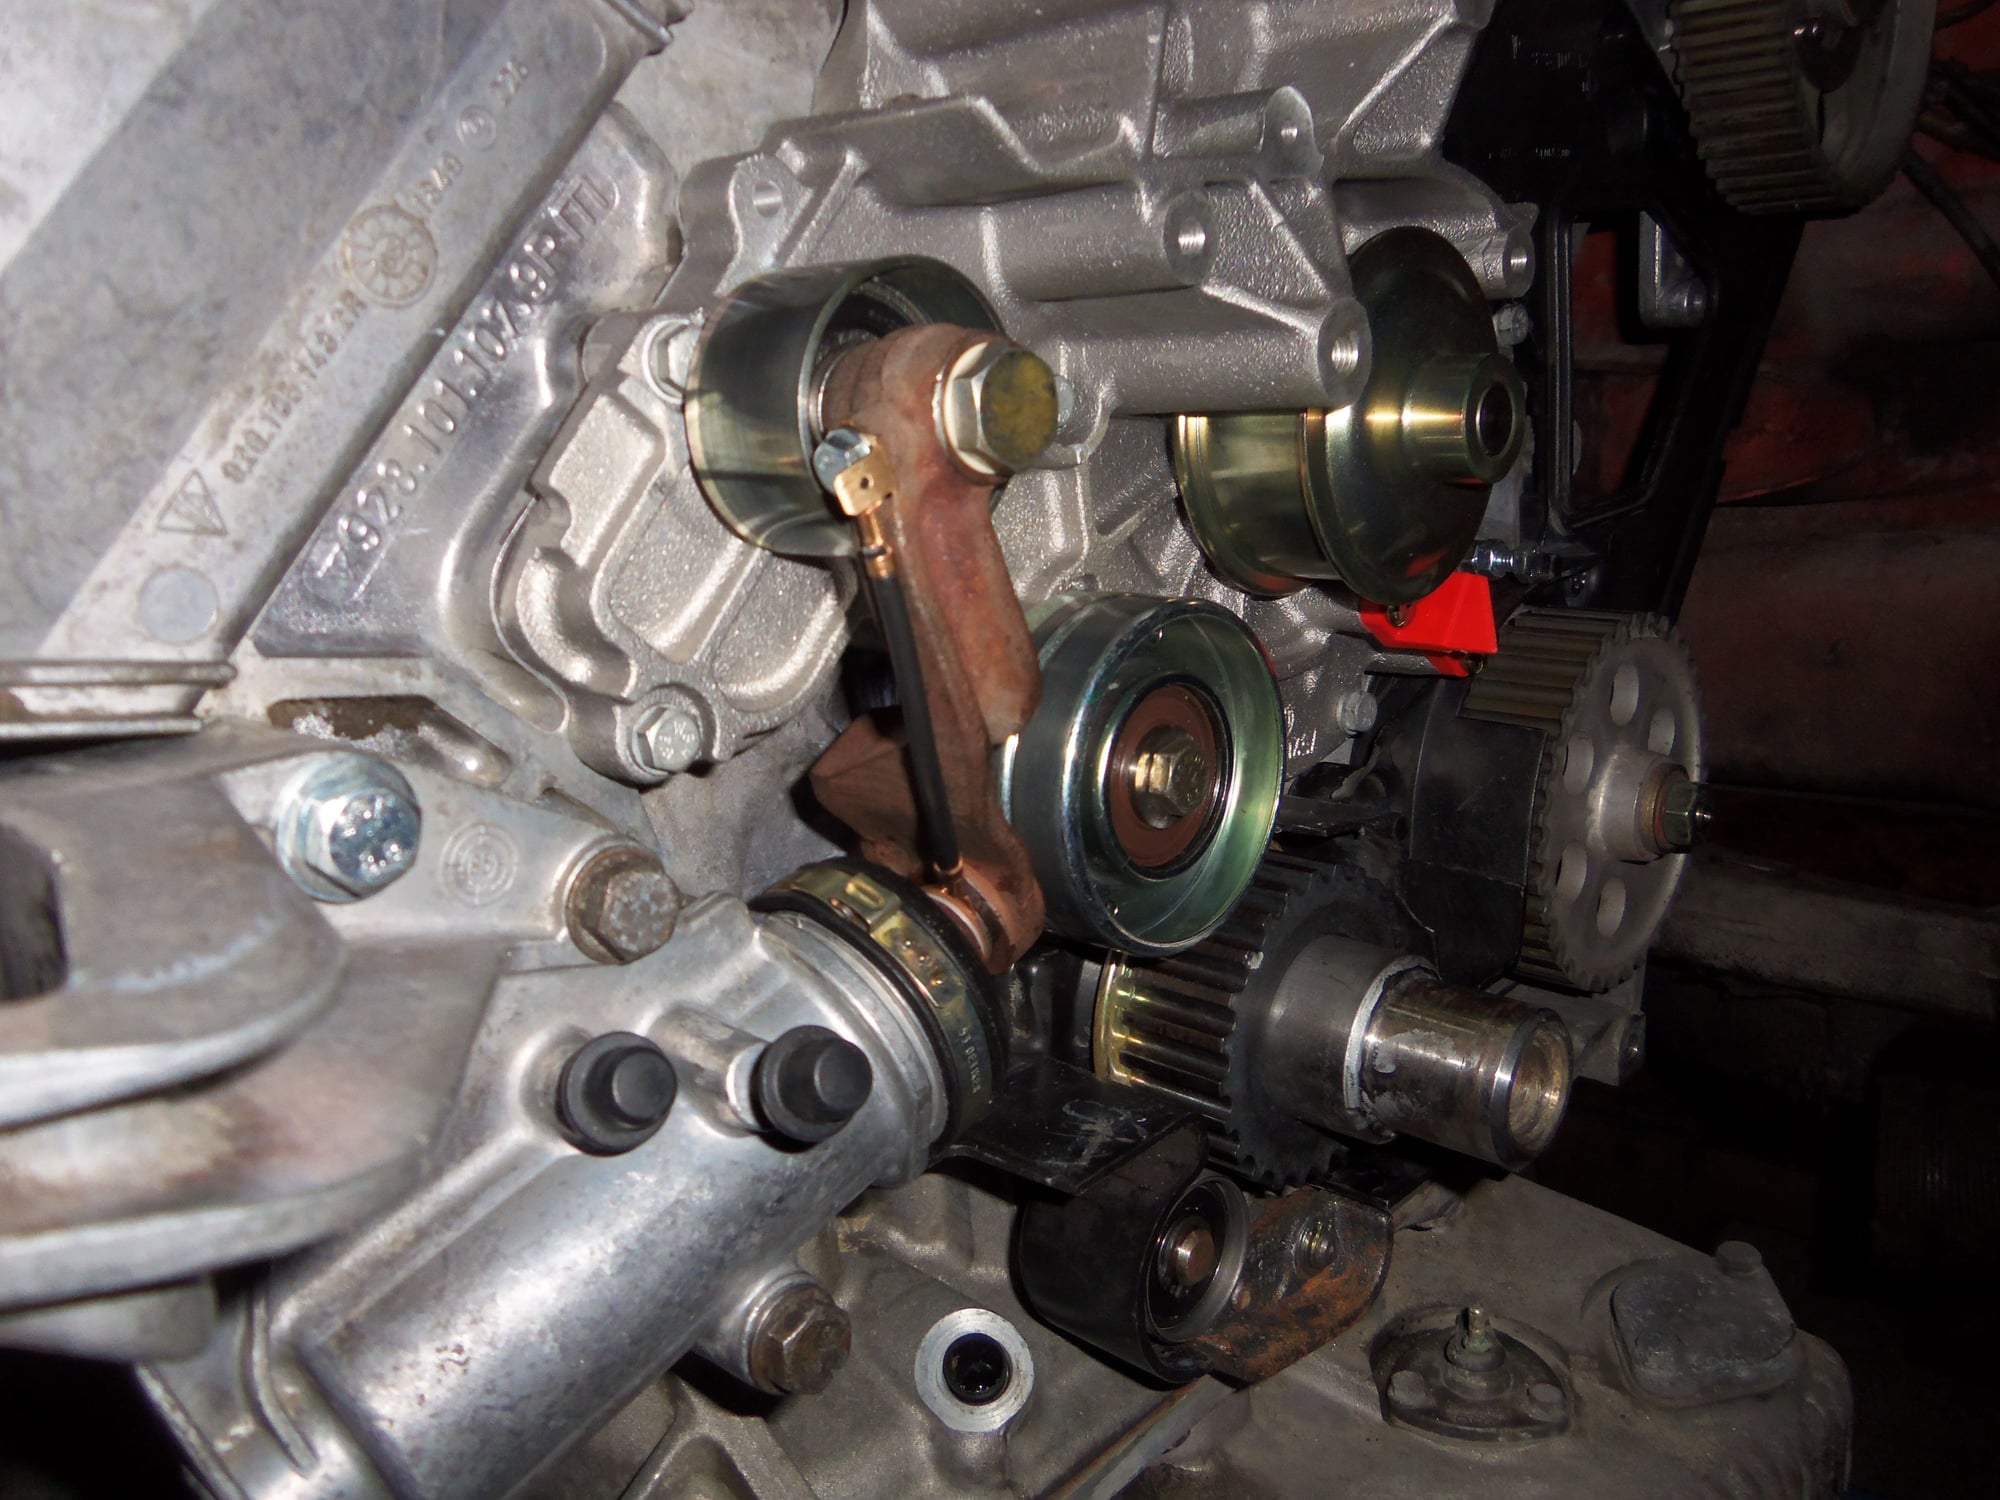
Roller arm installed, ready to tension the belt.
Wire does not interfere with anything.
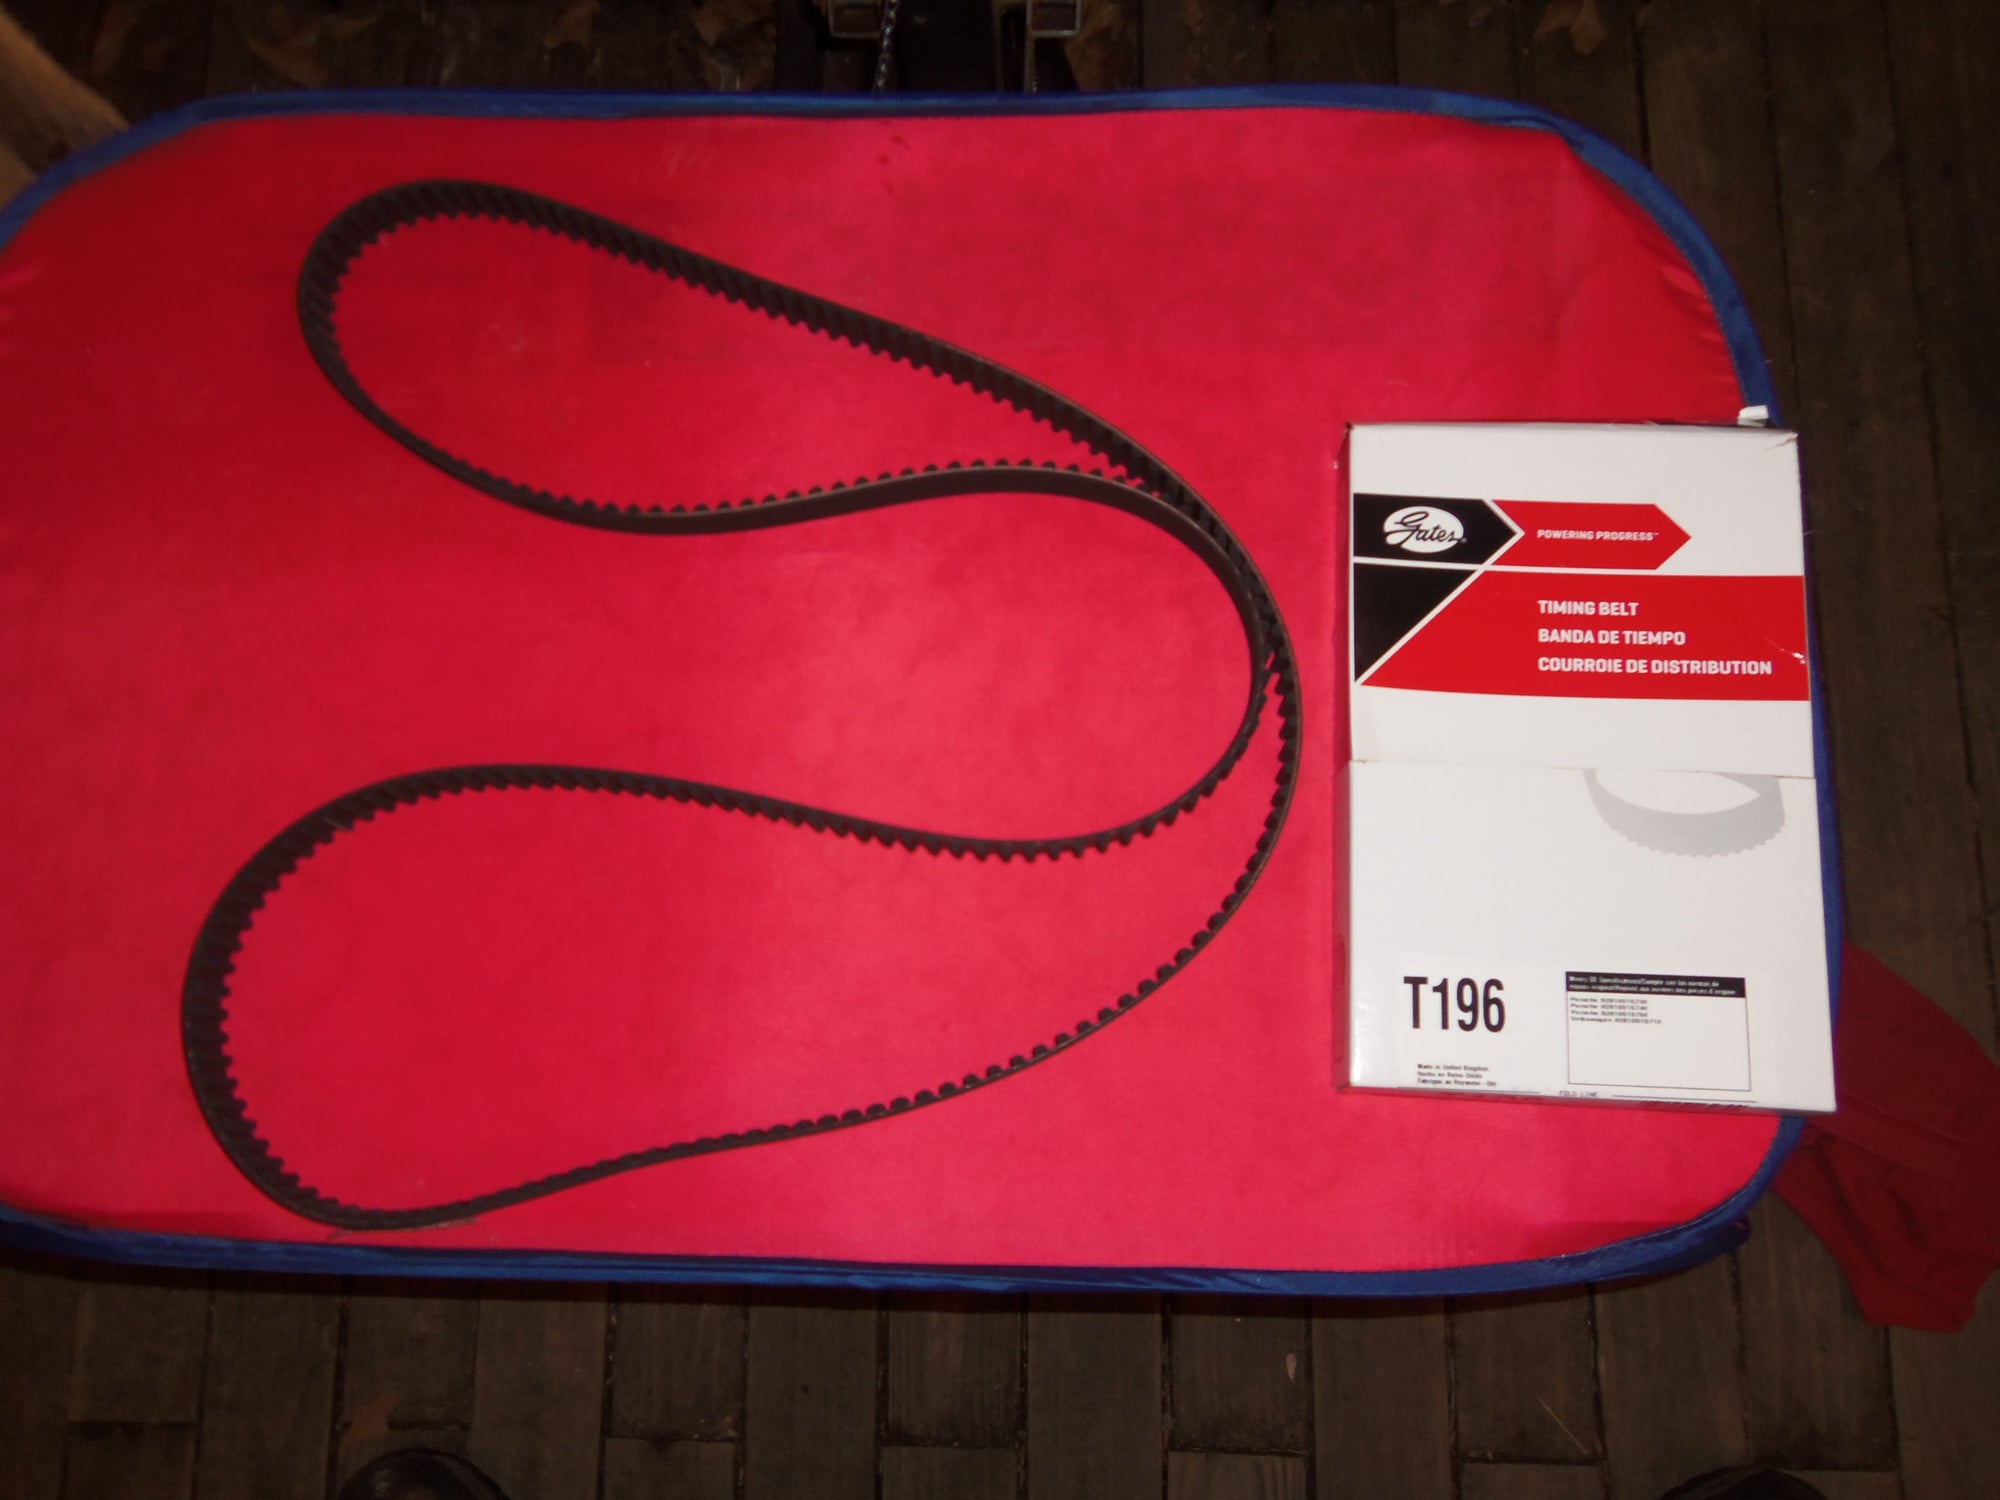
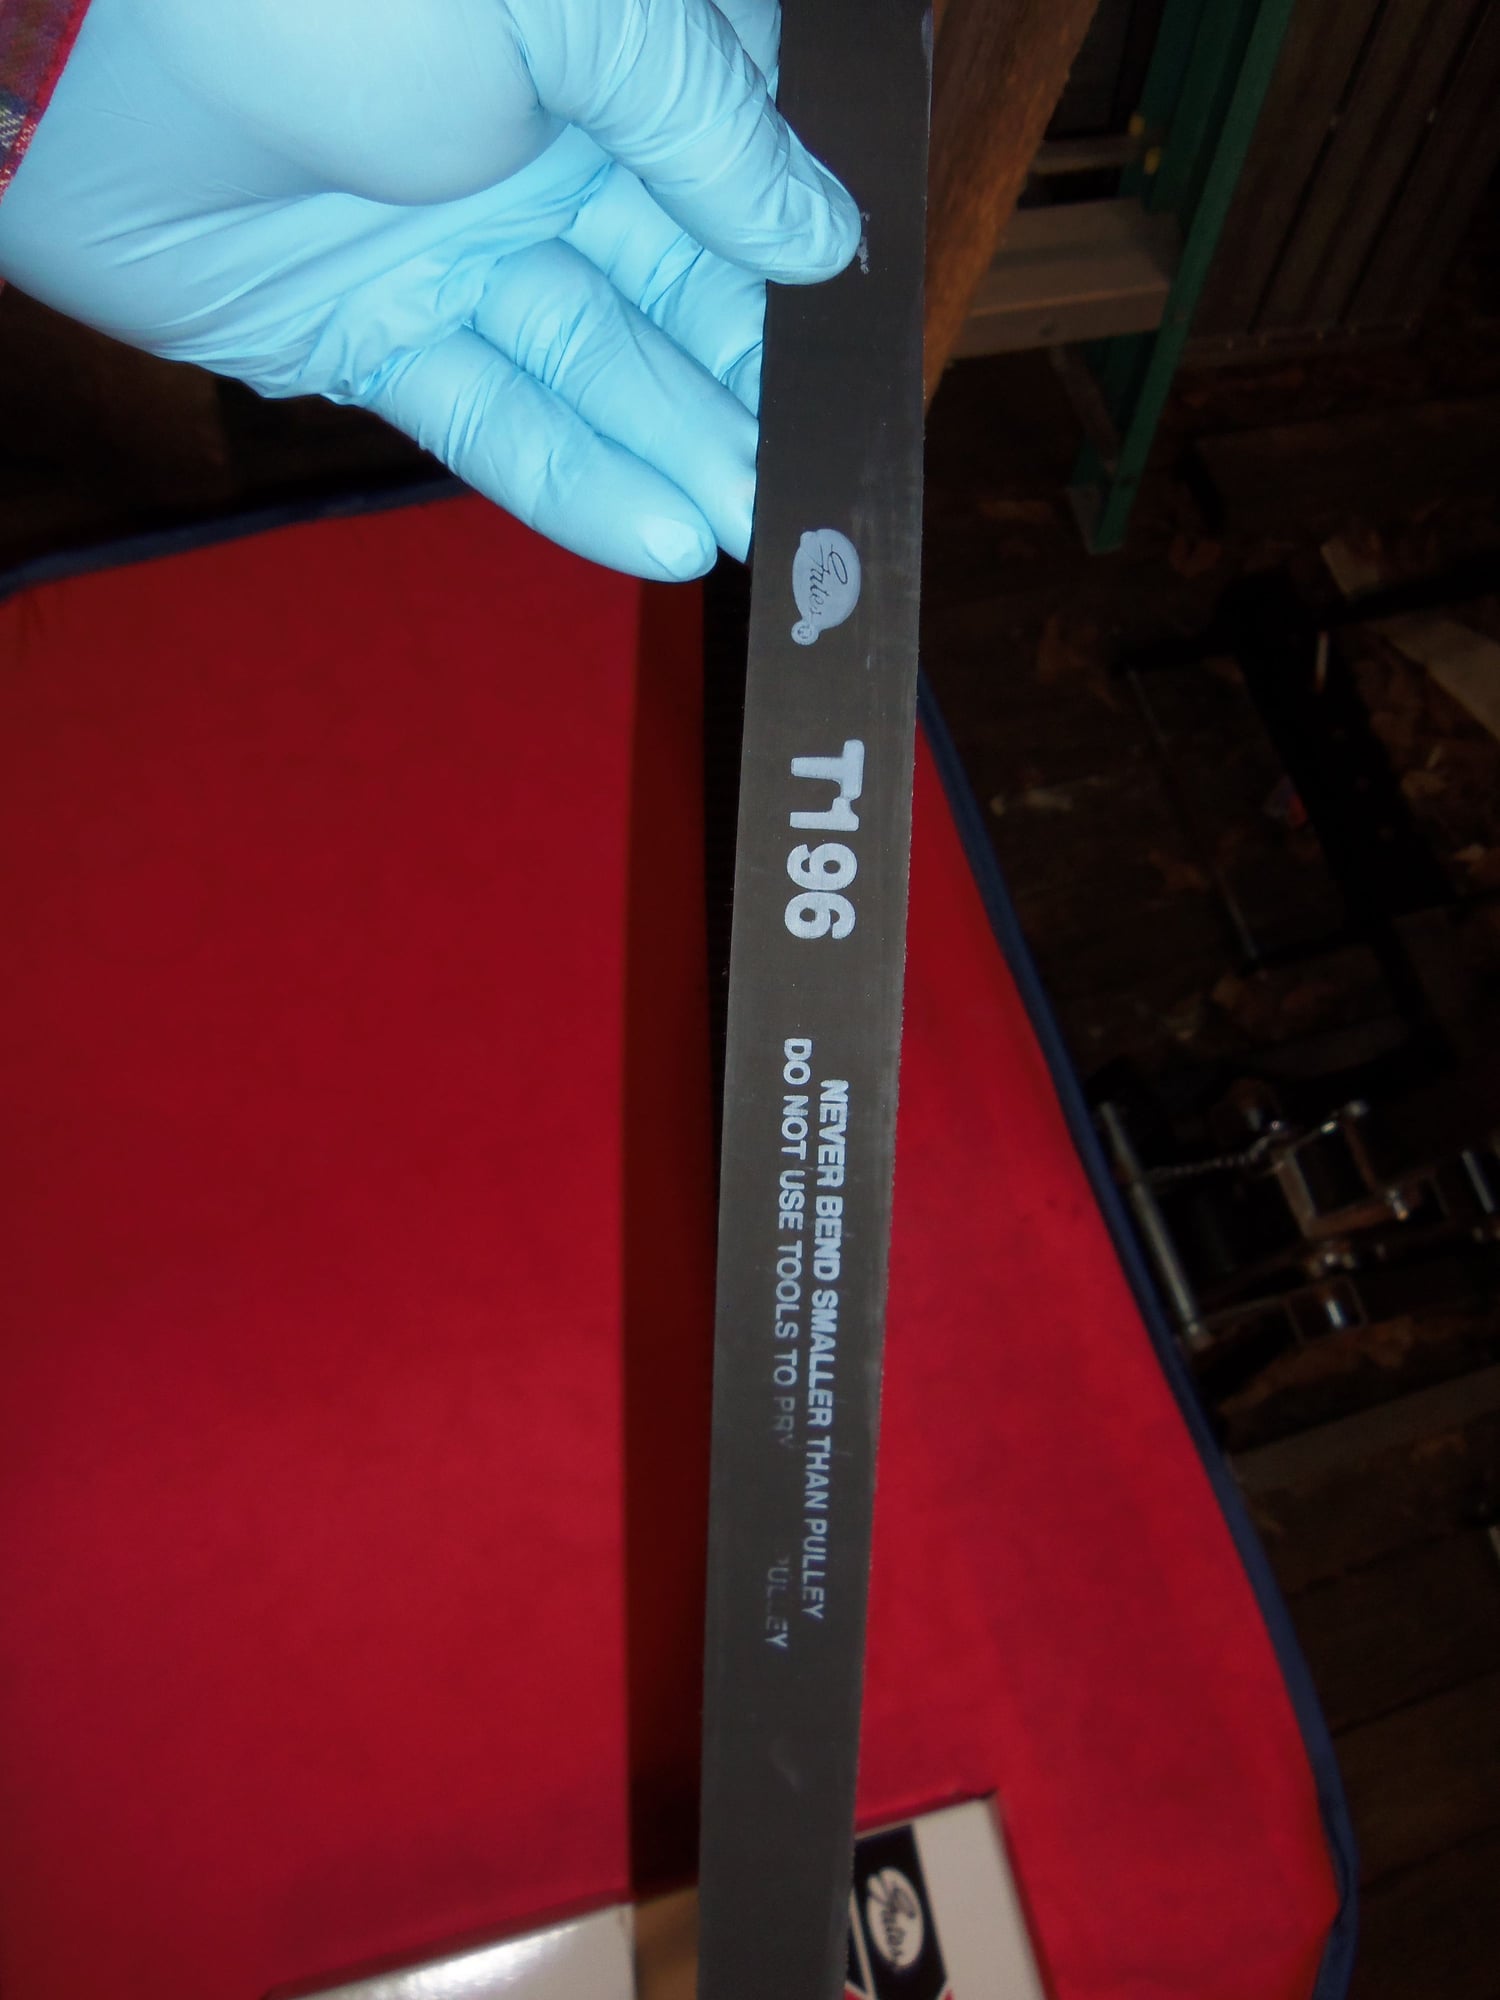
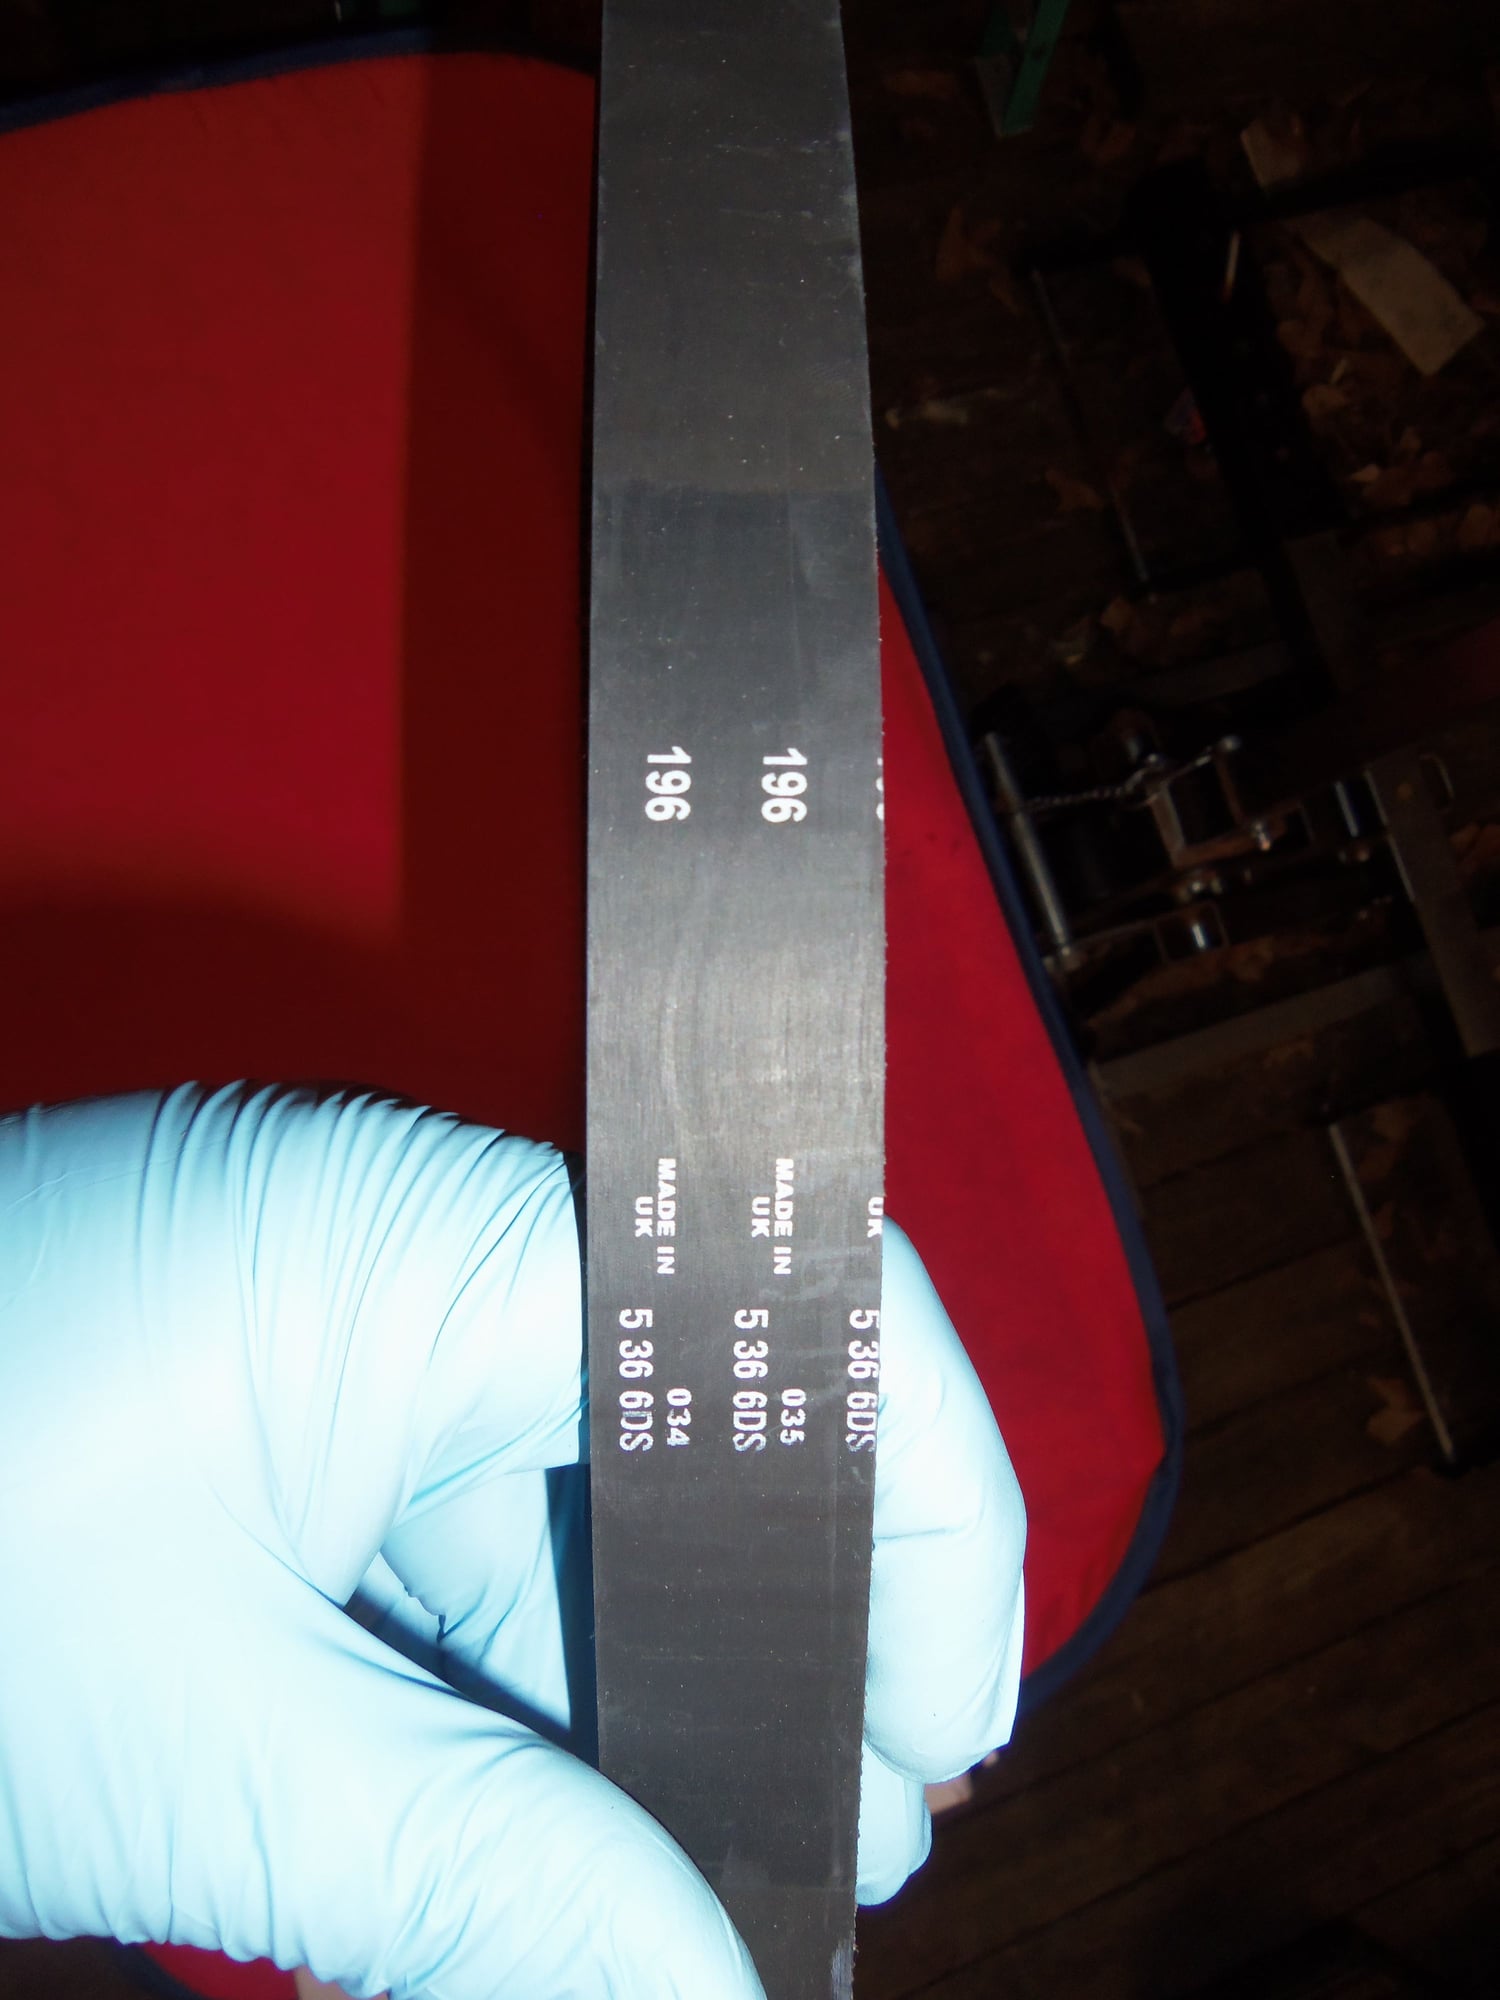
Here is where I screwed up and got out of sequence with the manual. I started stringing the new Gates timing belt. I got it over the crank sprocket, driver's side cam sprocket, and the water pump pulley.
As I got to the passenger's side of the front of the engine, I realized I screwed up. I should have installed the roller arm AFTER I strung the belt.
So, I removed the bolt for the roller arm and swung the arm and roller down far enough to let the belt slide by. Then I reinstalled the bolt. Again making sure the roller arm was not bound up.
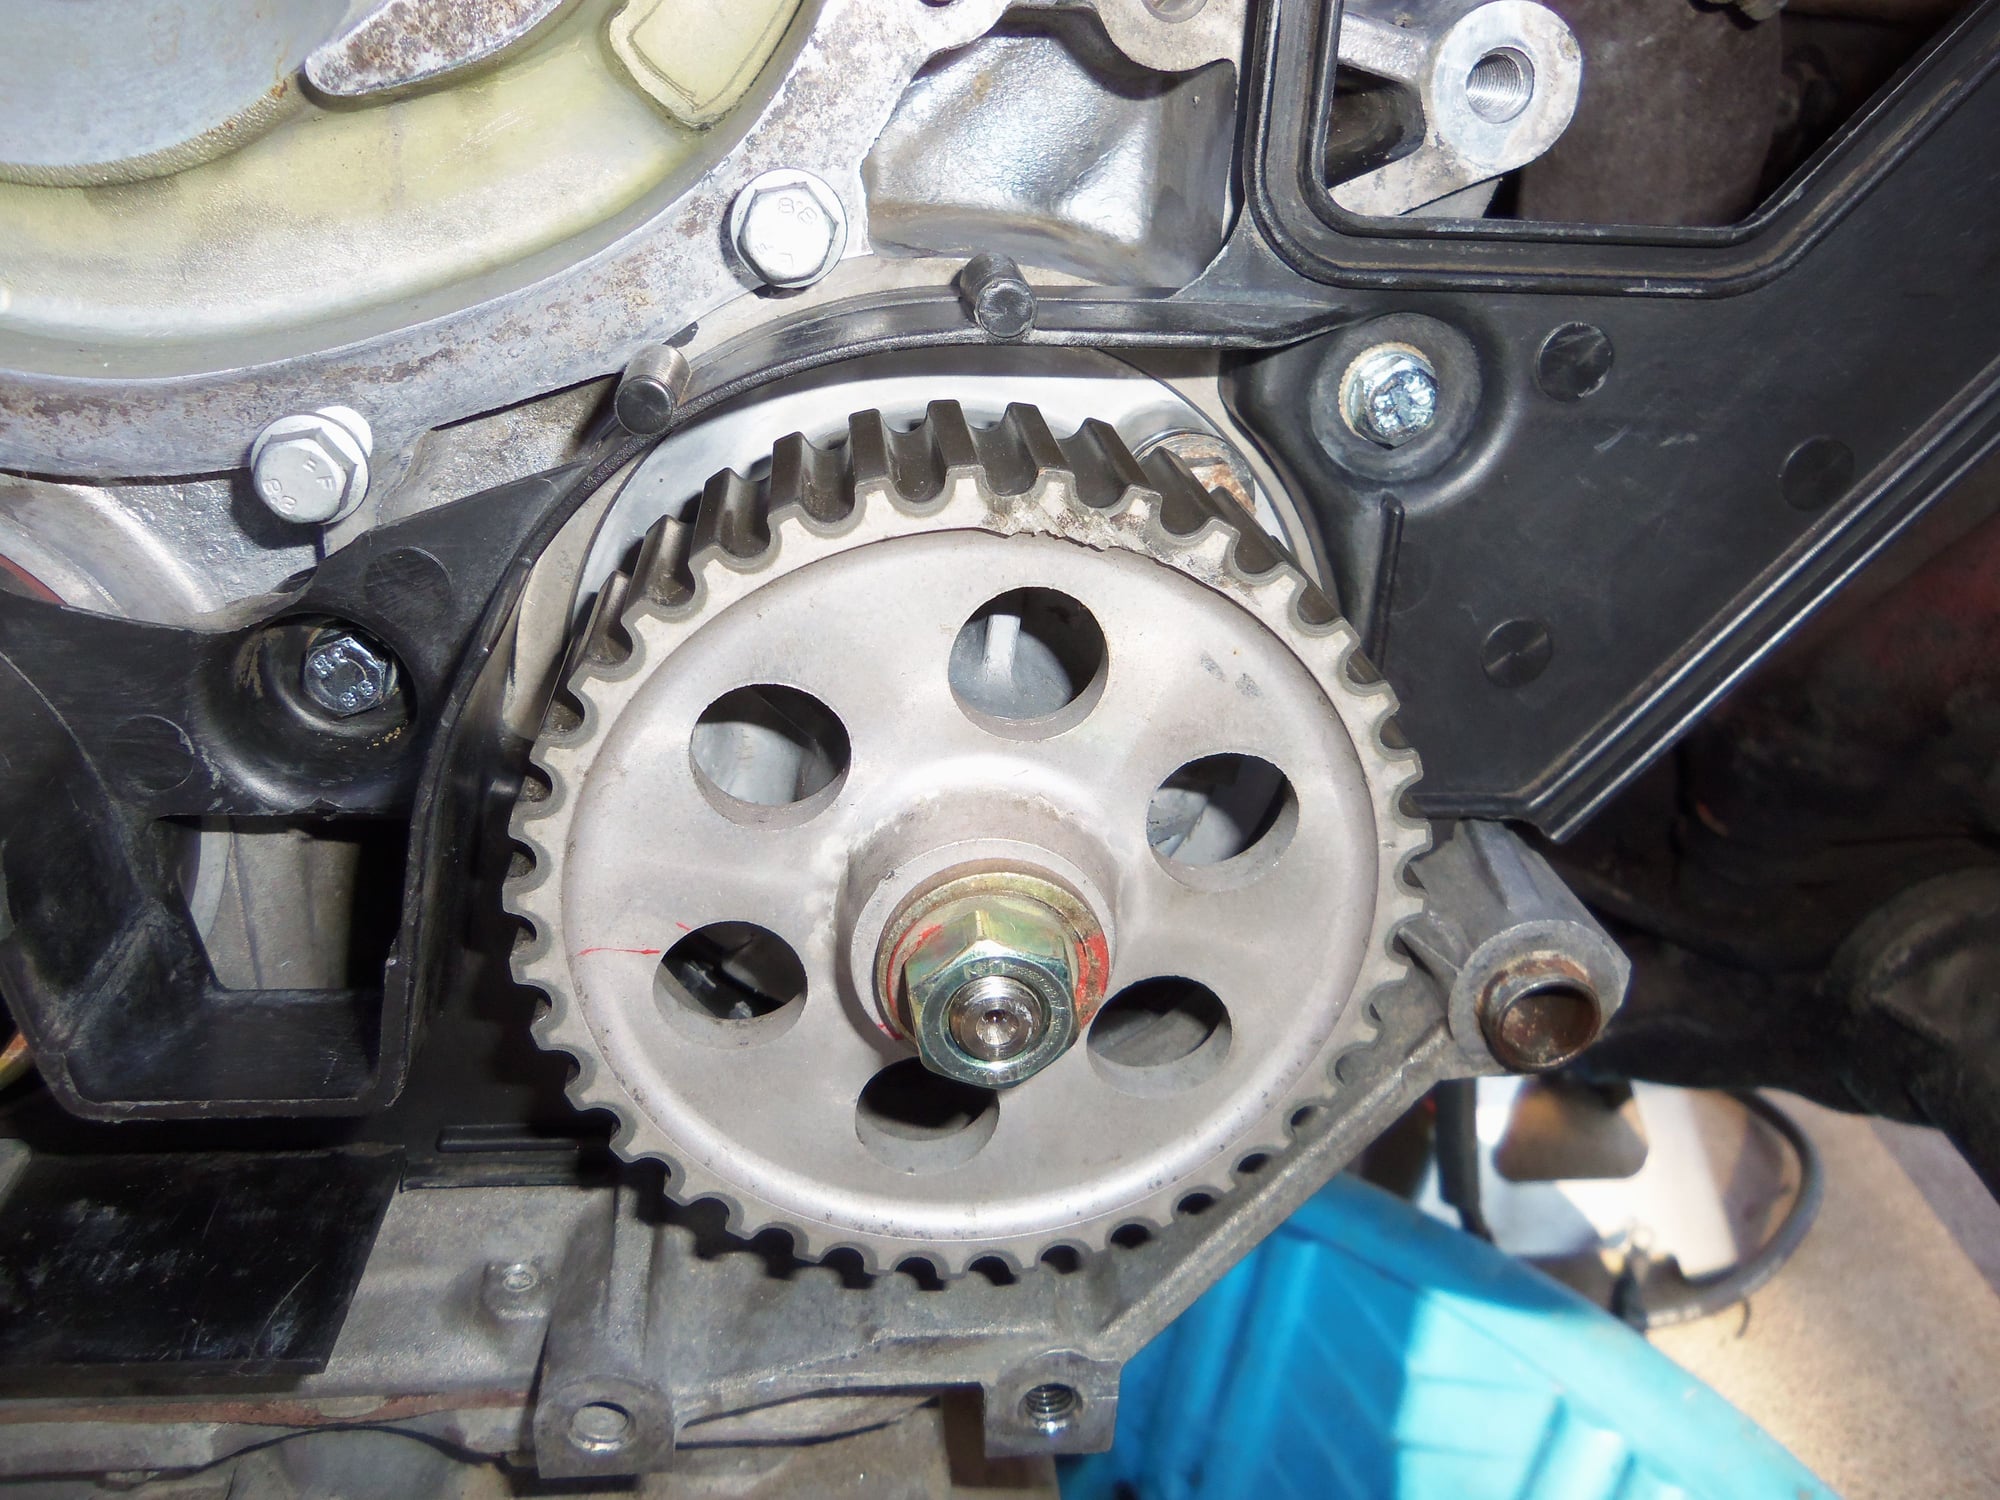
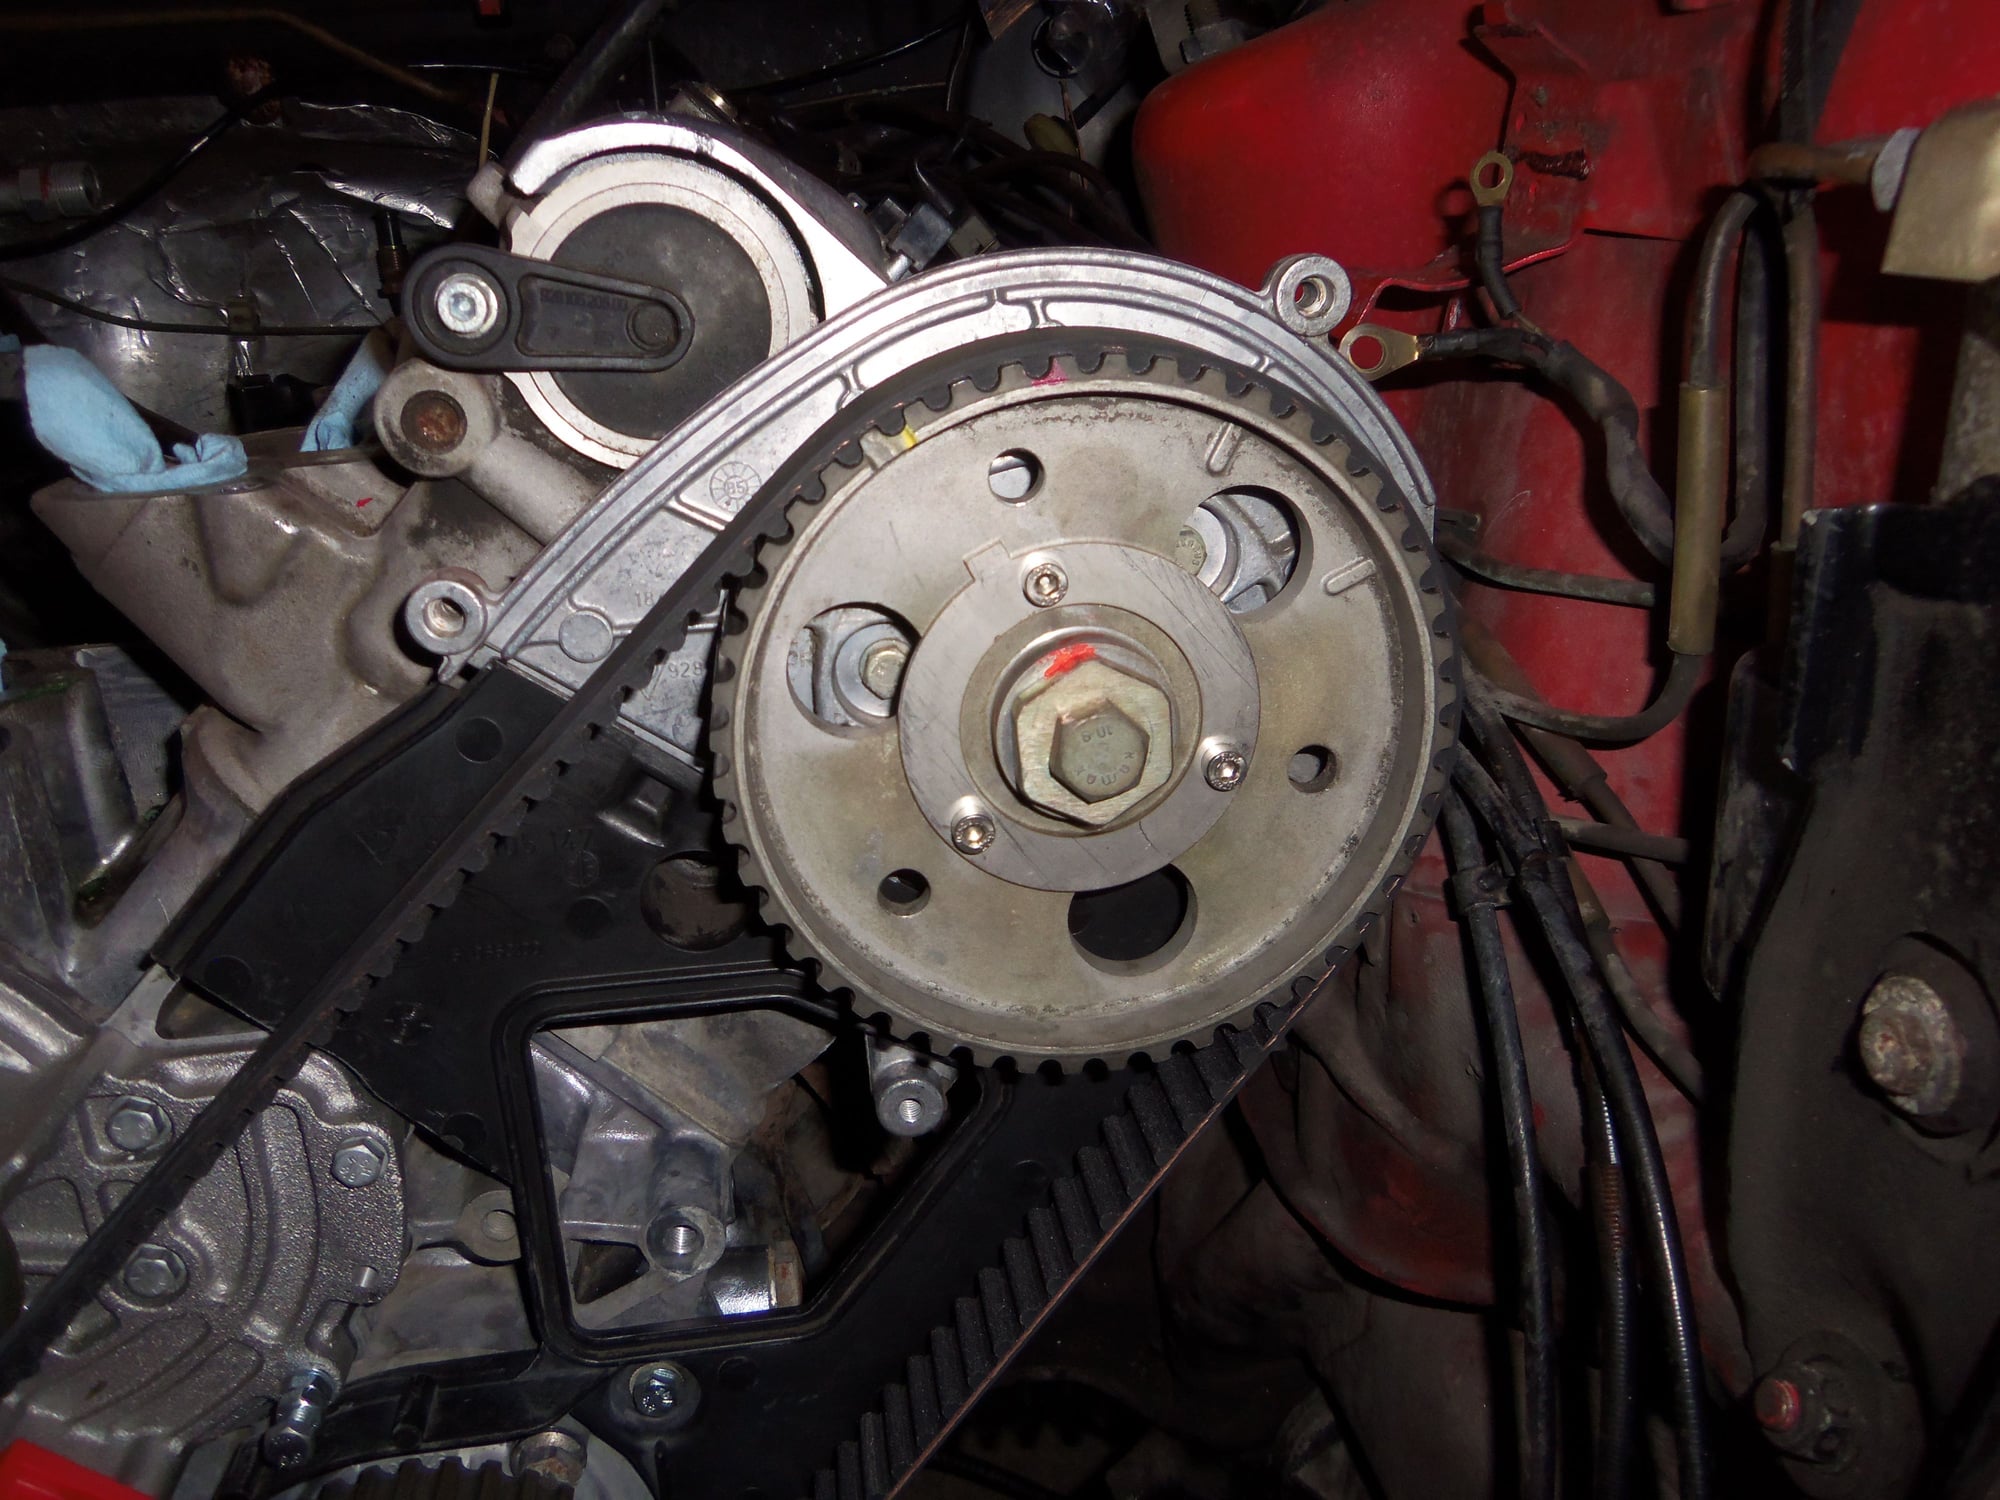
It was a bit of a b*tch getting the belt on the passenger's side cam sprocket. Even though my paint marks at 45� still lined up with the notches in the back of the belt brackets, the belt was approximately half a tooth off from fitting. I chose to turn the passenger's side cam clockwise until the belt fit. Then it was the pain in the ... of pushing the roller in to get enough slack to get the belt the rest of the way on the cam sprocket.
45� red paint mark is now slightly to the right of the notch.
45� red paint mark still lines up.
But, its on there. Because of the above, I think the belt now might be a tooth off.
Next time I work on this, I will tension the belt, remove the flywheel lock, and roll the engine over a couple of times. Then, check cam timing.
And go from there...


 02-19-2017, 02:44 PM