When you click on links to various merchants on this site and make a purchase, this can result in this site earning a commission. Affiliate programs and affiliations include, but are not limited to, the eBay Partner Network.
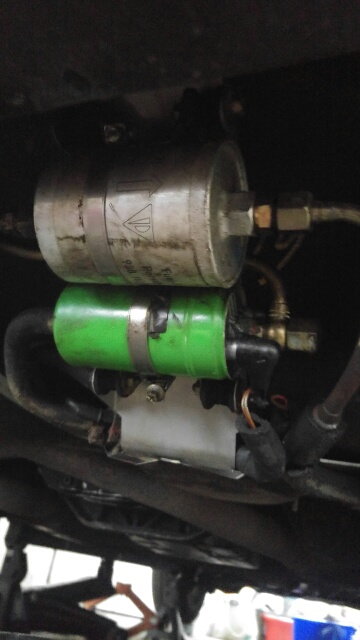
So I have a little fuel leak at fuel pump. Assume these are copper crush washers. If I disconnect this how much fuel will come out. I have almost a full tank? Is it just what is in the pump/line?
Also any idea what size these washers are and what I should torque back up to?
When I have done mine they also leaked. These need be tightened until you are positive they are going to strip. Then tighten a bit more and will be good. It seems that not a great amount of fuel was lost. (it has been a few years since I did this)
Do not super tighten the cap nut as this will cause the hard line banjo bulge to crush and deform thus creating a leak.
If you find the pump leaking its best to start fresh
Order a new check valve,
6 new sealing washers, 3 will be spares these are one time use.
and a new metal hard line,
and the short hose from the tank to the pump.
A new fuel filter
NOTE the fuel will pour from the line once its been disconnected
I suggest to have a fire extinguisher handy ,
and tie rags around your wrists and use gloves.
the rags will prevent the fuel from running into the your armpits
with the new short hose find a bolt that will plug it.
Then remove the short line from the pump and plug this with the bolt.
disconnect the battery,
then the wires to the pump.
Note how the positive wire is routed so its closest to the tank.
remove the line thats connected to the fuel filter and drain it.
loosen the 4 nuts on the rubber standoffs and remove the pump/ filter from the tank mount.
On the bench remove the cap nut,
then loosen the line to the filter and replace the filter.
Remove the hard line and inspect the banjo end for flatness where the seals seat if its not perfectly flat use the new hard line.'
Replace the check valve in the pump.
NOTE leave the pump attached to the mount to aid in holding it tight
leave the new filter loose but leave the new hard line connected while your installing the cap nut so the line is free to find its home
NOTE use PTFE pipe sealant on the threads of the new valve use a small amount ,
Then fit a new sealing ring then tighten this to the pump body make this tighter than the cap nut .
NOTE the PTFE should assist in holding the check valve in place for future repairs.
Then fit a new seal then the hard line then a new seal then the cap nut.
NOTE do not tighten the cap nut too tight use your discretion dont make the cap nut tighter than the check valve installation. overtightening the cap nut will distort the metal hard line and thus a new part will be needed
NOTE surface the capnut so it has a smooth seating surface 600 grip paper works good for this.
put some anti seize on the hard line B nut and the cap nut threads so to make it easier to remove at a later time.
Replace the short flex hose
Have another bolt in the new hose and remove the clamp on the old hose.
use PB blaster on the clamp.
install the new hose, then the pump assembly,
line up the short hose then tighten the clamp to tank.
install the wires to the pump.
NOTE just snug the nuts as these are aluminum threads and shear off quite easily .
Connect the line to the filter then tighten the 4 mount nuts.
last connect the line to the pump.
Nice write up Stan. Sounds exactly what I should have done but I decided already to go ahead with it after finding a box of assorted crush washers. I replaced the 3 washers, 2 for the banjo bolt and one for the check valve. It seems to be holding up. I probably lost about 1L of fuel in the process. Ideally I would have liked to refresh everything in there so if I have any more trouble with it then I will work through your guide. For the moment thou it is looking good and I should finally be able to get my MOT done. Failed on a power steering leak which I fixed then on the fuel leak. Everything decided to go at once.
Not a pretty sight. Hopefully my fix is good. It was leaking at the crush washer on the pump so all have been replaced. Tested it 4 times and no leak. Might have been a good time to refresh things and change the filter but was pleased to be able to fix it quickly with stuff at hand. Box of assorted crush washers was a good buy.
The pipe between the filter and pump gets twisted if you too much force to undo or do up the nuts.
The only cure for this is to replace the pipe and then torque very carefully. A new check valve and pipe from Porsche came with all the correct washers.
I keep saying this - remove the whole pump and filter assy from the car, and replace filter, pipe, whatever is needed ON THE BENCH! Only extra work is R&R the electrical connections, and they can only go on one way. Much more reliable, less chance of killing the S pipe. New copper washers, or if you must use old one, anneal them back to soft, tighten them once, back them off tighten again.

 06-05-2016, 08:49 AM